A $20.99 THRIFTED FRENCH PROVINCIAL GETS A STUNNING ONE-COLOR DRESSER MAKEOVER | YOUTUBE VIDEO
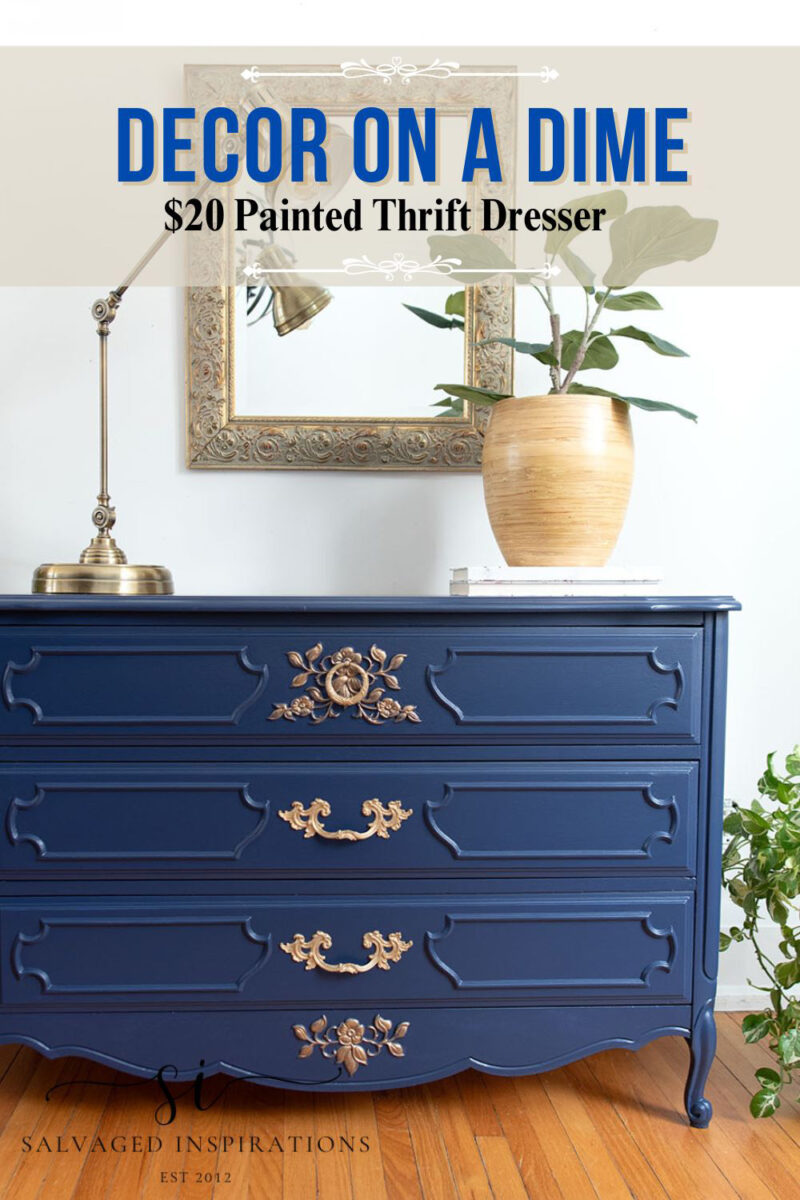
Hi, creative friends, and welcome back to another Furniture Fixer Upper tour! I’m on a hot streak at the thrift stores! I found this sweet French Provincial dresser for $20.99, and it stopped me in my tracks. I brought this dresser home and gave it a fresh, modern dresser makeover using ONE rich, timeless color that completely transformed the look. Wait until you see how a single shade can take a dated piece from forgotten to fabulous!
In today’s post, I’m also sharing –
- How to test for lead paint
- A primer that sticks to ALL slick surfaces
- How to add Antique Gold Highlights to hardware & details
- And my FAVORITE way to tint topcoat for a rich finish!
*As an Amazon Associate, I earn from qualifying purchases. There are affiliate links in this post to other companies/products I use and love as well. You will never be charged extra when you purchase through these affiliate links. If you purchase from my links – A BIG thank you for supporting me and the #siblog! To see my full disclaimer, click here.
Bonus, it’s Furniture Fixer Upper Day! If you’re new here, on the fourth Thursday of every month, I join four super-talented friends (Christy – Confessions of a Serial DIYer, Kathy – Petticoat Junktion, Natalie – A Ray of Sunlight, and Gail – My Repurposed Life) to share our before-and-after furniture restyles. I’ve included the links at the bottom of today’s post and I hope you join me in seeing what they’ve created this month! I always learn something new from these talented ladies.

Below is the three-drawer dresser I found selling for $20.99 at the Stoney Creek Thrift Store. This was an awesome price, as thrift store prices have increased over the last few years. We saw it just as the store was closing at 8:59 pm, and they wouldn’t let me ring it in, instead saying I’d have to come back the following morning. I’m NOT an early bird, but my sister Andrea took the drive out to Stoney Creek and grabbed it for me the next day. Sister’s the BEST!!!
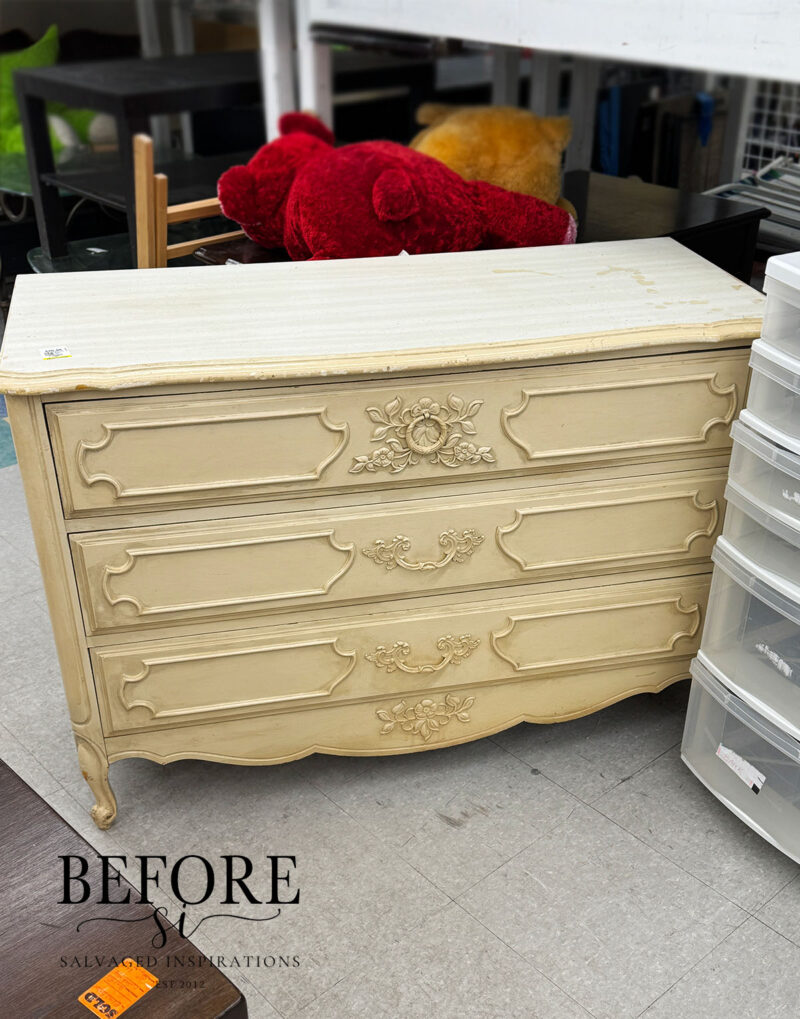
I was hoping this was a solid wood piece, but it was a wood composite with a laminate top.
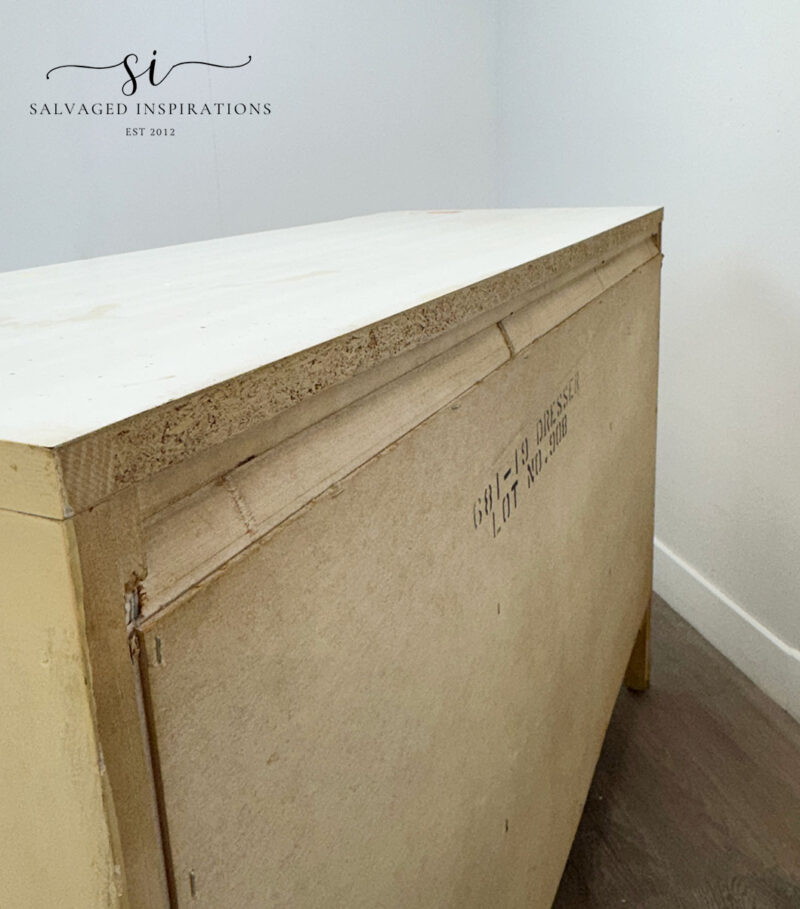
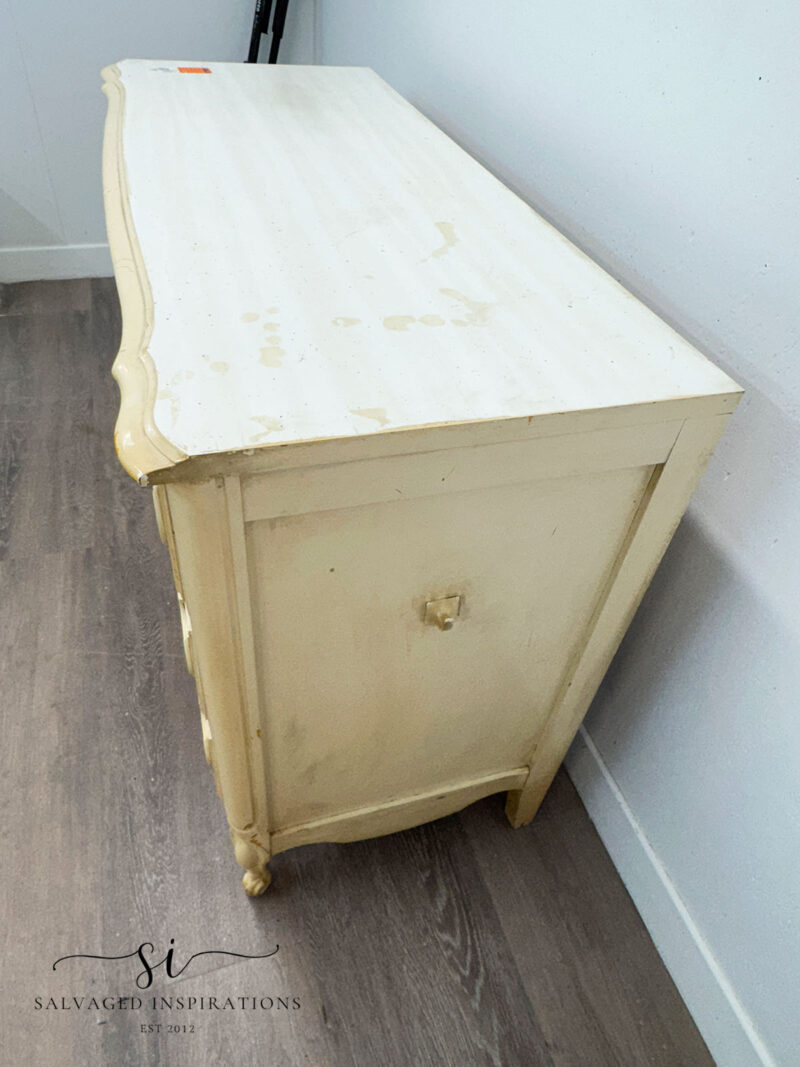
It was also filthy and stained, but nothing a little TLC couldn’t fix. Challenge ON for this thrifted dresser makeover.
THIS POST IS SPONSORED/CONTAINS AFFILIATE LINKS TO PRODUCTS I USE. YOU CAN SEE MY FULL DISCLOSURE HERE.
SUPPLIES
French Provincial Dresser – SALVAGED
White Lightning Cleaner
Auto Sponge
Sanding Sponge
Lead Paint Tester Kit
Bonding BOSS Primer
2″ Angled Paint Brush
Nautical SILK Mineral Paint
Heirloom Roses Rice Paper
Antique Gold Gilding Wax
Gator Hide Topcoat
TOOLS
Heat Gun
Plastic Putty Knife
Bosch Orbital Sander
Astro Euro HVLP Paint Sprayer 1.7mm Nozzle
CLEAN | REPAIR | SAND
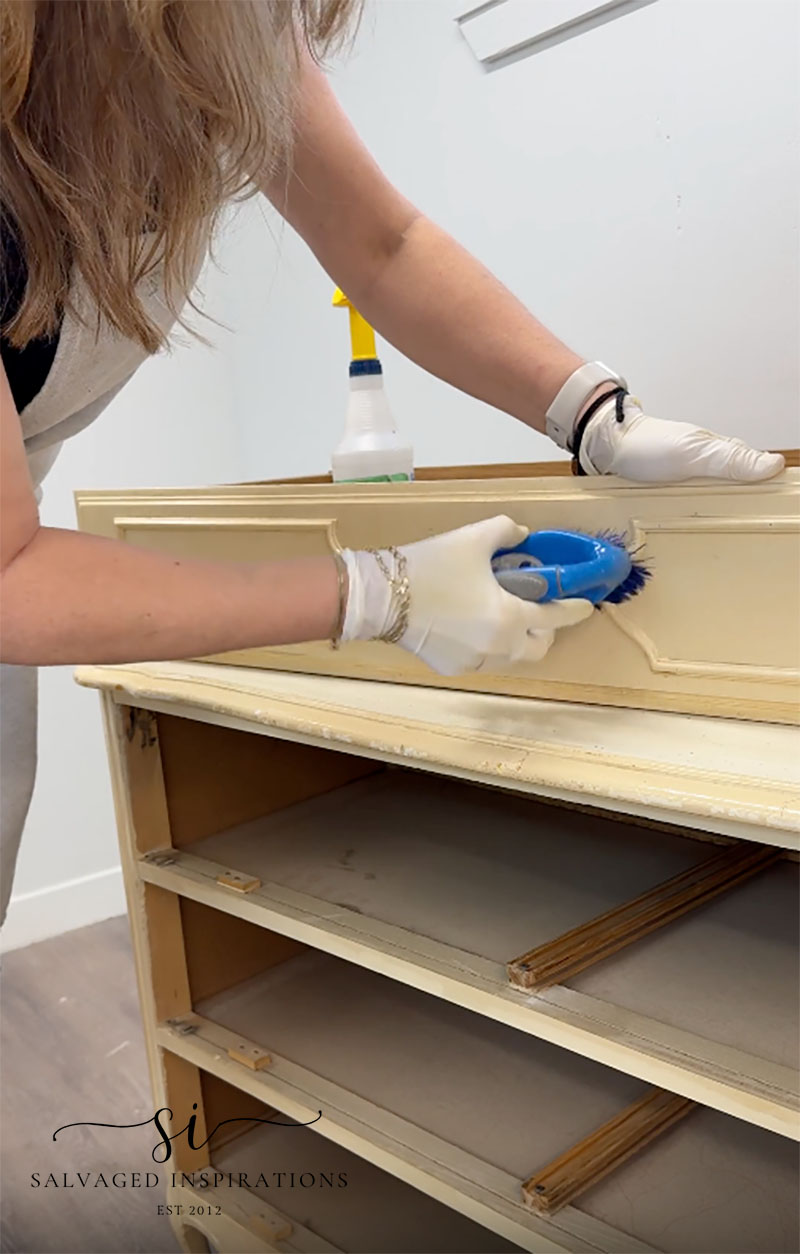
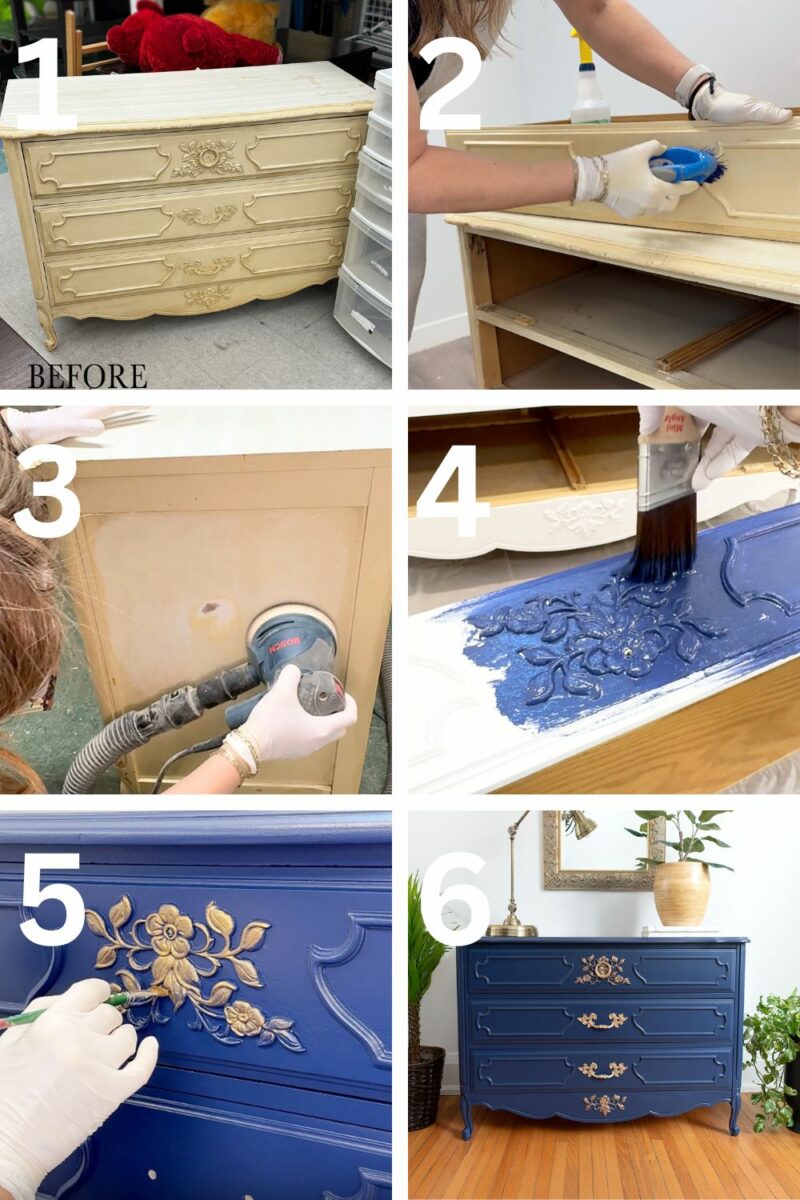
To start the prep process, I cleaned the top, sides, and legs with a heavy-duty furniture cleaner, and a large automotive sponge. For the gorgeous wood carving on both sides, I used a dollar store brush to get into all the details.
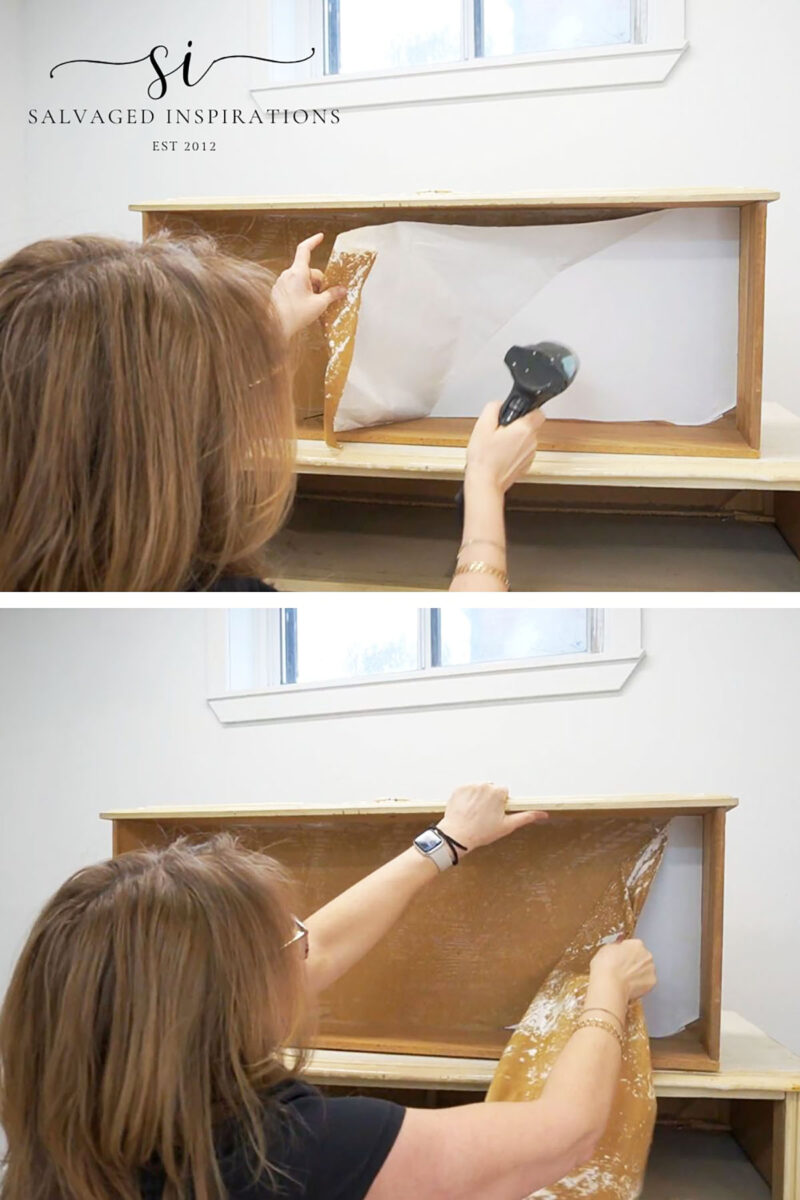
I had a little trouble removing 50-year-old contact paper – even while using a heat gun. It took off the top layer of the bottom of the drawer, because it was stuck on there for so many years. I don’t line drawers if they’re in good shape, but this one needed a liner to cover up this mess.
HOW TO TEST FOR LEAD PAINT
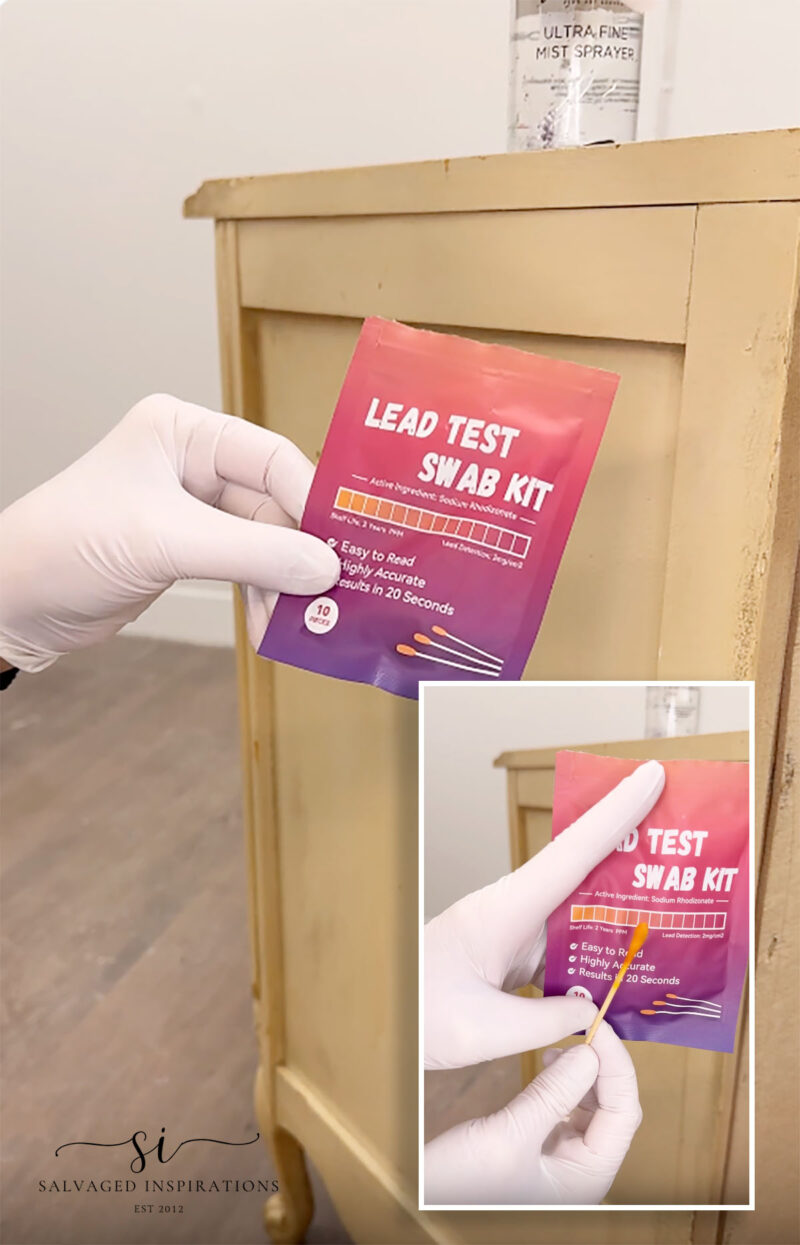
Someone loved this dresser enough to give it a prior makeover. It had been painted over the original factory finish with a glossy paint. By the looks of the paint, it looked like this was done many, many years ago. So as a precaution, I brought out my Lead Swab Test to make sure I wasn’t working with lead paint. If you work with a lot of furniture, I highly recommend keeping a pack of these on hand. Safety first, and this kit is super inexpensive and gives such peace of mind when I’m in doubt.
- Remove a test swab from the package.
- Spray the swab with water or dip into some vinegar and remove excess. (read package!)
- Rub the swab on the painted furniture for 20 seconds
- Check the color against the chart on the package.
- If the color is in the red zone, lead paint has been used.
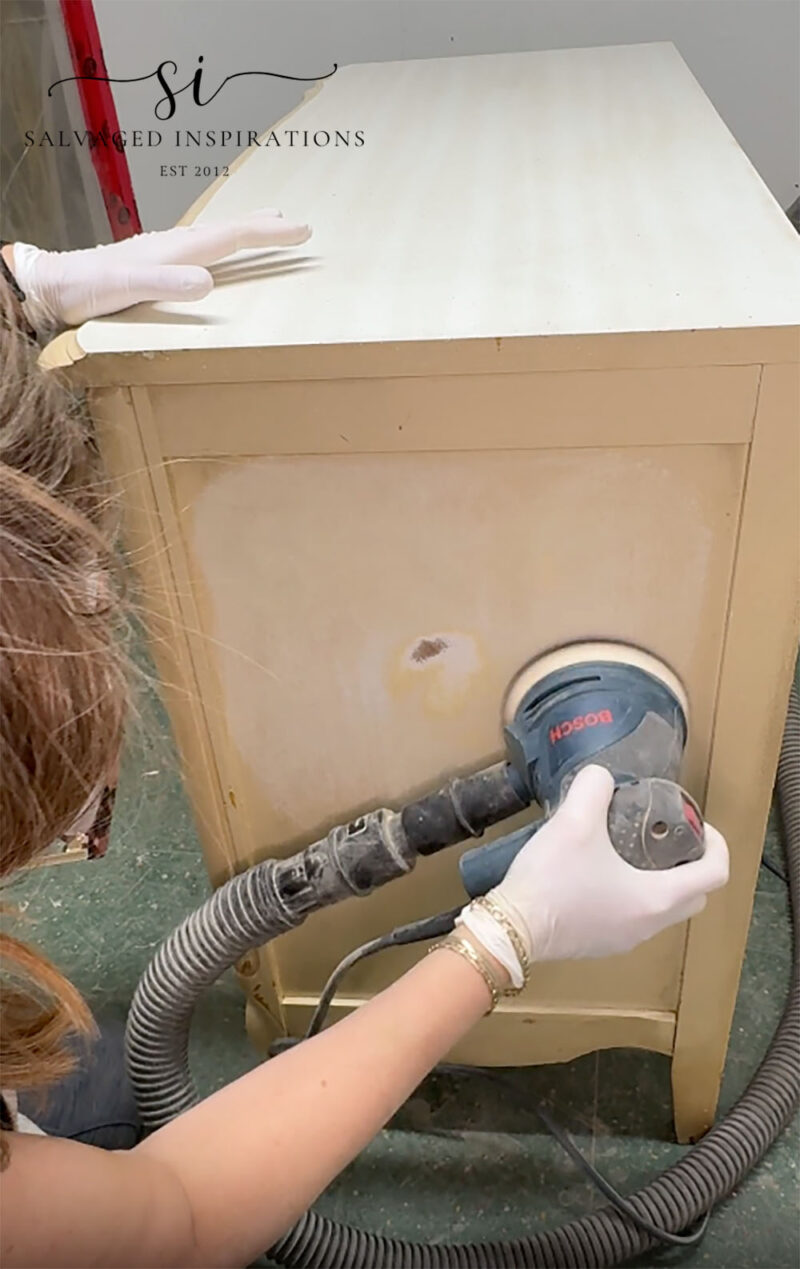
Once I knew the paint was NOT lead paint, I scuff-sanded the entire dresser with a rough 60-grit sandpaper using my orbital sander. The drawers were hand-sanded with an 80 grit sand paper. A lot of the paint was flaking off, so there was a lot of sanding. I think I was at it for almost 3 hours.
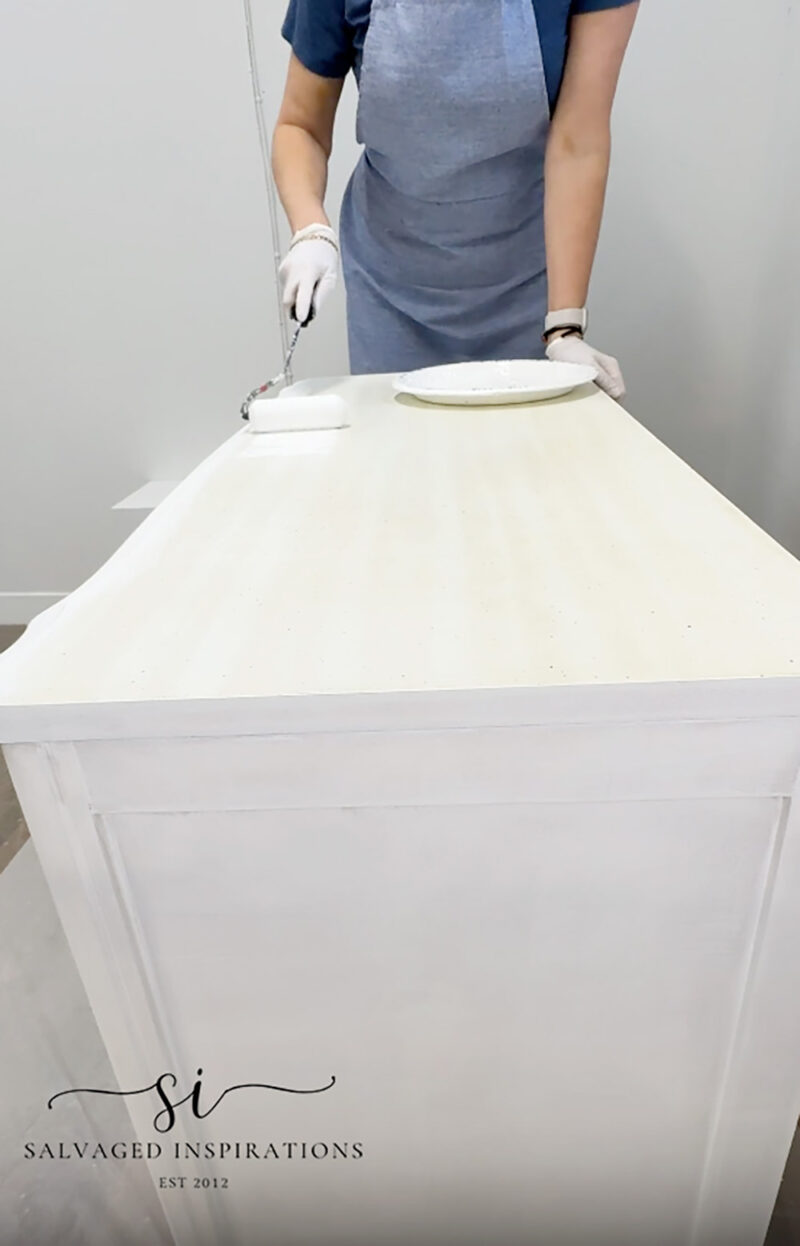
I came down the following morning to prime. Because this dresser had a laminate slick top, I brought out this Bonding BOSS primer that sticks to all shiny surfaces. It also blocks stains and odors. This is waterbased so no heavy fumes. For it to bond to the surface, 24 hours is required.
The following day, the scratch test passed with flying colors, which I’m sharing in the YouTube video tutorial at the end of this post.
NAUTICAL SILK MINERAL PAINT
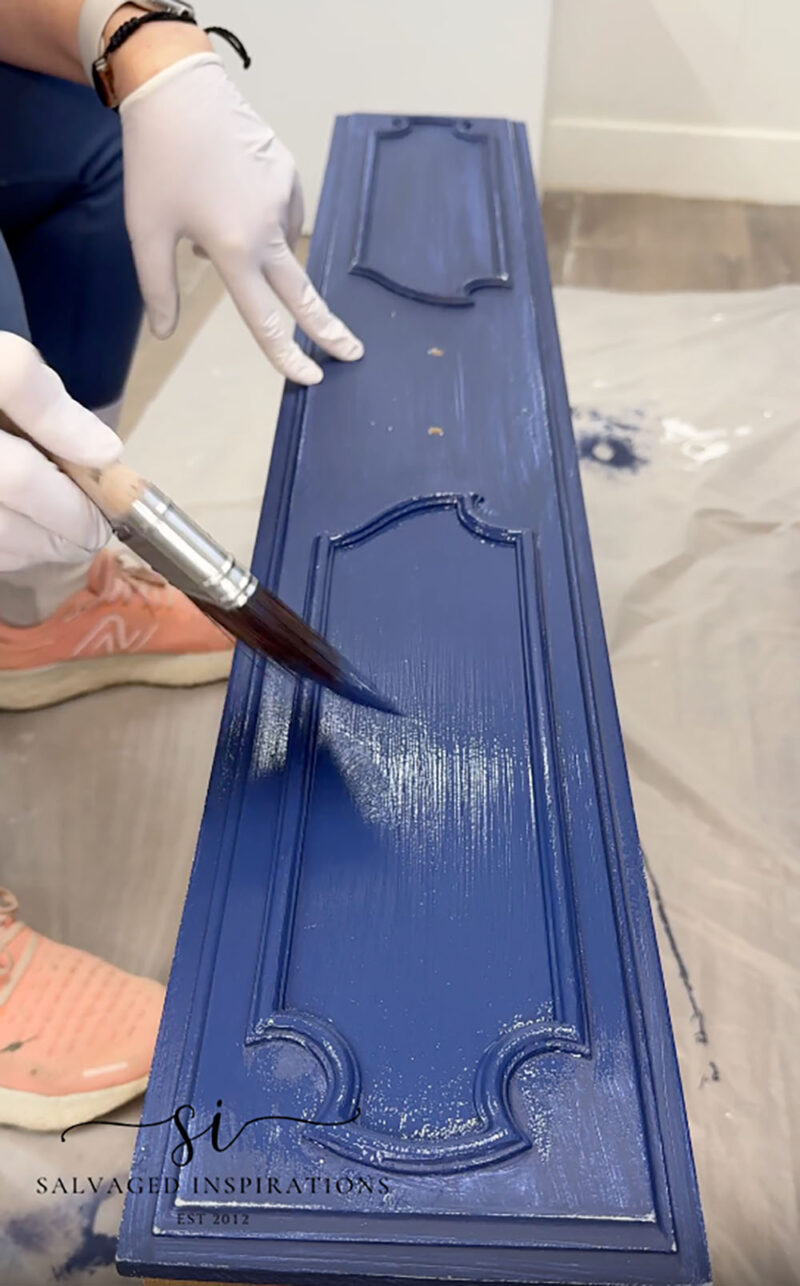
The color I chose to paint this piece is called Nautical SILK All-In-One Mineral Paint. It’s a gorgeous traditional deep-sea blue with a big personality that commands attention! I used my 2″ angled paint brush to get into all the crevices on the details. This paintbrush also gives a super smooth finish. I’ve had this brush for 6+ years and have used it on soooo many makeovers. If you buy a quality brush and look after it, i.e., clean it after each use, it will last you years.
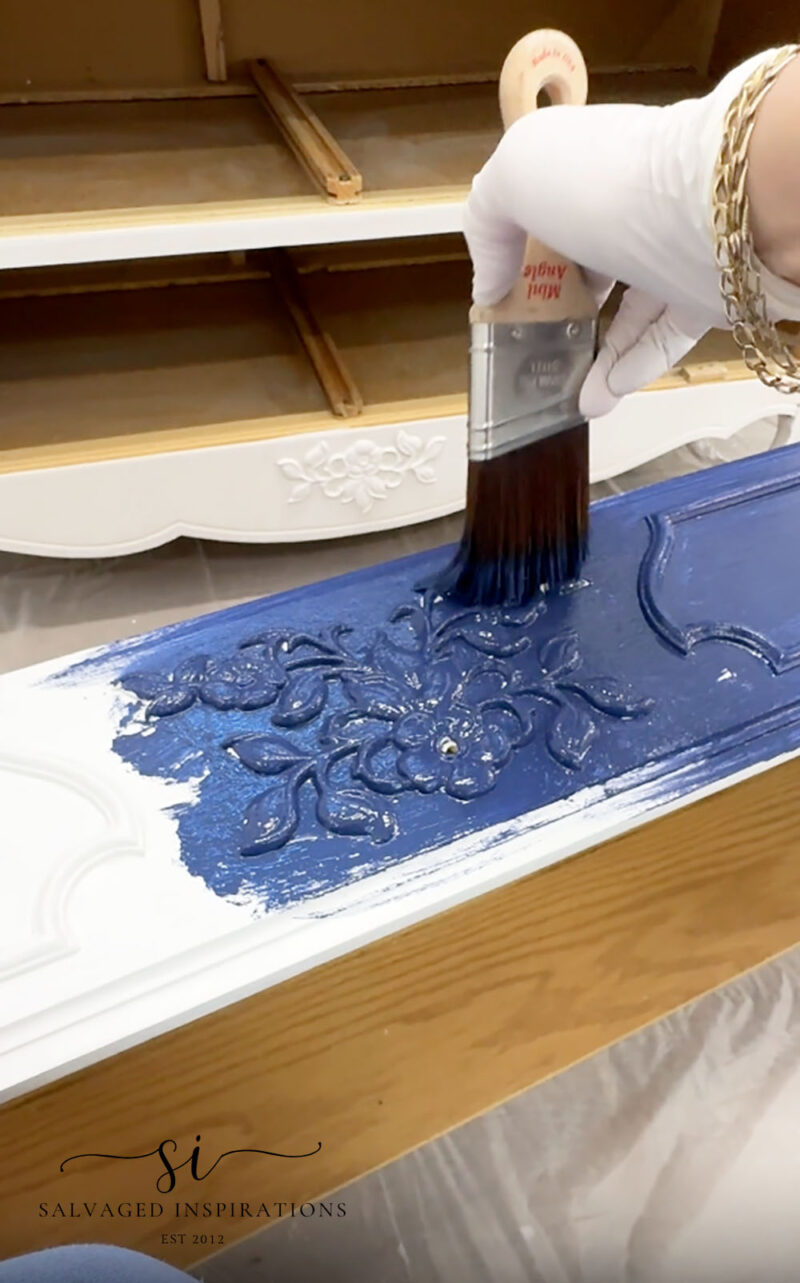
This dresser makeover took two coats for full coverage.
TINTED TOPCOAT
To protect this paint finish, I sprayed three coats of Gator Hide, which I tinted with a small amount of Nautical Blue Paint. This isn’t necessary when spraying a topcoat but I do find it can give a little bit more depth when topcoating a dark color. If you brush or sponge your topcoat onto a dark painted finish, this can greatly reduce brush marks and streaks as well.
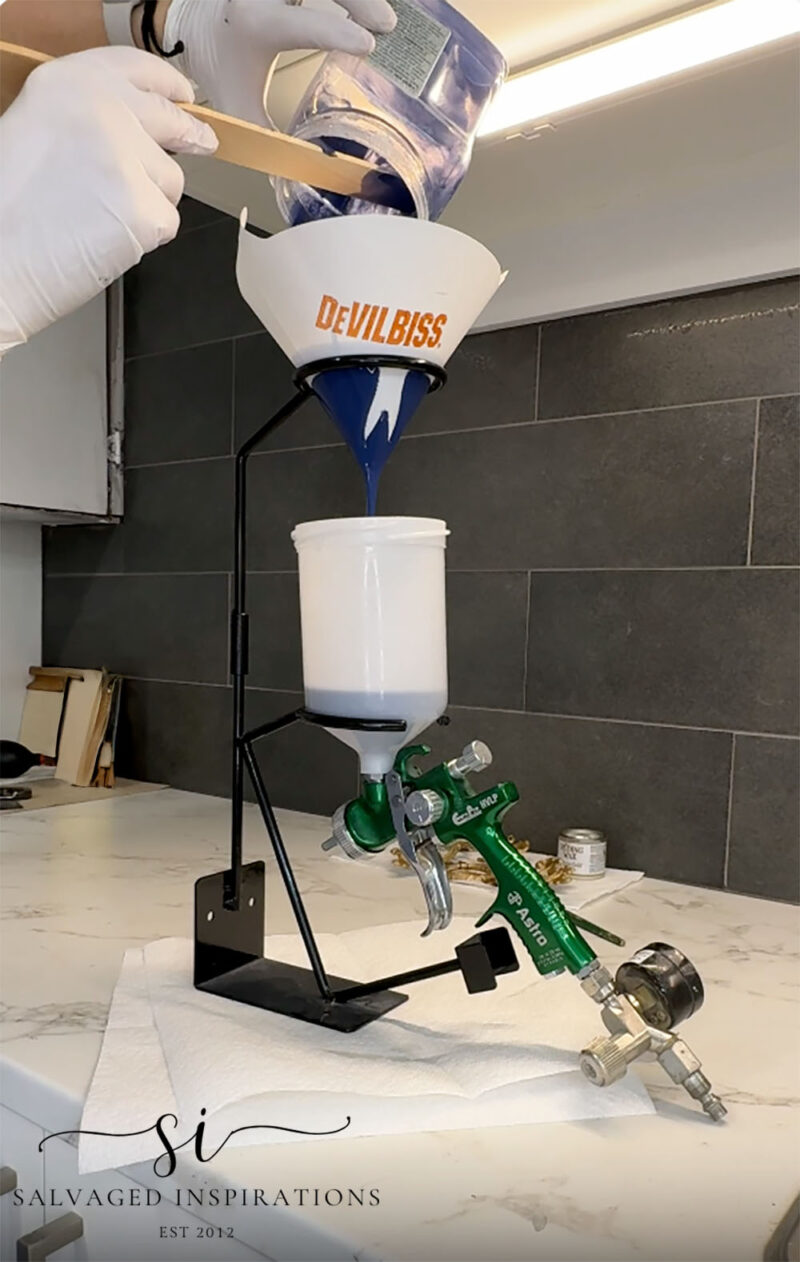
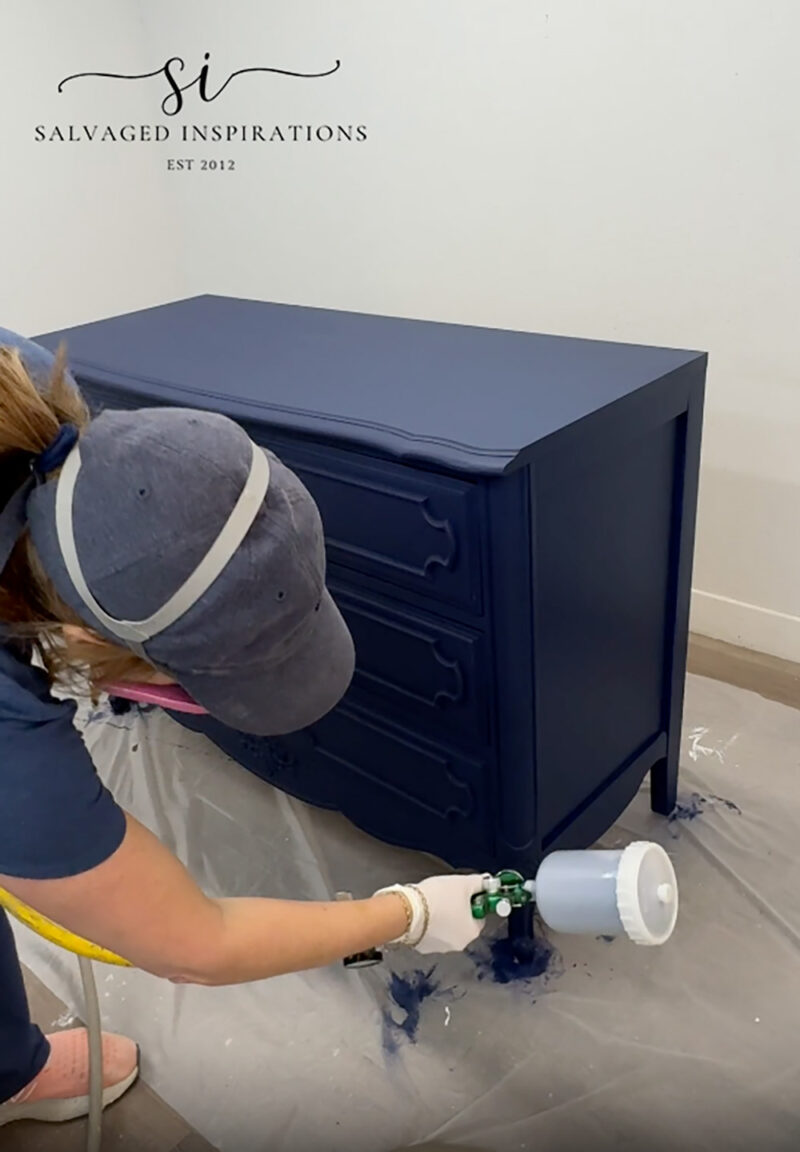
I sprayed three coats of the tinted Gator Hide using my Astro EURO Spray Gun. I like to lightly sand between the first and second coat for a super smooth finish.
ADDING ANTIQUE GOLD HIGHLIGHTS
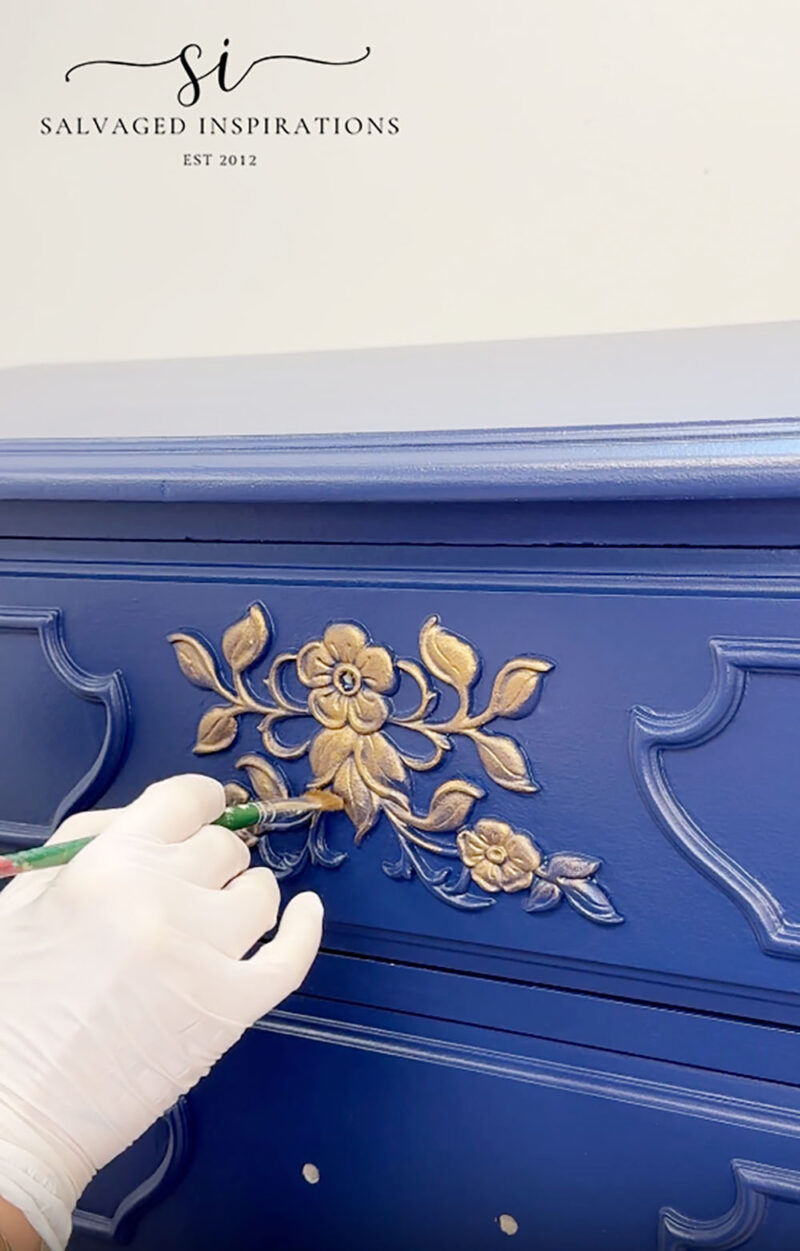
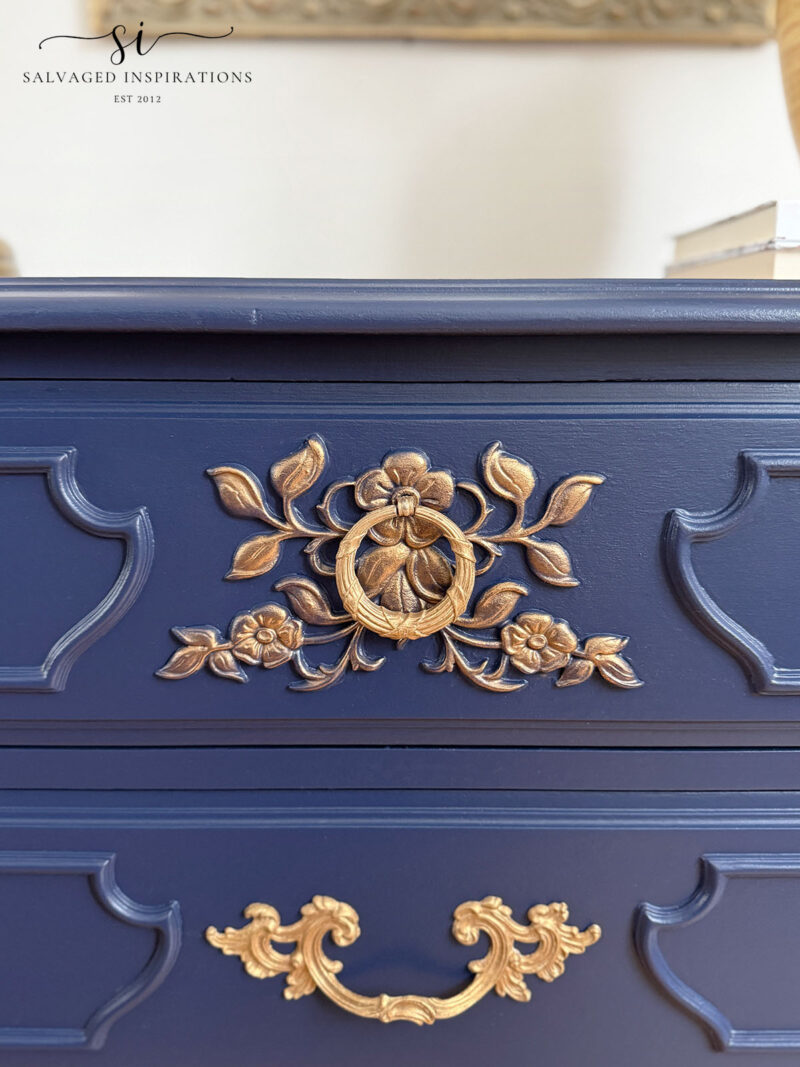
I waited for the topcoat to dry before adding the antique gold gilding wax to the floral details. Using an artist’s brush, I lightly brushed the gilding wax onto the florals.
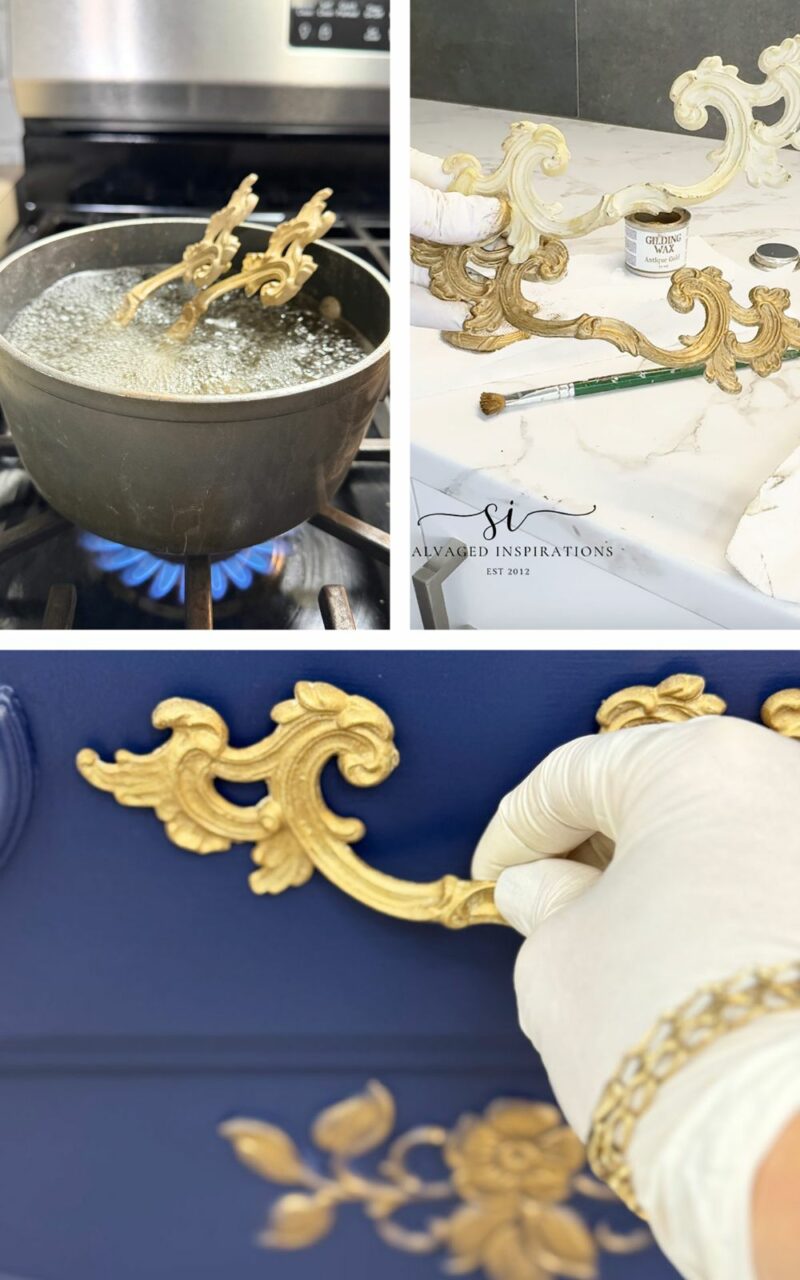
The hardware I did the day before so it was 100% dry when I reinstalled it onto the dresser. I boiled the handles in a water/vinegar mixture until all the paint loosened up. I cleaned all the old paint off and painted the two handles and top pull with the gilding wax. What a difference! They look like brand new ‘vintage’ hardware.
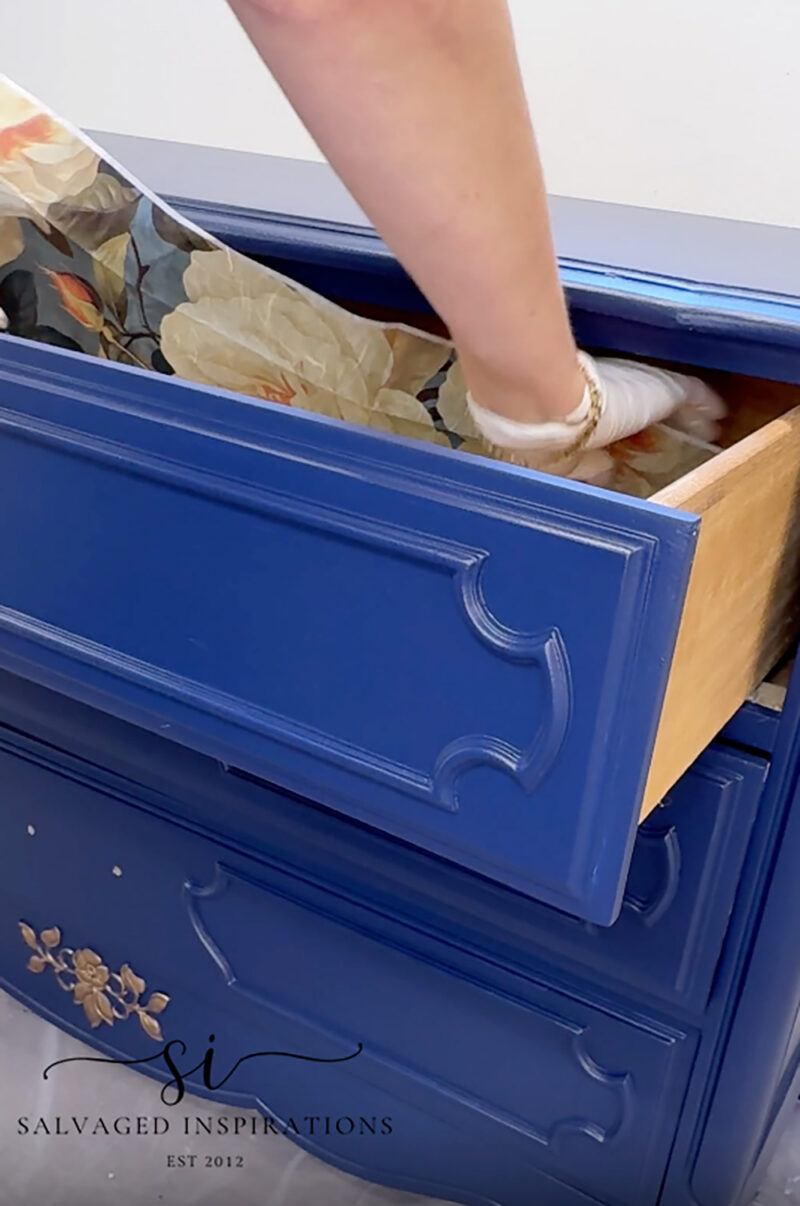
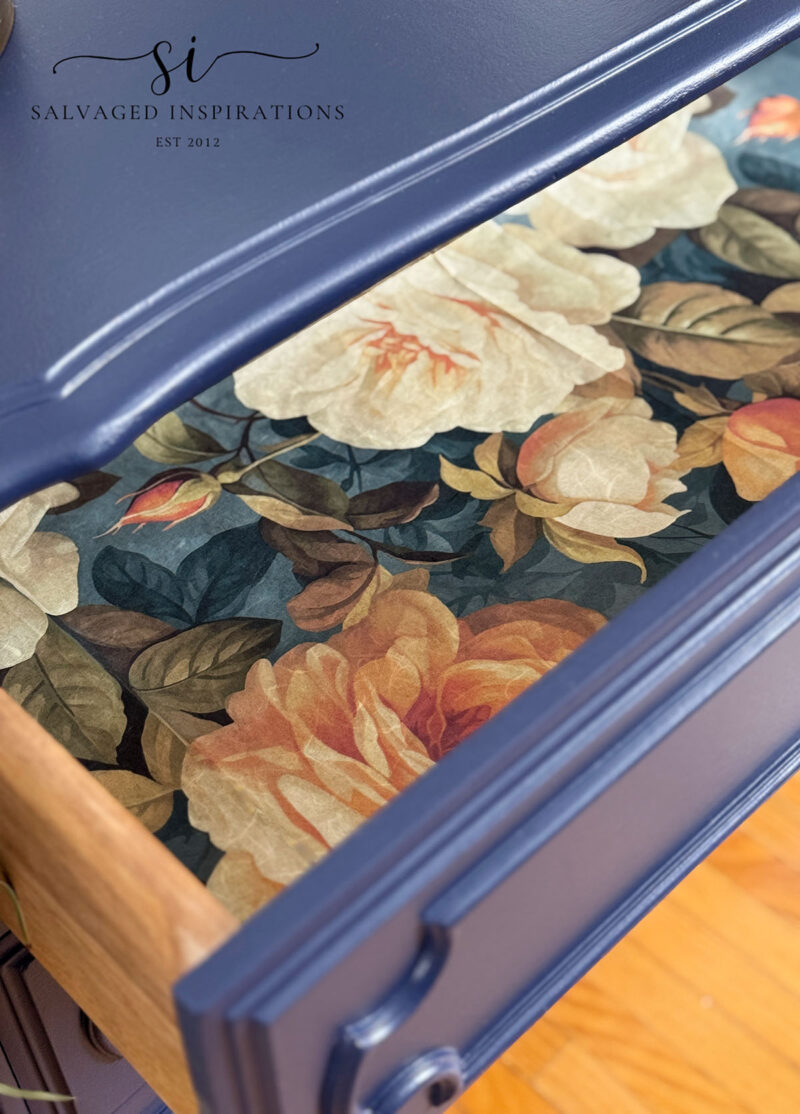
For the very last detail, I lined the bottom of the drawer with this lovely Heirloom Rose Rice Paper. I was running out of daylight to stage and style, so I haven’t adhered it yet, but I think it’s a perfect match.
PIN AND SHARE 🤗
STEP-BY-STEP DRESSER MAKEOVER
THE BIG REVEAL…
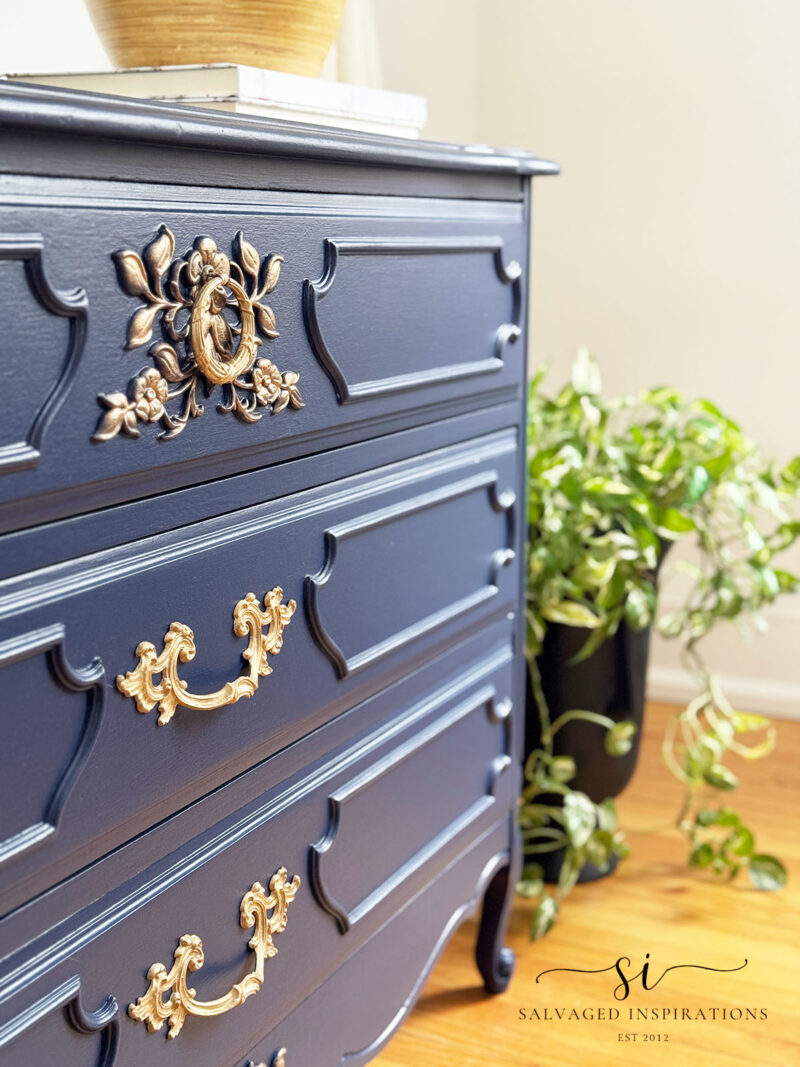
Here’s the finished look!
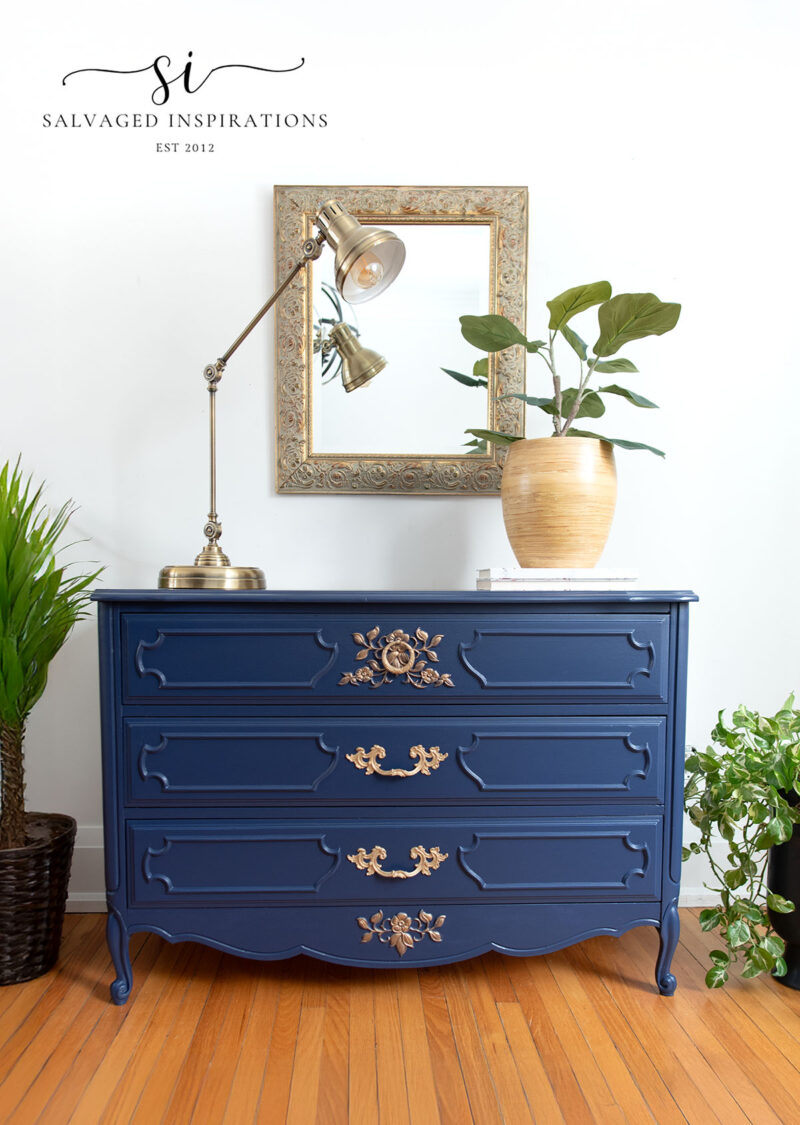
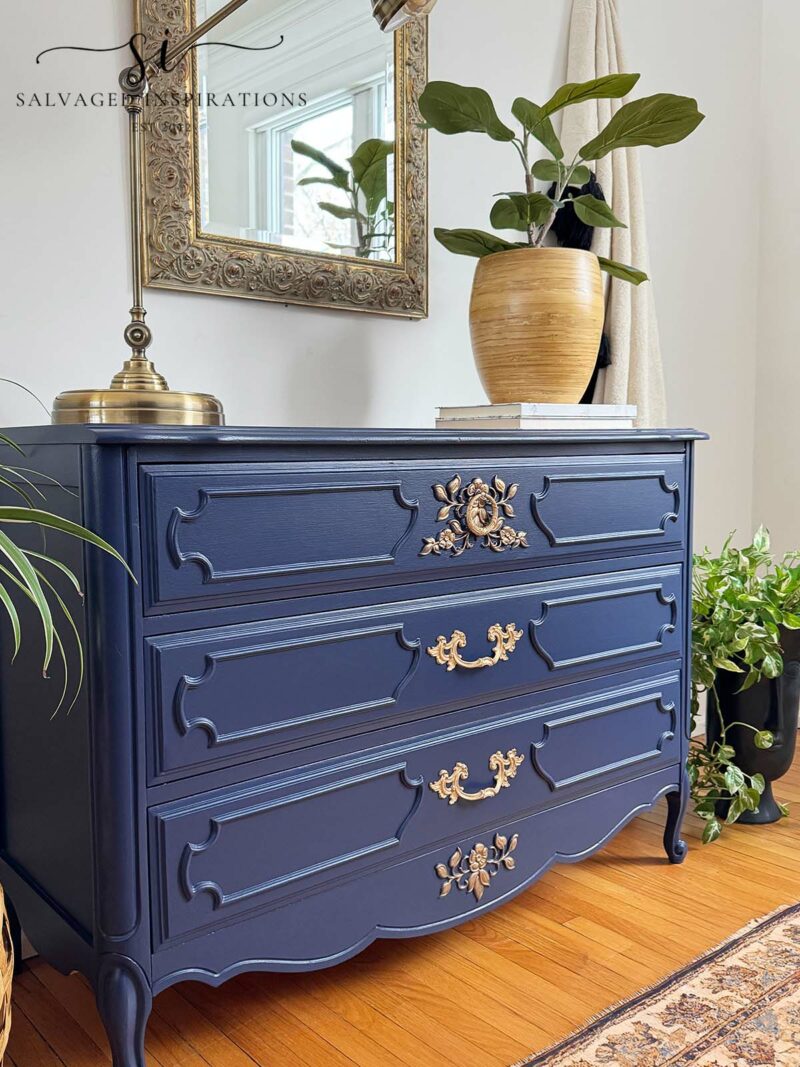
And check out the Heirloom Rose Rice Paper in the drawer. It’s a perfect match.
The antique gold gilding wax looks so elegant and really pops against this beautiful, rich blue.
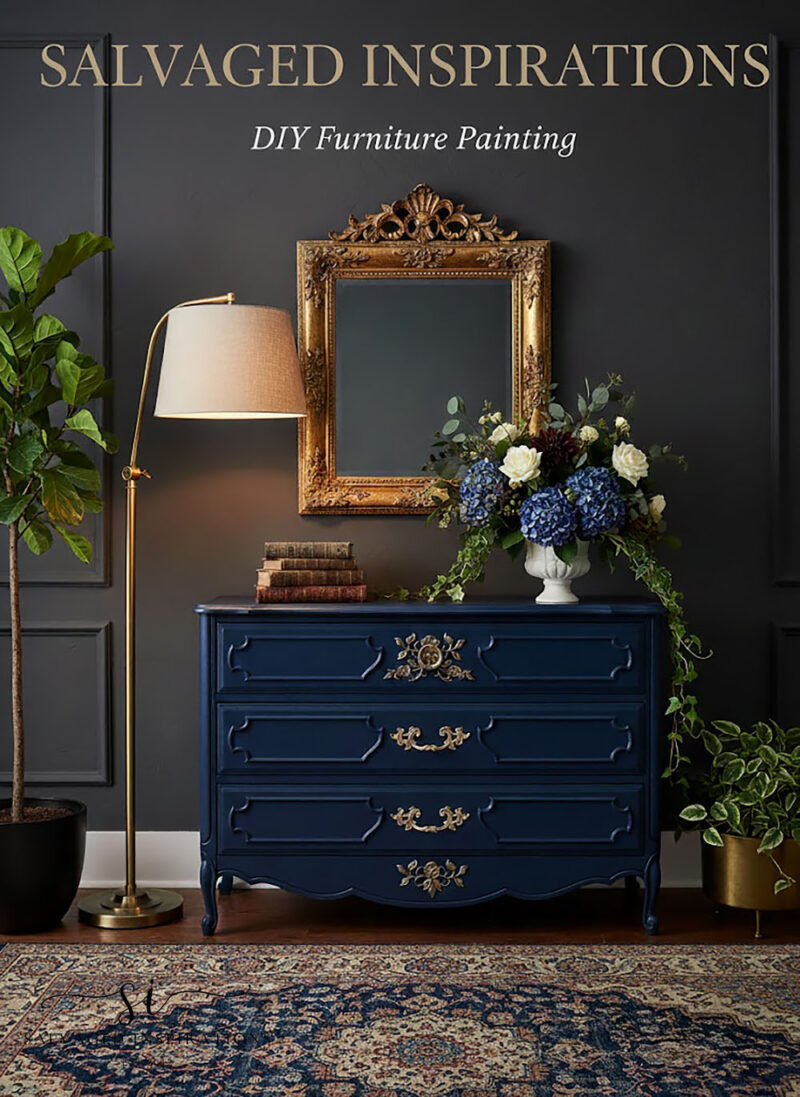
And just for fun, I prompted AI to generate a roomscape with the focal point being this restyled dresser. Here’s what it generated – WOWZER super elegant. I LOVE IT! I can’t wait to hear what you think of this one!
YOUTUBE TUTORIAL
Here’s the full step-by-step YouTube video tutorial for you. Our #siyoutubefamily is already a community of 56.9K, so don’t forget to subscribe if you haven’t done so already. You’re the BEST, and I appreciate your support! 🙂
And now for some FURNITURE FIXER UPPER FUN!
You’re going to LOVE what these creative FFU ladies do! Below are the BEFORE photos. Visit the links to see the amazing AFTERS and learn how they did it! I’m heading over to take a peek as well!
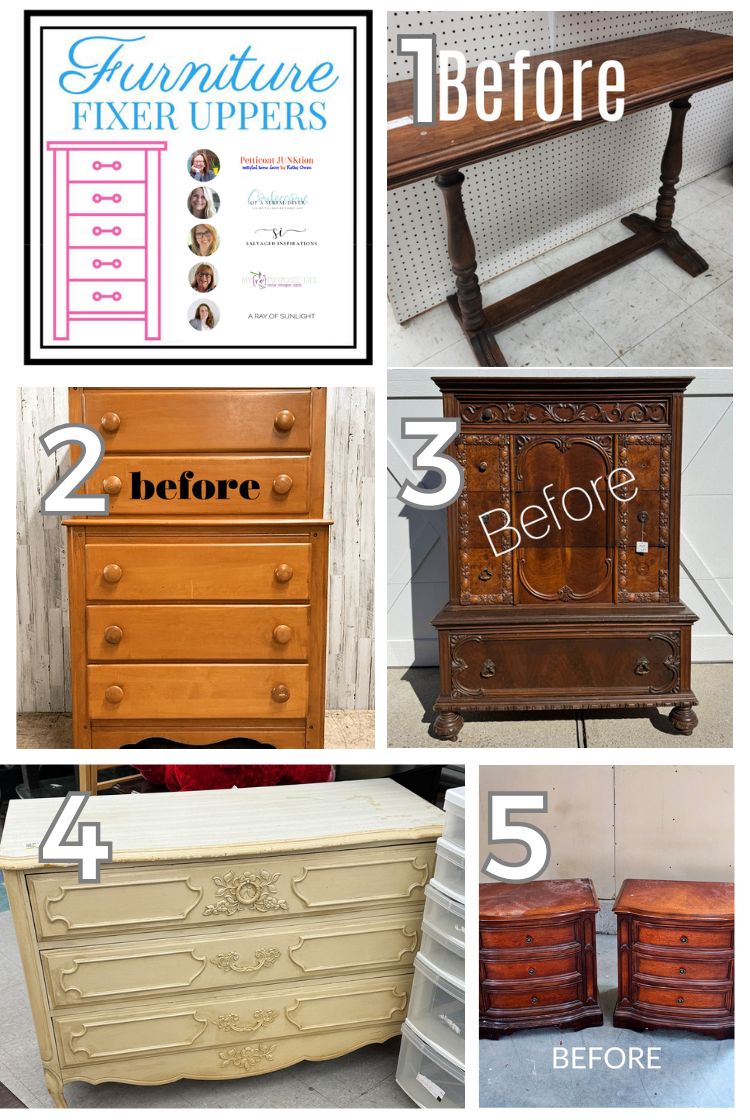
1. MY REPURPOSED LIFE
2. PETTICOAT JUNKTION
3. CONFESSIONS OF A SERIAL DIYER
4. SI (HAPPY YOU’RE HERE!)
5. A RAY OF SUNLIGHT
Here’s another look at this $20.99 French Provincial Dresser before and after. I hope it’s inspired you and given you some ideas for your upcoming furniture painting projects!
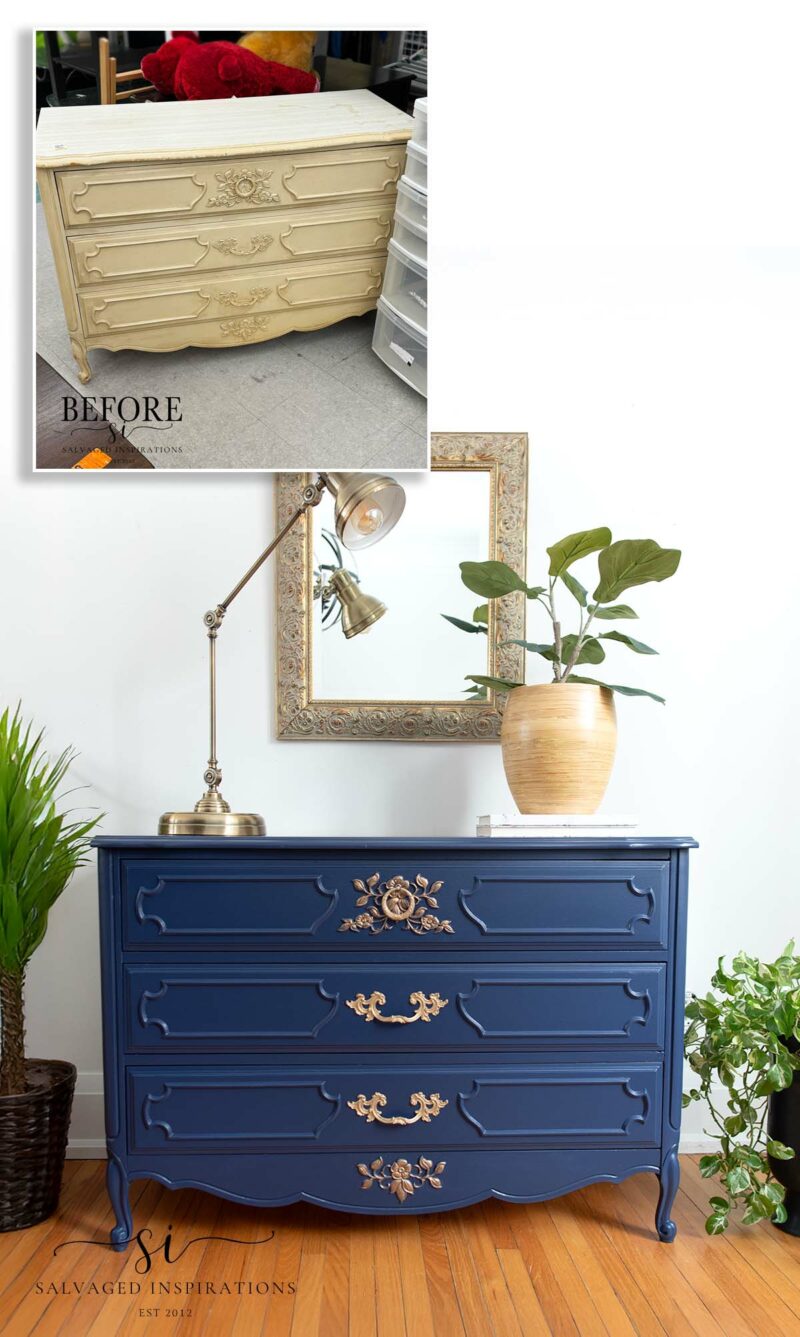
Finding a $20 (well-loved) French Provincial dresser and turning it into a bold, beautiful statement piece is always fun. This dresser makeover reminds me that with a little vision (and one paint color!), forgotten pieces can shine again. As a bonus, these FP dressers sell quickly, as well!
Thank you so much for being here, for cheering me on, and for following along with our February Furniture Fixer Uppers Tour. Your comments, messages, and encouragement truly mean the world to me. If you have a question or just want to say hello, I’d love to hear from you below — you always brighten my day!
Happy painting, sweet friends! 💙
Denise x
RELATED POSTS:
1970s DRUM TABLE MAKEOVER
BLACK PAINTED FRENCH PROVINCIAL NIGHTSTANDS
HOW TO CREATE AN OLD WORLD PAINT FINISH
ROADSIDE RESTYLE FRENCH PROVINCIAL TALLBOY
PAINTED FRENCH PROVINCIAL IDEAS
PIN AND SHARE! 🤗
 Hello again... I'm so happy you dropped by! Let's keep in touch! Follow me on social media or sign up for a dose of furniture painting inspiration and diy tutorials. :)
Simply Stunning! And I love the rice paper lined drawers. Perfect! Kathy
Thank you Kathy! Have a great weeekend! XOXO
That is a stately blue. Very appropriate for this FP design. The hardware is so delicate / detailed. I esp love the top drawer pull ! I’ve not seen one like this. Love it !!
You always do a great job staging. I also like your use of AI staging. Guess we all need to learn more about AI as it’s coming fast.
You never fail to impress 🙂
Thanks so much and I agree, it IS a stately blue! I’m loving it and look forward to using it again on another makeover. And I appreciate the sweet compliment on staging/styling P.💕 The first few years of doing this I STRUGGLED styling my pieces. Sometimes it would take me two days to figure out what to do – and I still didn’t like it.😆 It means so much when someone takes notice of the staging, so thank you!! I’m also having fun learning AI as well – its impressive – and scary all at the same time. Wishing you a fabulous weekend my friend. XOXO
Gorgeous! You never cease to amaze at how to apply the perfect finish on a piece. Good tip for the lead test too.
Thank you Tracy! And ya, a pack of lead testing swabs is super inexpensive so they are a great idea to have on hand. Enjoy your weekend!
What size of paint sprayer do you use? I see there are various options of nozzle size.
TIA!
I use 1.7mm tip. This allows me the option for thicker paints and topcoats along with thinner paints and topcoats by adjusting the spray guns output. I find with the smaller nozzles, too much water is needed to thin the product and then I don’t get the full benefit of the product ie good paint coverage or durable topcoat. Hope this hepls! Great question btw!
Gorgeous.
Thanks so much Lizzy! wishing you a fabulous weekend. XOXO
Denise,
You sure put a lot of work into this one, but it is stunning! I love the color, the hardware, everything about it. I bet it will sell very quickly!
Pinned!
gail
I hope so and thanks Gail! Thanks for the PIN as well!🤗
This is absolutely gorgeous. What an eye you have for cor and detail. It’s perfect. Have a great weekend.
Thank you Kathy, much appreciated! Have a fabulous weekend as well!
This dresser is meant for royalty, Denise! The blue is stunning with the gold hardware. I love it. 💙💛 Pinned 📌 xo 😘
Thanks my friend.😘 I’m loving this blue too!
A great price and this dresser turned out so elegant and pretty! You have a creative eye for turning dull furniture into swoon worthy Denise. Thank you for sharing what you do and inspiring us!
Thanks you for being here and sharing these makeovers with my Nicki! I really appreciated it! Have a great weekend. XOXO
So so so PRETTY! I love your choice of colors and this is another great makeover that benefited from your bold decisions. Thanks for sharing and inspiring us!
Hi Leslie and thank YOU!😊 I love this tradition but BOLD blue as well!
what software do you use for your staging photos and how difficult is it to use?
Hi Dana, great question! I stage and style all my own furniture – no software. I use REAL life lamps, plants, books, throw rugs etc. After I’m happy with the styling, I do my photoshoot and upload the pics. For the 1 AI pic that I’ve been including at the end of most posts, I either use chatGPT or Gemini. They are both VERY easy to use. You upload your image and then add prompts to describe exactly what you want to see. For instance, dark moody wall, floral arrangement etc. Hope this helps.🤗
Hi Denise. What an amazing find for such a low price. You turned this dresser into a show stopper. The blue paired with the gold accents and knobs are everything!!! Love!!!
Hi Monique and thank you! I really love this blue paired with the gold too… and I always love working on these FP pieces! Have a wonderful weekend my friend. XOXO
You do amazing work. So proud of your efforts! So regal in that navy color and gold accents.
Thank you Kim, I’m so glad you like it! Have a great weekend. XOXO
Wow this blue is so elegant on this pretty piece! I would have nabbed that too for that price! And three hours sanding is no joke, but the result is totally worth it! XOXO
Thanks my friend! And yes, almost 3 hours. That paint was all cracked and just chipping off flying all over the place.🤣 I had to keep sweeping and vacumming my sanding room and myself so I didn’t track paint chips all over the house.😮 Have an awesome weekend Christy! XOXO