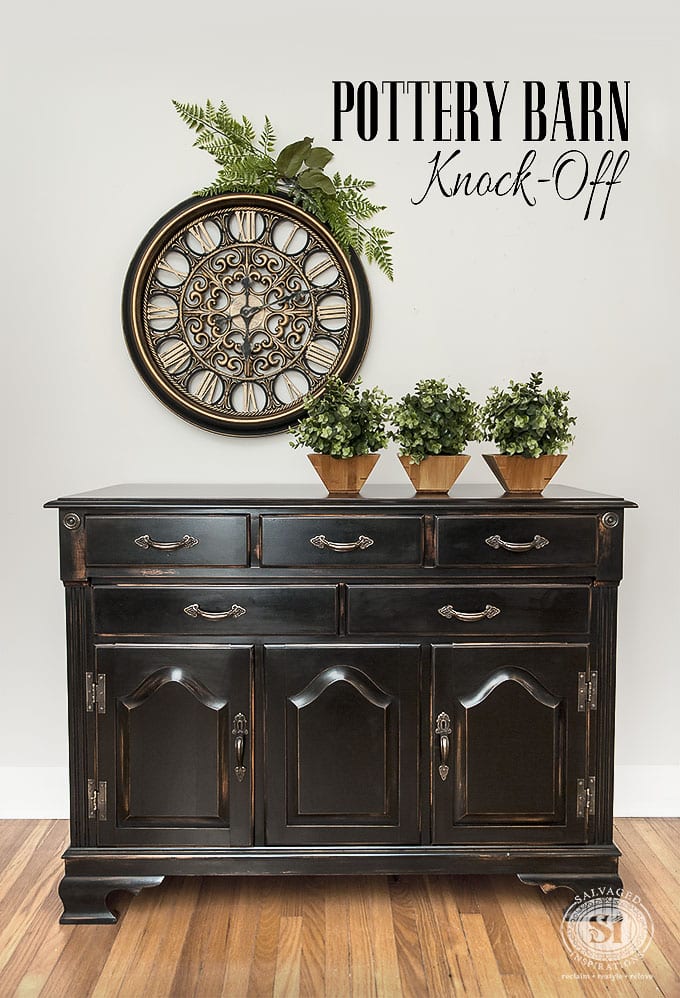
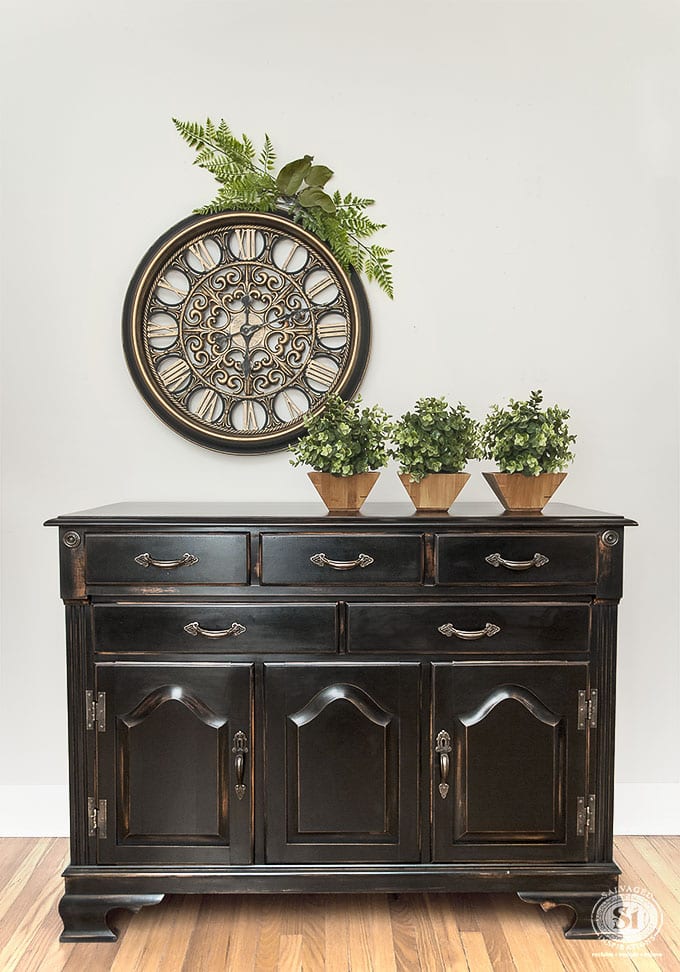
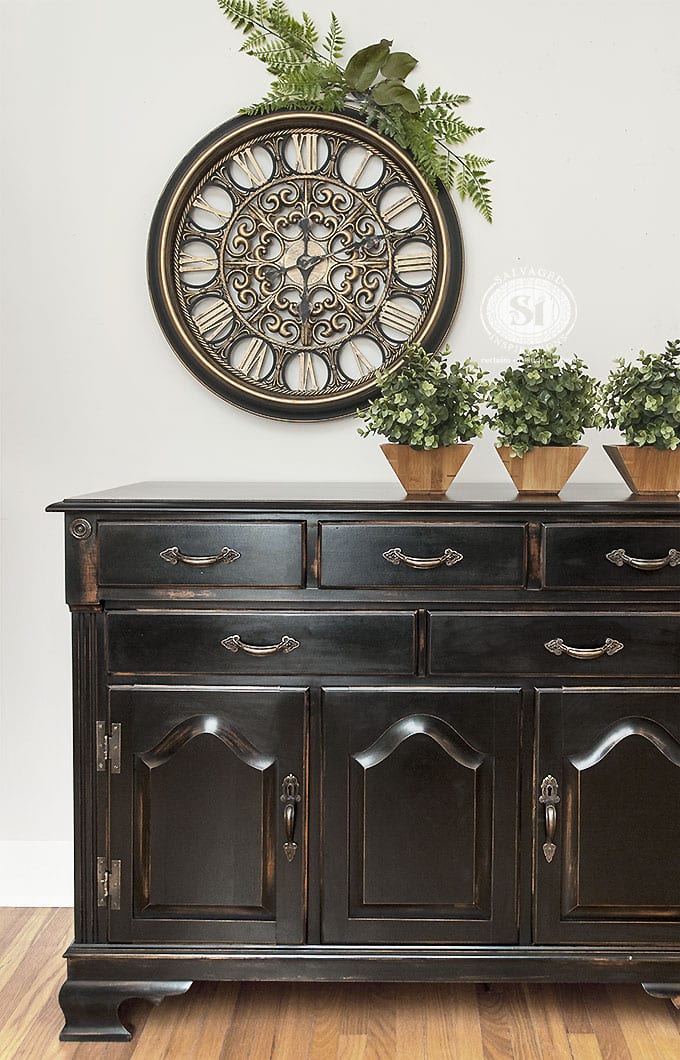
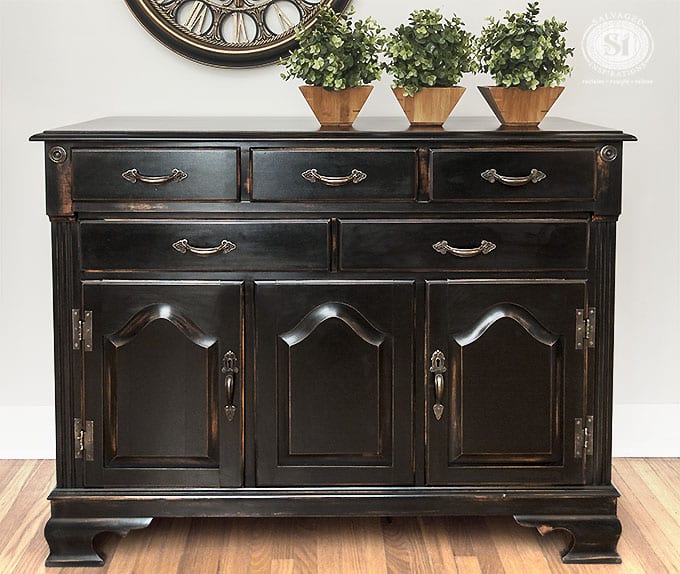
 Hello friends! Can you believe it’s already November? The weather is starting to cool down here, so I’m taking every opportunity to stay warm in my paint studio. I picked up this 80’s buffet from the ReStore and my first thought – was Pottery Barn Black Finish. The shape, style and existing stain are all perfect for a Pottery Barn knock-off! If you’re a fan of this popular black distressed look, be sure to read on because today I’m sharing 5 DIY tips that make recreating this dramatic finish a whole lot easier!


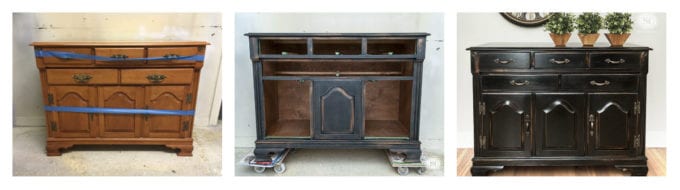
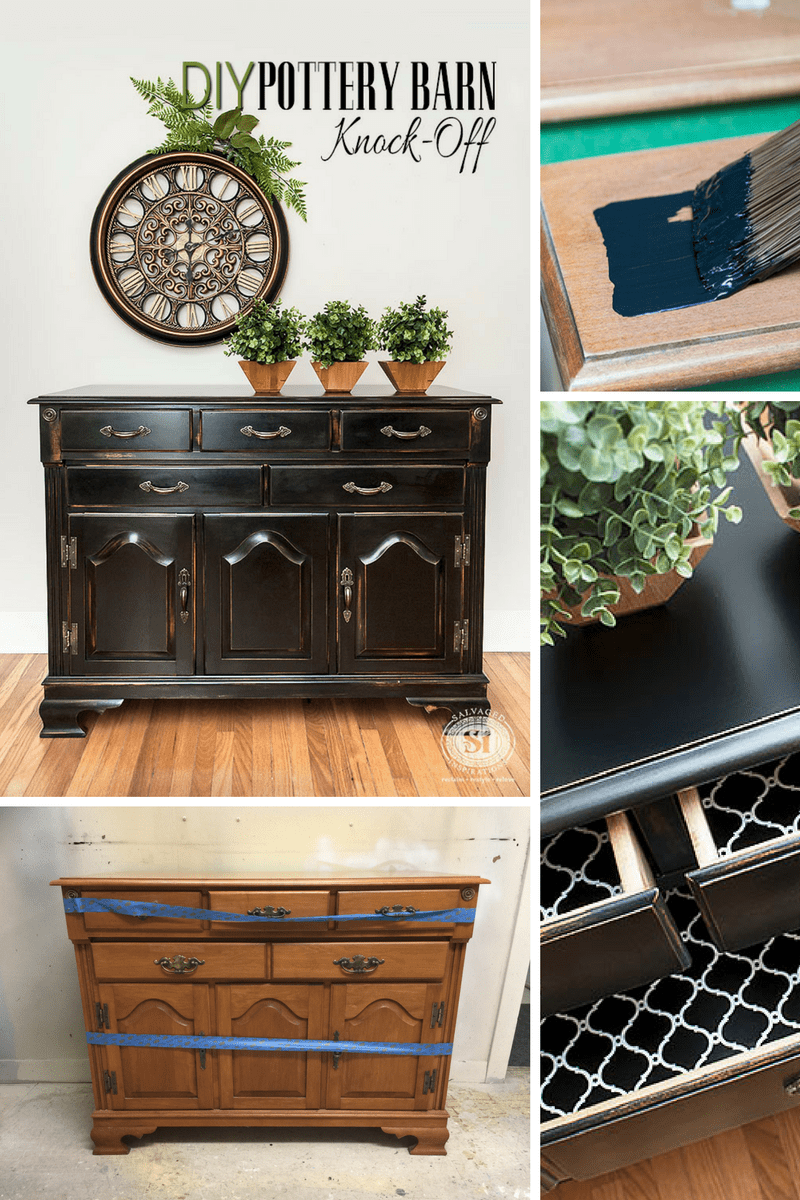
Here’s a peek at the before, during, and after. This buffet also came with a top hutch but I decided not to use it for this restyle. It will come in handy for something else down the road.
(This post contains affiliate links. See my full disclosure here.)

SUPPLIES~
80’s Buffet – Salvaged
General Finishes Lamp Black
Paint Brush | Roller
Sanding Sponge
Stain (I used Minwax Gunstock)
Q-Tips & Shop Towels
I used Black Wax for the body this Poly for the top)
5 TIPS FOR A KNOCK-OFF POTTERY BARN BLACK FINISH~
1. PICK THE RIGHT PIECE
The shape and style of the piece of furniture you pick will make a big difference. Solid wood pieces that have an existing warm stain (even the outdated orange stain on this 80s piece) work really well. It saves a lot of time when you already have a base coat of stain.
2. DO NOT USE PRIMER
Primer aids in adhesion and stops bleed-through and stains. The latter is helpful when painting with light paint colors. But when painting a black distressed finish, the last thing you want to see when you start sanding is a white primer underneath! This can ruin the entire look so here are a few options…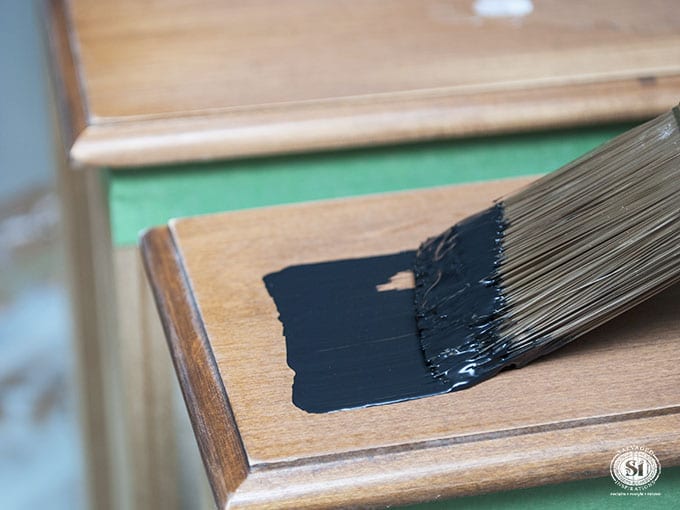
As long as your piece is properly cleaned, prepped with a light sanding (220 grit), and quality paint is used, primer is not needed. I didn’t use any on this piece and it turned out perfect. If you decide to use a primer, a tinted primer could be purchased so no white shows through after sanding. The last option is to avoid using a primer and use chalk or mineral paint where no priming is necessary.
3. SAND BETWEEN COATS
To get this distressed Pottery Barn Knock-Off Finish, sanding in between each coat is key.
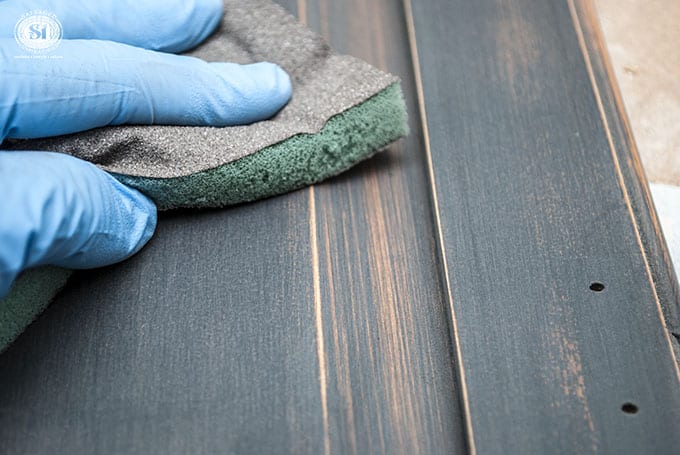
While I was painting, I painted some areas with a lighter hand and then sanded these areas back a little more aggressively. The goal is to reveal some of the original stain while the majority of the piece remains a rich opaque black.
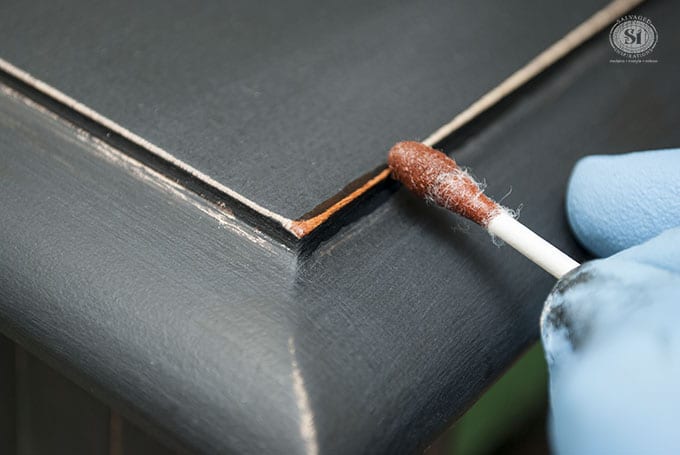
4. SPOT TREAT BARE WOOD WITH STAIN
Unless you sand back with a super light hand, you may find that some areas have been sanded back to bare wood, especially on the corners and edges.
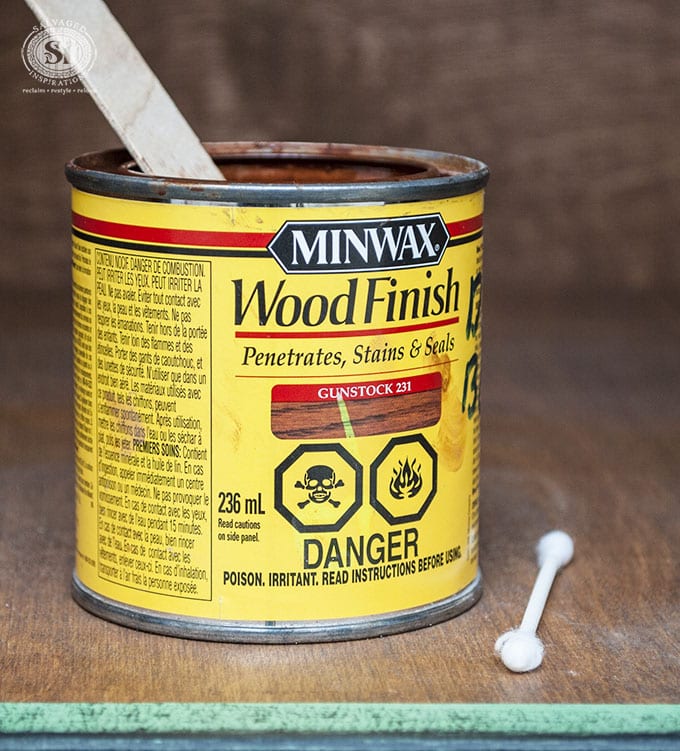
A really simple fix is to take a similar color stain and apply it with a Q-Tip. I dipped the Q-Tip into the stain and only applied it to the raw wood areas. I let it sit for a minute and then wiped it off with a shop towel and let it dry. This step is done after you’ve applied and sanded your last coat of paint but before you topcoat.
5. BLACK WAX FINISH & TOPCOAT
To get a rich black-on-black Pottery Barn Finish, black wax works amazingly. In the image below, the one on the left has been waxed and the one on the right has not. Big difference, right?!

For extra durability on the top of this buffet, I used General Finish High-Performance Poly. For the entire body, I used Black Wax.
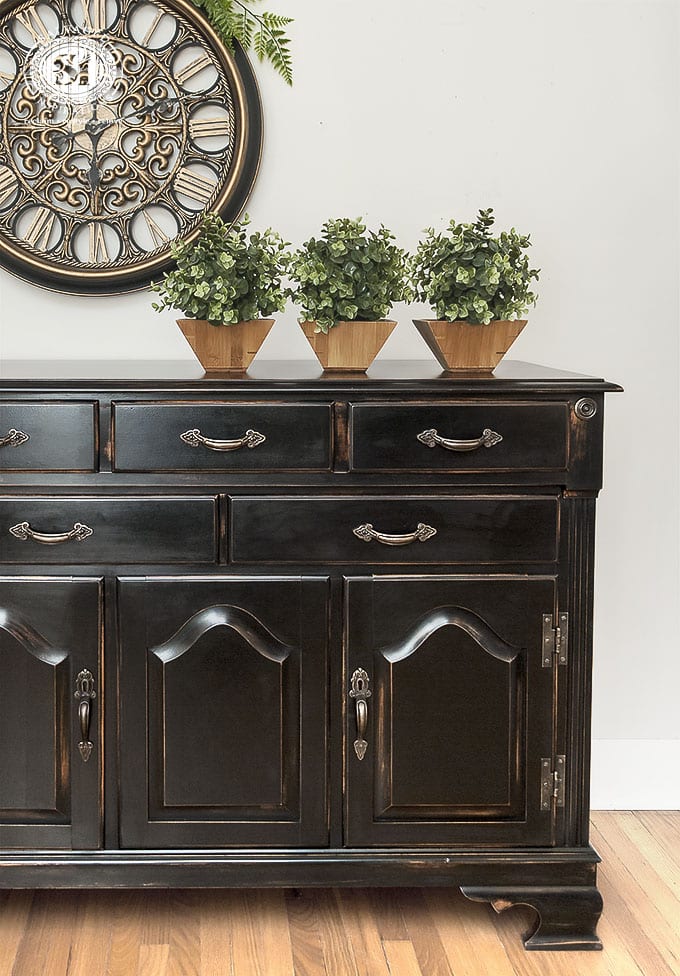
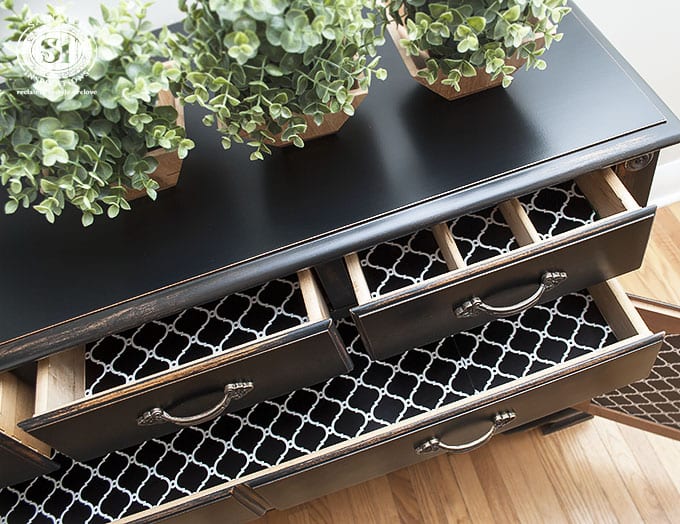
And check out these drawer liners! I found this paper at HomeGoods and it ties in so beautifully with this piece!

Feel free to pin this project and if you have any questions, ask away. 🙂
LET ME KNOW WHAT YOU THINK OF THIS TWO-TONE DRESSER MAKEOVER. FEEL FREE TO ASK ANY QUESTIONS YOU MAY HAVE… I ALWAYS LOVE HEARING FROM YOU. IT MAKES MY DAY! 🙂
Happy furniture painting friends!
Denise x
RELATED POSTS::
DIY ANTHROPOLOGIE DRESSER
HAMPTON OLIVE ENTRY TABLE
SALVAGED SETTEE BENCH
DIY BOHO NIGHTSTANDS
12 PAINTED NIGHTSTAND IDEAS
PIN AND SHARE!


Where did you purchase the Blk paint?
I believe I bought my GF Lamp Black from Lee Valley but they also sell it online. 🙂
I just bought a huge two piece armoire/tv stand that I am planning to turn into two different pieces and paint them like this!!! Thank you for sharing! I will share my progress and failures I am sure with you!!
Love it!! So rich looking!
Thanks Rosanne!
I have a similar piece in cherry wood with a dark finish. I want to achieve a look like yours. My question is should I use a tinted primer to avoid bleed through? And, wouldn’t my distressed areas look red instead of golden like yours? Let me know please. Beth
Hi Beth! Yes, you could use a tinted primer OR a clear primer which would be even easier. If you sand/distress to the wood and then use a stain you like you can avoid the cherry finish. Hope this helps. 🙂
Hey Denise! I love what you did with this buffet!!!! I did not understand exactly how you did the poly and the wax. So you did the poly first and then added the wax afterwards?
Thanks Kristi! I kept it super simple. I used black wax on the entire body. And I used a poly topcoat (for a super durable finish) just on the top.
I love this. I hope your foot is doing well.
Thanks Cynthia and yes, soooo much better. I’m out of the boot and exercising it everyday! Thanks for asking. 🙂
Beautiful!
Thank you Cheryl!
Beautiful piece! What kind of paint is General Finishes paint? I’ve never used this brand before.
Thanks Gayle! General Finishes is awesome, easy to use and super durable. They call it ‘Milk Paint’ (because of the colors) but it’s actually a premium acrylic waterbased paint.
Wow! Thanks so much for the useful information. Looking at your end-result, the paint looked like it had just a hint of gloss. I like that. Is that just the photo or is there just a little gloss. Looks fantastic!
Thanks, Christeen! There is a beautiful sheen. I buffed the Annie Sloan Wax and the poly on the top is a semi or satin… I don’t quite remember. 🙂
Hi Denise. Was wondering what you did with the hutch? i have a china cabinet almost exactly like this and want to do something similar to what you have done with the buffet, I was going to keep the hutch, but was looking for ideas of what i can use the hutch for in the future.
Hi Suzanne! It’s been a few years so I don’t recall what I did with the hutch. They make for great book shelves/cabinets if you add feet onto them tho!