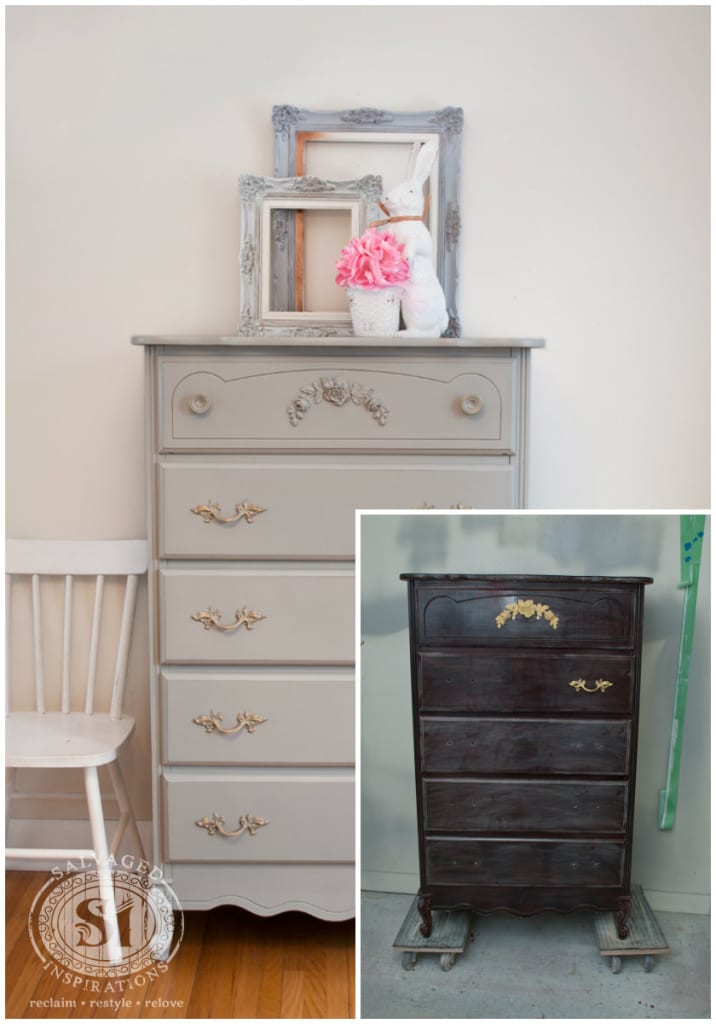
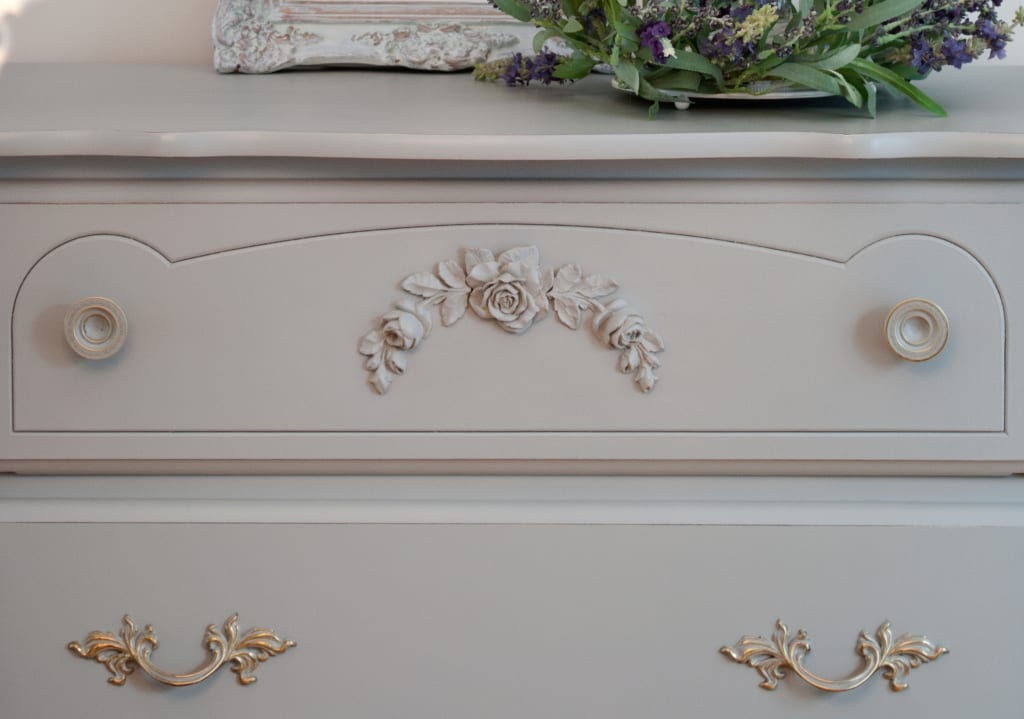
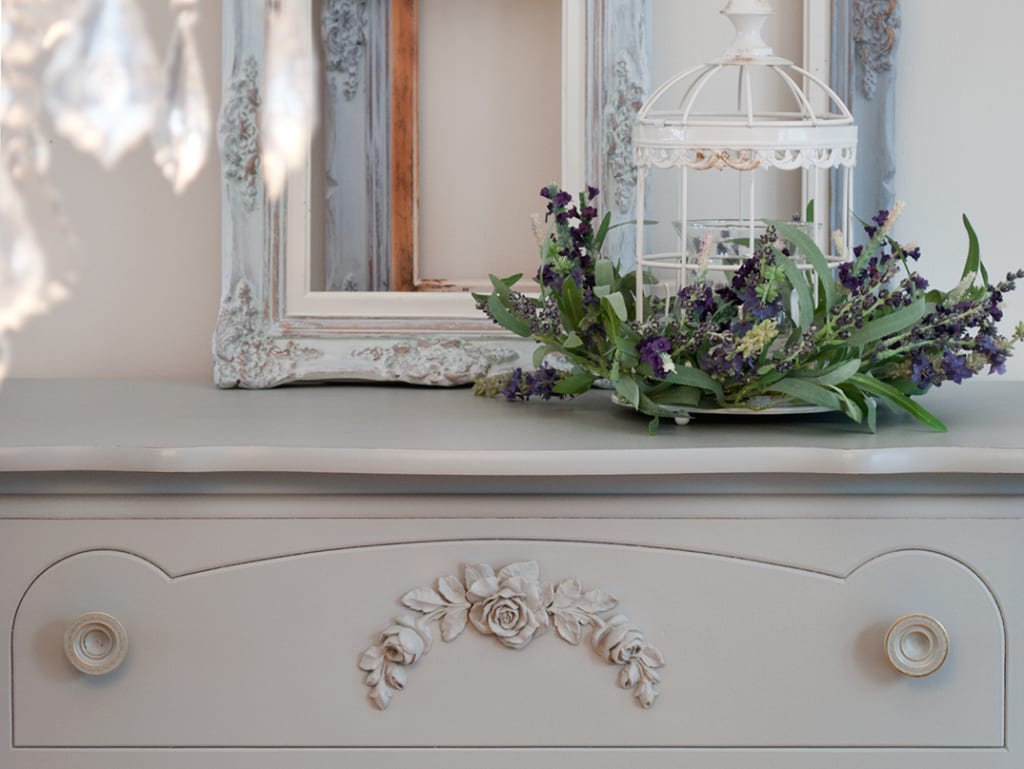
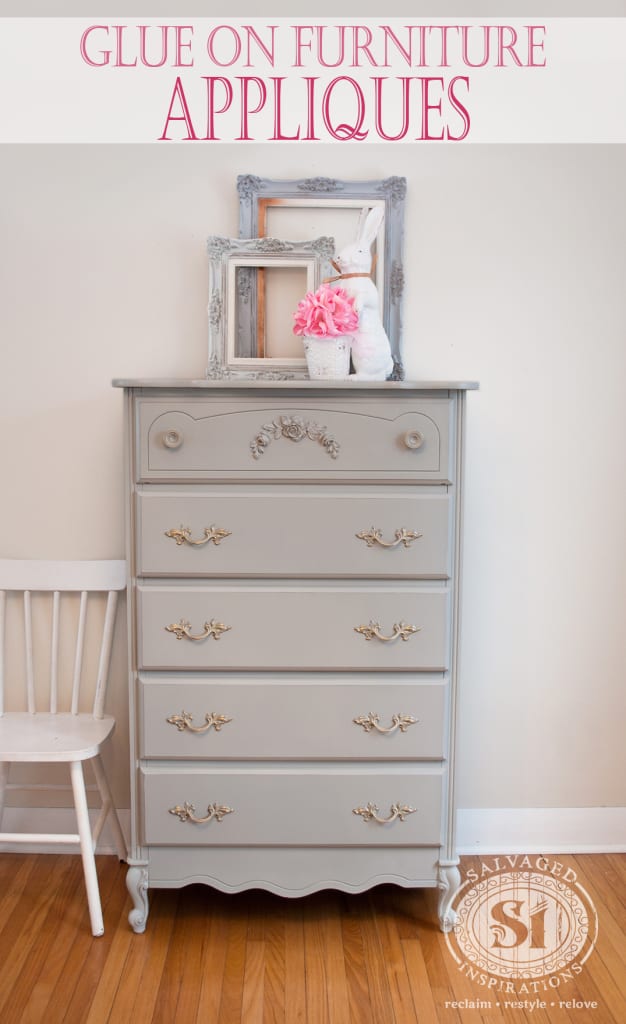
Here’s a sweet Classic French Provincial piece that I dressed up with my paint sprayer and an easy-to-glue-on applique. I LOVE these things! Appliques (aka onlays or mouldings) can turn an ‘real uguls’ (a term my Mum use to use) into a beautiful focal piece.
And they’re not just for furniture!
These decorative mouldings can be applied to frames, cabinets, doors, planters or pretty much anything you want to fancy up with some detail and dimension.
For past projects I’ve used wood appliques, but this was my first time trying a resin moulding. I wasn’t sure what to expect. Will it hold properly? Will it look seamless? Will it look as professional as a wood applique? Yes, yes and yes!

I was really surprised that it only needed gluing. I wanted to use a pin-nailer or finishing nails to help hold it on , but the resin material felt pliable yet breakable.
Flexible yet easy to tear… it’s weird.
I’m sure shooting it with nails wouldn’t have ended well so I just followed the manufacturer’s instructions. Wood Glue, No More Nails, Joint Compound or Gorilla Glue are all excellent adhesives for these appliques.
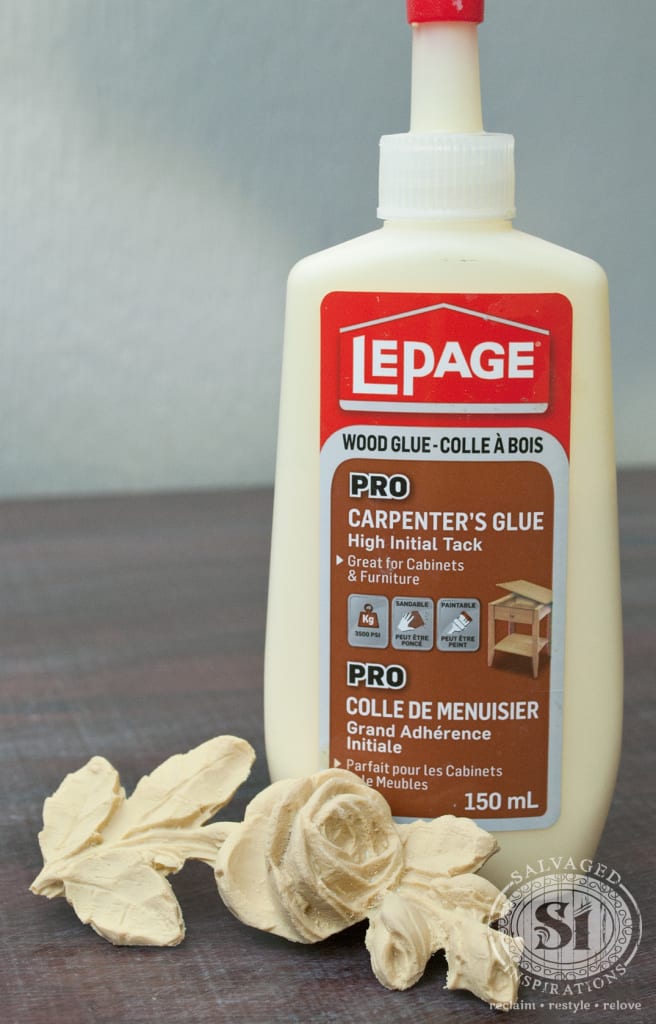
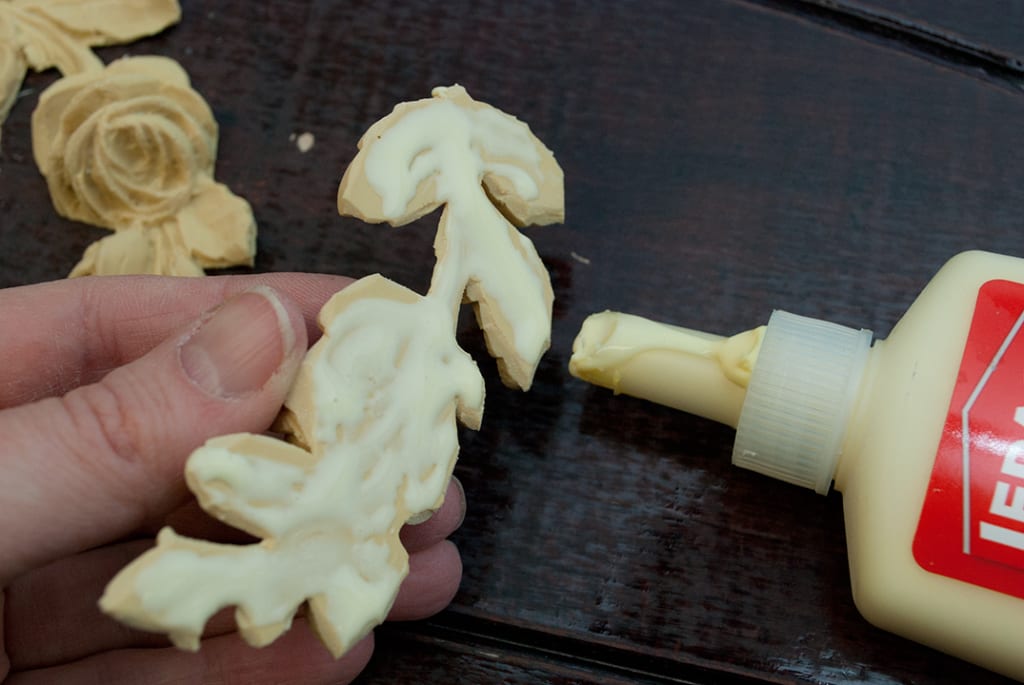
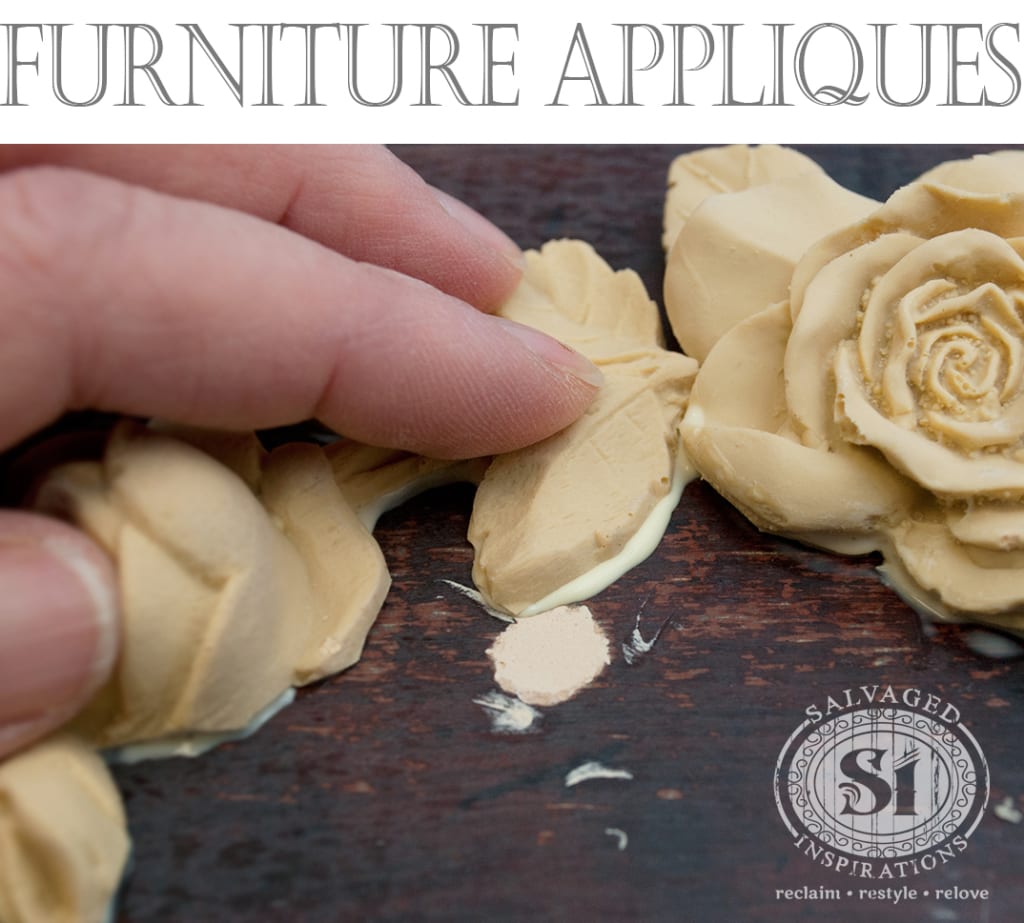
It was super easy to apply. I used LePage Carpenter’s Wood Glue and centered it evenly on the top drawer. If you want it perfectly aligned, you can measure and mark out the exact spot you want your applique. As you can see from my pic, I didn’t measure. Instead, I used the filled-in hardware holes as my guide and eyeballed it.
Here are a few tips when applying an applique to furniture~
1. Whether you’re applying an applique on furniture (or any other project) a flat surface is needed for proper contact and good adhesion.
2. Clean and sand the area where the applique will be applied. Remove any shiny surface or topcoat, dirt or grime that might interfere with adhesion.
3. To get a seamless look, cover the entire applique with glue and then press down or clamp.
4. Clean off any squeezed out excess glue with a damp cloth. I used a chopstick and toothpick to get into the tight areas.
5. Follow the manufacture’s instructions and give the applique extensive dry time before priming or painting. I let my applique dry overnight for 24hrs.
6. Prime and paint! I spayed light coats rather than heavy. If too much paint were to get into the nooks and crannies of this applique, it would have been a dripping mess!
7. To make an applique really pop, apply a dark glaze or wax, dry brush, or paint it in a totally different color to make it stand out.
After paint and prime, I sealed and protected with a clear wax for a clean look.

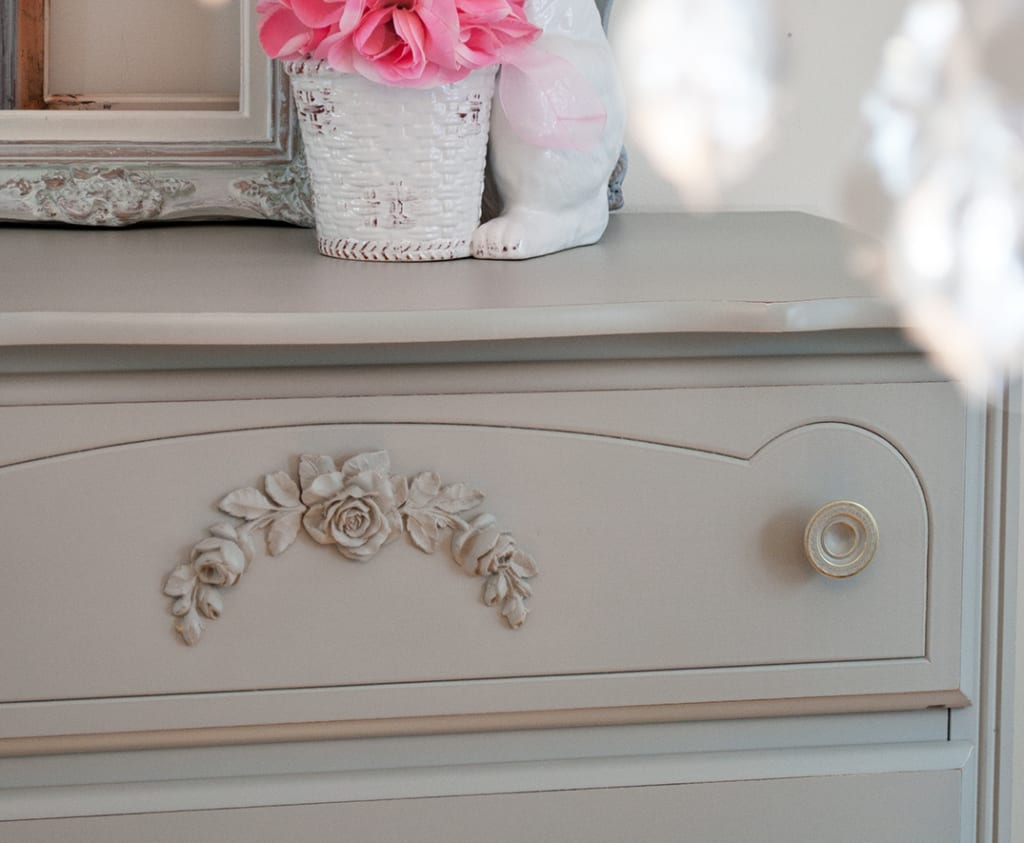
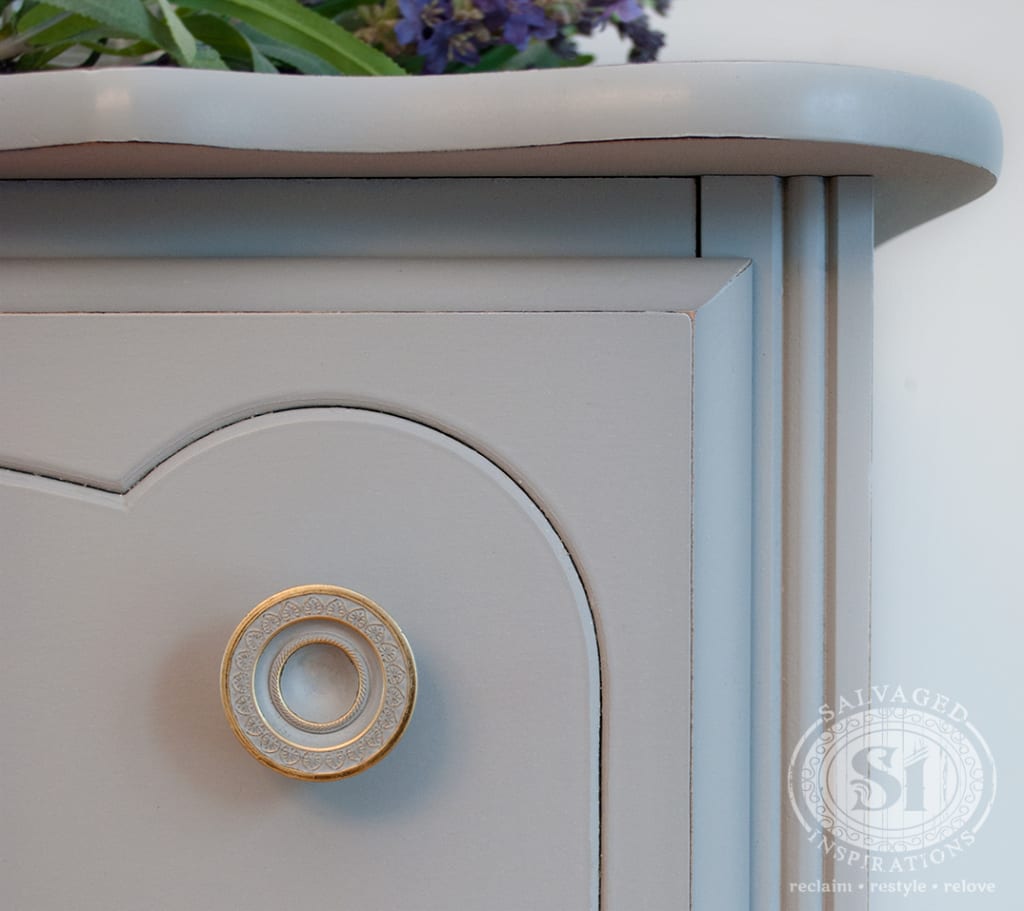
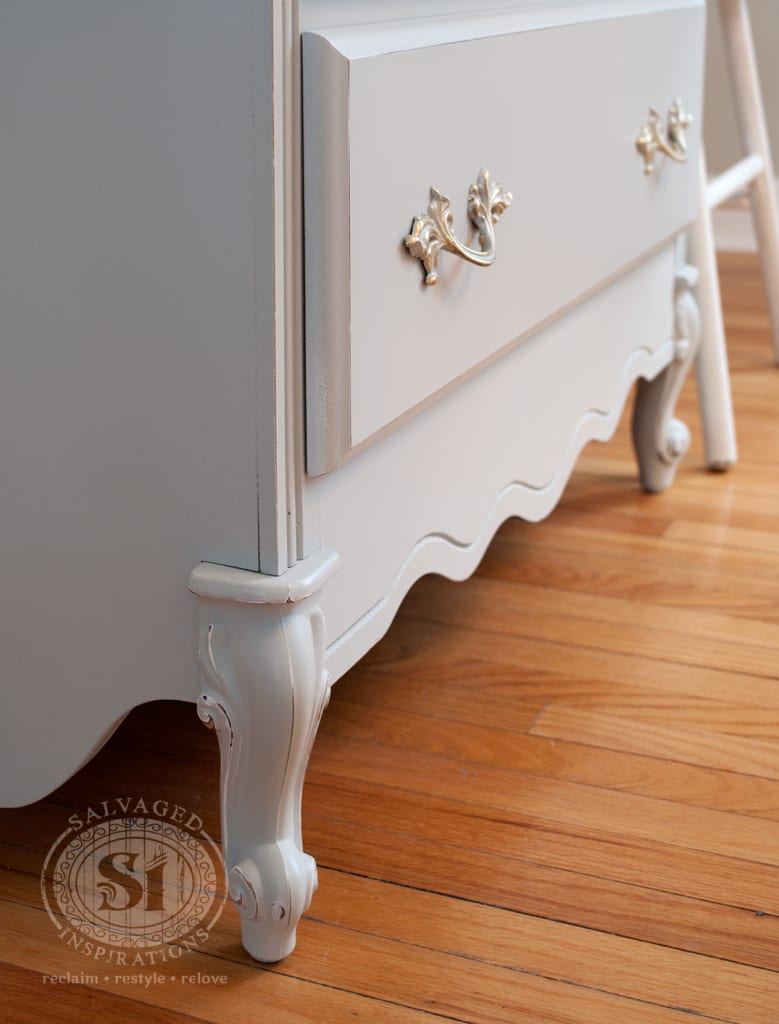
And since we’re showing off this classic girl, let’s flaunt her smooth custom “DIY Chalky Pebble Beach” finish, golden restyled hardware, and her shapley legs. 🙂
Once these appliques are fully adhered and all painted up, honestly, you can’t tell that it’s not wood! From now on, I’ll spend the extra money on wood appliques if I plan to stain. Otherwise, polymer, resin or plaster appliques are my new go-to for painting!
You can find some amazing appliques at Chic Mouldings, on Etsy, Bomar Designs or Do It Yourself Chic. Home Depot, Lowes and Lee Valley also carry them but it’s a limited selection. I’ve even seen some bloggers make their own. Hmmm…sounds like something I may have to try one day! 🙂
So what do you think of this French Provincial before and after? Have you ever applied appliques onto your projects? If you have any questions or have some additional tips you’d like to add, chime in!
Now onto my next project!
Denise x
_____________________________
Like what you see? Subscribe to Salvaged Inspirations so you’ll never miss a post!
Follow along on Pinterest, Google+, and Facebook for more inspiration!

Hi I tried gluing a wooden appliqué on a cupboard door I used carpenters glue and put a light coat to the edges. The next morning the edges pulled up a bit. The center glued solid. Any suggestions on how to pull the edges back Dow? Please and thankyou.
Hi Denise,
I just applied a resin appliqué and it looks blah. You mention to apply a dark glaze or wax to make it pop. That’s what I need. Can you explain those two products and where to get them? Do I paint the glaze on? Just not familiar with dark glaze or wax.
Thank you
Dark glaze or wax is really easy to use and can be purchased on Amazon, paint stores, shops and even craft stores like Micheals or Hobby Lobby. There are a TON of brands but a few of my fav’s are General Finishes, Annie Sloan and Dixie Belle. If you’re applying a dark glaze on your applique, you can brush it on, and then wipe away the excess with a paper shop towel or lint-free cloth. Exact same process with the dark wax. Just be sure to wipe while the products are still wet/freshly applied. This way the product will get into the crevices but all the excess is wiped away. If you want it a little darker. Reapply and repeat. Have fun and I hope this helps. 🙂
Hello. Is it possible to glue an applique at a dresser that is already painted with chalk paint and sealed with acrylic water varnish ? Will it last ? Thanks for the tips
Hi Katerina! It sure is but wood glue is not the best bet once everything is painted. I would use a glue that sticks to glossy surfaces like PL or Gorilla. 🙂
I ‘ve got UHU Power spray adhesive, which I think is kinda transparent gorilla glue in spray . Actually here in Greece we don’t have Gorilla as a brand . Thanks for you answer. I surely appreciate it
That sounds heavy duty… and transparent is even better! 🙂
How did you accent the legs with different highlight color – they are beautiful
Thanks Beverly. The legs were slightly sanded/distressed and what you see is a little white from the base primer, and a little gold that was original to the piece.
Hi. what kind of primer are you using? I have been using these appliques and have a hard time getting the primer to stick. you can peel it off with your fingernail after it has been drying overnight. do you prep the applique before the primer with something?
Hi Sue! A light sanding helps and B.I.N is my go-to primer.
Hi! What a beautiful piece! I went to Lowe’s for an applique, and you’re right, the selection is pretty sparse. I did get one, though, and tried to apply it with super glue. It didn’t hold, hence my search for the best way to apply it. I chalk painted the piece and then put a clear wax on, so that must be my problem. Should I sand it down it that area and then apply it. I have the Gorilla glue, but no clamp. Thanks for this valuable information. I’d like to buy some additional pieces of moldings somewhere else also, so thanks for posting!
Hi KK! Yes, it could be the waxed surface is causing some difficulty with the adhesion. It’s best to adhere to a clean/sanded surface prior to painting or finishing. A light sanding would be beneficial. If it’s a wood applique, small finishing nails can also be used to help fasten it along with some glue. And if you don’t have clamps, you can turn the piece on it’s back and lay something heavy (a few very large books etc) to hold it down while drying. 🙂
Go to Ebay and type in shabby n chic furniture appliques. They have a huge selection. $5.95 flat rate shipping out of CA. That’s where I bought mine. ( resin and wood, flexible.
Nice blog over classic french provincial…great experiment and i am also looking for new glue product for my product to stick. will you recommend me any glue for quick and hard solution.
There are some great wood glues out there Anna. Titebond, Gorilla, LePage just to name a few.
You made an excellent showing, affection it!
I have utilized the tar applications with incredible results. I’m as of now on the chase for my next task.
Cheerful works of art!
hi denise
Completely lovely from the applique to the paint work! Much obliged to you for showcasing this strategy! I’ve utilized wood however now I have numerous more choices!
Delightful!!
Did you make the photo outlines also with the moldings?
Monik, if you’re referring to the appliques on the staging frames, no – they were bought that way. But what a great idea to embellish plain frames with appliques too!
@Denise
This is sweet Classic French Provincial piece… Thank you for the info and the tutorial..
Regard
Raj
Beautiful!!
Did you make the picture frames as well with the mouldings?
No Sheila – I milk painted them but the frames were purchased at a flea market. Frames can easily be dress up with appliques though!
Denise,
You did a beautiful job, love it!
I have used the resin applications with great results. I’m currently on the hunt for my next project.
Happy paintings!
Kelly
Thanks Kelly…same to you! 🙂
This looks amazing. Thanks for the tutorial.Love the color too!
Wow I didn’t know they had appliques this large! Very cool add on I love it. Makes the piece so special.
You have great tips. Thanks.
Thank you Julie! They have appliques even larger than this! Some of the larger ones come in pieces, but once you glue them in place, they look like one full piece. This one on this dresser was in 3 pieces. The rose and 2 leafy sides.
Denise-
Absolutely gorgeous from the applique to the paint job! Thank you for showcasing this method! I’ve used wood but now I have many more options!
And if you’re going to paint anyway, these non-wood mouldings can save you $$$. 🙂
This is simply stunning. Thank you for the info and the tutorial. I’m just beginning to work with furniture, and this truly helps.
I’m so happy you find the info helpful Betty. And as I always like to say, if I can do it ANYONE can…lol! Thanks for dropping in again. 🙂
As always Denise, just gorgeous. I’ve used wood, plster or resin ones for a while as I mentioned before, but am dying to try your stencil method now. Just need it to warm up a bit 🙂
I’m waiting for it to warm up too Chez! I had my BFF 25th anniversary party to go to the other night but it was cancelled because of ANOTHER snow storm. I want my ‘regular’ social life back…lol. Back to appliques… out of those 3 materials, do you have a fav to work with?
I like wood the best, just because I like natural materials and wood roughs up better if you need it to, plus yes, you can just shoot nails into it, but it can be expensive and fragile.
Nothing wrong with plastic, plaster, pliable rubber and resin either though, whatever works for the design you need 🙂 I like Chic Mouldings too 🙂
Hi Denise!
Thank you for highlighting our company in your blog! Fantastic read 🙂 glad you found the mouldings so easy to use , and what a difference they make! We have over 500 designs, and post worldwide for only £4.50 per order, bargain! Happy Shabbying everyone! Sam @ Chic Mouldings http://www.chicmouldings.com
Pleasure Sam… you have beautiful designs! And thanks for leaving the info re worldwide shipping!
Hi Denise, BEEE-OOOO-TIFUL! I’ve been trying to locate these, thanks for the links. Great job on the dresser.
Thank you Tracy… your enthusiastic ‘beautiful’ put a BIG smile on my face!