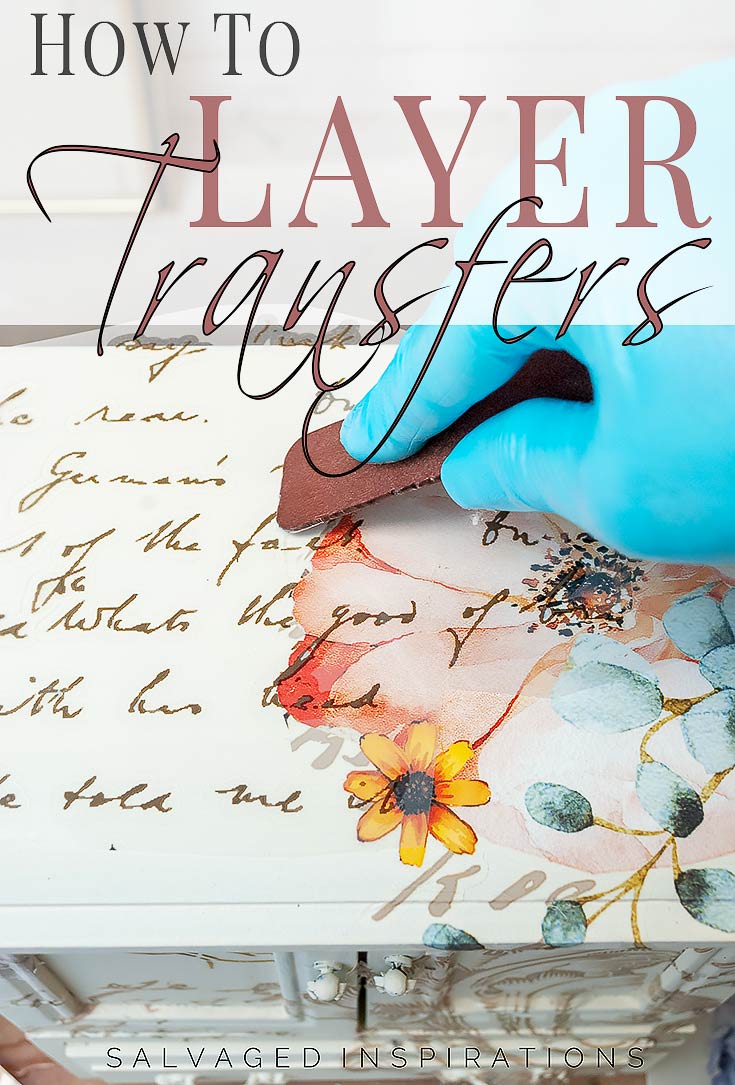
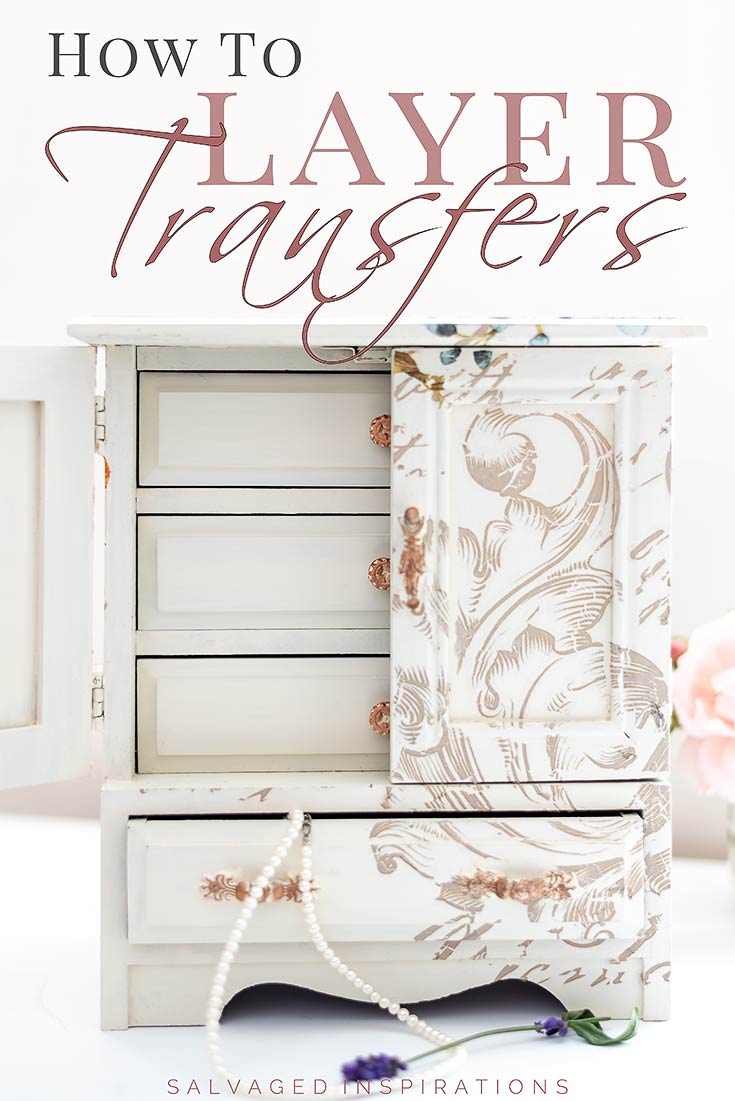
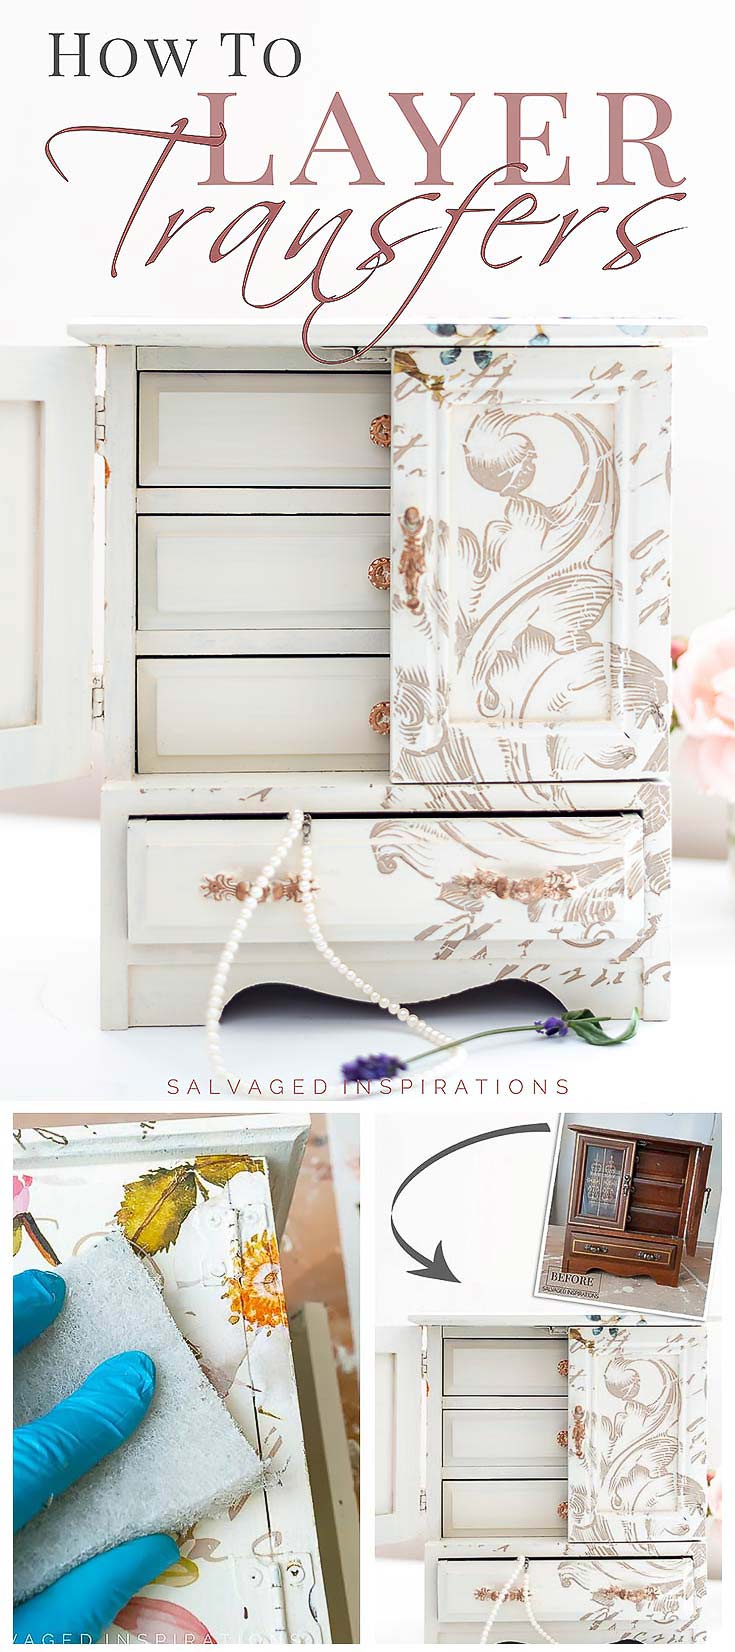
HOW TO LAYER FURNITURE TRANSFERS TO CREATE YOUR OWN CUSTOM DESIGN… ON ANY TYPE OF PROJECT!
Layering furniture transfers is a perfect way to create unique designs using any leftover transfers you may have… and remember, they’re not just for furniture! These transfers can be used on glass, wood, plastic, mirrors and almost any project your creative mind can think of!
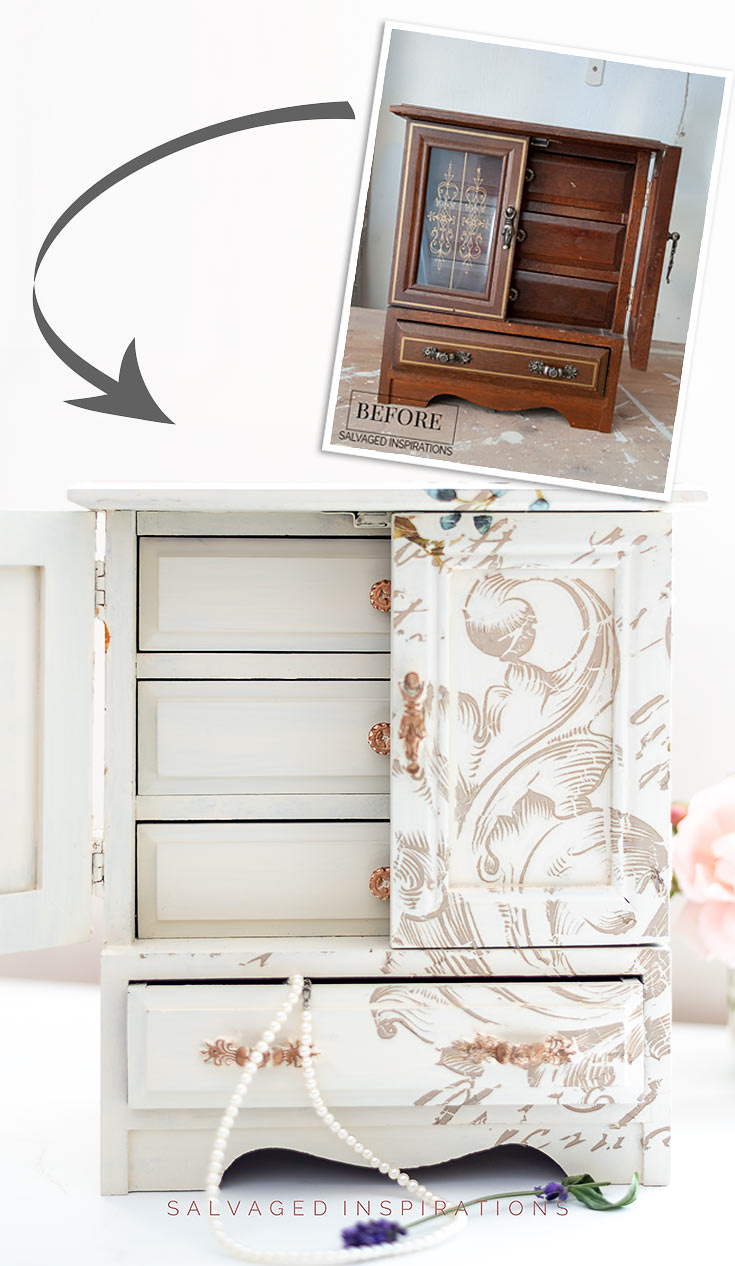
Here’s an old jewelry box I started with…
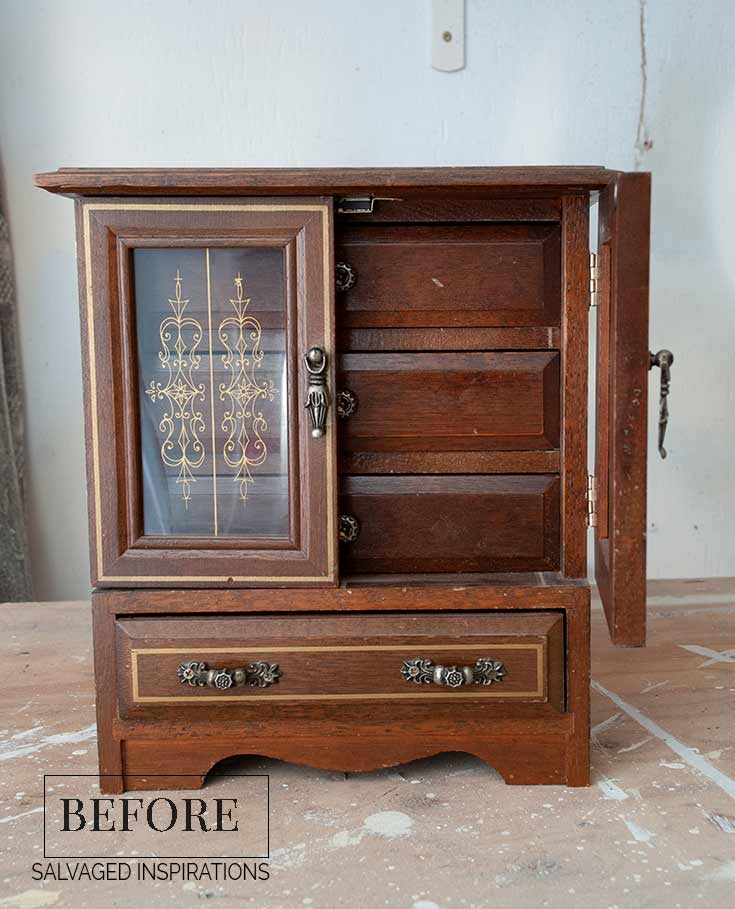
These jewelry boxes are really easy to find in thrift stores and garage sales and they make an excellent BUILD YOUR CONFIDENCE project if you’re just starting with furniture painting.
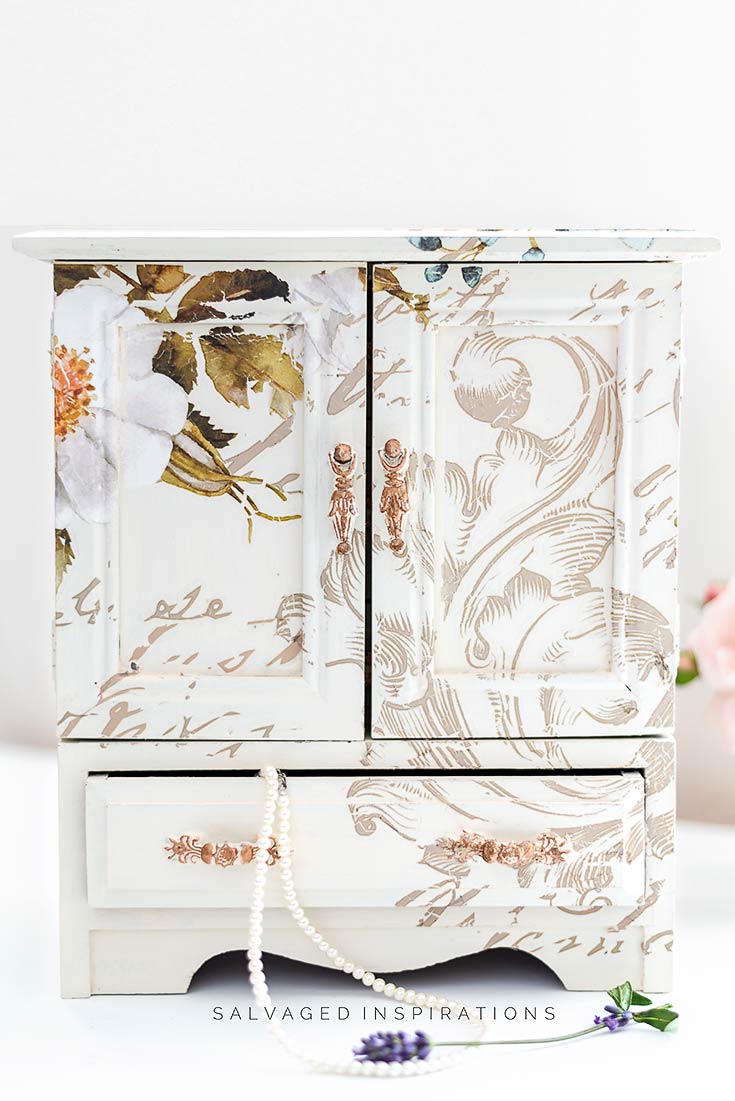
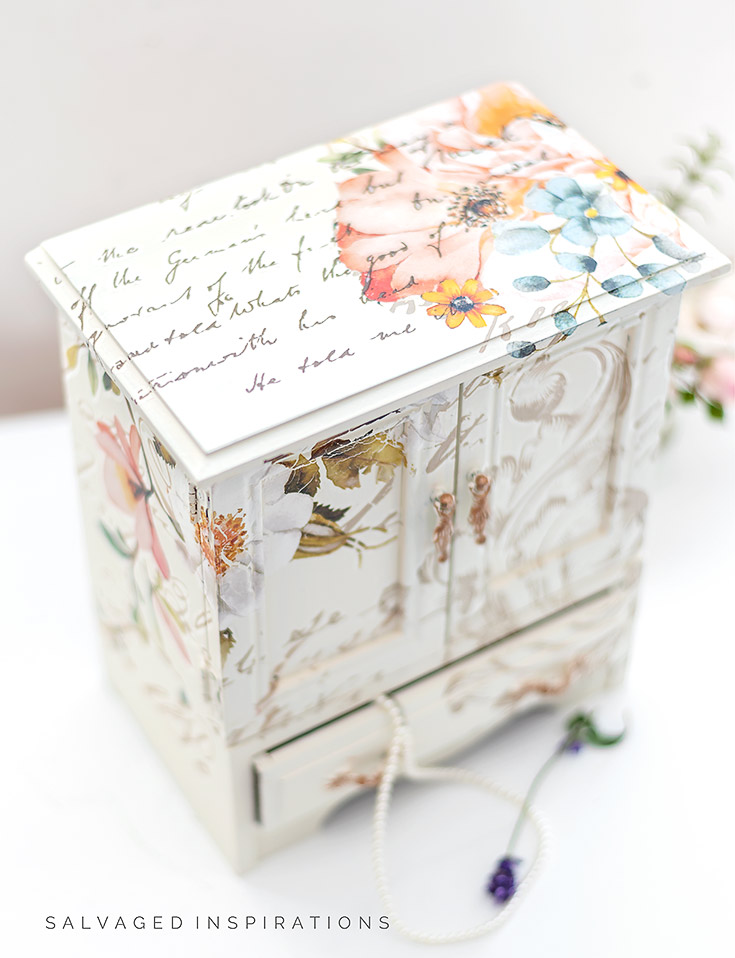
Check out this new look. What do you think?

THIS POST IS SPONSORED/CONTAINS AFFILIATE LINKS TO PRODUCTS I USE. YOU CAN SEE MY FULL DISCLOSURE HERE.
SOURCE LIST
-
- Jewelry Box – SALVAGED
- Paint Brushes
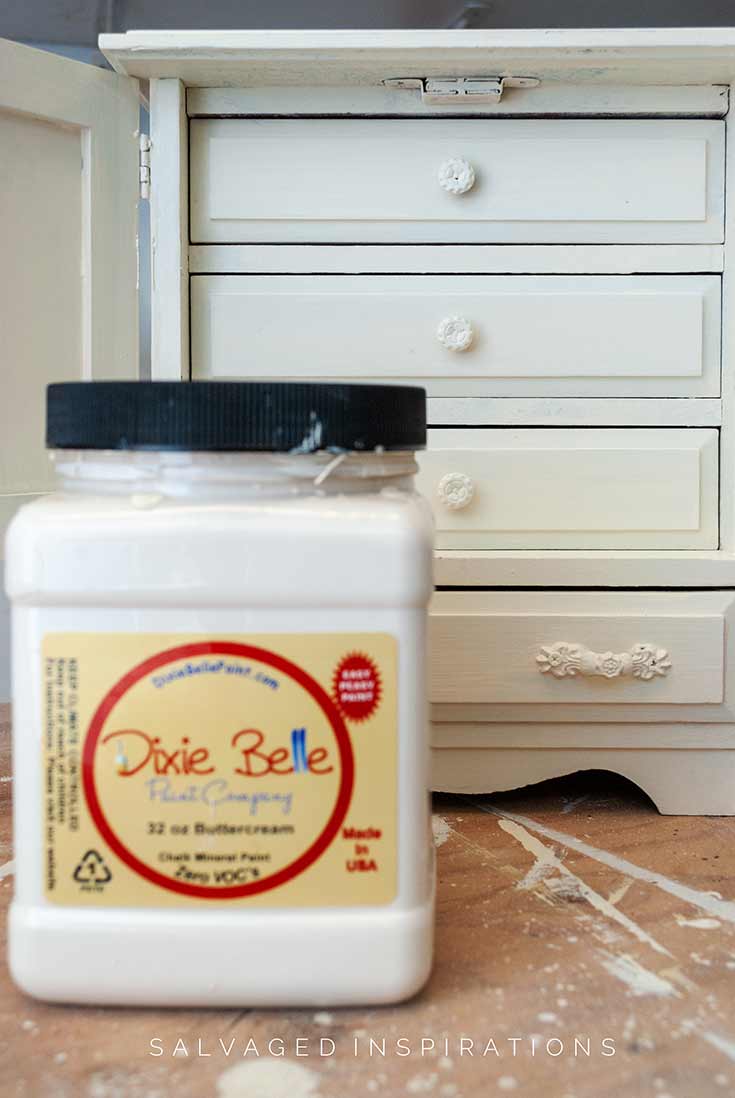
- Buttercream Chalk Mineral Paint
- Lavender Bush Transfer
- Rose Celebration Transfer
- Finishing Pad
HOW TO LAYER FURNITURE TRANSFERS
For this makeover, I gave the box a wipe down with vinegar and water and then painting in this beautiful Buttercream. No prep sanding was needed. Chalk and mineral paints adhere really well to non-shiny surfaces.
Here’s what the paint coverage looks like after just one coat.
After painting two coats and letting it dry overnight, I cut out parts of the transfer and planned my design.
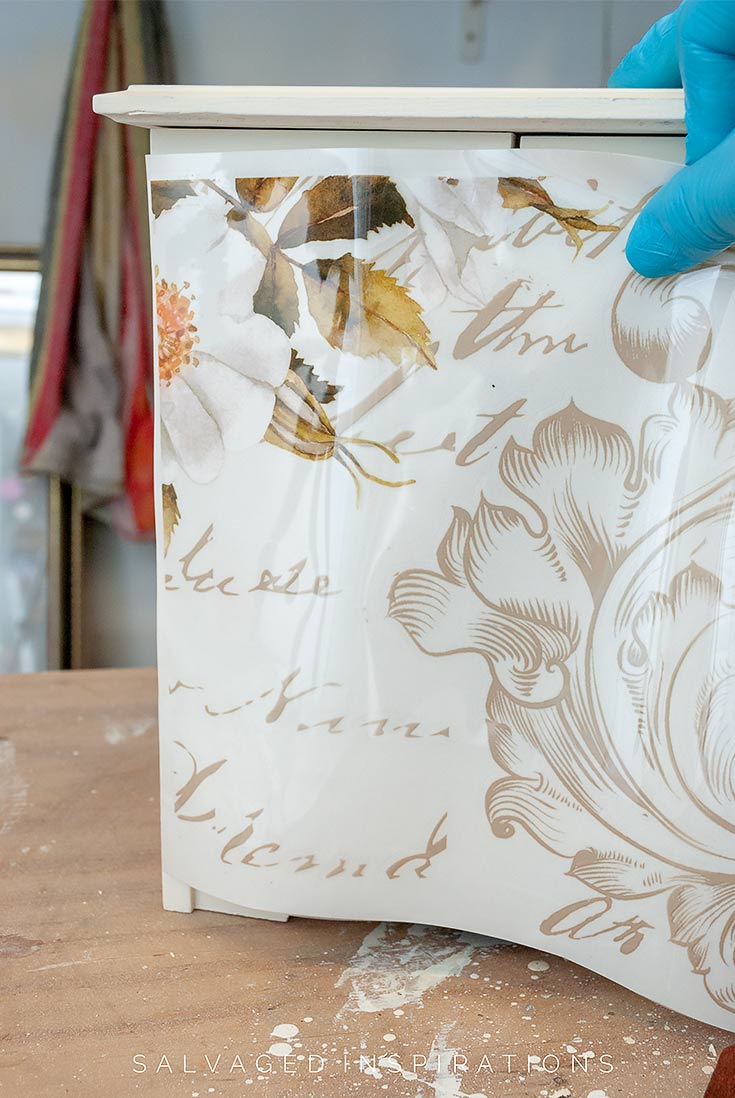
I find it easier to leave the transfer attached to its backing while figuring out where I want to place things. Once I have a basic idea of where I’m going to place the transfer pieces, I remove the backing from each piece and rub it on. I have an entire post on this easy rub on transfer method here.
I used the leftover Rose Celebration (one of my all-time favorites) and a few pieces from Lavender Bush.
Here’s a vintage dresser I restyled with Rose Celebration. It’s such a gorgeous design on big and small projects!
The key to layering furniture transfers is to make sure everything is adhered and secured.
To do this, once I place my base transfer down, I rub it on with the wood tool provided until the image has transferred onto my piece. Then I take my fingers and gently rub over the design making sure all the corners and small details are flat and stuck on 100%.
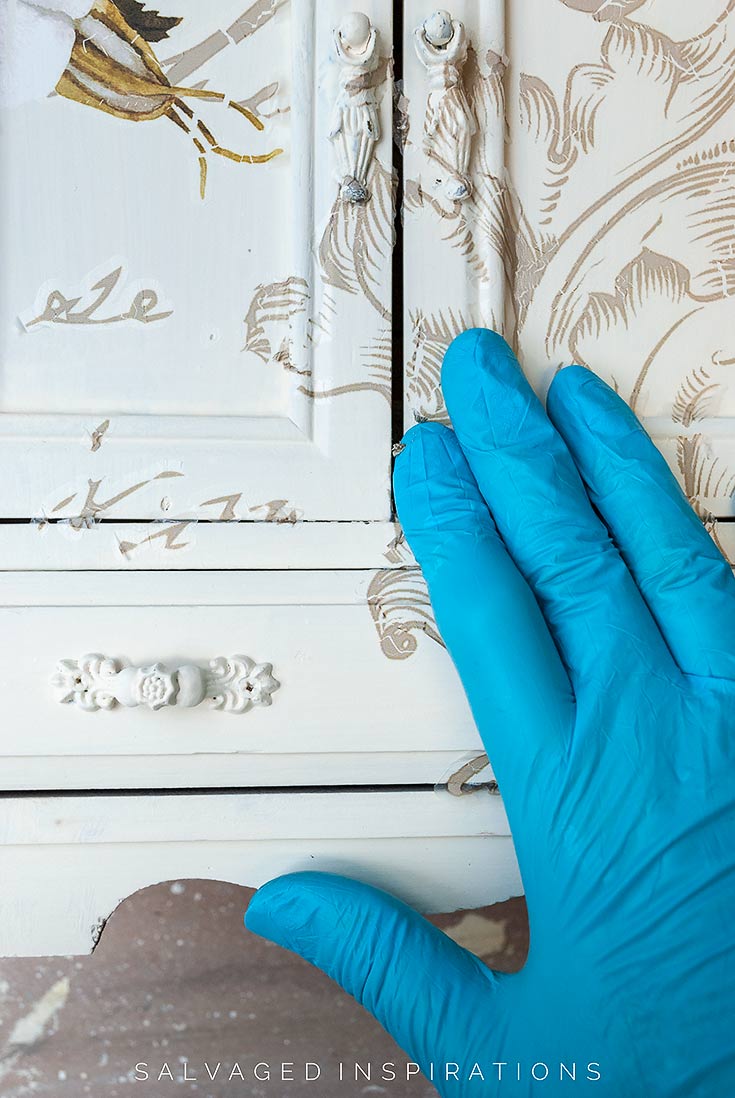
After the first transfer adheres I can start the layering and apply the second. There’s no waiting time required. Below I’m layering the font from Lavender Bush onto the florals of Rose Celebration.
I apply the same amount of pressure and rubbing as the first layer/transfer. Don’t be worried about ruining the first design because once they are stuck – they’re not going anywhere!
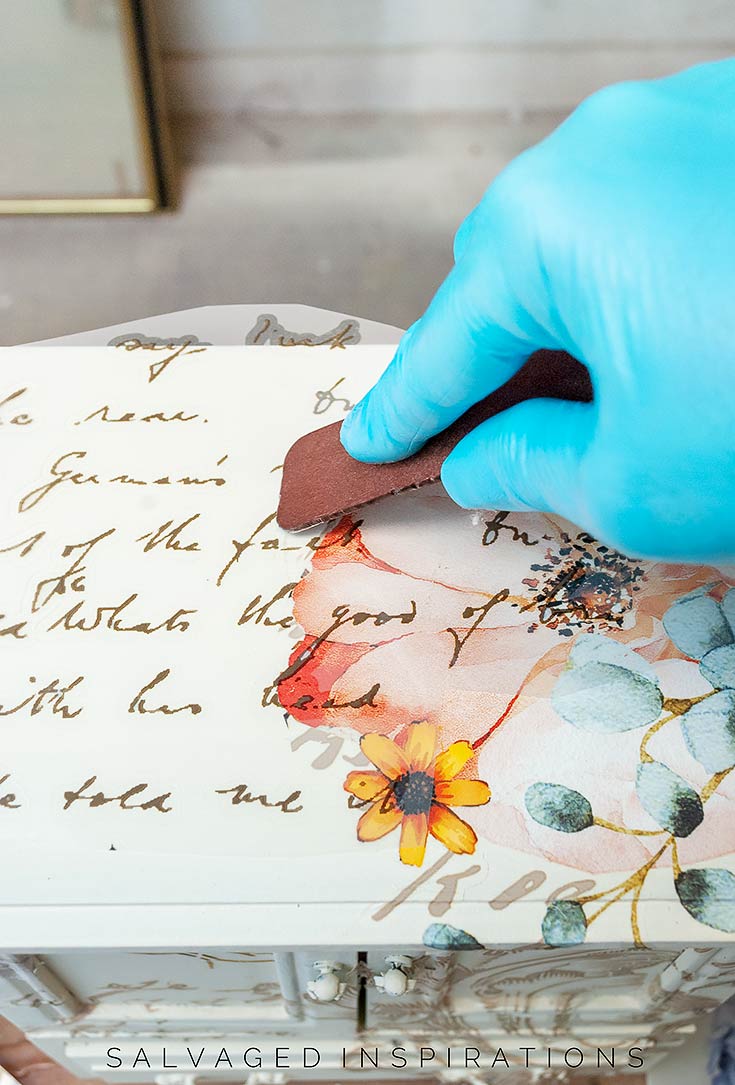
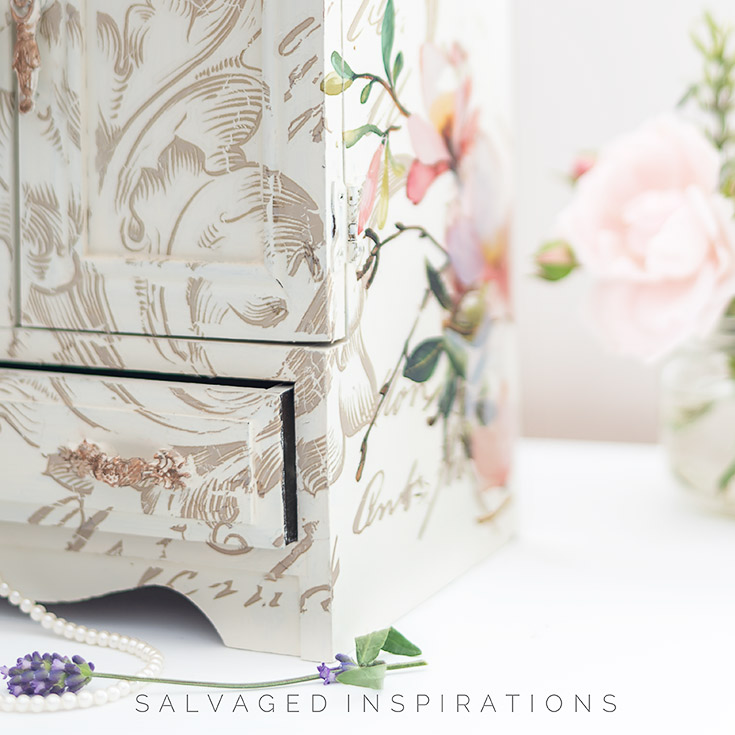
To finish this custom design off, I used this finishing pad to burnish the transfers onto the jewel box. I do this by rubbing the finishing pad (or you can use a 320 grit or higher sandpaper) around the edges of the design. This diminishes those “halo lines” around the transfer and polishes and smoothes them into the painted surface.
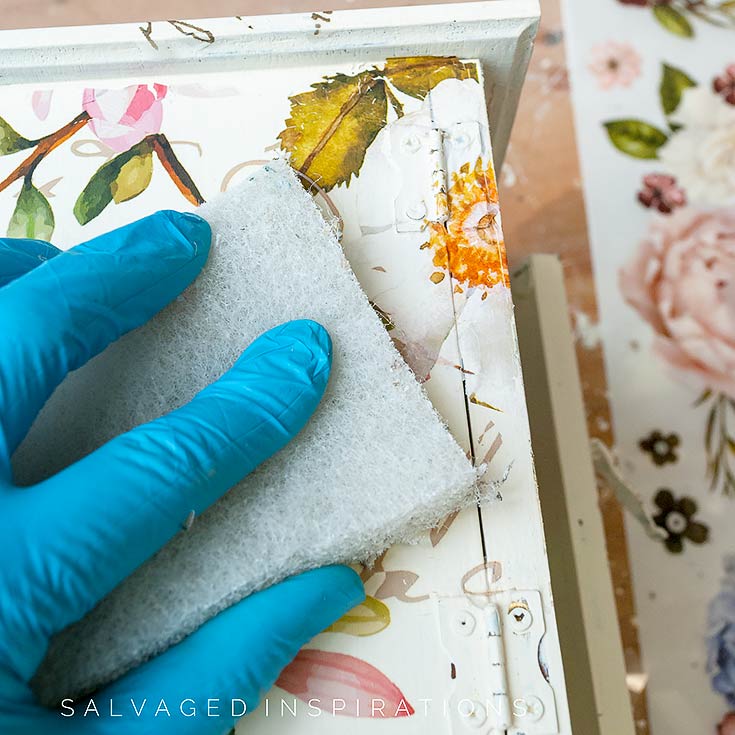
This gives it a gorgeous professional and finished look.

I think this turned out so pretty!
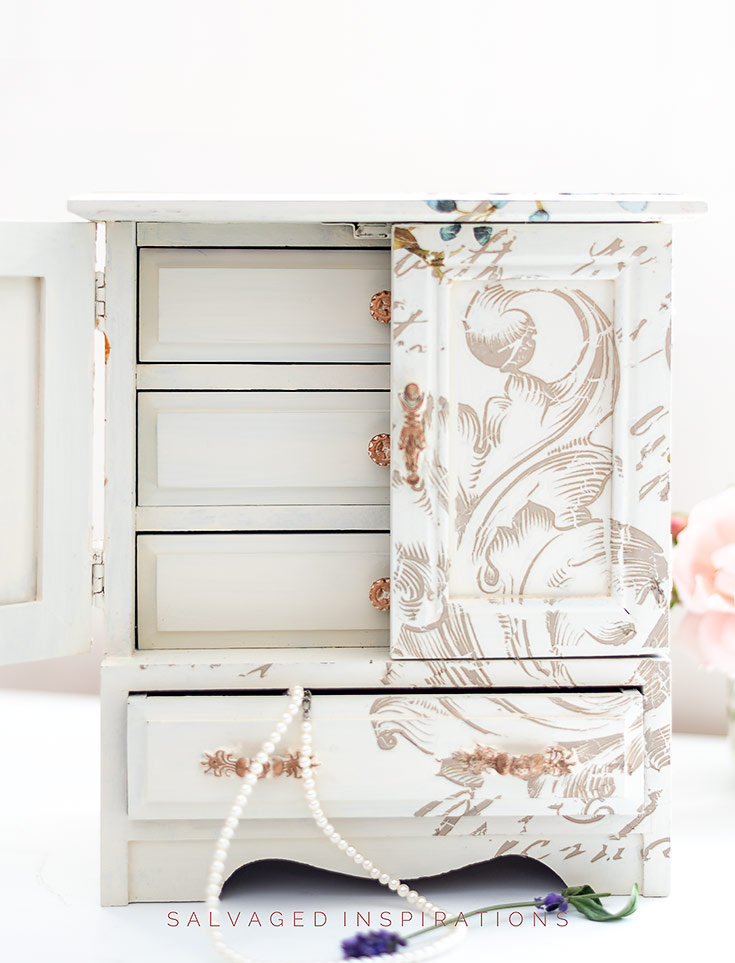
The layering really does create a unique design – one of a kind look!
Here’s one last look at the before and after.
LET ME KNOW WHAT YOU THINK OF THIS JEWELRY BOX MAKEOVER WITH LAYERED TRANSFERS… OR FEEL FREE TO ASK ANY QUESTIONS YOU MAY HAVE… I ALWAYS LOVE HEARING FROM YOU.
Happy furniture painting my friends!
Denise x
RELATED POSTS::
How To Apply Furniture Transfers
Adding Graphics | Vintage TeaCart Makeover
Furniture Transfers | 10 FAQ’s
How To Remove Furniture Transfers
Floral Transfers for Furniture
PIN AND SHARE!

Very beautiful!! I love this makeover. Looking through your posts, I can see you’re very good at this. Thanks for the tutorial and tips. Quick question: did you cover the glass door inserts with the transfer or paint over the glass? I have one like this that I’m currently working on and trying to figure out what to do with the glass since the design is outdated and ugly lol. Any advice would be greatly appreciated. Thank you!
Hi Brandi! Both. I painted over the glass and added transfers.:)
Could we have the source for the Lavender Bush transfer please?
Hi Karen! I can’t seem to find it anywhere on Amazon but I did find it for you here on Etsy. Hope this helps. 🙂
What a gorgeous makeover! My parents gave me a jewelry box for my 16th birthday that was blond wood and had cane inserts in the doors in front. Forty-three years later it still looks the same. I never thought I would change it, but this post has me having second thoughts. Thanks for this post!
Hi Tammie! Your sweet16 jewel box sounds beautiful. It’s wonderful you still have that momento whether you decide to restyle or not. 🙂 I still have my jewelry boxes from when I was a teenager too.
Hey Denise! I hope all is well with you and yours! I have the perfect jewelry box, the Buttercream and the Rose Celebration. I see a perfect jewelry box in my future. LOL. thank you for all the inspiration you give and the knowledge you share. It is much appreciated.
Thank YOU Cheryl for joining in and sharing! Have fun with your jewelry box… it’s a great project! XOXO
Such a gorgeous jewelry box makeover, Denise! They are such fun upcycles, like mini furniture makeovers. Love how you used transfers on yours. They make such lovely gifts too.
Thanks my friend! I’m gifting this one to Andrea since I have two more that I can restyle. And they ARE like mini furniture makeovers. They are the PERFECT “Build Your Confidence Project” for anyone who hasn’t painted a large piece of furniture before!
Absolutely stunning – although I don’t think I have seen anything of yours that I don’t like 🙂 so ‘stunning – as ever’ and love your videos
Kind Regards
Aw, thanks so much, Denise! XOXO 🙂
WOW! I would never have thought about layering transfers and this jewel box is lovely. You answered my question about the pulls! When you use part of a transfer do you cut it out or burnish it on from the full sheet? Thanks:!
Thanks! Layering is a great way to get a unique look… even if you’re cutting a layering ONE transfer design! For this little box I cut them out and “dry” placed them before I peeled the back and rubbed them on. Then after I adhered them all, I went in with the finishing pad and burnished all the edges. 🙂
I absolutely love what you did with this jewelry box. It’s absolutely gorgeous! The layering is perfection. I see you used finishing pads to diminish the halos of the transfers. I’ve used a transfer once. It was beautiful but I hated the way it looked and felt like a sticker. The halo was horrible to me even though I sanded the thing like crazy with 400 grit sandpaper. I couldn’t get rid of the very raised edge or the halos. I hoped topcoating would help, but , nope, it was still awful. My customer loved it but agreed it looked like a large sticker. What did I do wrong? Since that experience I’ve been afraid to try transfers again. Do you have any suggestions? I see them being used so often these days but rarely do the bloggers show a close up at the right angles to see if they have the halo effect too. I’m so glad you mentioned it because I thought it was me since no one else ever addressed it.
No, it’s not you Christie. Transfers DO leave a halo around the image. Burnishing them (after initially rubbing them on) with high grit sandpaper or finishing pad is super helpful. But even then, on some colors you can still see it… greatly reduced.. but still visible. It can also depend on the sheen of the paint being used whether it shows up more or less. My favorite way of using transfersfavorite way of using transfers is to sand right over the entire design so they are NOT perfect. To me, it looks the best because the paint shows through on some areas and the halo practically disappears. Some don’t like this look though… they prefer to see the transfer perfectly applied and perfectly intact. All personal preference, I guess. 🙂
This is a beautiful jewellery box makeover and I had no idea you could layer transfers ~ thank you! ` Nicki
Hi Nicki! 🙂 Thanks so much! XOXO
Looks beautiful! I am just wondering if the transfers need to be sealed? Love your projects!
Thanks Nancy! For longevity and protection, I always seal my transfers on my furniture makeoverstransfers on my furniture makeovers but I’ve left them au’ natural on mirrors and smaller low traffic projects like jewelry boxes, planters, for example. For my furniture I either use a waterbased poly or wax sealer.
What a beautiful transformation! The transfers you used are so pretty. Did you paint over the glass on front of the jewelry box? Thanks for the inspiration!
Thanks, Maryellen! I love these transfers too. And yes, I painted right over the glass. 🙂
Oh my gosh, I was so happy you sent this out today. I just started to think I needed to be layering some transfers but wasn’t sure how. You’re in my head girl!!! Thanks again!
lol… have fun, Kathy! I know whatever you do it will be gorgeous! x
Oh my gosh Denise – so pretty and sweet! Very clever to layer designs too, you certainly have the artistic gene. I have a similar jewelry box that could use some updating and now I have some ideas!
Thanks! 🙂 And so happy its sparked some ideas. I have two more of these jewelry boxes that I might restyle in the future as well. They are slightly taller/larger so they would be a fun project. Have fun with yours Peggi! XOXO
ABSOLUTELY STUNNING DENISE!
Thanks so much, Gwen! Hugs XOXO
This looks lovey! I look forward to your emails every week. I’ve learned a lot about painting techniques and the Prima Designs, so I’ll try something soon.
Thank YOU! This makes me so happy. If you give the painting or transfers a try, I’d love to hear how it all works out for you Liz!
What did you do to the hardware? Did I miss the info in the article? It looks like you used a type of rose gold metallic paint. The entire piece is gorgeous!
Hi Mikki! I used this gilding waxthis gilding wax on the hardware. Super easy to use. I just put a little on my finger and rubbed it on. 🙂
Love, Love this makeover! WOW what a difference the paint color and the transfer makes. Great details given, The transfer you chose is just beautiful. This post has given me inspiration to try something similar with a jewelry box I have.
Thanks so much for sharing.
Thank you Sue, and have fun if you give your jewelry box a makeover. 🙂 I have two more similar to this one that I would like to do too.
Very fresh and happy!!
Yes, happy!!! Thanks Susan. 🙂
Wow! I love these little jewel boxes and layering transfers is genius! xo, Do 😘
Thanks, Do! A fun little project for sure! XOXO
Darling! Any tips on how to adhere a transfer up, over and onto the hardware? Like the hinges. Love this project. Wish I had a bigger stash of transfer scraps!
I just go for it. 😉 I place the transfer over the hinges and/or hardware and using the corner of the wood applicator, rub it on. It doesn’t always rub on perfectly. Sometimes when the surface is uneven it will crack and I’ll have to piece it together. But if you butt the cracked design together, you can usually piece them together seamlessly. Working in small sections and focusing on what I’m doing (with those little details) makes all the difference for me. And ya, because I’m thrifty, I save all my transfer scraps. You never know when those little stems and leaves are going to come in handy, right? 😉
Beautiful as usual! Did you replace the glass with wood?
Thank you, Michele
Hi Michele!! 🙂 I actually painted right over the glass. If this were a HIGH traffic item, I would have used some of this Slick Stick firstthis Slick Stick first, but it adhered well so no need.
BTW…I can imagine this same color and technique used on a large armoire. Again, stunning work. You’re always an inspiration.
I think that would look beautiful as well! XOXO
Hi Denise. This jewel box is beautiful. I love the custom layered transfers over the soft buttery colored paint. Absolutely girly and so pretty. I have a quick question about the knobs and pulls. I noticed you painted them along with the box, and in the final pictures they’re a sweet rose gold. What did you do to get them that color? Thank you 🙂
Thank my friend! I really like this new look waaaay better too! For the hardware, I rubbed on some of this Hammered Copper Gilding Waxthis Hammered Copper Gilding Wax. It’s really easy to rub on with your fingers and once it’s dry, no top coating is required.