HOW TO TURN A BEAT-UP $15 THRIFT FIND INTO A GORGEOUS UPDATED PAINTED AND STAINED DRESSER
If you’re not sure whether to paint or stain, why not do both! It’s Furniture Fixer Upper Day my friends and I’m sharing a $15 beat-up thrift store painted and stained dresser makeover!
I’m also sharing…
- My favorite water-based stain color
- A FREE pre-stain wood conditioner for water-based stains
- How to keep your stencils clean
- A dollar store tool to help fix furniture veneer
- And my blogging besties’ Furniture Fixer Upper makeovers as well so be sure to check them out below! 🙂
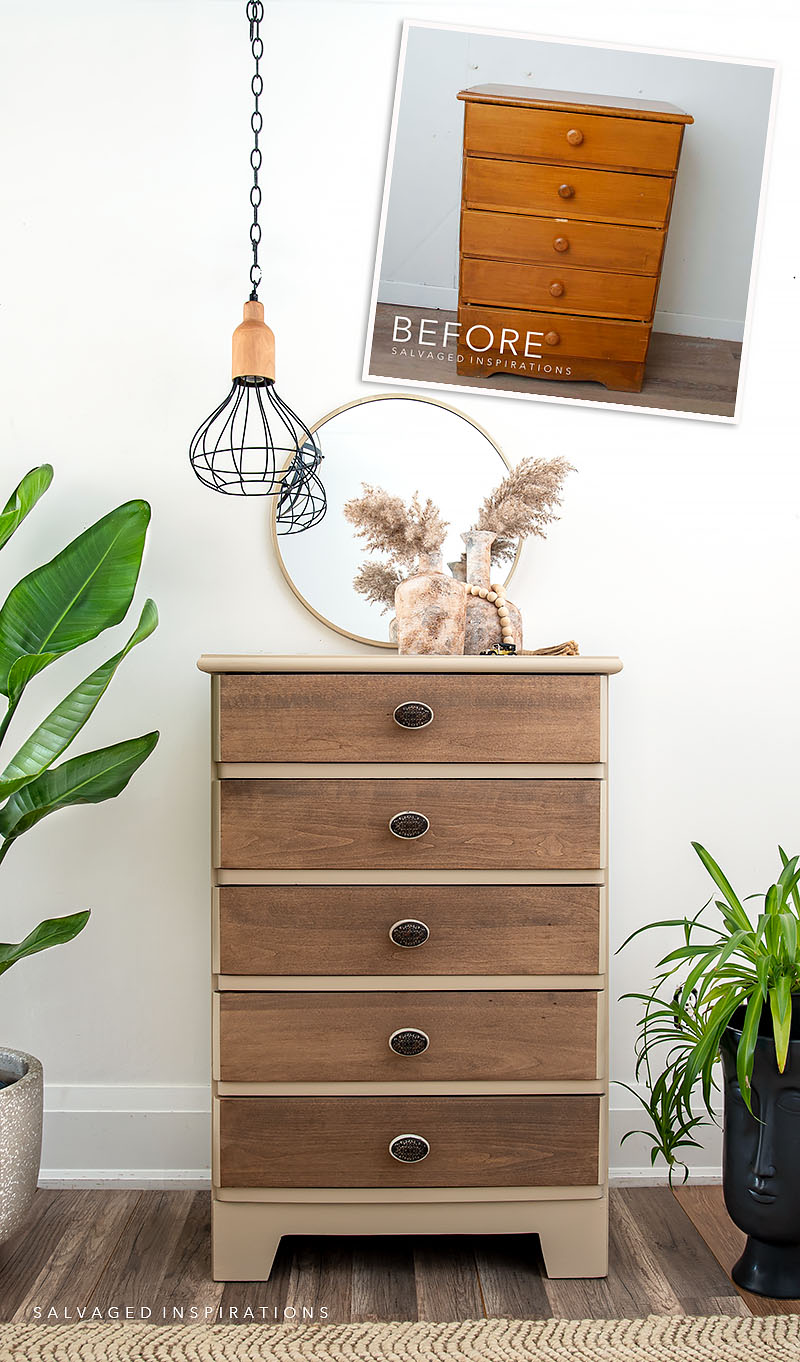
Here’s the thrift dresser I started with. I was so excited when I saw the $15 price tag until I took a better look. The top overhang was cracked and the veneer was lifting so this required some work. A perfect project for furniture fixer-upper day.
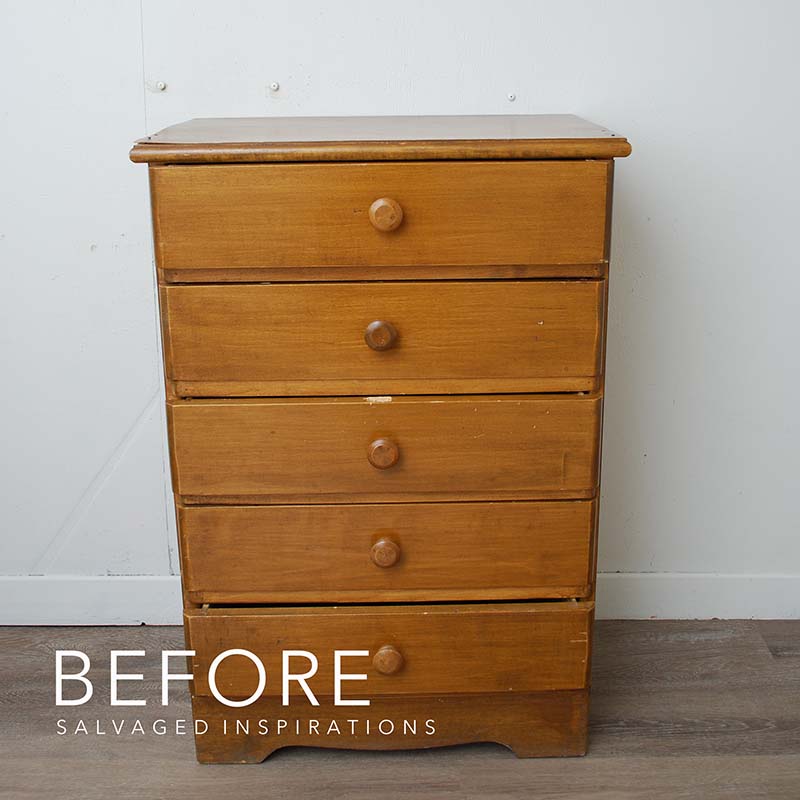
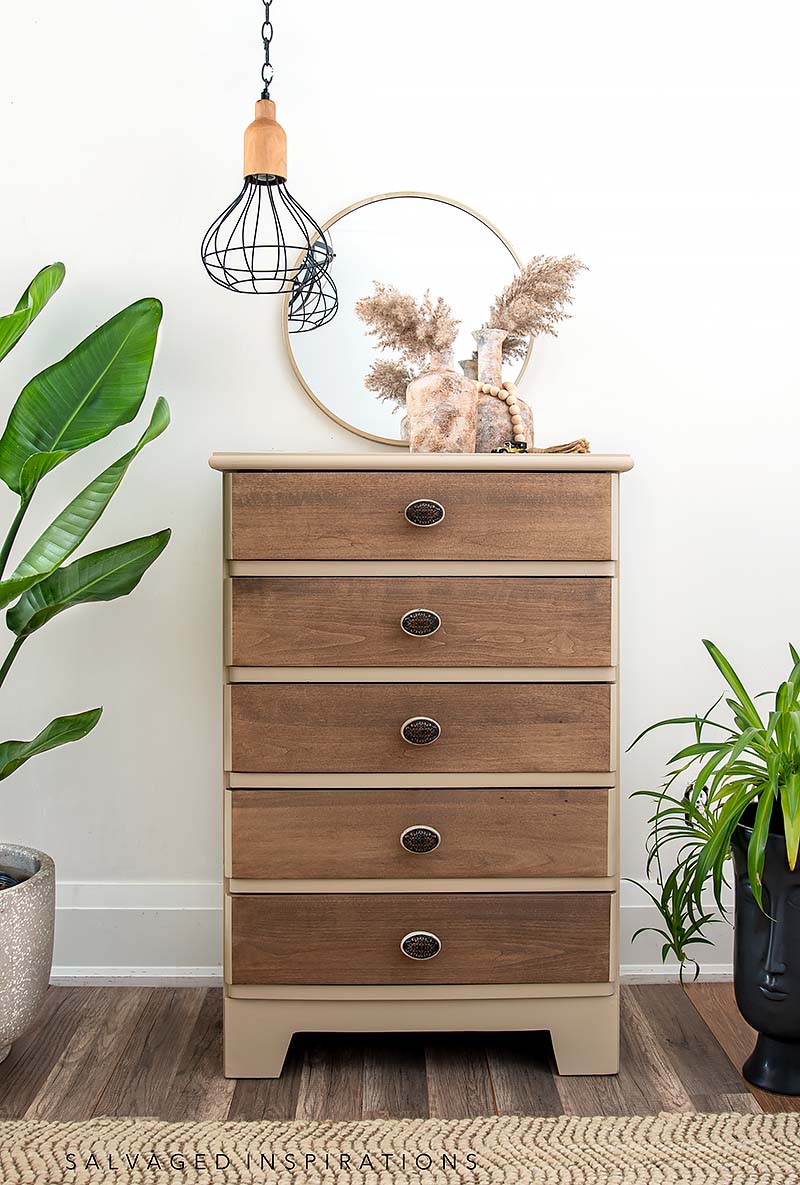
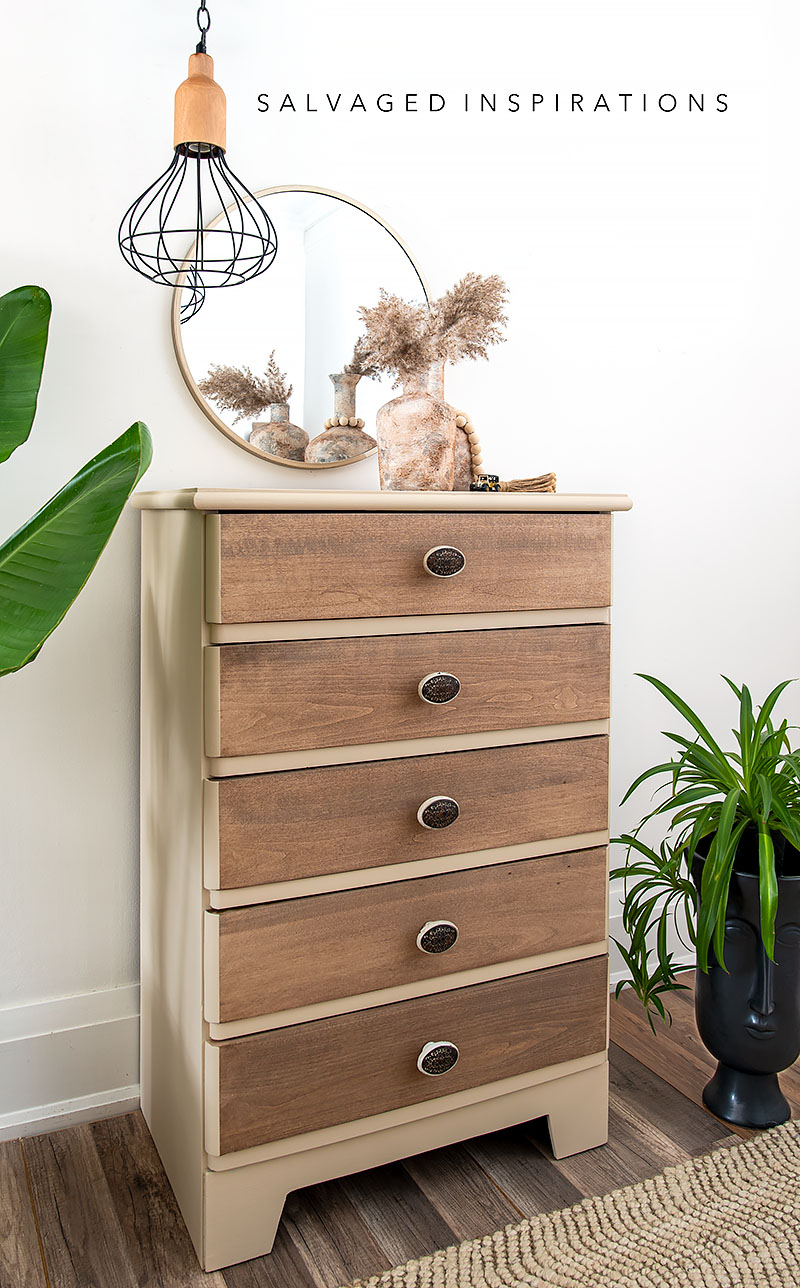
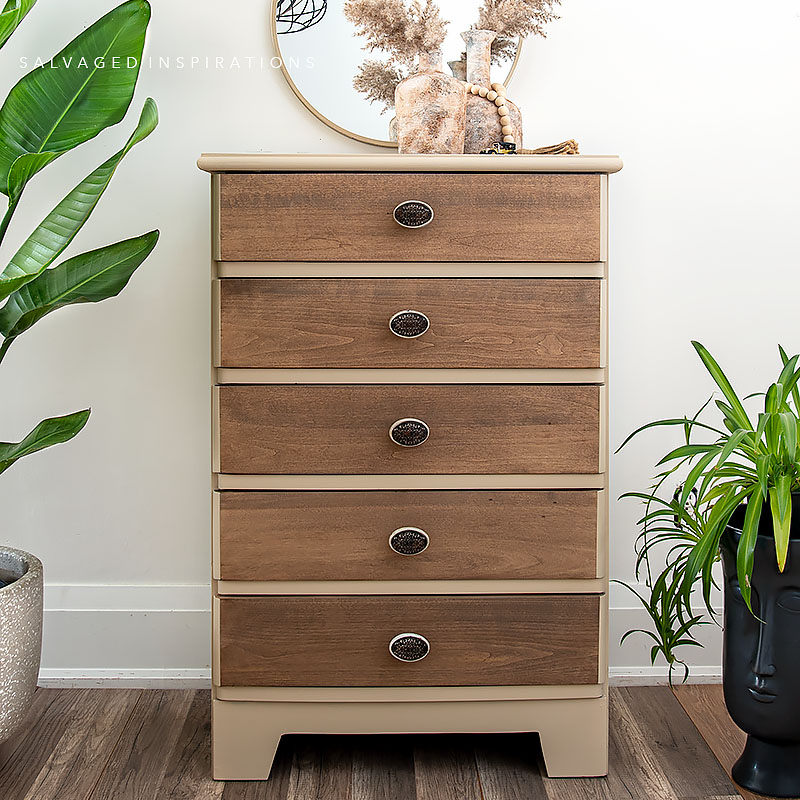
Before I get into the how-to details here’s the NEW look! What do you think? Worth $15? I LOVE the warmth of this paint and stain combo!
THIS POST IS SPONSORED/CONTAINS AFFILIATE LINKS TO PRODUCTS I USE. YOU CAN SEE MY FULL DISCLOSURE HERE.
SOURCE LIST
$15 Thrift Dresser – SALVAGED
White Lightning
Scrubby Soap
Wood Glue
Wood Filler
Paint Brush
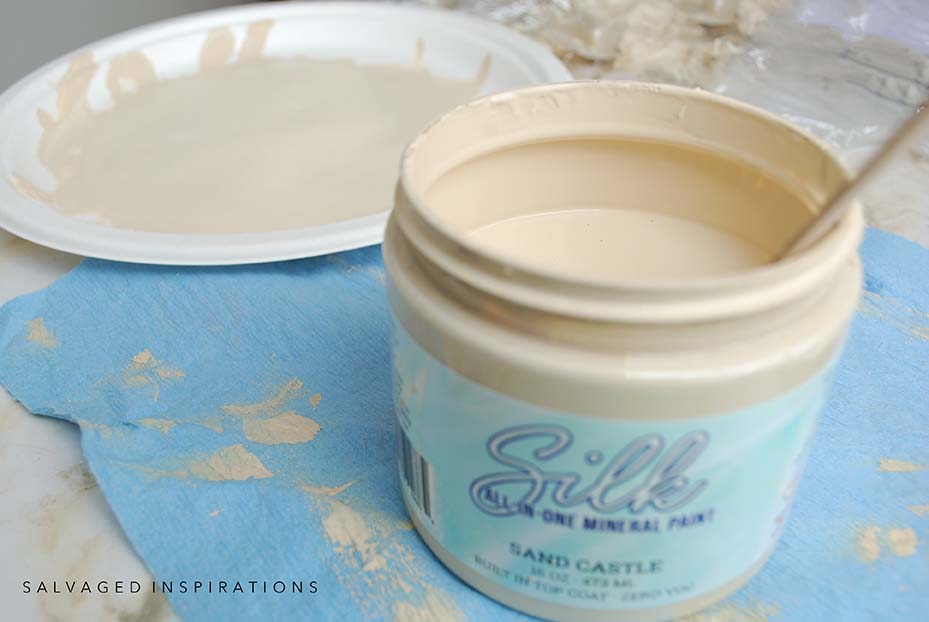
Sand Castle Silk Paint
Tobacco Road Stain
Basket Weave Stencil
Spray Wax
TOOL LIST
Jigsaw (similar)
Woodworking Square
Orbital Sander
Furniture Clamps
Glue Syringe
$15 PAINTED AND STAINED DRESSER MAKEOVER
When working on these types of fixer-uppers, it can feel overwhelming because there’s a lot to do. But I remind myself to take it step by step. Focusing on one step at a time makes it sooooo much easier!
Here’s how it all came together…
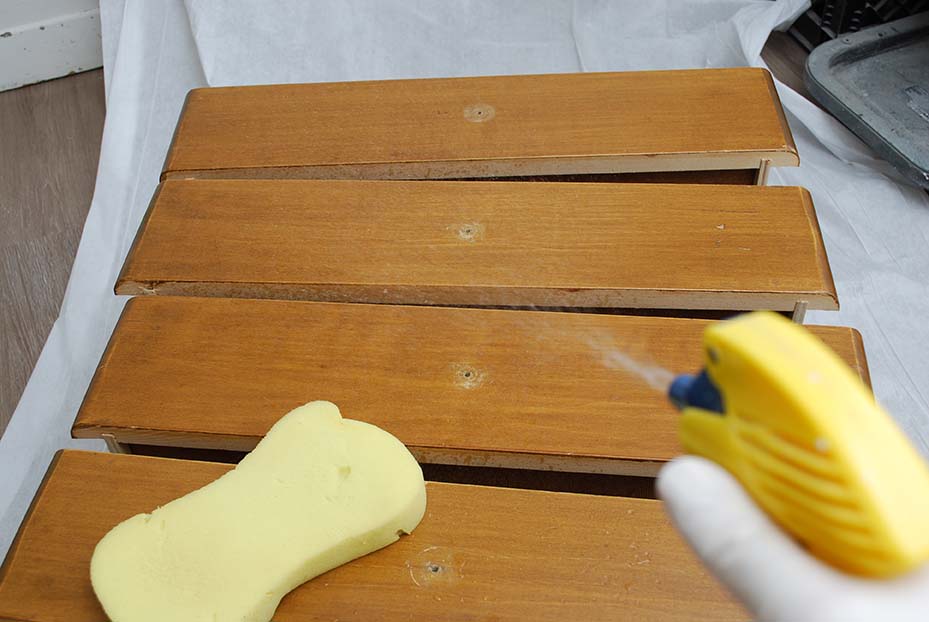
PREP | CLEAN
I removed the hardware and then cleaned this piece with this TSP substitute. I like using it in a spray bottle and wiping it down with a large sponge. Since Nick installed my new paint room flooring I’m also doing my best to keep it clean by using more drop clothes! 😉
Pro Tip ~ While cleaning your piece, give it a really good inspection. Keep your eyes peeled for missing pin nails in the drawers, loose drawer slides, or any scratches and knicks or missing or lifting veneer.
BOTTOM SKIRT REVISION
To update the skirt on this dresser I used a jigsaw, woodworking square, and a sharpie. I measured and marked the new bottom with a sharpie and then used my jigsaw to cut along the lines. To smooth the wood, I gave it a light sanding.
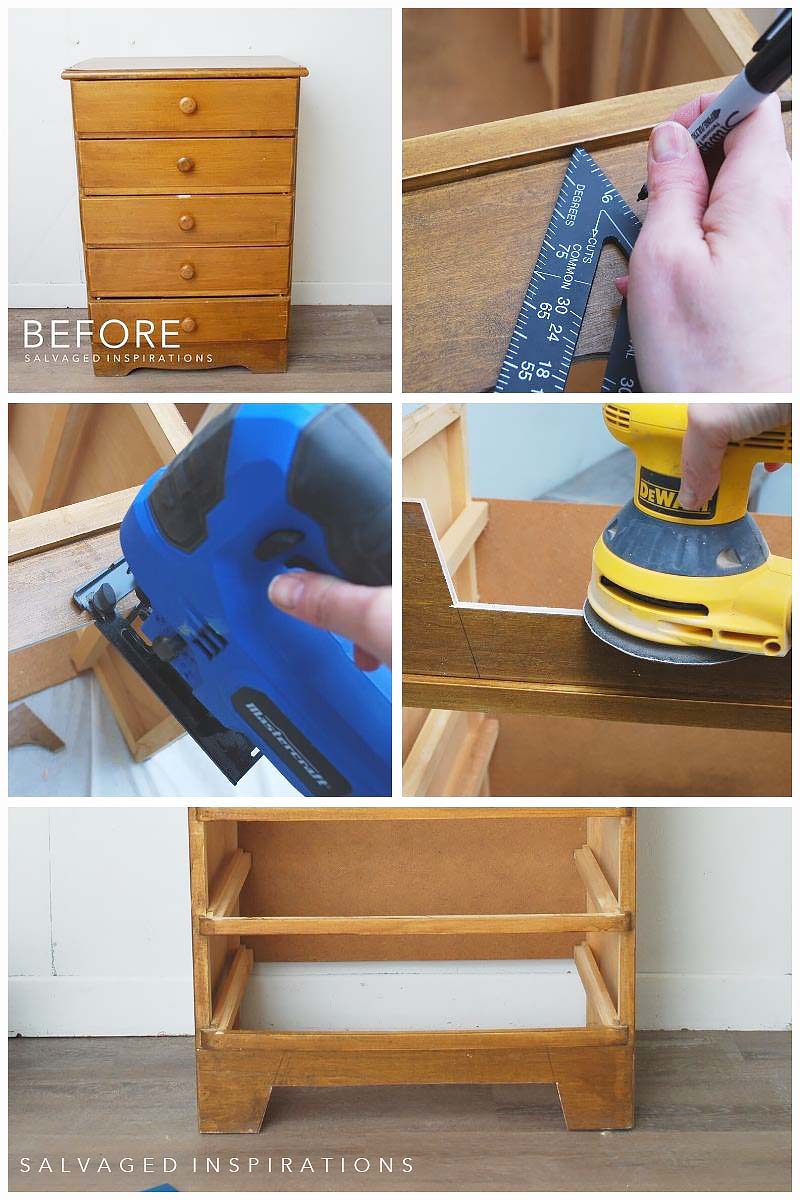
REPAIRS
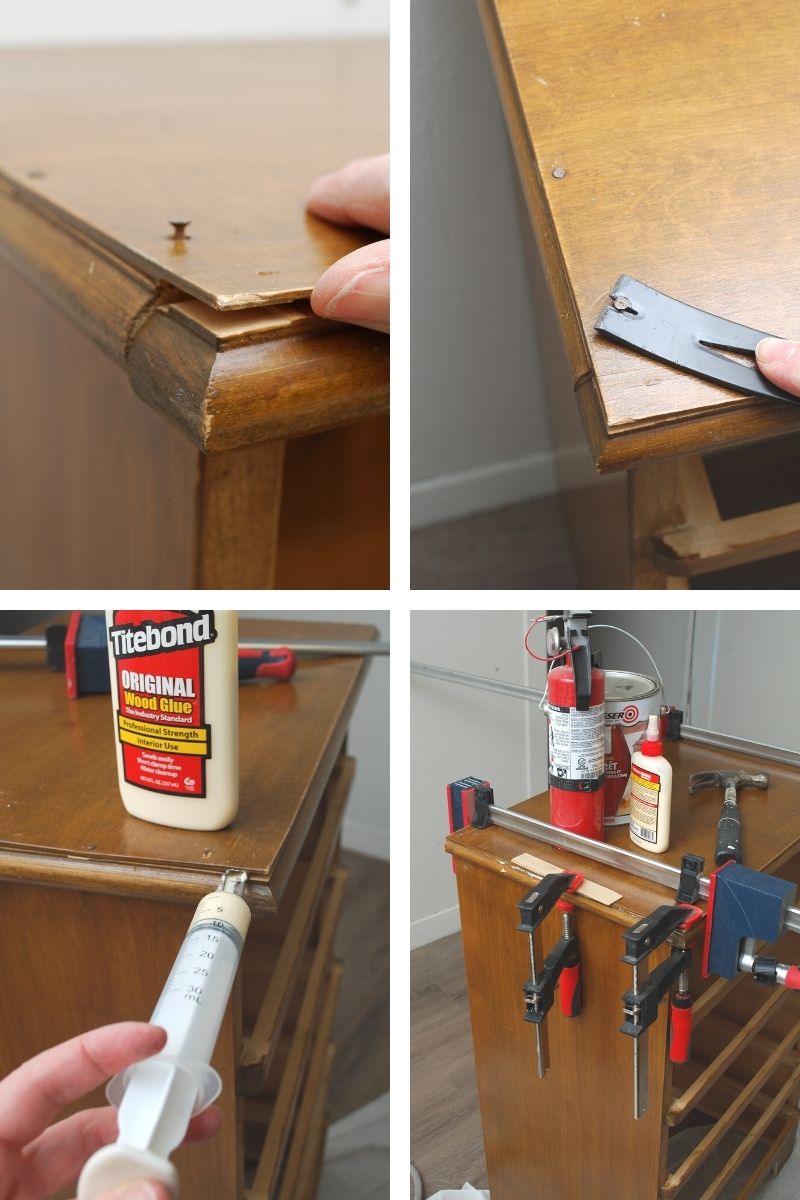
The front lip of this dresser was cracked and the previous owners fixed the lifting veneer by nailing it down. To fix all these issues I started by removing the nails that could be removed without breaking the veneer. (the other few nails I countersunk and filled with wood filler). Then I used a Dollar Store tool — a meat syringe — to inject the wood glue. They sell actual glue syringes on Amazon, or as I mentioned a dollar store meat syringe works just as well. Once everything was glued in place I clamped it with these furniture clamps and let it all set up. As extra reinforcement (not shown in the images below) I used a pin nailer to nail it all up as well and then wood-filled any remaining cracks.
FILL AND SAND
Using Bondo and this wood filler, I filled in all the cracks and dings. Then using my orbital sander and a 120 grit, I scuff-sanded the entire dresser. For the drawers, I sanded the existing finished off starting with an 80 grit and working my way up to a 220 grit to leave them nice and smooth and ready for stain.
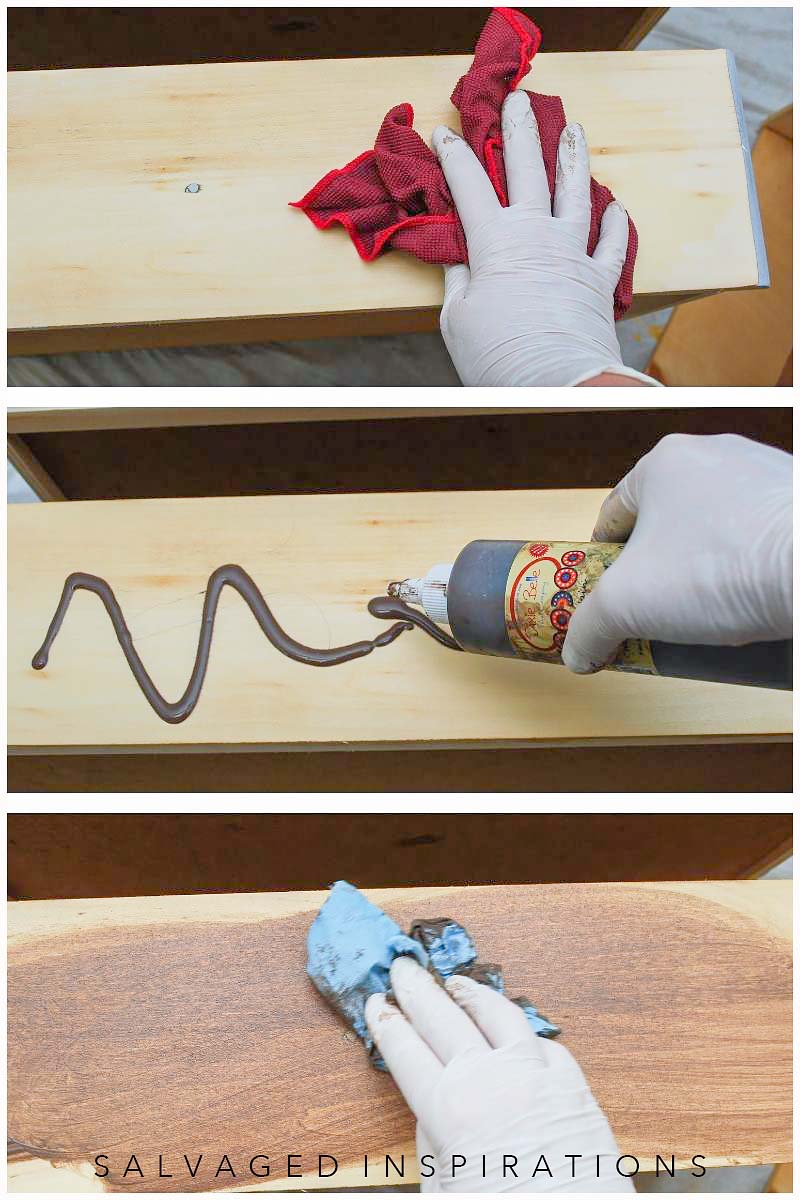
STAIN & FREE PRE-STAIN CONDITIONER
To stain these drawers I used my favorite water-based stain color — Tobacco Road. This is such a gorgeous stain and SO easy to use! It’s a warm brown but has NO orange undertones. This gives it a more modern-looking finish while allowing your wood grain to peek through.
When using oil-based stains it’s recommended to use a wood conditioner first. This preps the wood so your stain will take to the wood for a more even finish rather than look blotchy.
When using water-based stains, I use my FREE wood condition – WATER! I take a damp rag or sponge and wipe down the raw wood right before applying my stain. This opens up the grain to accept the water-based stain and gives a MUCH nicer finish!
PAINT
For the paint color I choose a warm neutral — this Sand Castle Silk All-In-One Mineral Paint. This Silk paint has a primer and topcoat included which is a time saver. I love spraying this paint but it’s self-leveling and brushes on beautifully as well.
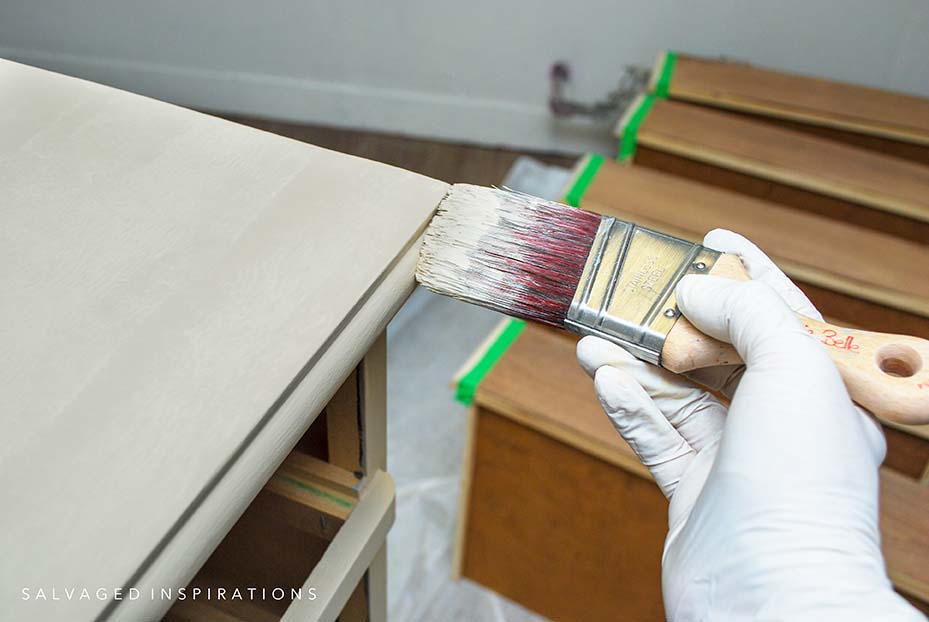
Check out how gorgeous this Sand Castle pairs with this Tobacco Road stain! Love it!

I’m often asked how much paint did you use for each project. For this dresser, I used 1/4 of a 16oz jar. Plenty left over for another project.
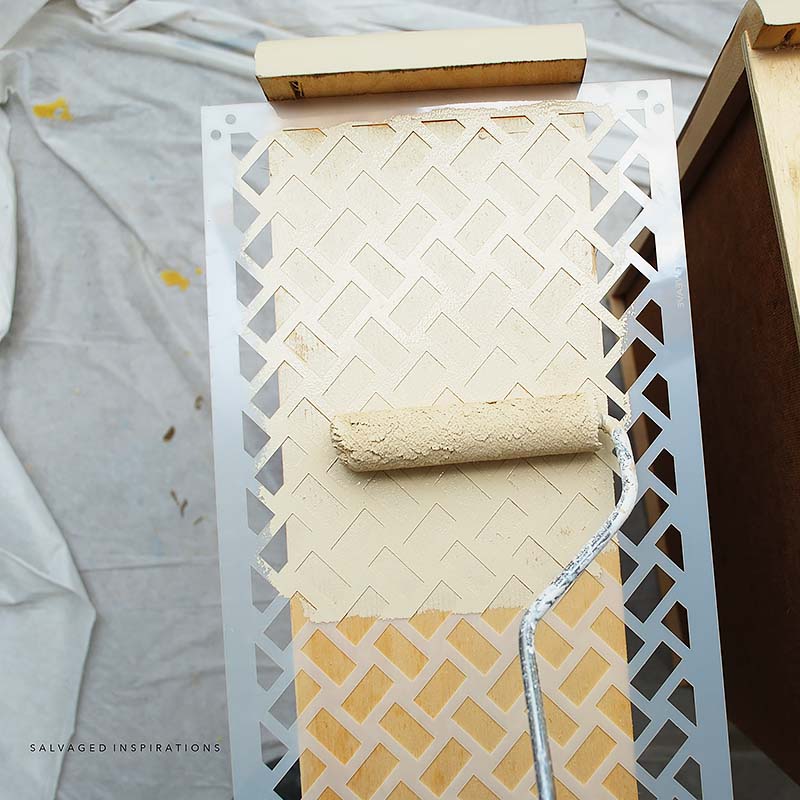
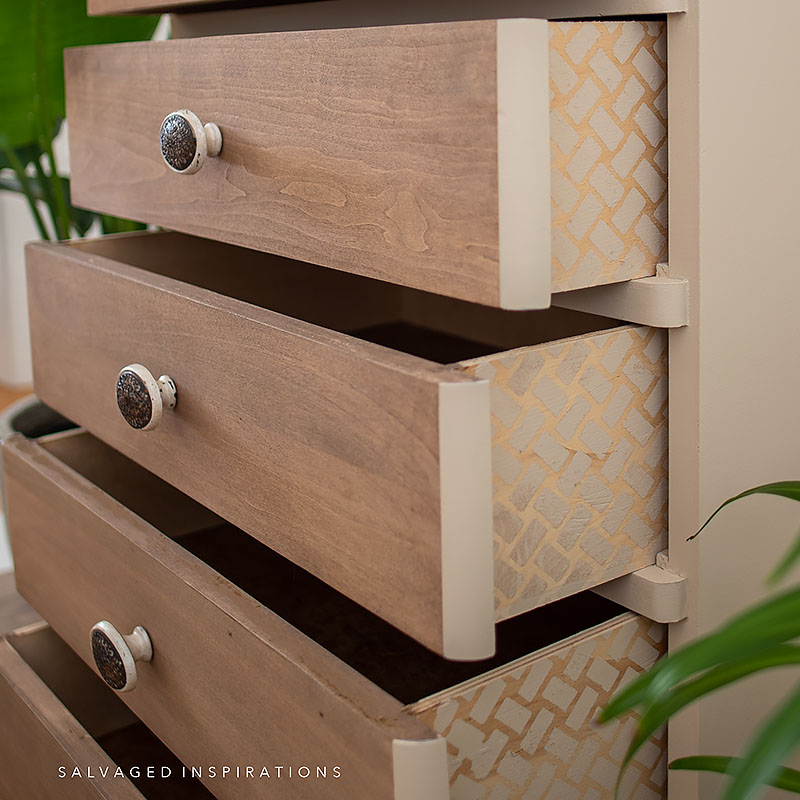
SIDE DRAWER DETAIL
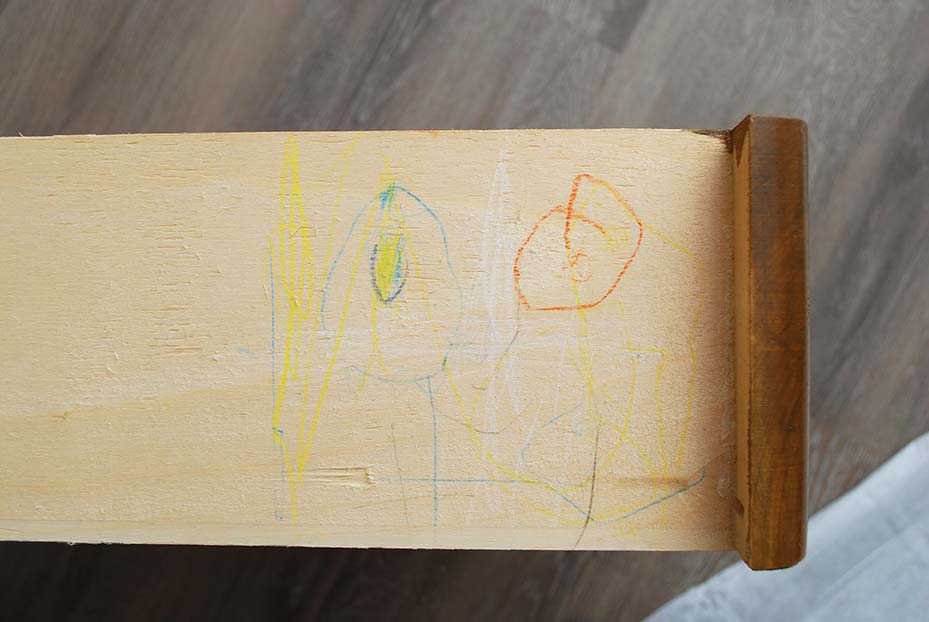
The previous owner was a budding artist and inspired me to add a little detail to the side of the drawers as well.
After sanding the sides of the drawer I added this NEW Basket Weave stencil design. This stencil is the perfect size for drawer details — front or sides!
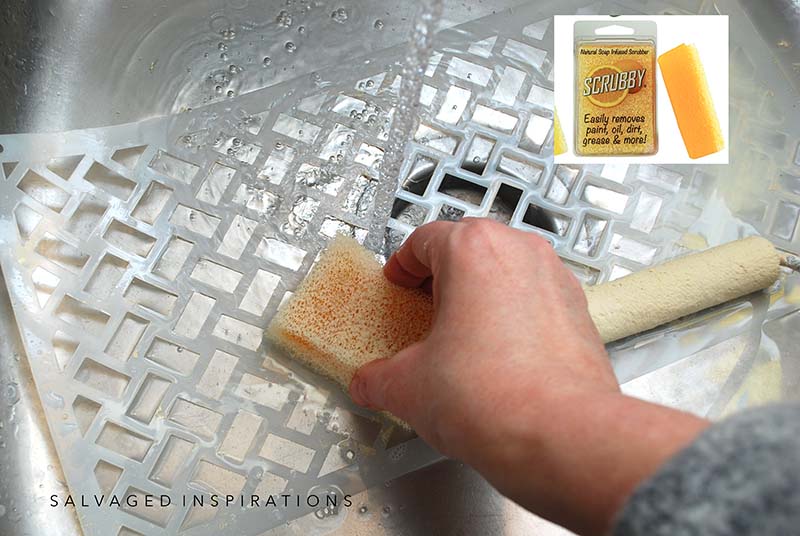
Pro Tip – If you have a hard time keeping your stencils clean and new, here’s a little stencil cleaning tip. The BEST thing I’ve found for cleaning my stencils are these Scrubby Soaps. They are great for cleaning brushes AND stencils because the rough sponge removes paint effortlessly!
TOPCOAT | PROTECTION
No top coat is needed for the paint portion of this dresser. To seal and protect the drawers I used this spray wax. It’s super easy to use and has a totally flat finish.
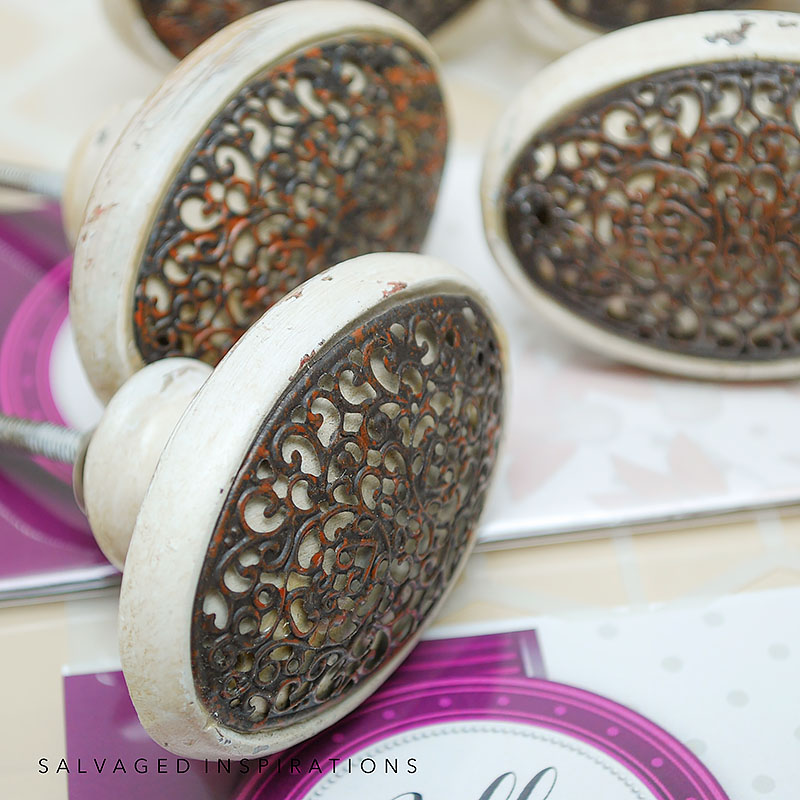
NEW HARDWARE
I replaced the old hardware with these large detailed knobs from Hobby Lobby – so pretty!
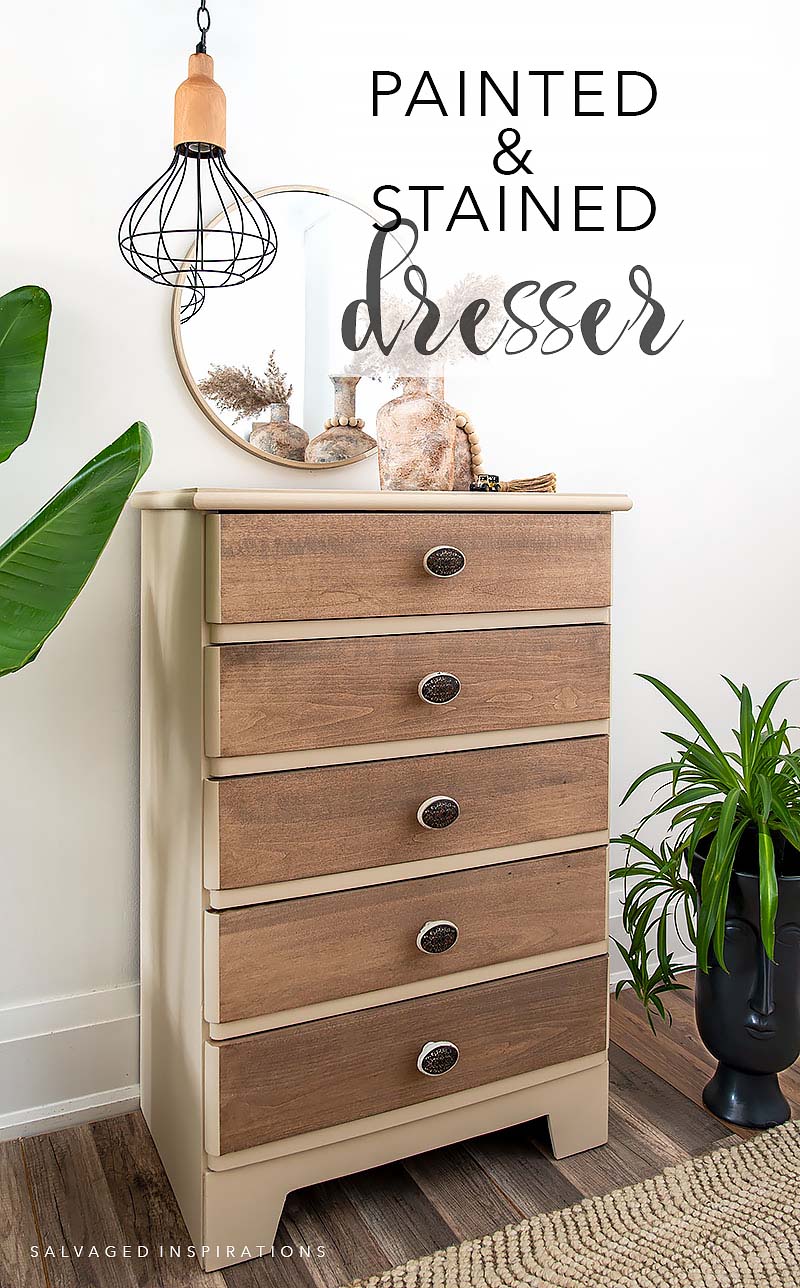
Here’s the finished look!
Check out these drawers!
AND NOW FOR SOME FURNITURE FIXER-UPPER FUN!
You’re going to LOVE what my creative team of Furniture Fixer Upper ladies do! Below are their BEFORE photos. Visit the links below to see the amazing AFTERS and learn how they did it! I’m heading over to take a peek as well! x
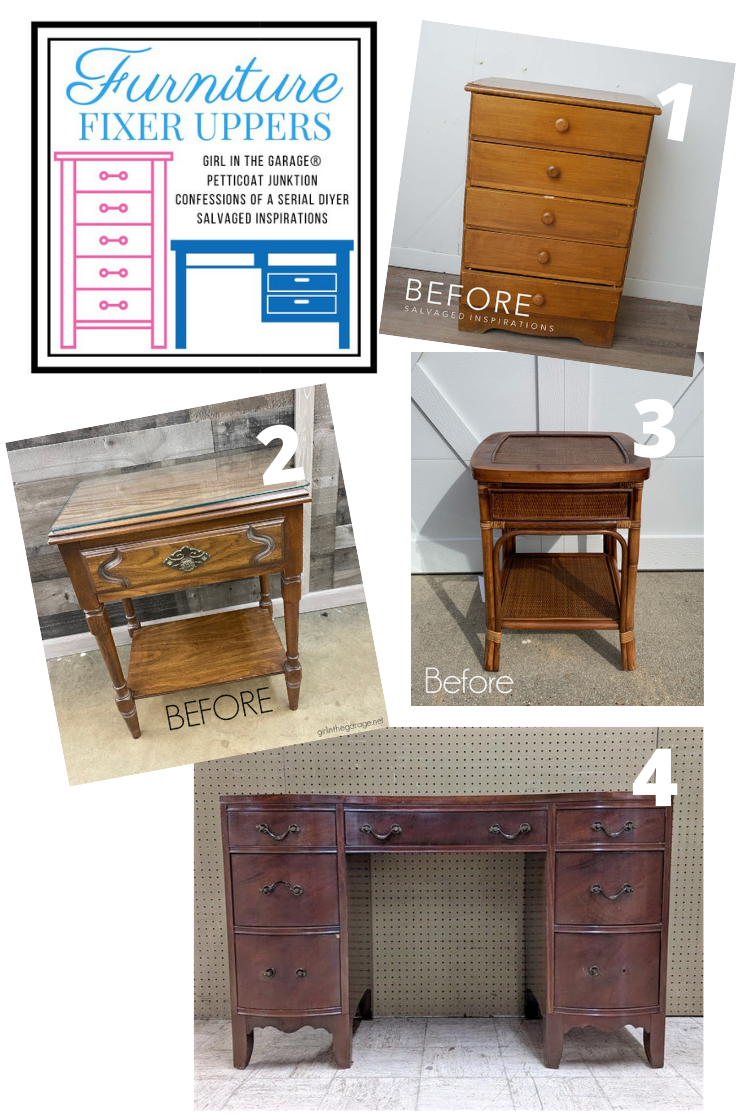
1. SALVAGED INSPIRATIONS (HAPPY YOU’RE HERE!)
2. GIRL IN THE GARAGE
3. CONFESSIONS OF A SERIAL DIYER
4. PETTICOAT JUNKTION
Here’s another look at this dresser’s before and after. I hope it’s inspired you and given you some new ideas for your projects!
LET ME KNOW WHAT YOU THINK OF THIS $15 DRESSER MAKEOVER. FEEL FREE TO ASK ANY QUESTIONS YOU MAY HAVE… I ALWAYS LOVE HEARING FROM YOU. IT MAKES MY DAY! 🙂
Happy furniture painting friends!
Denise x
RELATED POSTS::
DIY ANTHROPOLOGIE DRESSER
CACTUS PAINTED SIDE TABLES
HOW TO PAINT MCM FURNITURE
DIY BOHO NIGHTSTANDS
HOW TO REVAMP YOUR OLD DESK
PIN AND SHARE!

Wow, this turned out so beautiful! Great work and very creative. I recently bought an older dresser for my daughter and your post really inspired me. Thank you! 🙂
Thank you Jenna!
Absolutely gorgeous! Love the paint stain combo and the knobs are awesome with the entire look – stencil on the sides of the drawer just add that extra pop that lifts the entire project to the next level.
By the way, I use an old toothbrush to clean my stencils. Work really well overall. Love the idea of using the meat syringe for gluing the veneer back down – I always seem to forget I can use one of those for that purpose!
Love the toothbrush idea! Dish brushes work well with a little bit of Dawn too:) And thanks so much Barb!😊
Hi Denise!! It turned out gorgeous.
Thanks Cheryl!🤗
Haha, if I saw that at the thrift store I would totally fight you for it! Great piece and you made it look so much better! xo
lol…cute little piece, right!?… even in its sad state.😂 Thanks my friend! XOXO
I love how ‘squaring’ off the bottom skirt detail changes the entire look of the piece.
Nicely done Denise 👍👍
Thanks so much Annie! XOXO
WOW!!!!!! What a transformation. Holy moley it looks great. And YES the Sand Castle and that awesome stain color are beautiful together!!!!
Thanks Michele! And I love them paired up as well. I LOVE finding new combos that look awesome and work great together… I’ll be using this one again for sure!
Stunning, and inspiring! This looks like a dresser that was in our children’s bedroom many years ago. If only I had viewed this then:)
I’m sure it was! There were a ton of these dressers when we were kids. I think every one of my friends had one…lol
WOW! When I saw the before, I thought it was hopeless. Boy, was I wrong! The after is gorgeous!
Thanks so much Cindy! And ya, the before was a little blah…lol 😉
Denise…..this one is a definite likely for your “BEST” dressed list if ever you had a list lol.
Beautifully done n staged so well!
Love it! The new drawer sides look spectacular!
Love the new knobs too….great idea to use the paint n stain…..wow have I got some inspirational ideas from this one….thx! Dawn
Yaaaay! You just put a huge smile on my face… so happy it’s sparked some ideas Dawn! XOXO
Love it! Nice job. I’m always eager to see your “remodels.”
Thanks so much, Jeanne! And love your profile pic btw!🤗
It doesn’t even look like the same dresser! I admire your straight cuts with the jigsaw…my jigsaw cuts are a hot mess ha ha! And I love the original artwork…too bad it had to go lol! Beautiful save, my friend! XOXO
I loved the original artwork as well…super cute…lol! Thanks my friend. XOXO
BEAUTIFUL!!!!!!
Thanks Teri!🤗
I believe this is second piece of yours that I’ve seen where you updated the bottom. I love that idea!! It’s not something I think of and makes such a difference!! This turned out absolutely gorgeous! I love the paint/stain combo, the “new” bottom, and those knobs. 😍😍 Sooo glad I joined your email list!
Thanks for joining the #sifamily Heather and I’m SO HAPPY you like this idea. I’m new to using a lot of these tools. Modifying the bottoms are a great way to start without feeling it’s too much for me to handle. Thanks for the encouragement!😊
Hi Denise … what vision you have for an older piece like this little bureau! You have inspired me … I will look for a similar piece and give it a try… thanks for explaining and providing each tool and paint used. I have no imagination of my own!
Diana (Massachusetts)
I see a lot of these pieces at second-hand shops and garage sales. I guess they were super popular 30-40 years back and I’m guessing pretty inexpensive as well since they aren’t heavy duty. 🙂
This is a fabulous piece. Perfect paint color to complement the wood stain. The knobs are the perfect jewelry for the chest. Simple, clean, not too fussy.
Thank you Robin! I love this Sand Castle color as well… such a gorgeous neutral! 🙂
YOU ROCKED THAT DRESSER.
JUST SO CLASSY TOO.
You are very talented.
Thank you so much Margaret!!!🤗
I agree with Monique, what a cool boho chic vibe! This one is a stunner Denise!
Thank you Niki! And I have to admit, I’m loving the boho vibes lately so thank you! 😉
I have not run across nailed-down veneer before…. [grimace] Beautiful transformation, as always, Denise. And thanks for the tip about using water!
Ya, it was really nailed down which did the job.😉 And the water makes a HUGE difference Marcia. Night and day – and I’ve tried both with and without water a number of times. If you give it a go I’d love to hear your thoughts. 🙂
LOVE!!! The stained drawers with the paint on the ends looks so good. Thanks for sharing!
Thanks so much Nicki! XOXO
Love!!! Did you have to cut the screw ends on the knobs? I find the screws to be really long on the new knobs I have purchased from HL.
Thanks! And no I left the screws as is as these HL ones aren’t that bad actually… but I know what you mean. Some of them are super long!
This piece is absolutely stunning. I LOVE wood grain and sometimes I get upset when people paint over beautiful wood. This was a great compromise…stain nice wood and paint that which is not so nice. GREAT job.
Thanks Ellen! I really like the paint and stain combo on this piece as well! XOXO
I’m not a fan of the stain/paint look usually, but this one is amazing, Denise! Love how you updated the bottom of the dresser, and the stencil detail is a fun surprise. Beautiful piece now, would look great in an entry, too.
Thanks… and this would look amazing in an entry. I didn’t even think of that!
You are a wizard and a true artist! Your creativity and limitless ideas for pieces continues to astound me. Your work and fresh ideas are a constant inspiration. It would help if you would share the total dollar amount a project costs, not just the cost of the original piece. I know it would be an estimate since you use partial jars/cans of paint, tools, stencils, knobs, accessories you may already have.
Thank you for being so generous in sharing your ideas and talents!
Thanks Maureen! And I’ll keep the project cost in mind as well… great idea!
Hi Denise. This dresser went from sad and outdated to boho beautiful. A gorgeous up cycle. I love the warm wood tones paired with the paint…and those adorable knobs!!! I really appreciate how you always show your work step-by-step. You have so many wonderful tips and tricks. Thank you.
I’m happy you find the tips helpful and ya, aren’t these knobs adorable! They add a little extra detail that really pulls everything together!
What a beautiful refurbishing. I’ve been following you for quite awhile now, and I have not seen what you do with all the furniture that you redo. Do you have a business or a booth somewhere? Thanks for all your info.
Thanks Lane! And yes, I sell my pieces online. Often I get inquiries when I post or I list them on FB Marketplace and Kijiji. 🙂
Really love this one Denise!
Thanks Stacie! XOXO
I love the color combination of the stained drawer fronts with the rest of the piece painted. The new knobs add the perfect finishing touch!
Thanks Jennie, I’m loving these knobs with the finish as well. A little extra detail to pull the piece together! 🙂
Love, love ,love this dresser. From the colour of the stain to the basket weave on the sides of the drawers. Everything got some love. 😍😍Did you texture the vase with pampas grass? What did you use?
Thanks Lorri and YES I did. I have a full tutorial on the painted thrift glass here.😃
This is one of my favorites of your make-overs. the combination of the stain with the paint and the gorgeous pulls work together beautifully. I especially like the added detail of the new shape you gave to the base–it looks modern and fresh.
Yaaay! Favorite is GOOD!🤗 I’m trying to get used to working with more tools this year so modifying the bases is a good start. 😉