Happy Easter Monday SI Family! I hope you had a beautiful long weekend with family and friends, and if you’re lucky enough to have today off – enjoy – and thanks for dropping by!
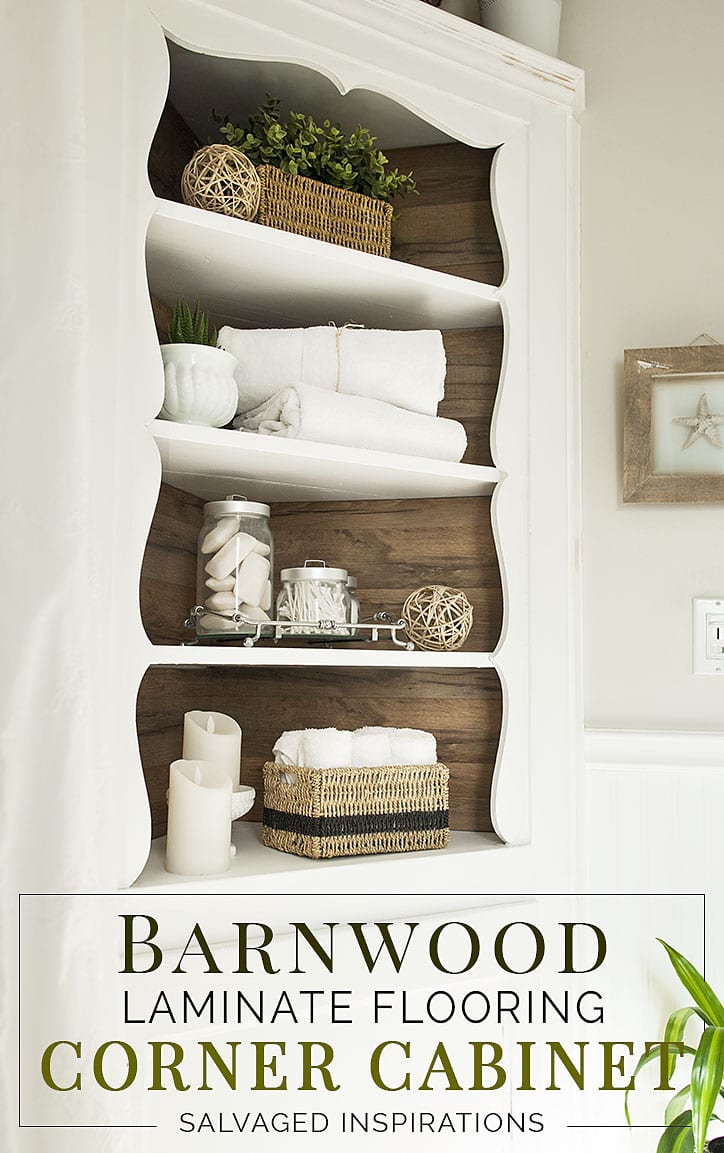
Back when I shared my bathroom makeover reveal, you may remember the salvaged tall corner cabinet MMM picked up. I love it and it’s great storage space, but it was a little plain and on my to-do-list to spiff it up. Well, today I’m sharing how a $16 box of Lowes Barnwood Laminate Flooring transformed this cabinet and gave it some real character!
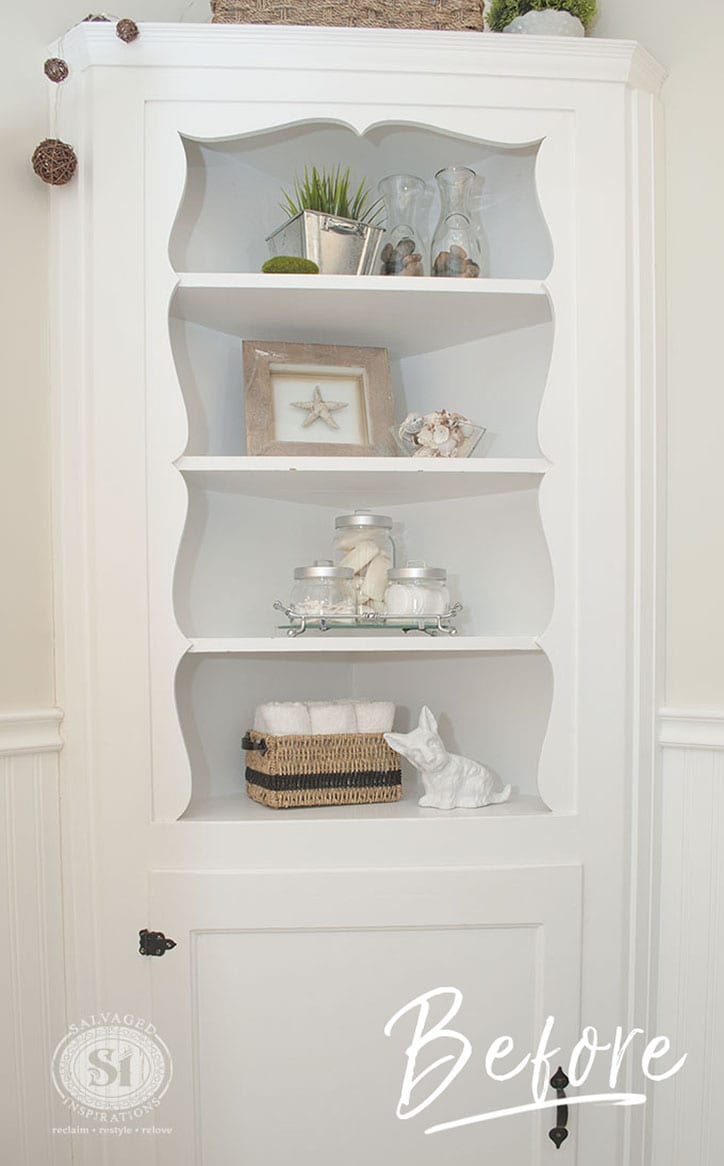
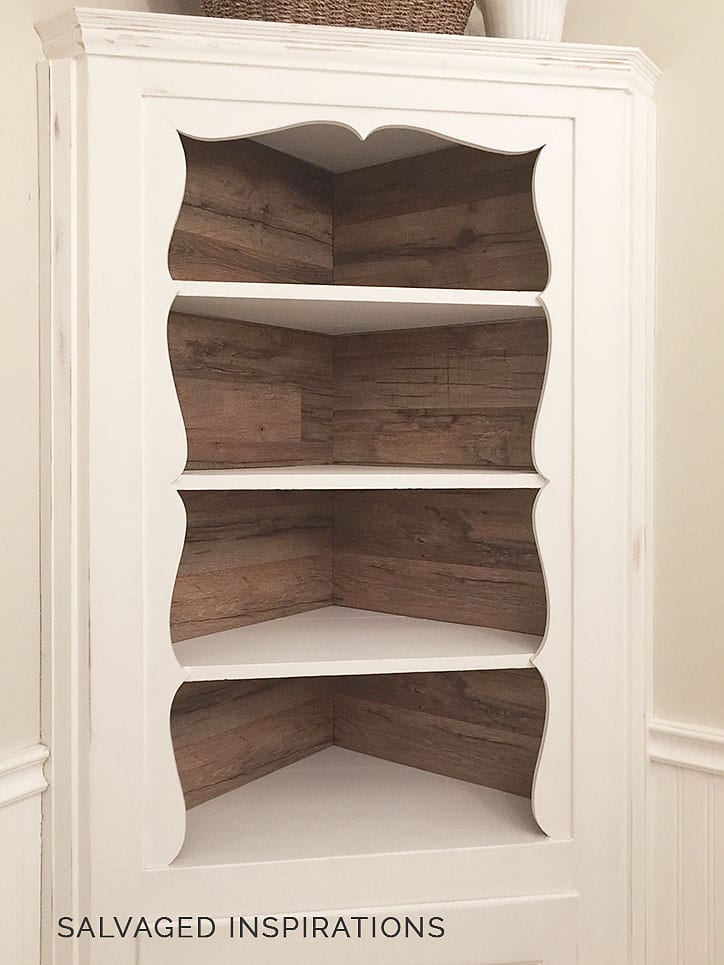
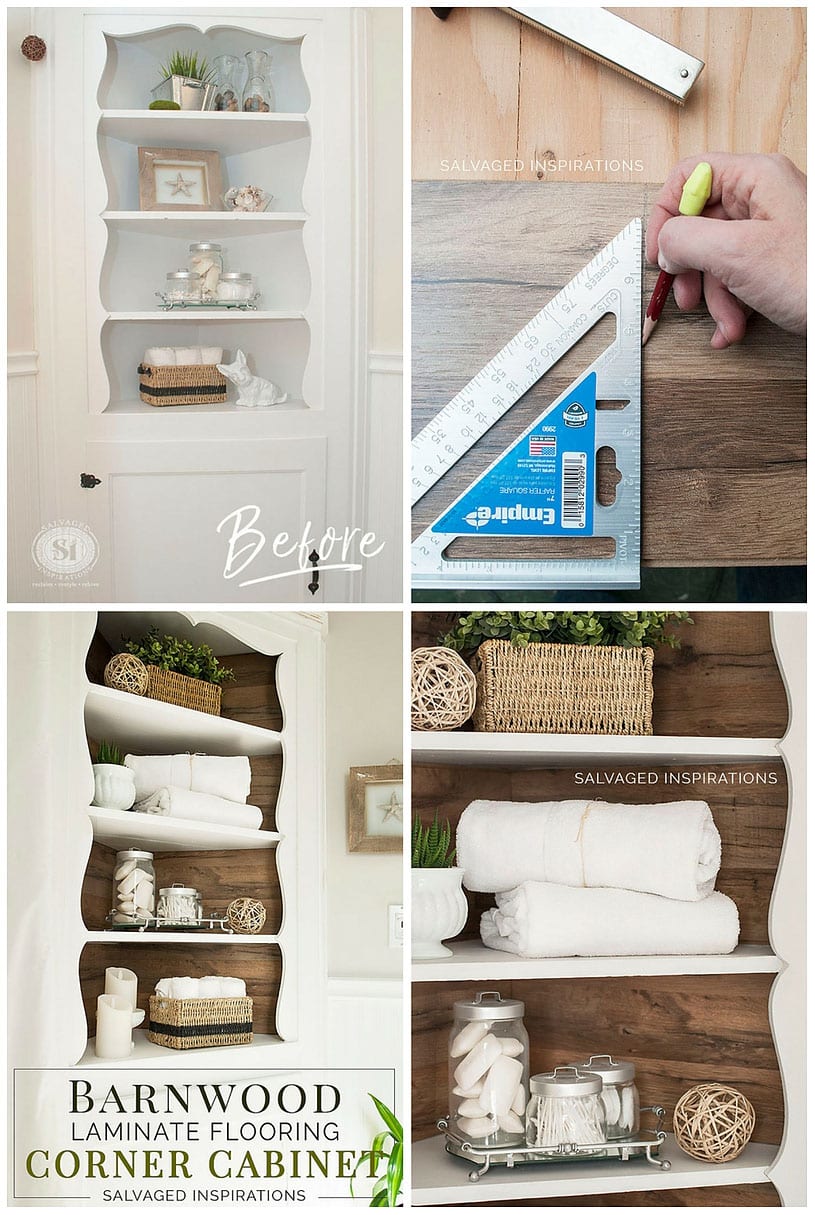
Here’s a look at the before…
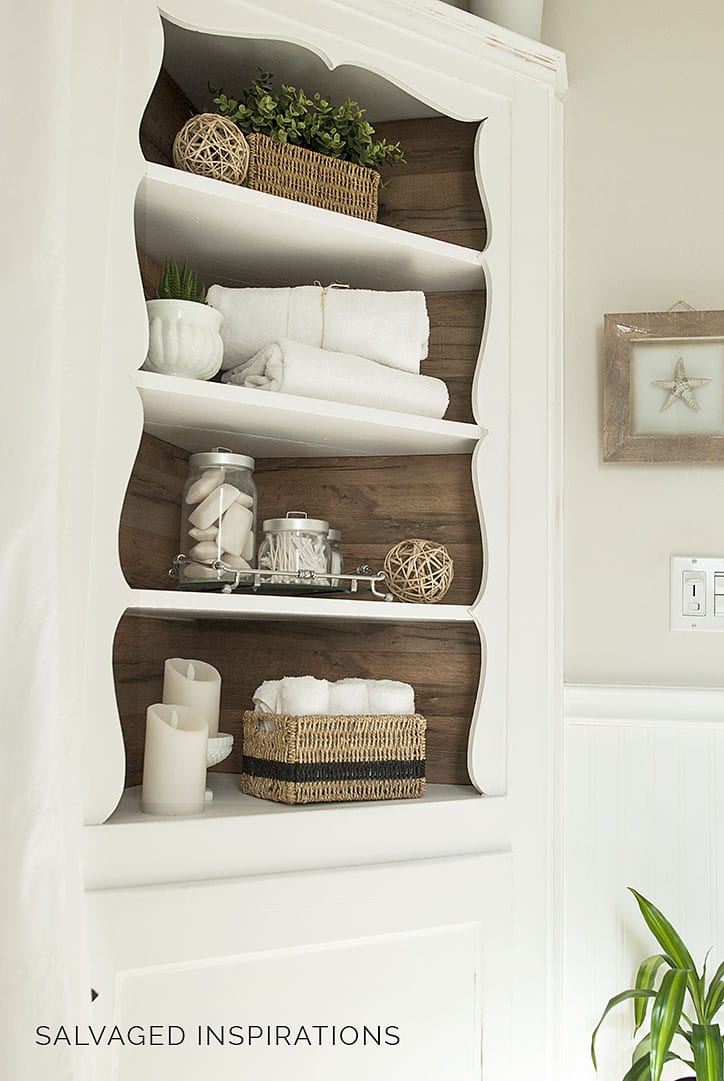
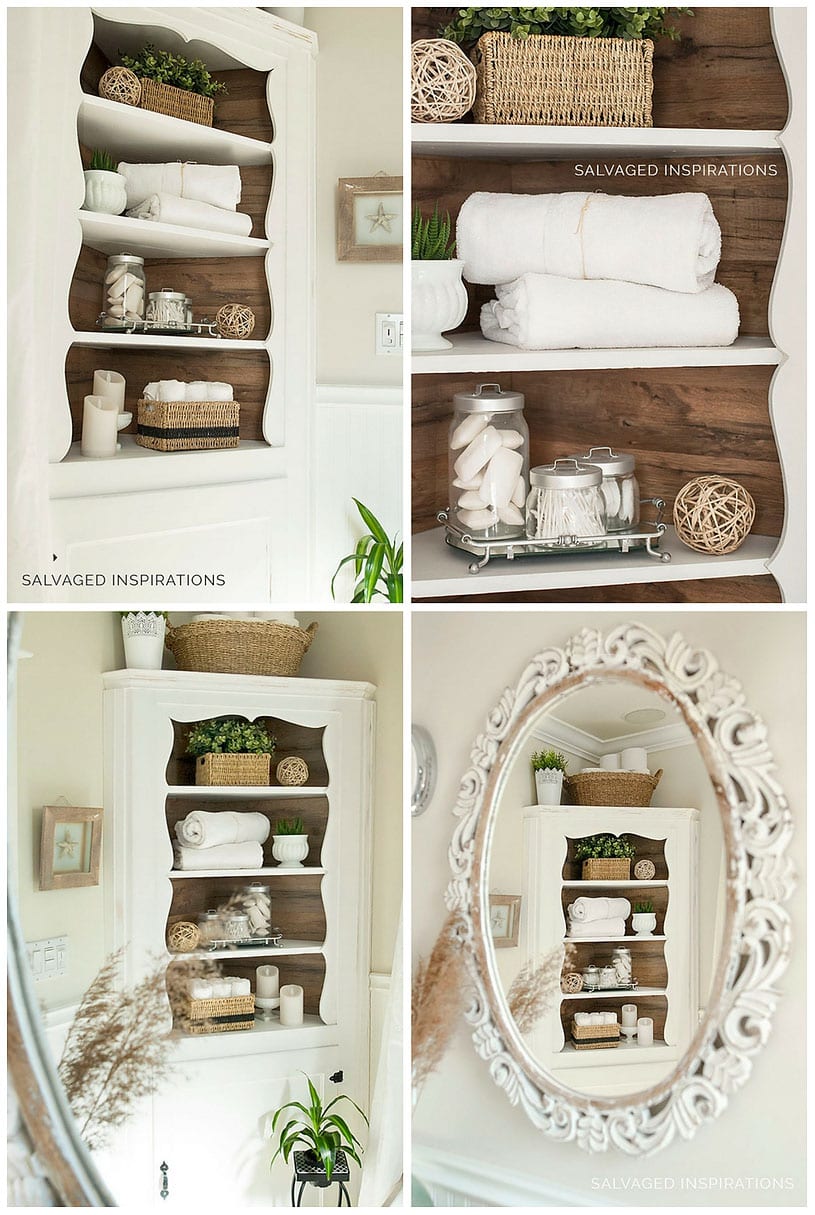
And here’s the after. Doesn’t the barnwood backing add a lot of interest and warmth?!
THIS POST CONTAINS AFFILIATE LINKS TO PRODUCTS I USE. YOU CAN SEE MY FULL DISCLOSURE HERE.
SOURCE LIST::
- Corner Cabinet (Salvaged)
- High-Density Foam Roller
- White Paint
- 1 Box Lowes Barnwood Laminate Flooring
- Measuring Tape + Pencil
- Straight Edge or Ruler
- Skill Saw
ADDING LAMINATE FLOOR TO A CABINET BACK
Step #1. Clean & Fresh Paint
I started by giving this corner cabinet a good wipe down and a fresh coat of white paint applied with a high-density foam roller.
Step #2. Measure
These shelves are fixed so I measured each back section separately to find out what size the laminate flooring needed to be. Each section was 21.5″ x 9.5″ except the top shelf which was slightly higher. Because theses laminate floorboards are 8″ wide, I attached two board together and then measured.
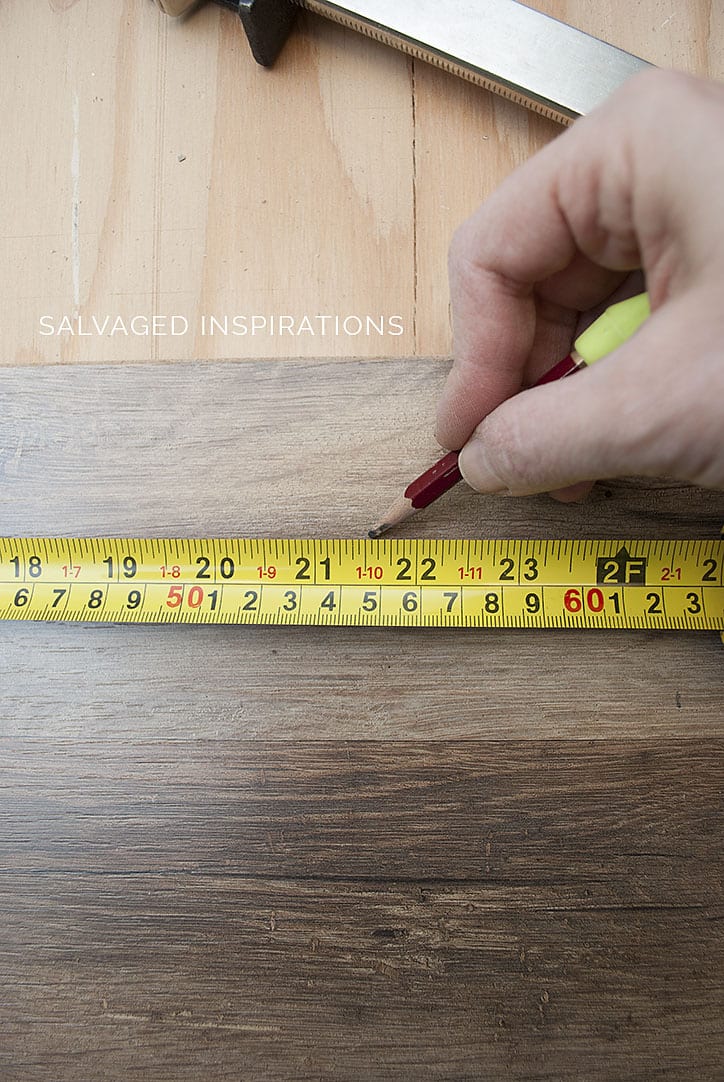
Step #3. Mark Measurements
I marked all my measurements with a pencil and straight edge. Again, you may need to join two floorboards together (depending on what your measurements are and how big your floorboards are) and then take them apart while cutting – then reassemble. You can also cut off the tongue and groove part (on the one side) with a utility knife… I didn’t bother though. You can see I left it attached at the bottom of the pic below.

Step #4. Cut To Size
I used my skill saw to cut these laminate floorboards but if you don’t have a skill saw, a really sharp utility knife will cut through them if you score them a few times. Once they were cut, I attached the two pieces back together before installing onto the back of the corner cabinet.

Step #5. Install In Back of Cabinet
These Lowes barnwood laminate floorboards were placed onto the back of the cabinet. They fit snug enough that no glue or nails were needed. This is a bonus. Because I may change things up down the road, they can be easily removed at any time!

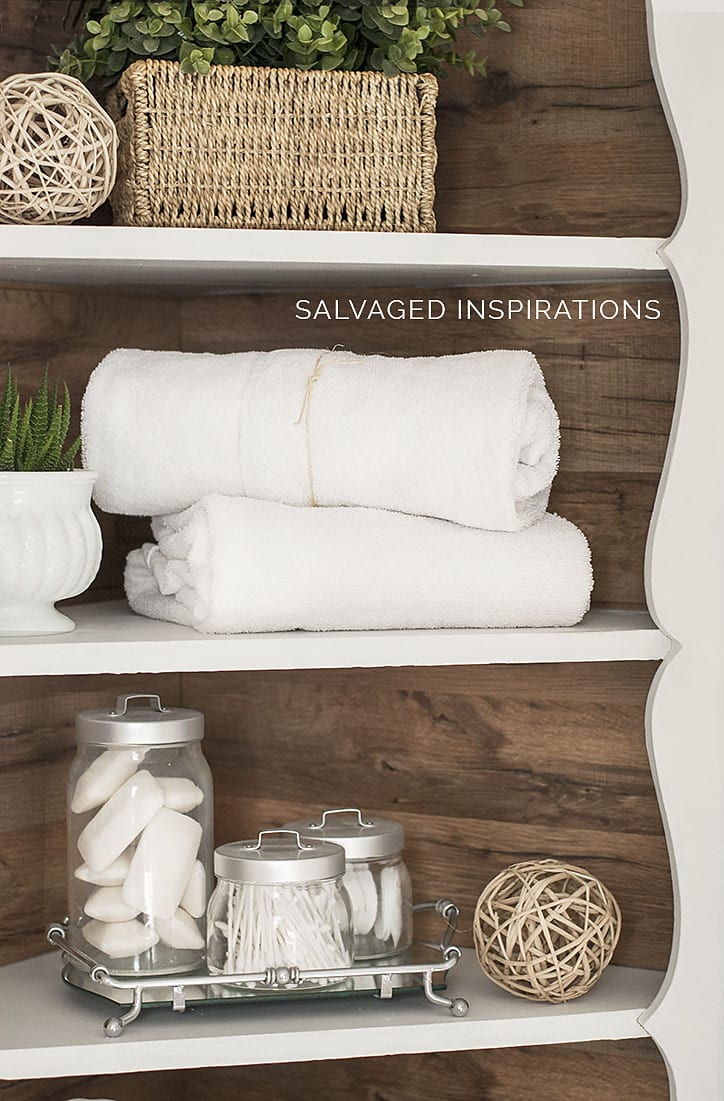
In the pic below you can see that I didn’t cut perfectly and there is a small gap between the shelf. If you have any boards that aren’t cut 100% even, it’s best to place them on a bottom shelf (below eye level). This way it’s not at all visible. 🙂


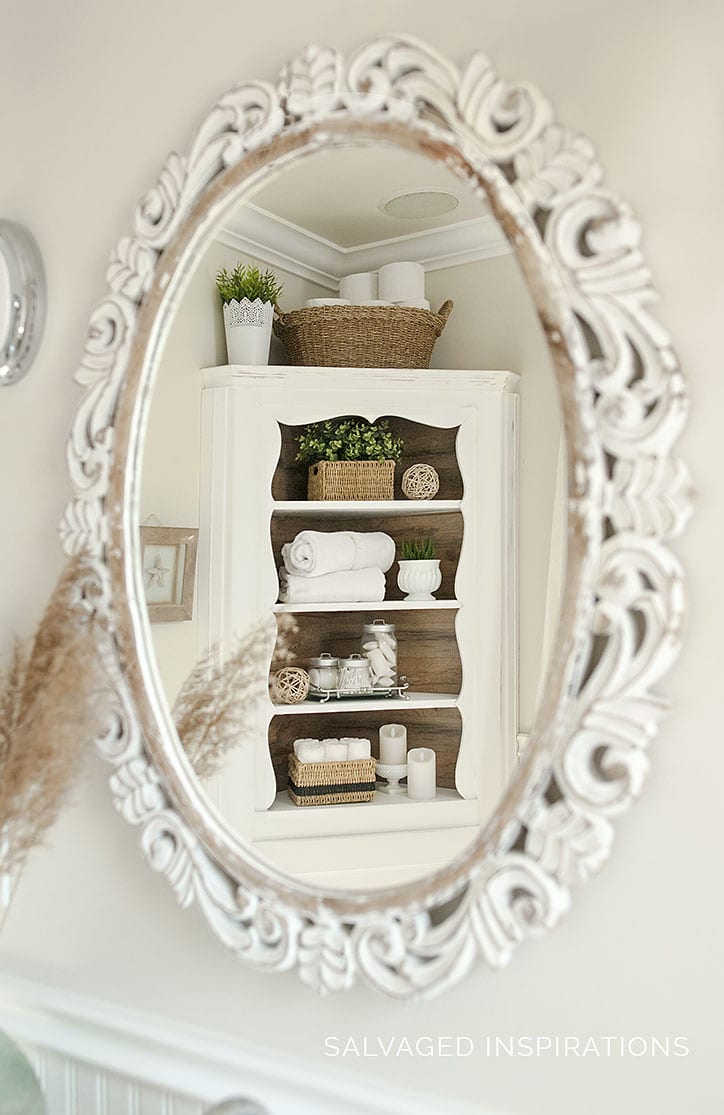
My takeaway from this piece – things can always be changed inexpensively… and adding a new backing is a great way to do it! A $16 investment in Lowes laminate flooring – well worth the new look. If you have leftover laminate, vinyl flooring, beadboard, wallpaper, fabric or pretty much anything flat that can be added to the back of a cabinet or hutch, it creates interest and character to an otherwise plain piece!
I’D LOVE TO HEAR IF YOU’VE EVER ADDED A CABINET BACKING BEFORE… AND WHAT YOU USED? IF YOU HAVE ANY TIPS YOU’D LIKE SHARE OR HAVE ANY QUESTIONS, FEEL FREE TO CHIME IN… I ALWAYS LOVE HEARING FROM YOU!
Thanks and have an inspiring day my friends!
Denise x
![]()

Denise, Great idea!! I’m so impressed at the idea, and how this really makes a striking difference in an already lovely piece. Great upgrade!
Yay! Thanks so much Cindy! 🙂
Beautifully done! What color was used on the walls beside the cabinet?
Thank you Brenda! I have an entire post on the color white here! 🙂
Love this look! Can you please tell me the exact Brand and Color Name of the flooring you used? I just looked at the website and Lowe’s has several “barnwood” laminates.
Thank you!
Thanks so much… and yikes, I don’t think I have the original box anymore Liz. 😲 I’ll take a look and if I find it, I’ll be sure to come back and post it for you.
I absolutely love this, Denise!! What a genius way to get that look! XO
Thanks Christy! I’m loving the new look. I also really like that I can swap it out whenever I want. 🙂
Спасибо! Очень Красиво!
Спасибо ТЕБЕ Татьяна! Я думаю, что ты первый человек из России, чтобы оставить комментарий! 🙂
This just warms up the whole corner of the room….so nice LOVE IT What a cool idea.
Thanks so much, Julie! xo
Well, you never fail to amaze me. But this time you went over the moon! I’m in love with this transition.
Yaaay, thanks my friend! XO It really does warm up the overall look in the bathroom. 🙂
Wow, this adds so much to this cabinet, giving it a real fresh country farmhouse look. What an original idea.
Thanks Tracy… I have to say, I like it much better. Warms up the cabinet and my bathroom. 🙂
What an awesome update Denise! And I love that one could cut that product with a sharp utility knife and not have to have a power saw.
Thanks Linda! Ya, I didn’t know that a utility knife could cut through the laminate. M-M-M explained that when he’s done laminate flooring, he sometimes cuts it with a utility knife. That said, you should see how big and strong his hands are…lol. 😉
Wow! Looks fantastic! I love having a darker color in the back of cabinets.
Thanks Lorin! I’m liking this darker back too. 🙂
You always have such great ideas Denise. Always an inspiration. My next project is putting wallpaper on the back of a small China cabinet. Wish me luck never done it before Ellen.
Thank, Ellen! And good luck and have fun… I bet it’s going to look amazing! 🙂
That’s a beautiful addition to the cabinet! I’m glad to know about the Lowe’s barnwood style floor boards. They would be great for many projects!
Thanks Patty! And they really would!
This is absolutely beautiful . How handy you are.
Thanks Betty… pretty easy makeover!:)
So unique! I love it!
Thanks Janie!
The barn board looks so good on the back of your cabinet Denise. I never would have thought to substitute laminate for real wood boards. Looks amazing!!!!
Thanks my friend! 🙂 I had some leftover ‘real’ barnwood – but not enough for the entire back. I took one of the pieces to Lowes and this laminate was a good match. Obviously, you don’t get the same texture/feel if you touch it, but I’m really pleased with the look!
My son just bought a house that is still in the 70’s look. But it came with an ugly corner cupboard that needs some help. Love your idea. And you’re right, it definitely brought some life into it. Great job! Thank you
Hi Cindy! Glad it’s sparked some ideas for your son’s house… cheap and easy too! 😉
Denise,
What a great idea! The Hutch looks “alive” with this change.. Thank you again for such a clear and
descriptive instructions.
Carli E.
Right… it kind of brought a little life into it… I so agree! 🙂
I have used beadboard wallpaper as a backing, and it really does look like beadboard once it is dry! Warning though, when it is wet it will tear like wet kleenex if you’re not careful! You must wait until it is completely dry before attempting to trim it, or it will tear (voice of experience here). The wallpaper is thick, so it covers most cracks or irregularities pretty well once dry. It is paintable if you don’t want white (but white really looks like beadboard. Lowe’s used to carry it, but our local Lowe’s quit carrying it, so I ordered the latest from Amazon. It is exactly like the kind I used before. I papered the back of a book case, and I have used it to create a chair rail height in our bathroom. In our old house, I used it in the kitchen and dining room. Loved it!
Love this Denise! I saw beadboard wallpaper at Home Depot and was going to pick up a roll. Wasn’t sure wether to use it in my bedroom, on back of shelves or both, so this is GREAT info. Thanks 🙂
So blasted cute! Great new idea. I’ve papered and painted but this is new!
Thanks Erin! 🙂 I’ve papered, painted and stenciled but I’m really liking this look too. And I have to say, it wasn’t any more difficult than using wallpaper and it took less time than stenciling!
Adding the rustic barnwood made all those pretty whites pop! Great idea, Denise and what a difference it made to your corner cabinet. Pinned 🙂
Thanks, Marie! And I agree, I think the knick-knacks look much better. Thanks for pinning my friend! XO 🙂
You have such an amazing vision. I love this idea.
Julie
Thanks, Julie. XO 🙂