Holiday decorating is FUN. But if you start feeling short on time, it’s helpful to keep in mind that your holiday DIY efforts don’t have to be all or nothing. There’s an in-between-sweet-spot where you can get creative and make a heartfelt one-of-a-kind project… without spending a lot of time or money!
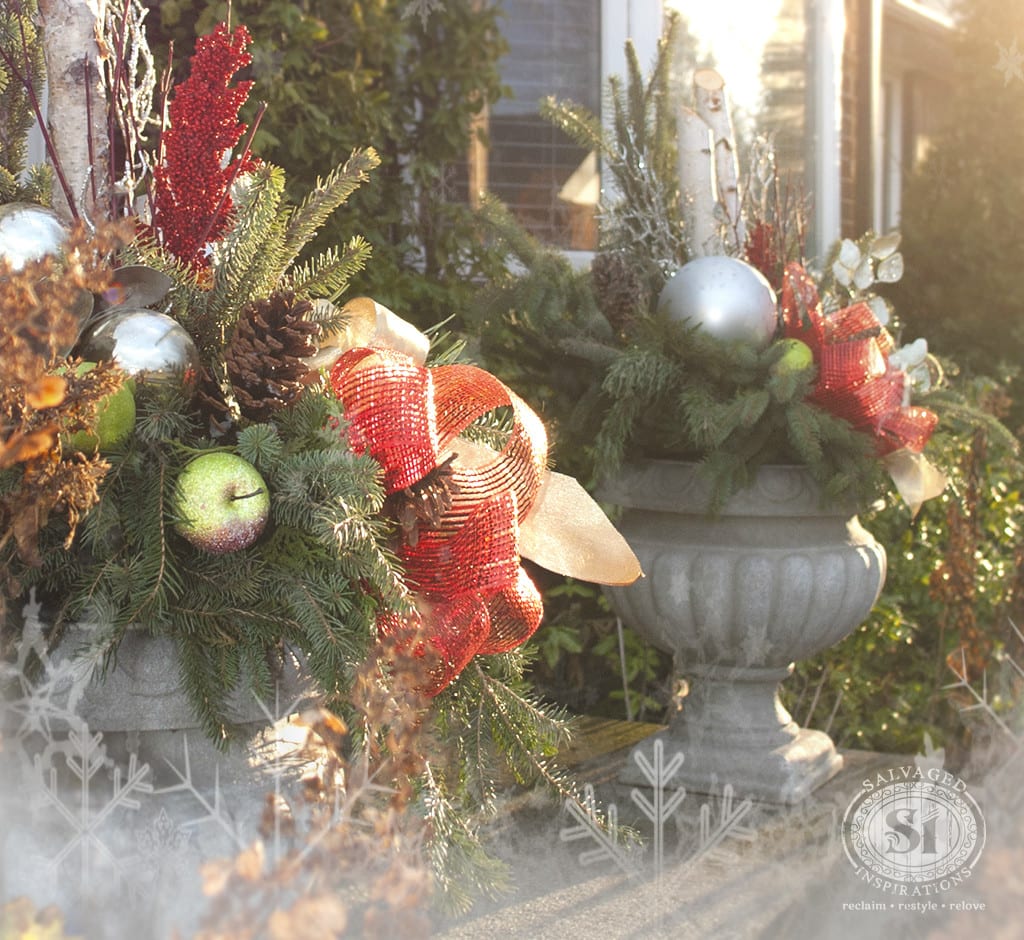
One of my favorite holiday decorating traditions is to make a pair of DIY Christmas Urns for my front porch. Christmas Planters are perfect for adding color, texture, sparkle, and most importantly, they add holiday cheer to the front entrance of any home.
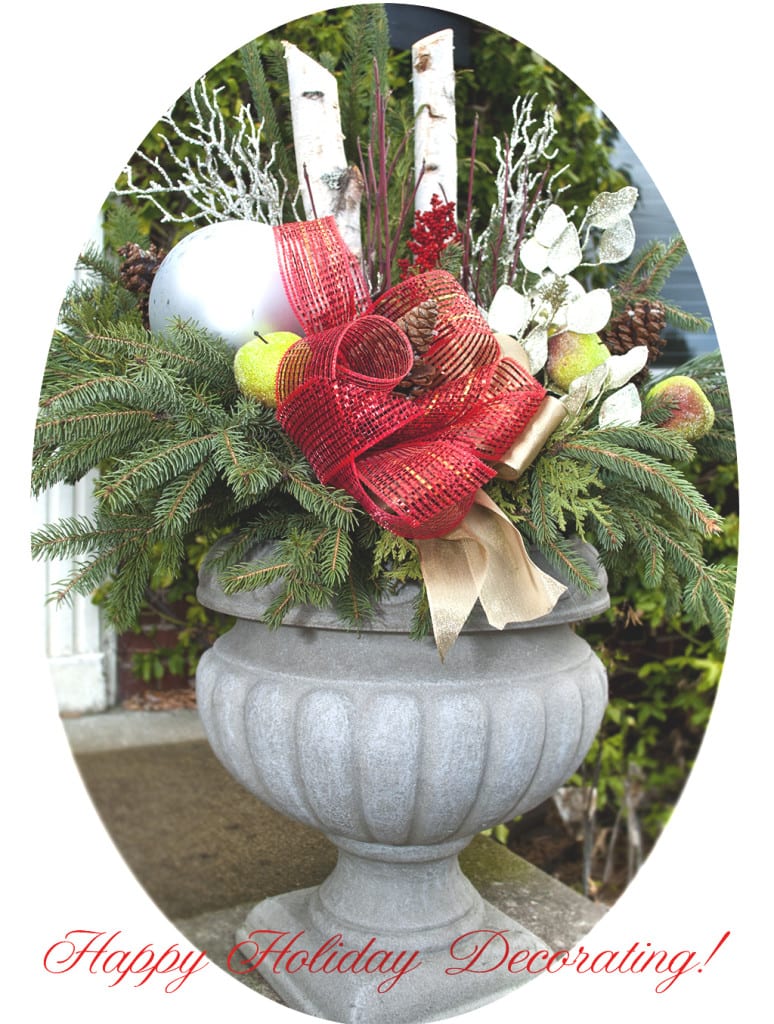
Here’s how I get the most bang for my buck and make a DIY Christmas Urn in 10 minutes or less!


Every year I shop at my local garden center and pick the plainest and most basic (aka the cheapest!) holiday planter I can find.
What I look for is nice greenery in a pot size that will fit my outdoor urns. In my case 12-13″ pots are perfect.
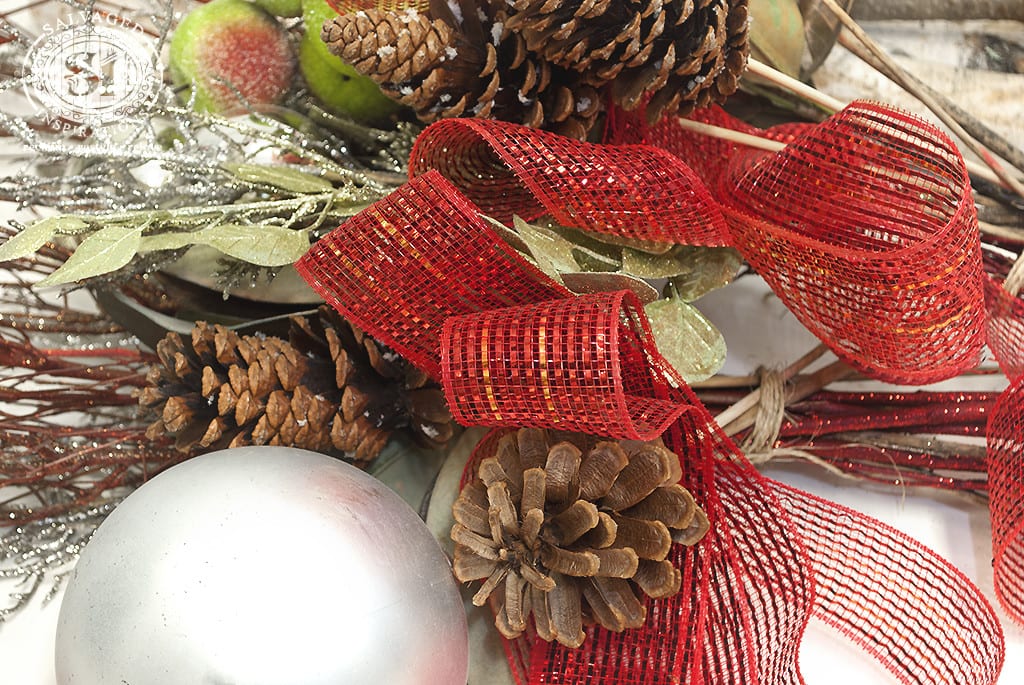
Here’s the basic Christmas Planter I bought today. Pine and evergreen with a simple gold bow, a berry pick and some red dogwood. Nothing special right?
I picked up a pair for $20 each.
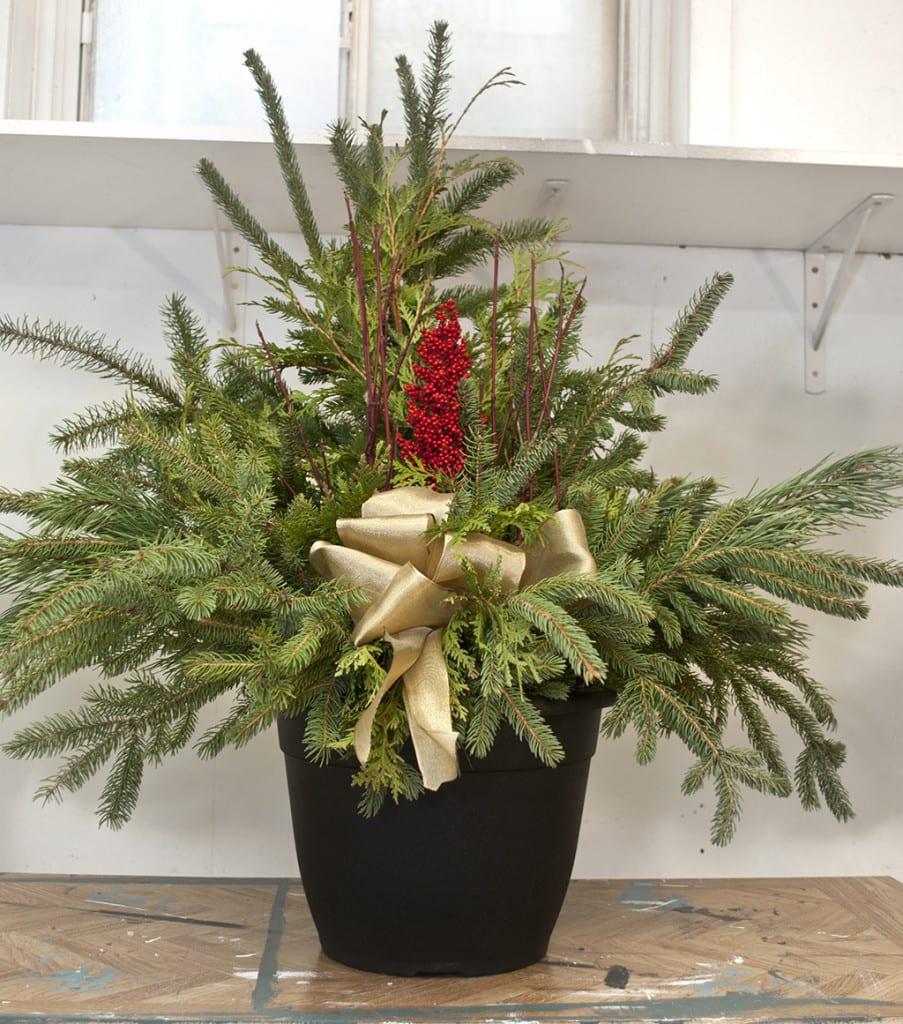
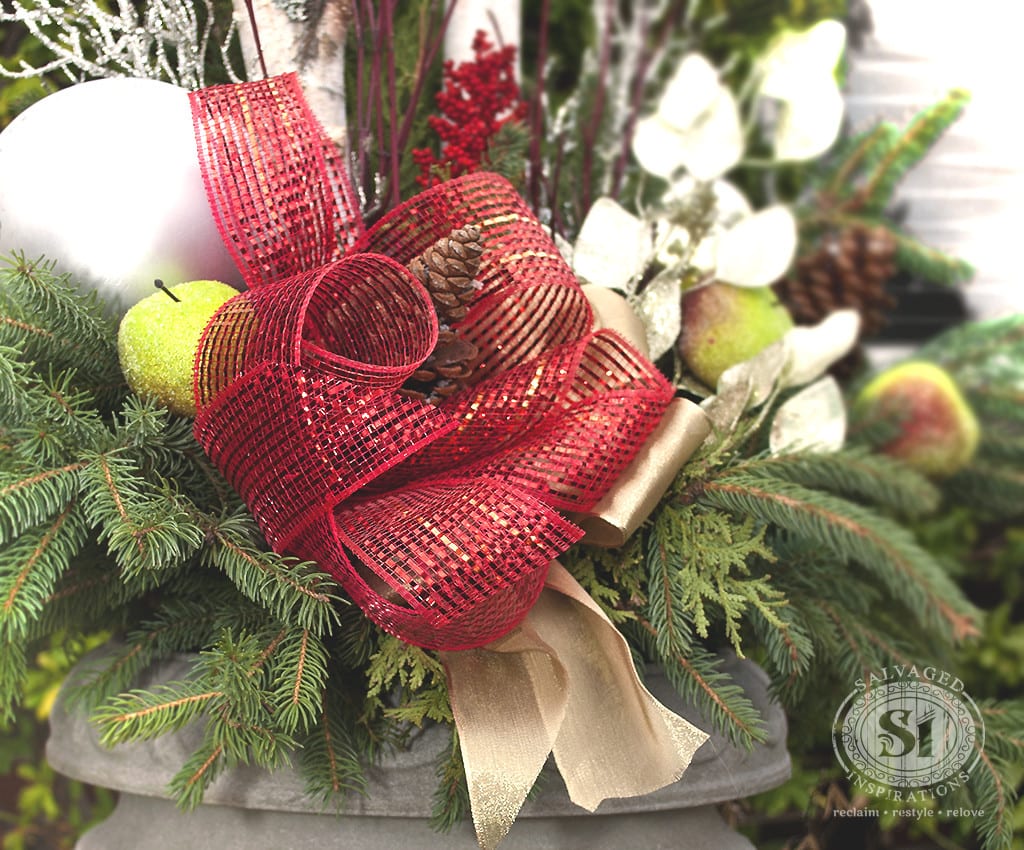
Now for the fun part. Dressing it up to make it your own!
My supplies for this planter are salvaged from last year’s urns. My motto – if any Christmas decorations make it through the harsh winter and still look good, they deserve to be saved and reused!
Supplies
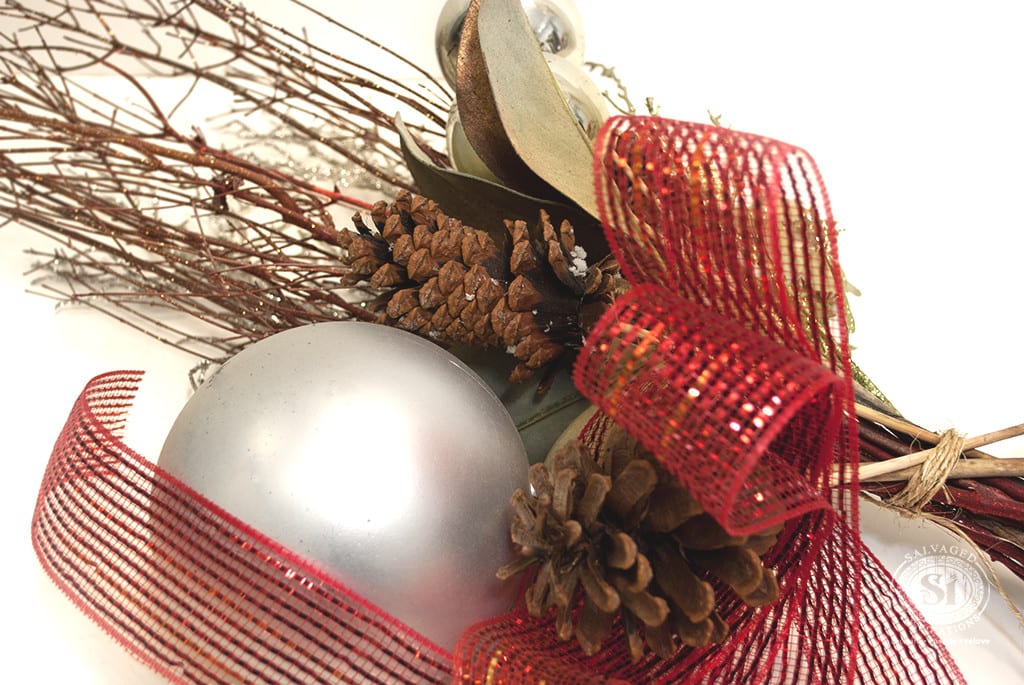
- Tall Sparkly Branches or Red Dogwood
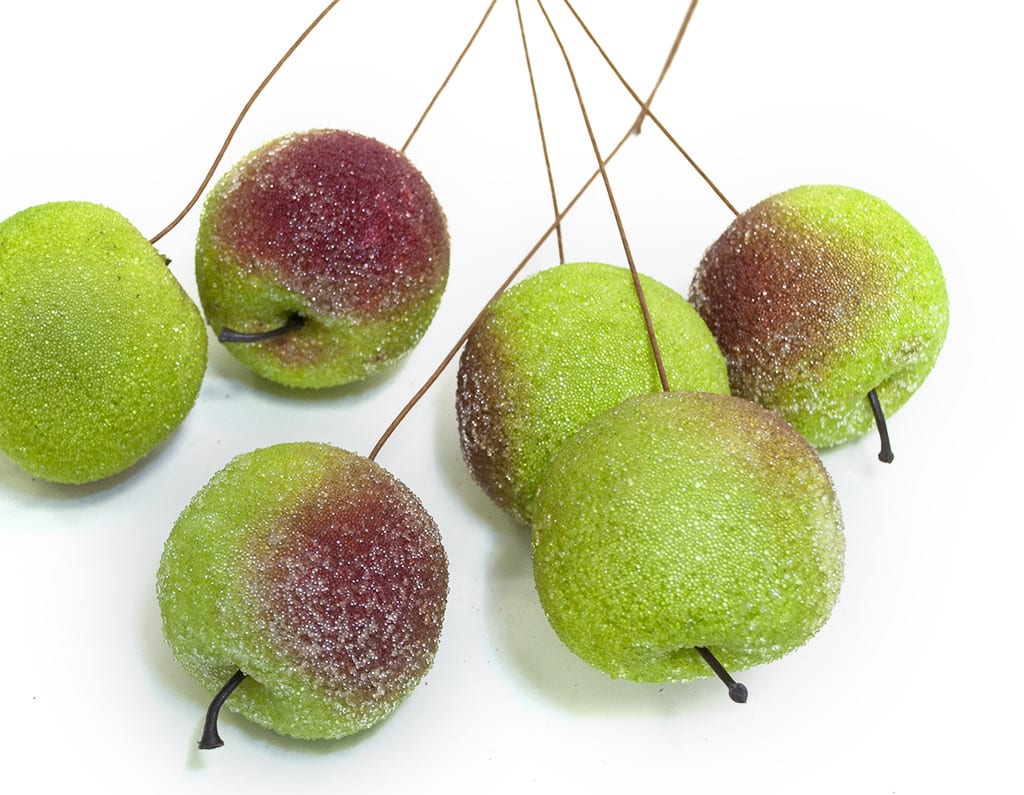
- Faux Berries or Fruit Picks
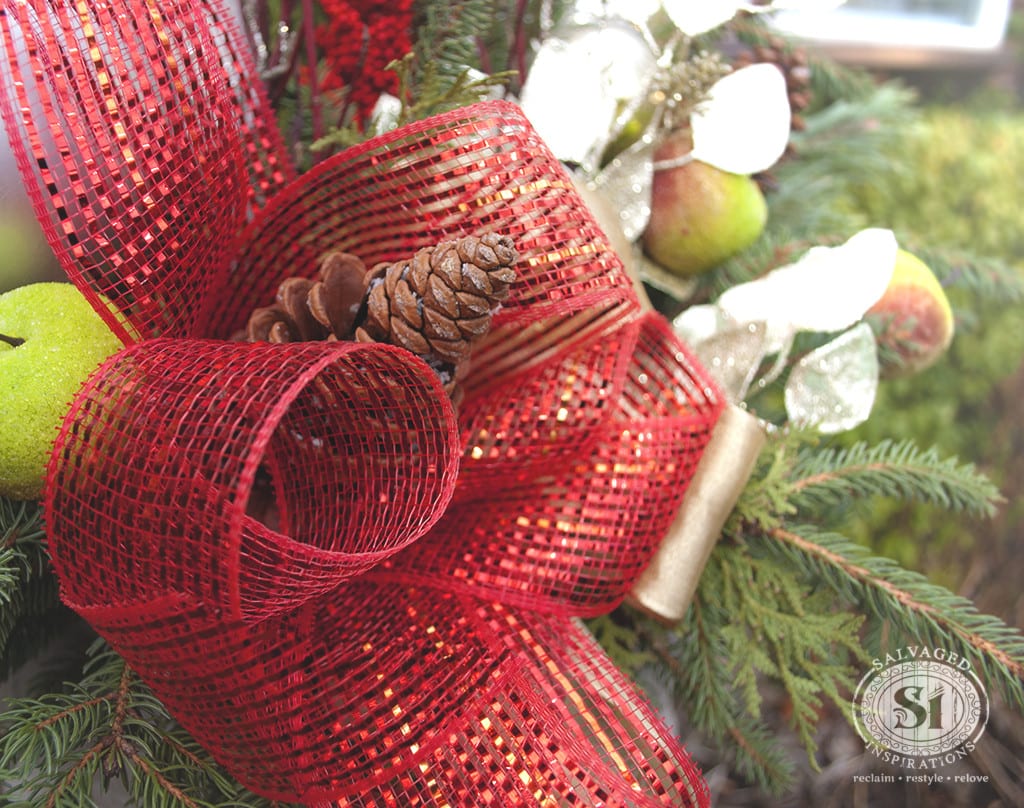
- Colorful Bow
- Large & Small Christmas Balls or Ornaments
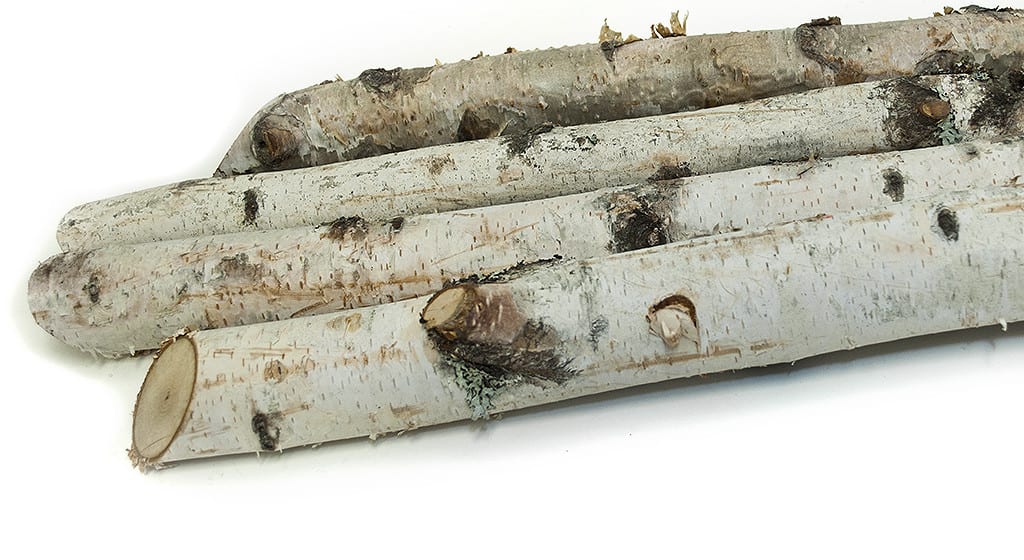
- Birch Logs
All the above supplies can be purchased at your local dollar store and/or favorite craft store. If your decorations make it through the winter, don’t forget to pack them away so you have more creative choices for next year!
Tips on Arranging
I like the floral designer’s tips for making attractive arrangements:
THRILLER – SPILLER – FILLER.
The THRILLER is the focal point in the center. The SPILLER is the greenery that spills over the sides. The FILLER is all the rest of the goodies and decor that fill out the basket. Here are a few more things that will add WOW factor to your arrangements.
- Texture
- Color
- Glitter
- Different Heights
- Design in a Triangular Shape

These tips are guidelines but remember there’s no right or wrong. If YOU find your Christmas planter visually pleasing… THAT’S what counts!
Cost Saving Tips
- Start with an Inexpensive Basic Planter
- Salvage & Reuse Ornaments and Filler From Prior Years
- Use the Same Urns for All Your Seasonal Arrangements
Time Saving Tips
- Keep all Christmas decor in one box and one location so there’s easy access when the season arrives.
- Use twine or string to tie all the filler together for next year.
- Arrange your holiday planter indoors so you stay warm. (Once my hands get cold it takes me double as long to do anything!)
Maintenance Tips
- Water thoroughly once – and then you can forget about it for the rest of the season! (This works in cold winter climates)
Salvaged Inspirations is about salvaging, re-using, re-purposing and re-loving in inspiring ways. I want to spread some holiday DIY inspiration because if you’re like me, you’ve probably been admiring all these amazing multi-talented bloggers with their perfect holiday crafts and home decor. This post is an example (to me) that not everything has to be 100% perfect for it to be fun, rewarding, and made from the heart!
So, if there’s something that gets your creative juices flowing; something that you can make unique and one-of-a-kind while having fun doing it… well… isn’t that what it’s all about?!
Thanks for dropping by today. I’ll be back this Thursday with my Furniture Fixer Upper Crew sharing all our 2024 FAVES!
What are some of your favorite DIY holiday decorating traditions? Do you re-purpose or re-use anything? I’d love for you to leave me a comment! 🙂
Have a fun day and Happy Decorating!
Denise x
_____________________________

Thank You For Sharing Denise 😊 LOOKS GREAT 👏🏼❗️G-d❤️Bless❗️
Thanks you Cheri and happy holidays to you!🤗🎁
Thriller, spiller and filler! I love this! I’ve been looking for ideas for my front porch urns that house ferns in the warmer months. Now that it’s cold, they are definitely getting revamped. Thanks for the inspiration. Merry Christmas and happy holidays. 🙂
If I had your ferns (which I LOVE btw!… for some reason I have no luck with ferns but they are one of my faves!!) I would stick some xmas pics and bows and call it day.😂 Your ferns are AWESOME! Happy holidays to you as well my friend. XOXO
Love,love,love——I use to do this every year, so much fun,I would pile the 4 kids in my VW van and travel the back country roads, finding downed evergreen branches ect..So much fun! pile them in the frontyard and work to make pot fillers, indoor decorations and sways [ 40] to give to family and friends. Thanks for the memories—
That sounds like so much fun and the best part – the entire family can enjoy the day and holiday decor!!
My grandmother, God rest her soul, saved everything and re-used over and over. I do the same now. Nice article, still readers in 2018!!
Thanks for sharing this Rae… love it!
How do you create a pick out of Christmas balls etc? This is my only hurdle. Please send me suggestions
Hi Kelly! I buy long wooden dowels from Home Depot or a Dollar Store, cut them to size and then glue them to the balls, faux greenery or whatever with a good epoxy glue. It takes some time to dry, but works way better than craft glue! Hope this helps and Merry Christmas to you! 🙂
Hahahaha, is so funny we have the same thoughts about Christmas decor. Re-using, re-purposing and re-loving. Im re-using most of mine past Christmas wreath from previous years and I’m re- loving them. And my last one for this year is a recycled glas vintage lights, re-using it in a wreath. You see it soon. I need to also complete my urn for the fireplace. Thanks for the inspiration!
Thanks Fabiola… and can’t wait to see your wreath! Happy Holidays to you and yours! x