Have you tried mixing milk paint powder and it didn’t turn out quite right? Let me fill you in on a little secret. You’re not the only one who gets inconsistent results! Whether it’s improperly mixed or the chippy effect turns out too-much or too-little, even ‘experienced’ milk painters don’t get it perfect 100% of the time!
Here’s a great email/question I received from a frustrated SI Reader:
“I’ve been searching and searching for some help on the milk paint! I just started to try out ….why can I not get it mixed right??? The clumps … Then when I am using I’ll get streaks of the pigment – is this all normal? I have read all the hints on mixing .. We’ll probably not all … What am I doing wrong? I’m thinking of maybe trying a sifter as putting in water? Using a blender just sounds like too much work – clean up – and that’s not sounding fun to me – Maybe it is suppose to do this- everyone’s painted stuff looks so nice – everywhere says unpredictable — all that is fine – the outcome but somewhere somehow something someone (me) is missing something.”
Because milk paint is a different animal – very different from the other pre-mixed paints we’re all familiar with, there’s a bit of a learning curve. Or maybe I should say, it takes a few times of mixing and painting before it starts to feel somewhat comfortable.
Then, when you think you have the hang of it, it can still surprise you or be slightly unpredictable! All part of it’s charm I guess. 🙂
Here’s a great example…
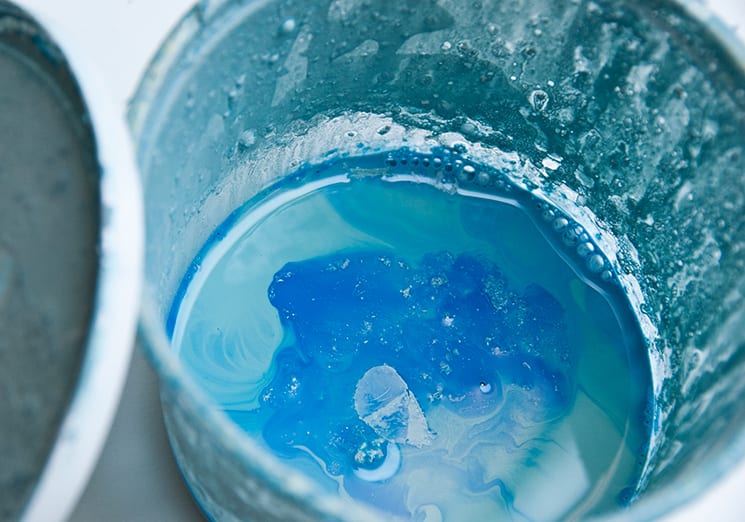
I’m working on this vintage dresser. I thought it would be restyled and posted for you to see today. Nope! Instead, I was rushing and my lumpy milk paint made a mess and left ugly splotches. To fix this – I have to sand, and then I’m going to strain my milk paint and add another few coats.
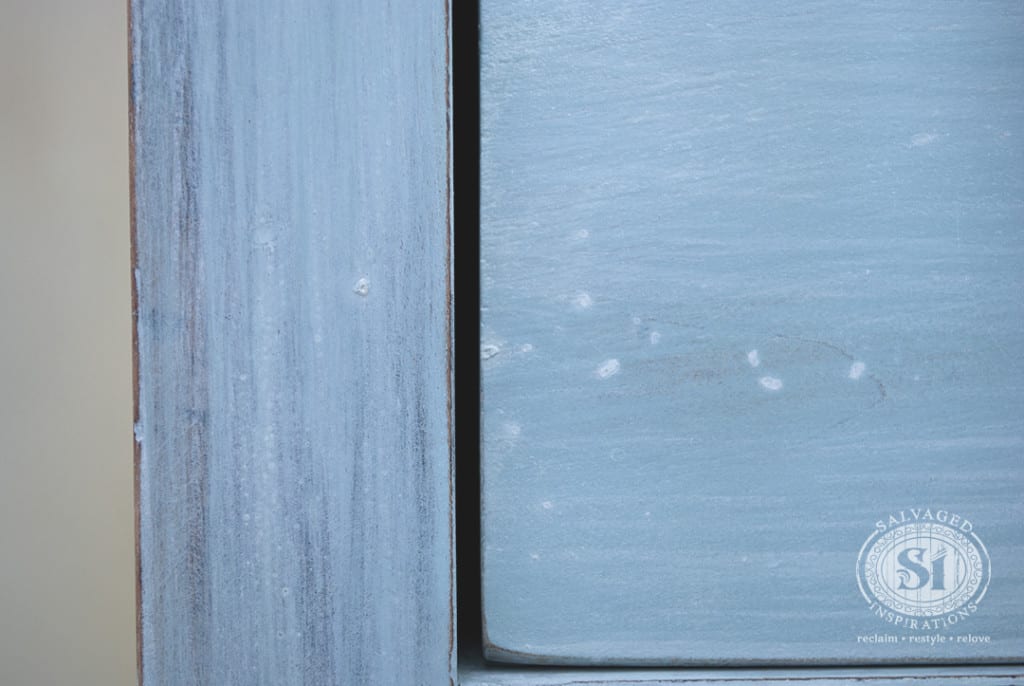
I’ve painted numerous pieces of furniture with a variety of milk paint brands but I don’t claim to be an expert. As you can see from my example – I’m far from it…lol.
However, I have picked up a few tips along the way. So here’s how I get the best results when mixing milk paint powder.
How to Mix Powdered Milk Paint:
Tip #1: Shake the Bag and/or Mix the Powder
I’ve never heard of any other milk painters doing this (and maybe it’s just a superstitious thing on my part), but I always mix the milk paint powder PRIOR to adding water.
In my mind, I believe it helps break up any lumps that have formed in the package and mixes all the pigments together. A sifter as the SI Reader suggested would also work nicely.
Tip #2: Mix As Much as You Need
Only mix as much as you need. I usually use 1/2 cup powder to 1/2 cup water for small to medium dresser. Below is showing a 1/3 cup used for this coffee table.
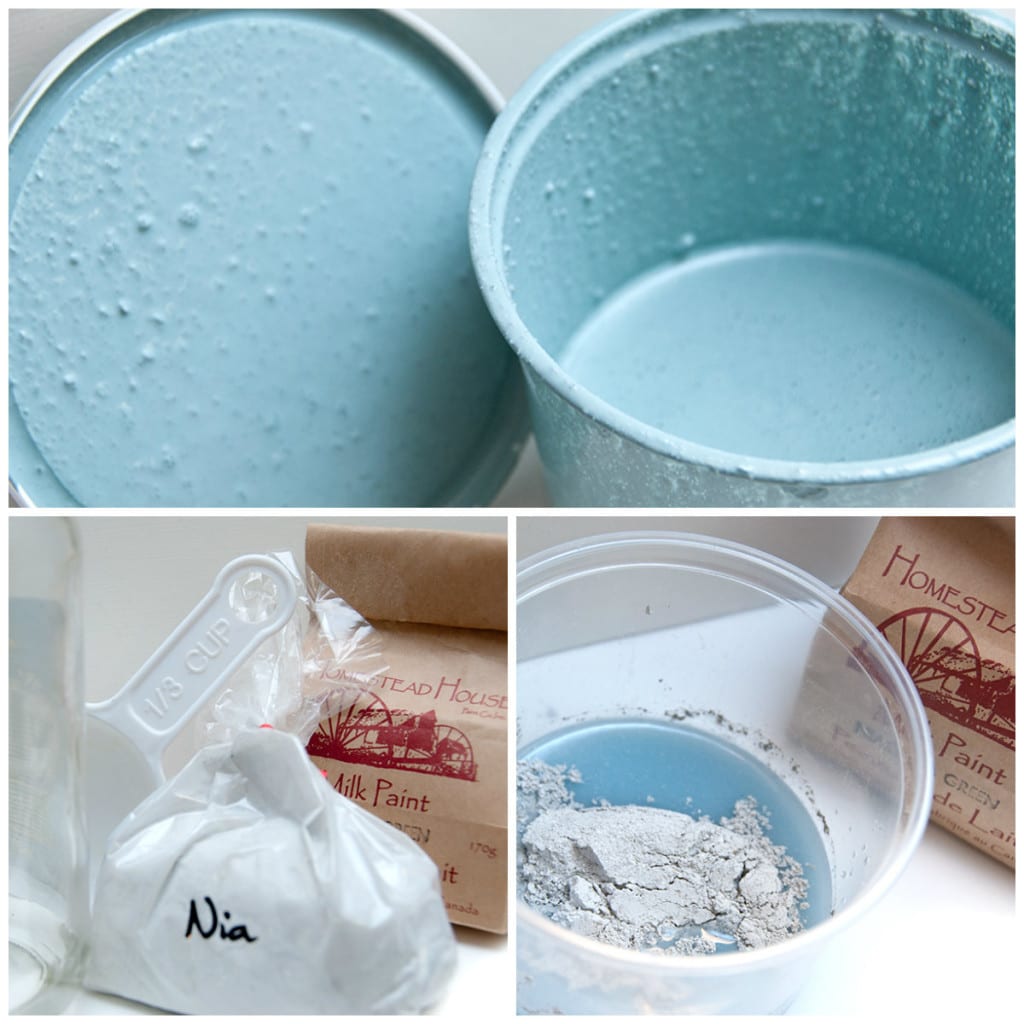
I only mix the amount needed for my first coat because once the powder is mixed with water, it will only keep for a few days.
It’s not as smooth or nice to work with once it’s been sitting for any period of time…even after re-mixing thoroughly.
This is what milk paint can look like after sitting for 24 hours.
Tip #3: Half & Half for Nice Consistency
For a nice consistency mix 1 part water and 1 part powder. As mentioned above, I usually start by measuring 1/2 cup milk paint powder to 1/2 cup warm water.
This can be adjusted. If you like your paint slightly thicker (add a little more powder). If you like your paint slightly thinner (add a little more water).
Tip #4: Mix & Settle
I stir consistently for at least 3-5 minutes working out all the lumps with a whisk and a stir stick.
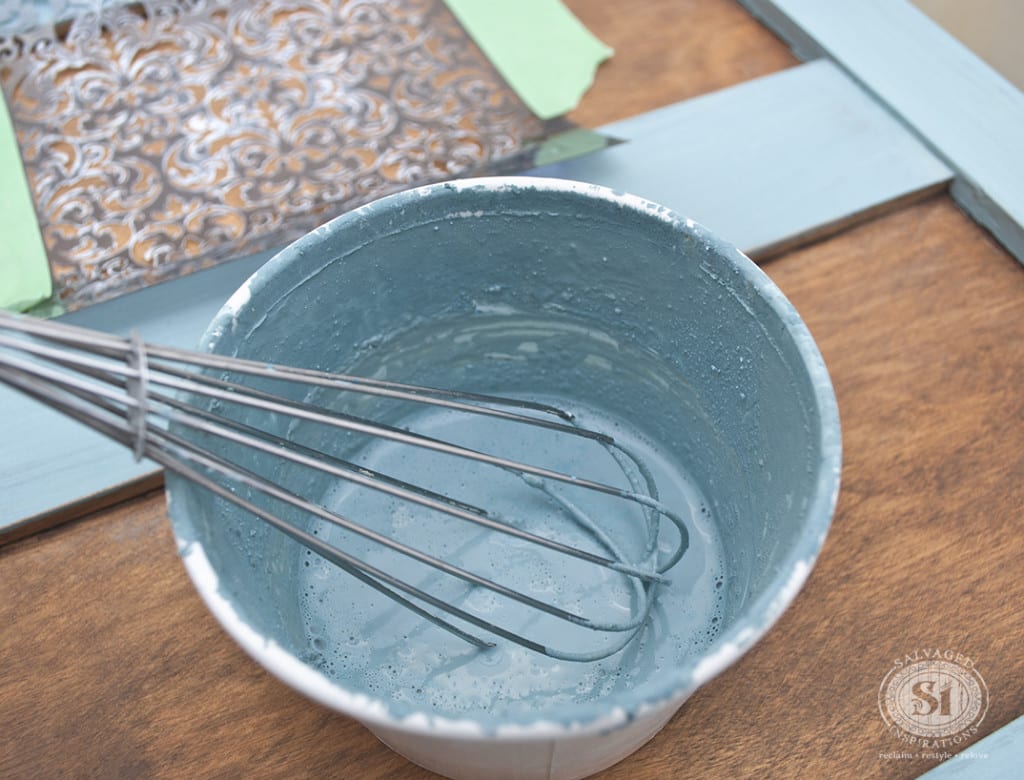
(I don’t use a blender! I find it gets way too frothy and then the paint doesn’t apply evenly because small bubbles show up!)
Once I’ve worked out all the lumps and bumps with my whisk/stir stick, I then let my milk paint sit and settle for 10-15 minutes. This allows for all the pigments to dissolve and blend together. Once dissolved, this will eliminate prominent streaky pigmentation showing up on your project.
(Note – milk paint has a natural variance in color which adds to its appeal but this should look subtle and natural – not harsh and streaky.)
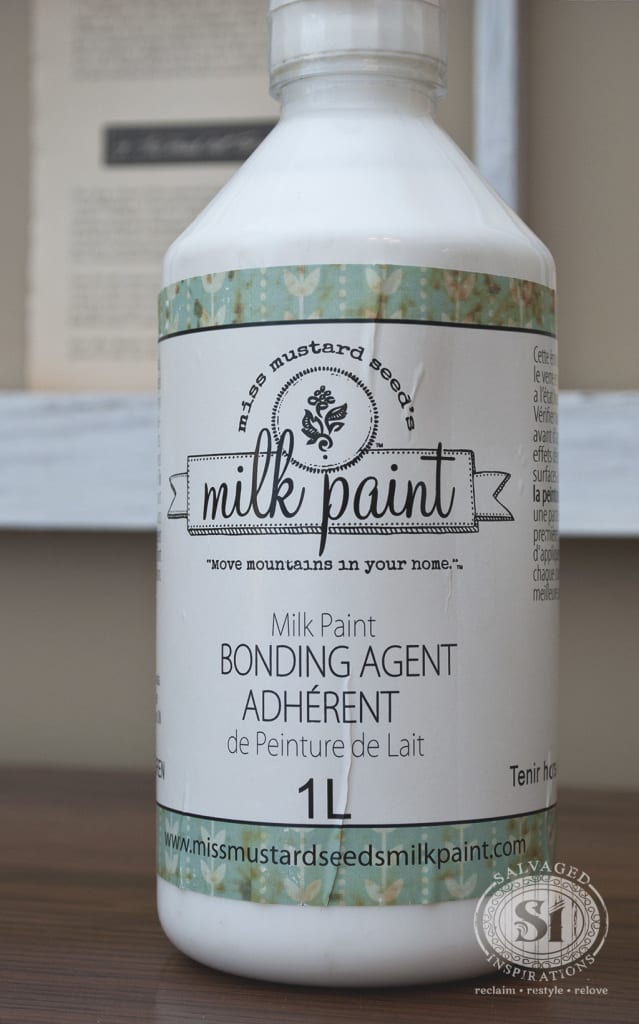
Tip #5: Add Bonding Agent
Once my milk paint is raring to go, if I need Bonding Agent, this is the time I add it in. Bonding agent acts like a primer and adheres the milk paint to the furniture’s surface with little to no chippy effect.
If a 1/2 cup of water was used, you can add up to a 1/2 cup of Bonding Agent or follow the directions on the bottle.
Tip #6: If all Else Fails….Strain
I’m not sure if any other milk painters do this but if all else fails, I strain my milk paint. A paint strainer will work nicely but I use dollar store pantyhose which I keep handy in my paint room.
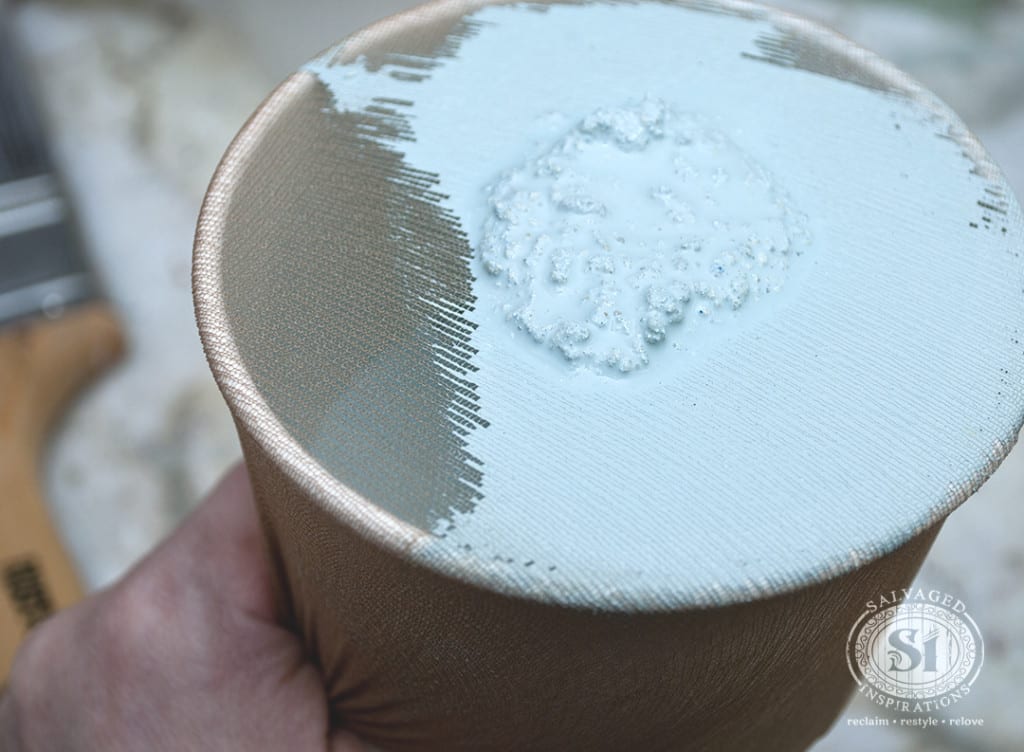
Once strained, every lump is removed for a smooth beautiful milk paint finish…guaranteed!
I’ll be sure to finish the vintage dresser up and share it with you on Monday.
Also, the winner of the Bluestone House $150 Giveaway has not yet claimed the prize! Penny, if you’re reading this, please contact me within 24 hours so we can send you your amazing paint package! 🙂
Did I mention YOUR favorite milk paint mixing tip? Feel free to leave a comment or question… I always love hearing from you – it makes my day! 🙂
Happy painting my friends!
Denise x
_____________________________
Like what you see? Subscribe to Salvaged Inspirations so you’ll never miss a post!
Follow along on Pinterest, Google+, and Facebook for more inspiration!

Just Found You!!! Am amazed and grateful for all of your Tricks and Tips, Research, Before’s and After’s Etc…Thank you for everything you do and share with us….!!!
Thanks for dropping by and leaving a comment. Hope to see you back again! 🙂
Try putting the water into the paint a little at a time, like mixing flour for baking. Mix in a little at a time, making a paste and then diluting it. Might be worth a try
YES Mary thanks for adding this! I’ve read other tutorials that advise adding the milk paint powder into the water is ideal – but I always add the water to the powder little by little and mix exactly like you do. Great tip… I should have included this one! 🙂
Hi Denise ! Thanks once again for such and informative post ! I love all the information you share and I always learn something new even though I consider myself experienced ! You’re the best !
Thank you Cynthia <3
Thank you Denise .For smooth homemade Milk Paint or Chalk Paint i cover the amount of lime or chalk i need with water 1 ” or 2 ” over for a day then pour the excess water out , I add the soaked pigments or color after .( Though i have added them first without real loss of color )
Very interesting! Are you making homemade milk paint Catherine?
Hello Denise ! I am e-mailing you some sites (in French ) I have not made or used one milk paint so i cannot speak of results but these are very good info and cost .
I will translate if you see something that catches your eye ,i will see about choosing one of the recipe that i can actually tell you what the ingredients do .Looking forward to be of help .
Catherine, I loved this email…thank you! Now I just have to find the time to try some of those old recipes!!!
Hi Denise, i love your blog because you call it how it is and don’t fluff things!?I totally agree with you with the points you outlined, i too always shake the bag and this has helped alot, As for the blender/ frother doodad, i stopped using it too and came to the conclusion that its a marketing strategy, and have stuck to a hand whisk and stir stick, purely based on what actually works. Love your work and your blog Denise, i always look forward to your posts.
Ya, I’m glad it’s not just me not getting good results when using a ‘blender/frother doodad! I also tried the ‘shake-it’ method (adding water & MP powder into a jar and shake) but that turned out bubbly and frothy too. I even let it sit for a few hours thinking if I just let the paint settle, that may help – it didn’t. So I’m with you Renee. Stir stick and/or hand whisk…perfect. 🙂
This is definitely a Pinworthy post! I’ve tried MMS Milk Paint a few times, but just can’t seem to get the hang of mixing it. I love the ‘using panty hose’ as a strainer tip! Thanks for sharing some great tips! ~ Robin
Thanks Robin! And if I haven’t said so before, I’m a big fan of your work. x
I would pass this through cheese cloth. Those clumps are annoying.
Sorry Just read this, I did send you an email today
Yaaay… and CONGRATULATIONS to you Penny! 🙂
Love your tips and your projects.
Very useful.
Thank you
Rose
Thank you Rose!
Great tips! Milk paint is indeed a fickle animal but it has so much character in it’s way, it is worth bothering with of you love that look or your piece tells you, that is what it wants 🙂
I will admit I used to use it sparingly because of the effort & cost when it messes up, but that happens less & less AND because you unselfishly share comprehensive tips like this, I hope other painters feel more confident to forge ahead because this gives them a head start 🙂
Yes, a fickle animal it is.I do love the finish when it all comes together though. Now I’m going to slip on that designer dress and head out. {wink-wink}
I haven’t tried this milk paint yet. Can you buy it online? I am still on the chalk paint and having great success with it. I use your #1 recipe and I found when I mix it with Valspar 2000 Home Rental Commercial I get the BEST paint ever. It is so smooth and beautiful and not too chalky feeling like some of the others. Looks really pretty. Thanks for all your tips!
Hi Lianna!! Yes, you can buy any brand of milk paint online. And I’m so happy you’ve found a DIY Chalk Paint Recipe that’s giving stellar results!
Thanks for this Denise, will keep for that day in the future when I mature and actually decide to take the plunge! Don’t you just love the pantyhose trick?? I ask my female relatives to give me their old ones instead of tossing them.
Yes, the pantyhose trick works wonders! And if you ever decide to try milk paint, I’d love to hear your thoughts and see how your first piece turns out Tracy!