
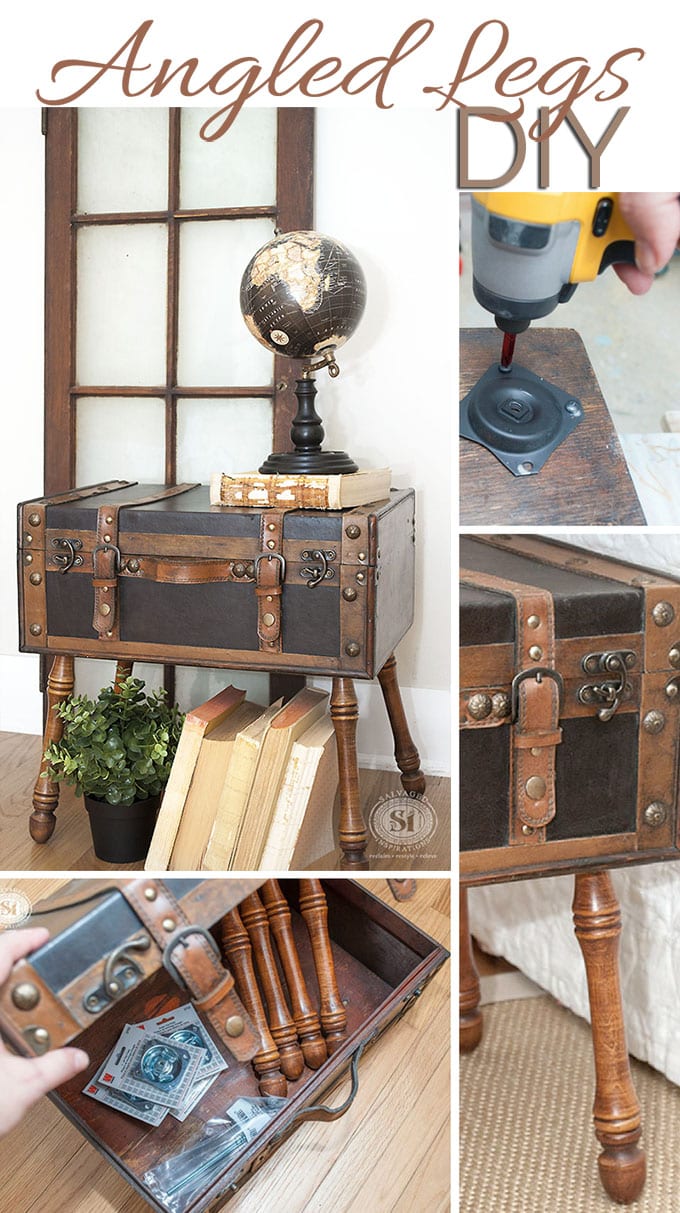
Painting and restyling furniture is fun, but sometimes it’s refreshing to do a quick and easy project. Fast results can make you feel like a super star – right! 🙂 So, today’s project doesn’t involve paint, but it’s worth sharing how easy it is to install angled furniture legs onto any of your projects!
If you’re a fan of Mid-Century-Modern (MCM) furniture, you’re probably very familiar with angled legs. It’s one of the signature features of the MCM style.
Having furniture legs protrude on an angle can add visual interest to ANY traditional or vintage piece! And the nice part is, with the inexpensive hardware available at any Home Depot or Lowes, angled legs are just as easy to install as traditional legs or feet.
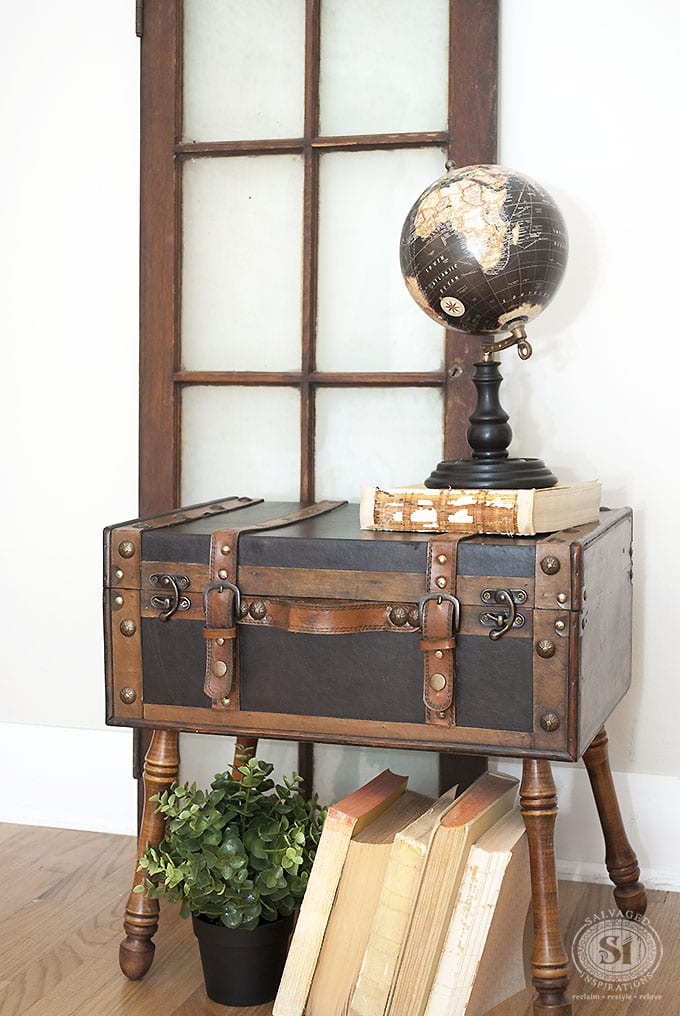
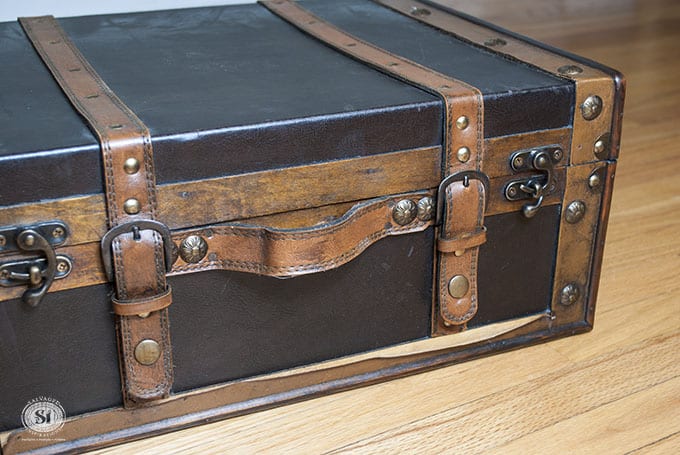
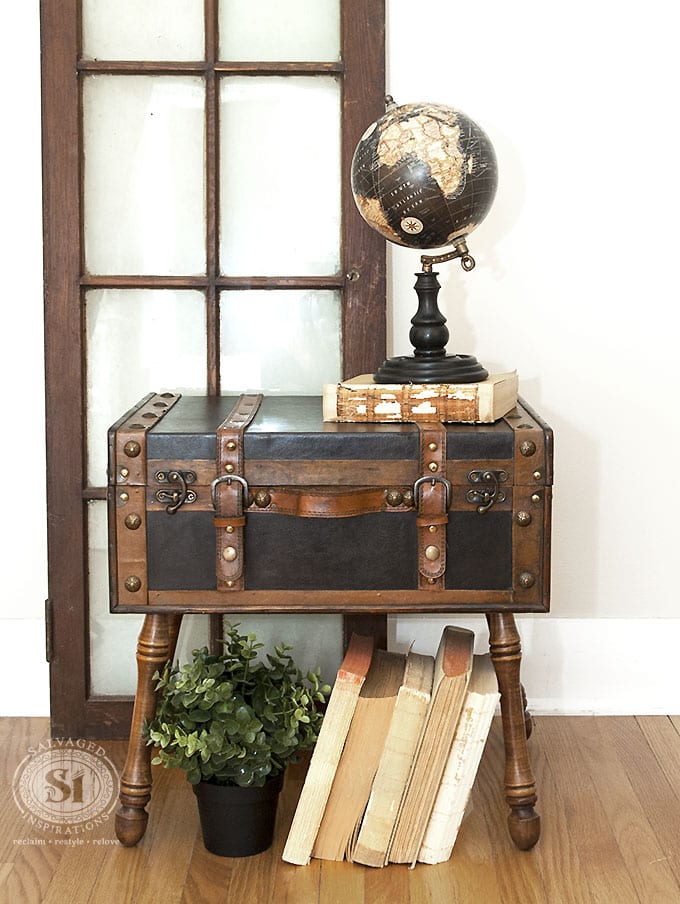
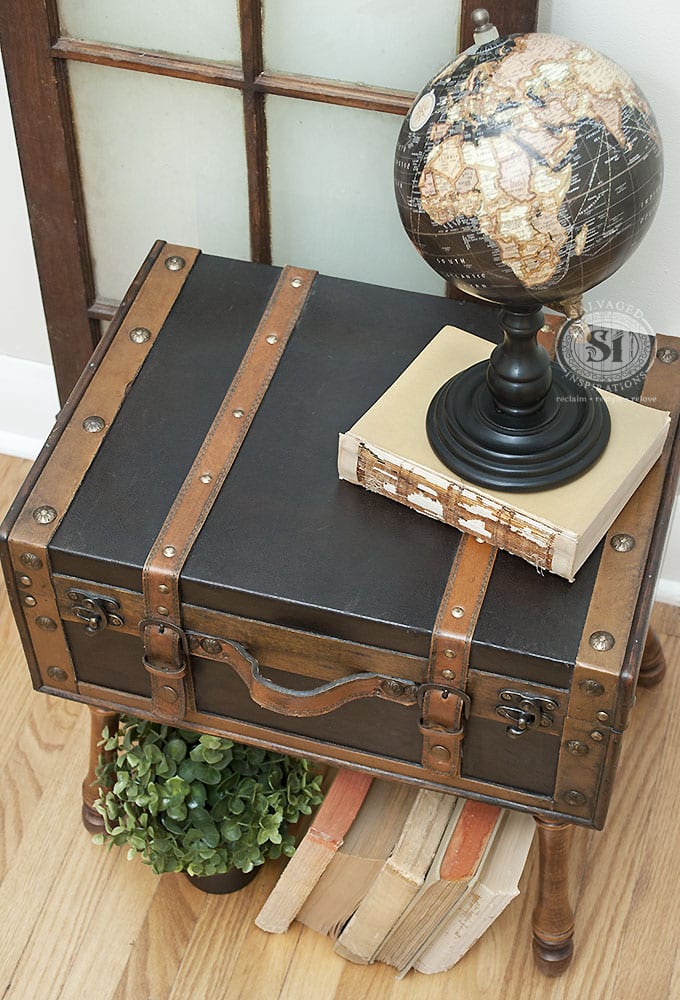
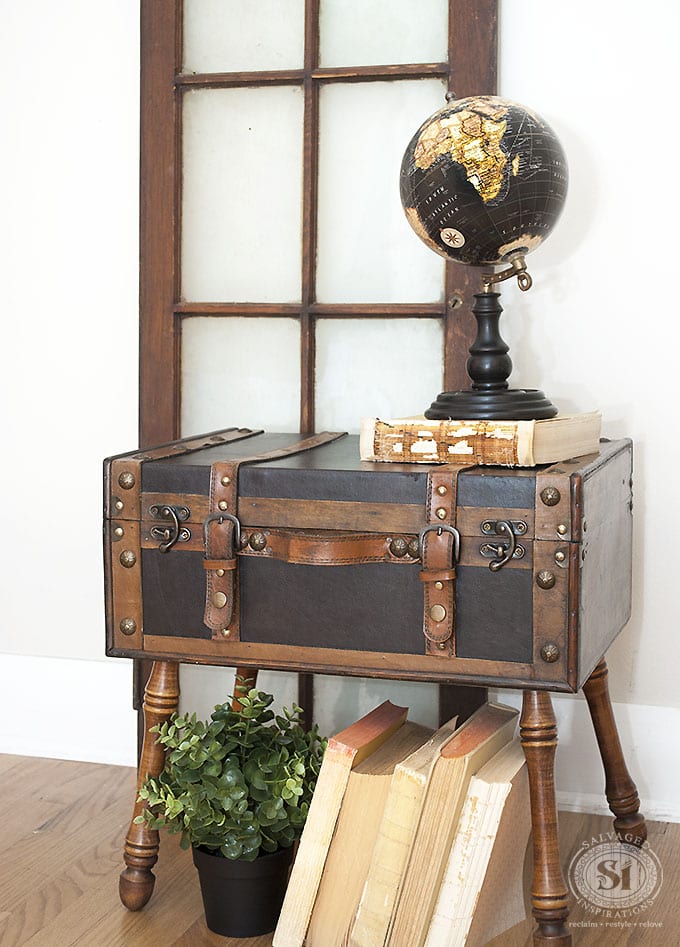
A little back story on this piece. My sister Andrea brought me this salvaged trunk along with some orphaned legs and asked me to ‘fix-it-up’. She had curb-shopped it while we were on route to Whole Foods a few years back. It’s been hiding in her basement collecting dust ever since. Her original thought was a cat bed. The trunk needed a thorough cleaning and some of the leather needed gluing down. Other than that, this charmer was in perfect condition.

Supplies:
(Affiliate links are provided below for convenience. For more information, see my full disclosure here.)
- Trunk/Furniture
- Legs with bold/screws
- Angled Plate Top
- Measuring Tape or Ruler
- Screw Driver or Drill
- Black Paint (optional)
How To Install Angled Furniture Legs:
1. First, make sure the bottom of your piece is stable enough to hold the legs. If you’re working with a piece of furniture, this shouldn’t be an issue. But in the case of this trunk, it’s a replicated vintage piece made in China. It has a very thin bottom. To reinforce the bottom and make it strong, I cut a piece of hardwood, painted it black to match, and attached it with wood glue. I finished with screws for a secure anchor.
2. I spray painted the angled plates black so they blend in with the bottom of the trunk. Since they aren’t visible, this was optional. On furniture, spray painting the angled plates is probably not necessary.
3. Test and measure where you want to install the legs. The trick to installing these Waddell Angled Plates is to have the slant or angled part of the plate facing the INSIDE of your piece. Otherwise, your legs will be slanted inwards in the wrong direction!
4. Attach the Angle Top Plate with the screws provided.
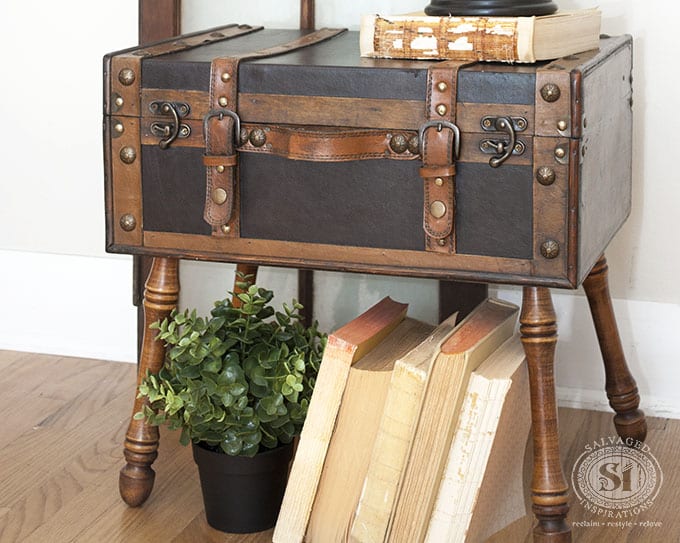
5. Screw the legs into the installed Angle Top Plate and enjoy your handy work!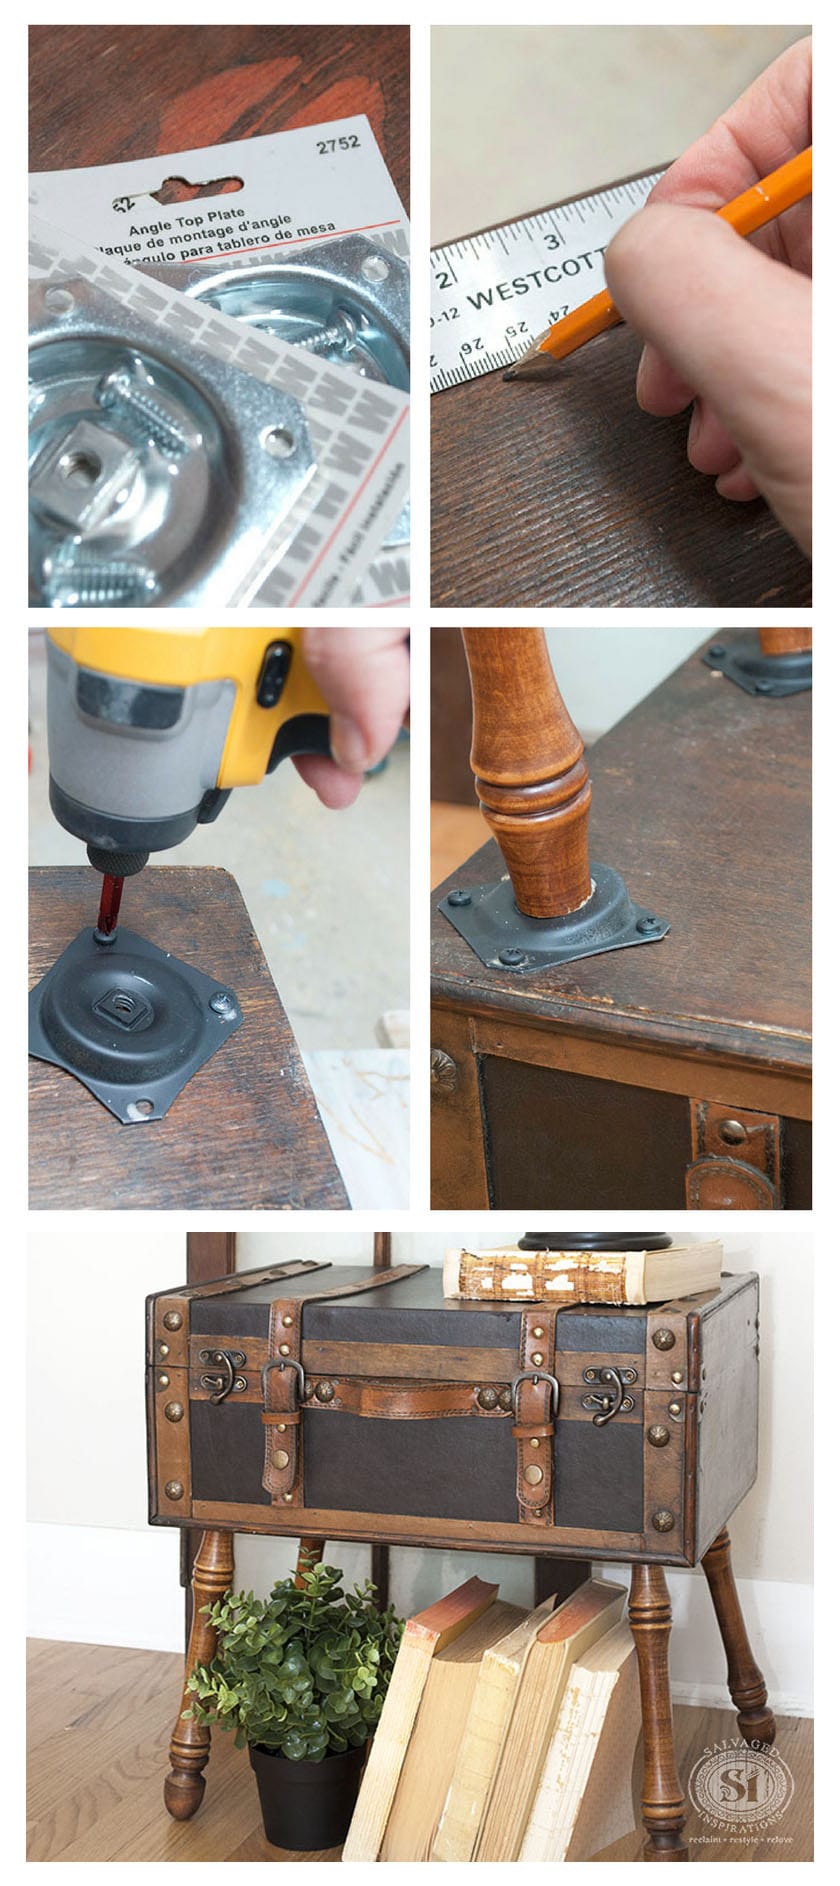 I love the way this little trunk turned out. It has real character and is strong enough to hold a good amount of weight… including a cat if that’s what my sister decides to do. It could also be used as a liquor cart, an end table, a mini library, or just for decoration and storage. However Andrea uses it, this cute little trunk will bring eclectic charm to any room. I wish this leggy cutie was mine because it looks great in my living room! 🙂

I hope all of you had an amazing Labour Day weekend. Many of you will be busy this week getting the kids back to school. For those of you SI Readers who are local to the GTA, I’m working on an exciting giveaway for you. Be sure to follow on Facebook and check back next week for details.
Feel free to pin this project! If you have any questions, ask away. 🙂
What do you think of furniture with angled legs? Do you like the look…or not so much? I always love hearing from you so chime in with your thoughts!
Have a great day!
Denise x
_____________________________
LIKE WHAT YOU SEE? SUBSCRIBE TO SALVAGED INSPIRATIONS SO YOU’LL NEVER MISS A POST!
FOLLOW ALONG ON PINTEREST, GOOGLE+, AND FACEBOOK FOR MORE INSPIRATION!

Hi Denise. It’s your sister Andrea here. Just wanted to say thanks again for re-styling my trunk. I love it. Sooooo cute. It’s getting a lot of use and looks great in my house. And for your readers information…I DID get my trunk back. Teehee;)
I know where you live and have a key!!! …Teeheeheehee 😉
Nice idea. Perfect for an antique collection. Great job 😉
Thanks Joel! 🙂
G’Day Denise!
I’ve just come across your awesome page and just had to tell you that I am so totally inspired!!! … I now have soooo many colour, painting techniques, furniture dressing, restyling, refurby’s, reclaiming and reviving idea’s racing around in my head, that I’m totally exhausted!! So now I’ve made a cuppa and going to explore the rest of your page and soak it all in! Lol
Your little trunk with angled legs caught my attention as I’m just about to start work on 2 old Vintage Suit Cases being recycled and made into Funky Retro Coffee Tables / Side Tables. Its my first crack at it .. so fingers crossed they’ll look amazing!
Thanks for your inspiration Denise! Keep Smiling and Stay Spunky!
Hi Nikky! We sound like kindred spirits. 😉 Sometimes my head reels with all the projects floating around up there…lol! Welcome to the SI Blog and have fun with your projects! 🙂
Ooooohhhh! How adorable is this little trunk:) I’m always impressed by your projects Denise, both big and small. I think this may be too fancy for a cat bed. Your sister is lucky you didn’t keep this trunk for yourself. lol
Thanks Monique… and I haven’t given it back just yet. As I write this…it’s still in MY living room…lol.
Denise, this is such a fun idea turned into a wonderful and practical piece! Absolutely precious. Thanks for sharing!
-Beth
Thanks Beth! 🙂
Love this! Quick, easy and very functional!! Pretty to look at and extra storage space as a bonus!
Thanks Rosanne! My sister is really pleased so that makes me happy. But now that I see how stink’n cute these trunks can be, I think I want one for myself. 😉
Love this idea!
Thanks Julie. The legs were my sisters idea, putting them on an angle was mine. It was a joint effort. 🙂
Hi Denise, I love what you did with this trunk <3 The angled legs give it style and interest! I think if they were anything but angled it would just look to 'square'.
Exactly Annie! When I went to install them straight up and down, it just didn’t look right at all… way to leggy and square!
That is a YUMMY re-do. Wish it were mine!! Just beautiful.
“Wish it were mine” makes me smile Linda. My sister’s niece is 4 years old. Whenever she sees something she likes, she says “THAT should be MINE!” Now it’s our ongoing joke and we blurt it out whenever we like something.