HOW I PAINTED THIS TRASHED VINTAGE CHAIR WITH *TEXTURED* FABRIC| YOUTUBE VIDEO
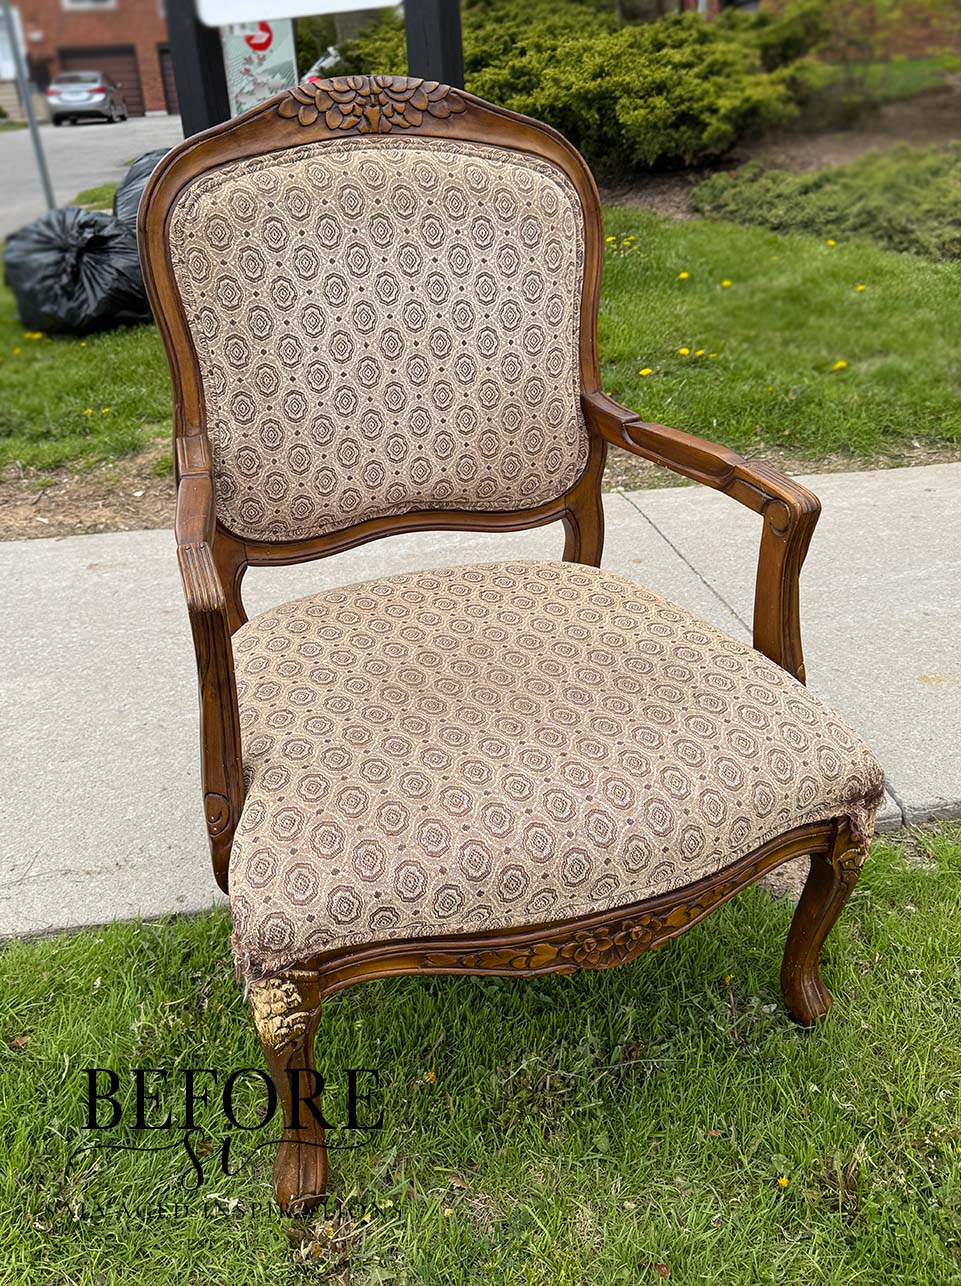
Today I’m sharing a build-MY-confidence project. When I found this vintage chair curbside, I almost didn’t pick it up. If you’ve ever tried painting textured fabric, you know it can go wrong fast. The last time I attempted it, the finish turned out horrible – all stiff and cracked—not exactly the look I was going for. But his vintage cutie was headed straight for the landfill—tired, worn, and covered in dated textured upholstery fabric—but still solid and with some potential. The bones were good, the shape was there… it just needed a second chance. So I decided to try a painted texture fabric chair makeover instead of reupholstering.
I gave it another try… and what happened next might surprise you. I can’t wait to hear what you think of this chair’s new painted look.
*As an Amazon Associate, I earn from qualifying purchases. There are affiliate links in this post to other companies/products I use and love as well. You will never be charged extra when you purchase through these affiliate links. If you purchase from my links – A BIG thank you for supporting me and the #siblog! To see my full disclaimer, click here.
This chair had definitely seen better days. The fabric felt dated, that old-school textured upholstery fabric that feels raised, uneven, and nubby. But underneath all that, it had a really great frame. No matter how bad the fabric is, if the structure is solid, it might be worth saving. And hey, I’m a softie for these curbshopped pieces. hehe
When I brought them down to my studio, it was time for a better look. The corners looked chewed up and tattered. It needed a cleaning.
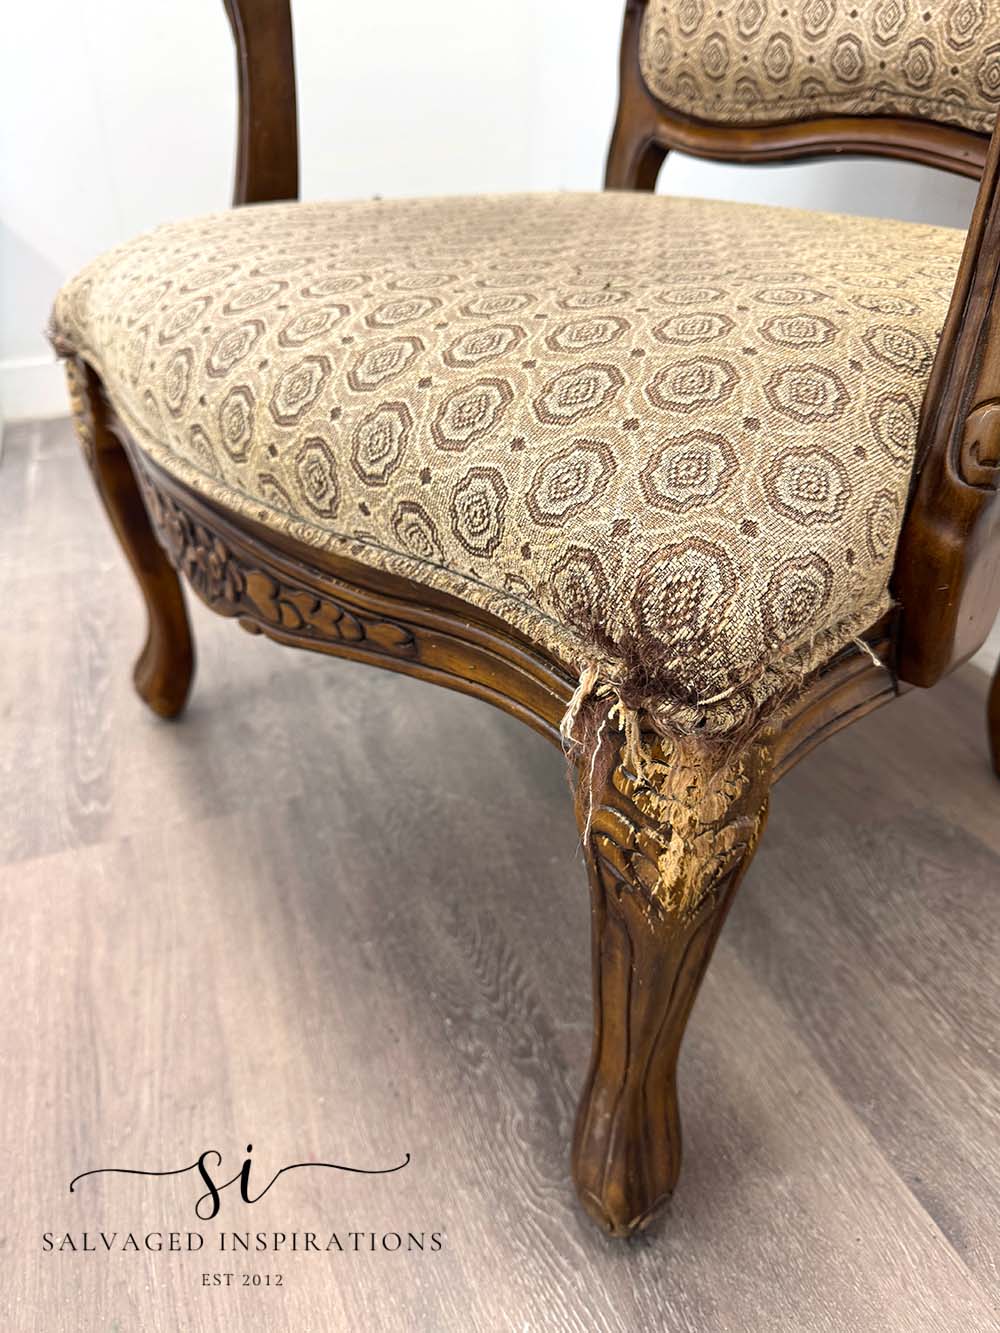
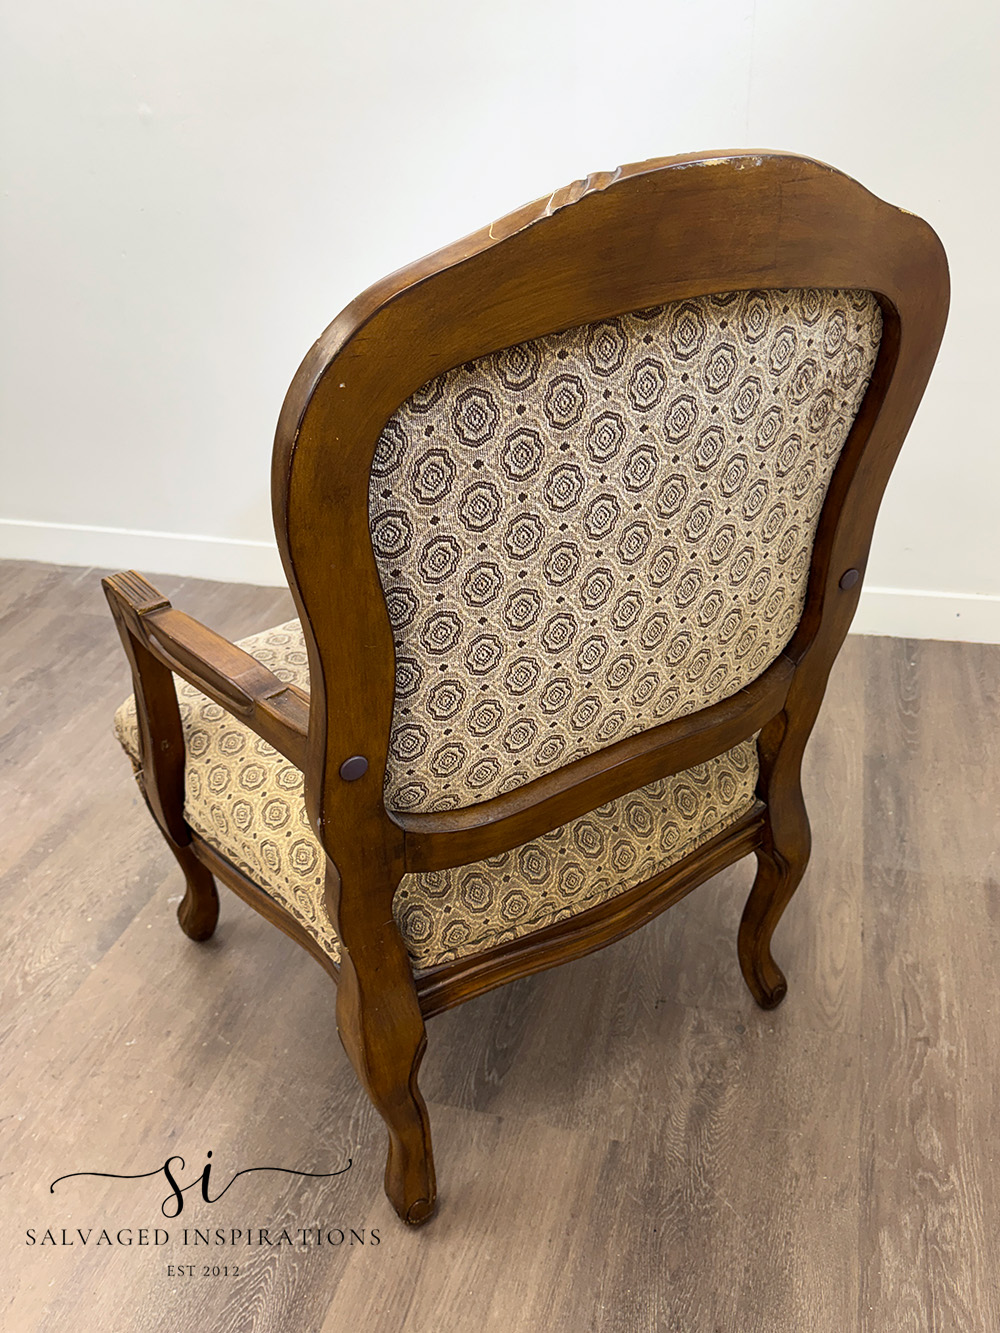
But strucutally, it was still in good shape.
THIS POST IS SPONSORED/CONTAINS AFFILIATE LINKS TO PRODUCTS I USE. YOU CAN SEE MY FULL DISCLOSURE HERE.
WHAT YOU’LL NEED
Vintage Chair – SALVAGED
White Lightning Cleaner
Cleaning Brush
Best Dang Brush easy upholstery painting
2″ Angled Paint Brush for painting frame
Black Sands SILK Mineral Paint
Whitecap SILK Mineral Paint
Black Wax protection/sealing
Shop Vac
Heat Gun (25% off as of writing)
WORKING WITH TEXTURED UPHOLSTERY (What You Need to Know)
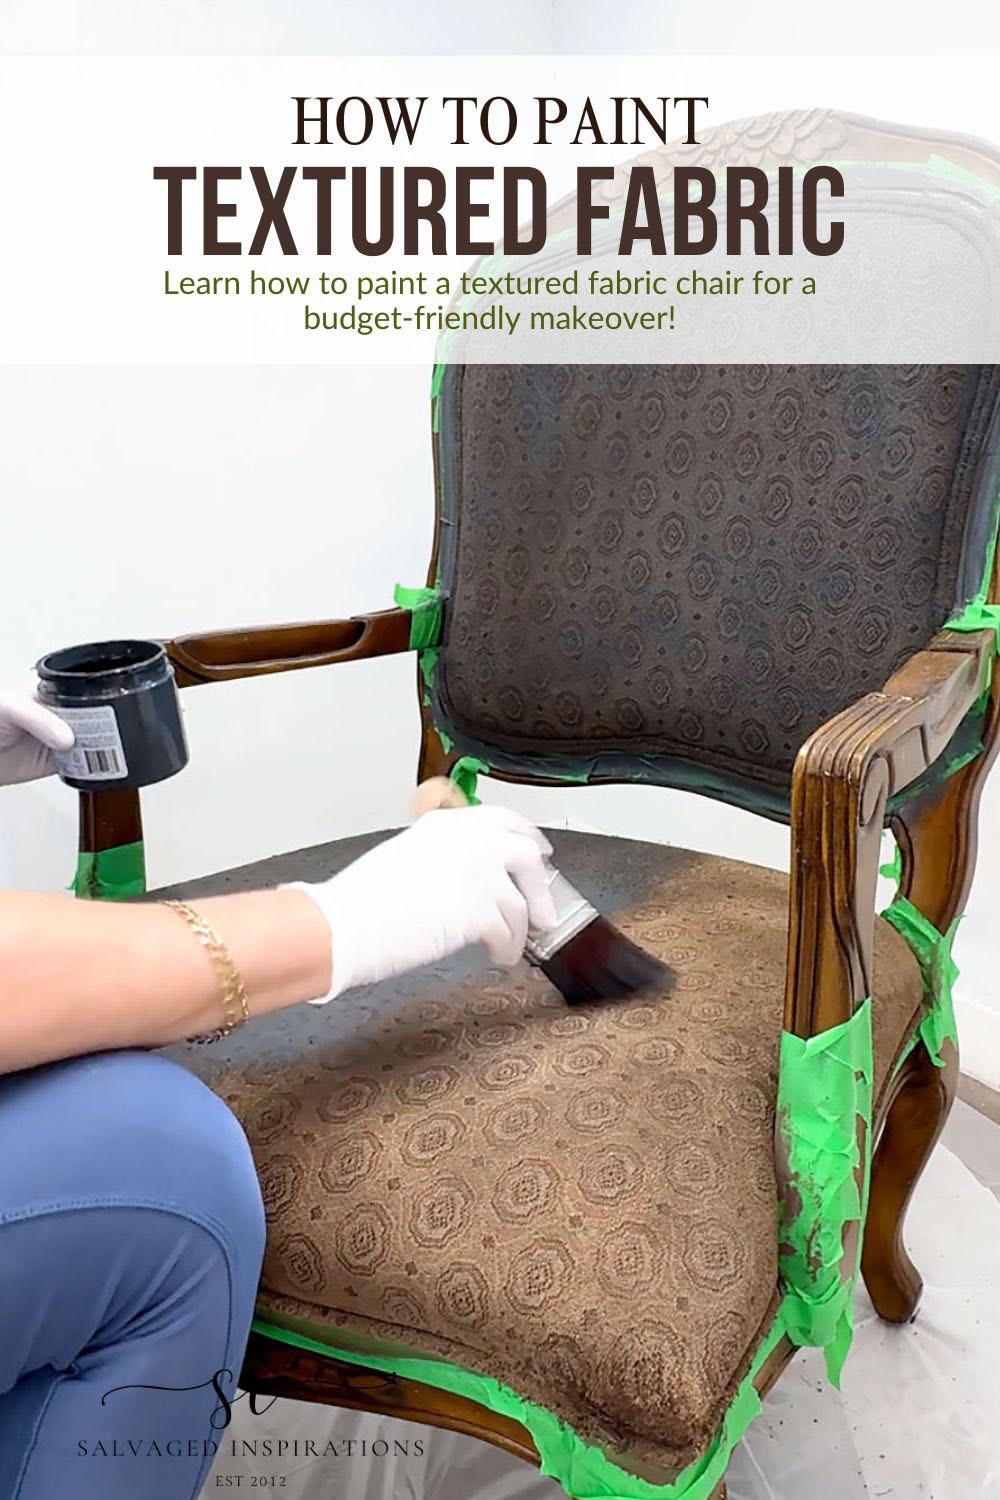
If you’ve got a chair like this, textured fabric behaves very differently than smooth upholstery. The raised areas tend to grab paint first, while the lower areas can stay untouched if you’re not careful. So instead of brushing like you would on a flat surface, you have to work it in. Tip – a good brush is key! You’ll be wetting the paint to make it more like a dye rather than a thick paint. And to work the paint/dye into the fabric, dabbing, pushing, and layering is the best way to go.
Also, texture can make fabric feel stiffer once painted if you overload it. So the key is:
- Thin coats
- Patience
- And building color slowly
Multiple light coats (usually 2–4) give you better coverage without turning your chair into cardboard.
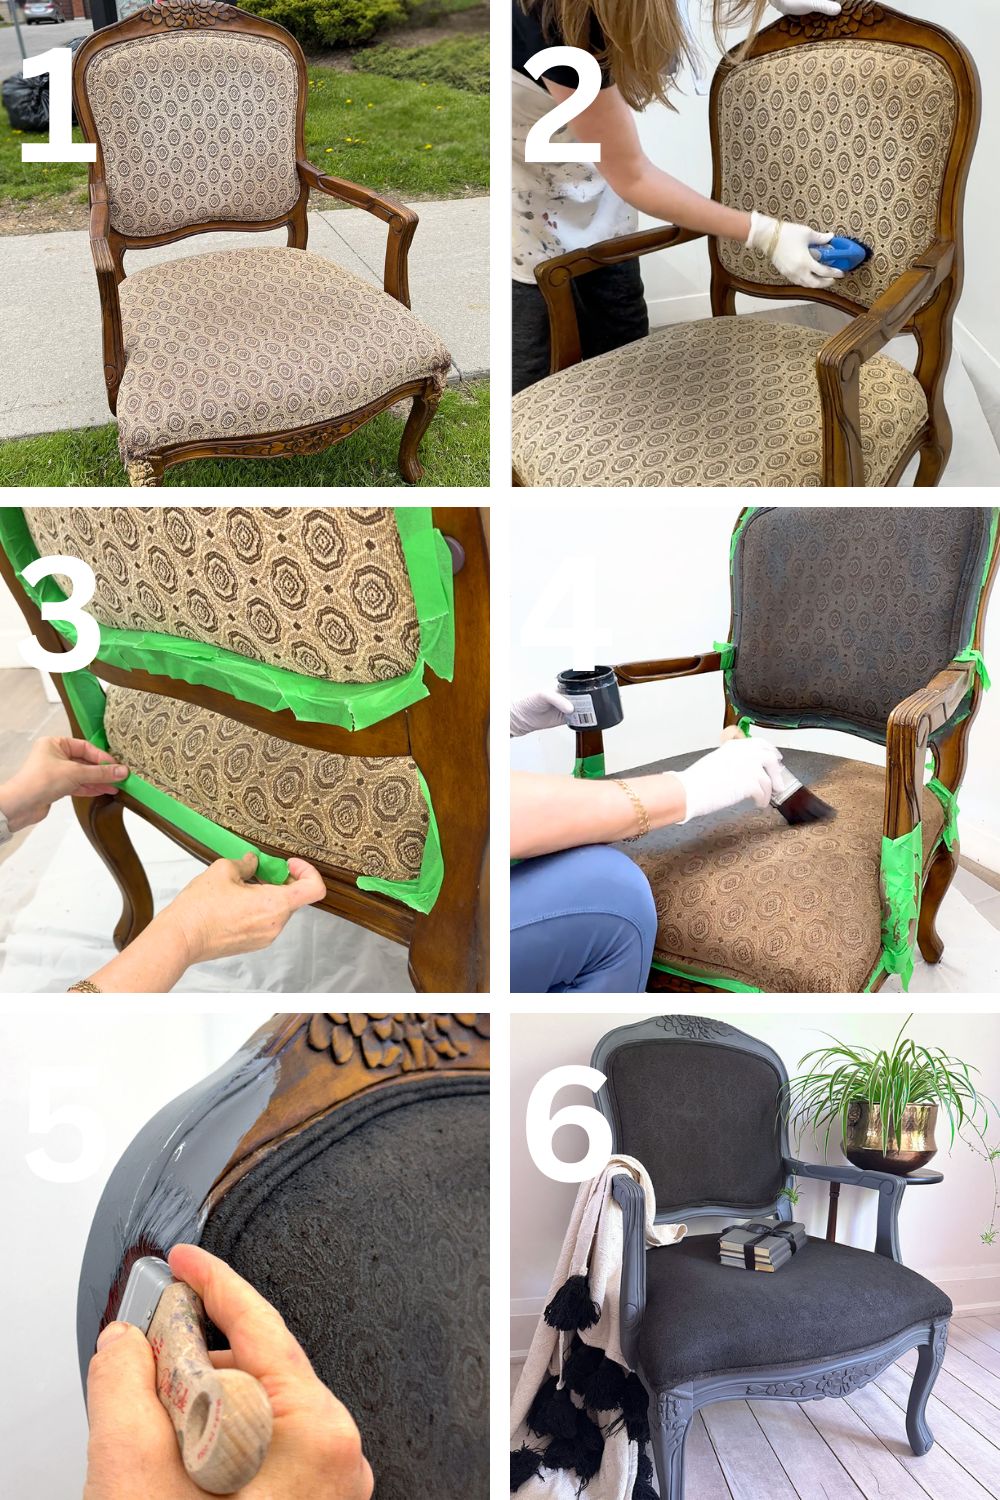
CLEANING/PREP
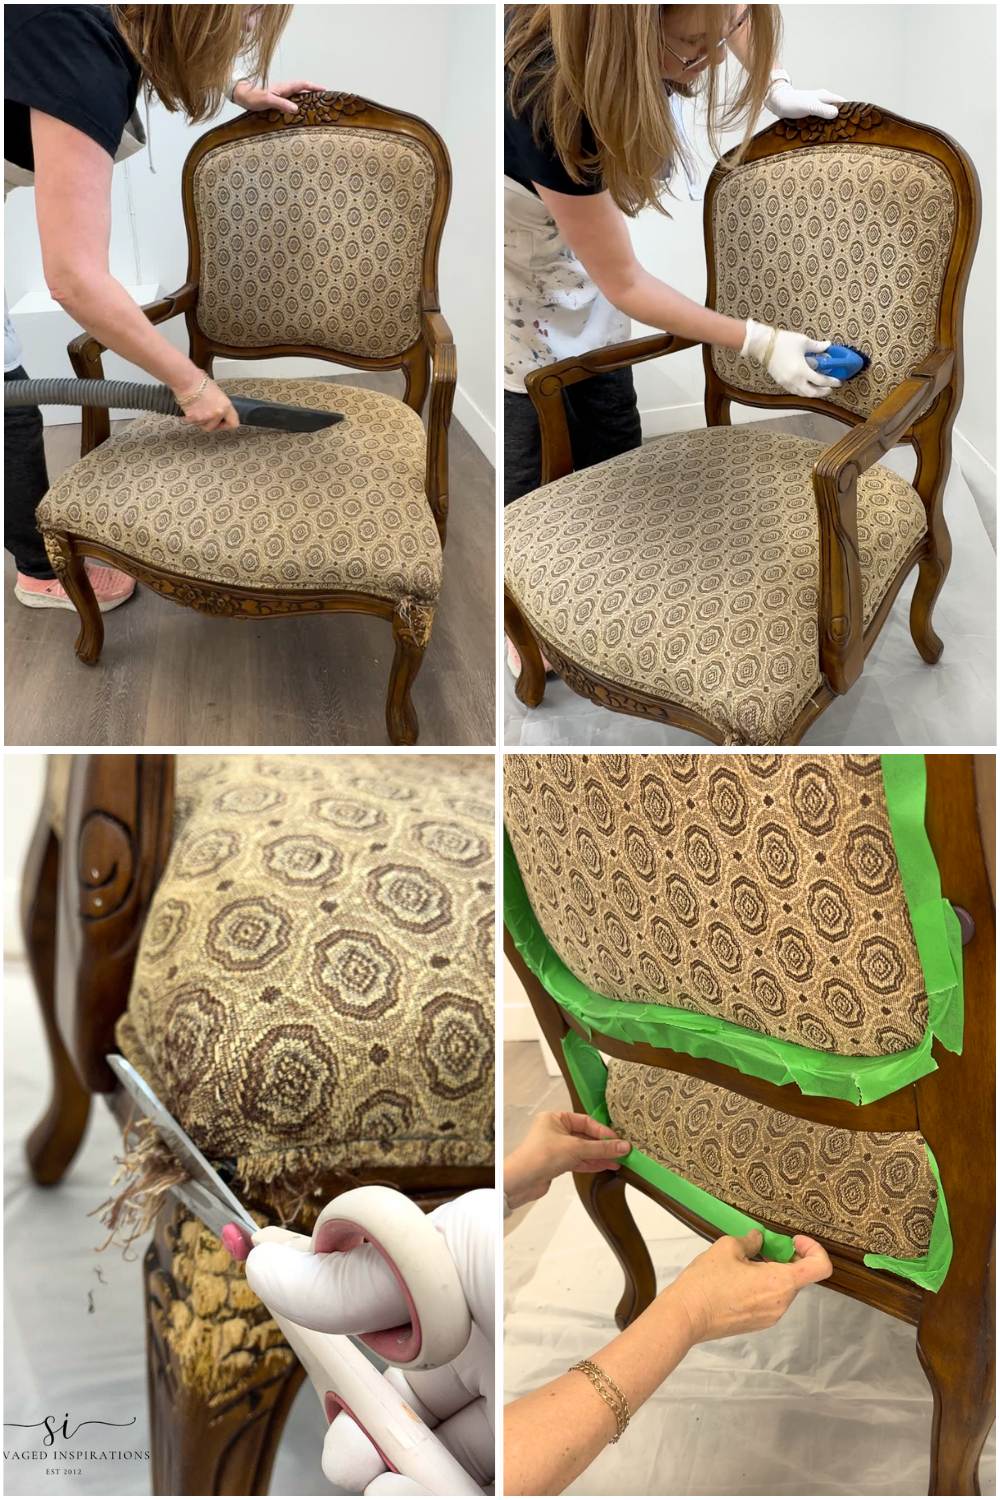
Before anything else, I gave this chair a really good clean. Unfortunately, I don’t have a steam cleaner, which would have been ideal. Instead, I used soap, water, a brush for scrubbing and my wet/dry shop vac. Then, using a pair of scissors, I cut off all the fraying fabric in the two corners. It looks so much better once that was all removed. Then I used painter’s tape to mask off the frame from the fabric.
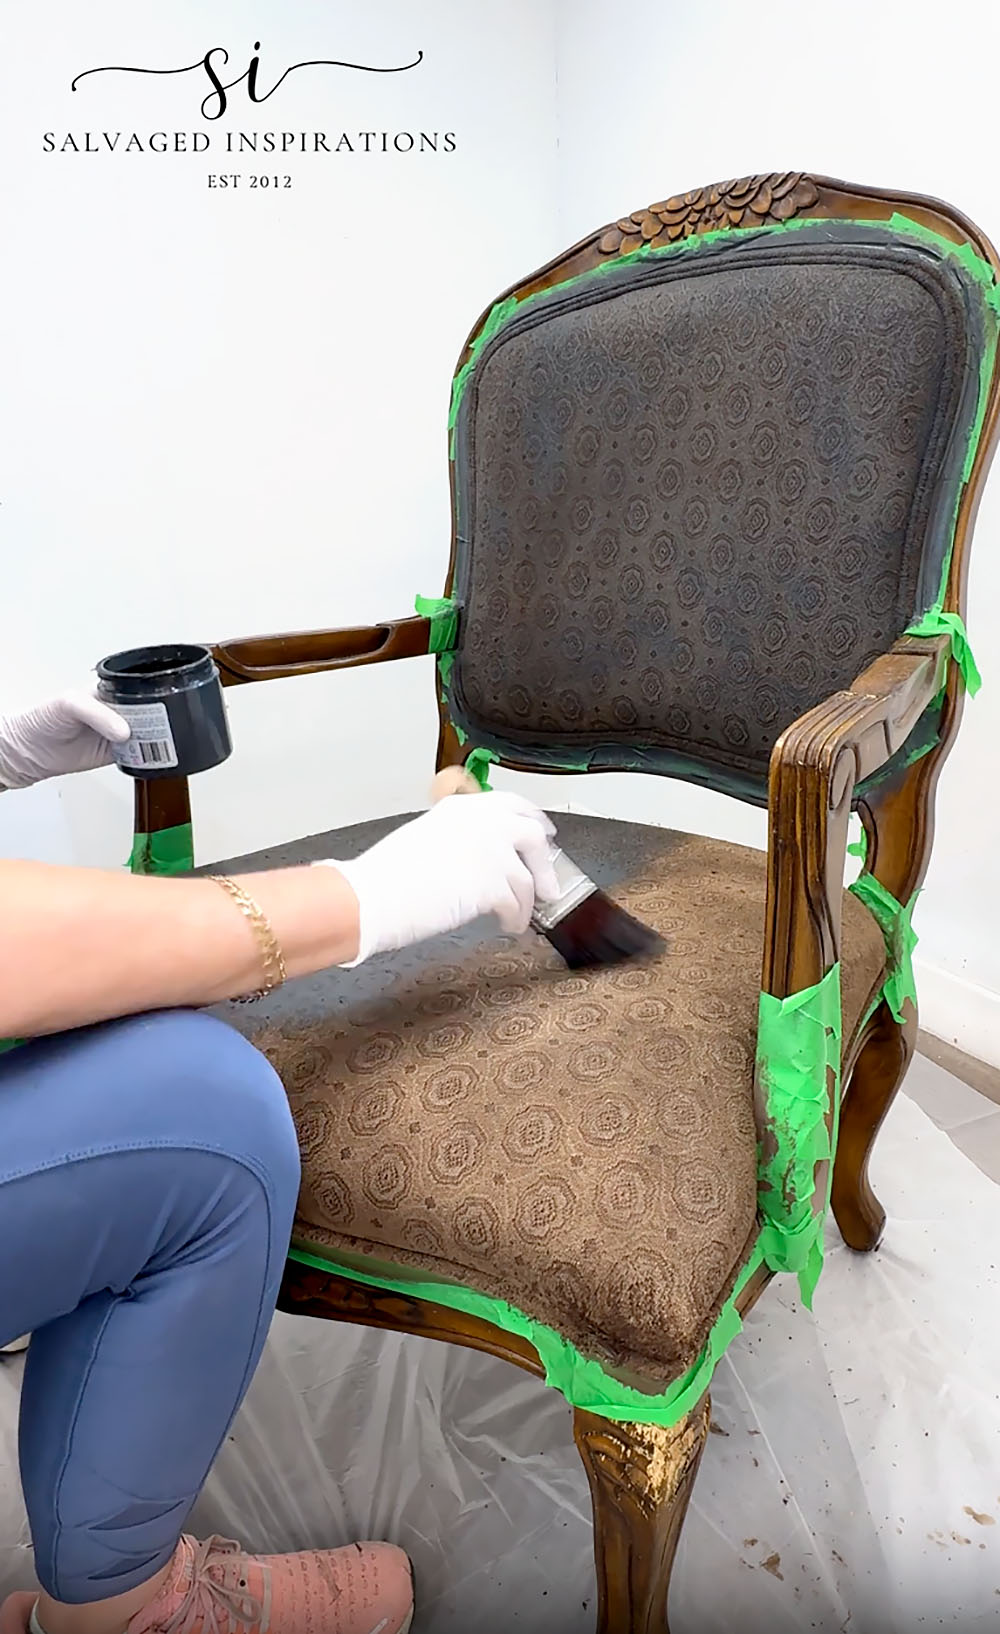
THE FIRST COAT (It’s Going to Look Bad 😅)
Let me just say this upfront…just like when painting wood furniture, the first coat is not pretty. With textured fabric, it can look patchy, uneven, and slightly concerning. Totally normal. To make things worse, I thought I was going to do a faux leather finish on this chair so I started with a brown paint. It looked horrible, and I soon realized that with the textured print, a faux leather finish would be impossible to achieve.
I pivoted my vision and switched to this Black Sands. As I mentioned, I’ve painted fabric chairs before and my preference is to keep it simple.
- I add some water to a cup.
- Dip my brush into the water.
- Then dip my brush into the paint.
- Then paint the fabric.
- Then applied a very thin coat using more of a dabbing motion than brushing.
The goal here isn’t coverage—it’s a base.
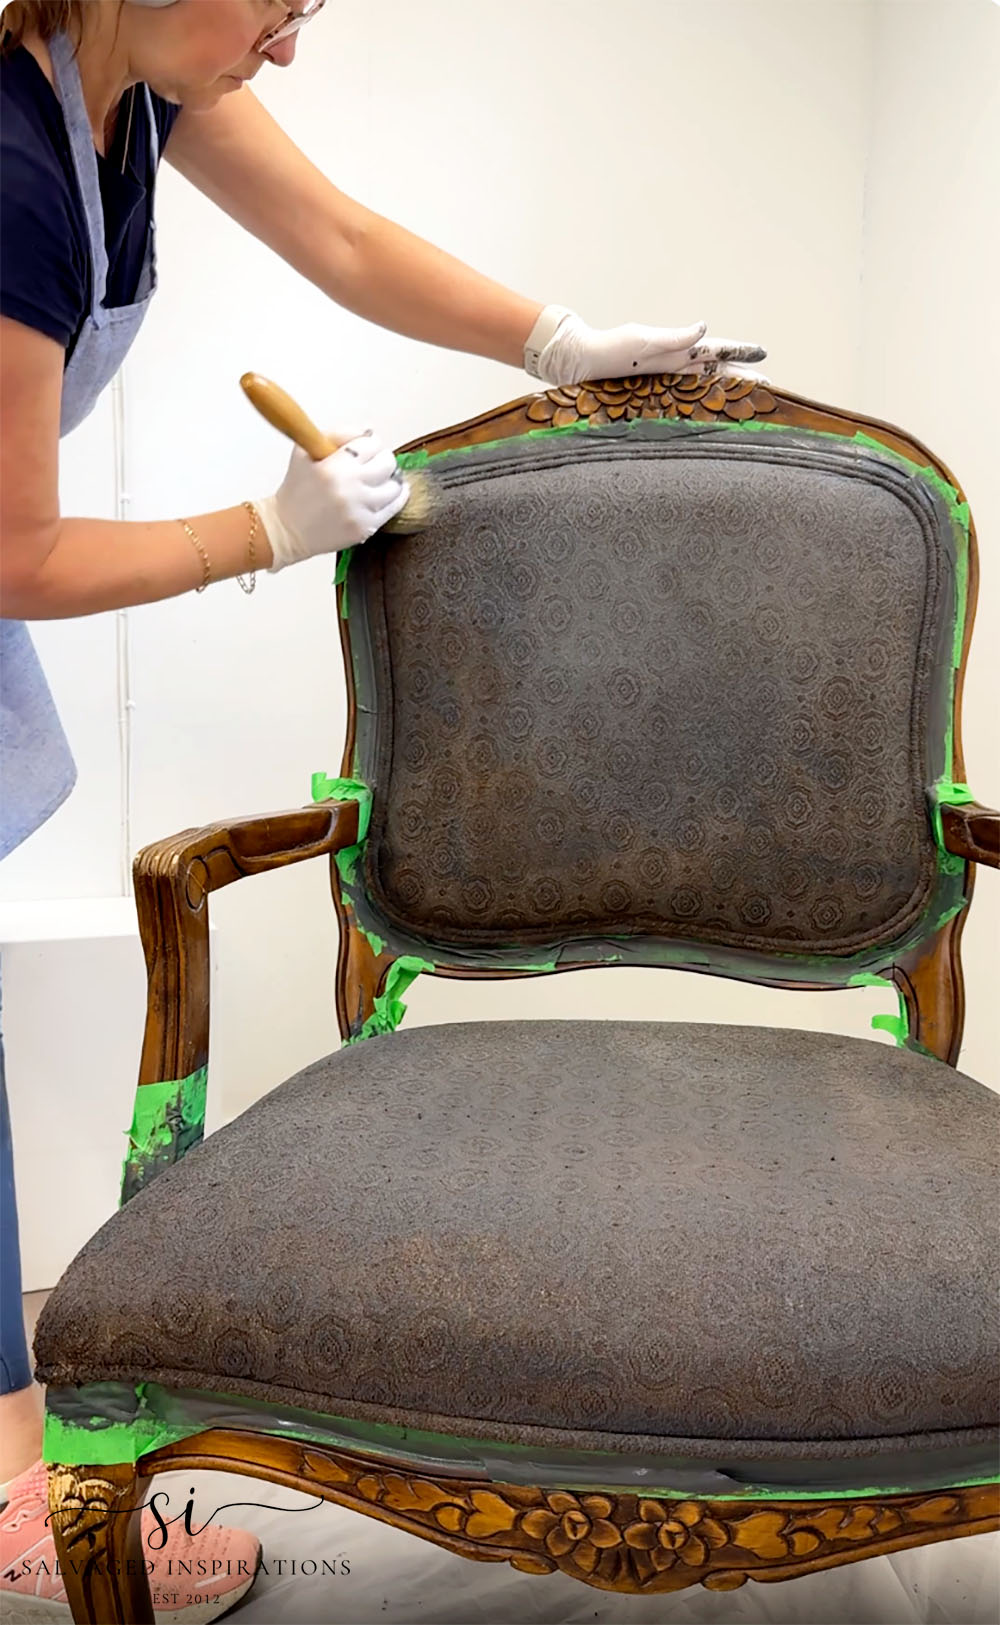
Half way through I switched to this very large and natural bristle Best Dang Brush. I found it worked much better, and the two coats went on much faster. I let each coat dry overnight. I also gave the first coat a very light sanding before painting on the next coat of paint.
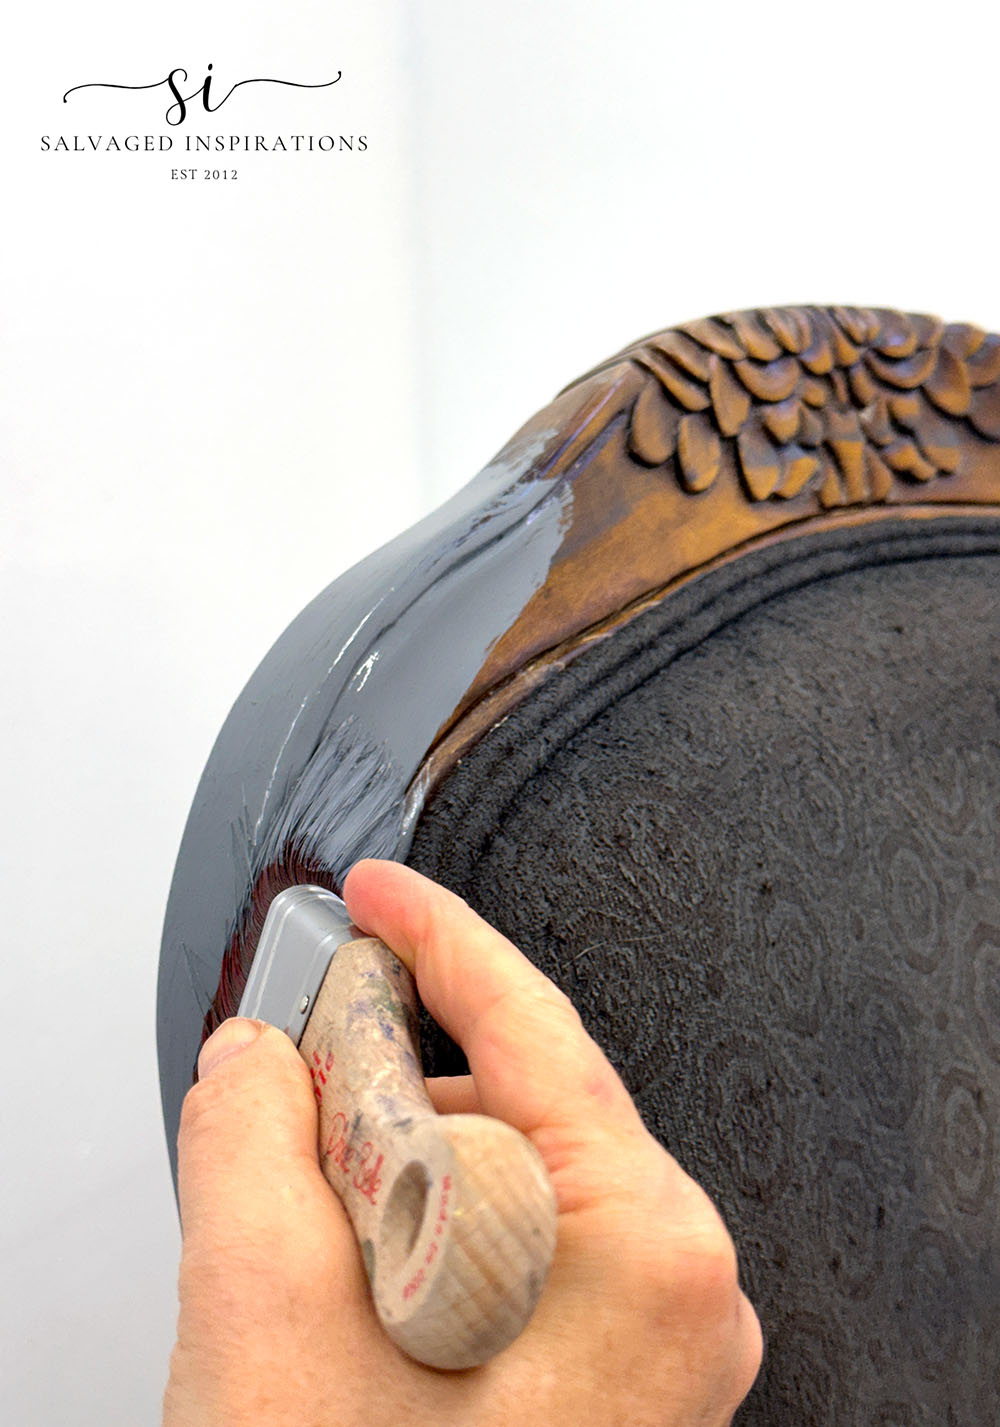
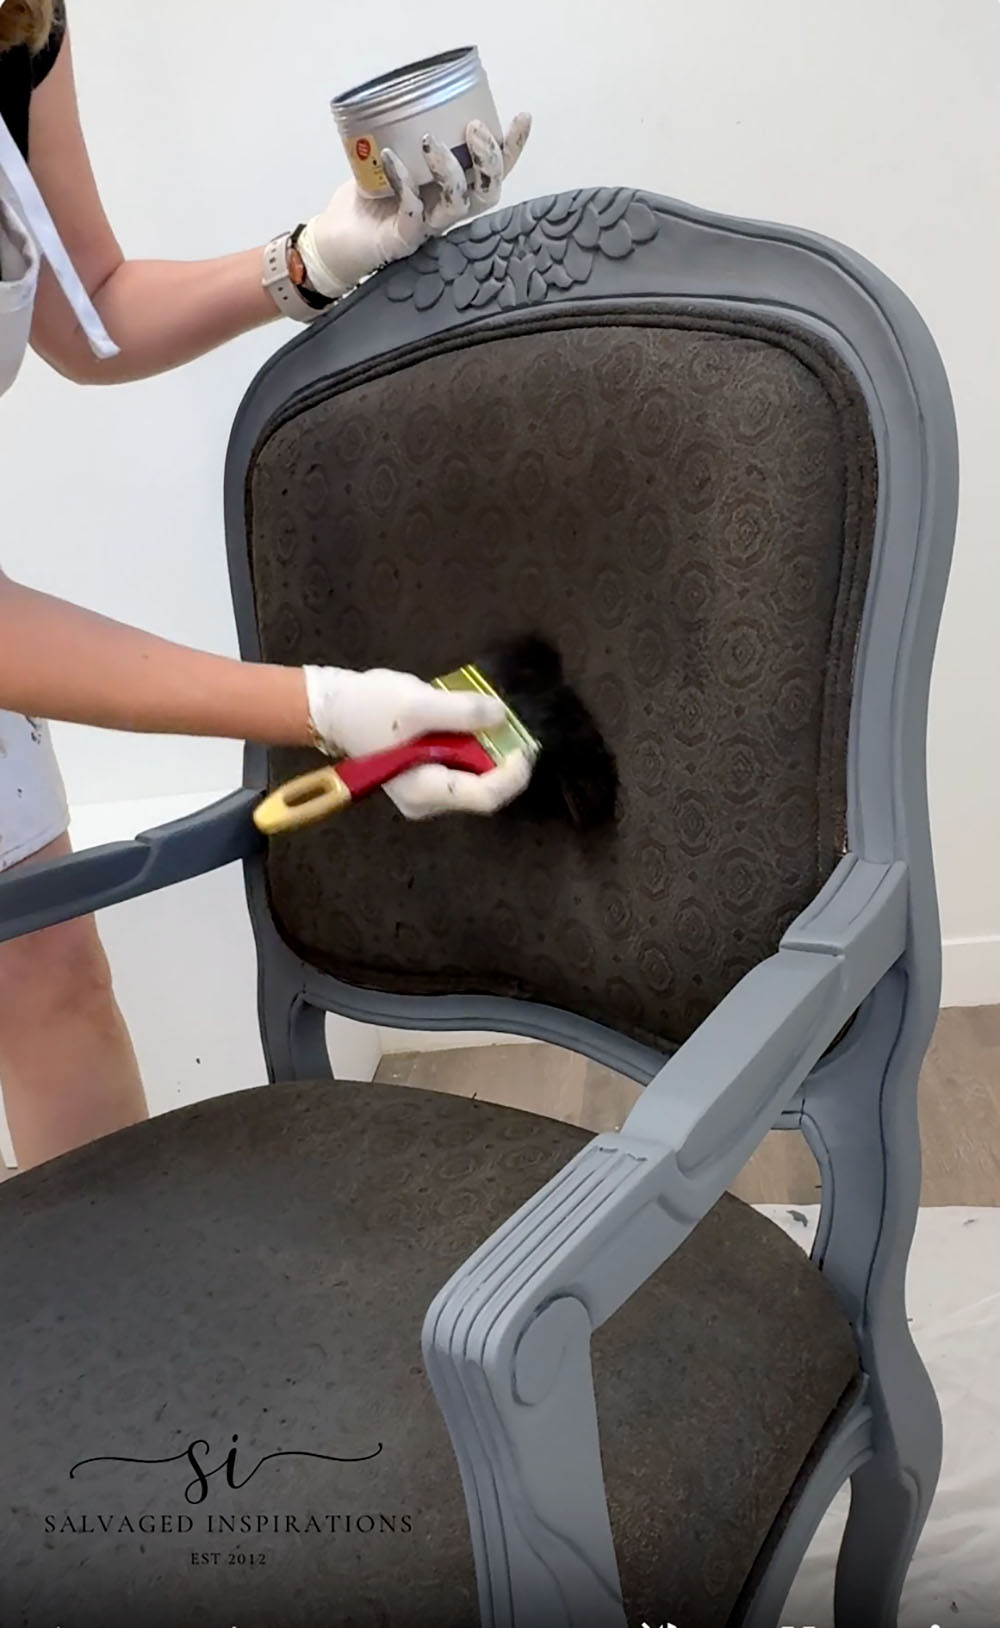
PREP & PAINT THE FRAME
Once the fabric was all painted/dyed and dry, it was time to paint the chair frame. I removed all the painter’s tape using my handy heat gun. If you don’t own a heat gun, a hair dryer works nicely too. Whatever you have to add warm air to loosen the stuck-on tape that’s been on there for a few days. Once the tape was removed, I gave the wood a light scuff with a 220 grit sanding sponge. I focused a little more on the chewed-up carvings but I’m not sure it made that much of a difference.
Then I went ahead and painted the entire frame in Black Sands mixed with Whitecap. The same color I painted the fabric but I lightened it up a little with the white paint. I also want to point out that taping off the fabric isn’t necessary if you’re using a quality brush and have a steady hand. Getting into the nooks and crannies and creating a perfectly straight paint edge along the fabric is easy when using the correct brush. I love this 2″ angle brush.
THE FINAL TOUCHES
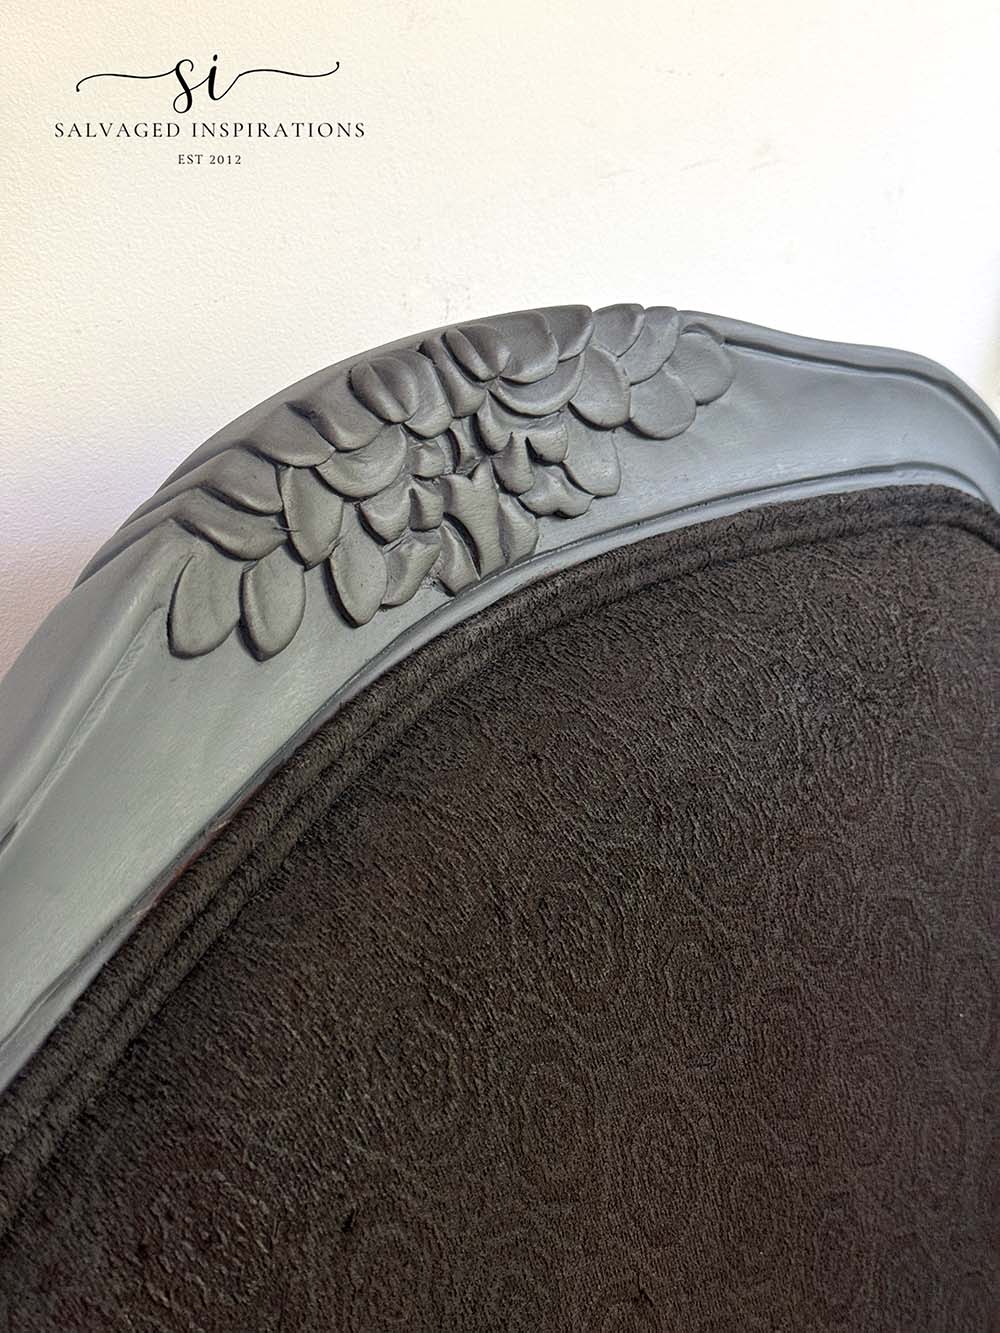
To seal the painted fabric, I used black wax. This darkens up the fabric some more, and it will take 2-3 weeks to cure before I can sit on it and use this chair. Until then, it’s going to be strictly decorative. To enhance the wood floral carvings on the frame, I added a little black wax there too. It tied the entire look of the chair together beautifully. For lighter-use pieces, the waxing is optional.
PIN AND SHARE 🤗
STEP-BY-STEP PAINTED CHAIR MAKEOVER
YOUTUBE TUTORIAL
WATCH THE TRANSFORMATION COME TO LIFE 🎥
I honestly didn’t think this textured upholstery was going to cooperate… but seeing the paint go on in real time makes all the difference. In the video below, I’m sharing exactly how I layered the paint, avoided a stiff finish, and brought this vintage chair back to life step-by-step.
Here’s the full step-by-step YouTube video tutorial for you. Our #siyoutubefamily is already a community of 58.2K, so don’t forget to subscribe if you haven’t done so already. You’re the BEST, and I appreciate your support! 🙂
THE BIG REVEAL…
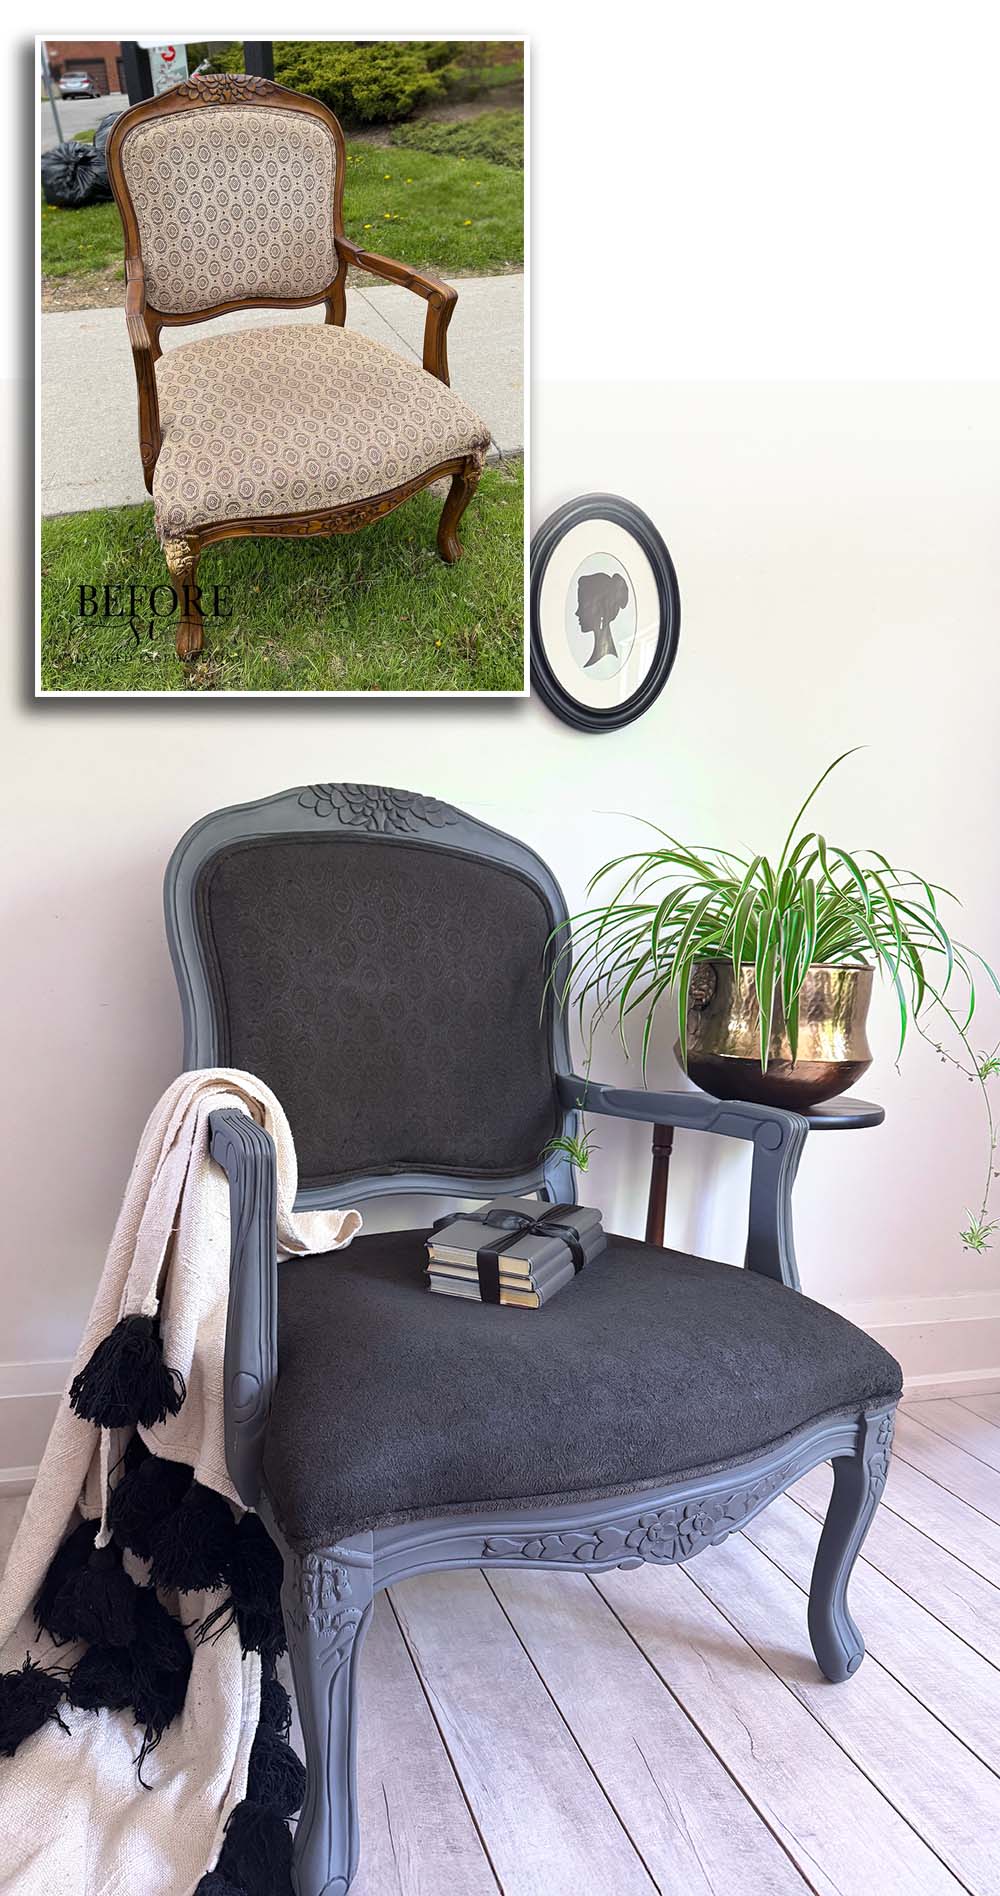
Here’s the finished look! What do you think?!
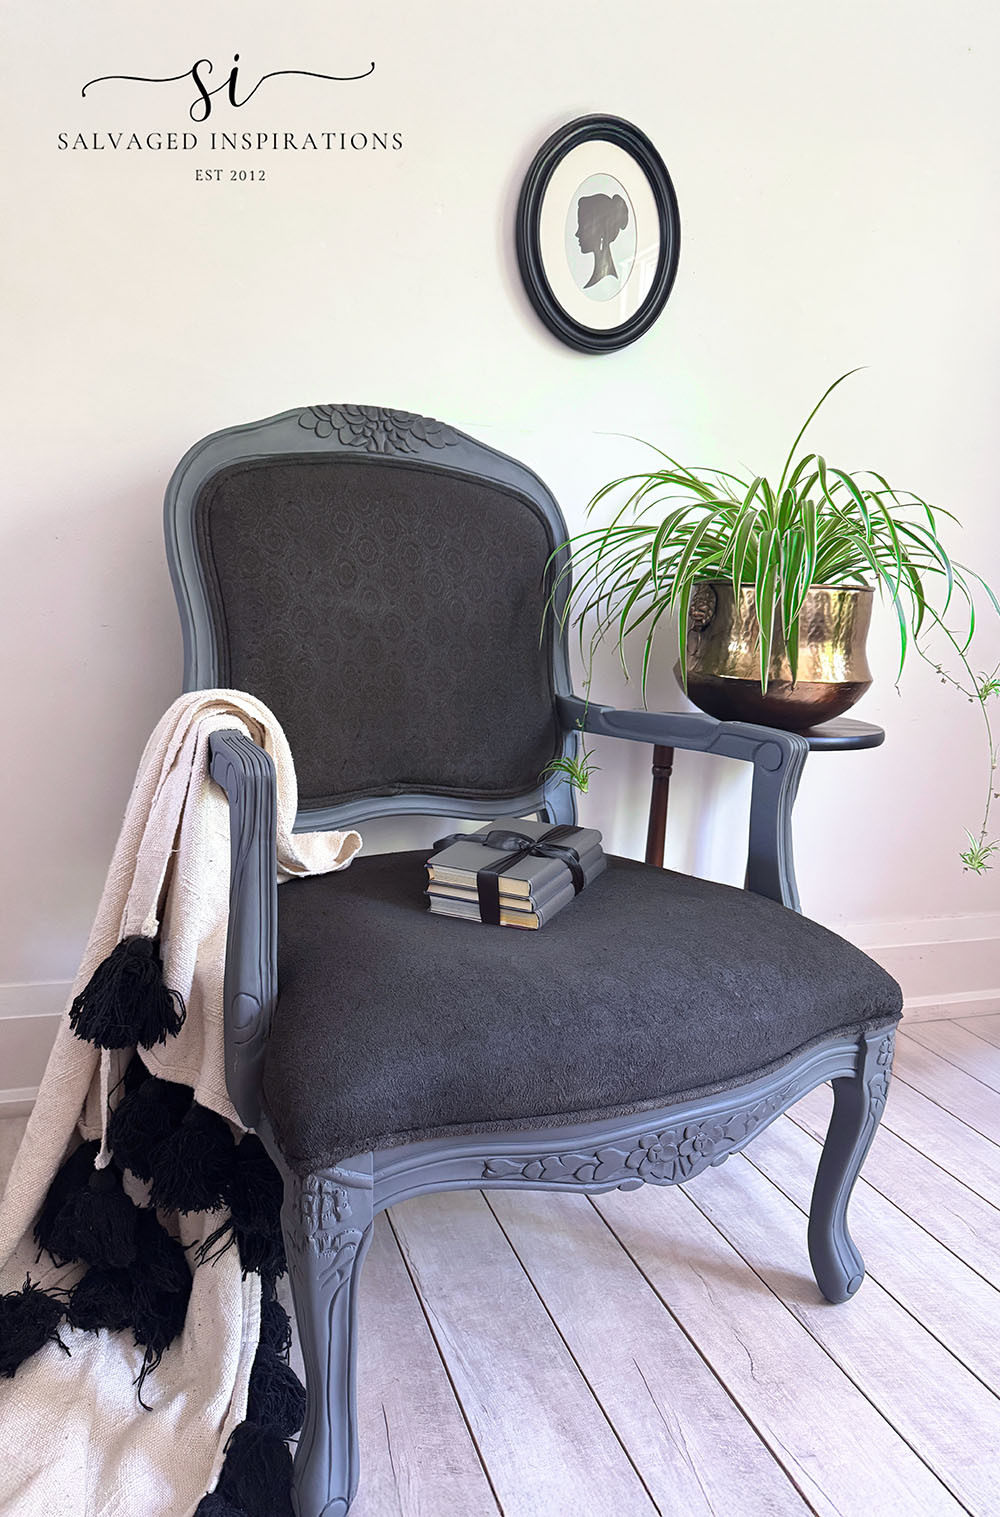
The fabric turned out great but the chewed-up leg still looks a little chewed up — although soooo much better. I’m giving myself some leeway, though. This build my confidence project wasn’t about creating something for sale OR fixing up the wood frame. It was all about the fabric transformation… and I’m pretty darn pleased I gave this another try!
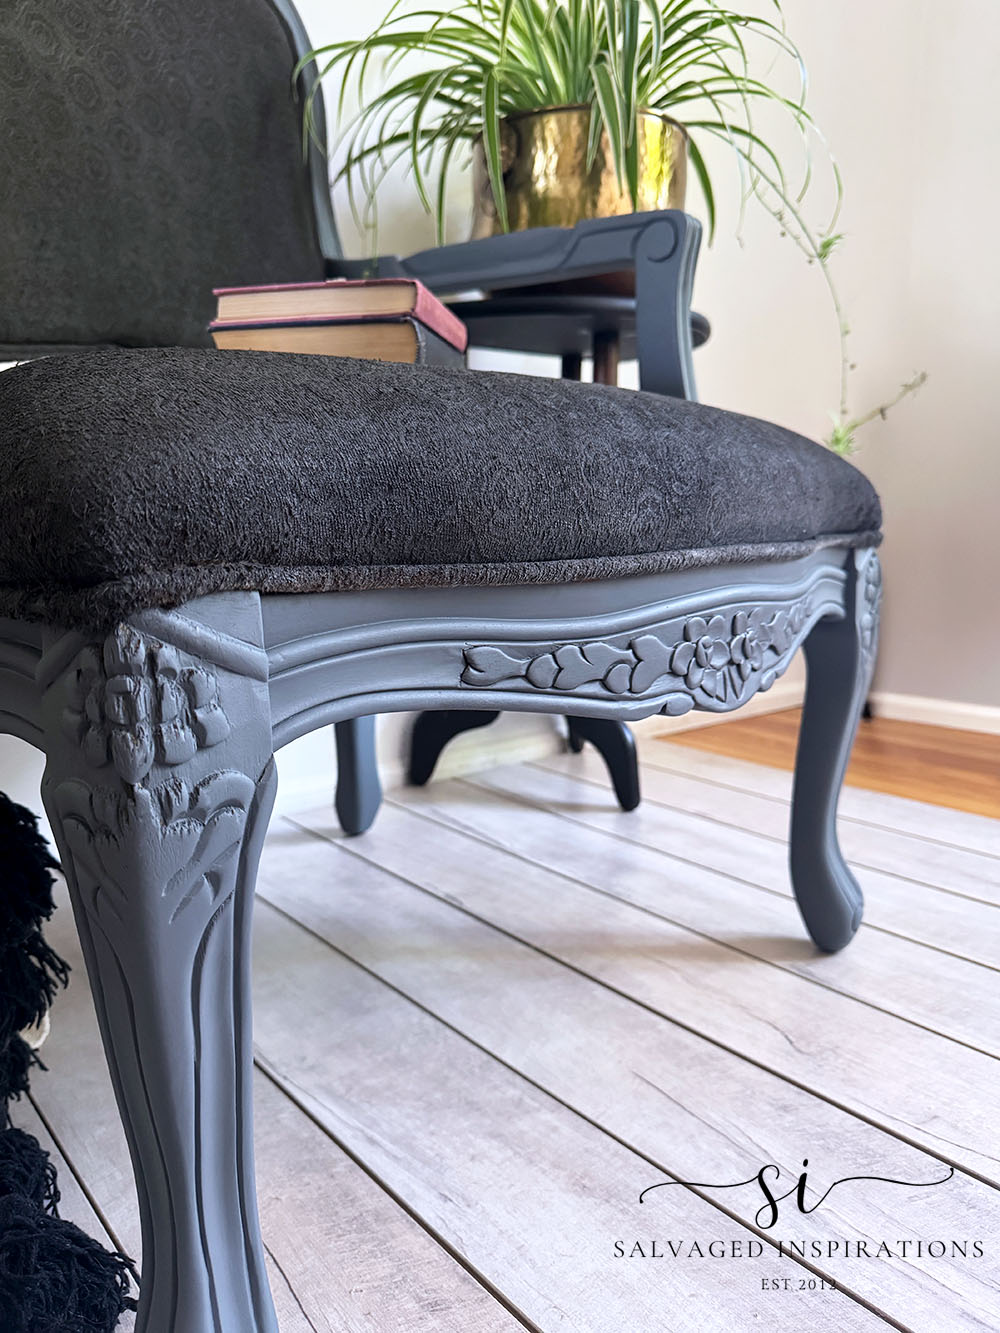
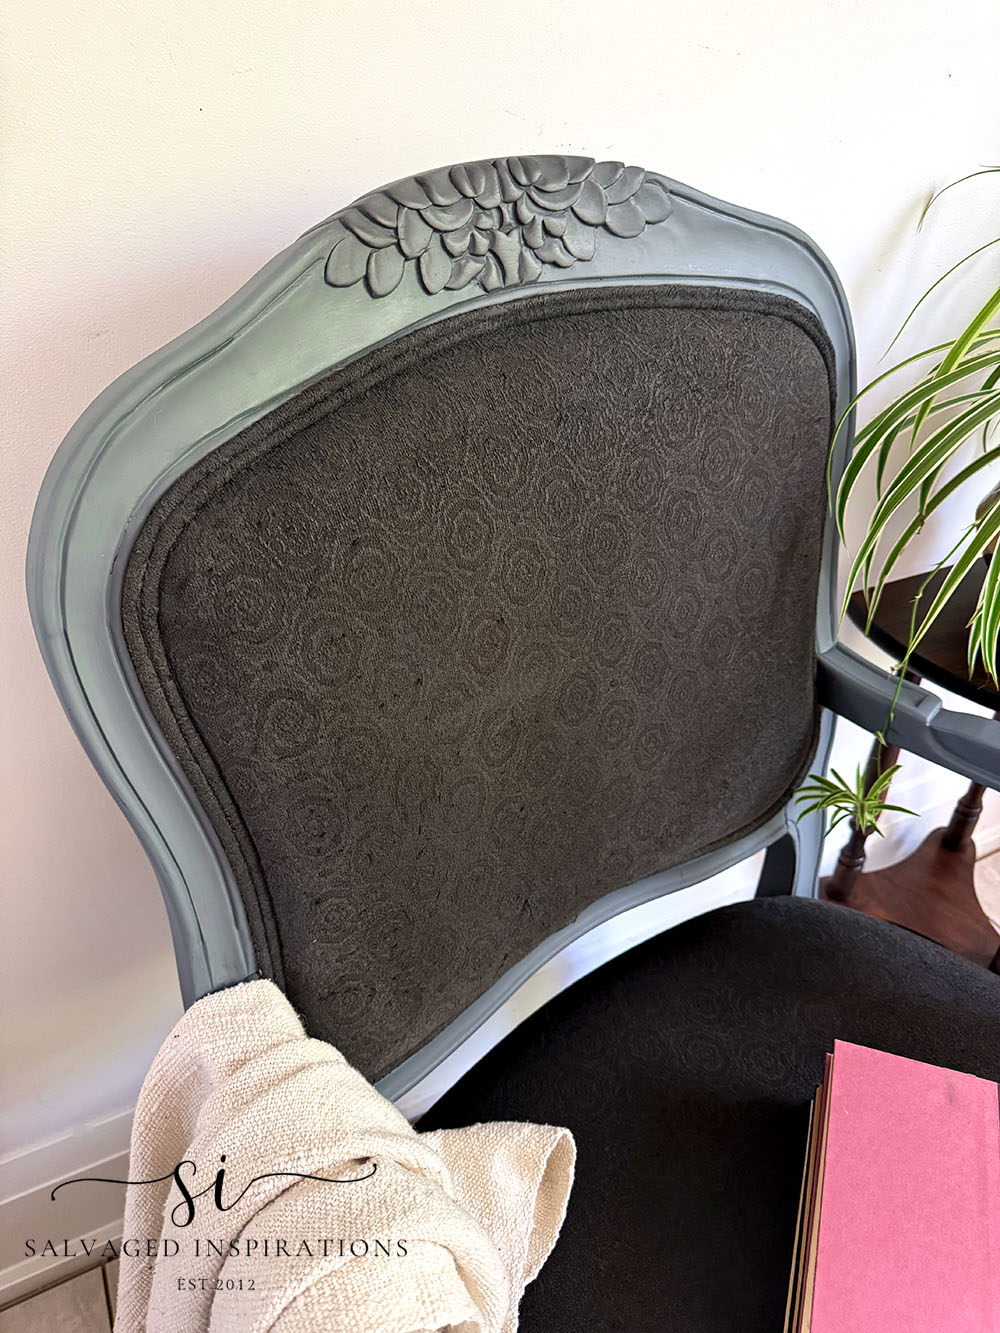
And here’s a close-up of the painted textured chair fabric and black waxed floral carving.
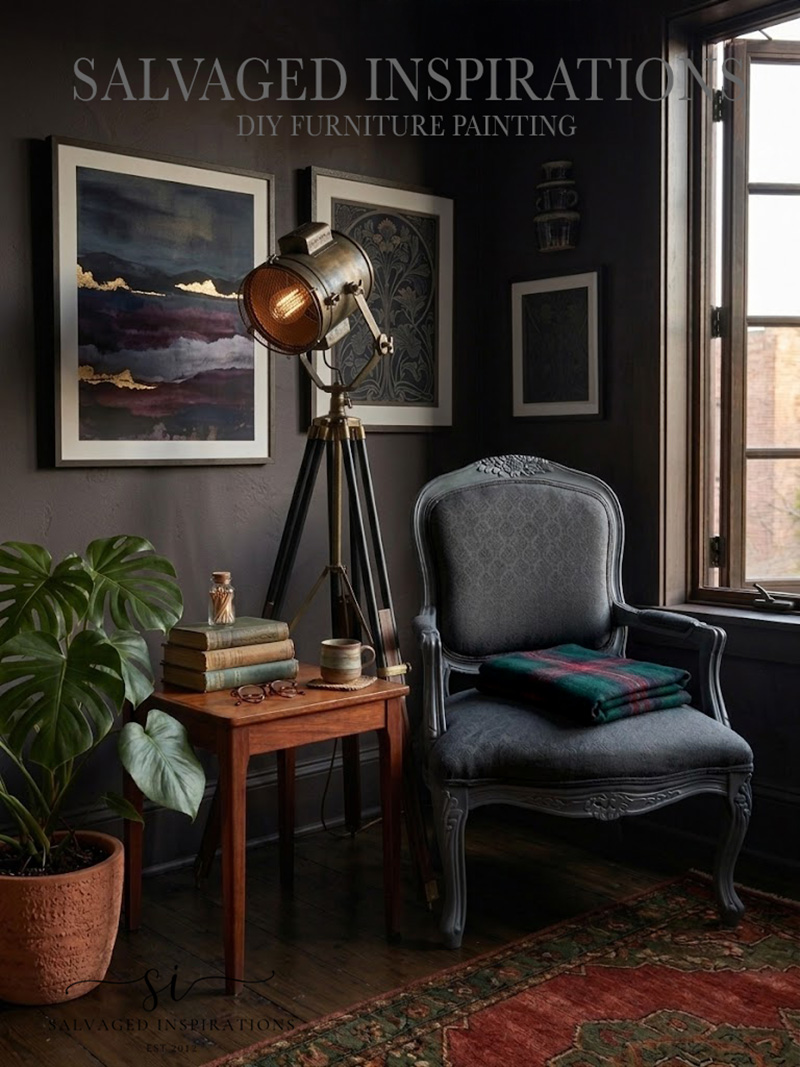
And just for fun, I prompted AI to generate a styling of this vintage chair makeover in a room setting. Here’s what it generated. The color of the chair seems slightly off but overall I think it looks really good. I love these dark moody rooms! I’m always amused by what it comes up with…
Here’s another look at this vintage fabric-painted chair before and after. I hope it’s inspired you and given you some ideas for your upcoming furniture painting projects!
MY FINAL THOUGHTS
This project was such a good reminder that you don’t always need to take the long, complicated route to get beautiful results. Any upholstered chair can be made over by dying the fabric with paint. And that if it doesn’t work the first time, don’t get discouraged, try again. Sometimes it’s about seeing potential, trying something a little experimental, and trusting the process. So if you’ve got a chair like this sitting around, don’t write it off just yet. It might just be your next favorite piece. 😃
I also want to give you an update on the baby birds. All three robins have left the nest and are flying around my backyard looking for worms. They are doing fabulous. I’ve tried taking a few pictures for you, but they are too f*a*s*t! lol
Happy painting, sweet friends! 💙
Denise x
RELATED POSTS:
PAINTING FABRIC WITH CHALK PAINT
PAINTING FABRIC WITH FABRIC MEDIUM
HOW TO MAKE FABRIC LOOK LIKE LEATHER
DO’S AND DON’TS WHEN DYING FABRIC WITH PAINT
PRIMA TRANSFER ON PAINTED FABRIC
PIN AND SHARE! 🤗

I won’t be painting upholstery but I appreciate that you wanted to try it and many do. I’m just disappointed to not have seen your techniques for highlighting the beautiful CARVED ELEMENTS on the chair. I’m trying to get better and better at that part of refurbishing furniture. Actually working on an upholstered (back and seat) 50s telephone chair right now, paint and reupholstery, but I want help with the carved details on the stiles of the chair. Love your work. —- But an aside question: You are certainly advanced in creating your A.I. room setting for the beautiful chair. Can you share a link to learn how to do that? Thank you.
Hi Joann! I have quite a few tutorials on how to highlight details which you can check out here, here and here. For the AI roomscapes, I don’t have any tutorials but I’ve been using chatGPT and/or Gemini. It’s all in the prompts. If you can imagine it, articulate it in words, it will create it! There are plenty of YT video to help as well. Hope this helps.
Congrat’s on your perseverance to try again and not let the first experience be your last! You are amazing!!
I’m laughing at myself as I think this – I would have been nutsy enough to sit and fill in those little nibs on the chewed end of the leg. I hope you’re laughing, because the more I think about doing that, the harder I laugh and shake my head. Oiy! Talk about overkill, huh? I can’t wait until tomorrow to watch the video on this.
Thanks for sharing this, Denise. You give us courage and the will to try, try, try again.
Oiy 😂 — if this chair was a seller rather than a build-my-confidence (fun) project, I’d probably be thinking the same thing Catherine. We are same same!🤗
Love the color, you made it beautiful again. This chair was worth saving with its wonderful carvings!
I think so too! I couldn’t just leave it there… too cute. 🙂 Have a great week Tracy! XOXO
This chair makeover is beautiful. It went from ugly duckling to looking like a luxurious black velvet demask!
Thanks Nicki, and yesss, it does resemble a black velvet! It definitely has a more moody vibe now. Thanks for dropping by and have an awesome week my friend. XOXO
Great tutorial! It looks amazing.
Thanks my friend!🤗 I’m really glad I tried this again! XOXO
Hi Denise. Boy do you ever have artistic vision. This chair went from UGLY to moody beautiful!!! Love how it turned out.
Aw, thank you Monique!🤗 I’m really happy I gave textured fabric another try. Have a great week! XOXO
That turned out really nice
Thanks so much Patsy! 😊