HERE’S HOW I UPCYCLED THIS TRASHED 1980s LINGERIE CHEST INTO AN ELEGANT UPDATED PIECE WITH ONE COLOR | YOUTUBE VIDEO
Hi, creative friends, and welcome back to our Furniture Fixer Upper tour. So happy you’re here! This furniture makeover was created with love. My sister has been looking for a tall, skinny cabinet for her dressing room. Something she can use for jewelry, belts, scarves, and accessories. When I saw this 1980s six-drawer lingerie cabinet — it fit the bill, and I knew with some TLC it could be turned into a beauty.
In today’s post, I’m also sharing –
- A classic color that gives an elegant look
- How to tint primer
- How to update a wood base
- And more!
*As an Amazon Associate, I earn from qualifying purchases. There are affiliate links in this post to other companies/products I use and love as well. You will never be charged extra when you purchase through these affiliate links. If you purchase from my links – A BIG thank you for supporting me and the #siblog! To see my full disclaimer, click here.
Bonus, it’s Furniture Fixer Upper Day! If you’re new here, on the fourth Thursday of every month, I join four super-talented friends (Christy – Confessions of a Serial DIYer, Kathy – Petticoat Junktion, Natalie – A Ray of Sunlight, and Gail – My Repurposed Life) to share our before-and-after furniture restyles. I’ve included the links at the bottom of today’s post, and I hope you join me in seeing what they’ve created this month! I always learn something new from these talented ladies.

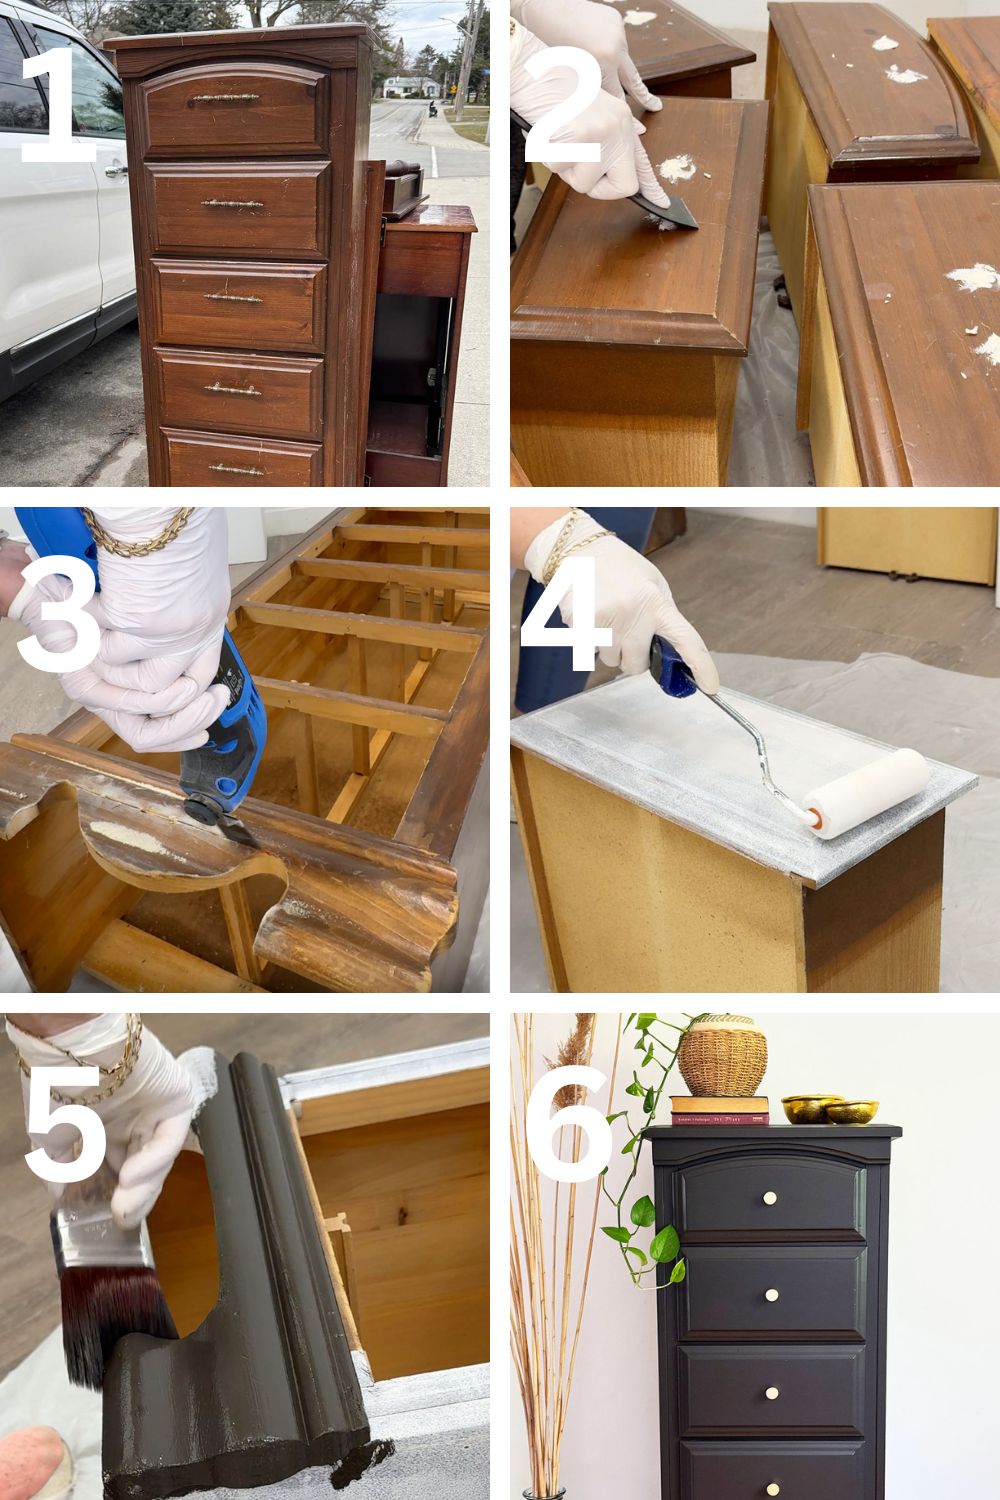
Below is the lingerie cabinet that nearly ended up in our landfill. It was sitting curbside along with a few other pieces.
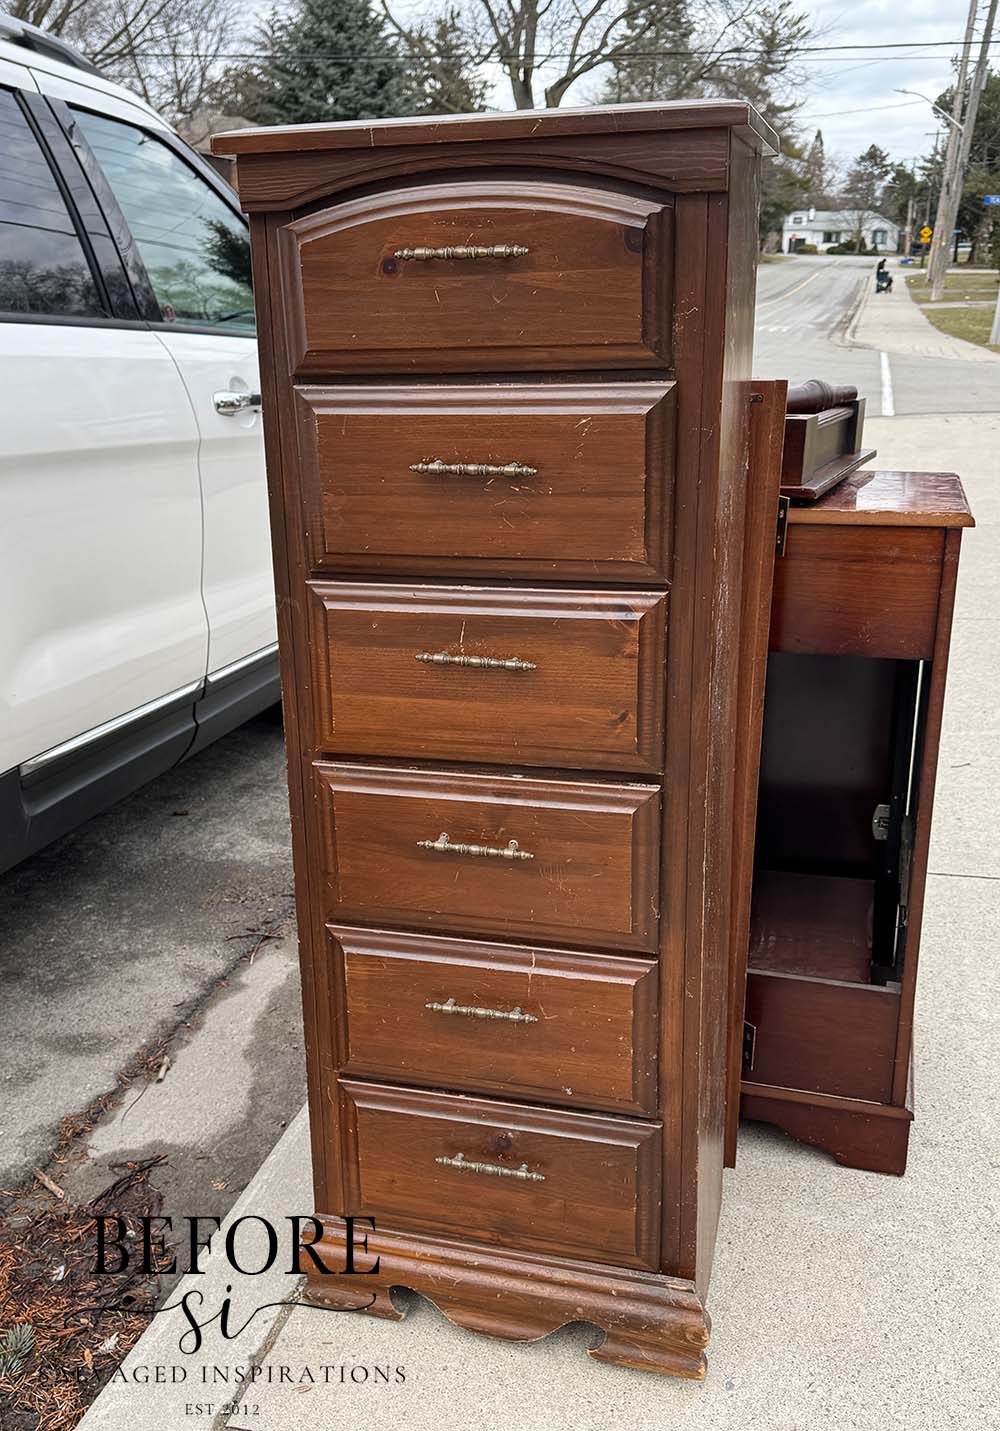
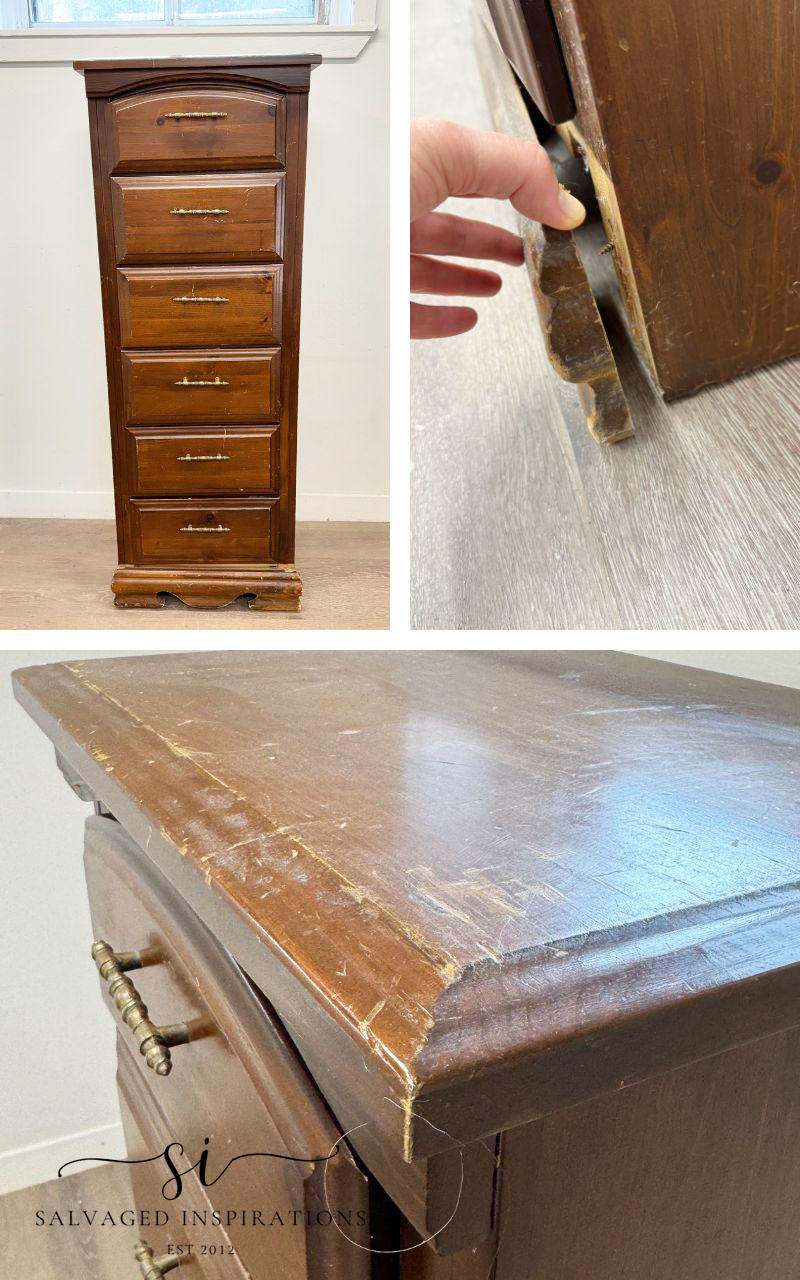
This is a mass-produced piece from the 1980s is made from pine and plywood. Since pine is a soft wood that scratches and dents easily, the surface showed plenty of wear from years of use. What really made the piece feel dated, though, was the hardware and the skirt base.
THIS POST IS SPONSORED/CONTAINS AFFILIATE LINKS TO PRODUCTS I USE. YOU CAN SEE MY FULL DISCLOSURE HERE.
SUPPLIES
1980s Lingerie Chest – SALVAGED
White Lightning Cleaner
Auto Sponge
Sanding Sponge
Two Part Wood Epoxy
Bonding BOSS Primer
2″ Angled Paint Brush
Coffee Bean Chalk Mineral Paint
Gator Hide Topcoat
TOOLS
Oscillating Multi Tool
AstroEuro HVLP Paint Gun
Heat Gun (25% off as of writing!)
Plastic Putty Knife
Bosch Orbital Sander
Brushed Brass Drawer Pulls
PREPPING THE CABINET
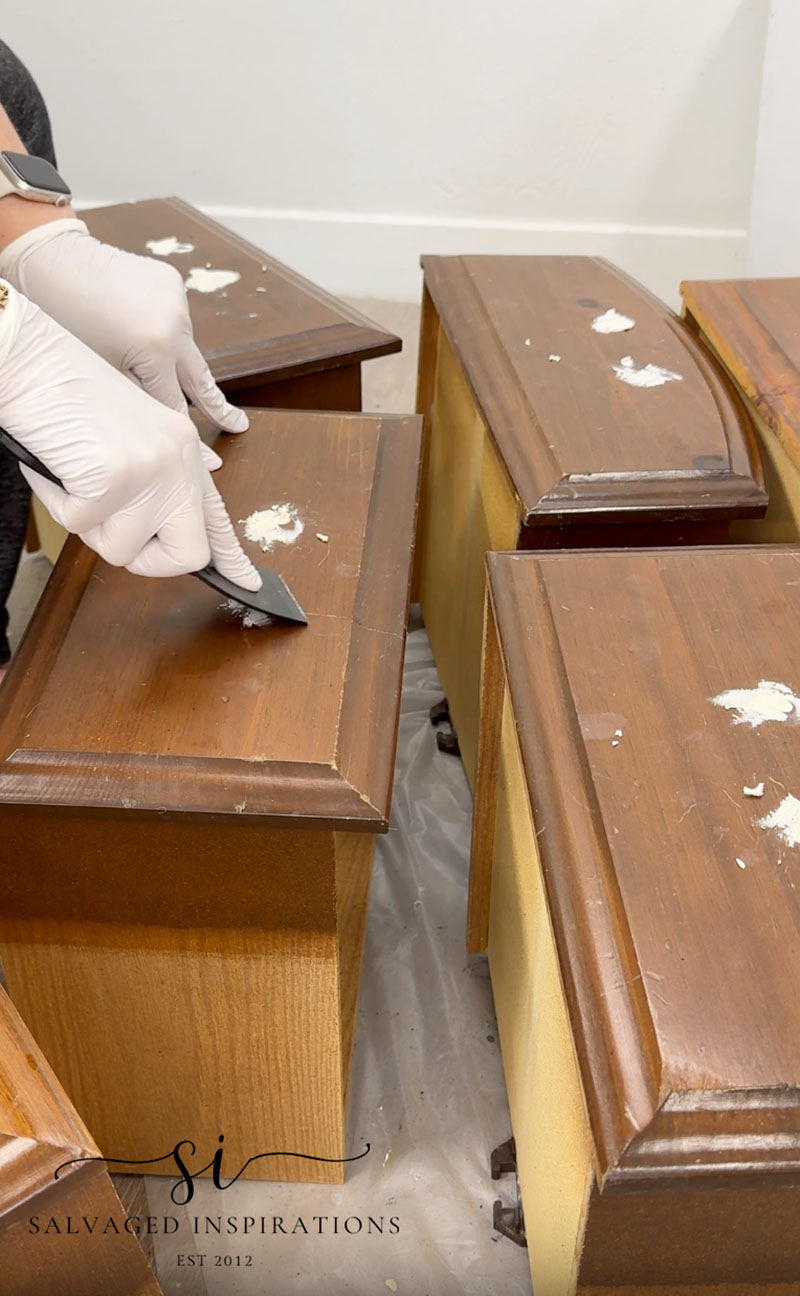
To start the prepping process, I removed all the old hardware. Then I cleaned this cabinet with a heavy-duty furniture cleaner, and a large automotive sponge. Once I had the inside and outside of the cabinet sparkling clean, I used this two-part epoxy wood filler to fill in all the hardware holes. I really enjoy using this putty even though it’s not inexpensive to buy here in Canada… and you all know how thrifty I am, so that says a lot! 😉 It’s easy to mix in small quantities, no smell, and dries hard and fast.
BASE REPAIR & UPDATE
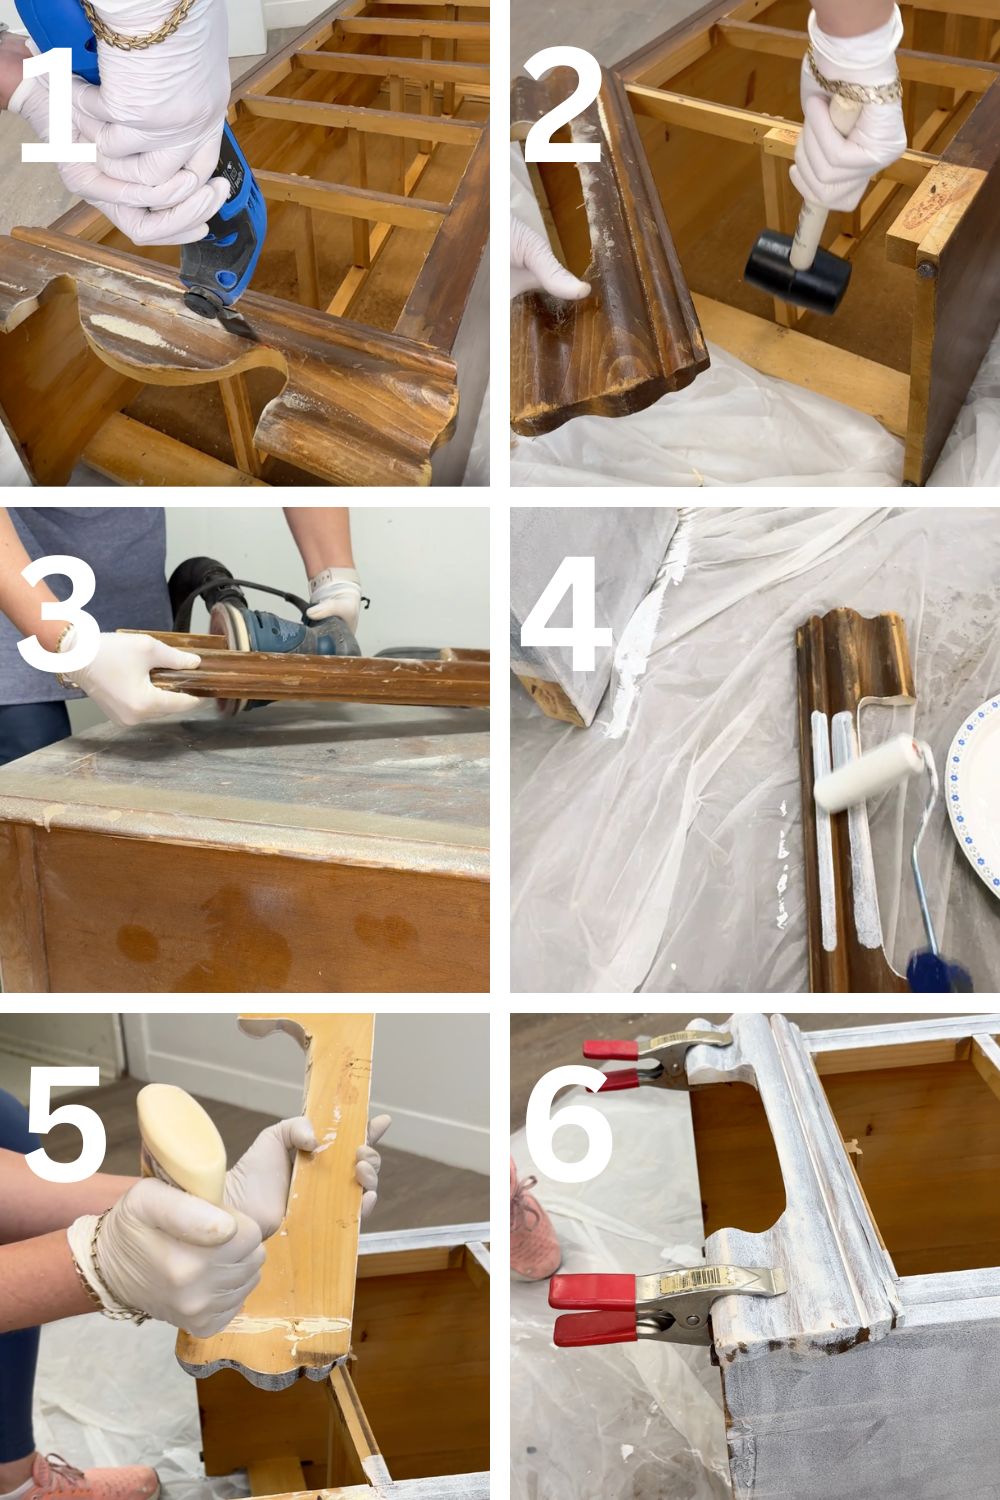
The skirt on this piece was already hanging partly off, so it was the perfect opportunity to repair and update.
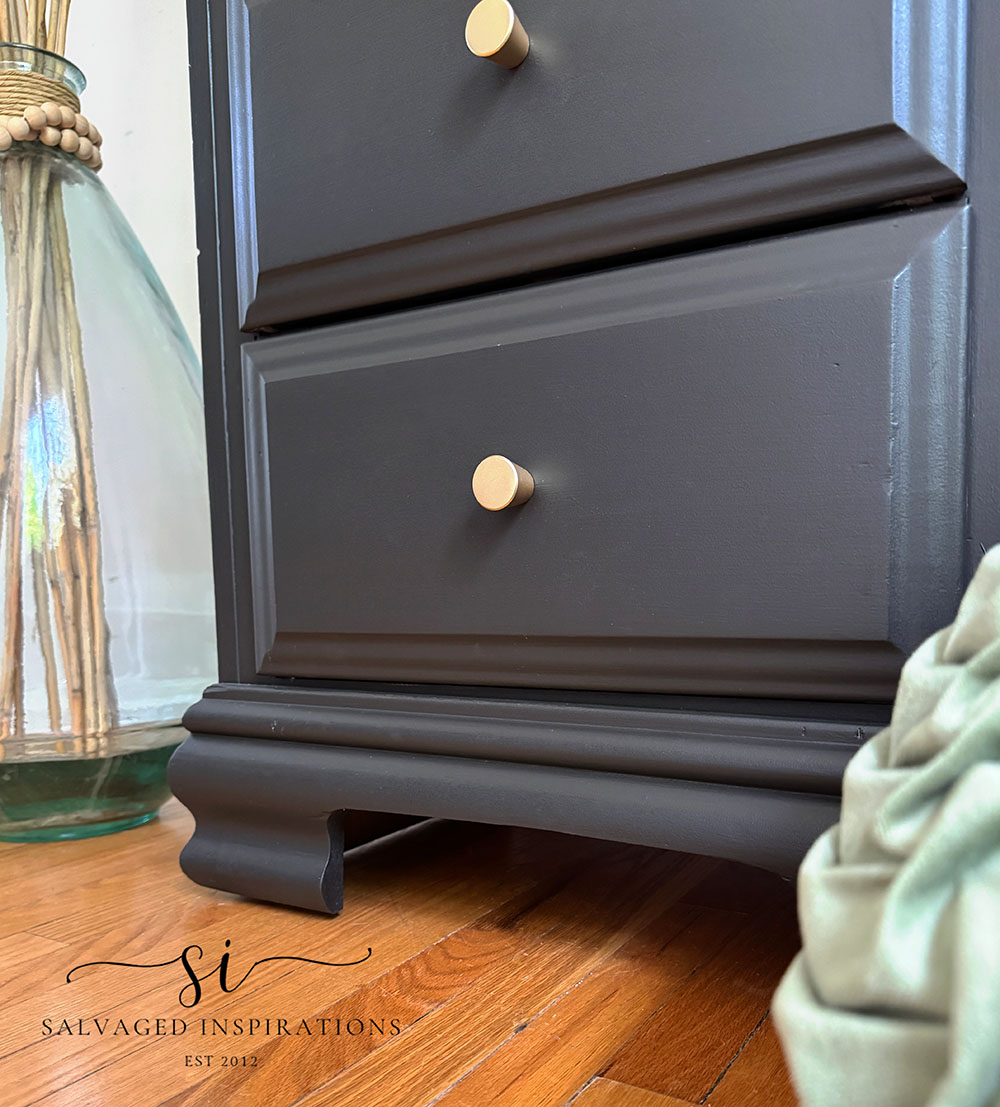
- Using an Oscillating Multi-Tool, I cut the curves off the skirt to give it a more streamlined look.
- Then I removed the skirt from the chest
- I smoothed out the cut by giving it a good sanding
- Primed with Bonding Primer
- Glued and screwed the skirt back into place
- Clamped and let it dry
PRIMING & PAINTING
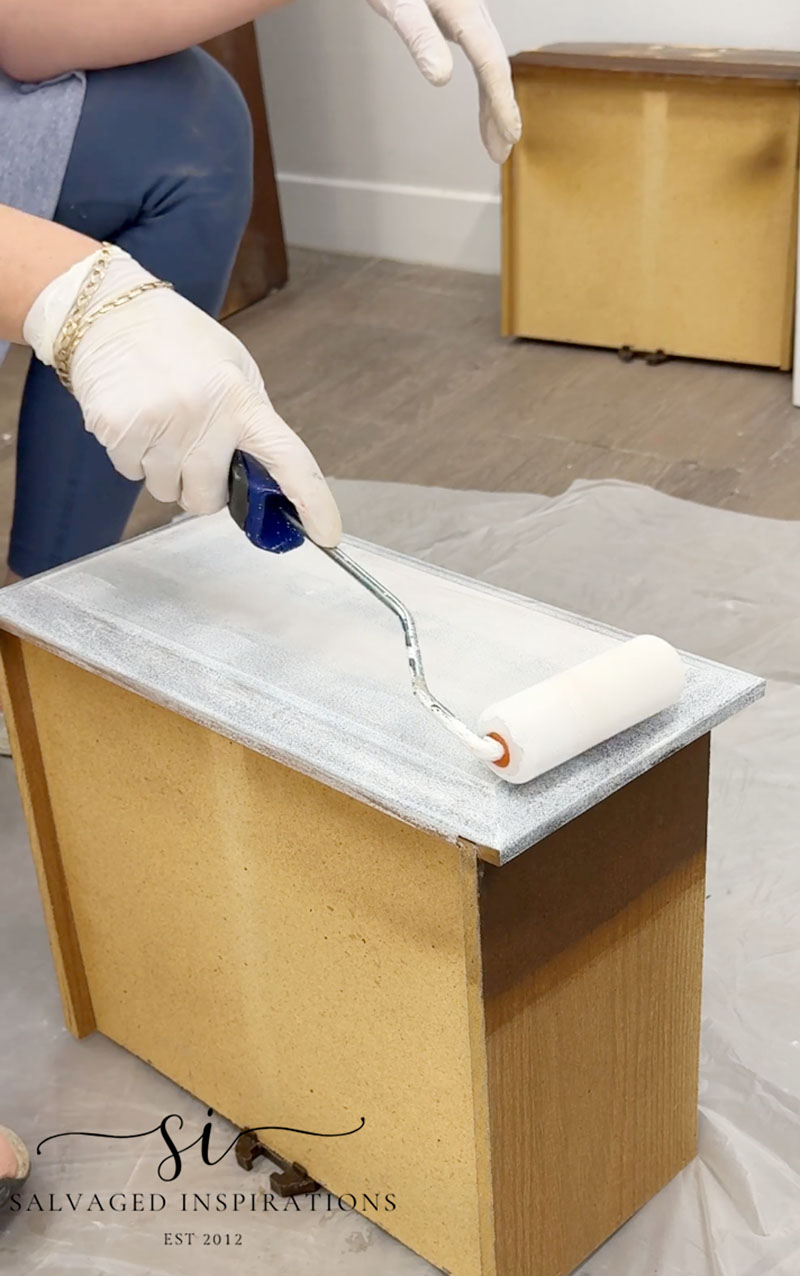
I went ahead and scuff-sanded the entire piece using my orbital sander. I removed the dust and then applied a coat of clear bonding primer. I tinted it with a little white bonding primer so you all can see it being applied. I bought a few jars of clear and then realized it might not be the best for you all to see it being applied here on the blog and on videos.
You can tint primer by adding a small amount of paint to it — usually the same color family as your topcoat. This helps with coverage, especially when painting over dark colors or when using bold paint colors.
Here’s the basic process:
- Start with a clear, white, or light gray primer.
- Add a small amount of paint (no more than about 10% of the primer volume).
- Stir thoroughly until the color is completely blended.
- Test a small area to make sure the primer still applies smoothly and evenly.
A few tips:
- Use the same type of paint as the primer base when possible (latex paint with latex primer, oil with oil).
- Don’t over-tint — too much paint can reduce the primer’s adhesion and stain-blocking ability.
- Many paint stores can professionally tint primer for you, which is often the easiest and most consistent option.
For deep or vibrant topcoat colors, a gray-tinted primer usually works better than white.
I like applying this primer with a four-inch foam roller. It rolls on beautifully, and the tip of the roller even gets into all the nooks, crannies and frame of this piece.
COFFEE BEAN
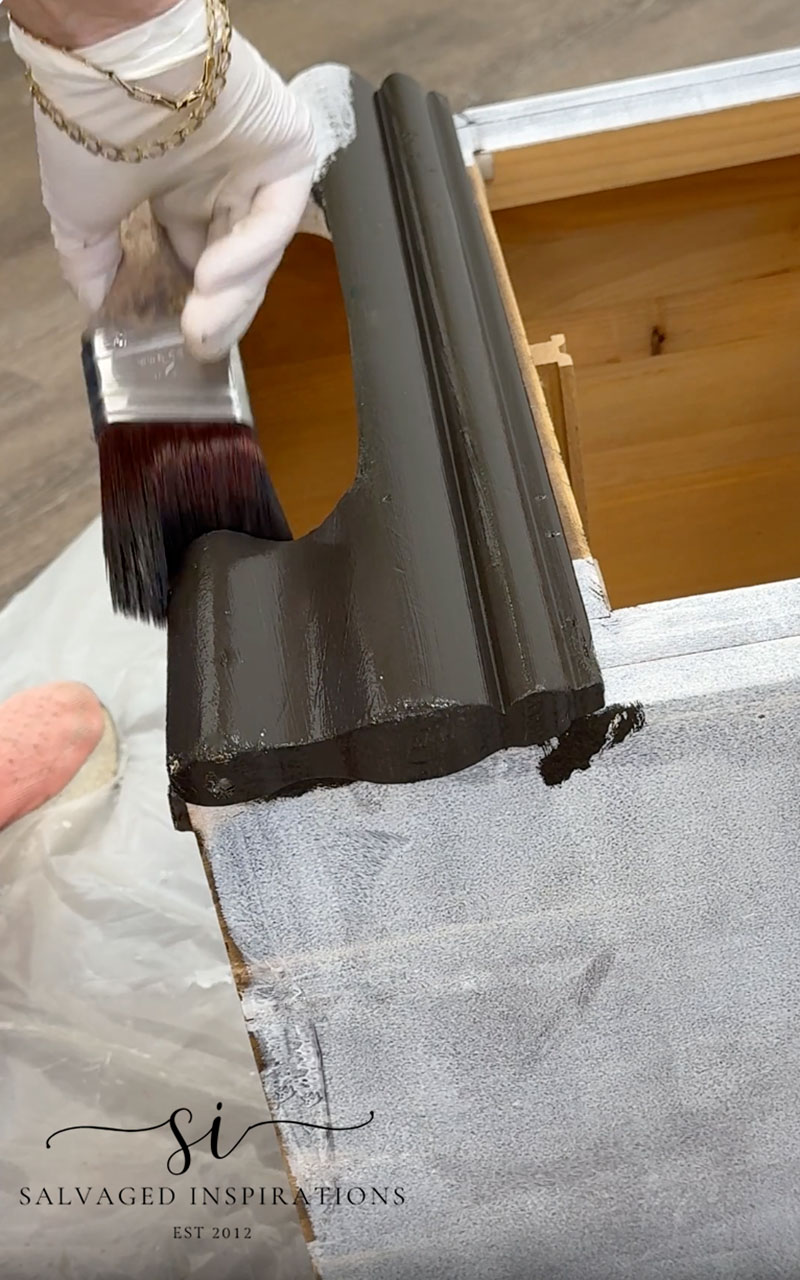
The next day I came downstairs and did a scratch test on the bonding primer. Here’s a super short video on how to do a scratch test. It passed with flying colors, and now it was time for paint. My sister chose the paint color – this beautiful warm black with brown undertones called Coffee Bean. This is one of my fave colors as well. It’s a classic. If you ever want to elevate a piece with just one color, you can’t go wrong with a moody black.
To paint the body of this tall chest, I laid it down on the floor to get all the under edges and drawer frames. If your piece is light enough to lay it on the floor, this is the best way to make sure all the underside is painted nicely.
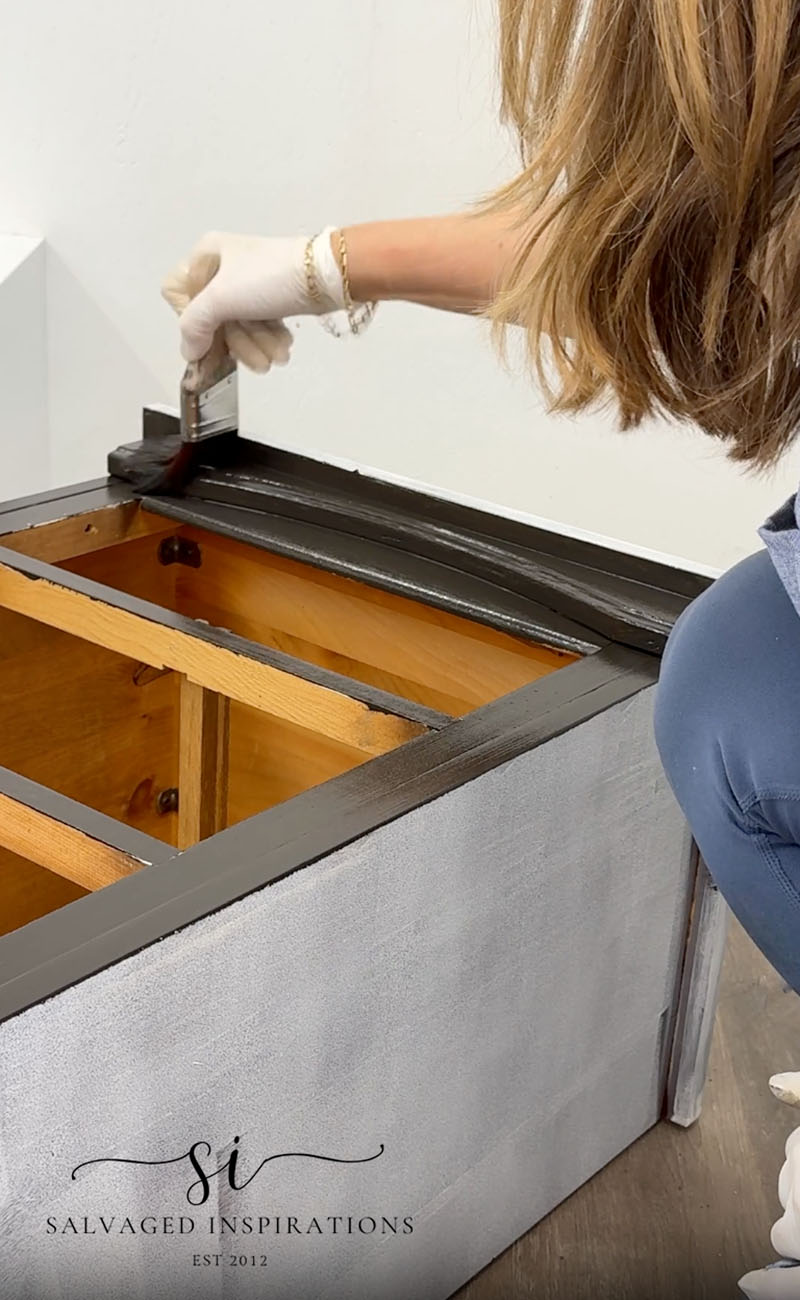
The new base of this piece looked soooo much better all painted up as well. The entire chest got two coats of paint and then I let it dry overnight.
FINISHING TOUCHES
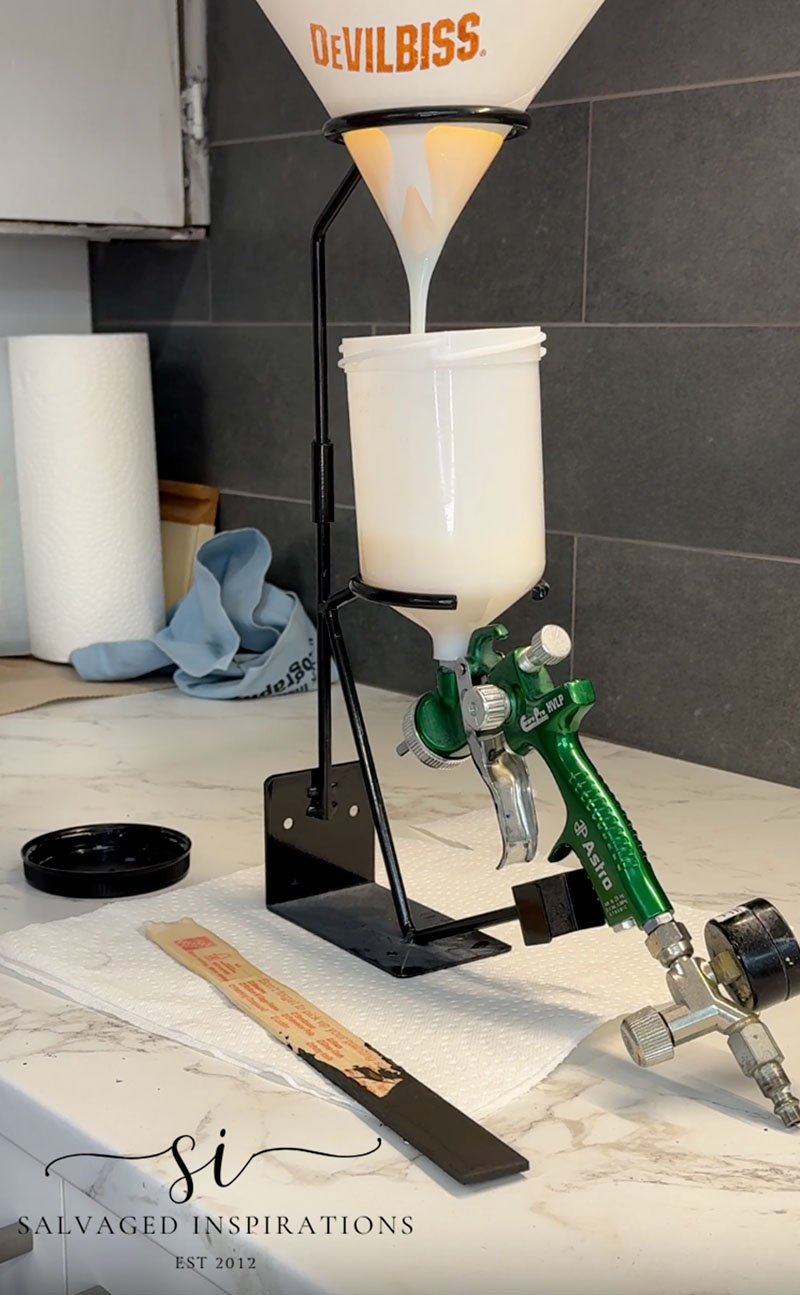
To protect this paint finish, I sprayed three coats of Gator Hide. Because I used an open jar of the topcoat, I strained it through one of these filters. I also like this stand for my paint gun. It makes pouring the paint or topcoat into the cup a much cleaner, easier and faster process.
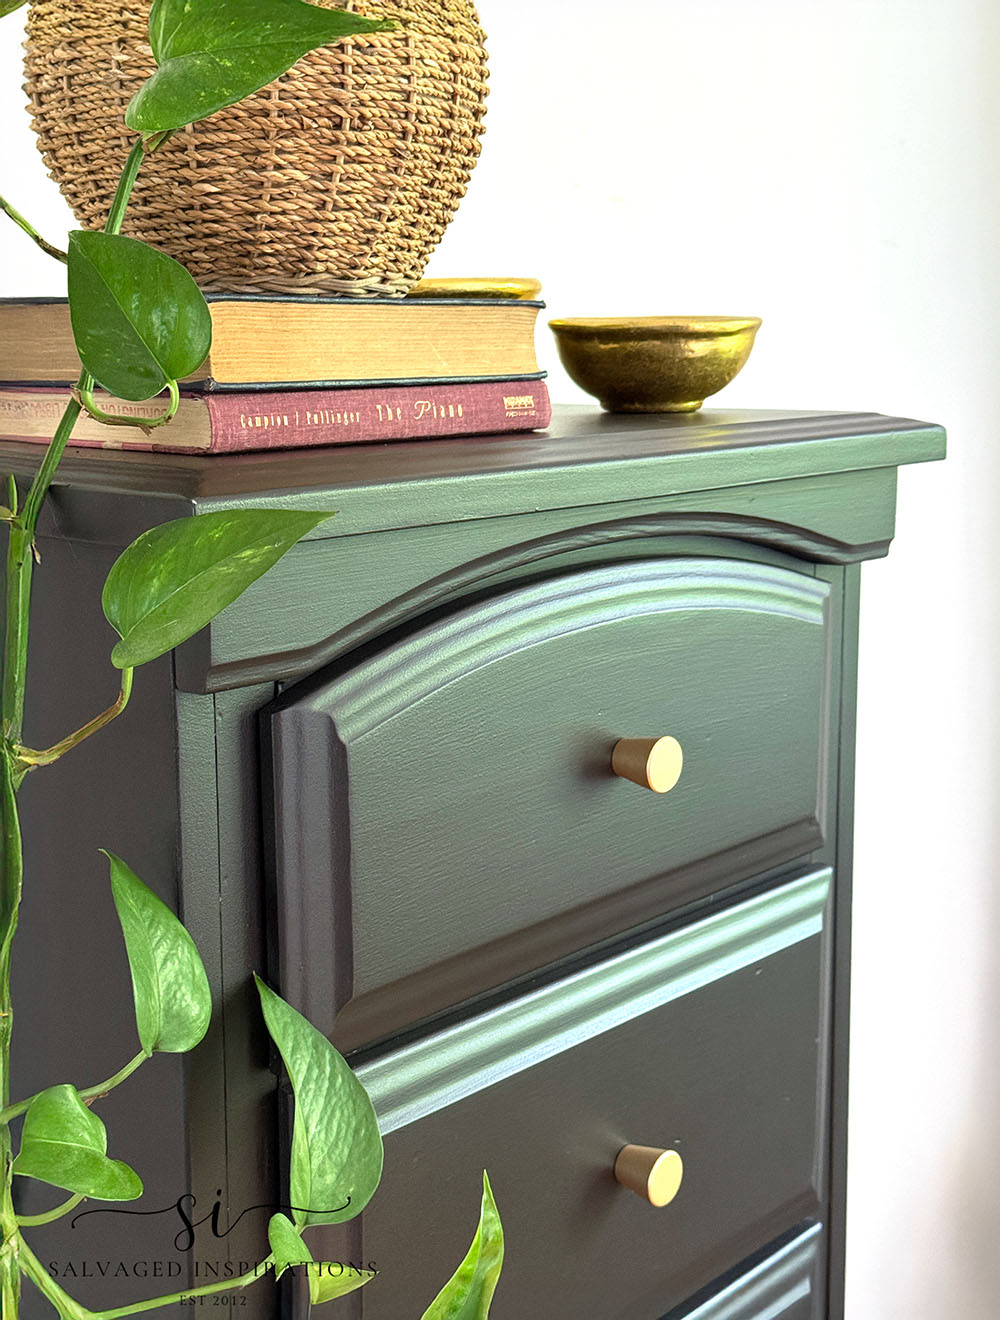
For the final detail, I added beautiful brushed brass drawer pulls that really pop against the rich Coffee Bean paint color.
PIN AND SHARE 🤗
THE BIG REVEAL…
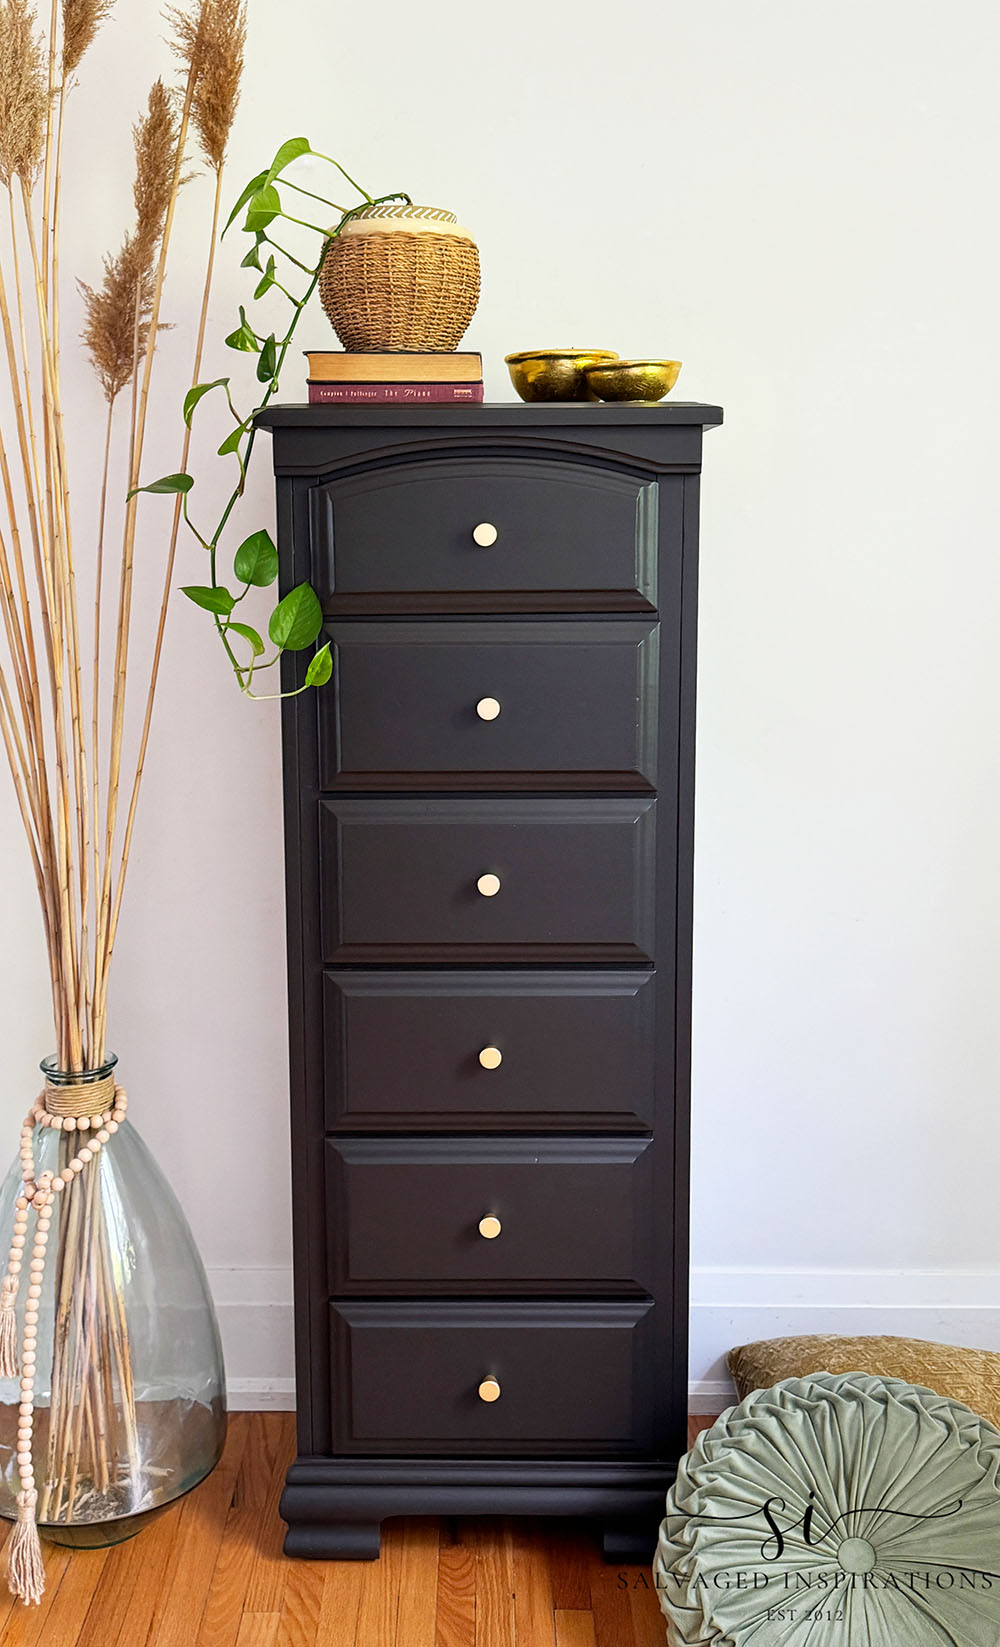
Here’s the finished look! What do you think!?
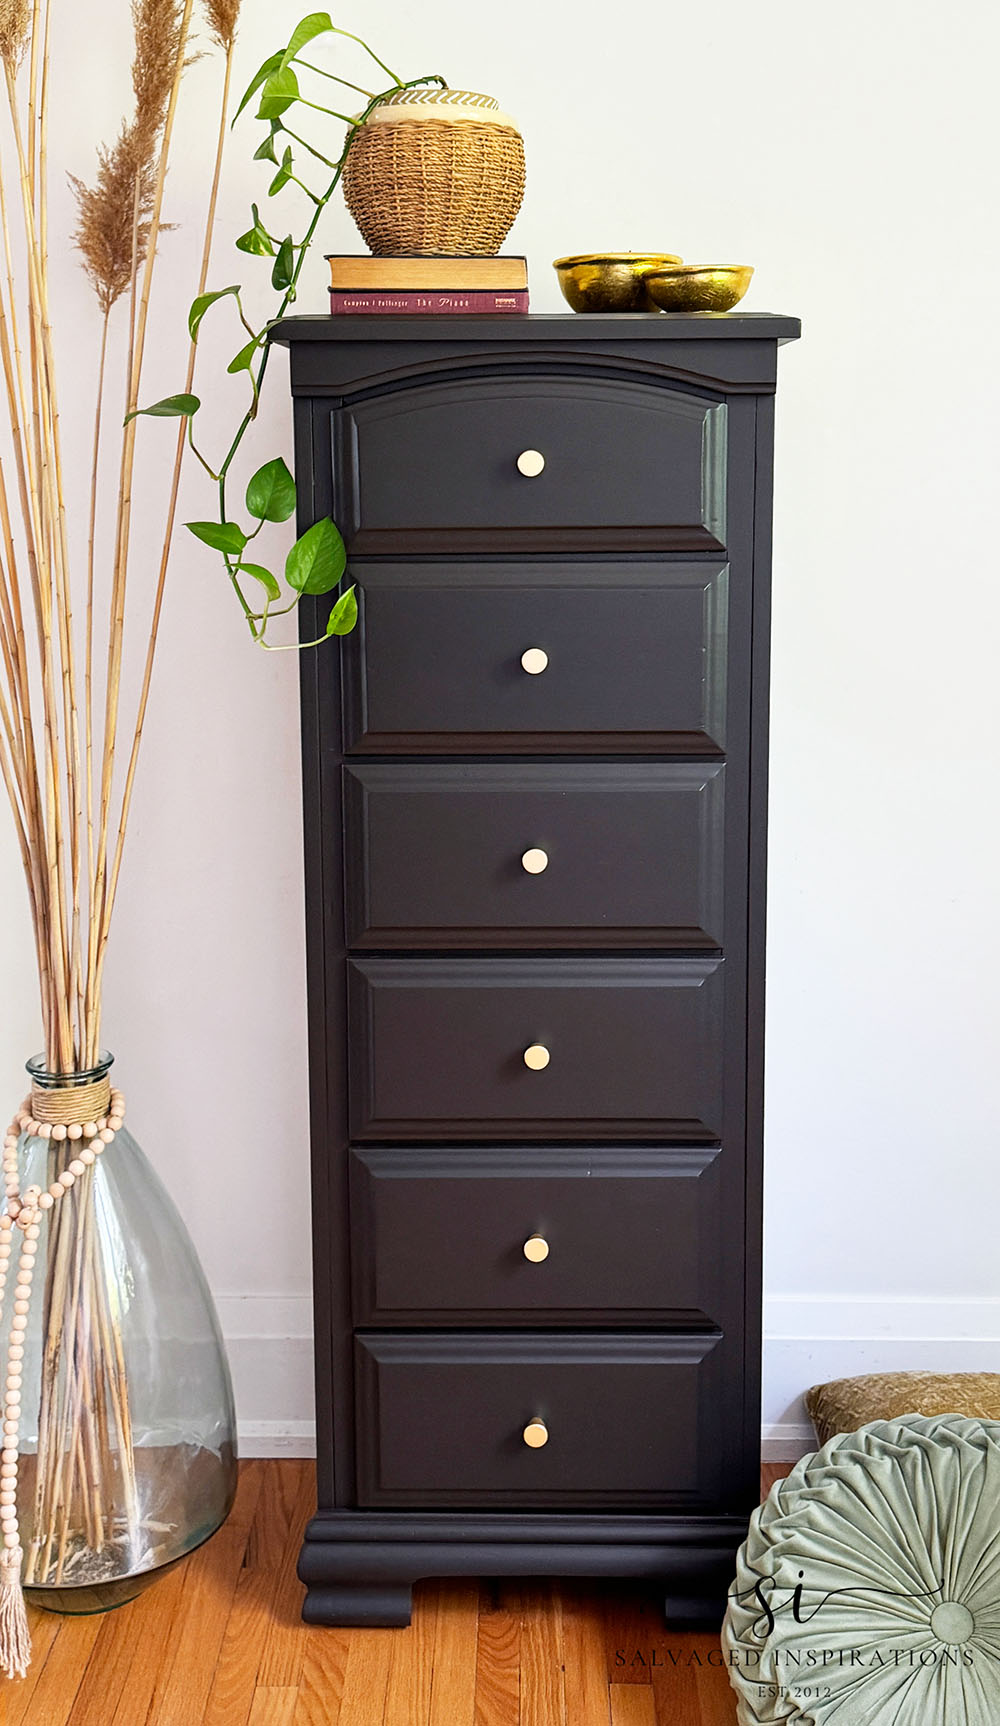
The warm black paint color really updated this piece and gave it a much more elegant look.
And remember the bottom before? I’m so glad I cut the bottom into a sleeker look to match the new look. I love these knobs as well!
YOUTUBE TUTORIAL
Here’s the full step-by-step YouTube video tutorial for you. Our #siyoutubefamily is already a community of 58.3K, so don’t forget to subscribe if you haven’t done so already. You’re the BEST, and I appreciate your support! 🙂
And now for some FURNITURE FIXER UPPER FUN!
You’re going to LOVE what these creative FFU ladies do! Below are the BEFORE photos. Visit the links to see the amazing AFTERS and learn how they did it! I’m heading over to take a peek as well!
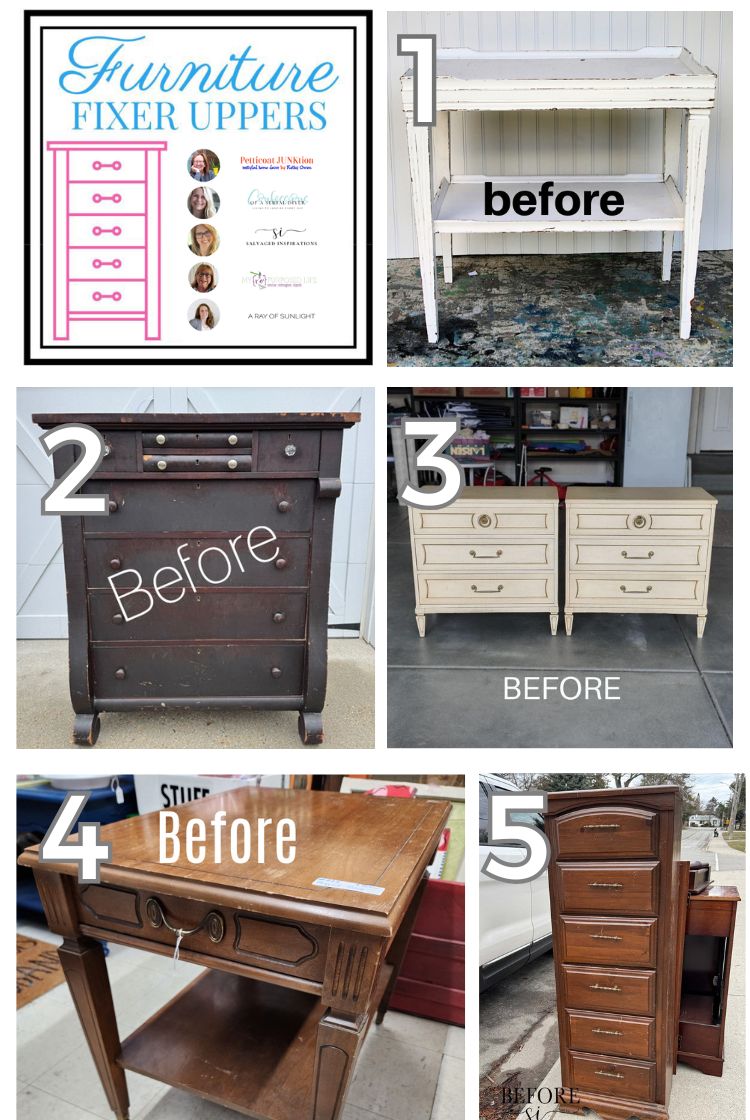
1. PETTICOAT JUNKTION
2. CONFESSIONS OF A SERIAL DIYER
3. A RAY OF SUNLIGHT
4. MY REPURPOSED LIFE
5. SI (HAPPY YOU’RE HERE!)
Here’s another look at this curbshopped lingerie chest before and after. I hope it’s inspired you and given you some ideas for your upcoming furniture painting projects!
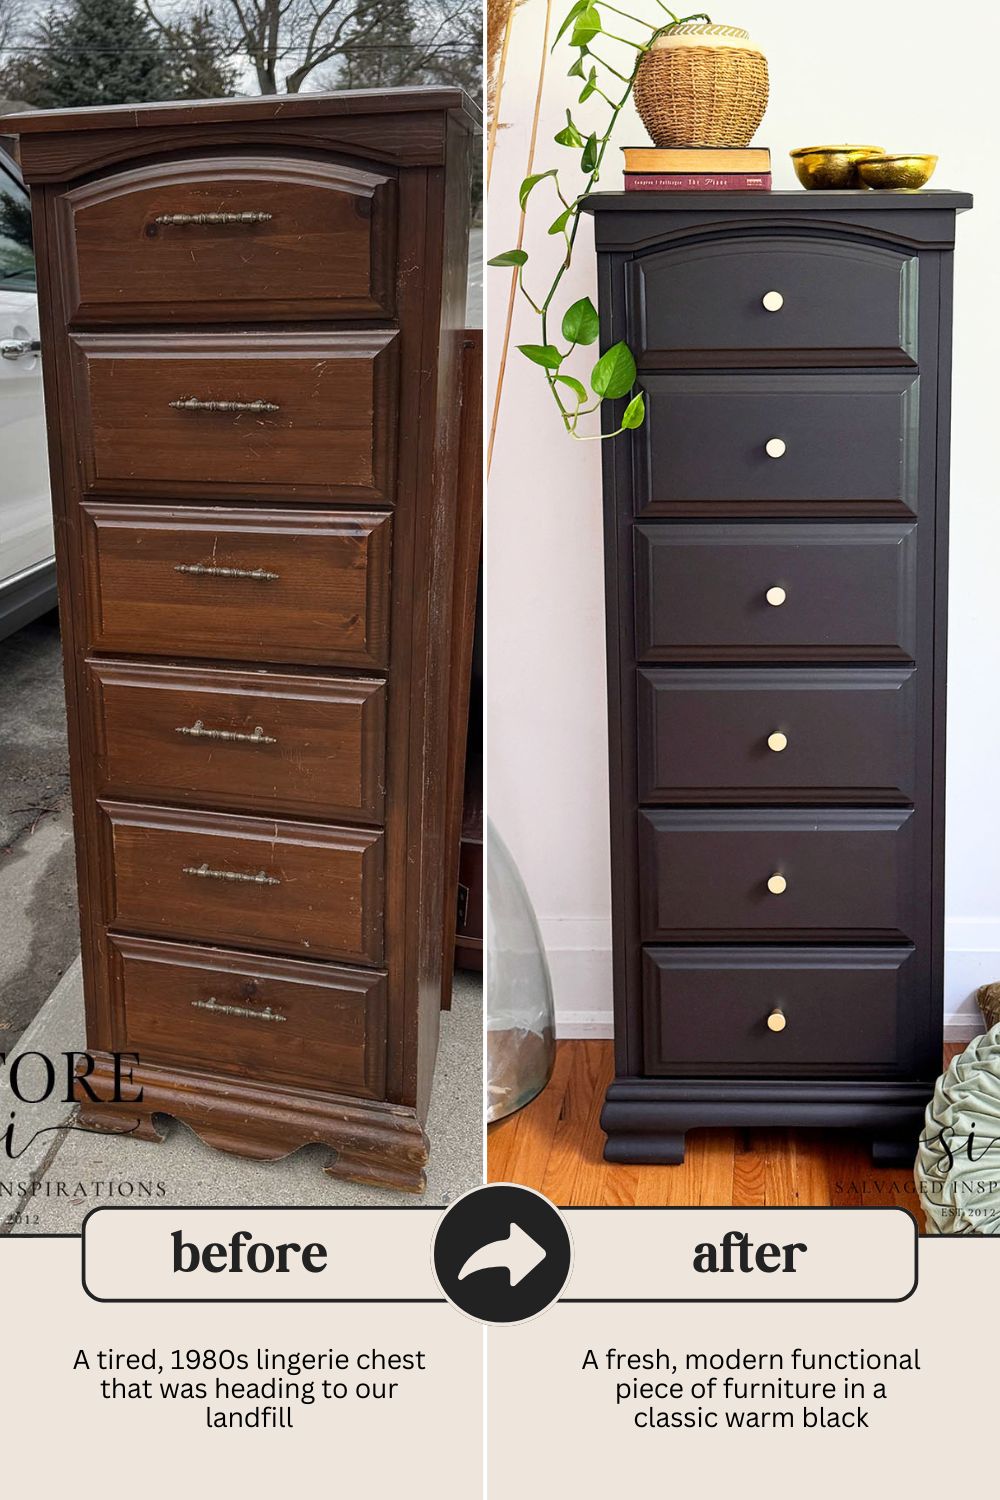
What do you think of this before and after? This was a chance to save another piece of furniture from our landfill and give it a new life. Although it wasn’t originally a high-end piece, it’s still very usable and built a lot better than some of the mass-produced pieces out there today… and it looks lovely again! You are all seeing this piece before Andrea does, so I really hope she likes it! It checks all the boxes for what she was looking for, so I’m hoping it’s a good fit for her space.
Thank you so much for being here and for following along with our May Furniture Fixer Uppers Tour. If you have a question or want to say hello, I’d love to hear from you in the comments below — you always brighten my day!
Happy painting, sweet friends! 💙
Denise x
RELATED POSTS:
1970s DRUM TABLE MAKEOVER
USING BOLD COLOR TO UPDATE FURNITURE
15 IDEAS TO MAKE OLD FURNITURE LOOK MODERN
BEST BLACK PAINT FOR FURNITURE
COFFEE BEAN PAINT WASH NIGHTSTANDS
PIN AND SHARE! 🤗
 Hello again... I'm so happy you dropped by! Let's keep in touch! Follow me on social media or sign up for a dose of furniture painting inspiration and diy tutorials. :)
I like the new bottom! Great job. Coffee Bean is on my radar for this week. Can’t wait to try it. Great makeover.
Thanks my friend. You’re going to LOVE Coffee Bean!
Hi Denise! My all time favorite colors fr9m DB. You just cant go wrong.
Hi Cheryl! I’m with you, I agree 💯% Have a great weekend! 🤗
This makeover turned out beautiful! I really love the direction you took with this piece, and the knobs you chose finish it off perfectly.
Aw thanks Natalie. Great minds with the elegant black finish! 😉
I agree!
I love lingerie chests! So much storage with such a small footprint. You really saved this gal from a fate worse than death! 🙂
Love the color and the new hardware. Great tips for getting the job done Denise!
pinned
gail
Yes, there is a ton of storage in this tall chest, love it! Thanks so much Gail and have an awesome weekend!
If I had to choose one color for a quick makeover, it would be Coffee Bean. Love the dark, moody vibes it gives. Your sister did great picking this color. Nice save, Denise! Pinned 📌
Have a fantastic weekend, my friend. xo 🙂
Andrea did pick a great color – can’t go wrong with classic black! Thanks for the pin and enjoy your weekend as well my friend. XOXO
Hi Denise. Your sister is LUCKY! This lingerie chest looks so beautiful with the new color, knobs, and modern skirt. I’m sure she’s going to 😍
Aw, thanks so much Monique! I sent her a pic and she loves it so I hope you’re right. Enjoy your weekend. XOXO
I agree with Christy, you find the best pieces, and it’s always a joy to see you turn these ugly ducklings into something modern and beautiful! You are very talented and have a great creative eye and imagination. Your sister will love it!
Thank you Nicki, very kind of you to say! I love working on these finds, they are usually my favorite makeovers because of the ‘save’ factor. Have a great weekend my friend. XOXO
It looks so much better now! Even with the lesser qualities of the build, it looks like it has a new life. It will be a good addition for Andrea. It must be nice to have such a good sister. Good job, as always Denise.
I think it will be a good addition for Andrea as well. And if/when she gets bored, she know she can hit me up for something else.😆 Thanks Catherine. Wishing you a fabulous weekend my friend. XOXO
Well done, the chest looks brand new. Hope the sister likes it. Thanks for sharing
I hope she likes it as well. I sent her a pic via text and she said she loves it so I think its a winner! Thanks for dropping in and have a wonderful weekend Mary!
So beautiful as always!
Thank you Kimberly! 🙂
Such a transition. Tired and dated to sturdy and modern. I’m amazed how minor changes make so much difference.
Cutting off the skirt curve made a huge difference. I love the simple hardware and the Coffee Bean color.
Of course – the added quality of your workmanship make it really stand out.
awww, thank my friend! Amazing what a little paint and elbow grease can do, right?! Thanks so much! XOXO
You find the BEST things!!! I love this piece so much and what a difference cutting that base made! XOXO
Our bulk days are awesome! They used to have them a couple of times a year on designated weekends. Now its every two weeks and the areas rotate. I guess the garbage collection was too intense when there was no limit a couple of times a year. Now it’s max 3 items. Glad you like the lingerie chest my friend and I’m glad I modified the skirt as well. Have a great weekend. XOXO
Sooo much better! You’ve really modernized it.
Right!?!😃 Thanks Lizzy and I agree, sooo much better. I’m always amazed at what a little paint can do!
What a transformation! Looks so elegant modern. Love the color, perfect for that piece. Thank you for saving that tired dresser. It looks happy now!
I can’t take credit for the color choice b/c Andrea picked it… but I agree, perfect for this piece. And it DOES look happy now! Thanks Jewels. Enjoy your weekend! XOXO
That turned out really beautiful! I didn’t think I would like the warm black as much as I did. Your knobs and modernizing the skirting made such a huge difference! Thank you for the tinting tips on the primer.
Thanks and my pleasure Marie! Small changes can make all the difference and so happy you like the warm black.🤗
You do such beautiful, creative work. Patience and inspiration abound.
Wondering how you treat the outer sides of drawers? I worry about them sticking if I paint them.
Thanks for all your suggestions.
Deb
Thanks Deb! 🙂 For this type of dresser the outer sides of the drawers and drawer frames dont rub/touch so it’s not an issue. But on older vintage pieces, I’m very careful to paint THIN layers and then sand and or wax. You don’t want any paint build up. If you find they are sticking, a coat of wax should fix it right up. Hope this helps.
I really love this and hope to find a similar piece for my granddaughter. The shade of black you used is gorgeous and your post is inspiring – thank you very much!
I’m so glad you like it Marion and I’m wishing you luck finding a similar piece for your granddaughter! It’s a fun project and they hold a lot of stuff with the six drawers. I’m sure she’d love it!