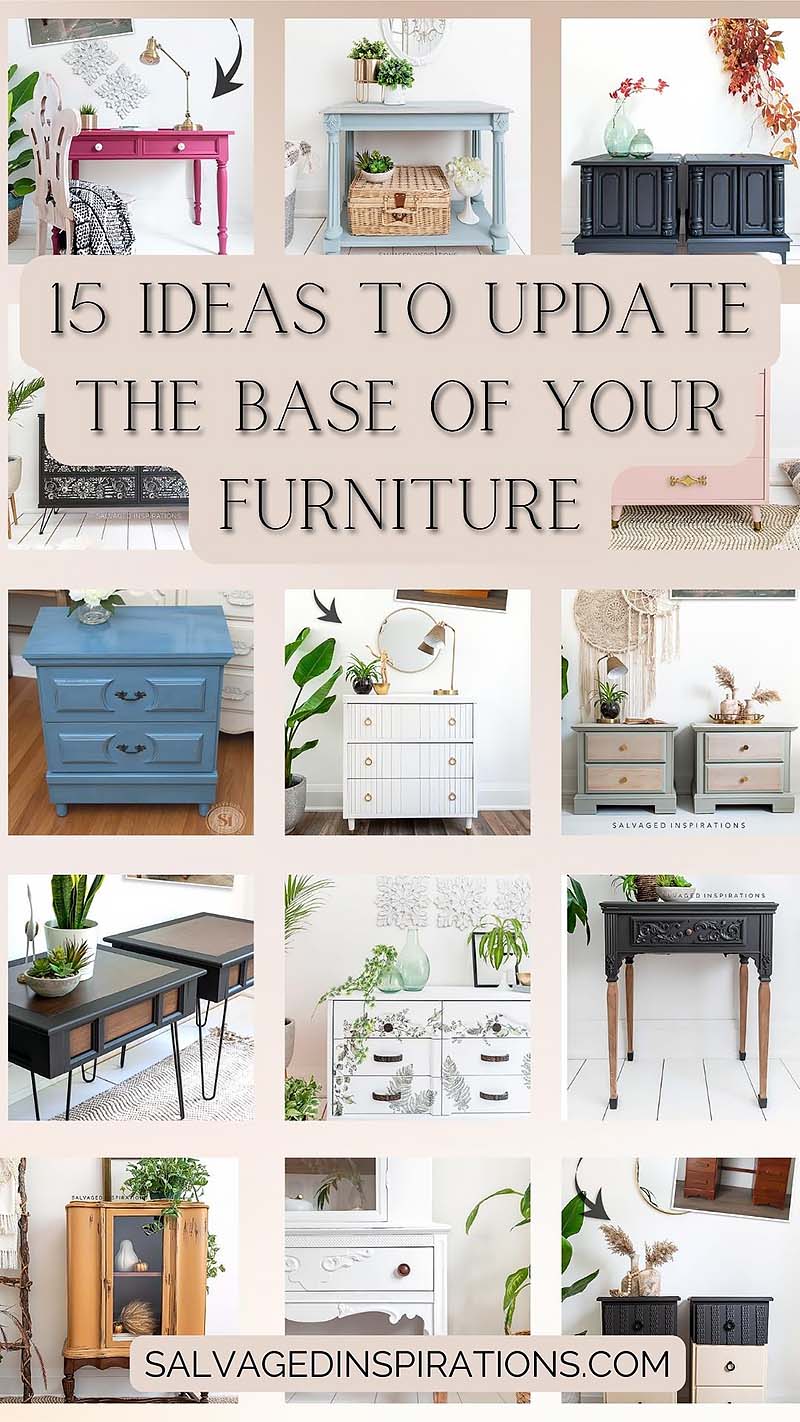
TODAY I’M SHARING HOW TO MAKE OLD FURNITURE LOOK MODERN BY UPDATING THE BASE AND BOTTOM | 15 IDEAS AND LINKS TO FULL DIY TUTORIALS

Hi, sweet creative friends! To start this month off, I’m sharing a fun roundup on How To Make Old Furniture Look Modern – 15 Ideas To Update The Bottom Your Furniture! As I always like to say, if I can do this YOU can do this!
I’ve added 15 easy ideas below in no particular order. There is a link to the original blog post and step-by-step tutorials.
Let’s get this party started…
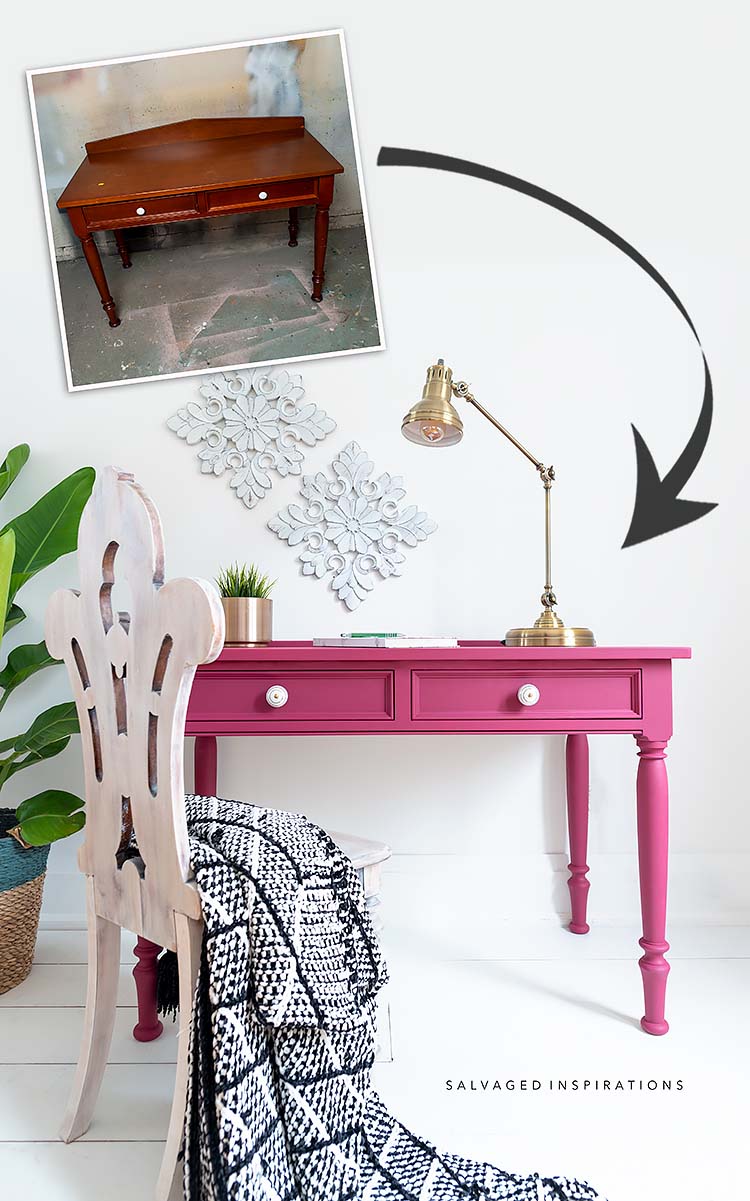
1. PAINT LEGS IN A FUN COLOR
Color evokes emotion so one of the easiest ways to update old-looking furniture is with a fun pop of color. If you pick a color you love, you can’t go wrong. Below I painted this dated desk in a bright Plum Crazy. This color puts a smile on my face every time I look at it!
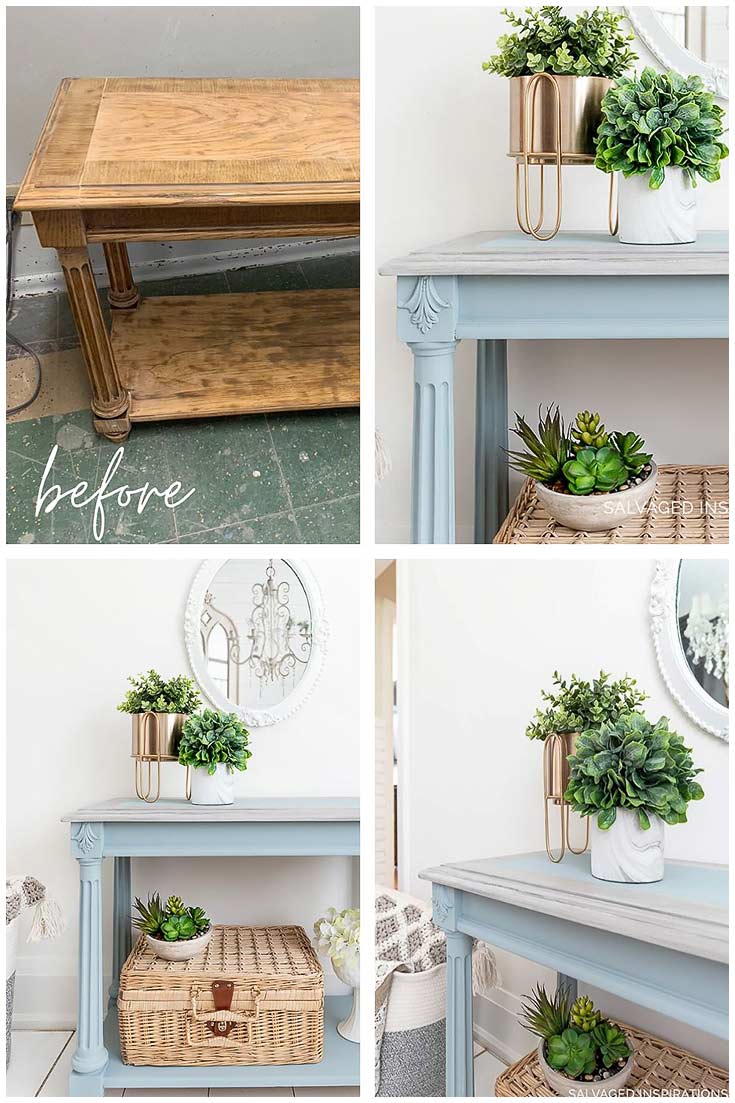
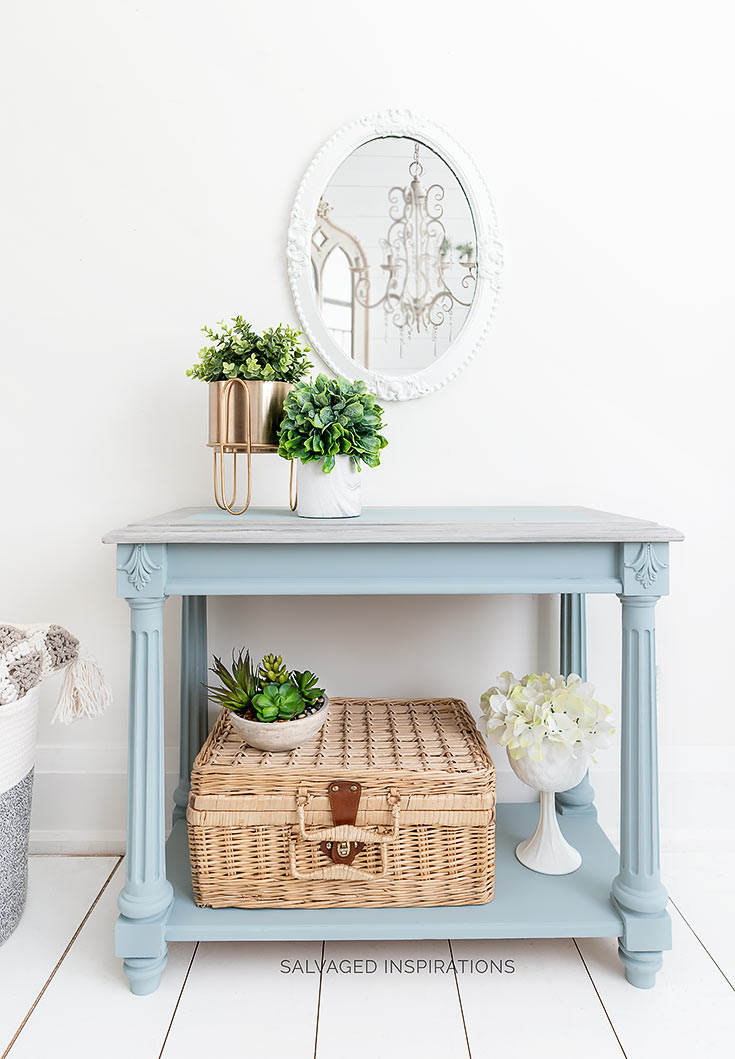
2. ADD MOULDINGS
For this console table makeover, I added a Lafleur molding AND a pop of color to update the legs and draw the eye up.
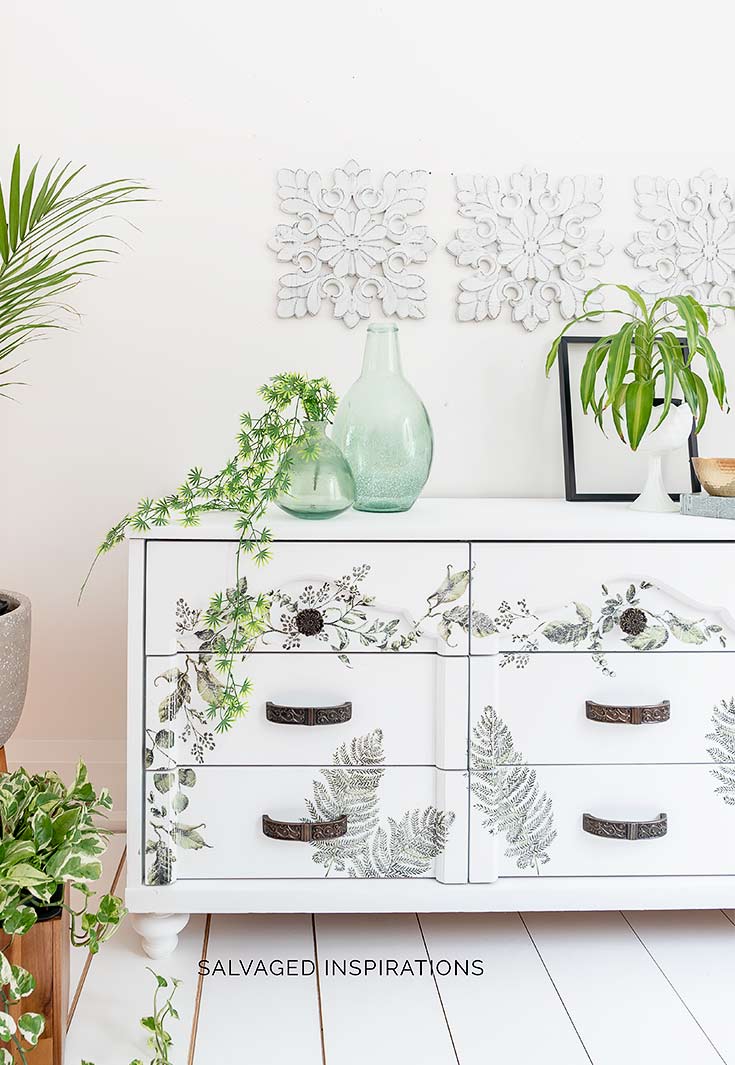
3. ADDING HAIRPIN LEGS
On one of our bulk days, I found this Ikea dresser roadside. Once I decided I was going to paint a high contrast bold stencil design, the round wood feet needed updating. I swapped them out for these hairpin legs and what a difference!

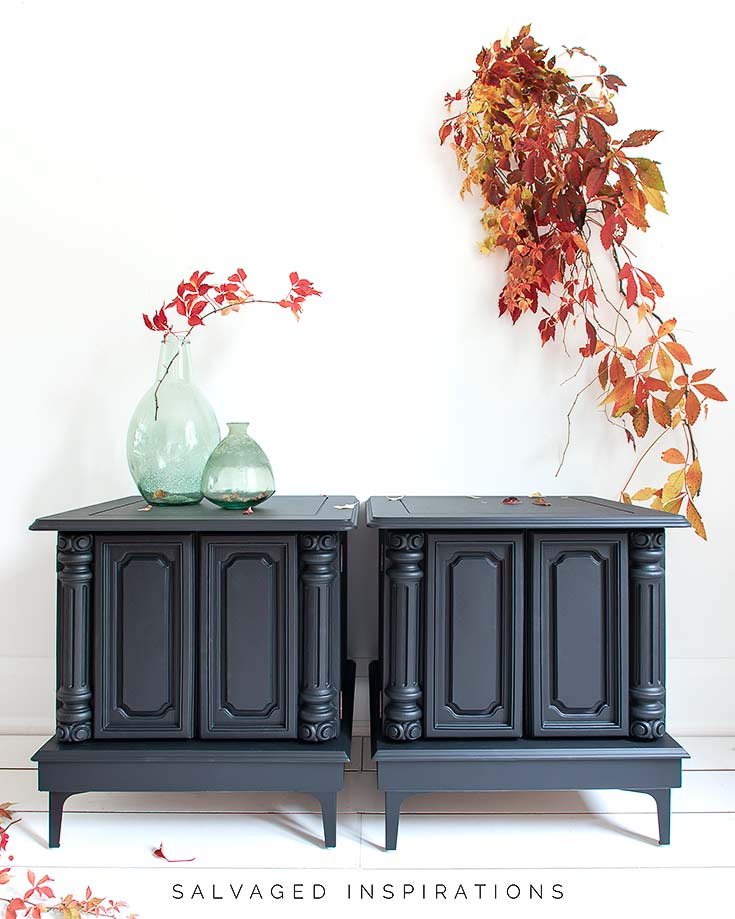
4. ADDING METAL LEGS
I believe these thrift store nightstands are from the 70’s or 80’s. They were low to the ground and looked very bulky and heavy.
I painted them in modern black and added these metal feet. These metal legs come in black, gold, and silver and give a much cleaner and sleeker look to older-style furniture.
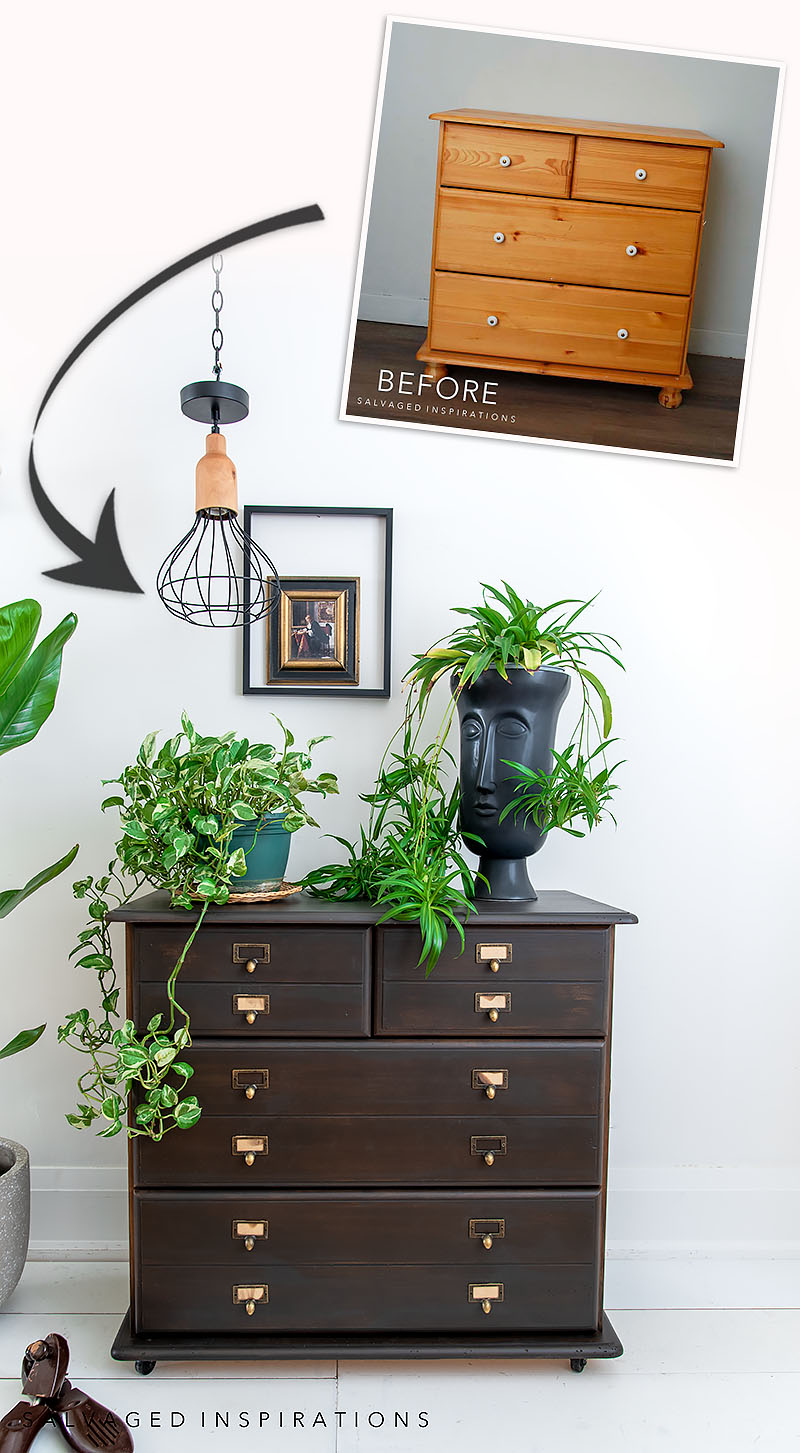
5. ADD CASTOR WHEELS
If you were visiting a few weeks back you may have seen this dresser-turned Map Cabinet. This was another Ikea find that had round wood feet. To refresh this piece, I added small caster wheels so this piece is easy to move and looks way more updated.
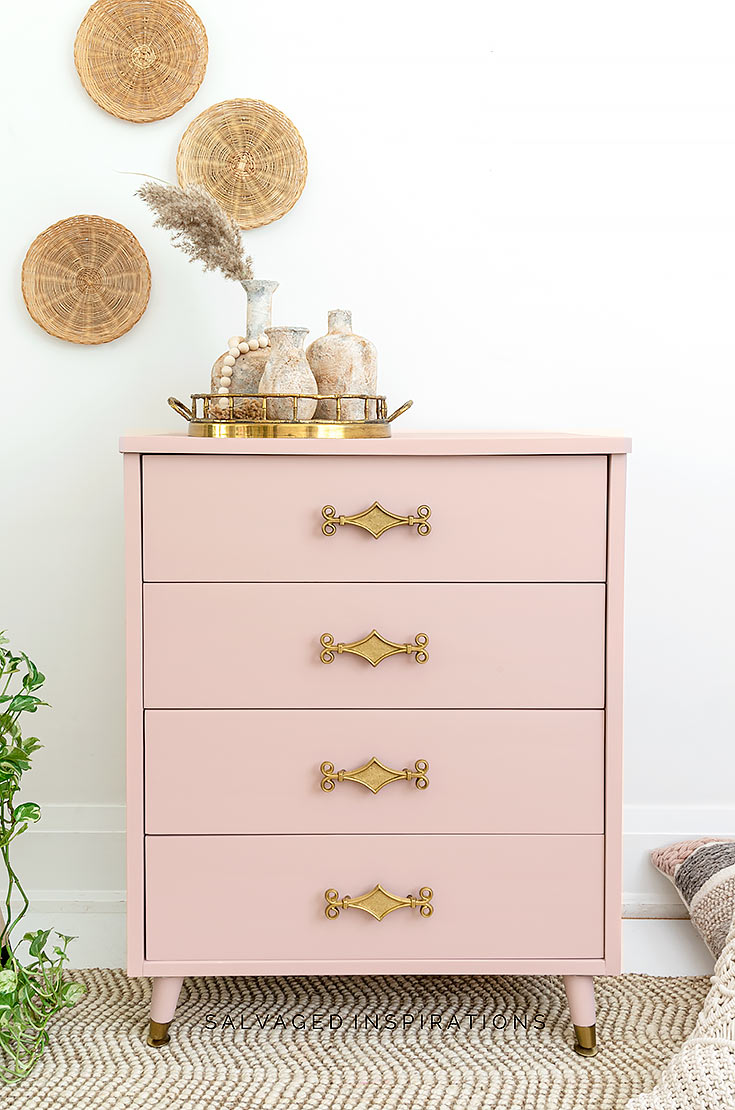
6. SWAP OUT A FLAT SKIRT FOR LEGS | PAINT GOLD CAPS
This one is a double whammy. I removed the bulky bottom skirt and replaced it with tapered legs. Then I painted gold on the bottom of the feet to create faux gold caps. This piece went from a plain flat dresser to a gorgeous Anthropologie Dupe!

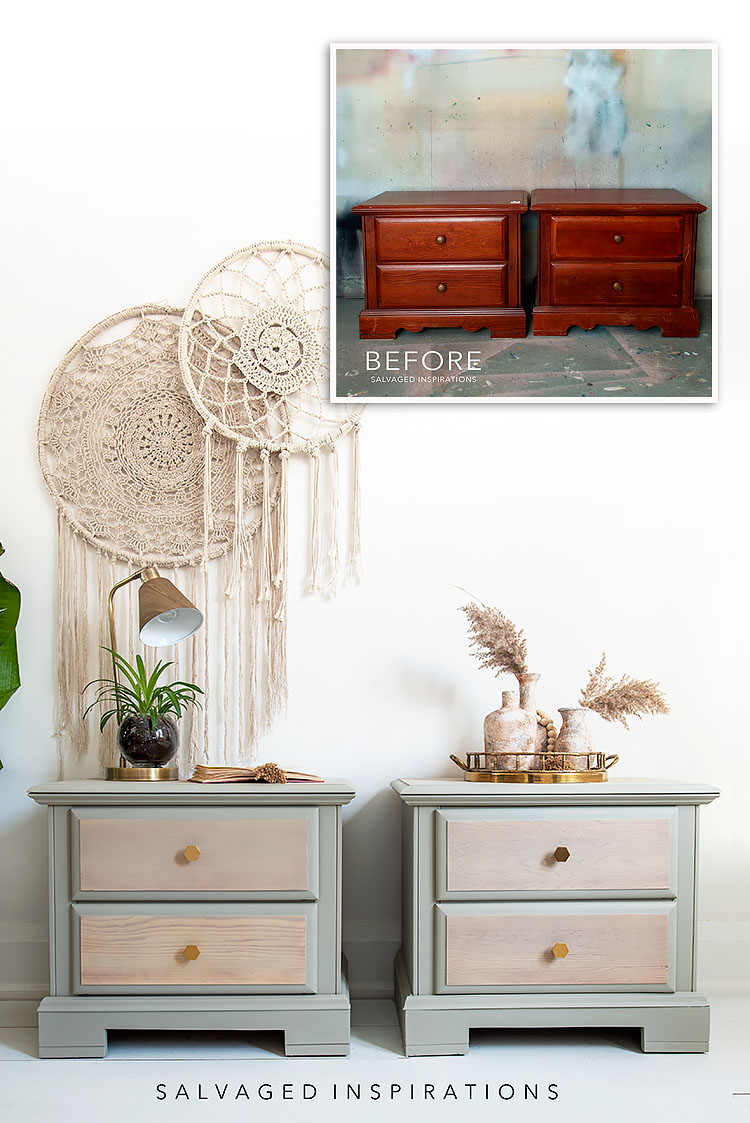
7. STRAIGHTEN OUT THE BOTTOM SKIRT
To give these $12 nightstands a new Boho vibe, I straightened the bottom skirt by cutting the rounded edges straight. It’s not difficult to remove a skirt and it gave me great practice using a jigsaw!
What a difference, don’t you think?!
8. ADDING ANGLE LEGS
This piece started out as a high gloss boxy dud and turned into this fabulous feminine beauty.

I repurposed these angled legs (they came off another dresser in my inventory) onto this boxy dresser and I feel the bottom angles add so much more than a straight leg ever could!
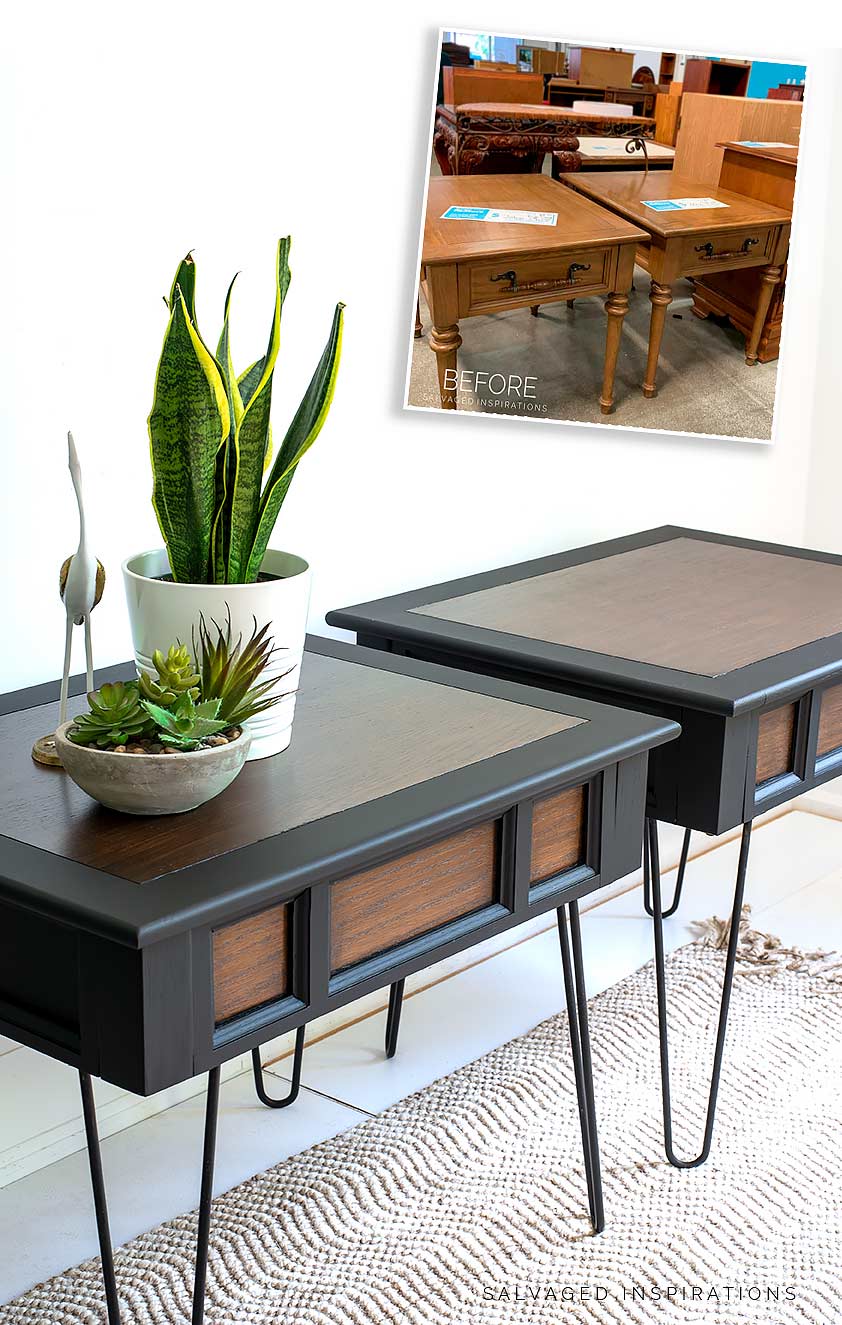
9. LONG HAIRPIN LEGS TO ADD HEIGHT
I picked up these side tables at my local restore. To give them a totally new updated look, I removed the old dated wood legs, changed the front of these tables to the long side rather than the short, and added 16″ long hairpin legs. The difference is unbelievable. I wouldn’t even know these were the same tables if it wasn’t me who restyled them!
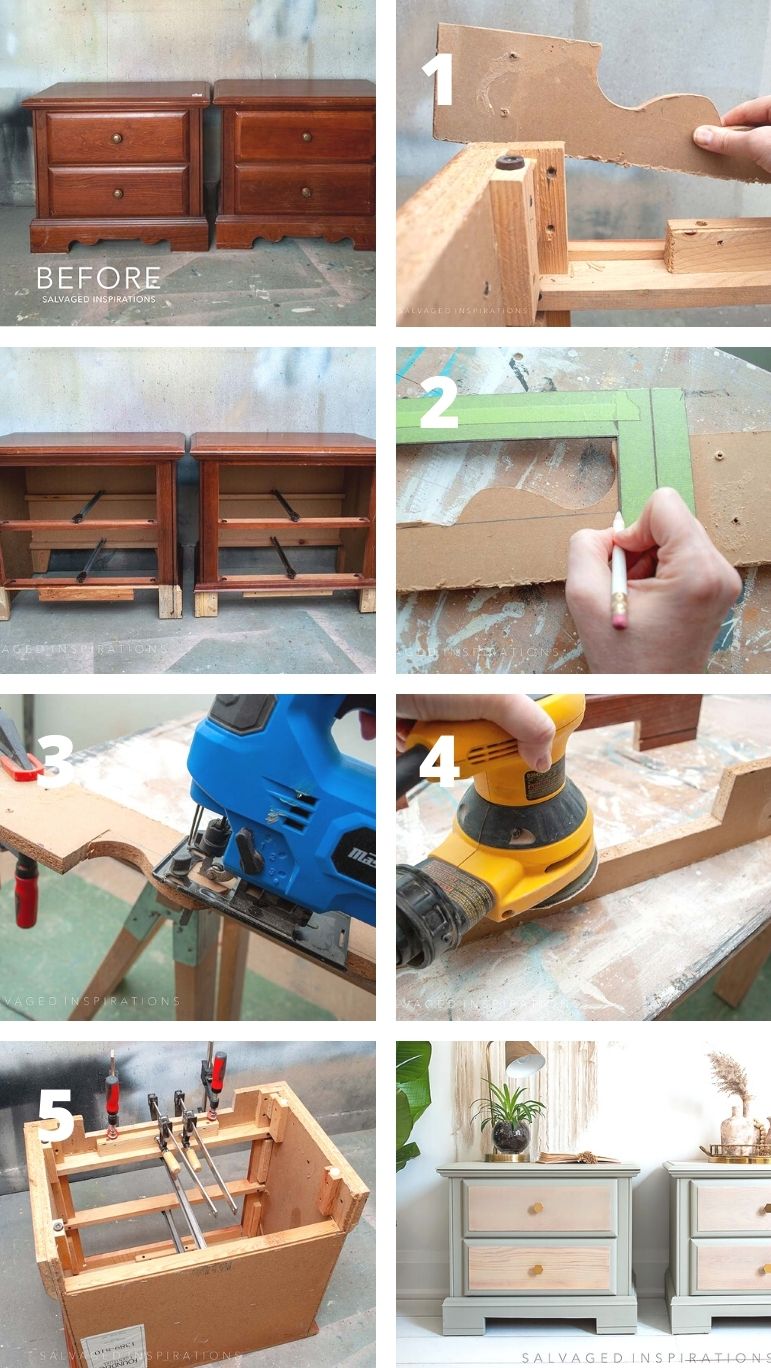
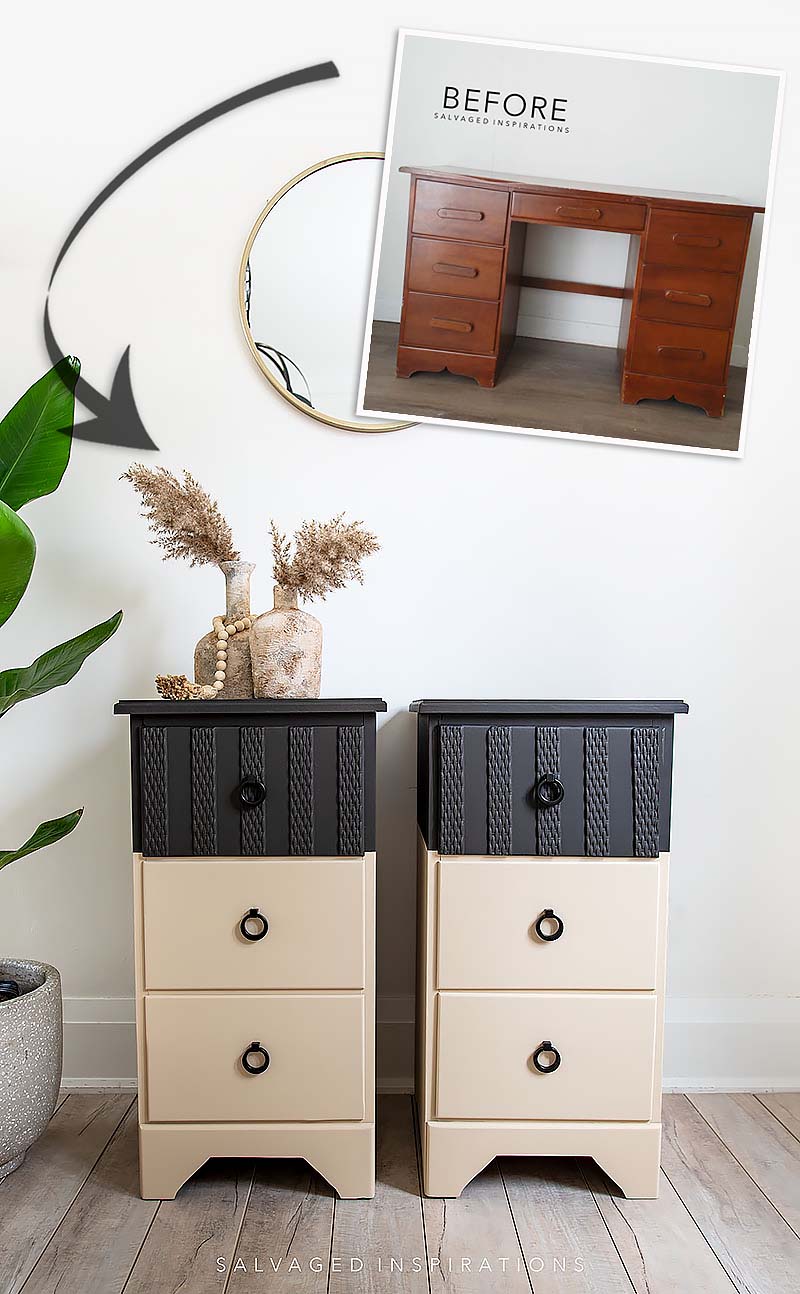
10. ANGLED BOTTOM REVISION
Last week I upcycled this trash-bound desk into two updated nightstands using an angled bottom revision. To get rid of the whale tail skirt, I marked out my angles using a woodworking square and a Sharpie. Then using a Jigsaw, I followed the lines to create a new bottom skirt profile.
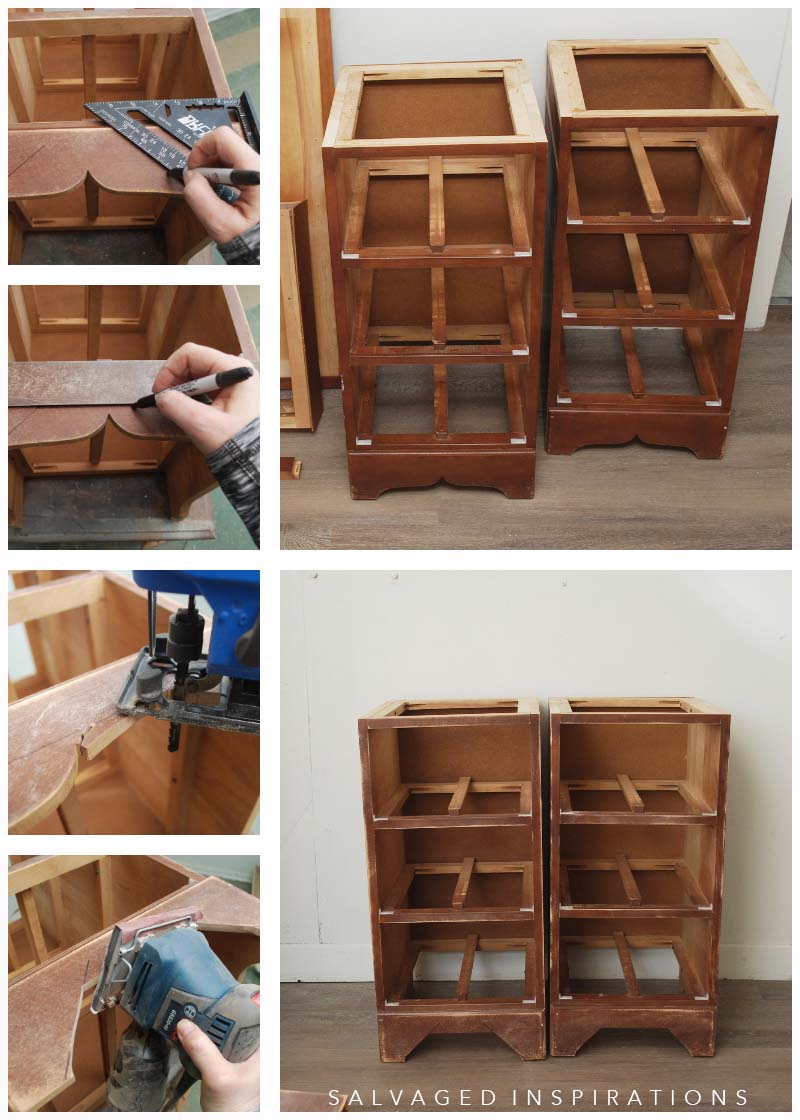
This angled bottom works much better with the new cleaner look.
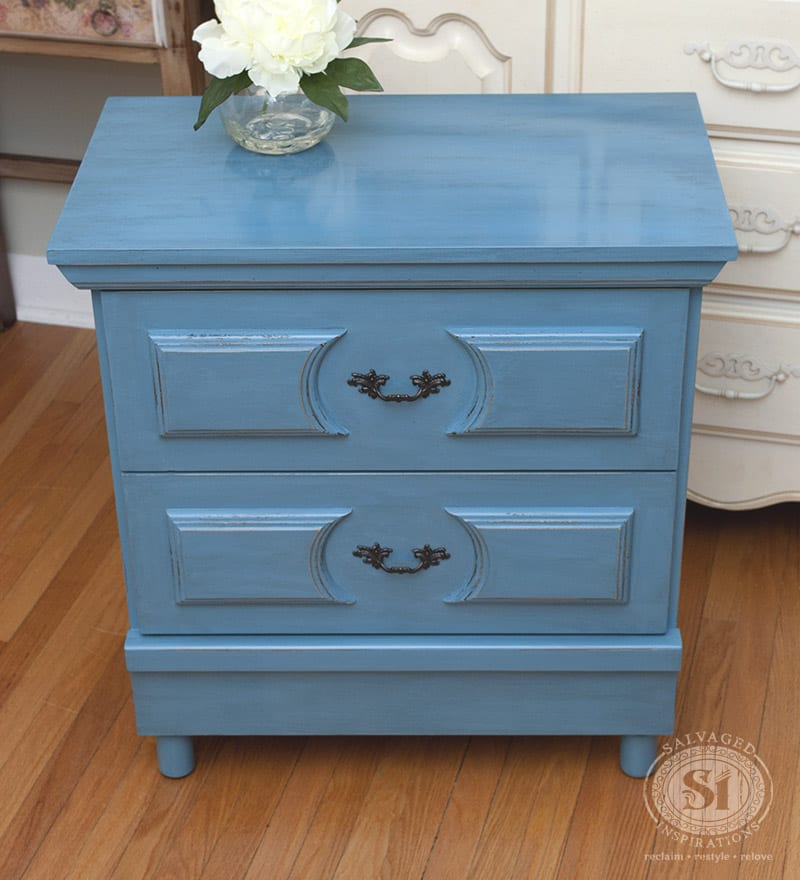
11. ADD FEET TO AN EXISTING SKIRT
A lot of older furniture is short by today’s standards. If you find a piece you love but looks dated because of its size, you can add a few inches by adding legs to an existing skirt. This nightstand was a custom piece for a client back in 2015. The addition of the feet raised the entire nightstand by 4 inches and gave it a more modern updated look. Here’s a simple way to add legs to your furniture.
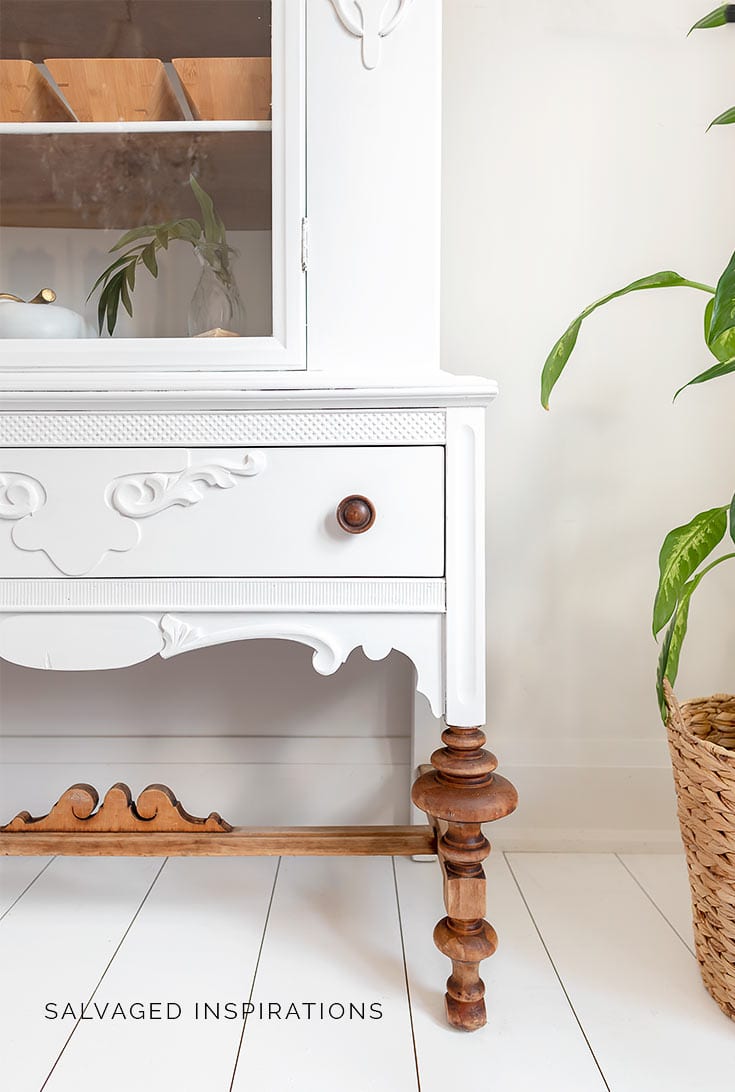
12. ALL-NATURAL WOOD BASE
I love this look. Taking a vintage piece of furniture, painting the top but leaving the base in its all-natural wood beauty! This really gives your vintage furniture a fresh look while showing off its workmanship in a fresh way.
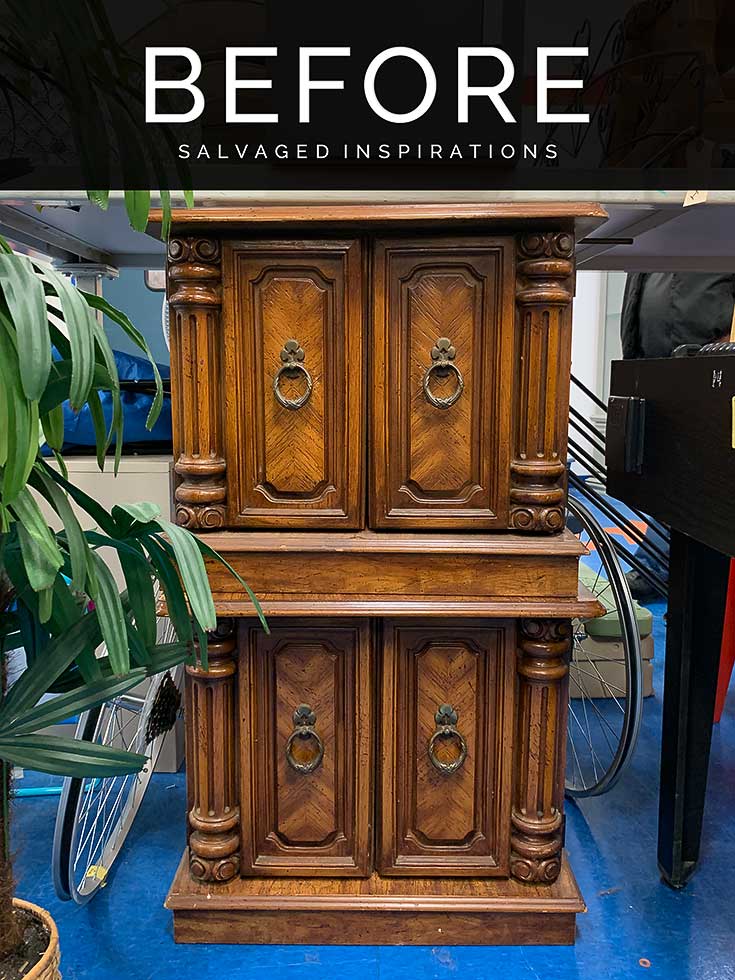
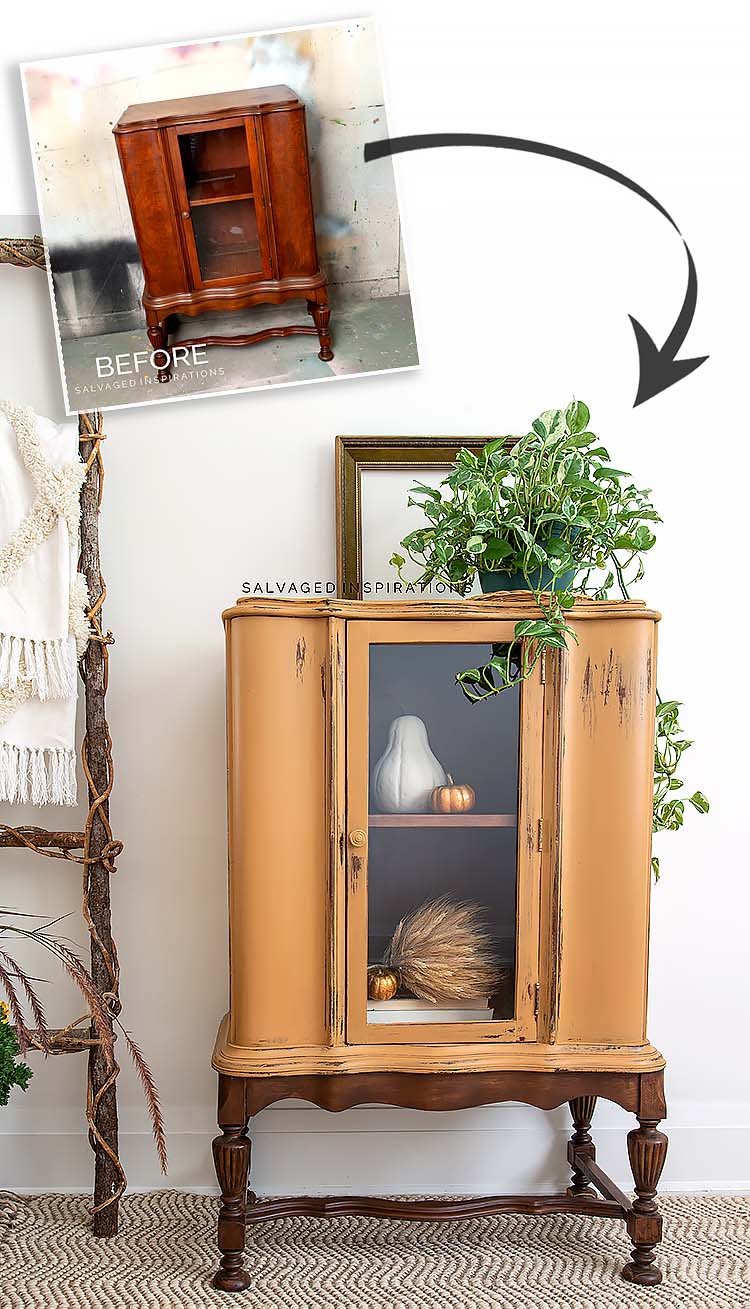
13. STAINED LEGS W PAINTED TOP
And here’s another version of the above. If your vintage piece already has a flawless and gorgeous stain, why not paint the top with a pop of color and leave the legs showing off a rich stain. That’s exactly what I did with this Fall Cabinet. I also included some distressing so some of the dark stain peeked through and tied the entire piece together.
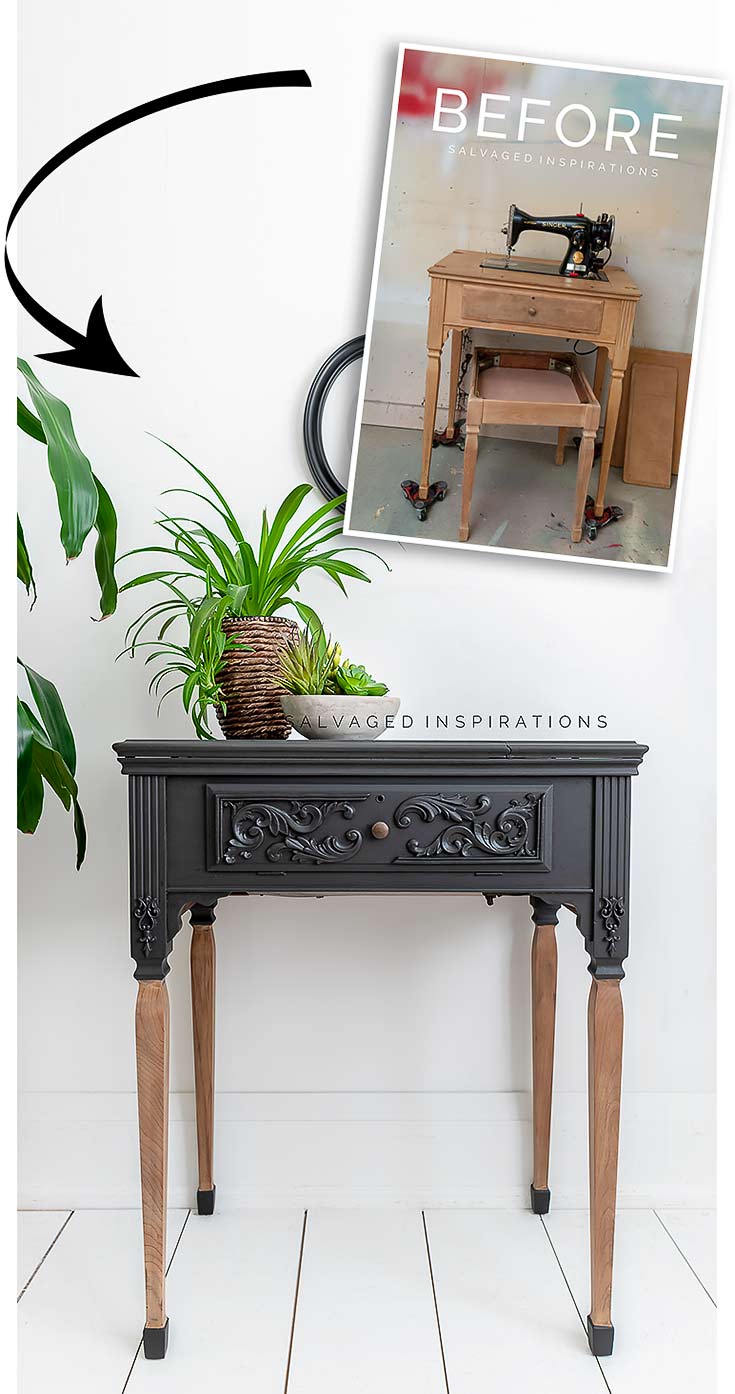
14. PAINT DIP A NATURAL WOOD LEG
Paint dipping or color blocking is a fun way to update the base of your furniture. This sewing machine cabinet makeover had these stunning long legs that I left bare wood.
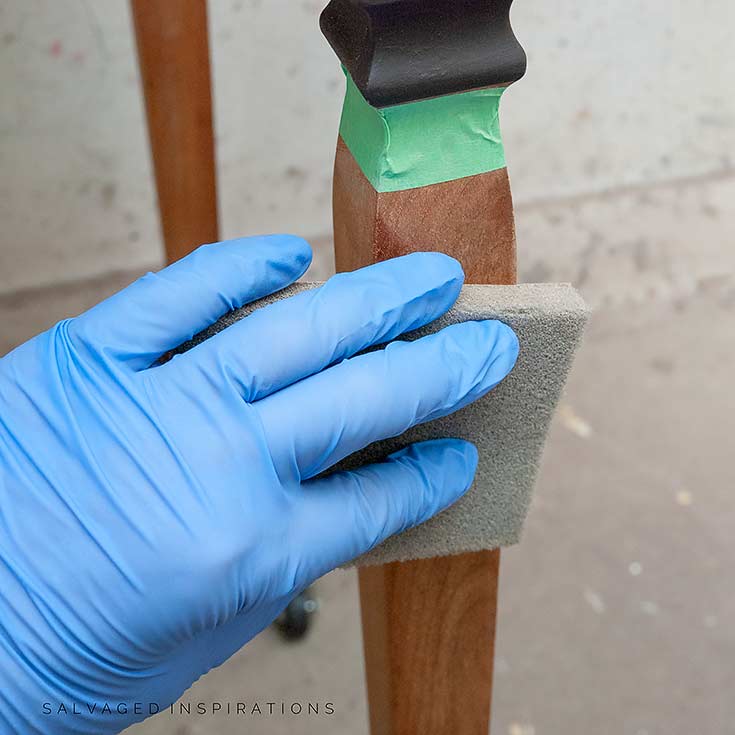
To tie the new modern look together, I painted the feet the same color as the top. It weighs the piece down and adds interest to these long gorgeous legs – like little ballerina shoes!
15. ADDING BUN FEET
I always want to call Bun Feet Bunt feet…lol, but whatever you call them, they can make a huge difference on your old furniture. Check out how this beast of a dresser all came together! Adding bun feet raised this dresser off the ground to give it a classier modern look!

These bun feet are adorable and they come in all different shapes and sizes!
I hope you enjoyed today’s makeover and it’s given you some ideas on how to update your old furniture!
LET ME KNOW WHAT YOU THINK OF THESE IDEAS OR FEEL FREE TO ASK ANY QUESTIONS YOU MAY HAVE… I ALWAYS LOVE HEARING FROM YOU. IT MAKES MY DAY! 🙂
Happy furniture painting friends!
Denise x
RELATED POSTS::
DIY ANTHROPOLOGIE DRESSER
CACTUS PAINTED SIDE TABLES
HOW TO PAINT MCM FURNITURE
DIY BOHO NIGHTSTANDS
HOW TO REVAMP YOUR OLD DESK
PIN AND SHARE!
JOIN THE SALVAGED INSPIRATIONS FAMILY!

Wow, Denise! I love all of your tips and examples of how to modernize nightstands and other furniture legs. Thanks so much again sharing!
Best regards,
Gina
Thanks Gina! 🙂
Hello Denise! Just got a chance to check out this blog post and so glad I did. I love every single one of these and thank you for putting them all together here. This is so great for giving a different perspective when deciding whether or not to tackle a piece that is just missing something and it’s as simple as ‘legs’! Let me say also that the sewing machine cabinet is ‘the bomb’! Love what you did with that. You’re an awesome teacher and all around inspirational creative!
Clare
Hello Clare! So happy you enjoyed the roundup and it’s inspired some ideas. And thanks re the sewing cabinet makeover. I kept it! The odd time I sew I bring out that old singer and it always puts a smile on my face. Have a super day!🤗
There are a few small nightstands I have painted that I wish I had added legs to but I was too intimidated. I kind of still am so thank you for putting this blog together. Love your makeovers.
Thanks Cheryl! I felt the same way… and still do! But I hope you give it a try on one of your future makeovers.🤗💜
You truly are a master of furniture makeovers, Denise! Every single makeover is always absolutely stunning after you’ve worked your magic. I always enjoy taking a trip down memory lane when you do these round-up posts. Such clever and creative transformations and always so beautifully staged.
Awwww, thank you, Marie! It’s fun taking a stroll down memory lane and I’m having so much fun modifying with tools!
Hi Denise. These are all very creative, smart ways to update furniture. You definitely have a talent for turning furniture beautiful. Thank you for all the inspiration.
Aw, thanks so much Monique! Hugs to you and have a fabulous day my friend. XOXO
So many amazing pieces and fantastic ideas to freshen up a dated piece!! Some of these are totally unrecognizable!! XOXO
Thanks my sweet friend! It was fun looking back on them. I didn’t realize I restyled/changed so many furniture bottoms.😃
I love all your updates and ideas! Thanks for sharing with us Denise!
My pleasure and thanks so much Nicki! Hugs
Thanks for putting this together, Denise! What a bunch of great ideas. The creative juices are flowing…. :o) As always, beautiful projects!
So happy it’s sparked some ideas my friend! XOXO
What a nice email with so many ideas all in one place! Thank you!
I’m so glad you enjoyed it Gail! XOXO
I love them all. I just can’t pick one! Great job!
Aw, thanks so much Rebecca!🥰
Great info. Loved the updates.
Thank you Carol!😊
Love your stuff ! You are so freakin talented 🙂
You are so freakin sweet Kelly… thank YOU!!!🤗
Denise, This was a really good blog, showing off all your wonderful accomplishments. I don’t know where you get your furniture from. It is hard to get around here, even at the resale store. The antique dealers are usually there first. Thank you for the inspiration
Thanks Michael! And we are really lucky here in the Greater Toronto Area. We have ‘bulk days’ every two weeks where we are allowed to put out three large items so many times I’ll be driving down the street and see something fabulous. The thrift stores and Restores around here also have great finds even though the prices have increased since C19.