HERE’S A BEGINNER’S BACK TO BASICS GUIDE TO PAINTING FURNITURE USING JUST ONE COLOR | YOUTUBE VIDEO COMING THIS WEEKEND!
Hi, creative friends, and so happy you’re here! I was keeping my eyes peeled for a free trashbound find, but instead came across this $10 waterfall dresser at my local Restore. With thrift prices these days, that’s almost free, right?! 😆 I’ve painted a good few waterfall dresser makeovers over the years, and every time I do, I say the same thing – I have very mixed feelings about waterfall furniture. But this project became a reminder of why I love restoring vintage furniture of all styles. And why you don’t have to get fancy to create something GORGEOUS. Going back to the basics and using just ONE color can make all the difference!!! I can’t wait to hear what you think of this ten-dollar rescue that nobody wanted.
In today’s post, I’m also sharing –
- A classic new moody color that gives a moody, elegant look
- How to EASILY update vintage hardware
- How to fix wood sliding drawers
- And more!
*As an Amazon Associate, I earn from qualifying purchases. There are affiliate links in this post to other companies/products I use and love as well. You will never be charged extra when you purchase through these affiliate links. If you purchase from my links – A BIG thank you for supporting me and the #siblog! To see my full disclaimer, click here.
Bonus, it’s Furniture Fixer Upper Day! If you’re new here, on the fourth Thursday of every month, I join four super-talented friends (Christy – Confessions of a Serial DIYer, Kathy – Petticoat Junktion, Natalie – A Ray of Sunlight, and Gail – My Repurposed Life) to share our before-and-after furniture restyles. I’ve included the links at the bottom of today’s post, and I hope you join me in seeing what they’ve created this month! I always learn something new from these talented ladies.

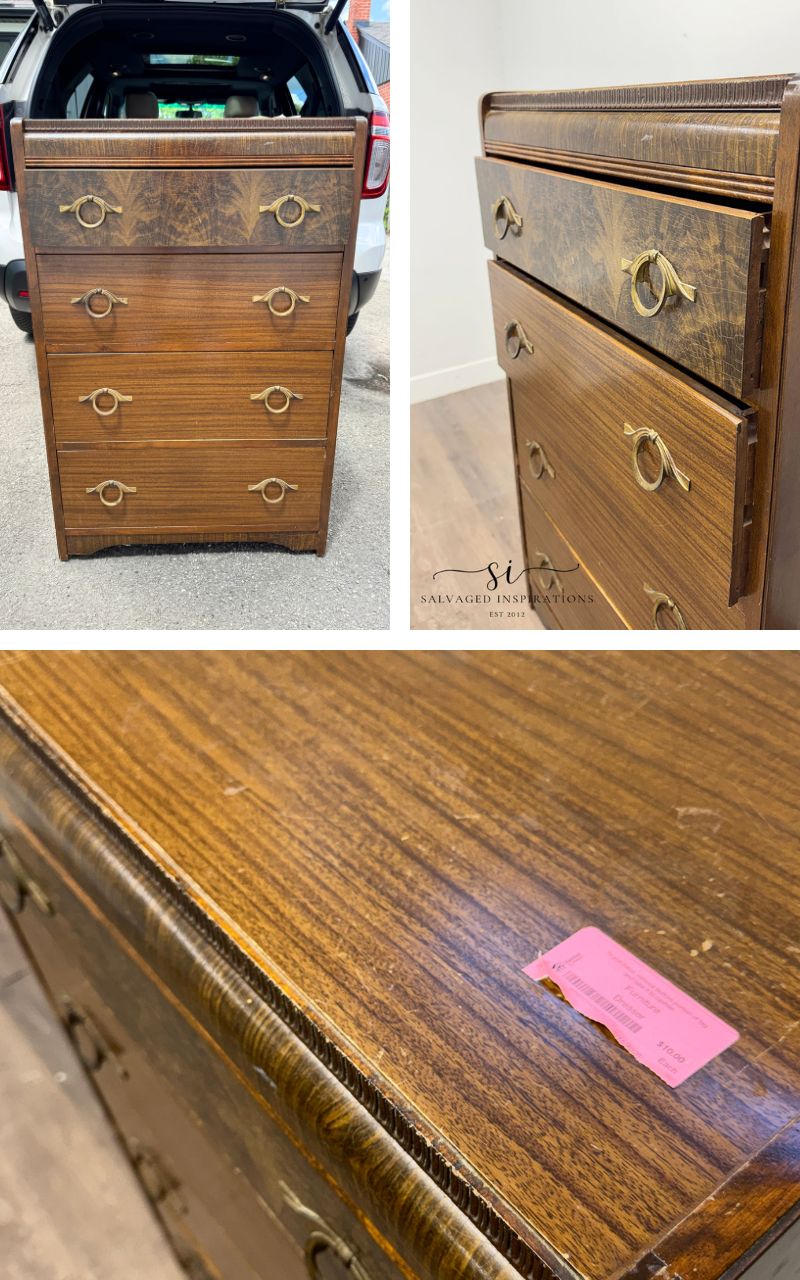
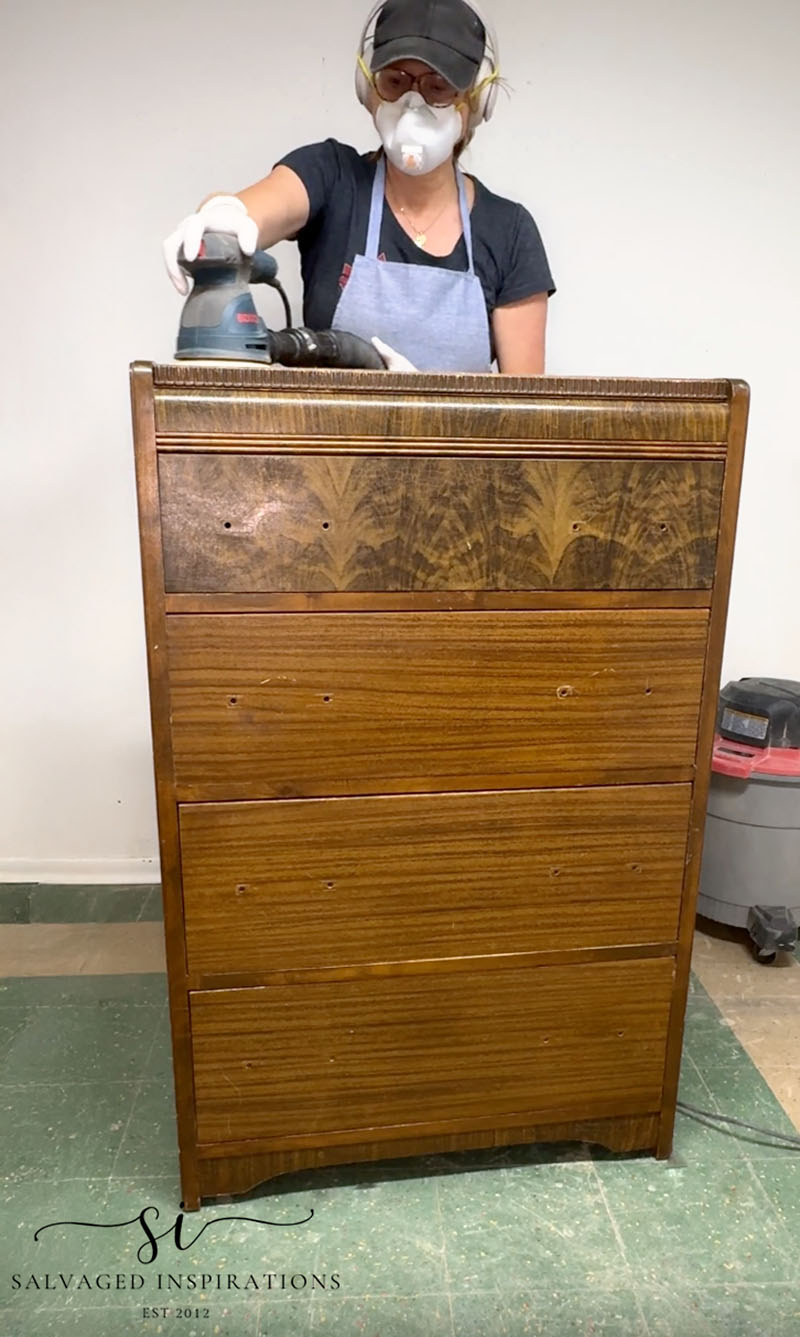
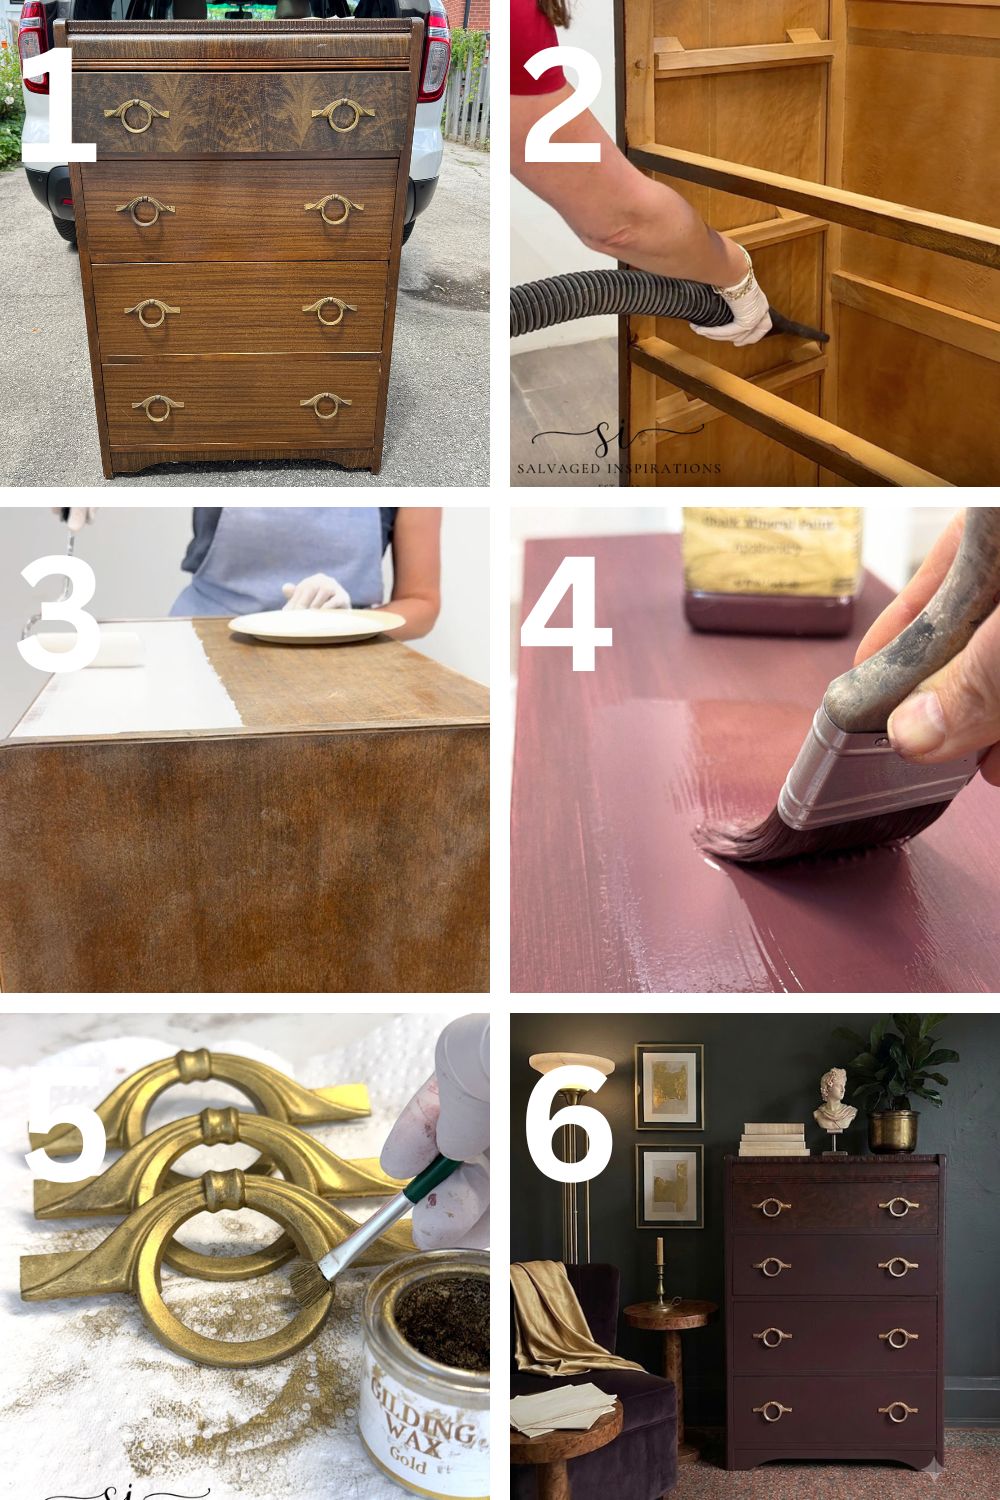
Here’s the Waterfall dresser I found at my local Restore. It was hiding in a line-up of larger pieces. I’m so glad saw it. I can’t believe all the furniture they have at The Restore Habitat for Humanity. A lot of it is overpriced at $100+ and more, but when they have their 50% off sales, or they price the odd piece that isn’t selling- like this one here, you can get some fabulous deals.
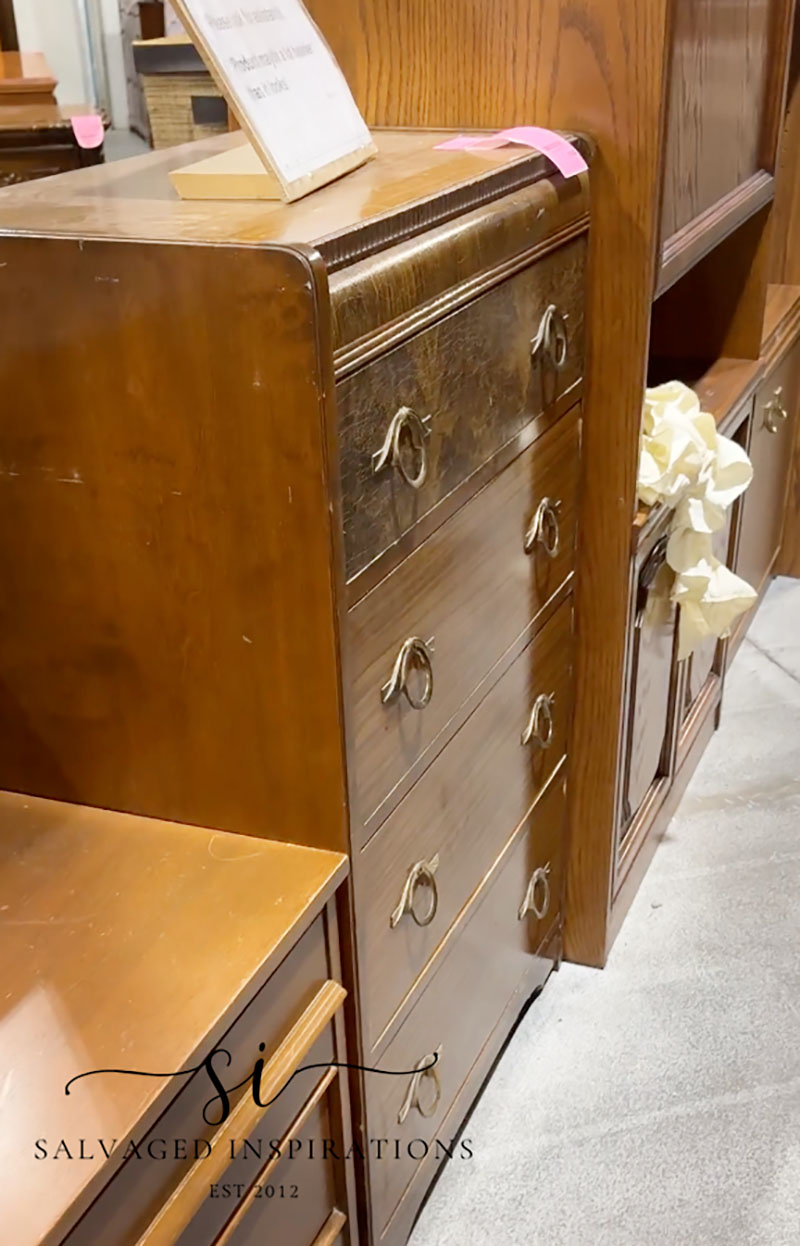
This was a solid piece, and I have to say I’m in love with the art deco hardware! The top two drawers wouldn’t fully close, but for ten dollars, it’s a great piece of furniture.
THIS POST IS SPONSORED/CONTAINS AFFILIATE LINKS TO PRODUCTS I USE. YOU CAN SEE MY FULL DISCLOSURE HERE.
SUPPLIES
Waterfall Dresser – SALVAGED
White Lightning Cleaner
Auto Sponge
Sanding Sponge
Bonding BOSS Primer
2″ Angled Paint Brush
Apothecary Chalk Mineral Paint
Gold Gilding Wax
Gator Hide Topcoat
TOOLS
Oscillating Multi Tool
AstroEuro HVLP Paint Gun
Bosch Orbital Sander
HISTORY OF WATERFALL FURNITURE
Waterfall furniture was mass-produced during the Art Deco era between the 1920s and the 1940s. The front edge is curved like a waterfall and was mostly manufactured using veneer made of walnut, mahogany, oak, maple, and burls. Although this dresser doesn’t have them, many waterfall dressers also had Bakelight hardware.
PREPPING THE DRESSER FOR PAINT
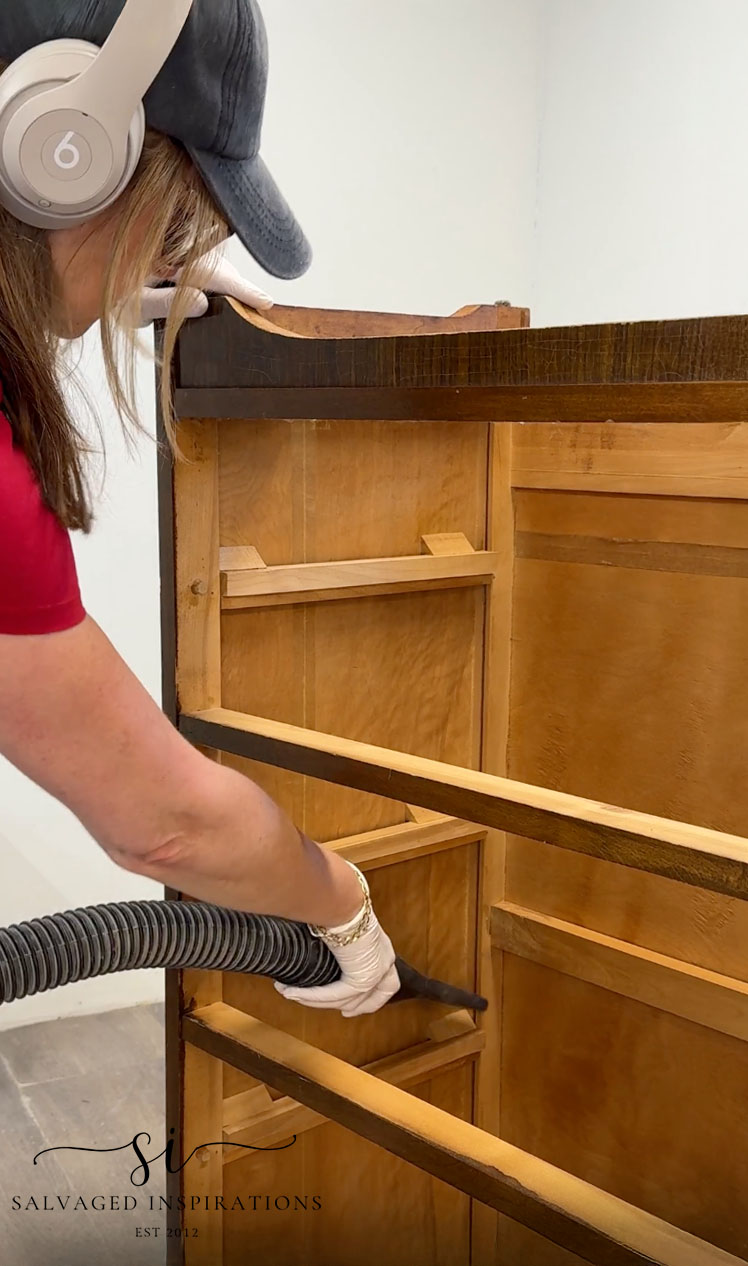
To start the prepping process, I removed the vintage hardware and tucked it away in a plastic cup so I wouldn’t lose anything. Once all the handles were off, the body and drawers got a good vacuum, and then I cleaned this cabinet with a heavy-duty furniture cleaner and a large automotive sponge. Once I had cleaned the inside and outside of this dresser, it was time to fix the drawers.
THE DRAWER REPAIR
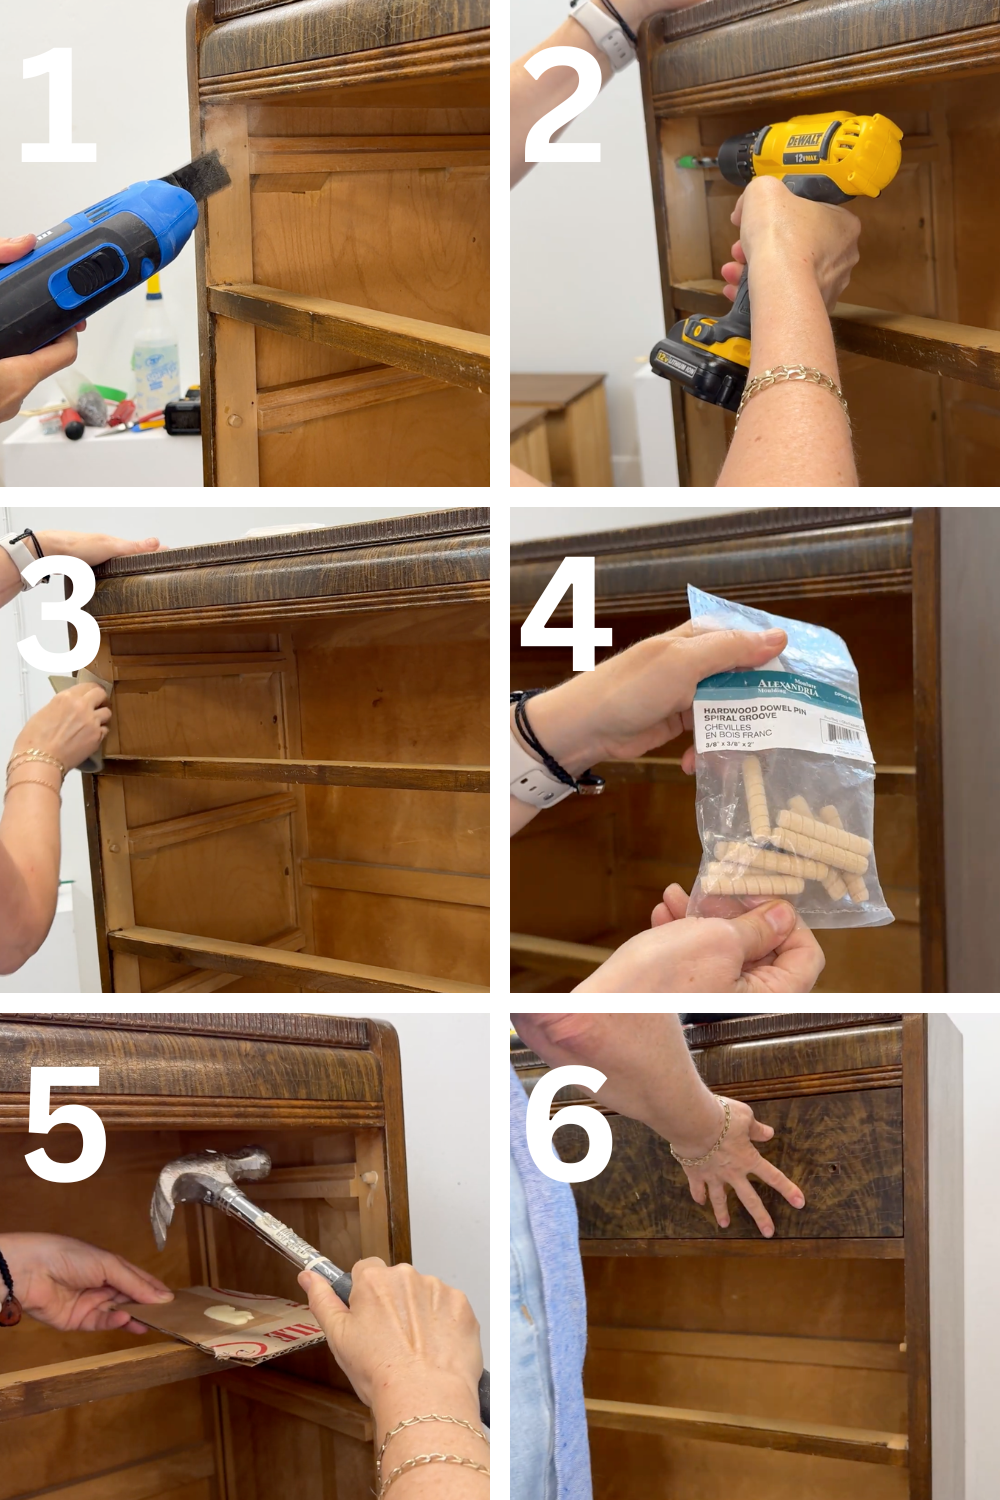
The dresser itself was solid, but the top two drawers had one annoying issue—they slid in perfectly… until the last inch, then I had to lift them about half an inch just to close them all the way. The drawer guides and tracks are made of wood on these old dressers so it’s not uncommon for them to wear down over time. And this will cause the drawer to sit a little lower. The fix can be done a few ways but I choose to raise the dowel to hold the front of the drawer in the proper position.
- Using my oscillating tool, I cut the original wood dowel flush with the dresser frame
- I drilled another hole slightly higher than the original dowel by 1/4 inch
- I sanded everything smooth
- Then brought out some new wood dowel pins in the appropriate size
- Using some wood glue, I inserted the dowels into the hole and hammered them in
- Success – the drawer closes beautifully!
SCUFF SAND
To scuff sand this veneer I used a 120-grit sandpaper on my orbital sander. The goal wasn’t to remove any of the original finish, just to scuff it up enough for it to hold the primer and paint. For the burled wood veneer on the waterfall edge, I hand-sanded so I wouldn’t risk any damage.
PRIMING & PAINTING
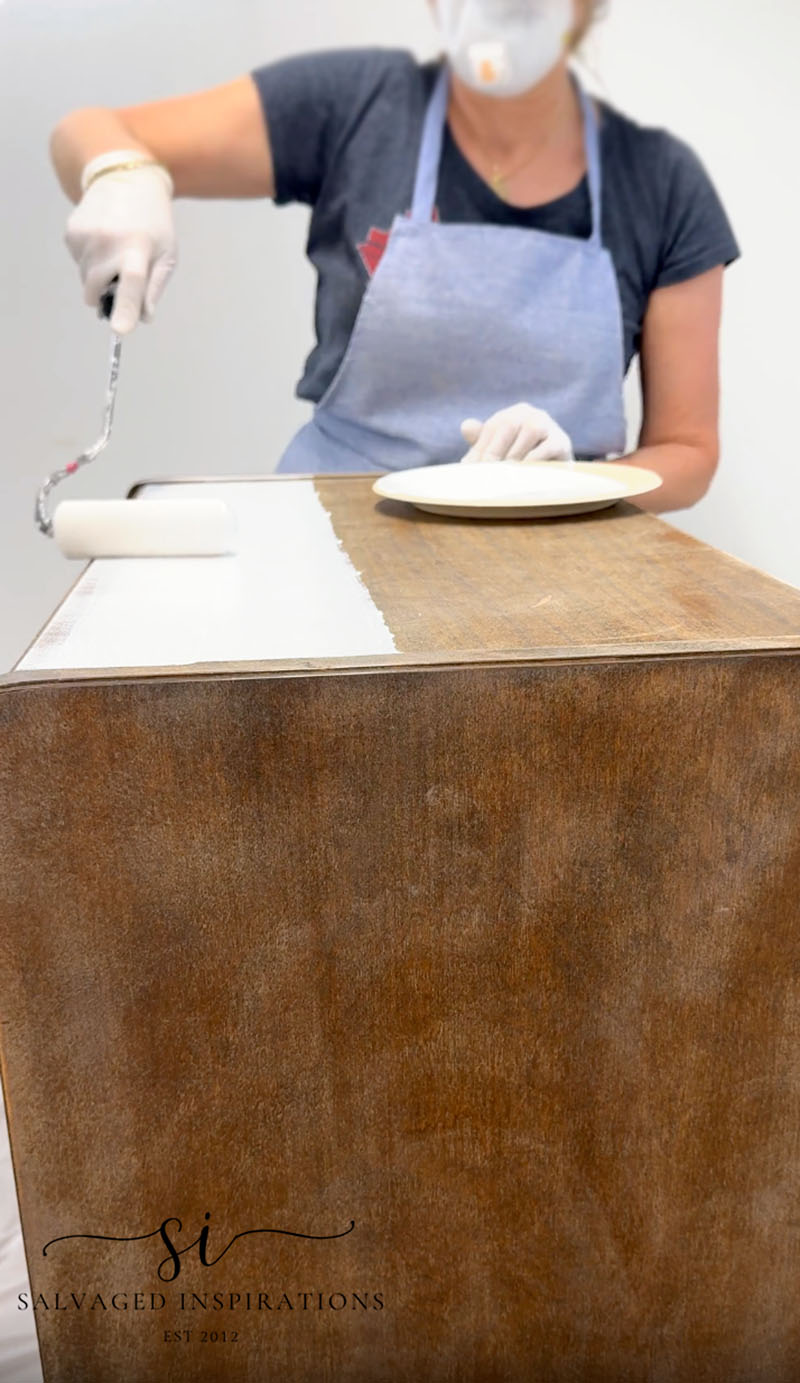
Once I had the entire piece scuff-sanded, I removed the dust and applied this Bonding Primer using a four-inch roller. I applied one coat and let it dry overnight for 24 hours. I didn’t bother with a second coat because it passed the scratch test with flying colors, and I knew I was going to use a dark, moody color so there would be no issues with staining or bleedthrough.
MOODY CHALK MINERAL PAINT
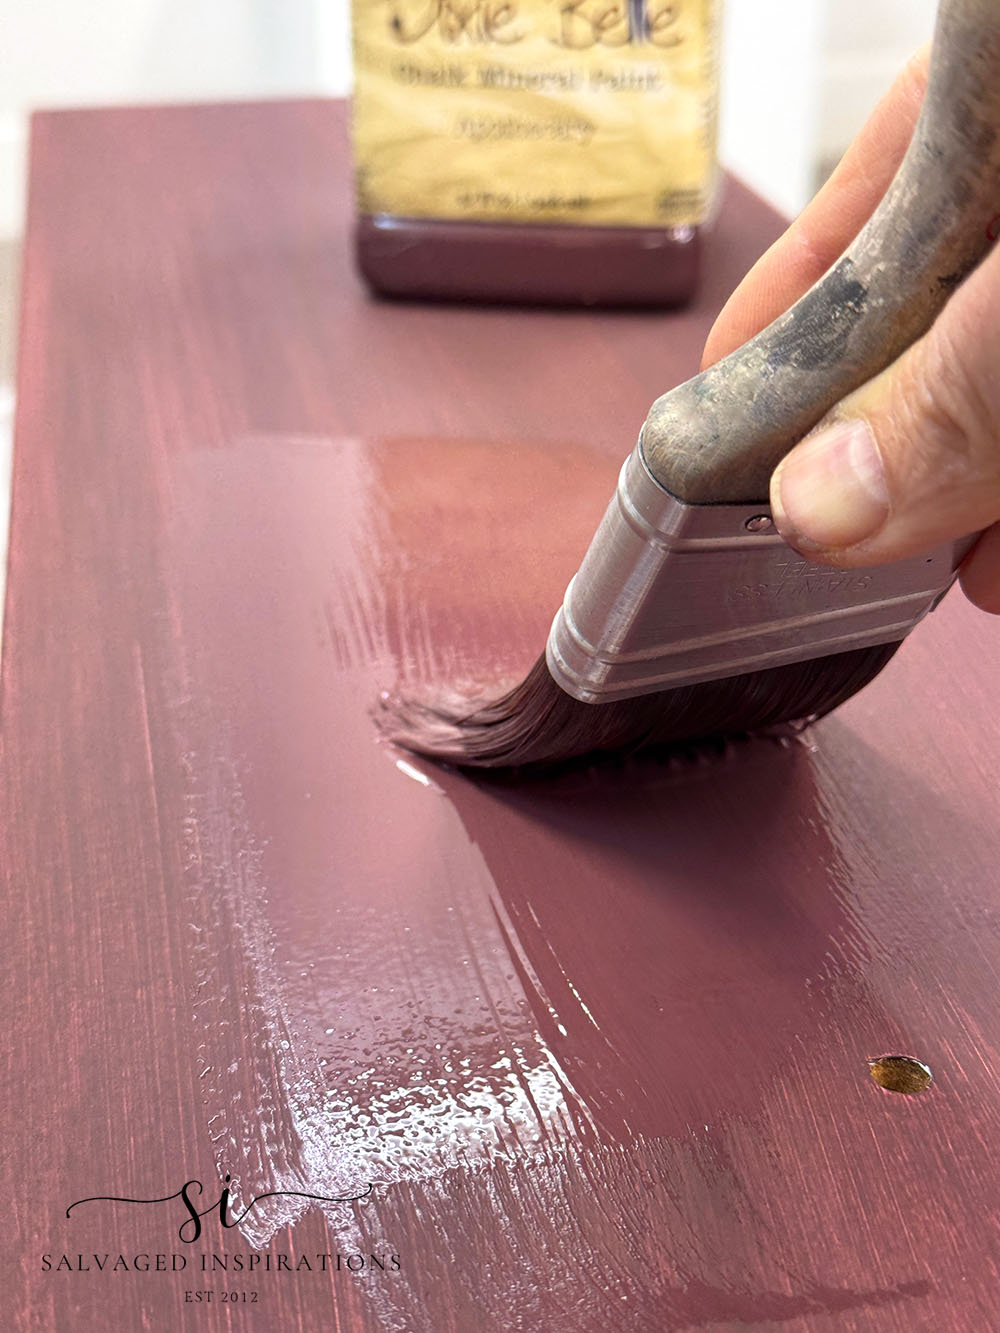
Now for the fun part – it was time for paint! I ordered a new-to-me paint color called Apothecary Chalk Mineral Paint. It’s GORGEOUS! A dark and moody, rich-looking mahogany color. The first coat looked scary, and that’s normal. A color never really reveals itself until I paint the second coat.
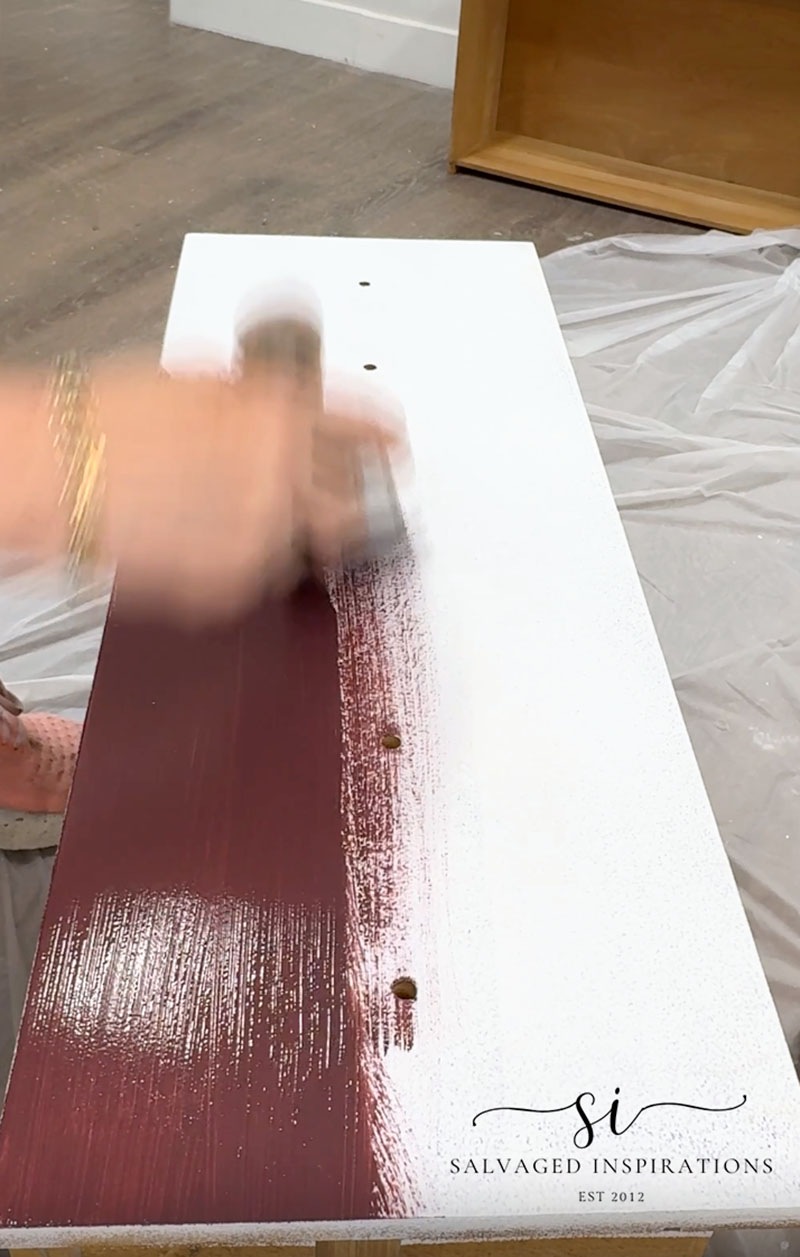
By coat number two, it was looking gorgeous. But there were a few areas that needed a little extra so I let it dry overnight and came down the next day for a third coat. For some reason, when using red paint or paint with red undertones, it sometimes benefits to add that extra 3rd coat for full coverage.
FINISHING TOUCHES
To protect this Apothecary paint finish, I sprayed three coats of Gator Hide. I really like the heavy-duty protection and how fast I can spray three coats. I wait about 2 hours in between spraying so I can get it all finished within one morning or afternoon. And as I’ve mentioned in prior posts, whenever I used an open jar of the topcoat, I strained it through one of these filters. I also like this stand for my paint gun. It makes pouring the paint or topcoat into the cup a much cleaner, easier, and faster process.

For the final detail, I gilded the original hardware with this gold gilding wax. I like using an old artist’s brush. I add a little of the wax to the tip and brush it on. Very little is needed, and it dries 100% overnight. The following day, I took a soft rag and buffed it out and then screwed the hardware back into place. Using the same gorgeous hardware in the existing holes is a beginner-friendly way to update your furniture – especially if you have beautiful vintage hardware like this!

PIN AND SHARE 🤗
THE BIG REVEAL…
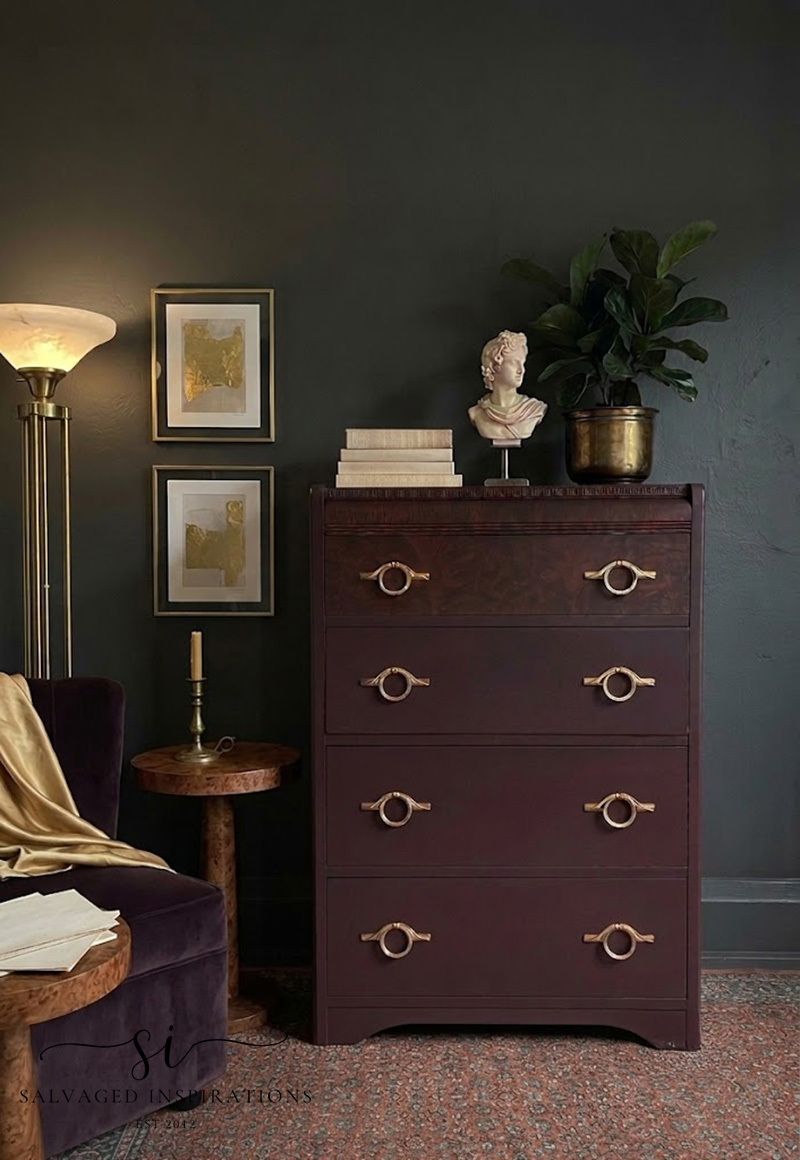
Here’s the finished look! What do you think!?

The paint and topcoat give this dresser such a smooth, nice sheen!
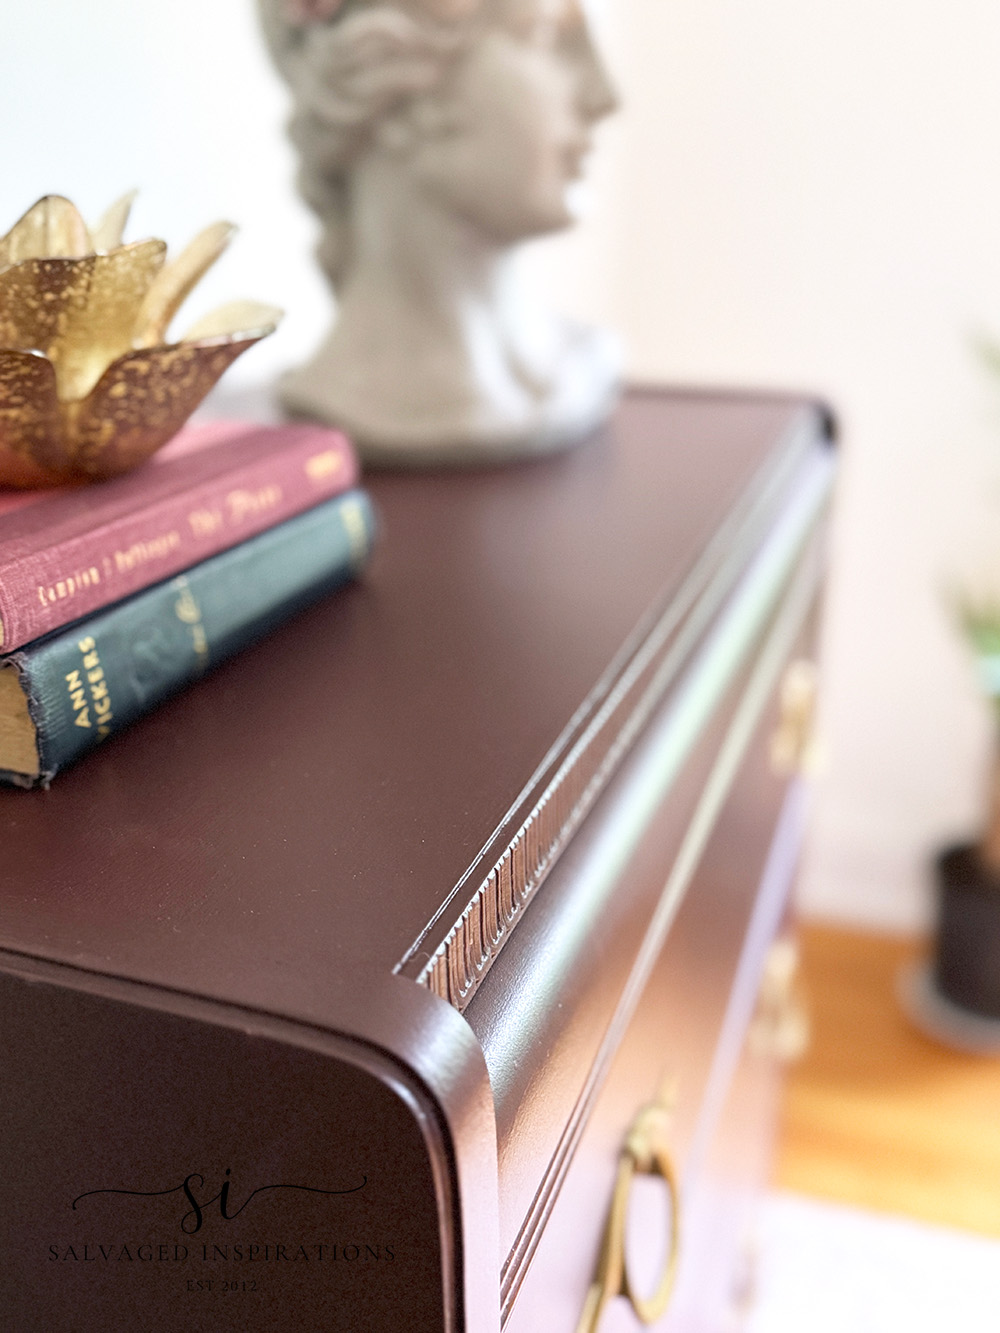
And remember how dry and old the top drawer and waterfall feature looked? I’m so happy with how the paint wash turned out. You can still see this beautiful match-booked burl veneer, yet it all ties in with the new modern color.

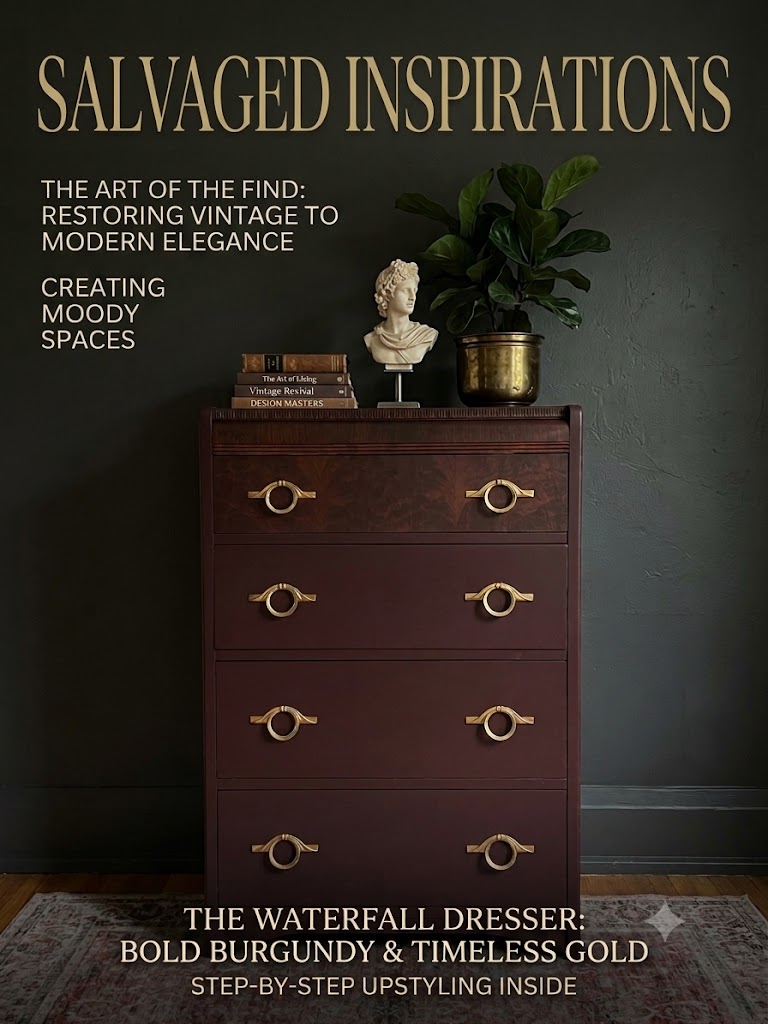
And just for fun, I prompted AI to generate a styling of this vintage art decor Waterfall Dresser in a room setting. Here’s what it generated. I love it! I think it looks really good. What are your thoughts on this moody vibe?
YOUTUBE TUTORIAL
I’ll have the full step-by-step YouTube video tutorial published for you this weekend. Our #siyoutubefamily is already a community of 58.7K, so don’t forget to subscribe if you haven’t yet. You’re the BEST, and I appreciate your support! 🙂
And now for some FURNITURE FIXER UPPER FUN!
You’re going to LOVE what these creative FFU ladies do! Below are the BEFORE photos. Visit the links to see the amazing AFTERS and learn how they did it! I’m heading over to take a peek as well!
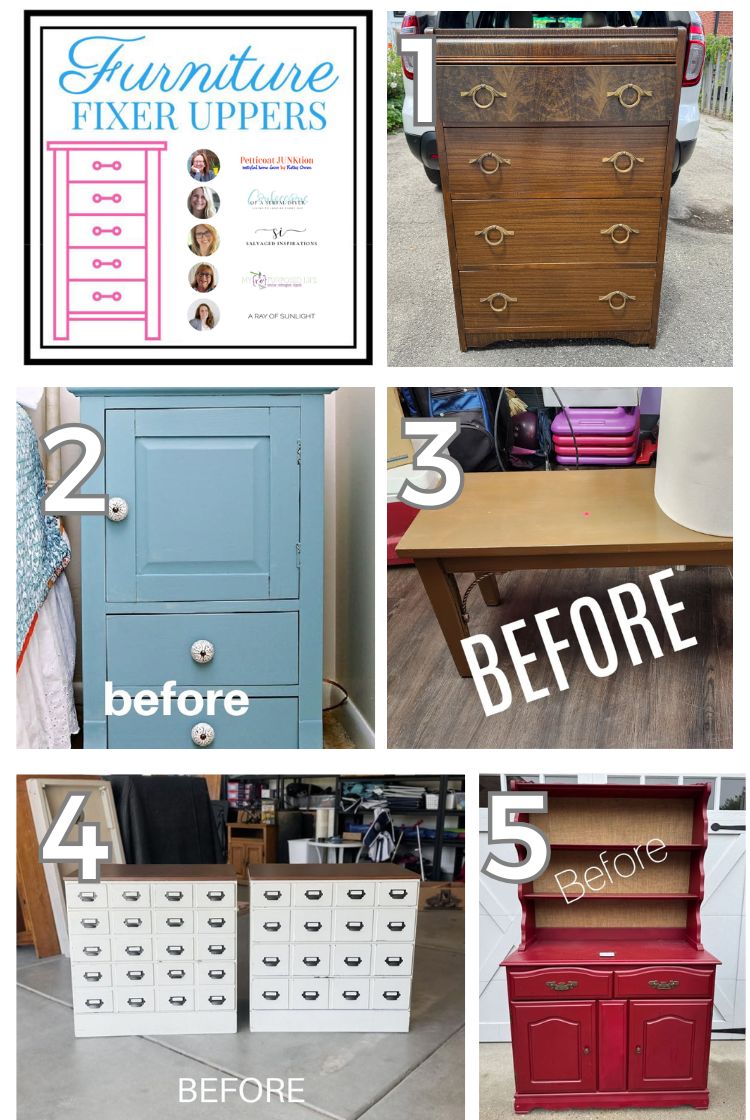
1. SI (HAPPY YOU’RE HERE!)
2. PETTICOAT JUNKTION
3. MY REPURPOSED LIFE
4. A RAY OF SUNLIGHT
5. CONFESSIONS OF A SERIAL DIYER
Here’s another look at this $10 Restore Waterfall Dresser before and after. I hope it’s inspired you and given you some ideas for your upcoming furniture painting projects!
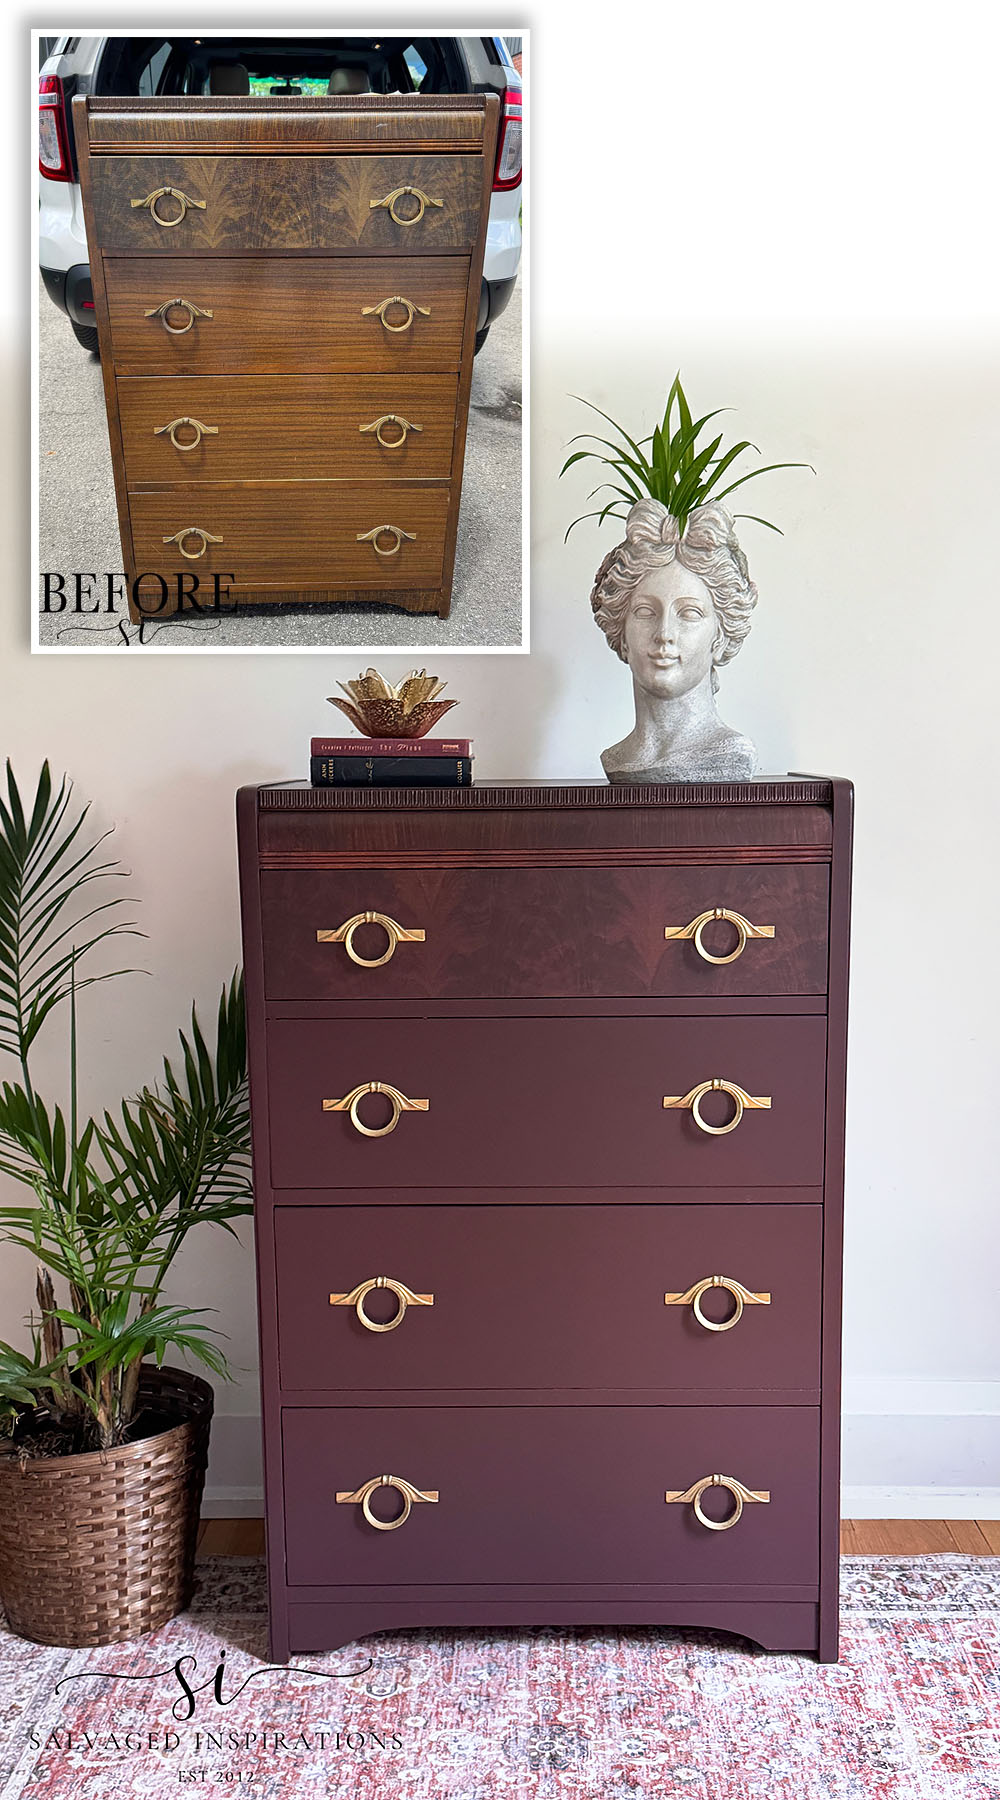
What do you think of this Waterfall dressers’ before and after makeover? For me, this project is a reminder of why I love restoring vintage furniture. Sometimes the best furniture makeovers start with a piece no one else wants, and all it takes is ten dollars and a little patience to put the biggest smile on my face.
Thank you so much for being here and for following along with our June Furniture Fixer Uppers Tour. If you have a question or want to say hello, I’d love to hear from you in the comments below — you always brighten my day!
Happy painting, sweet friends! 💙
Denise x
RELATED POSTS:
BEST PRIME DAY DEALS 2026
PAINTED AND STAINED WATERFALL DRESSER
USING BOLD COLOR TO UPDATE FURNITURE
1980S LINGERIE CHEST MAKEOVER
COFFEE BEAN PAINT WASH NIGHTSTANDS
PIN AND SHARE! 🤗

It turned out beautifully. It’s not a color I would have chosen, but I really like it! Really great work.
Thanks Lizzy and ya, color is so objective. I love it but my sister – anything with red or red undertones – not so much. Yet, she drives a red car! 😂 🚘 😂 Enjoy your week! XOXO
Gorgeous
Thanks Rebecca! 🤗
I love the way the waterfall dresser turned out, how did you manage to get the moulted look to show through on that top drawer. That really makes it look amazing.
I just realized I didn’t add a pic or full explanation so thanks for asking Ramona! I diluted the Apothecary paint into a paint wash and brushed it on. Super easy and took me all of 2 minutes and it really tied the burl wood together with the rest of the dresser makeover. I’ll share the full details in this weekend’s Youtube video. 😊
Beautiful, as usual! One question… did you use a different finishing technique on the top drawer since the burled wood shows through so wonderfully? I can’t imagine that you primed and painted this drawer like the rest of the piece?
I used the same color in a paint wash and brushed it on. It tinted the burl veneer just enough to tie the dresser all together while leaving this beautiful detail still shining through. I’ll share all the details in this weekends Youtube video. In the mean time, I’ll double check if I have an image. I must have forgot to take one while I was paint washing. 🤦♀️
Hi Denise. Love how this $10 dresser turned out.
Thanks so much my friend, happy you love it! XOXO
So moody and elegant now, Denise! I love this color so much, and it works so well with the period of this piece! XOXO
I’m loving this color as well! So gorgeous and it really does work well with all styles of period pieces! Have a great weekend XOXO
Denise, I love the color you choose for this piece! It is so amazing, especially the burl veneer that still shows through!
I love that bul veneer as well. I added a paint wash and it tied everything in nicely!
It looks nice. I have a waterfall bedroom set and can’t bring myself to paint it. I had it refinished years ago and still love the various wood pieces. Plus I do have the original hardware. Perhaps someday I’ll chance it, but doubtful. LOL! This was a steal for sure! I love the hardware most on this one.
Hi Jeanne! I would enjoy the various wood and original hardware as well – especially if the set is in good shape. And I’m with you, the hardware on this piece is what really drew me in!