Four Ways To Remove Old Paint And Reveal the Beautiful Wood Hiding Underneath | YouTube Video Coming This Weekend
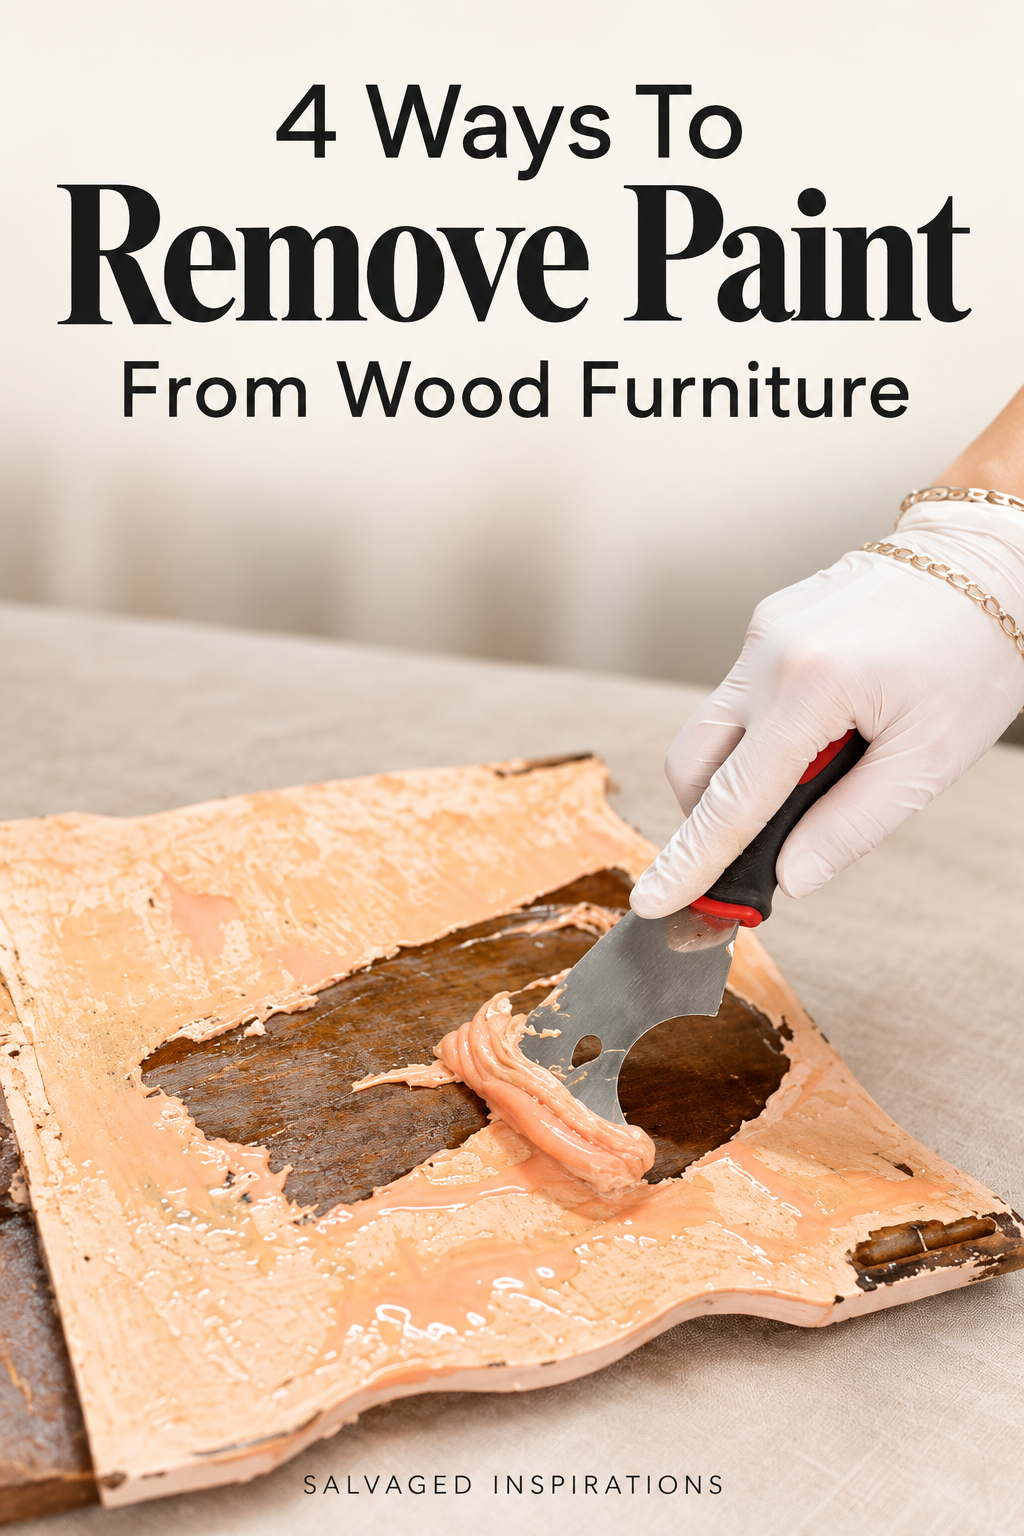 Have you ever started stripping a piece of furniture and wondered what you’d gotten yourself into? Hours of work, stubborn paint, and a whole lot of elbow grease… I’ve been there! Today I’m sharing four ways to remove paint from wood furniture and tips to help you choose what works best where. Sometimes, using different methods on the same piece makes the job a whole lot easier! I’m sharing them on this curbside table my sister Andrea found, and I can’t wait to share what was hiding under the paint and hear what you think of this trash-bound table now!
In today’s tutorial, I’m sharing –
- 4 ways to strip an existing paint finish off your old furniture
- A Bonus stripper I’m trying for the very first time
- My favorite stain color to restore a gorgeous piece of wood
- And more…
*As an Amazon Associate, I earn from qualifying purchases. There are affiliate links in this post to other companies/products I use and love as well. You will never be charged extra when you purchase through these affiliate links. If you purchase from my links – A BIG thank you for supporting me and the #siblog! To see my full disclaimer, click here.
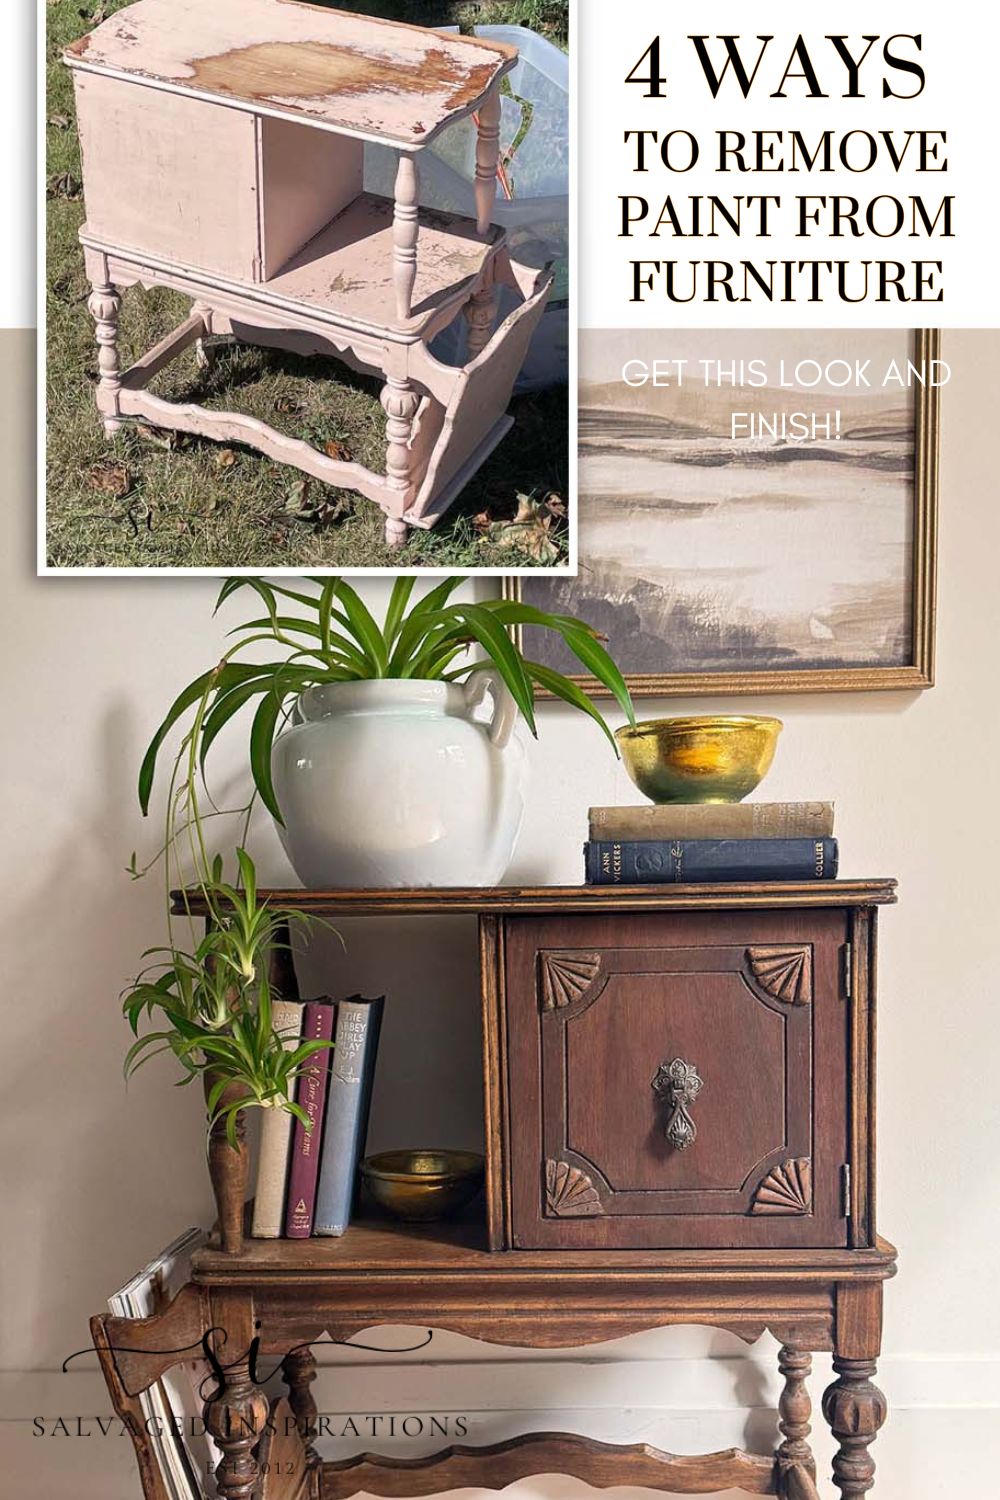
Here’s the pink magazine table Andrea found curbside. Just wait until I share what was inside the cubby of this table…
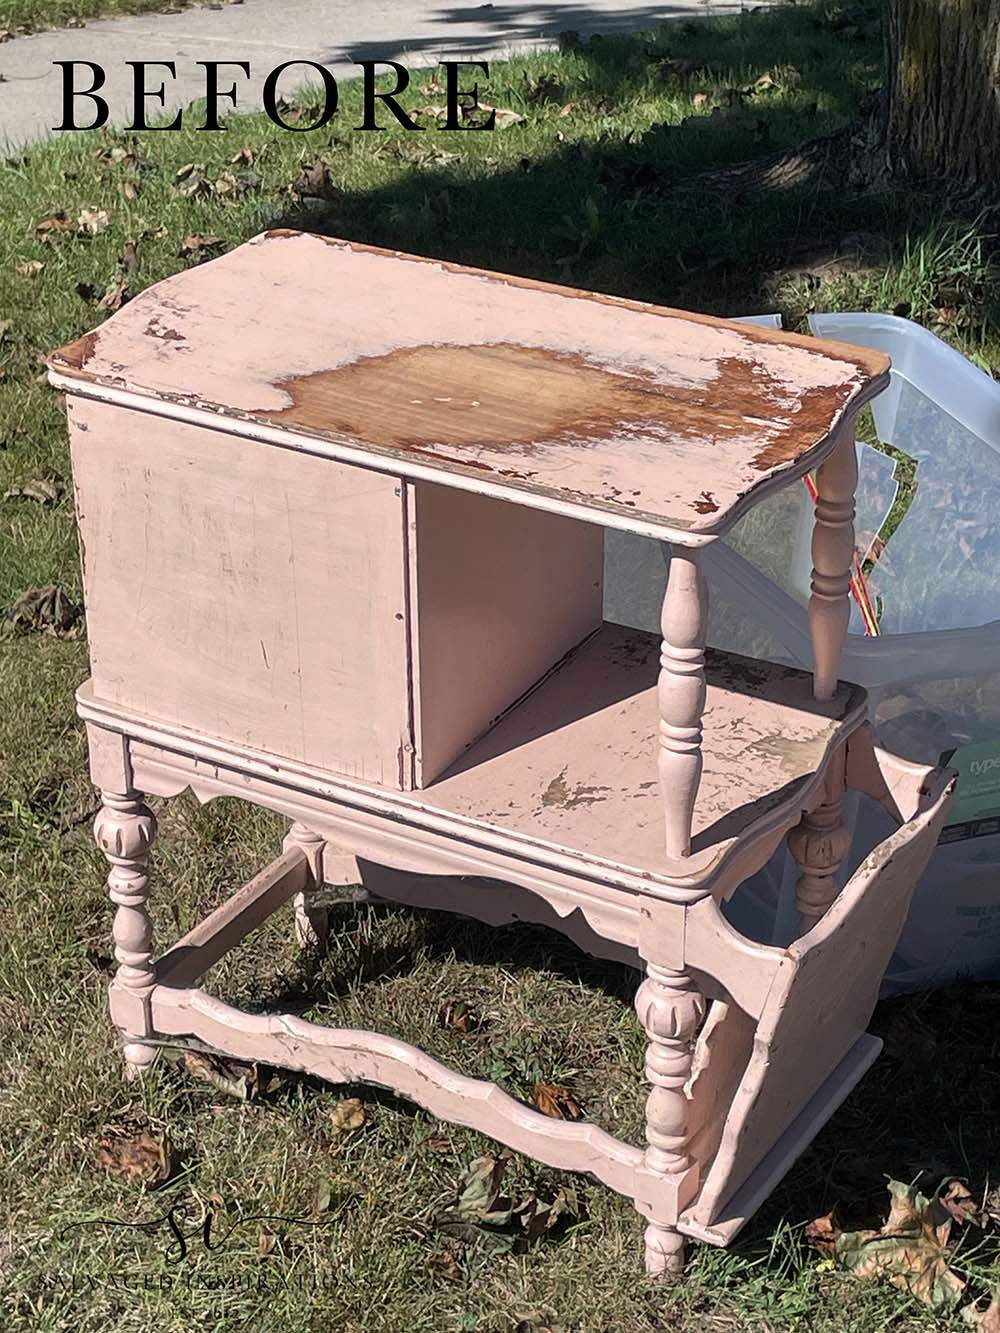
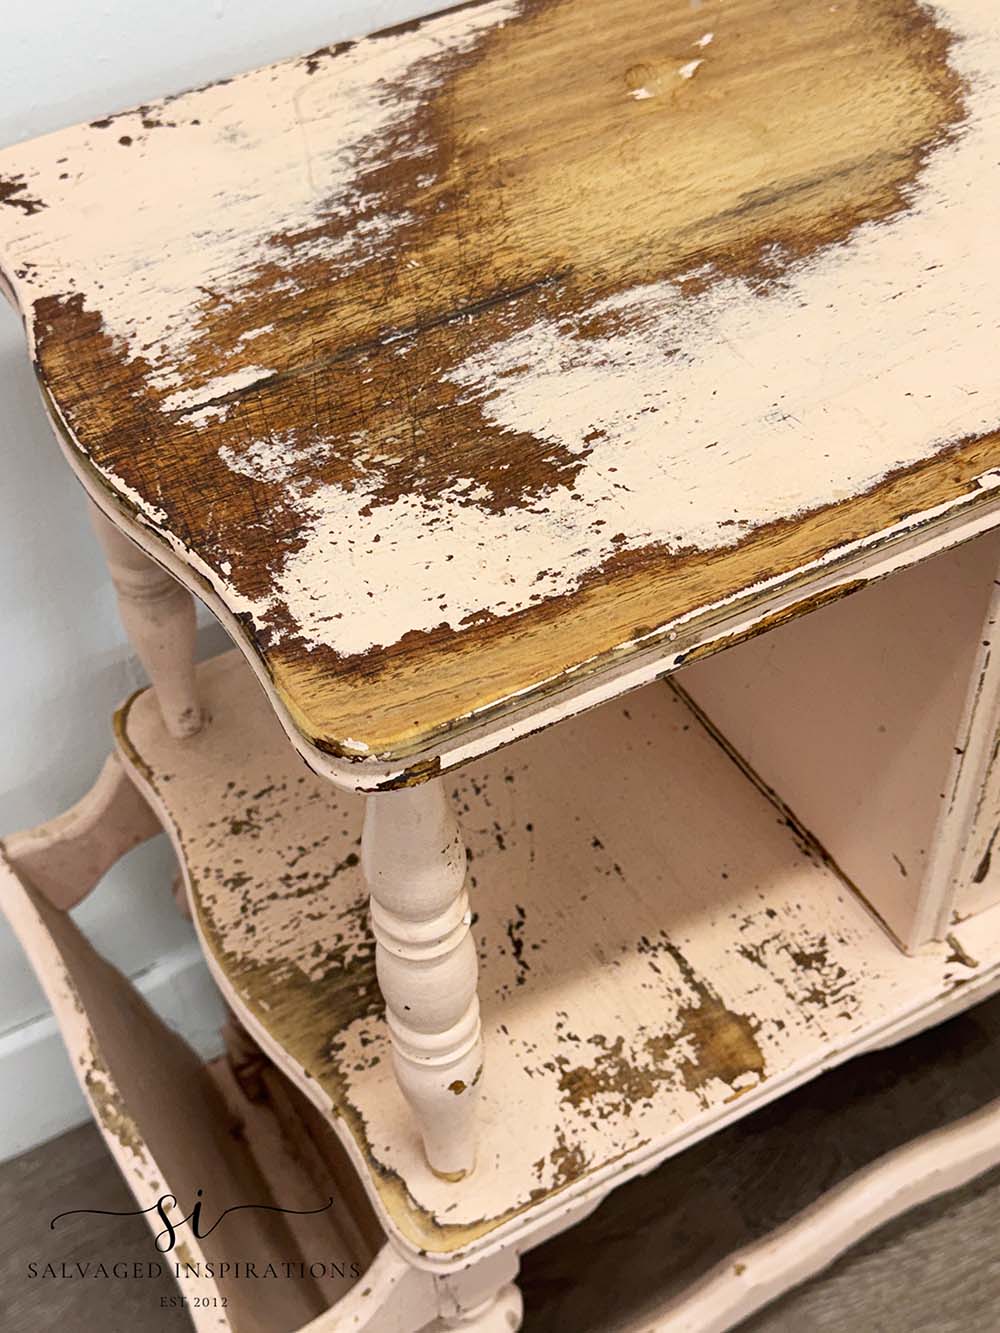
This piece was really scratched up. It looked like someone was using it as a cutting board.
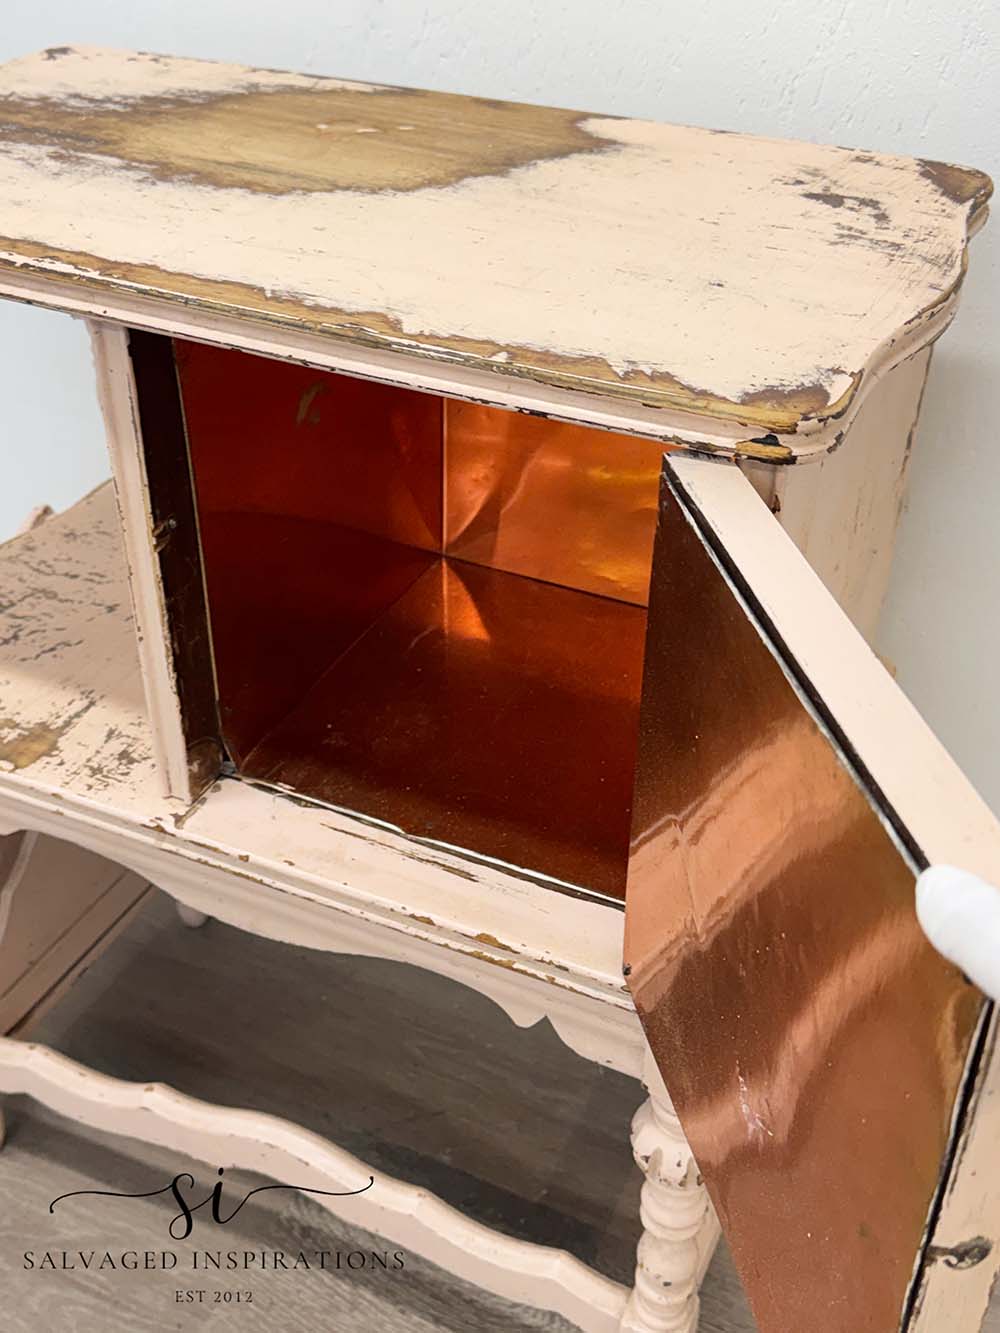
And what I found even more interesting was that someone had lined the interior with sheets of metal/copper… whaat?? I wondered if they were hiding a treasure between the copper and wood. And again, I was wondering should I remove it – or keep it? I posted this on Facebook asking if anyone knows why it was lined in copper, and I received some very interesting feedback. Humidor, smoking cabinet, telephone table, ice box, pie and bread safe, and a chamber pot stand, to name a few. You can check out more of the comments on the actual Facebook Post here.
THIS POST IS SPONSORED/CONTAINS AFFILIATE LINKS TO PRODUCTS I USE. YOU CAN SEE MY FULL DISCLOSURE HERE.
YOUTUBE TUTORIAL
I’ll have the full step-by-step YouTube tutorial for you this weekend. Our #siyoutubefamily is already a community of 60.1K, YAY… I can’t believe we hit 60K this past week… so don’t forget to subscribe if you haven’t done so already. You’re the BEST, and I appreciate your support! 🙂
SUPPLIES
Magazine Side Table – SALVAGED
White Lightning Cleaner
Auto Sponge
Carbide Scraper for Removing Paint
Palm Sander For Sanding
Heat Gun
CitriStrip Chemical Stripper
Sanding Sponge
Golden Ash No Pain Gel Stain
Gator Hide Topcoat
4 Ways To Remove Paint From Wood Furniture
So here’s how this little table was all stripped down of paint…
PREPPING THE SIDE TABLE FOR ITS MAKEOVER
To start prepping this piece for its new look, I gave it a good cleaning with my heavy-duty furniture cleaner and a sponge. It was filthy. I had to go over the entire piece more than five times for the sponge to finally be running clean under the tap. Then I let the piece dry overnight.
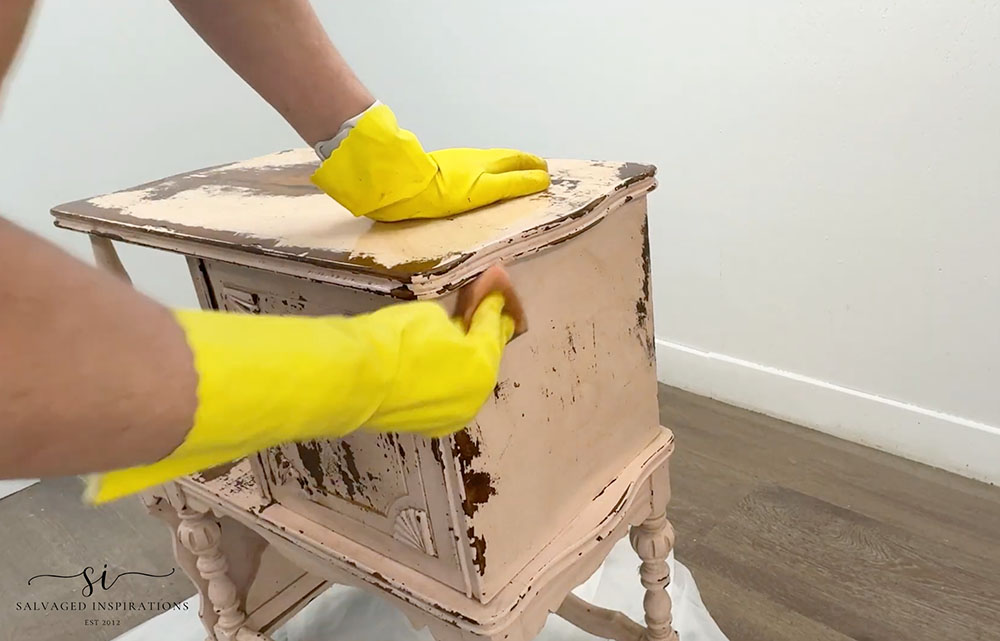
The next day, I removed the loose bottom of the magazine rack and reached for my carbide scraper. Time to see what was hiding under that pink paint.
And as a side note, there always seem to be a few comments on social media saying WHY would someone paint this? Painted furniture can bring out some strong opinions, and I understand loving an original wood finish. I love it too! But this little piece has clearly had a full life, and someone cared enough to give it a fresh look. I’m tickled pink someone took the time to paint this in their own style! We might choose different finishes, and that’s part of the fun of creating. And the awesomeness of wood furniture is that it can KEEP BEING REFINISHED in a variety of ways over the years!
METHOD 1 – CARBIDE SCRAPER
A carbide scraper has become my favorite way to remove an old finish! No stripping chemicals, smells, or fumes, just good ol’ elbow grease. The tool is inexpensive, and the carbide blade lasts a LONG time. I’ve been using mine for over a year and haven’t replaced it yet. The blade has two scraper sides, so when one gets a little dull, you can take it out and flip it to the new side.
To remove a finish easily, the trick is to use steady, even pressure and adjust your pressure depending on the finish you’re removing and the hardness/softness of the wood underneath. Start with a light touch and see how the finish responds—you want to lift the finish without gouging or scratching into the wood underneath.
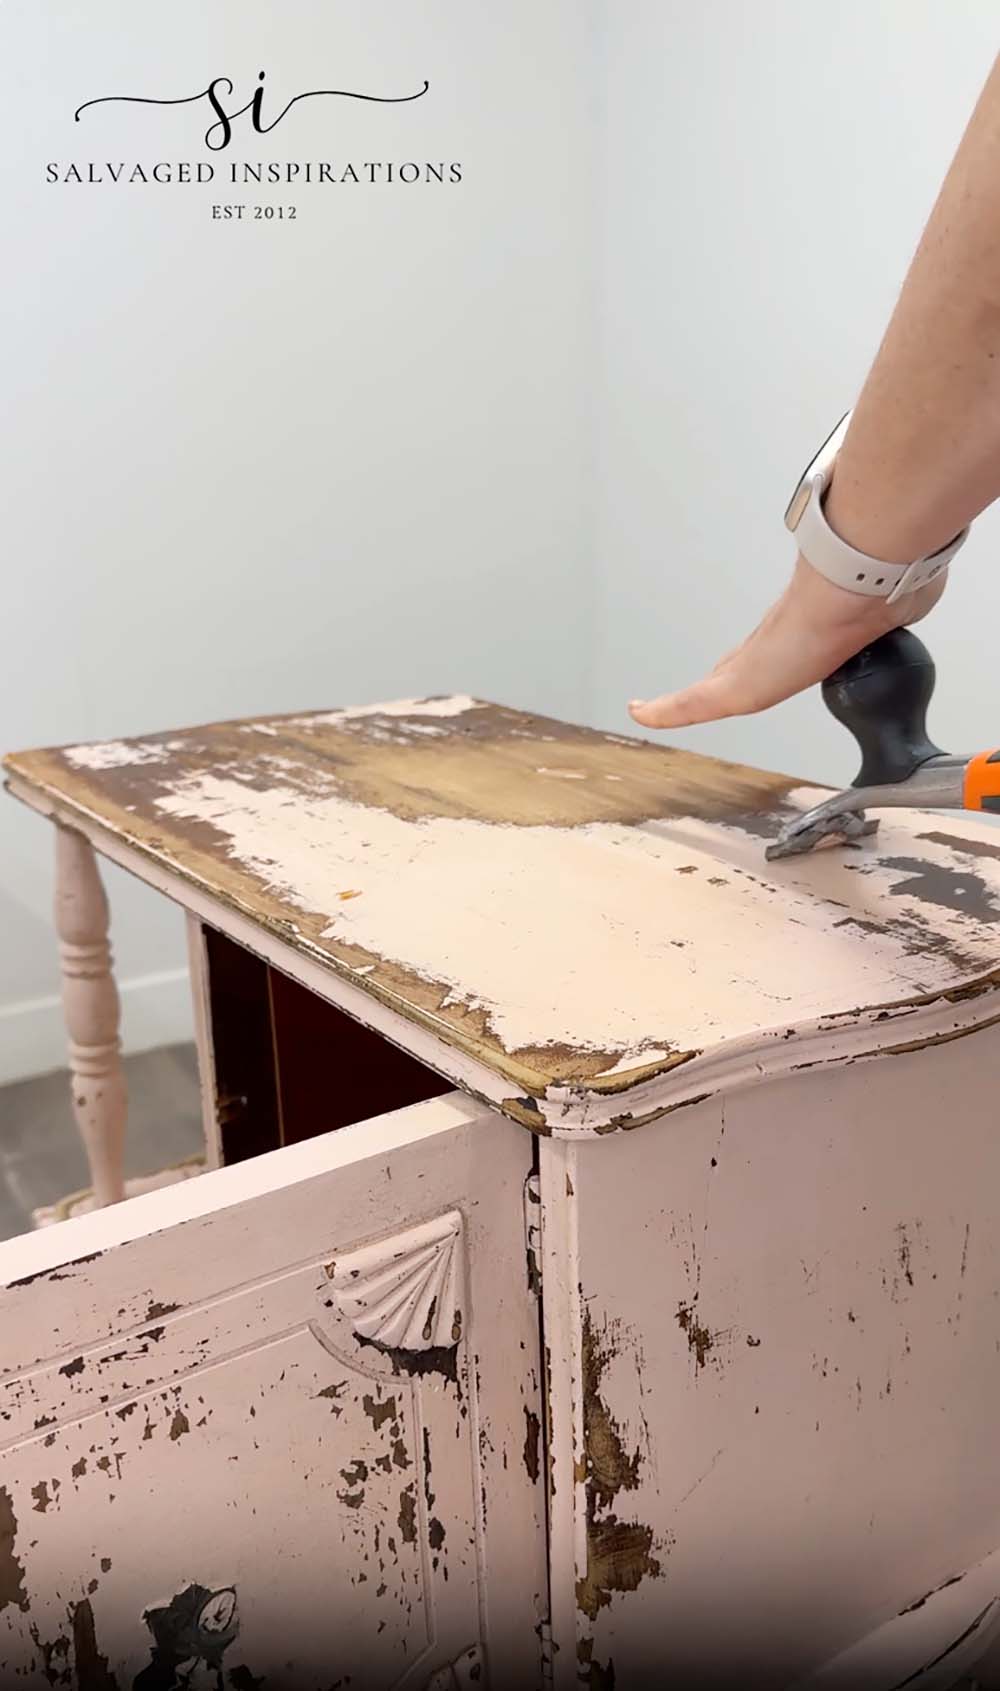
Here are a few tips when using a carbide scraper…
- Test a small area first to get a feel for the angle and pressure that work best.
- Work with the wood grain whenever possible to help prevent scratches and tear-out.
- Use controlled strokes. There’s no prize for taking off the finish in one giant swipe.
- Keep the blade clear of buildup so it continues scraping cleanly.
- Ease up around corners, edges, and veneer. You don’t want to remove wood along with the finish.
- Switch blade shapes for curves and smaller details rather than forcing a flat blade into tight spots.
- If the scraper starts digging in or skipping, stop and adjust your angle or pressure.
- Finish with a light sanding if needed to smooth any remaining marks.
A carbide scraper works wonderfully on smaller details as well. I’ll share it in action in this weekend’s upcoming video tutorial. I used the corner of the blade to get into details on the carved wood and also remove the paint from the metal hardware.
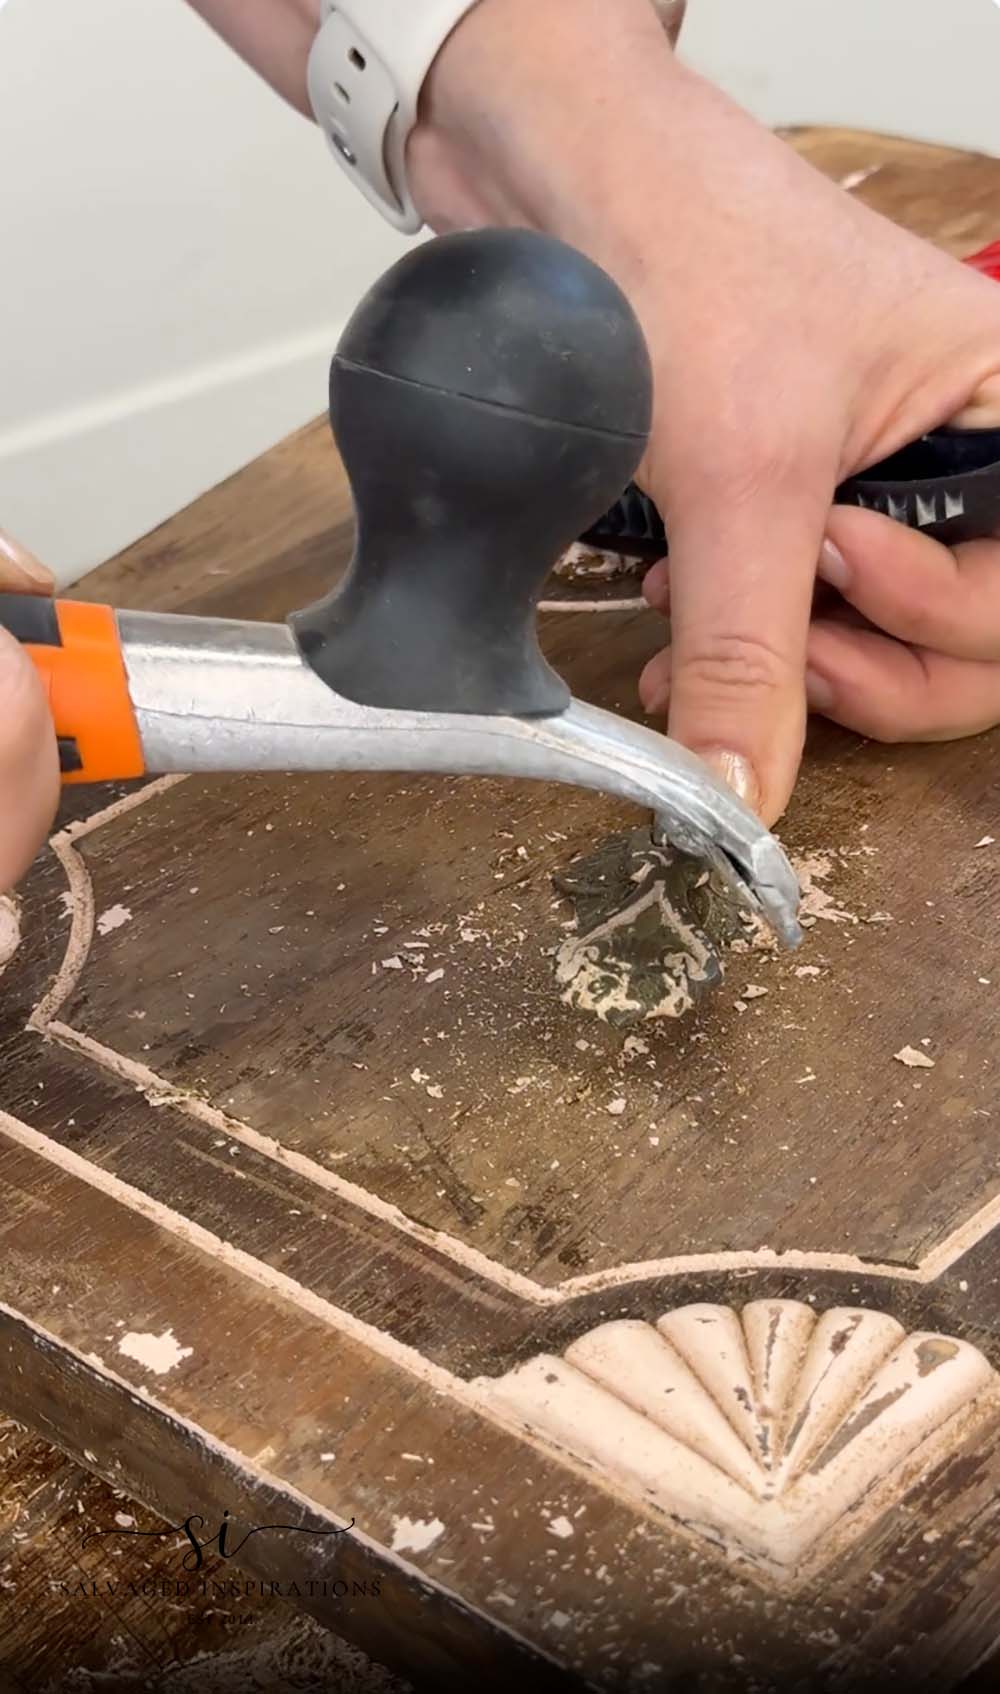
METHOD 2 – SANDING
Sanding with a palm sander is a great way to remove an old finish and smooth the wood at the same time, especially on flat surfaces like tabletops and drawer fronts. There’s no stripper to scrape off, and you can see your progress as you go! Just be sure to wear a mask – safety first.
The grit you start with will depend on BOTH the existing finish and the wood underneath. You want sandpaper that’s aggressive enough to remove the finish without leaving deep scratches, gouges, or swirl marks to deal with later. Softer woods need a lighter touch and often a higher starting grit, while harder woods may tolerate a coarser grit when needed. Test a small area first, let the sander do the work, and gradually move up to finer grits for a smooth surface ready for its new finish.
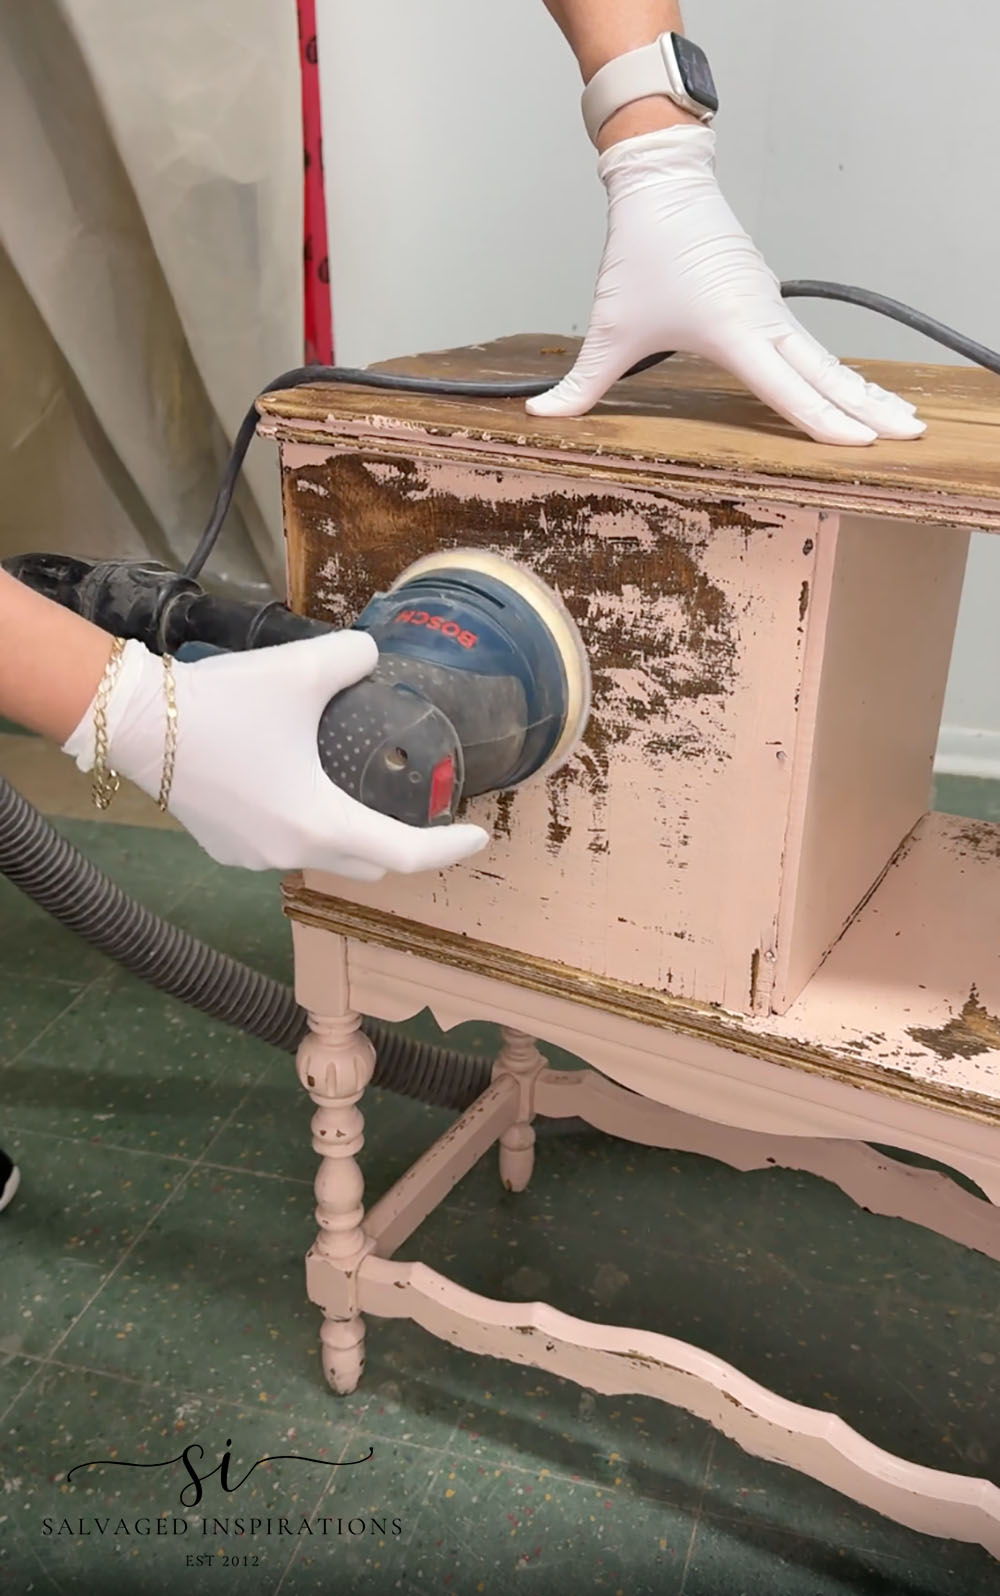
A few more sanding tips…
- Keep your sander flat and moving steadily. Pressing harder won’t give you a better result.
- Replace clogged or worn sandpaper rather than pushing harder to make it work.
- Remove dust between grits, so leftover particles don’t scratch the wood.
- Work through the grits gradually. Fine sandpaper won’t quickly erase deep scratches left by coarse paper.
- Hand-sand delicate edges, curves, and details to preserve their shape.
- Be extra careful with veneer—it’s easy to sand through that thin layer of wood.
METHOD 3 – HEAT GUN + SCRAPER
A heat gun and putty knife or scraper can be a handy combination for removing old paint. The heat softens the paint so you can gently lift it away rather than scrape away at a stubborn finish. Before trying this method, identify the coating if possible and make sure ALL the paint layers are lead-free—not just the top coat. Never use a heat gun on lead pain/finishes because it can give off fumes when heated.
Traditional oil-based and alkyd paints are often good candidates, while latex and acrylic paints can soften into a sticky, gummy mess rather than lift off cleanly. A small test spot like I used on this table, will tell you a lot!
For this particular piece, I’m focusing on the grooves and smaller detailed areas rather than the large flat surfaces, using a scraper that fits the shape and a light touch to protect the wood underneath.
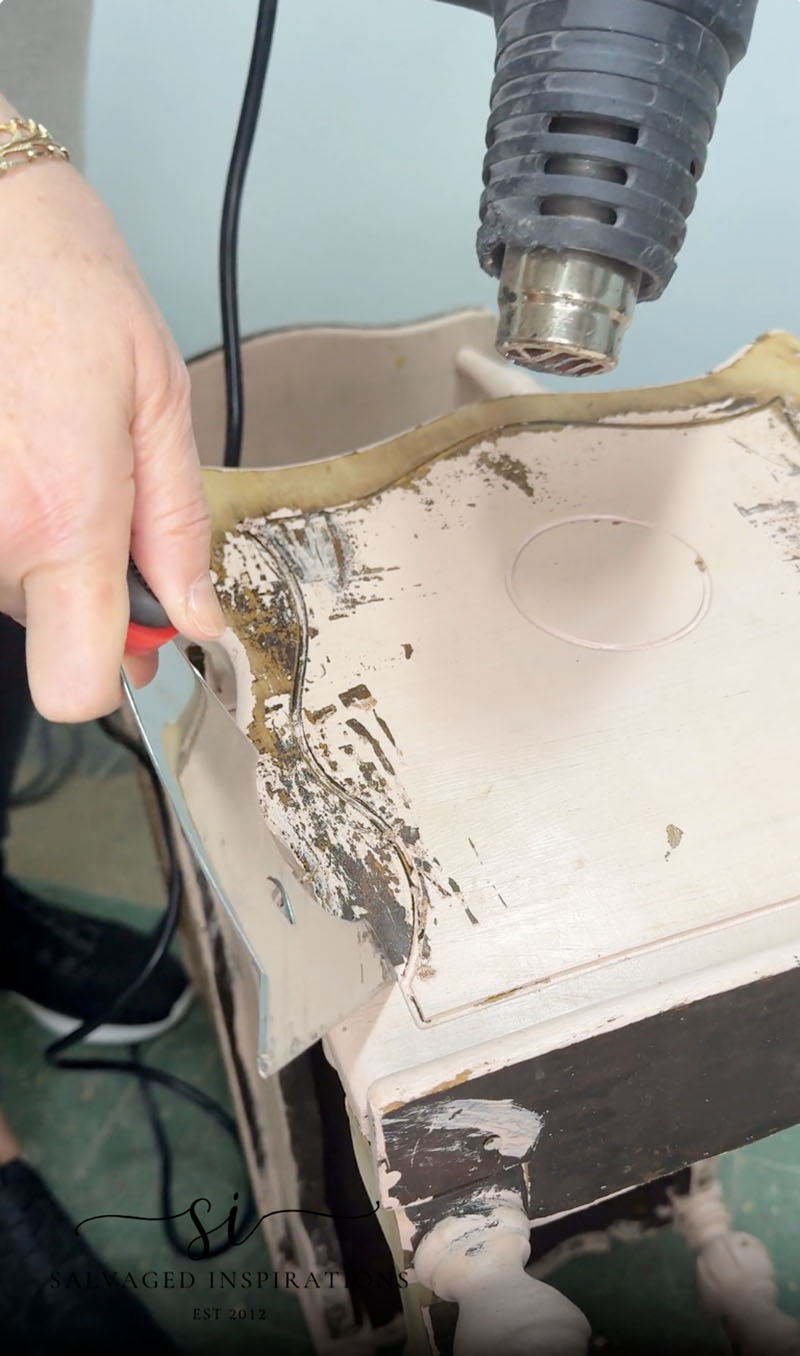
More heat gun tips…
- Start with a low heat setting and increase only as needed, following your heat gun’s instructions.
- Keep the gun moving. Holding it in one spot can scorch the wood or start a fire.
- Work in small sections and scrape while the paint is still soft. It doesn’t always need to bubble before it’s ready!
- Use a metal putty knife or a shaped scraper that fits the groove. Avoid sharp corners that can dig into the wood.
- Keep your hands and scraper out of the hot air stream.
- If the paint smears or gums up, try another removal method rather than continually adding more heat.
- Be especially cautious around veneer and glued joints—heat can loosen the adhesive.
- Work with good ventilation and use the protective equipment specified for your tool and coating. A dust mask doesn’t protect against fumes.
- Keep the heat gun away from chemical strippers, solvents, and flammable materials.
METHOD 4 – CHEMICAL STRIPPERS
Chemical strippers can be a great option for removing an old furniture finish, especially around turned legs, grooves, and details that are tricky to sand or scrape. They soften the coating so you can lift the old finish away with less scraping, and some products can tackle several layers at once. The key is choosing a stripper made for the paint, varnish, or other finish you’re removing—and giving it time to work.
Gel and paste formulas are handy on vertical surfaces because they cling better. Follow the directions on YOUR product, because application, wait times, and cleanup can vary quite a bit. Chemical strippers work but they are not my favorite to work with. They can be messy, smelly and good ventilation is a must. But if I’m having a hard time removing a finish, bringing out the big guns and letting the stripper do the hard work does make the job easier.
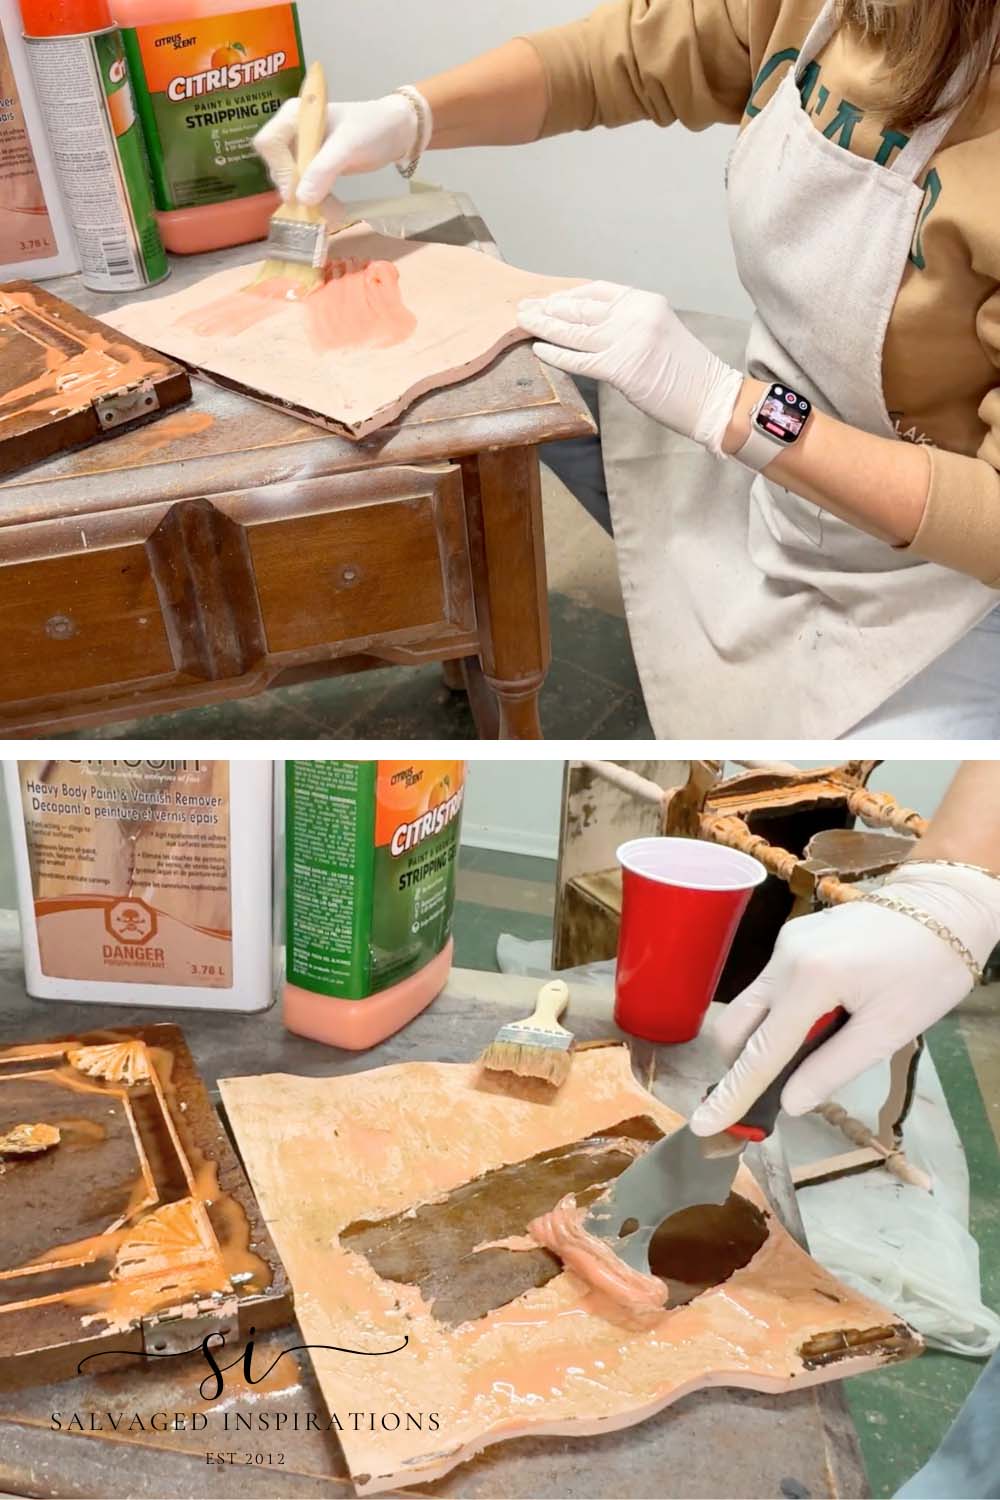
Chemical Stripper tips and tricks…
- Test a small hidden area first to see how the finish responds.
- Apply a good, thick layer. Spreading it too thin can make it less effective.
- Give it the recommended time to work. If the finish still resists gentle scraping, it may need more time or another application.
- Work in manageable sections and avoid letting the stripper dry out. Only cover it with plastic wrap if the manufacturer recommends it.
- Use a scraper suitable for your product and keep a light touch to avoid gouging your wood.
- For grooves and carvings, use a compatible brush or detail tool to gently loosen the softened finish.
- Be careful around veneer and glued joints. Avoid soaking the piece or leaving the product on longer than directed.
- Follow the label’s cleanup instructions exactly. Some products require a specific wash or neutralizer before refinishing.
- Allow the wood to dry fully before sanding, staining, or painting.
- Work outdoors when possible and wear chemical-resistant gloves and eye protection as directed. “Low odor” doesn’t mean harmless!
- Keep strippers away from heat guns, sparks, and flames.
- Check older paint for lead before starting. Lead-containing residue needs special handling and disposal—chemical stripping doesn’t make it harmless.
- Collect the residue and dispose of it according to the product label and your local waste guidelines. Don’t pour it down the drain!
BONUS – ACETONE STRIPPER
I’m including this under the chemical stripper umbrella even though it’s a solvent. My friend Natalie at A Ray Of Sunshine introduced me to this method on our Furniture Fixer Uppers tour, and I’m so glad I tried it! It worked amazing on the curvy, shapely spindles.
Working outdoors, I took an old rag and laid it on top of the spindle and poured some Acetone to wet the rag completely. I let it sit for a few minutes so the acetone loosened all the paint and then used the rag to wipe the paint right off! Nitrol gloves and eye safety are a must, along with good ventilation, but this is an easier way to remove paint from all those tiny crevices.
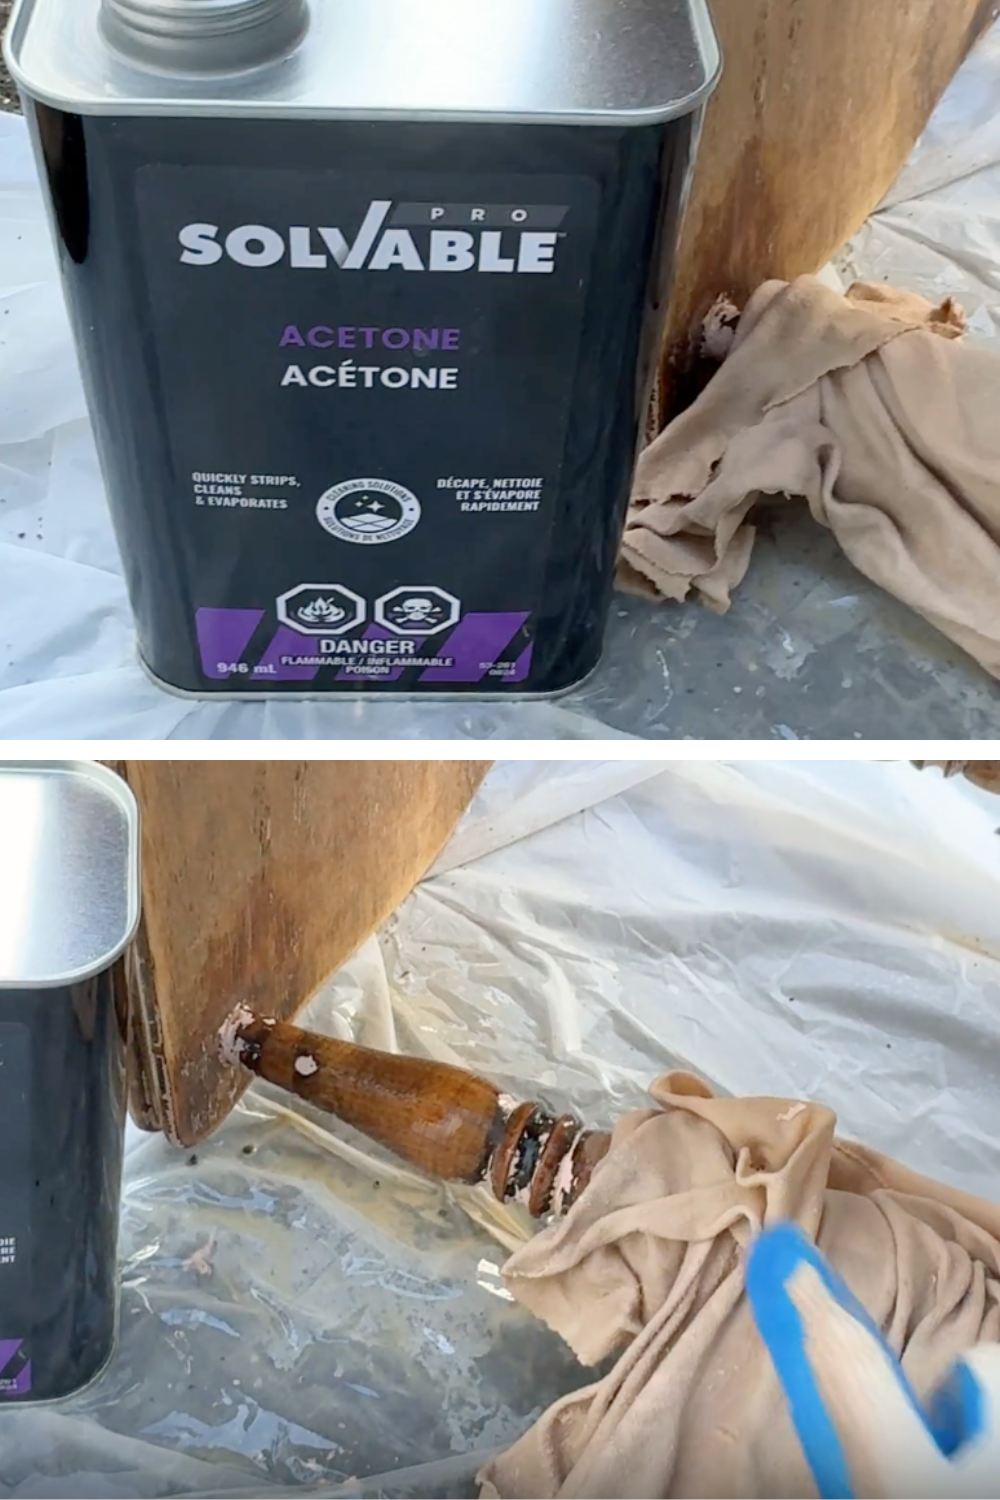
SANDING DETAILS
Once I had the bulk of all the pink paint removed using the methods above, I hand sanded the remaining bits off and smoothed out the entire surface before staining. I have a few hand sanding hacks that I’ll be sharing in this weekend’s video as well. Using sandpaper wrapped around a pencil to get into grooves, and a duct tape spindle sanding hack I share in this video here as well.
STAIN AND FINISHING DETAILS
Once I had the table totally stripped, sanded, and all the dust removed, I brought it back into my painting room and started staining the wood. I picked this gorgeous Gold Ash No Pain Gel Stain that is a beautiful and classic mid-tone stain. You may remember I used it on my Dad’s Wood Garden Bench here, and also on my Hallway Table Makeover Table here. It has been my go-to stain color for a traditional not too yellow/orange look since the first time I used it!
Applying the gel stain is super easy. I give it a good mix. Then, using a sponge, brush, rag, or shop cloth, I apply it, working in manageable sections, then wipe back the excess. I move onto the next section and repeat.
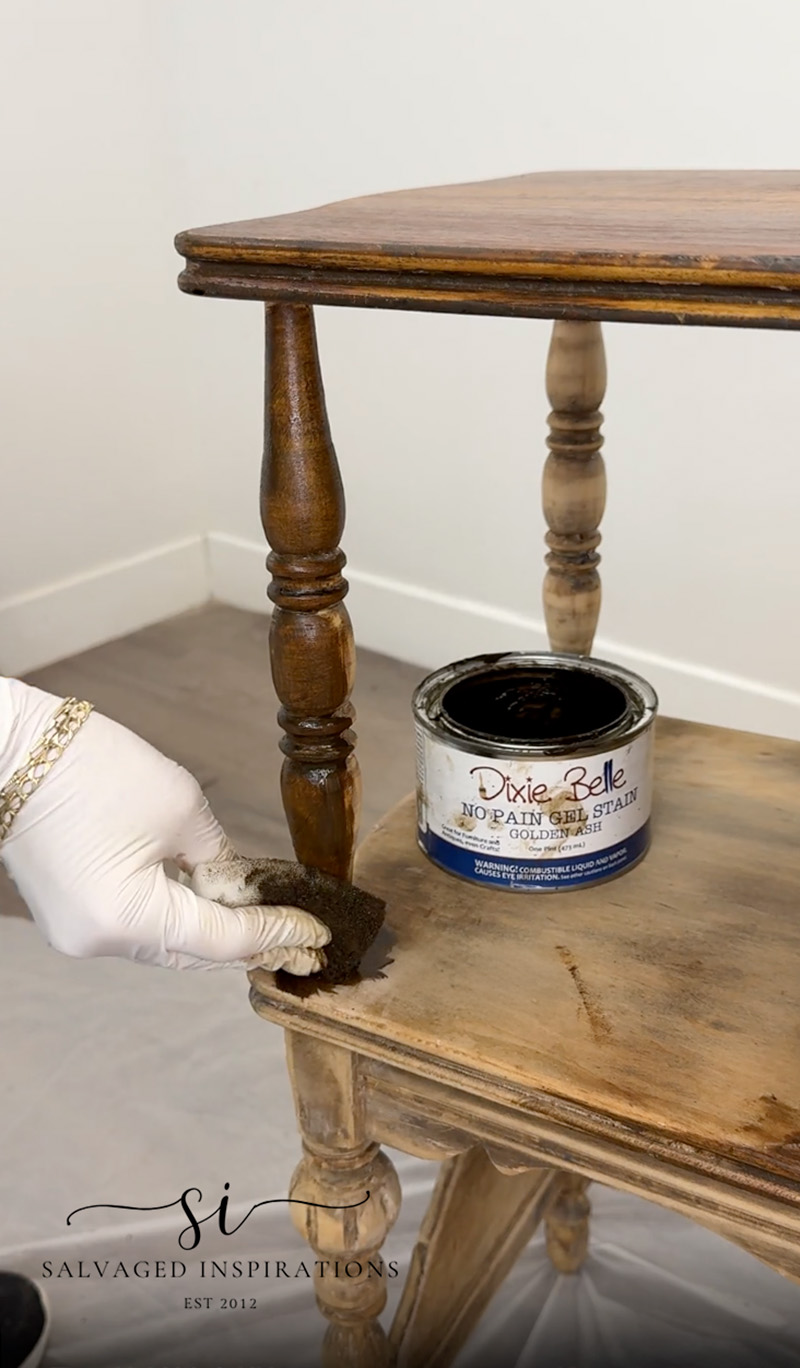
To protect the oil-based stained finish on this side table, it requires 3-5 days of dry time before topcoating. I like using Gator Hide for a super durable finish that I can spray. For the finishing touches, I reassembled this table. I debated whether or not to remove the magazine rack portion but then decided to keep it all original as Andrea found it. I’m curious what you would have done? Keep the magazine cubby or remove it?
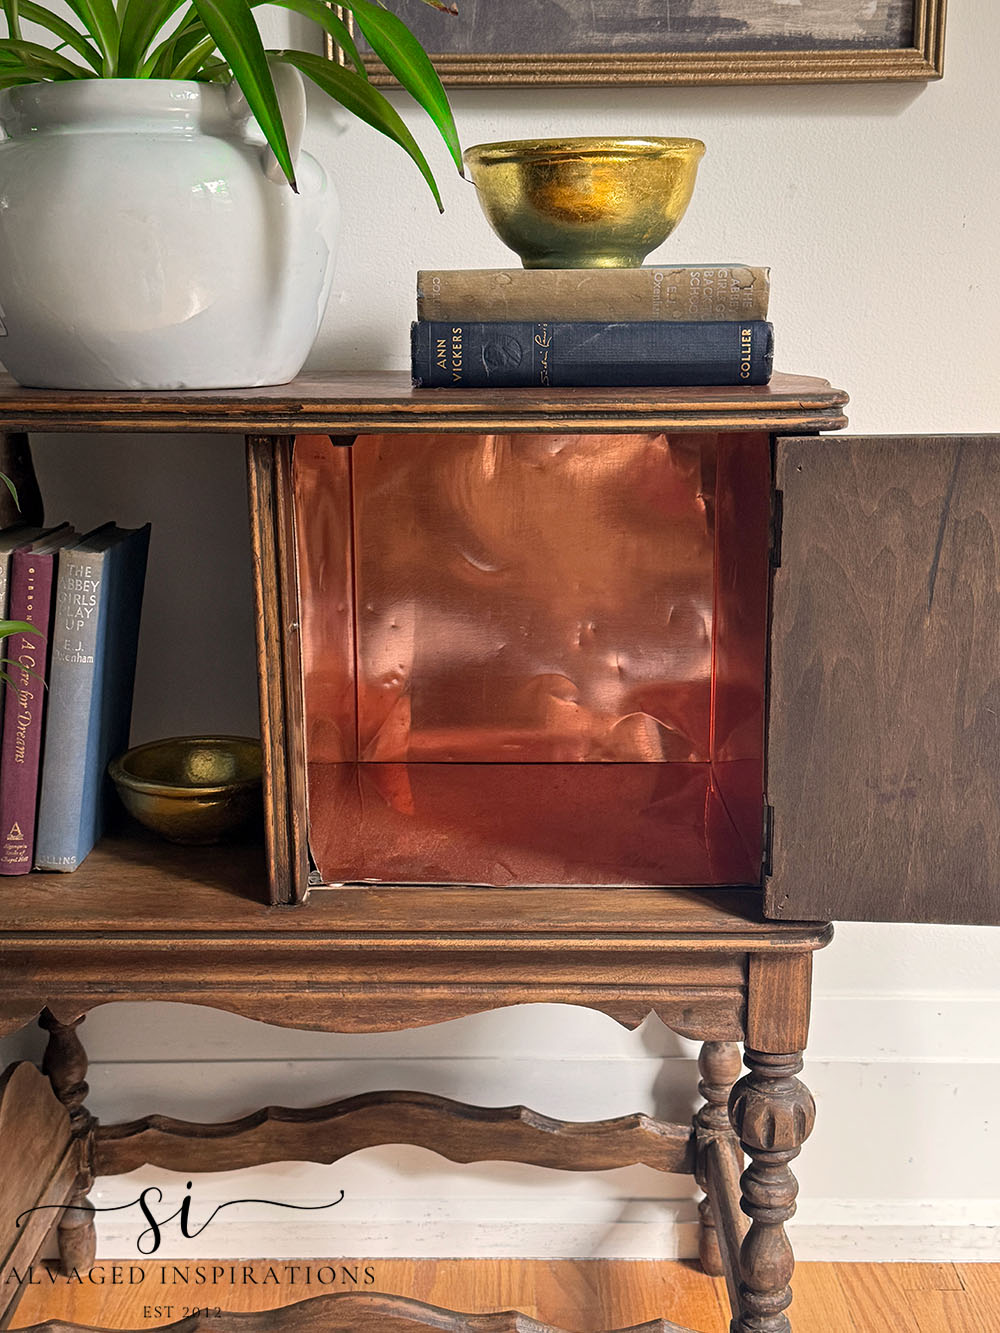
I also removed the metal lining from the back of the door (it was all discolored from the chemical paint remover) and straightened out the hardware, so it wasn’t hanging sideways anymore.
THE BIG REVEAL…
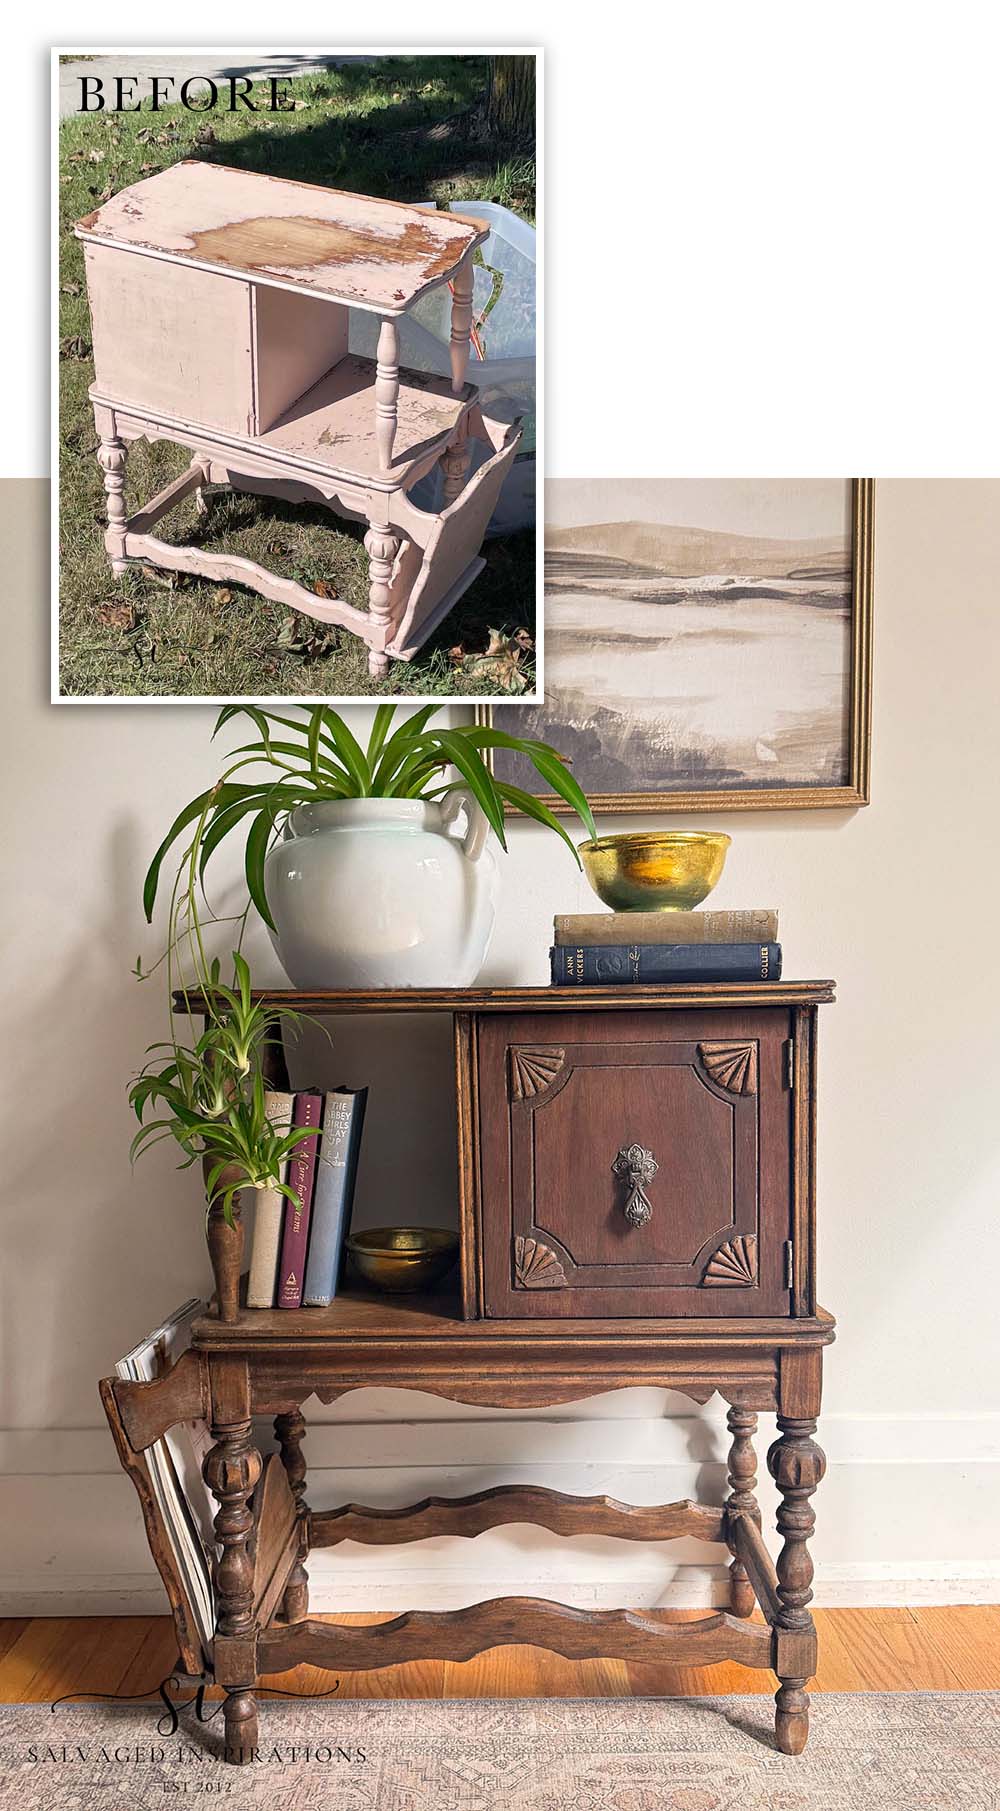
Here’s the finished look! What do you think!?
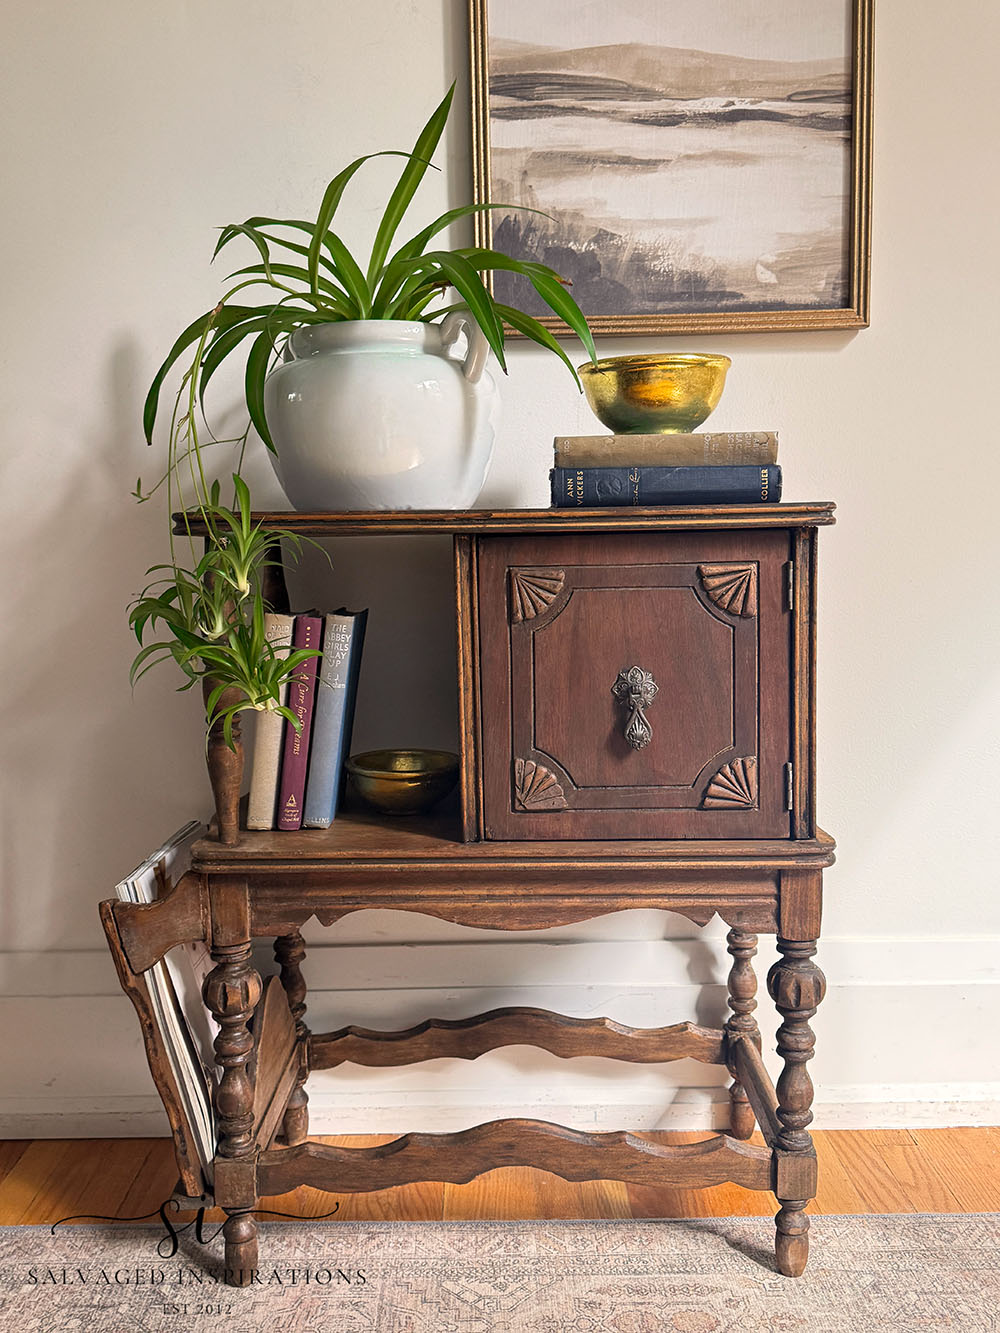
For a beat-up curbside table, I’m really pleased I chose to strip it down and see what was hiding underneath all this paint. It’s far from perfect, and looks a little rustic, but I think having it stripped back and stained really brings out some great vintage character in this piece.
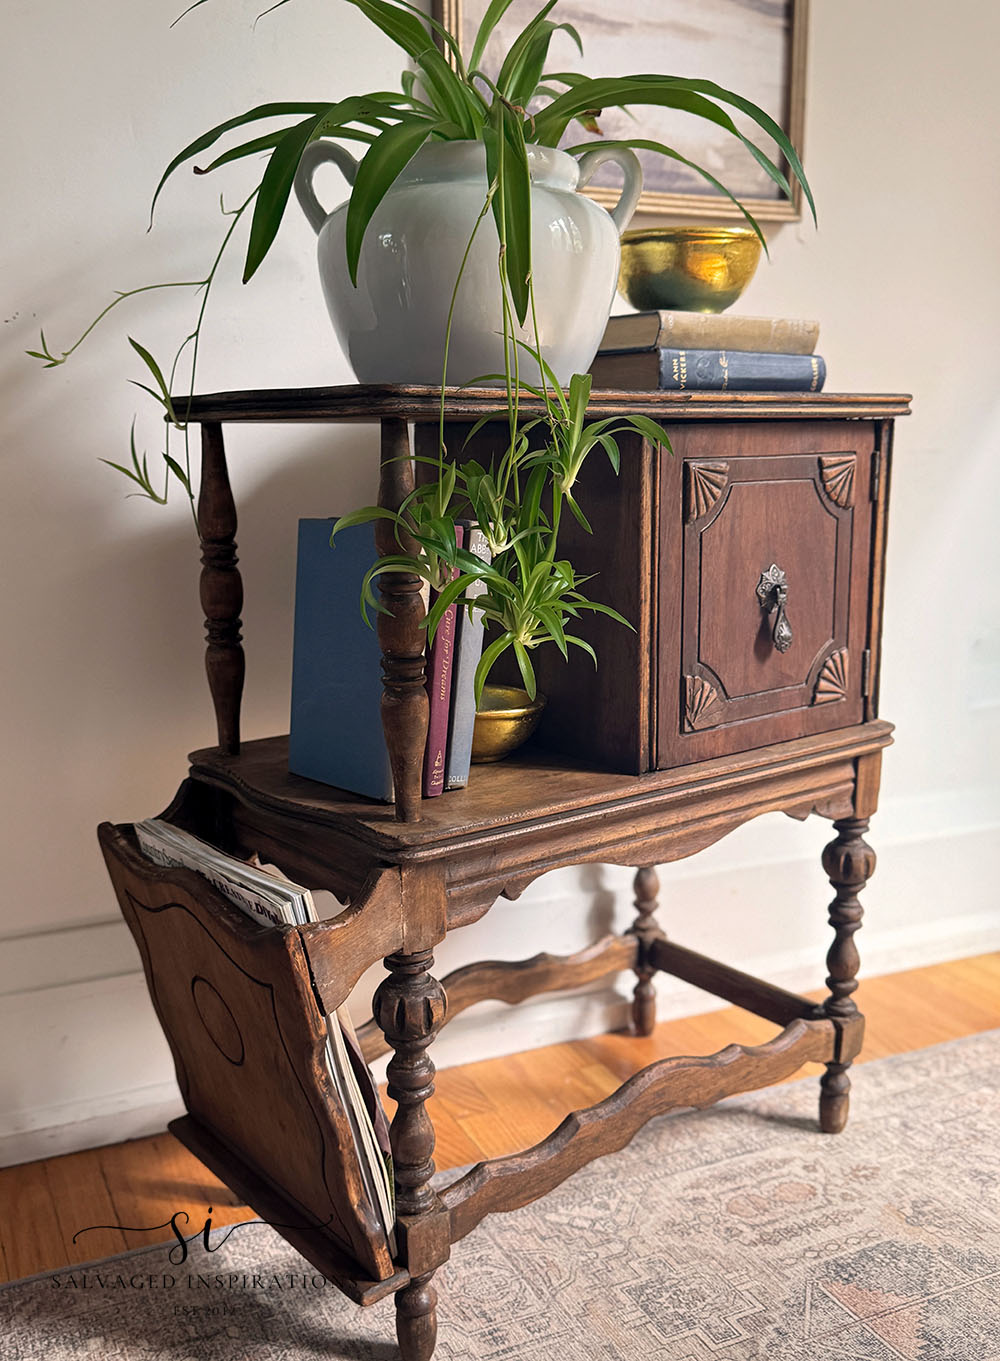
And check out how straight the teardrop hardware hangs now. It looks sooooo much better.
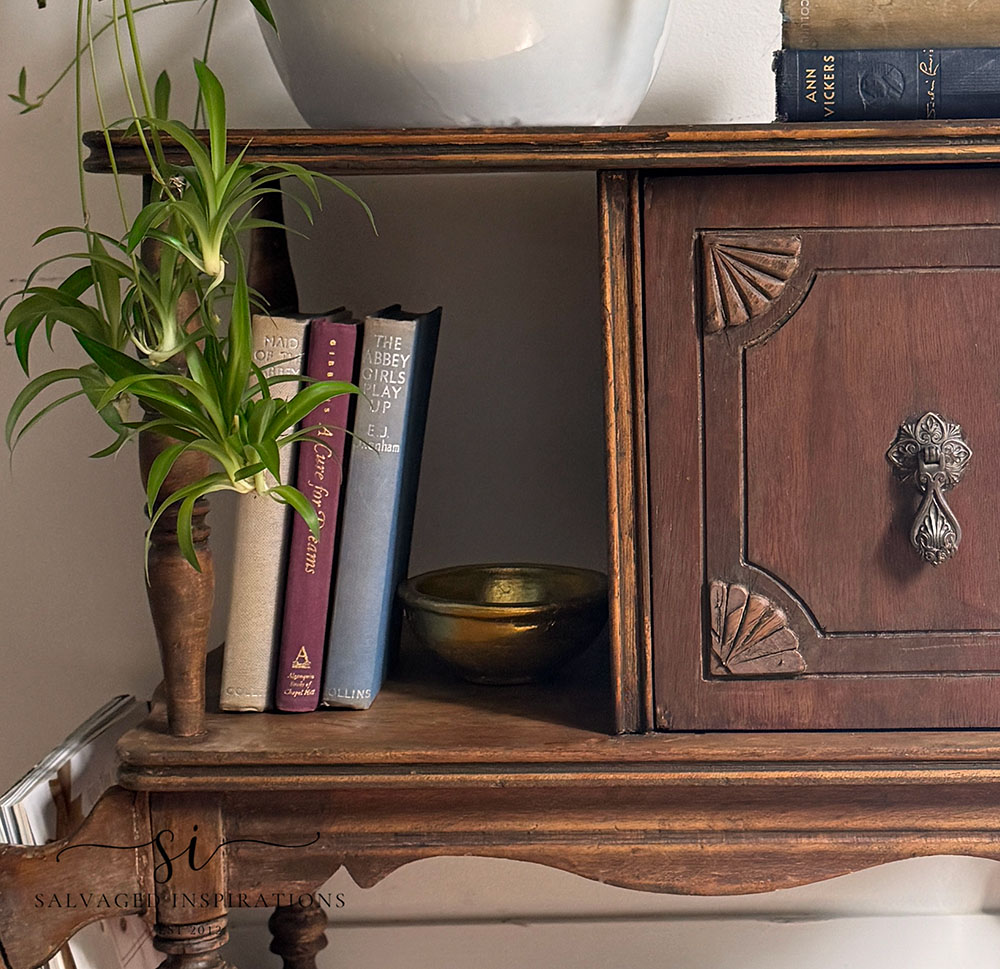
And here’s a look at the inside. I’m still so curious if something is hidden behind this metal lining! I’m also really happy I removed the sheet on the back of the door and restained.
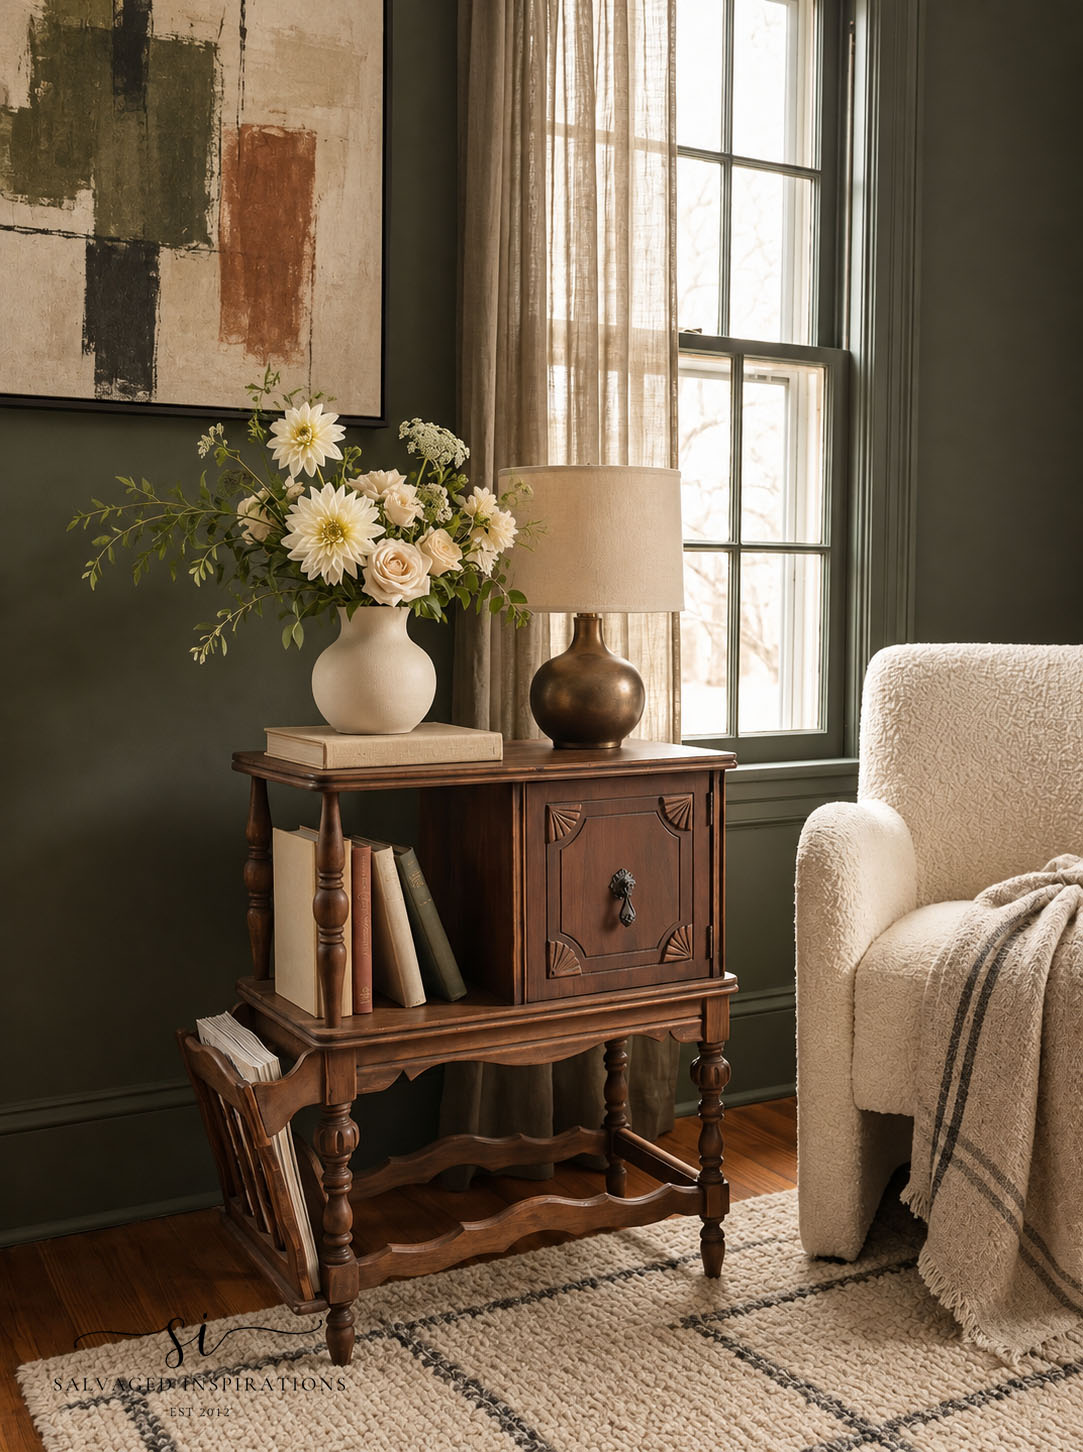
And just for fun, I prompted AI to generate this stripped-and-stained side table in an olive modern roomscape. Here’s what it generated. I LOVE it! But if you look closely at the magazine holder portion… it did its own thing, adding spindles instead of the solid piece of wood. 😆 And there is something else different on this table as well… can YOU spot it?
And now for some Trashy Treasures FUN!
Below are the TTT ladies’ BEFORE photos. Visit the links below to see the amazing AFTERS and learn how they did it! I’m heading over to take a peek as well! x
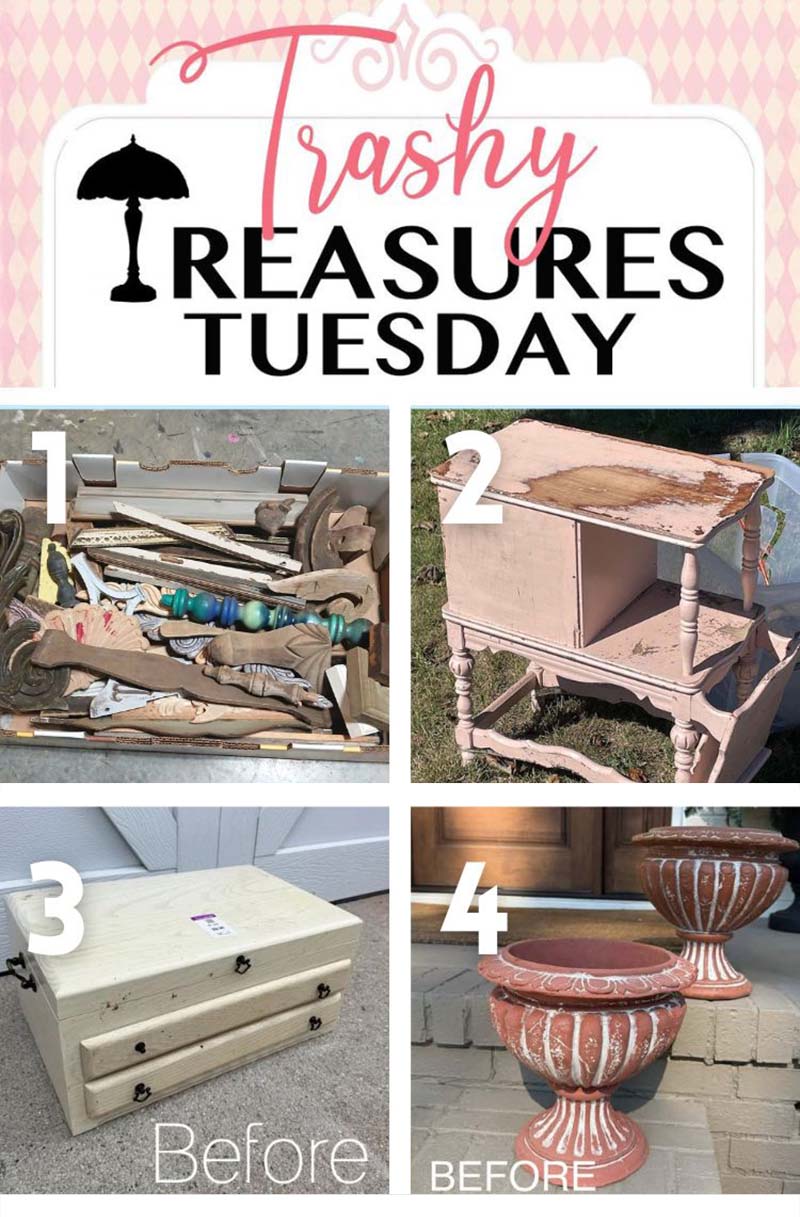
1. PETTICOAT JUNKTION
2. SI (HAPPY YOU’RE HERE!)
3. CONFESSIONS OF A SERIAL DIYER
4. ARTSY CHICKS RULE
Here’s another look at the before and after of this old, beat-up, trash-bound table. I hope it inspires you to remove some old paint and see what is hiding underneath on one of your makeovers!
FINAL THOUGHTS
Stripping an old finish takes some time and effort, so I like to pick pieces that feel ‘worth it’ and inspire me. If I’m curious about the wood hiding underneath an old piece, it’s a GO! And I like that you don’t have to use one method from start to finish, either. Combining different methods can make the job easier, especially on a piece with lots of details and shapely spindles.
My final thoughts would be to be flexible, take your time, and give yourself permission to take breaks. Also, the proper safety equipment and good ventilation are super important so you can enjoy the process AND the reward of seeing that beautiful wood come back to life!
Thank you so much for being here and for following along with our October Furniture Fixer Uppers Tour. If you have a question or want to say hello, I’d love to hear from you in the comments below — you always brighten my day!
Happy creating, sweet friends! 💙
Denise x
RELATED POSTS:
HOW TO SAND SPINDLES
15 PRO TIPS FOR SANDING FURNITURE
HOW TO APPLY A COLOR PAINT WASH
SALVAGED EASTLAKE TABLE | BEFORE & AFTER
HOW TO APPLY A CLASSIC BLACK WASH ON FURNITURE
PIN AND SHARE! 🤗
 Hello again... I'm so happy you dropped by! Let's keep in touch! Follow me on social media or sign up for a dose of furniture painting inspiration and diy tutorials. :)
Leave a Reply