HOW TO RESTYLE YOUR DATED DINING TABLE WITH AN EASY MODERN FINISH | WHITEWASHING WOOD WITH PAINT | YOUTUBE VIDEO
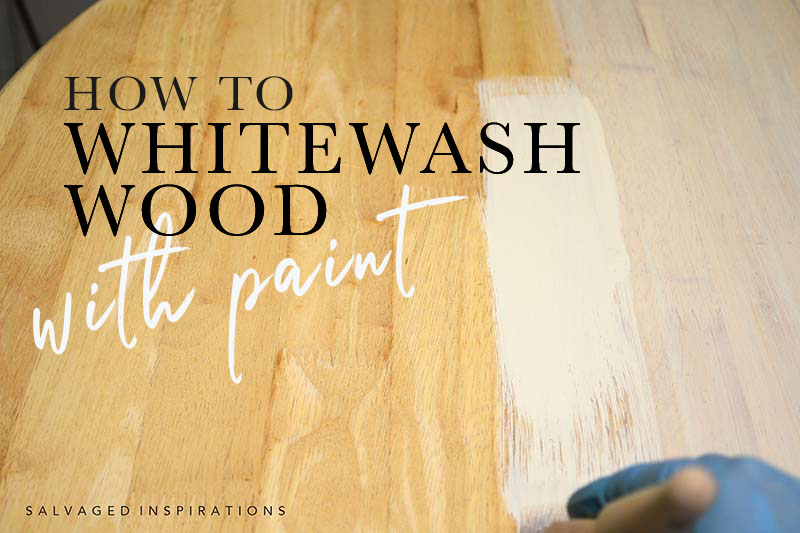
Hi, my beautiful and creative friends! I see these orange-toned wood pedestal tables everywhere but lucky me, I found this dining table curbside. You may have one similar one as these tables are such a popular shape and style! To give this dining table a NEW modern look, I’m sharing How To Whitewash Wood With Paint. This is SUPER easy to do (no staining required!) and I promise you’re going to be shocked at how amazing this simple finish looks!
It’s also one of my favorite days of the month – Furniture Fixer Upper Day! As a bonus, I’ve included the links to my super-talented blogging besties’ furniture flips before and afters down below.
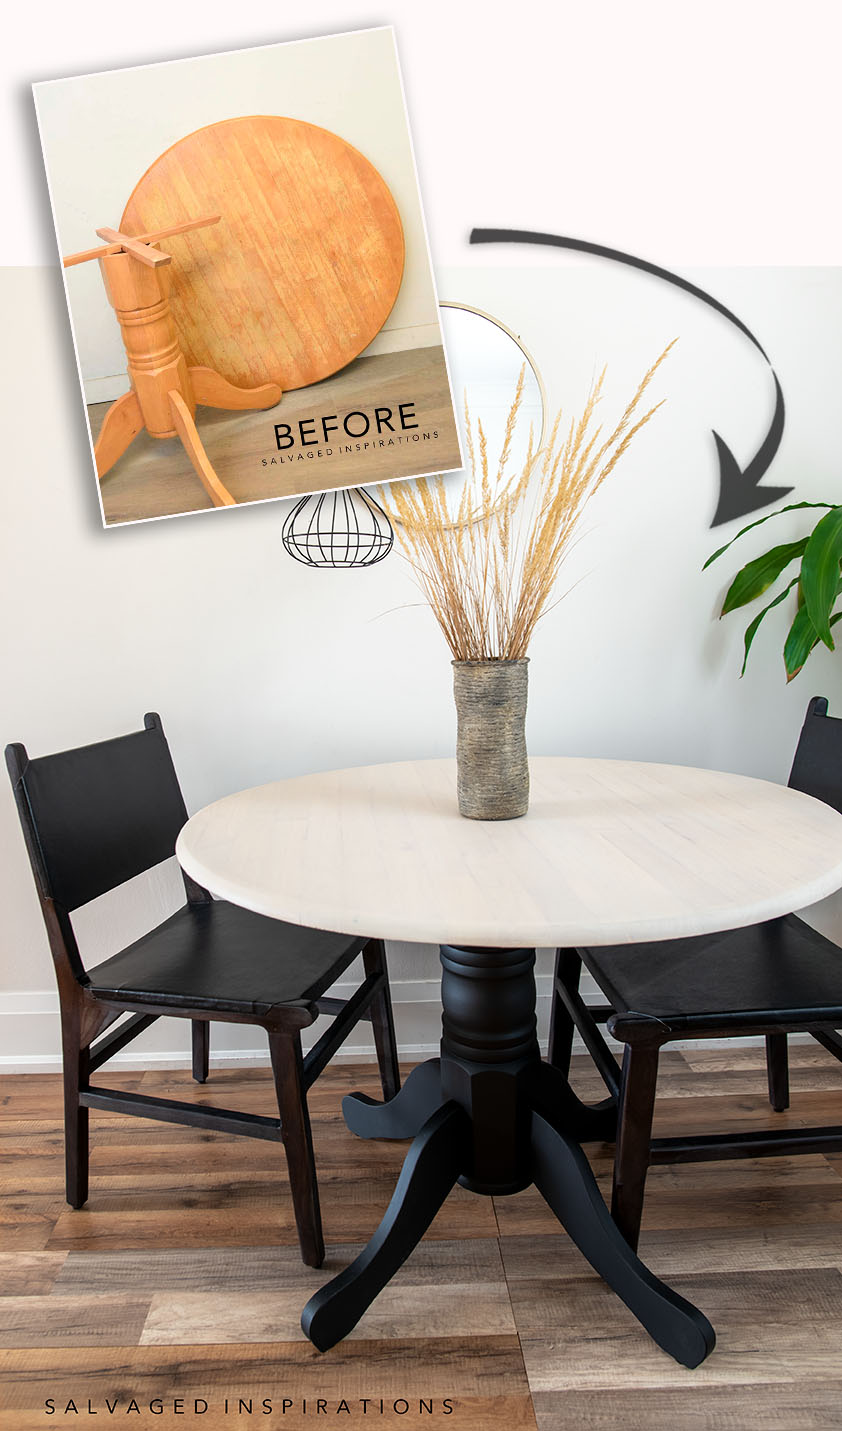
Here’s the curb-shopped pedestal dining table I started with. It was structurally sound but the finish on the tabletop has seen better days.
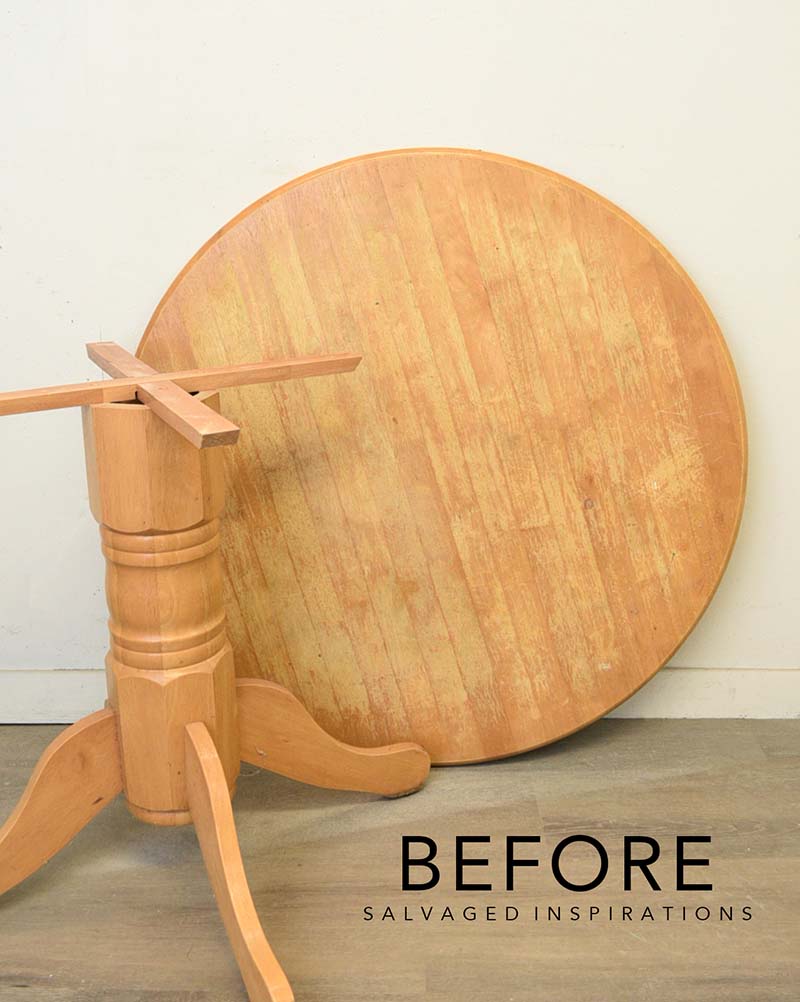
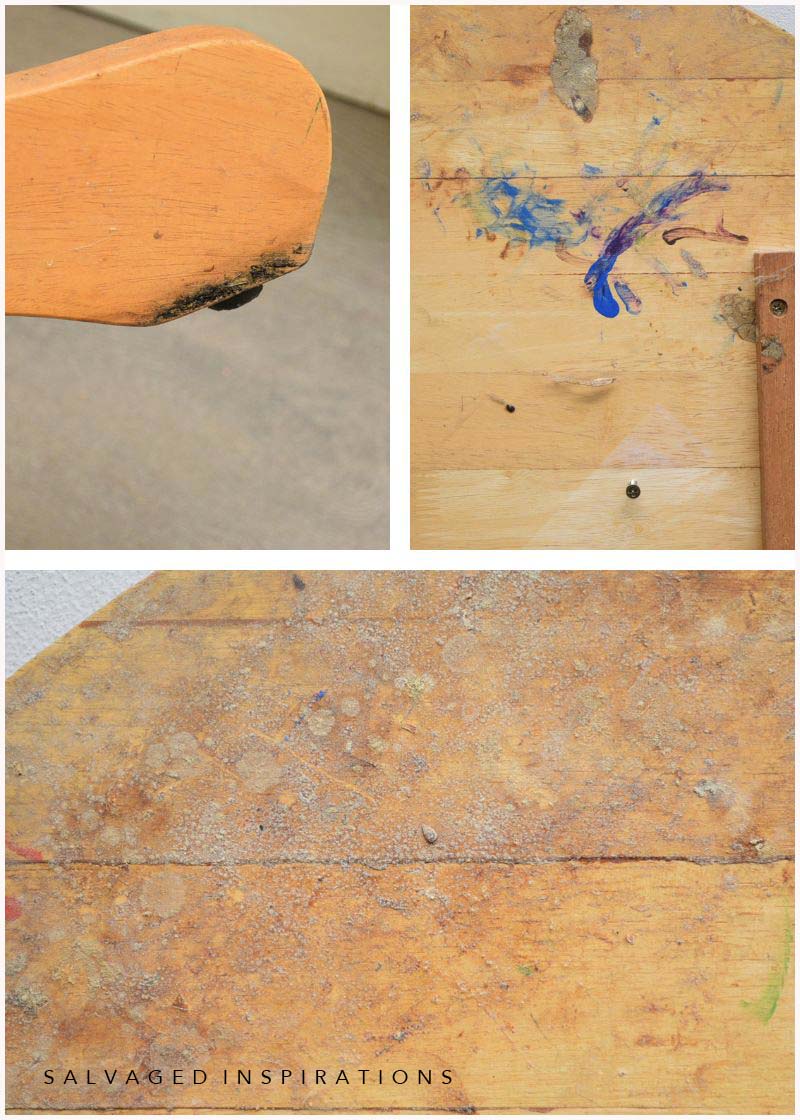
There was also some mold, mildew, and spills that needed removing as well. Challenge ON!
This table has a ‘Made In Malaysia’ stamp so I’m guessing it’s rubberwood as this is the most common wood species used for furniture manufacturing in Malaysia.
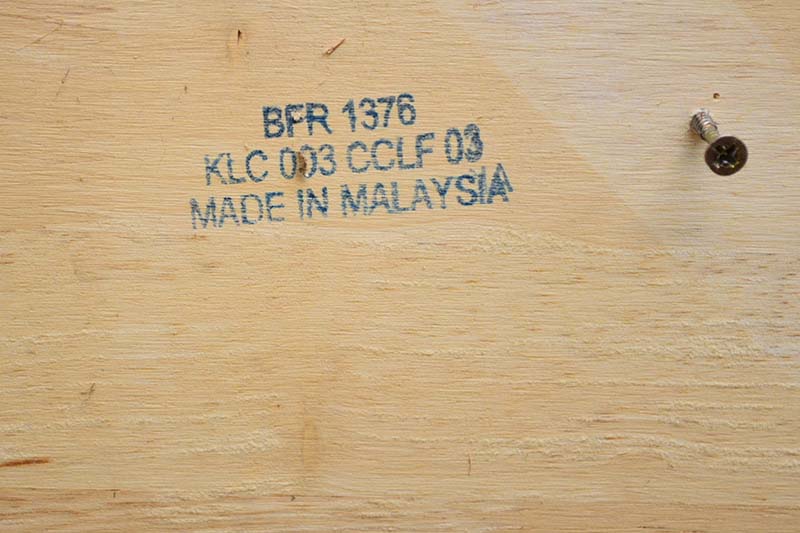
Under the old ambered stain, it seems to have a pale cream color and interlocking grain which are characteristics of rubberwood.

THIS POST IS SPONSORED/CONTAINS AFFILIATE LINKS TO PRODUCTS I USE. YOU CAN SEE MY FULL DISCLOSURE HERE.
SOURCE LIST
Curbside Dining Table – SALVAGED
White Lightening
Sand Paper | Tack Cloth
Shop Towels
2″ Chip Brush
2″ Flat Large Brush
Slick Stick Bonding Primer
Anchor Silk All-In-One Paint
Drop Cloth (off-white paint)
Gator Hide Topcoat
TOOL LIST
Orbital Sander
Paint Gun Sprayer
Bahco Carbide Scraper
HOW TO WHITEWASH WITH PAINT | DINING TABLE
Here’s the step-by-step makeover of this pedestal table. I really hope this makeover inspires you to give this a try!
PREP | CLEAN
To get a good paint wash finish, I needed to start with a good cleaning. When I see mold on wood, extra attention needs to be taken to remove it. I always wear a mask, gloves, protective eyewear, etc. I removed the mold and mildew by cleaning this piece with this TSP substitute. You can also use water and dish detergent. Or add vinegar or some bleach to a spray bottle as well. They also sell mold removers on Amazon if you’re not into mixing your own. Tip ~ Remember the inside, back, and bottom of the piece when cleaning your furniture. This is where mold spores can be hanging out and you want to make sure to get it all!
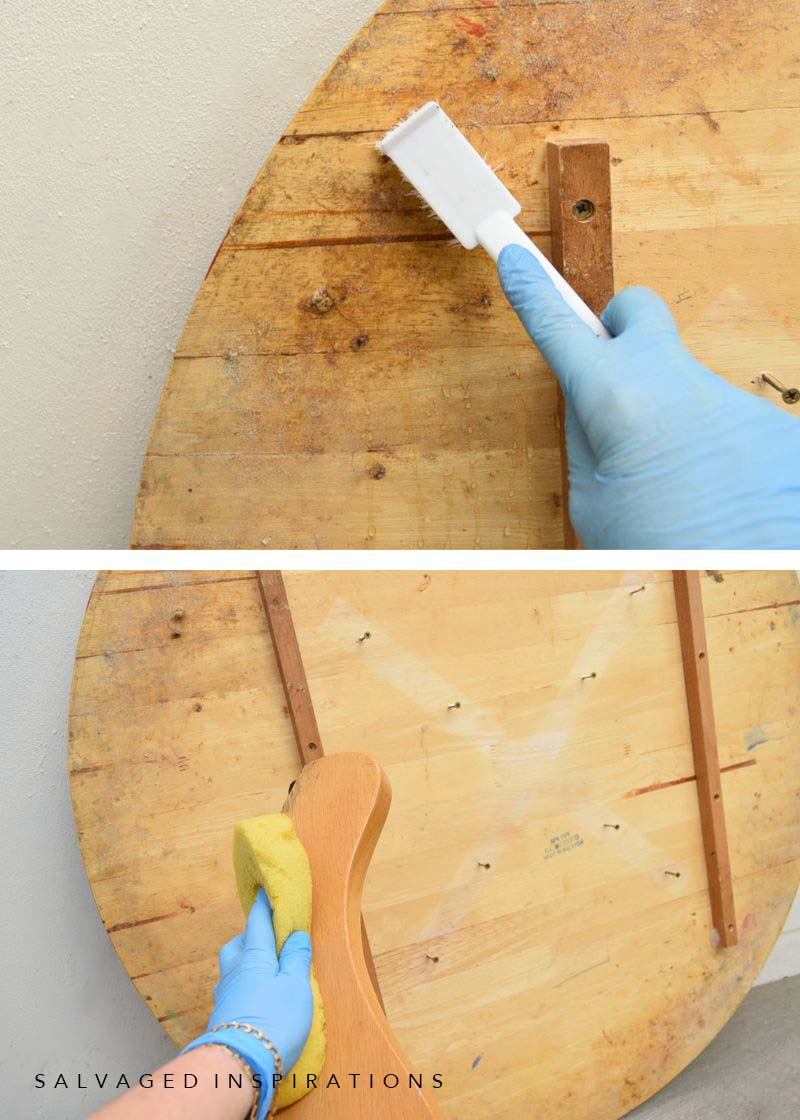
REMOVE OLD FINISH
Once the table was clean and dry, I started to remove the old finish. I bought this Bahco Carbide Scraper to see what all the hype was about. I LOVE it! It took me half an hour to scrape off the majority of the finish. No smelly chemicals were required! If any of you have this tool, I’d be curious to hear how often you change the blade.

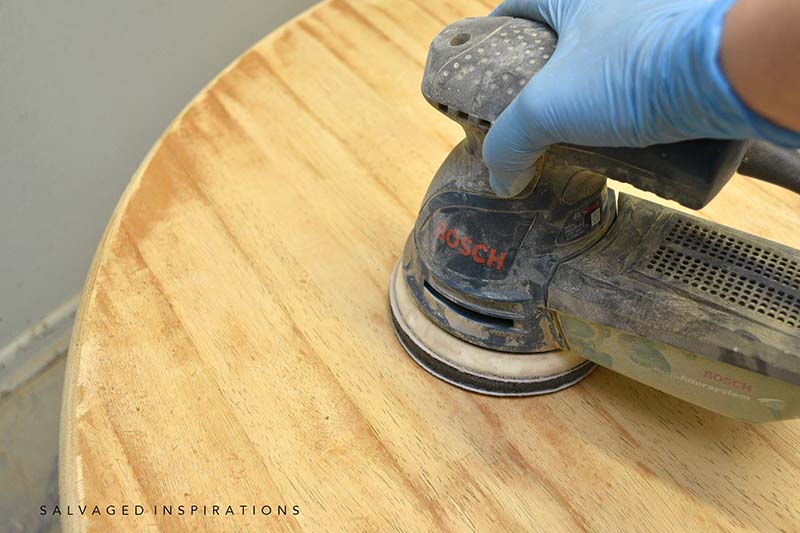
Once I had about 90% of the finish scraped off, I used my orbital sander to finish it off. I started with 80 grit and then moved on to 150 and finally 220 grit for a smooth finish. I removed all the dust with my tack cloth and it was ready for a whitewash.
WHITEWASHING WOOD WITH PAINT
Okay, here’s the fun part! Whitewashing wood is super easy and costs MUCH less than buying stain. You can use ANY type of white paint. Latex, mineral paint, acrylic paint, chalk paint, craft paint – whatever white paint you have on hand. I would stay away from high gloss but other than that anything goes. Leftover paint is great for this because so little is needed.
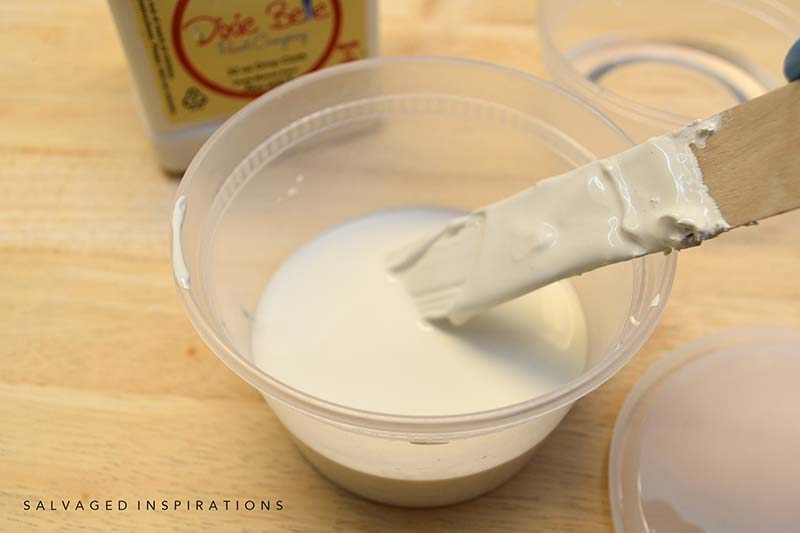
I suggest mixing a 1:1 ratio of water and paint meaning 50% paint into 50% water. This is a great place to start. Then you can test this in an inconspicuous area of your wood to see how you like the look. If it’s too opaque (or dark), add more water to dilute the wash. If it’s too translucent, (or light) add more paint to thicken it up. Adjust the water-to-paint ratio to whatever YOU LIKE.
The same goes for color. Pick whatever color of white paint YOU LIKE. I prefer using an off-white so I made my paint wash using 1/4 cup Drop Cloth and 1/4 cup room temperature water.
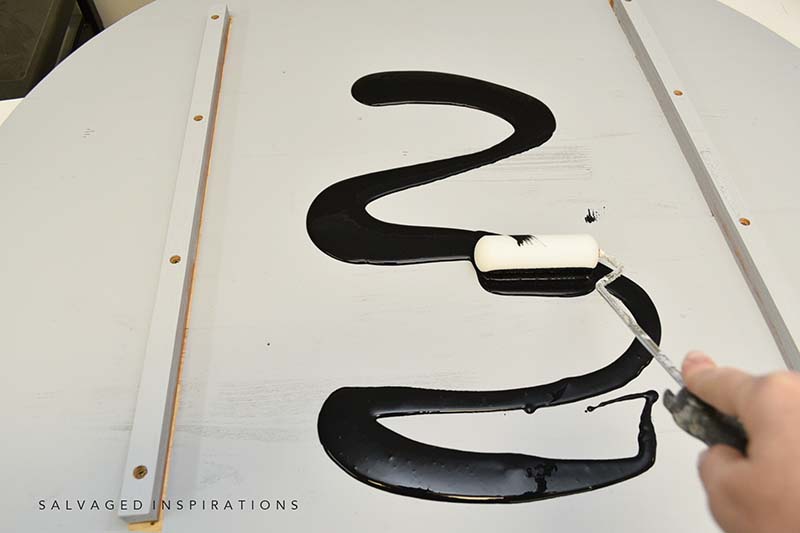
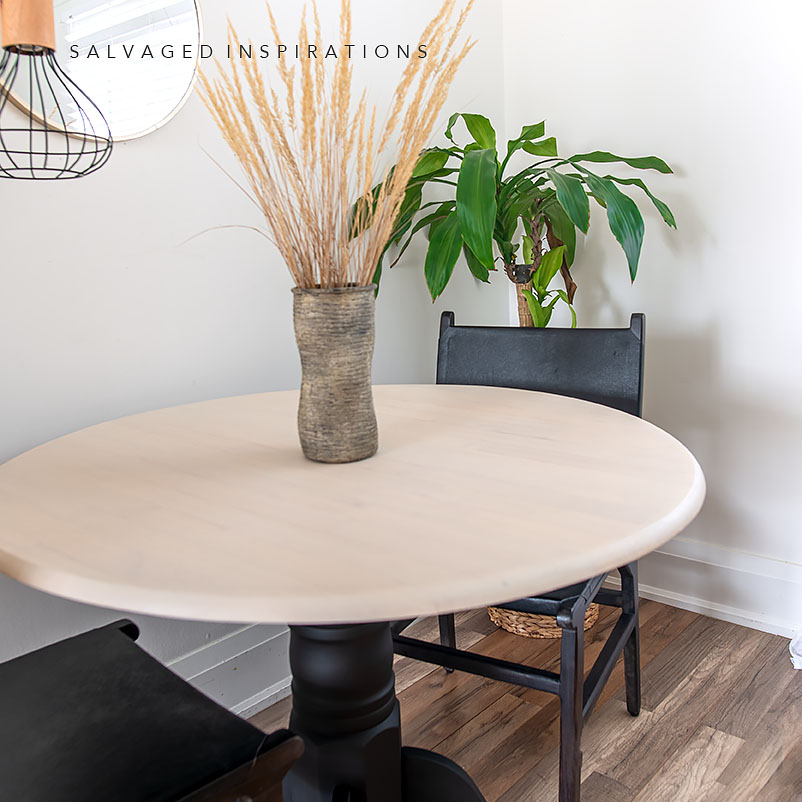
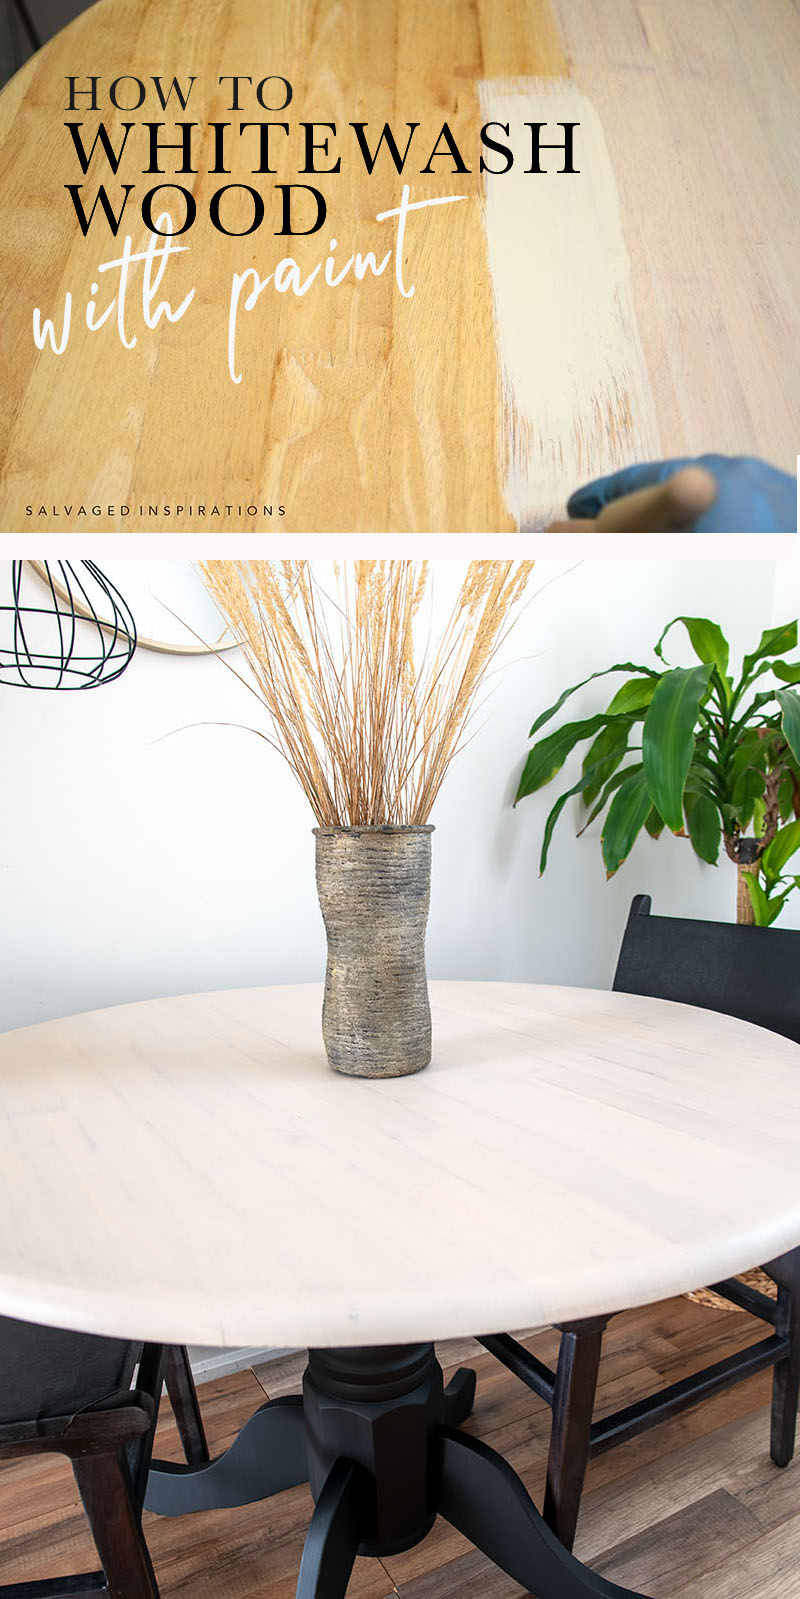
To apply the paint wash, I used a 2″ synthetic brush. I dipped the brush into the wash and painted the table in sections applying the wash in the same direction as the grain. I worked in smaller sections because it’s important to keep the paint WET. While the paint wash was still wet, I used my shop towel to wipe off the excess. As you can see below, it REALLY cuts down on the orange wood tone while leaving a gorgeous light wood grain finish.
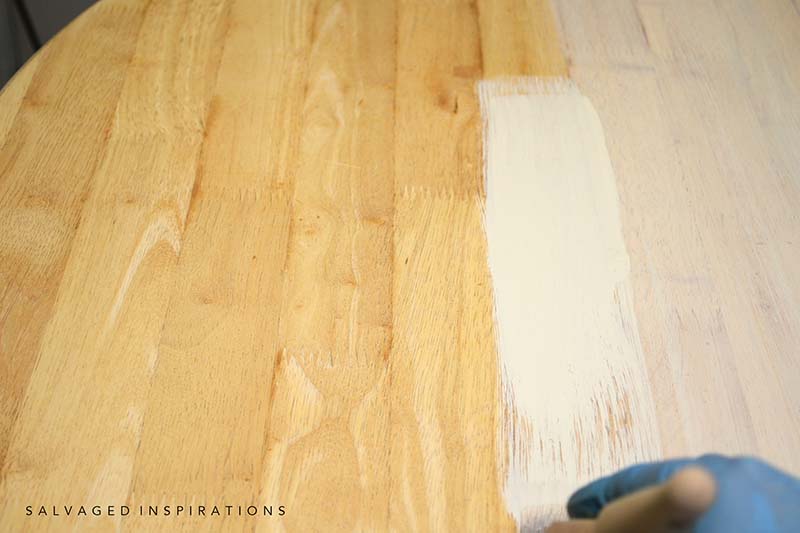
Big difference right!?!

PRIMING & PAINTING THE BACK
I forgot to mention that I primed the BACK of this table top with BOSS Primer. This will ensure no mold grows back and it smells fresh! Once the primer was dry, I painted a coat of Anchor Black to match the pedestal base. I’m also getting pretty good at pouring paint and primer which you can see in this Saturday’s video. 🙂
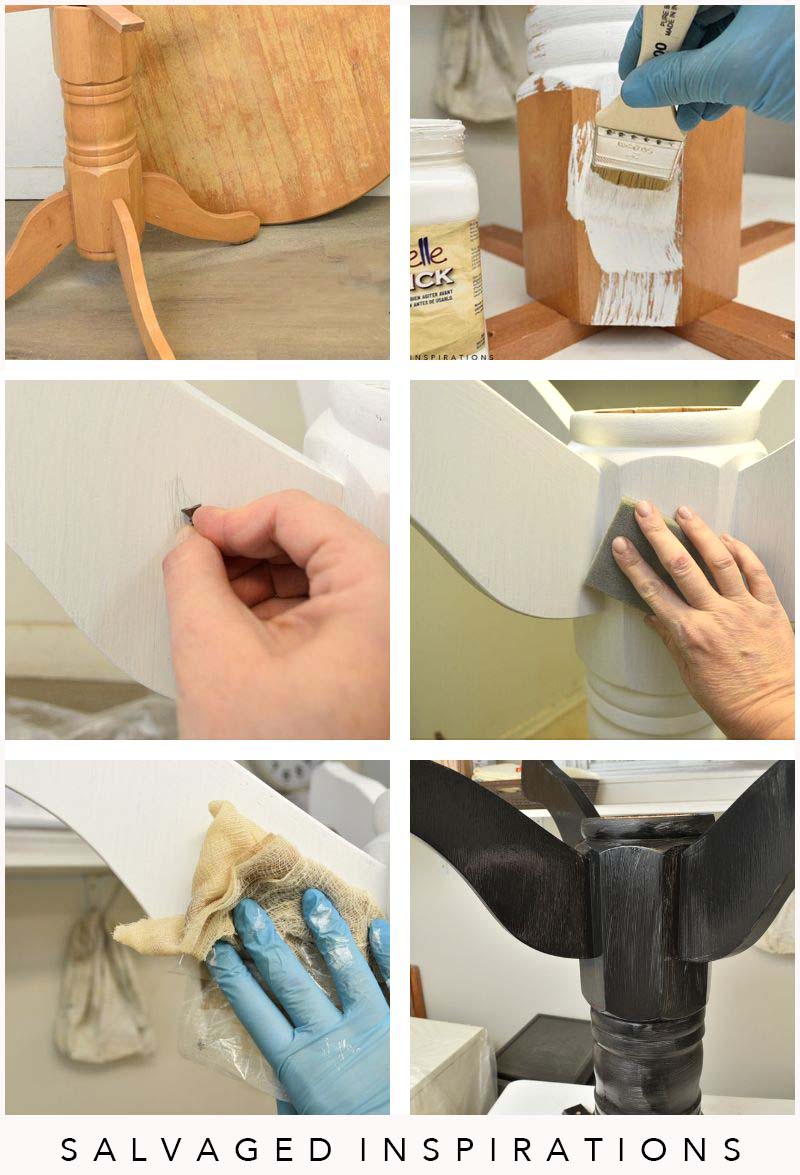
PAINTING THE BASE
To give this piece a modern look and create some contrast, I restyled the pedestal base in this Anchor Black Silk All-In-One Mineral Paint.
Here are the steps!
- Clean
- Prime with Slick Stick Bonding Primer (so no sanding was needed)
- Scratch Test to make sure it was 100% adhered
- Light sanding before paint
- Remove dust with a Tack Cloth
- Paint 2 coats of Anchor Silk All In One Mineral Paint
TOPCOAT
To protect and finish the tabletop I used my favorite topcoat – Gator Hide! I used this on my dining room table 2 years ago and it still looks amazing and is holding up beautifully. It’s super durable. Easy to clean. And not only water resistant (like most topcoats) but actually water repellant.
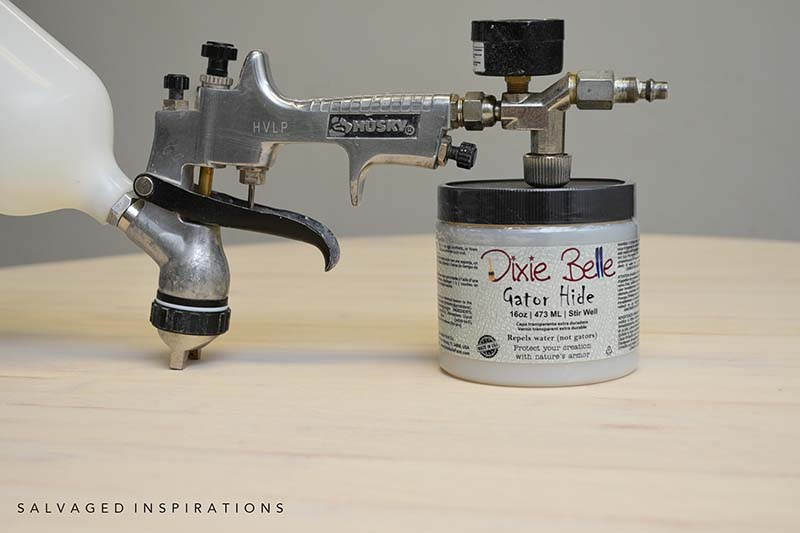
I sprayed three coats sanding very lightly between the first and second coats. No need to sand the last coat. Also, if you’ve ever topcoated a wash and noticed it started to turn slightly orange again, here’s a little trick to keep your whitewash looking white. Add a very small amount of the leftover wash into your topcoat. I added 10% wash to 90% Gator Hide.
And here’s the finished look!

I love the high contrast of this table!
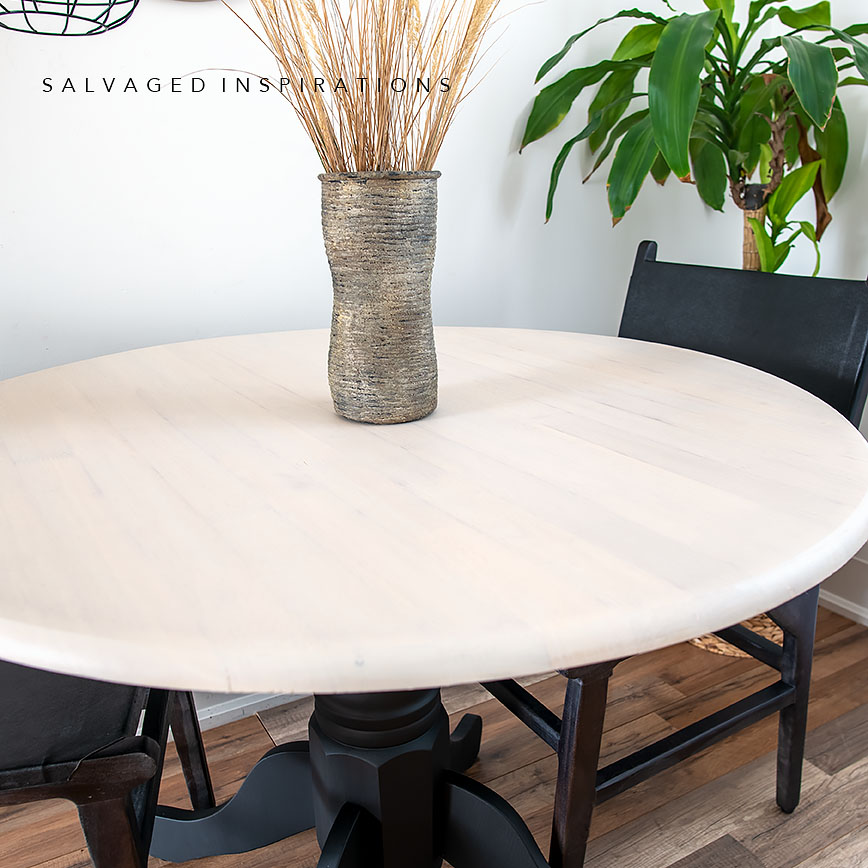
And I’m so glad I primed and painted the bottom of the table as well. Not that anyone will be this low to see it, but if they are… 😉
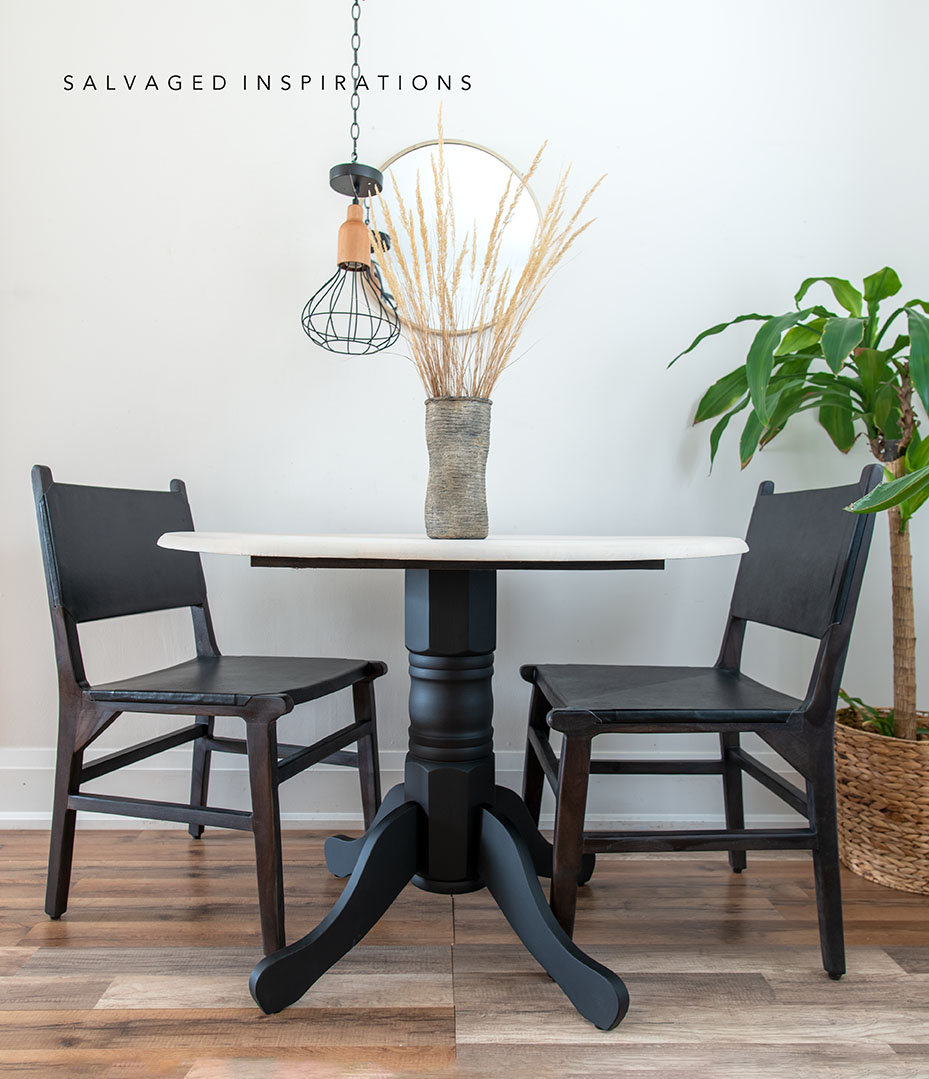
The Drop Cloth is a perfect color for a modern whitewashed finish. It looks so natural!

YOUTUBE TUTORIAL
Here’s a step-by-step tutorial on Youtube. If you have any problems viewing it below, feel free to watch it on my Youtube Channel HERE. Our #siyoutubefamily is already a community of 30.6K so don’t forget to subscribe if you haven’t done so already! So exciting, thank YOU! 🙂
AND NOW FOR SOME FURNITURE FIXER-UPPER FUN!
You’re going to LOVE what my creative team of Furniture Fixer Upper ladies do! Below are their BEFORE photos. Visit the links below to see the amazing AFTERS and learn how they did it! I’m heading over to take a peek as well! x
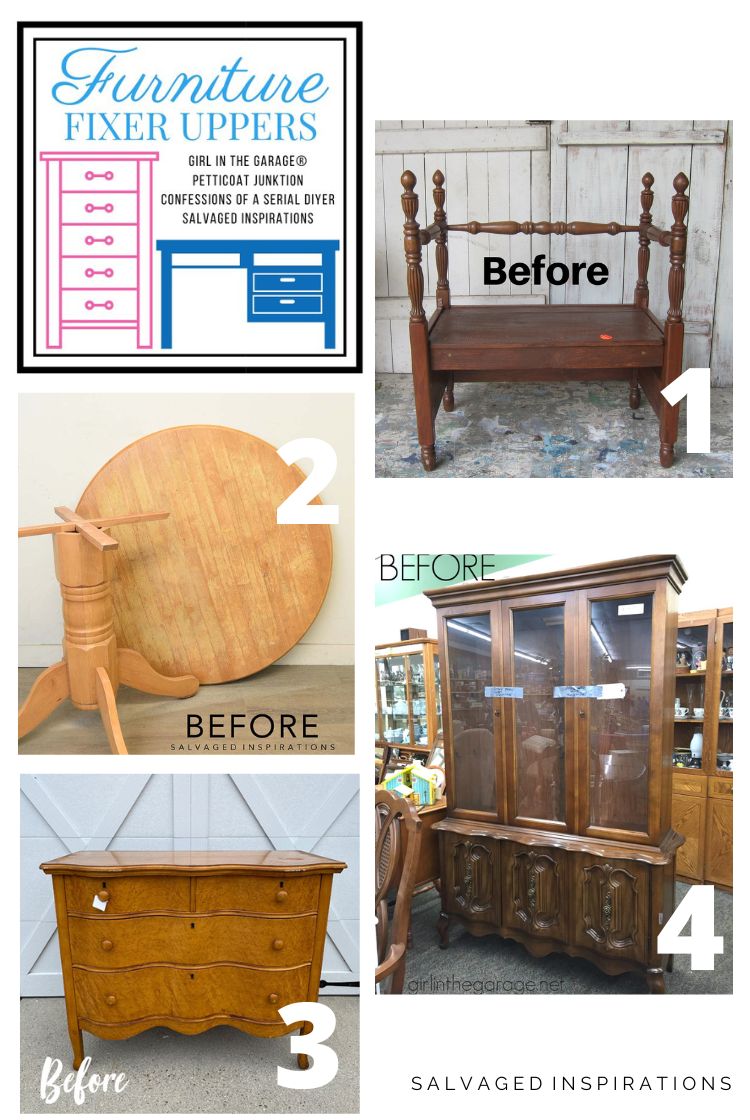
1. PETTICOAT JUNKTION
2. SALVAGED INSPIRATIONS (HAPPY YOU’RE HERE!)
3. CONFESSIONS OF A SERIAL DIYER
4. GIRL IN THE GARAGE
Here’s another look at this curb-shopped dining table before and after. I hope it’s inspired you and given you some new ideas for your projects. If so, feel free to PIN and SHARE so you can save it for later!
LET ME KNOW WHAT YOU THINK OF THIS WHITEWASHING WOOD TABLE MAKEOVER. FEEL FREE TO ASK ANY QUESTIONS YOU MAY HAVE… I ALWAYS LOVE HEARING FROM YOU. IT MAKES MY DAY! 🙂
Happy furniture painting friends!
Denise x
RELATED POSTS::
PAINTED KITCHEN TABLE MAKEOVER
HOW TO WHITE WASH WOOD W STAIN
HOW TO WHITEWASH FURNITURE
HAIRPIN TABLE MAKEOVER
HAMPTON OLIVE ENTRY TABLE
PIN AND SHARE!


I love this look! Quick question, you mentioned being able to use any paint for the whitewash, does that include a primer? ATM a white primer is all I have available to me due to funds and the wood I’m working with us pine. This exact colour contrast is what I’m wanting for my bookcase! Thanks in advance.
If it’s a water based primer you could give it a try in an inconspicuous area (maybe the back of the bookcase) to see if you like the whitewash look with the primer. I’ve never tried doing a wash with primer but my ‘guess’ is it should work. I’d love to hear how it turns out for you Shanowa!
Hi Denise, Love the redo.
I want to purhase a ready made cabinet, engineered wood. Do I have to scrape off paint before I start?
Hi Joyce and thank you! No need to scrape off all the paint before you start. I would sand the paint smooth and rough it up to accepts a good primer – then paint. 🙂
Thanks
Gorgeous! I have used a similar scraper & depending on the type of finish being removed, it can save mucho sanding time, let alone saving so many sandpaper sheets. This kind of tool can also be used to age/distresss painted edges/corners which saves sanding time. One table I worked on had so many layers of synthetic clear coat, so I used my scraping tool to get down to the paint/varnish, then proceeded with electric sander. The scraper I have does need a new blade every so often for top performance, but I am pretty sure I can sharpen the blades for a few more uses before discarding them, as you do kitchen knives. Also, you don’t discard expensive chisels just because they become blunt as there is a method to sharpen them. Check out sharpening stones, or steels depending what you want to sharpen.
Whaaaaaat…I can sharpen these blades?!😃 I had no idea! I’ll look into the sharpening stone or other tools. I think Nick even has some sort of sharpening tool. I’ll get him to do it…😂 thanks my friend! XOXO
Denise this looks so good! Love the contrast in colors! xo
thanks my friend! Have a great weekend. XOXO
I learned a neat tip from a blogger who put down red oak floors and hated the reddish orange undertones when she wanted the whitewash look. She added a small amount of medium green craft paint to the gallon of white paint. The green, being the complement of red, turned things a nice shade of light tan with the whitewash. Looked beautiful when done. In reality, you can tone down most any color by adding the complement until you get what you want.
Love this tip… thanks, Crystal! 🙂
Beautiful! Thanks for the tip about adding paint to Gator Hide! I love the sleek black with the whitewash. Andrea may take this one from you! 😜
haha… you might be right!😂 Thanks my friend and have a super duper weekend. XOXO
Hi Denise! Such a great update. Much more modern now and a super bonus on a curb find. I also love my carbide scraper. I just recently changed the blade and realized upon using the new blade that I probably needed to change the blade sooner.
Thanks and good to know! I guess I’ll buy a couple and keep them on hand. 🙂
Denise, I just soooo glad you’re here! I learn so much from you and today you taught me not only how to whitewash, but clued me in on a tool I never heard of before. I actually sent for one, and it should arrive tomorrow. Thank you so much!!
Oh I’m soooo glad! When you try it, I’d LOVE to hear what YOU think!
Looks Fantastic! I just did the same thing on a pub-height table and chairs, with 50% Silk color Baja Gray and 50% water, washed on the top, and black color on the bottom and chairs….
Great Job!
Thanks, Laura and your pub-table sounds FABULOUS!!!
Hey Denise!! This is fate. I just picked up this same table but the sides go down on mine and mine was made in Taiwan.Lol. does this mean it’s not good wood? Why did you use slick stick on the bottom? I may just have to use this technique on my table. Thank you!!!
Hi Cheryl!🤗 A ton of furniture is manufactured in Asia so ‘made in Taiwan’ I’m guessing could be anything from plywood under veneer or high-quality solid wood… I think it just depends. And as for the Slick-Stick, I was doing it the lazy girl way so I wouldn’t have to sand. hehe
Awesome and beautiful job!
Thank you, Constance!
It looks so good and I still cannot believe the treasures you find on the curb! Although this one did look pretty gross lol! Love it!! XOXO
Pretty gross right,😂! Well, we BOTH picked real fixer-uppers this month! hehe
This table is so updated now. Thanks for sharing Denise
Thank you Nicki! XOXO
Will other colors work as well? Table looks great, I love your work.
Thanks Vickie! And YES. Other colors work really well. Here’s a table I did in black.
Hi Denise. What a lovely redo. I especially love the contrast between the black table base and the white stained top. Very updated look.
Hi Monique and thank YOU! I’m really liking the high contrast as well!☺️
Greetings. Thank you, Denise, for sharing your beautiful table project. I look forward to each and everyone of your inspirational projects. I’ve learned quite a lot from you and others who have shared their love for restoring items. I, for one, am very grateful for your educational expertise.
Warm Regards,
Donna
This means a lot to me Donna! It’s why I do what I do so you put a huge smile on my face. Thank you!💕
Fabulous job
Yay, thanks Rebecca! XOXO
WOW, Stunning, I love this it looks fabulous.x
Thanks Janette! XOXO