HOW TO SAND SPINDLES, CURVED CORNERS, MOULDINGS, AND DETAILED TRIM FAST AND EASY! | YOUTUBE VIDEO
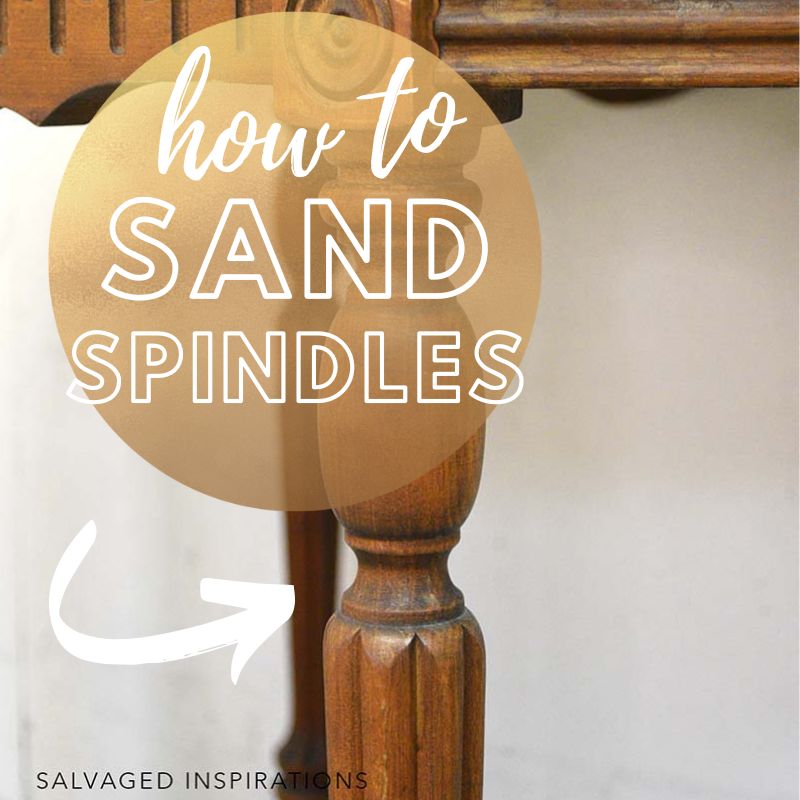
Sanding spindles and curved edges on furniture can be a pain and VERY time-consuming. Today, I’m sharing my FAVORITE WAY to sand spindles along with tools that will help you save time and effort when sanding your furniture!
It’s also one of my favorite days of the month – Furniture Fixer Uppers Thursday. If you’re new to the #siblog, on the fourth Thursday of every month I join my blogging besties and share their furniture before and afters down below. Be sure to check them out and say hi!
Here’s the ornate thrift table I started with. I found it at a Mission Thrift Store selling for $14.99!
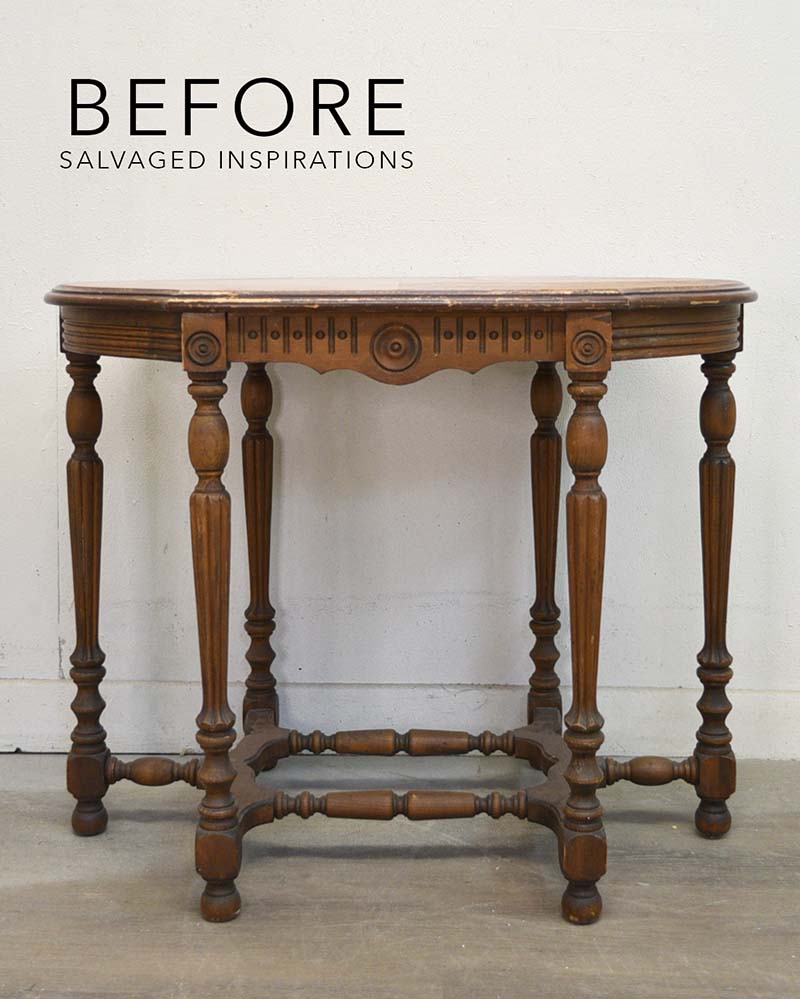
The top was stained, scratched, and chipped but this little table was still gorgeous.
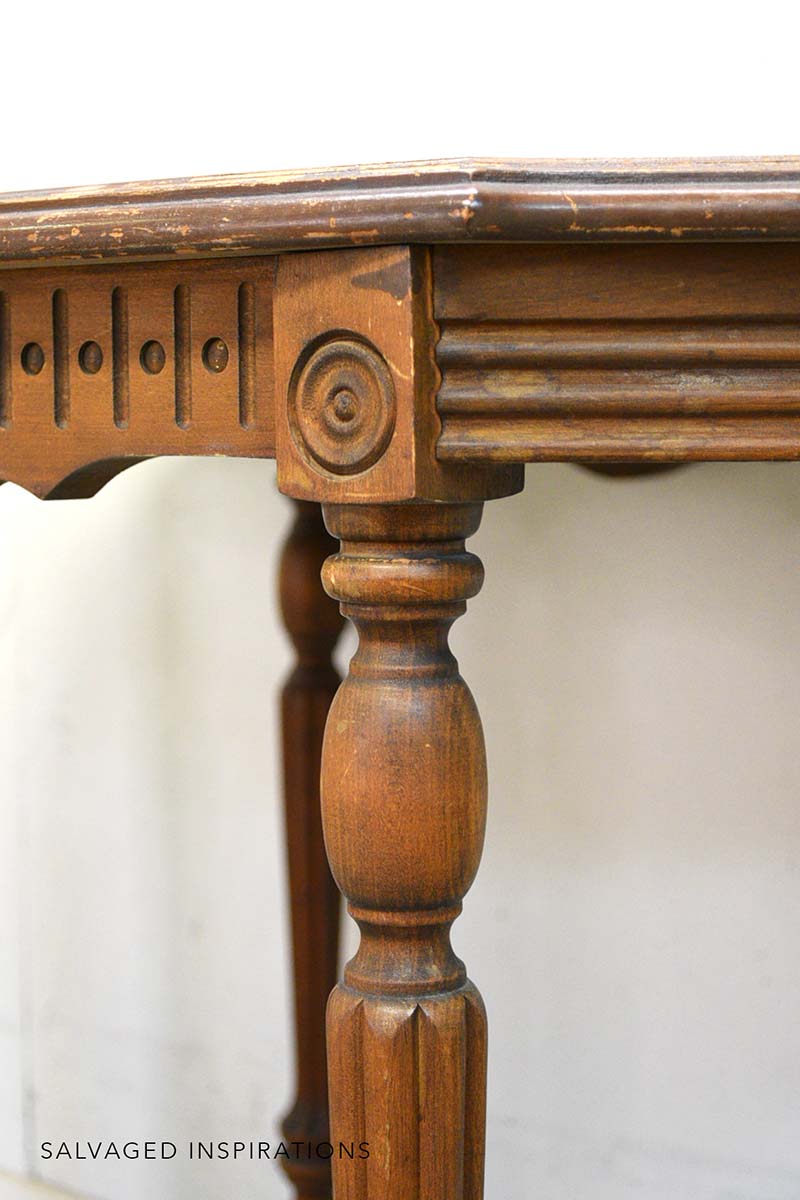
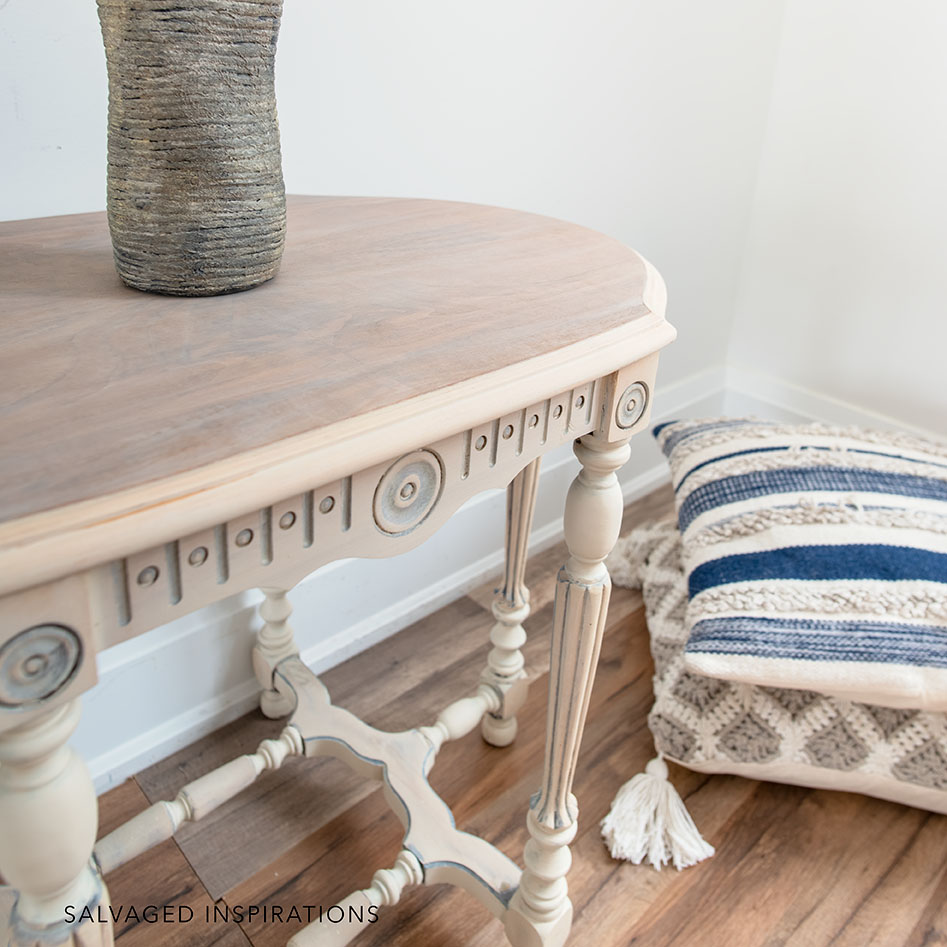
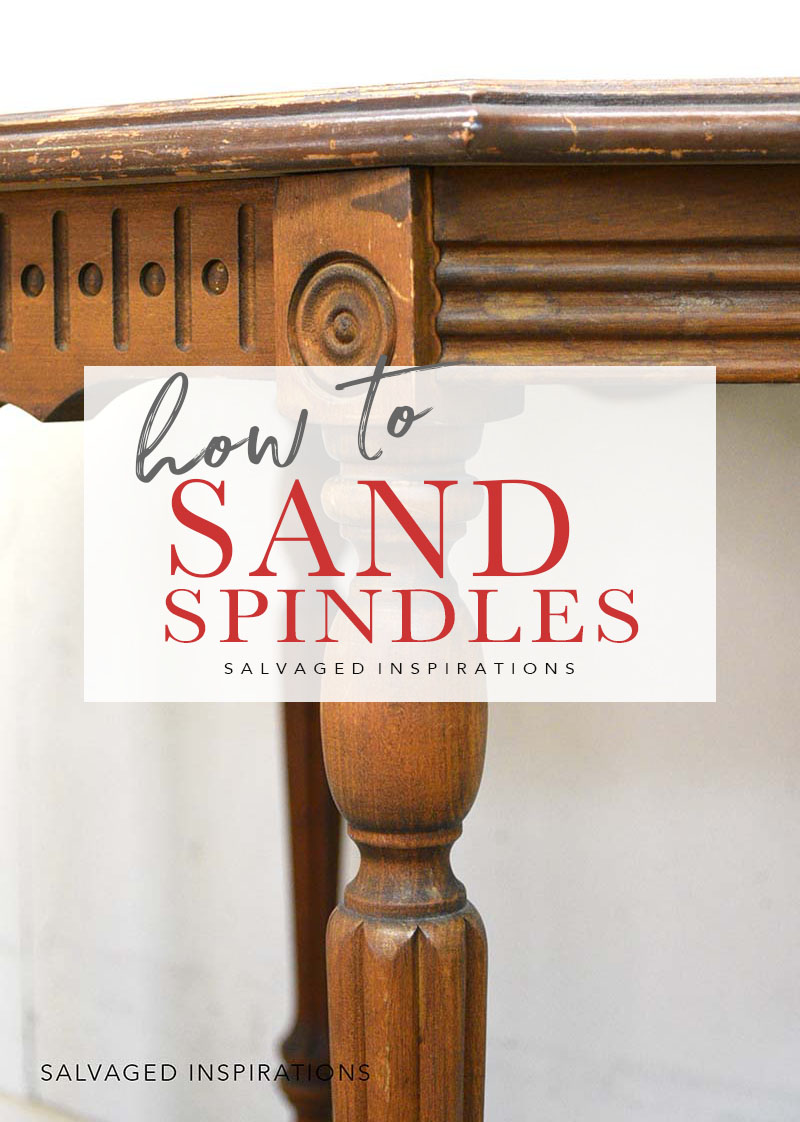
Check out all the details on these beautiful spindle legs!
THIS POST IS SPONSORED/CONTAINS AFFILIATE LINKS TO PRODUCTS I USE. YOU CAN SEE MY FULL DISCLOSURE HERE.
SOURCE LIST
$14.99 Thrift Table – SALVAGED
White Lightning
Paint Brush
Sand Castle Silk Paint
SANDING TOOL LIST
Dremel Tool
Orbital Sander |
My Bosch Sheet Sander (38% OFF as of writing this post!)
Duct Tape | Sheets Of Sandpaper
3M Roloc Bristle Disc 50 Grit
2″ Disc Pad Holder
Flap Sanding Wheel
$14.99 TABLE MAKEOVER
This table was A LOT of sanding and I should have started this project a little sooner than I did as you’ll see below. That said, I really hope the information in this post will help you save time, money, and some elbow grease when you have a project to sand.
CLEAN | SAND
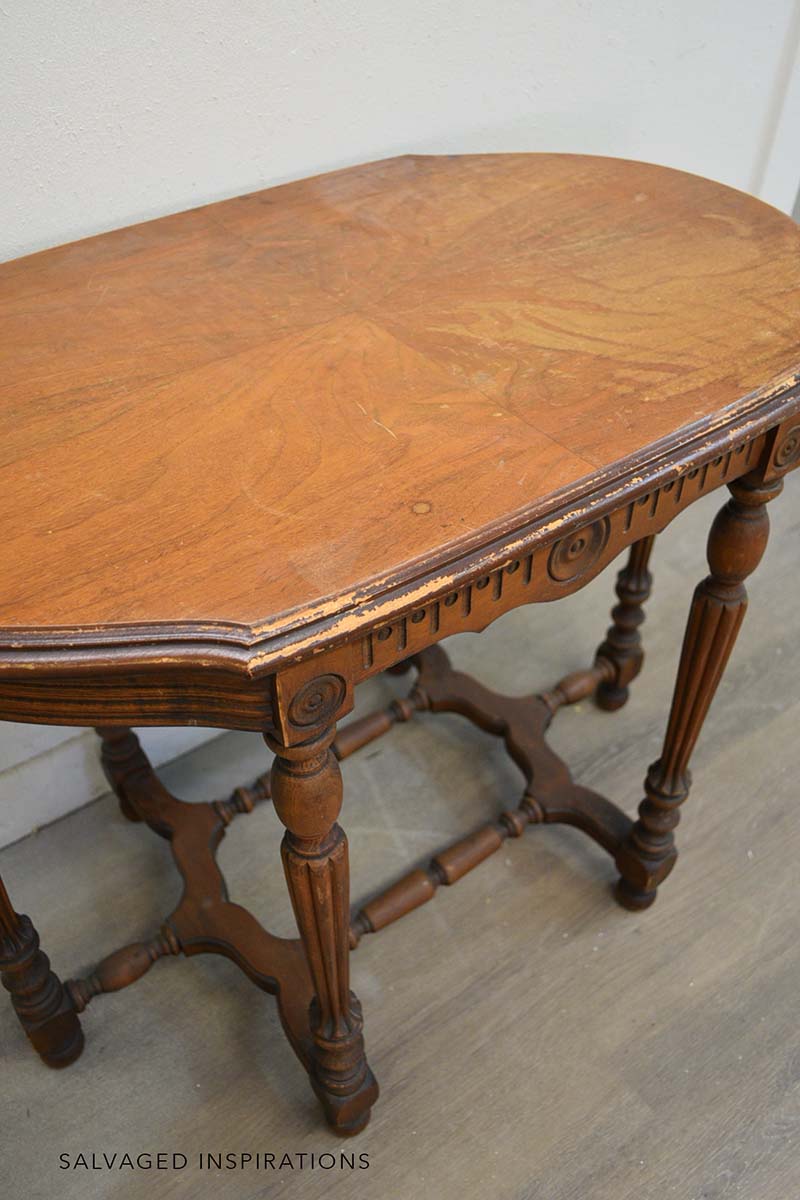
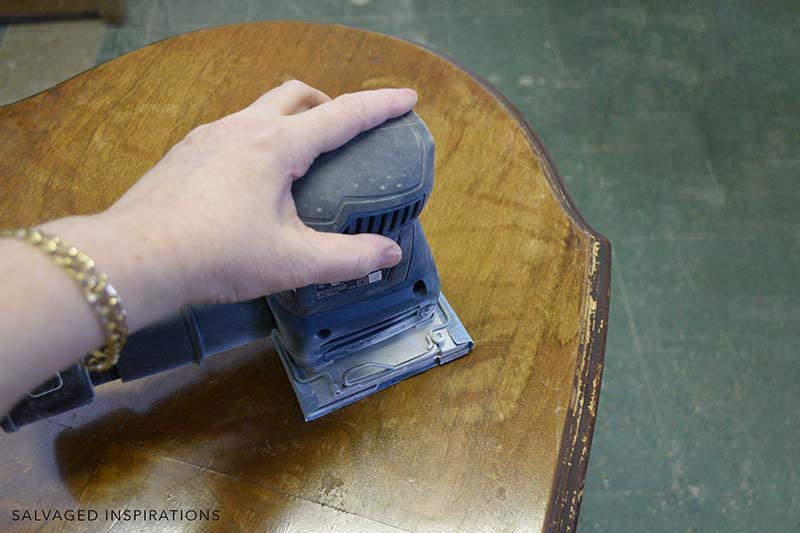
I started by giving this table a good cleaning and then got right to the sanding. As you can see in the image below, this table top is veneer. The giveaway is the four seams that intersect in the center of the table.

To make sure I didn’t sand through the veneer, I used my Bosch Sander (this sander is 38% OFF as of writing this post!) and 320 grit sandpaper. The sanding takes a bit longer when using a fine grit, but well worth the extra time to be gentle with this top!
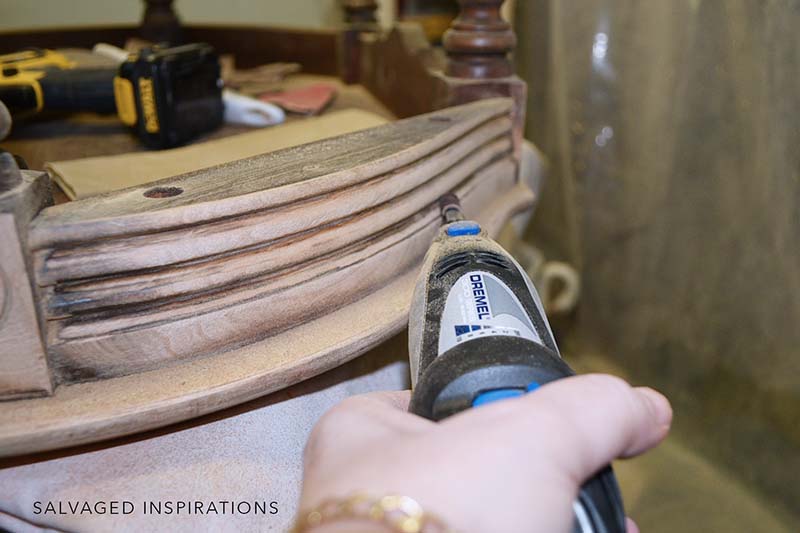
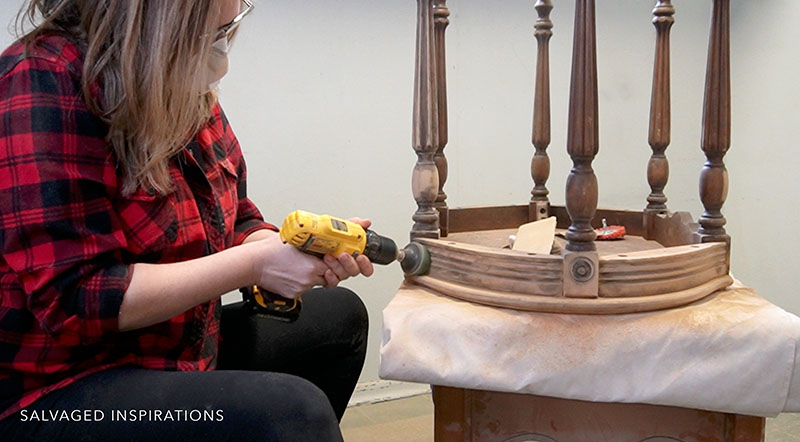
DREMEL TOOL FOR DETAILS
To sand the details under the lip and on the spindle legs, I used my Dremel. A Dremel is a power rotary tool that comes with a variety of ‘tips’ that you can swap in and out of this tool. Depending on what tip you use the Dremel can grind, clean, engrave, cut, polish, and SAND!
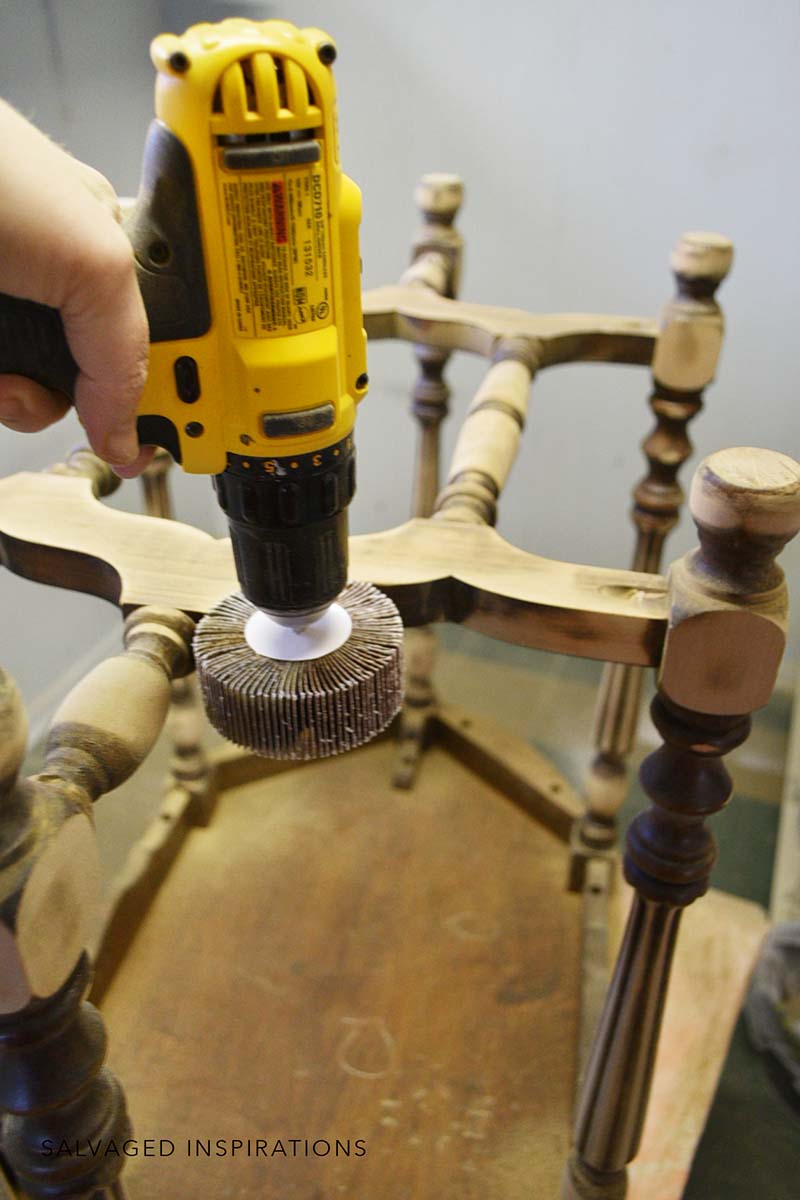
FLAP SANDING WHEEL
I bought this Flap Sanding Wheel from Canadian Tire which worked really well. This sanding wheel has a little give and worked amazing on some of the contoured profile edges as seen below. These wheels attach to any drill with a 1/4″ shank and come in a variety of grits.
3M BRISTLE DISK
This is a new tool for me and I was really impressed with how well it worked. Have you seen one of these in action?! I first learned about it while I was watching WeRefinish Youtube Video. The round bristle disk is 2″ in size and equivalent to a 50 grit.
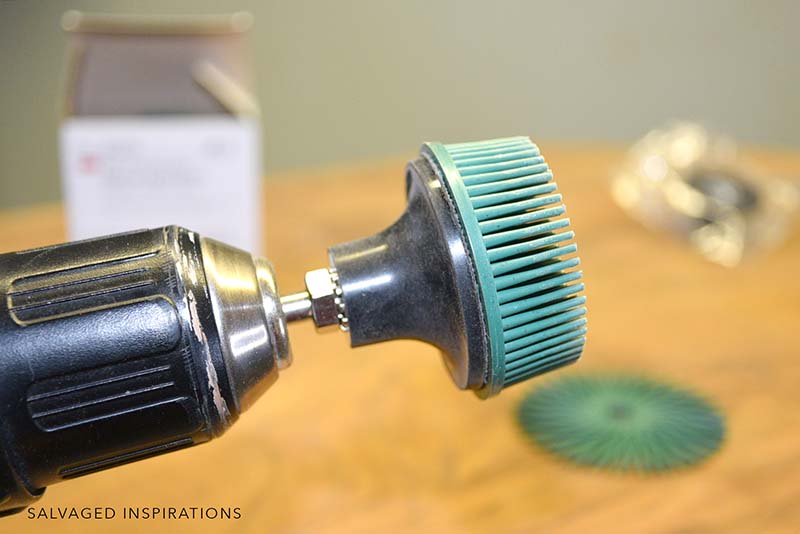
The 3M Bristle disk is 52% off on Amazon as of writing this post. Unfortunately for me and my fellow Canadians, I didn’t find a sale. I paid the full price ($20) on Amazon.ca. That said, it’s well worth it. I’ll be getting plenty of use out of it on future makeovers. *Note, the 1/4″ disk pad holder is required to use this on a drill and is sold separately.
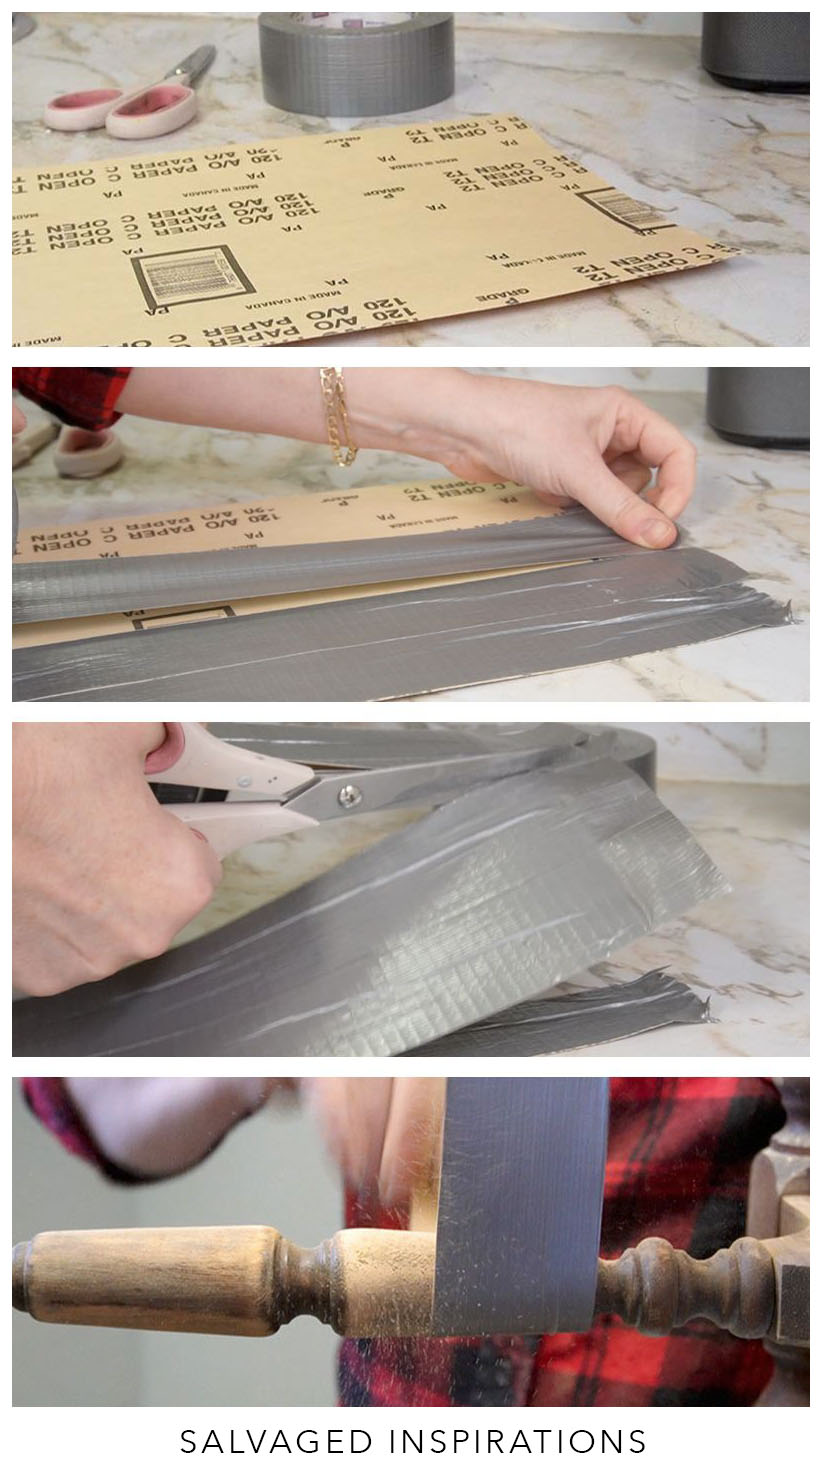
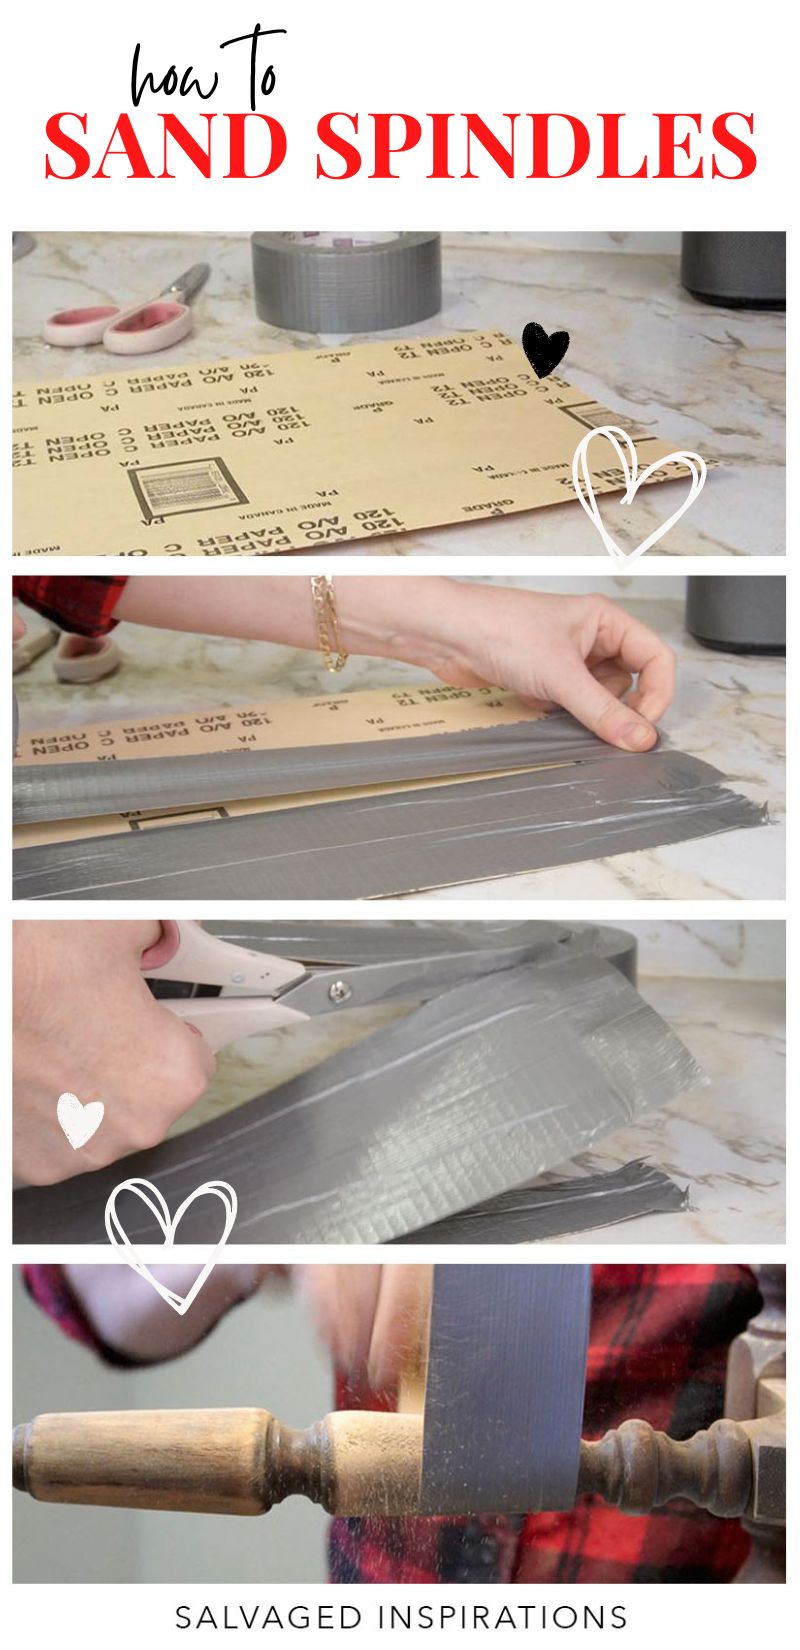
USING DUCT TAPE ON SANDPAPER
Here’s an old-school sanding hack that works AMAZING and is my favorite when sanding spindles! It works if you’re scuff sanding before painting OR sanding an existing finish off. All you need is duct tape and a sheet of sandpaper. I cut strips the length of the sandpaper but in varying widths. The duct tape makes the otherwise weak sandpaper super strong so you can wrap it around a spindle and pull on each end to sand! It works really well.
- Cover the entire back of your sandpaper with duct tape
- Cut lengthwise in a variety of widths
- Wrap the sandpaper around the spindle
- Pull on each end to sand the spindle smooth
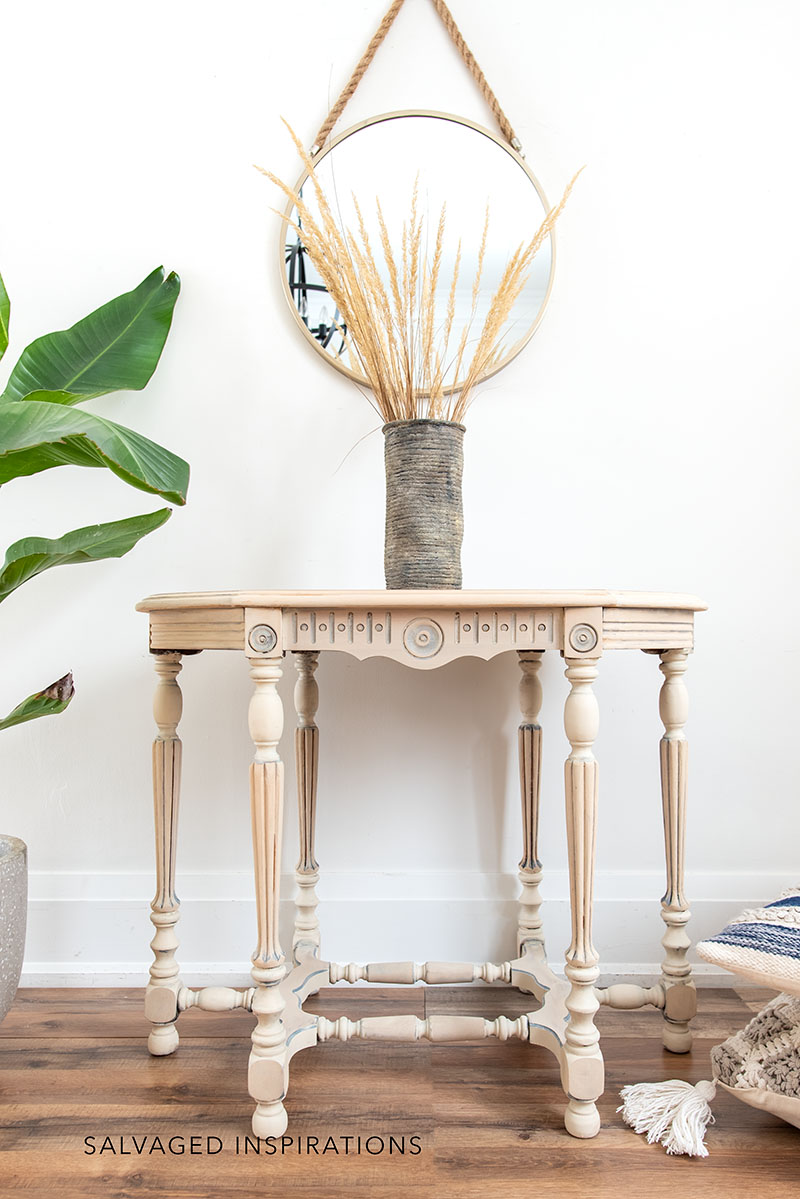
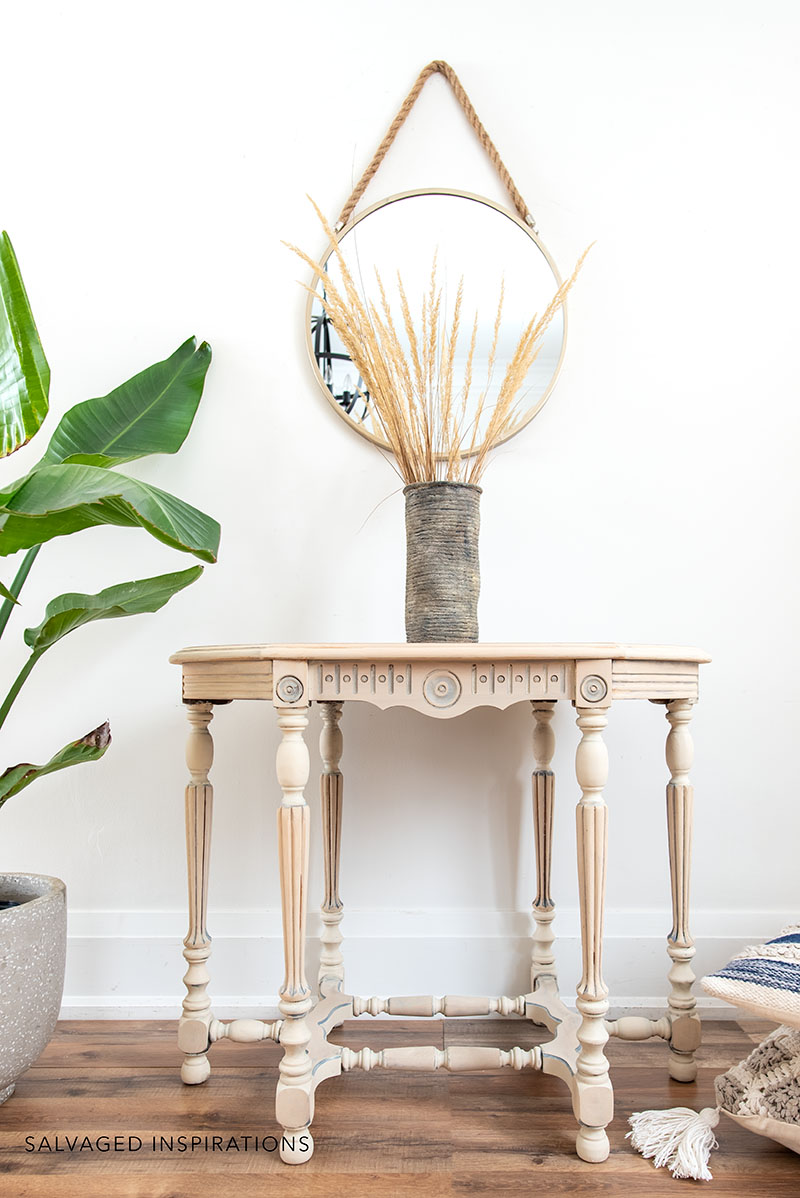
This table isn’t 100% finished but I didn’t want to let down my Furniture Fixer Upper ladies or YOU! As you can see, there is still some detail sanding to finish and another coat of paint is going to be applied to certain areas as well… but I hope you see the gorgeous sanded and washed wood with all the potential of what it will be!
I wish I had started this project a day or two earlier. The truth is, even though the tools and techniques above are SUPER HELPFUL, sanding spindles, contours, and wood details is always more time-consuming than you think! Leave yourself ample time to get your sanding project finished. I’m definitely going to take my own advice. 😉
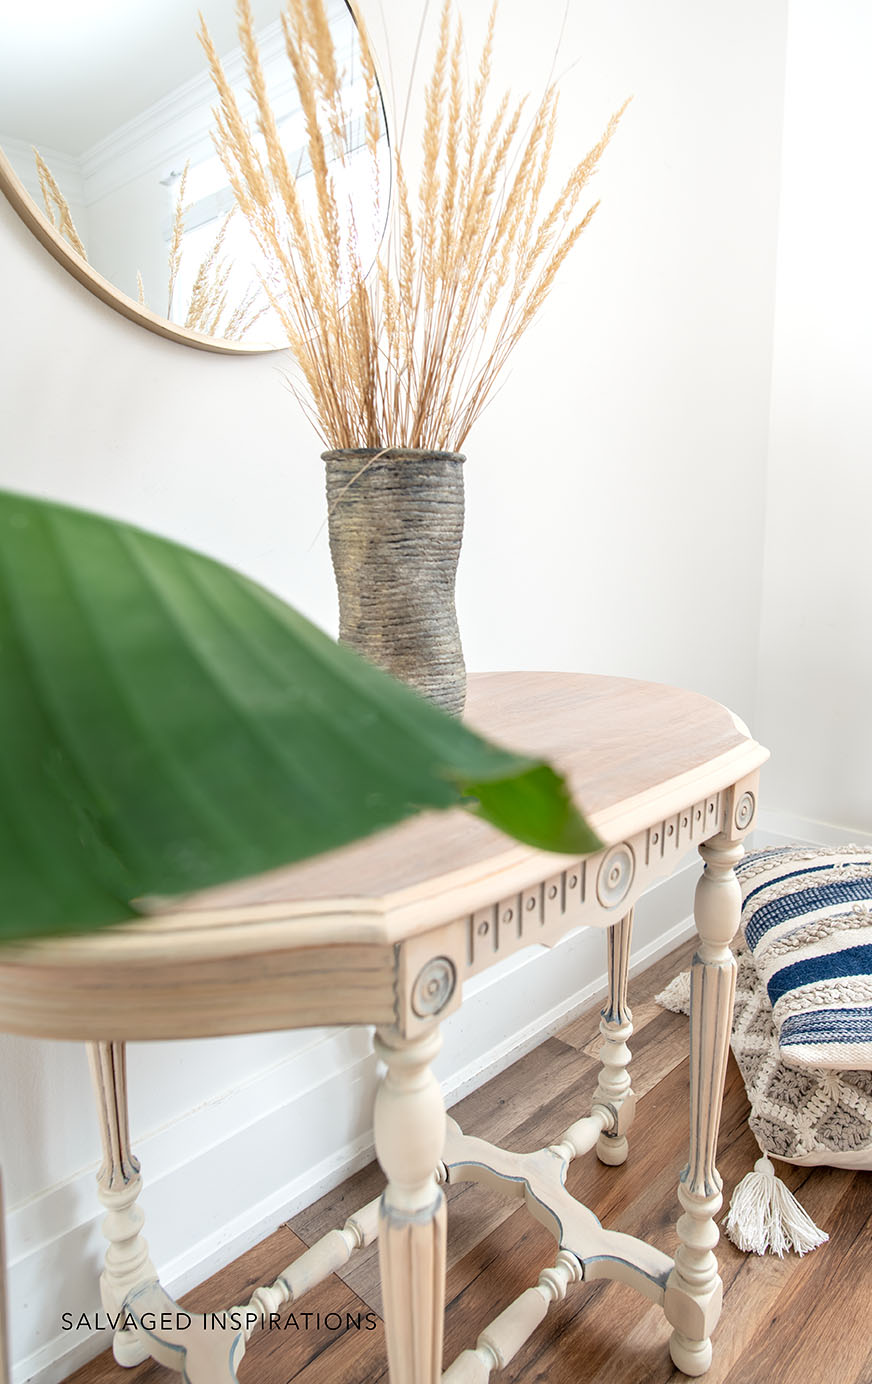
The top looks amazing and I’m really loving the raw wood look on the spindles as well. Even though she’s in her in-between stage, she’s looking gorgeous and I can’t wait to finish her!
YOUTUBE TUTORIAL
Here’s a step-by-step tutorial on Youtube. If you have any problems viewing it below, feel free to watch it on my Youtube Channel HERE. Our #siyoutubefamily is already a community of 35.4K so don’t forget to subscribe if you haven’t done so already! So exciting, thank YOU! 🙂
AND NOW FOR SOME FURNITURE FIXER-UPPER FUN!
You’re going to LOVE what my creative team of Furniture Fixer Upper ladies do! Below are their BEFORE photos. Visit the links below to see the amazing AFTERS and learn how they did it! I’m heading over to take a peek as well! x
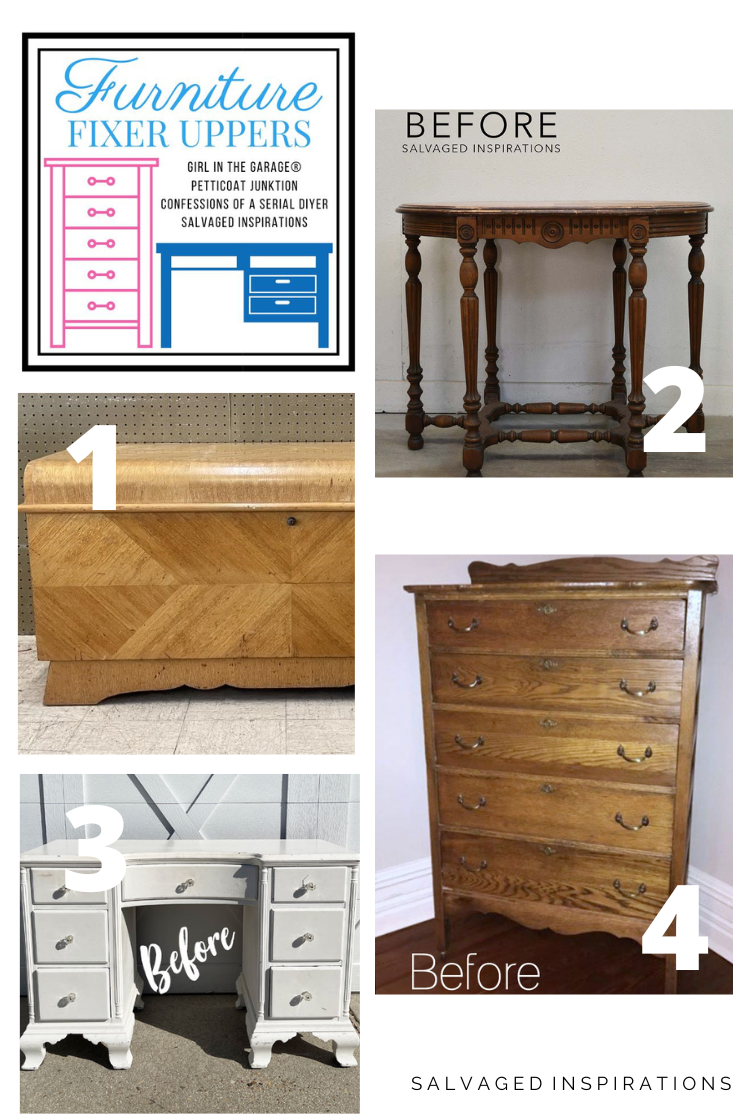
1. PETTICOAT JUNKTION
2. SALVAGED INSPIRATIONS (HAPPY YOU’RE HERE!)
3. CONFESSIONS OF A SERIAL DIYER
4. GIRL IN THE GARAGE
Here’s another look at this table in progress. I hope it’s inspired you and given you some new sanding ideas for your projects!
LET ME KNOW WHAT YOU THINK OF THE TOOLS LISTED ABOVE OR IF YOU HAVE ANY SANDING TIPS OR TOOLS YOU LOVE TO USE. I’D LOVE TO HEAR ABOUT THEM! FEEL FREE TO ASK ANY QUESTIONS YOU MAY HAVE… I ALWAYS LOVE HEARING FROM YOU. IT MAKES MY DAY! 🙂
Happy furniture painting friends!
Denise x
RELATED POSTS::
DIY ANTHROPOLOGIE DRESSER
A FOOLPROOF WAY TO AVOID TRICKY SANDING
SANDING FURNITURE | 15 PRO TIPS!
5 WAYS TO PAINT FURNITURE WITHOUT SANDING
HOW TO PAINT LAMINATE WITHOUT SANDING
PIN AND SHARE!


What grit sandpaper did you use with out scratching the wood
The higher the grit the better and it really depends on the hardness of wood your working with. For the veneer I used 320 grit. For the spindles I used 120 to 220. I suggest experimenting in an inconspicuous area for the grit that will work your piece.
Hi there!! Thank you so much for a super informative video. I will be doing a piece tomorrow and will try the sandpaper and duct tape trick. Just curious as this is August now if you finished the piece? I would love to see the finished product. I saw that you were painting it in the video and would love to see the products you used as well. Love your blog!!!
Hi I have a dining room set that I am interested in doing the restoration hardware color that you have posted here on Pinterest. I have never done this before and I was interested in finding out as a beginner. Is this difficult to do or will I be ruining a whole dining room set up? Lol.
I’d appreciate some feedback from you in reference to this your videos very helpful
What a gorgeous table! The color is beautiful. I can’t wait to see this table finished even though it looks great just as it is now.
Thanks Victoria!😊
That table is gorgeous and it isn’t even finished. Can’t wait to see it once it’s completed
Great tips! The duct tape……. the different sanding tips for the Dremel. I have a dremel but haven’t used it to it’s full potential. Thank you
Thanks Joanne, and so happy you’ve found the tips helpful!💕… and bust out that Dremel!😉
Gorgeous work so far. Lots of amazing tips that I did not know, so I’ll be referring back to this! Everything’s always more expensive in Canada, eh?
Thanks Sara!:) And yes, unfortunately, it is more expensive here but I’m super okay with the $20. This tool will come in handy over and over again.
What a lot of work!!!!! This table is exquisite, so many details. I don’t think I have the patience. You have the “eye” and the talent.
Aw, thanks Marian! And yes, a lot of work but I love the way she’s turning out. So much more modern, right?!😊
Thanks for sharing such smart ideas for sanding! That table was a deal and a half!!
A REAL deal and a half! Thanks my friend. Enjoy your weekend. XOXO
Thank you for the Duct Tape tip!! I have to try it.
Your going to love it! Thanks Kathy! XOXO
Oh my goodness! What a great idea for the spindles……Will be going this route from now on! 🙂
I hope it works beautifully for you Laura! Let me know!!
Hi Denise!! I love the raw wood and that tape tip is fantastic!! I don’t understand what the big round tool with the wires were use for. Great job!!
Hi Cheryl! Do you mean the green 3M or the bigger one made of sandpaper flaps? Both of them eat away at the finish. The green 3M disc is more flexible and helped me with the detail on the skirt under the top and also the fluting and details on the spindles. The bigger round tool with sandpaper was amazing for the contours on the base.. any wood that has some curves. If you watch the Youtube vid this Saturday you can see them all in action and it might help you decide which ones could be helpful for your projects.🤗
Just WOW. Such a transformation for this table.
I love the unique details on this piece. I can’t believe you got it for $15 !!!
The raw wood finish is gorgeous.
Sanding is work, but I really don’t mind doing it, esp when it makes such an incredible difference.
But…. sanding the curves and fluted spindles has made me crazy. Duh, I have a dremel and didn’t look into sanding bits.
The bristle disc and flap sanding wheel look like great options too.
Your duct tape sanding idea is genius ! I will definitely try that !!!
Thanks. I can’t wait till spring weather to get at some sanding. 🙂
p
That’s so nice you don’t mind it! Sanding can be relaxing and even meditative for some people… although I’m not one of them hehe. And ya, try the duct tape for sure P! It’s a game-changer!😃
It’s a knock-out! Thanks for the tutorial, too. That duct tape hack is brilliant!
It works REALLY well! Duct tape works for everything! 😂
Oh Denise! I love it like this! I am sure you have a wonderful vision for finishing this table. I have never dreamed of using my Dremel for sanding! I can’t wait to get the disk and pad so I can play around with it! Thanks for sharing all your expertise and knowledge.
Thanks my friend! Dremel works amazing for sanding details! Just play around with the grit and speed of your Dremel, otherwise, it can gouge the wood… been there and done that. hehe
Duct tape on the back of sanding paper….why didn’t I ever think of that!!
Many thanks.
Super easy and super good, right?!😃 Thanks Marilyn!
The table is lovely and thanks for your duct tape tip. I have to give it a try!
Thanks Nicki! And if you try it, I’d love to hear how it works out for you!
Denise so helpful! I have a Dremel and have never given it a thought for sanding. Your table turned out beautiful and love the color!
Thanks! My Dremel came with 3 different size sanding tips that are super helpful for scalloped edges and fluting! I also bought the sanding bits in all different sizes and grits separately for under $20!They work great! 😃
Oh, those spindles… you make it look so easy with your cool tools, tips, and tricks. I love these kinds of posts. I am definitely going to try this next time, Denise. Pinned. xo
Thanks my friend! And what’s that saying?… “a man (or woman) is only as good as his tools” hehe. 😉 Sanding is def not a quick job but this makes it soooo much easier! Have a great day Do! XOXO
I love the way you finished this piece. It fits right in with the furniture that is so popular now
I love the tip about duct tape and sandpaper. I will definitely try that.
Thanks Gin and YES, please try it! Costs nothing and works GREAT!!!🤗
So many great techniques for sanding…especially love the tip with the Duct tape! It is looking gorgeous so far! XOXO
Aw, thanks my friend! And ya, the Duct tape on the back of the sandpaper makes a HUGE DIFFERENCE!!
Wow…thanks for the hack on the duct tape and sandpaper. What a great idea. This table is gorgeous already… it will be fantastic when done. 😍
Thanks Lorri! If you give the Duct Tape a try I’d love to hear what you think! And so happy you like the table.😊
Ooh, the table looks lovely as it is in the “after” photos! Very beachy!
Yes, beachy… I like this! Thanks so much Noelle!😃
Hi Denise. Thanks for all of the sanding tips. Personally, I find sanding very tedious work. Lol. This table has so much pretty detail and I love the new raw wood look.
Sanding is ‘work’ for sure…lol. So happy you love the raw wood look. I think she’s looking pretty good too. hehe 🤗
That table is beautiful! Love the natural color!
Thank you Linda!😊
What a gorgeous table, love the way it looks now though, and thankyou for the tip about duct tape, would never have thought of it. xx
If you give this sandpaper ‘hack’ a try I’d love to hear what you think Janette! I find it SUPER helpful! Have a great day. xx