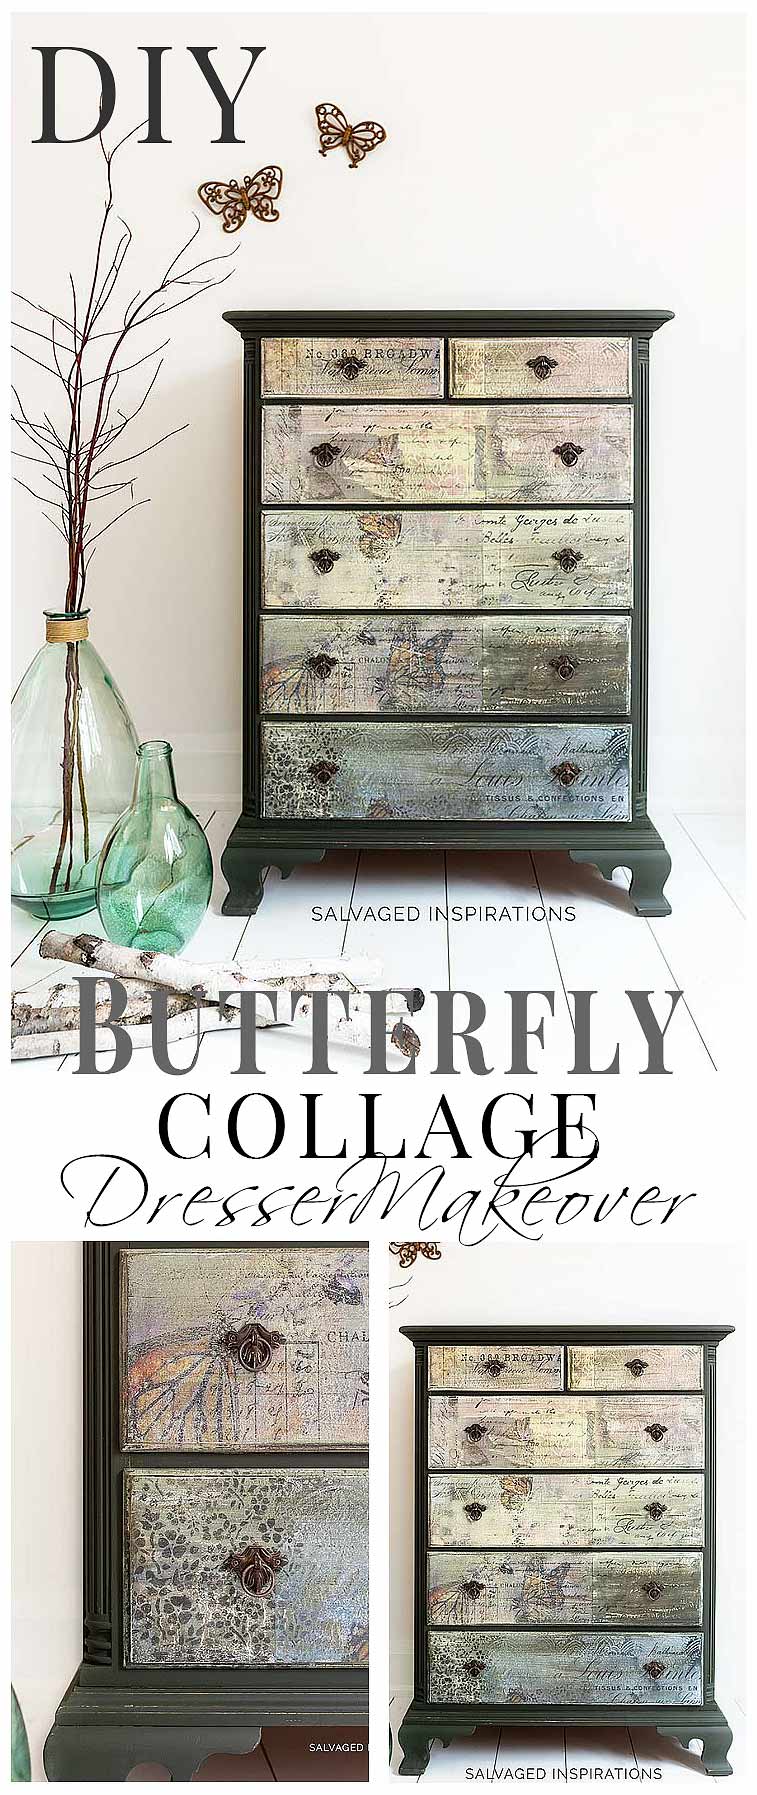
HOW TO CREATE DIY COLLAGE FURNITURE USING A LITTLE BIT OF THIS AND A LITTLE BIT OF THAT.

This Butterfly Collage Dresser Makeover kept me on my toes the last couple of days. Oddly enough, it wasn’t the collage part that stumped me but the paint color/finish around it. It’s STILL not 100% done — I’m probably clear waxing as you read this — but I’m sharing with you anyway. 🙂
I did have loads of fun mixing multiple products to get this look. It stretched my creativity to unify this entire front. I used a little of this and a little of that to put together something original and spectacular. Although this dresser is solid and in good shape, a collage is a GREAT way to hide any furniture scratches or flaws!
Here’s what I started with.
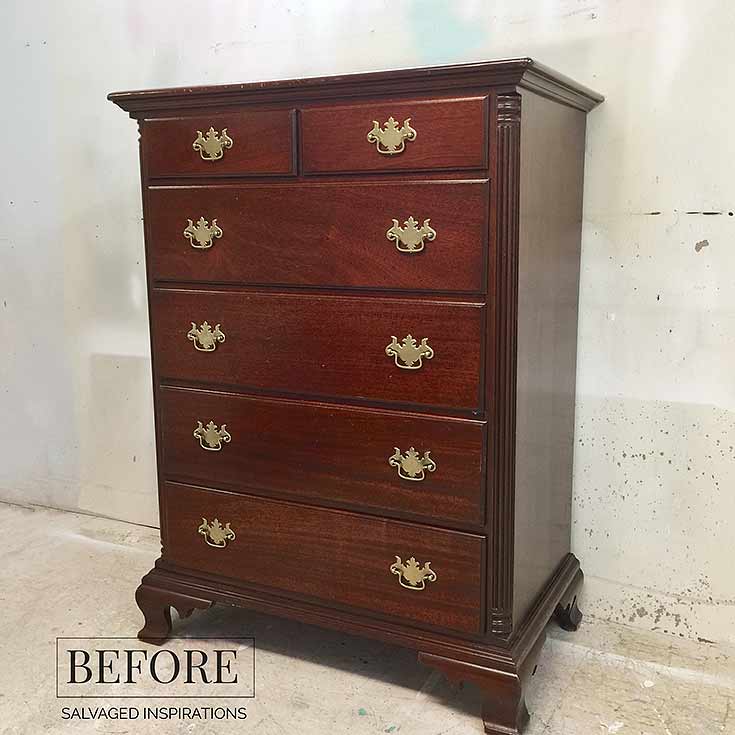
I was given this 80’s highboy from one of my sweet clients who bought this Farmhouse Green Dresser a few months back. Which btw, I have something exciting to share with you at the end of this post ALONG WITH THE WINNER of last weeks book bundles! So stay with me!
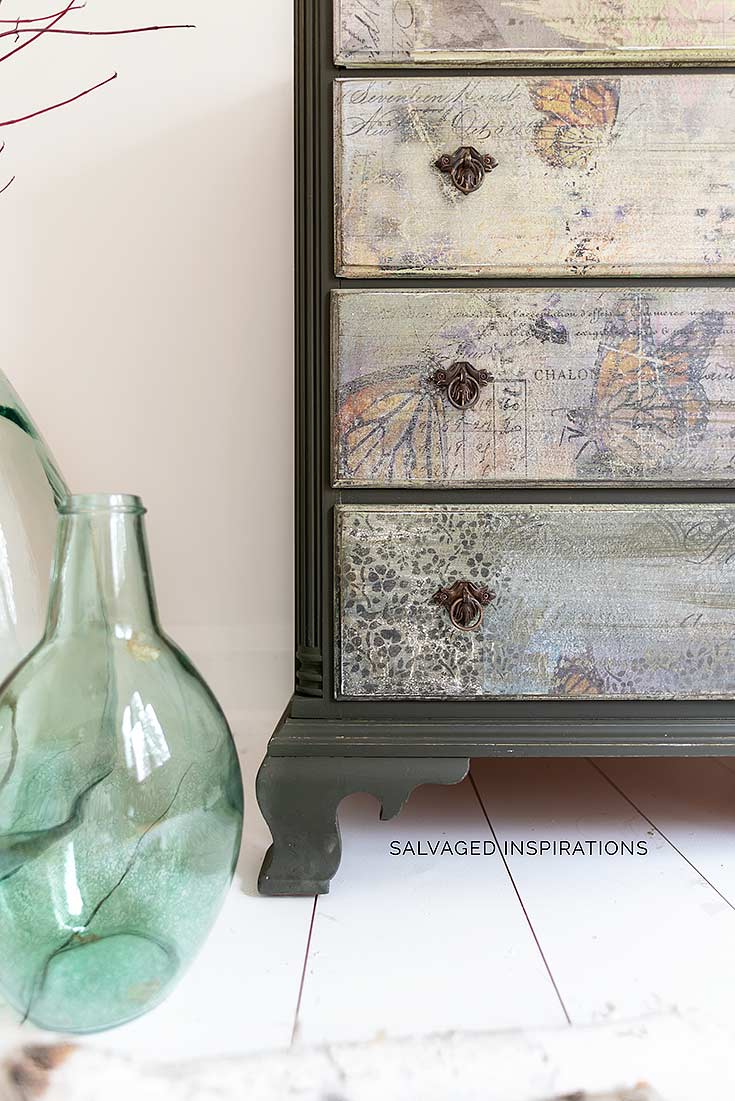
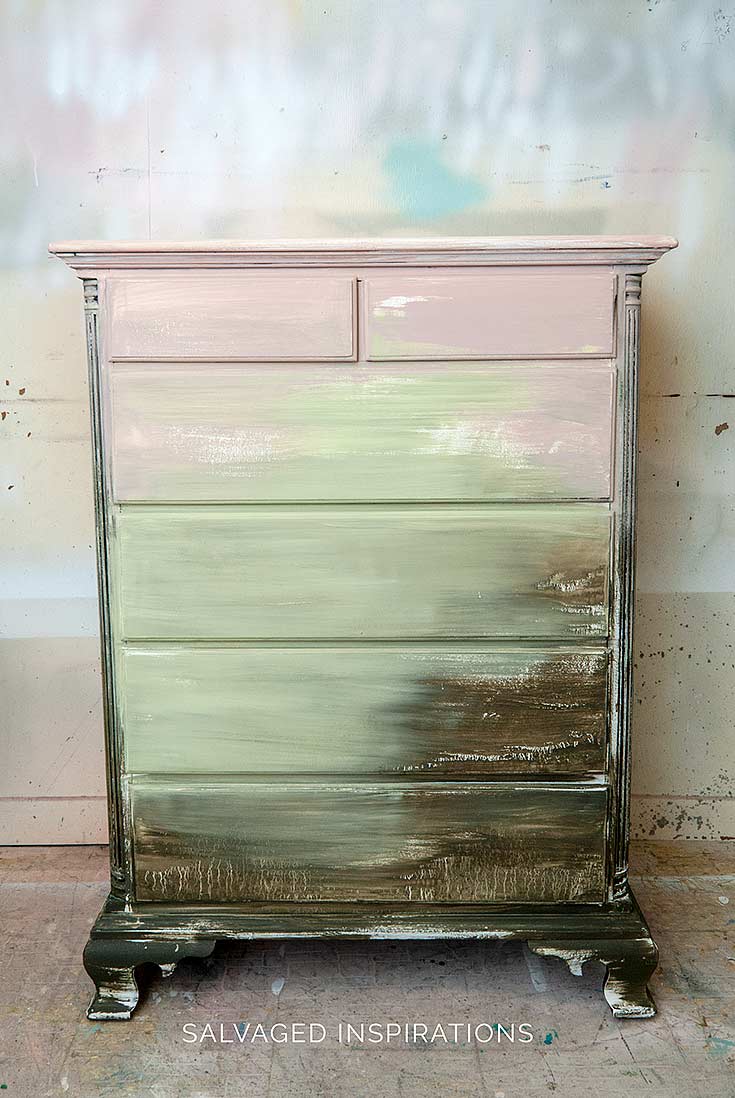
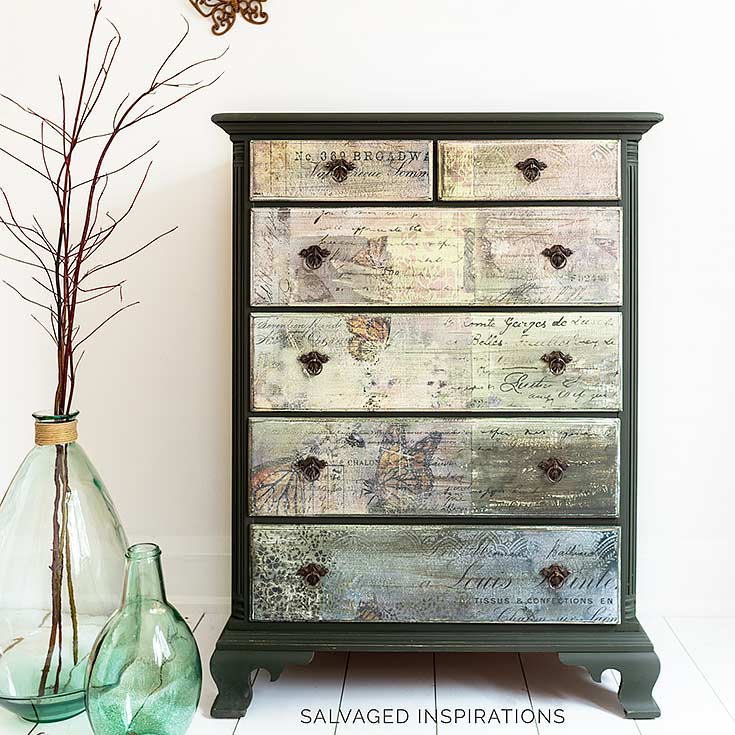
Here’s the finished Monarch Grace Dresser. What do you think?

I couldn’t put anything on top to stage it because the paint wasn’t totally dry but check out these adorable vintage butterflies on my wall… retro 70’s baby!

THIS POST IS SPONSORED/CONTAINS AFFILIATE LINKS TO PRODUCTS I USE. YOU CAN SEE MY FULL DISCLOSURE HERE.
SOURCE LIST::
-
- Highboy Dresser – SALVAGED
- BIN Shellac Primer
- Paint Brushes
- Sand Paper
- Sharpie + Ruler
- Collard Greens Chalk Mineral Paint
- Tea Rose Chalk Mineral Paint
- Farmhouse Green Chalk Mineral Paint
- Monarch Grace Butterfly Transfer
- Royal Ann Garden Stencil
- Black and White Floral
- Clear Wax
- Gator Hide
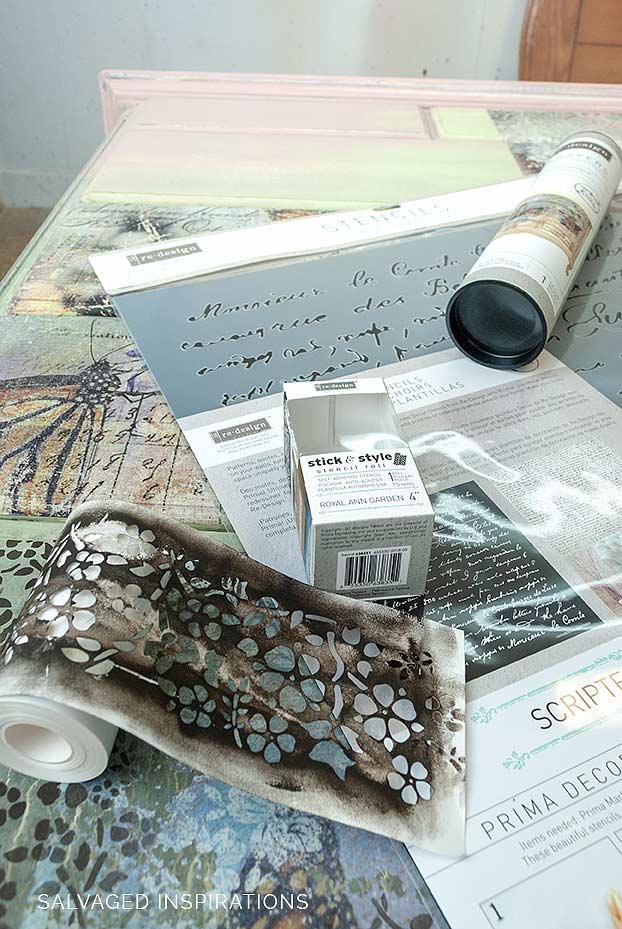
I pulled this patchwork collage together using 3 paint colors, 3 stencils, the Monarch Grace Furniture Transfer and a Sharpie! *Update – I believe Monarch Grace may have been discontinued but you can find gorgeous butterfly transfers here!
How To ~ Collage Furniture::
Step #1:: Clean, Sand + Prime
The very first thing I did was give this dresser a cleaning, sand, and prime. Because this type of 80’s cherry stain has horrendous bleed through, I used my heavy duty never fail BIN Shellac Primer.
Step #2:: Base Paint + Distress
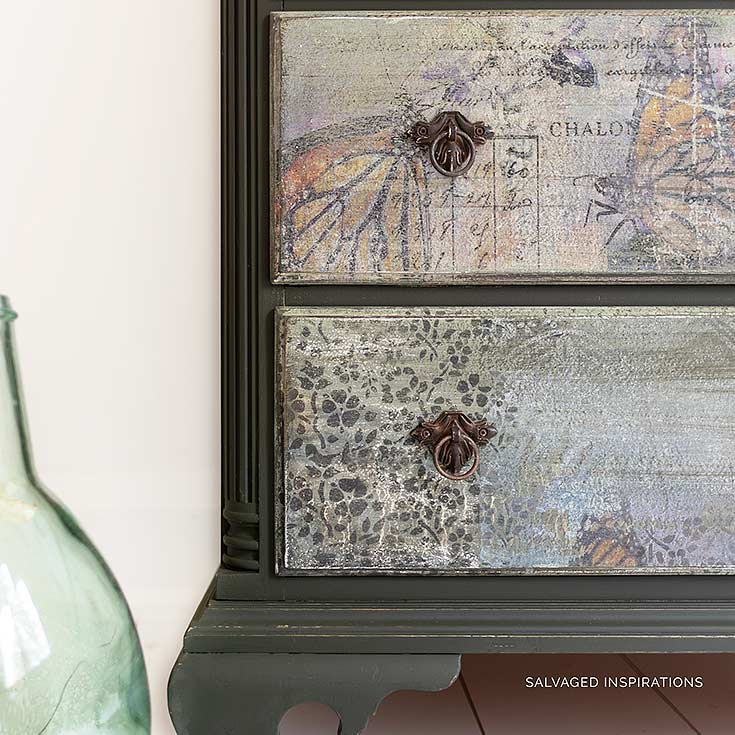
I used three (3) colors when laying down the base. Collard Green was used for the entire dresser along with the bottom front. Farmhouse Green and Tea Rose (a gorgeous combo!) were used for the drawers.
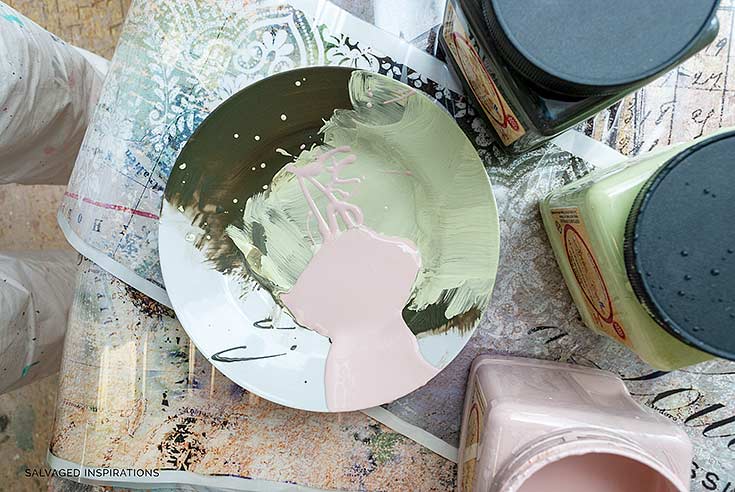
The paint texture and distress was created by spraying a mixture of vinegar and water onto the paint while it’s still wet. This gives it a drippy “old world’ feel which you can really see the effects of on the bottom in the pic below.
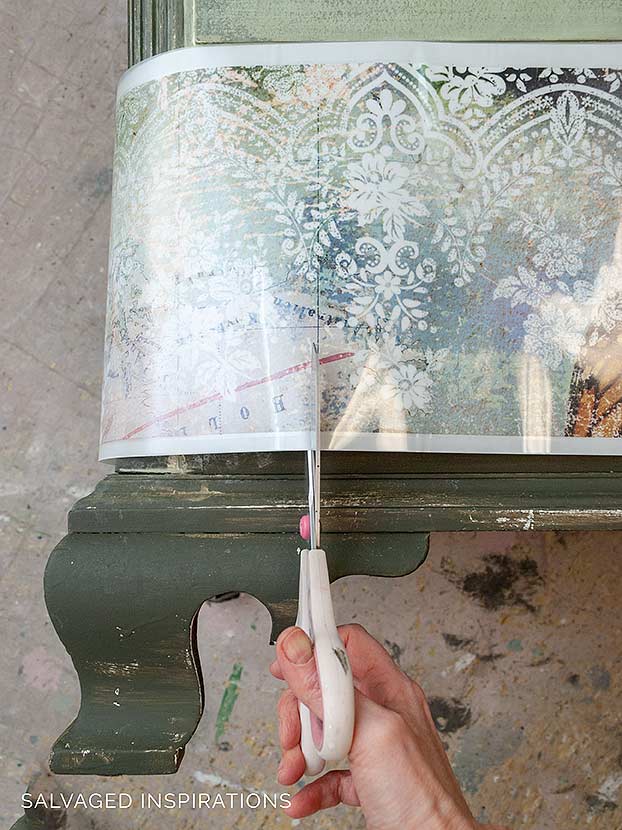
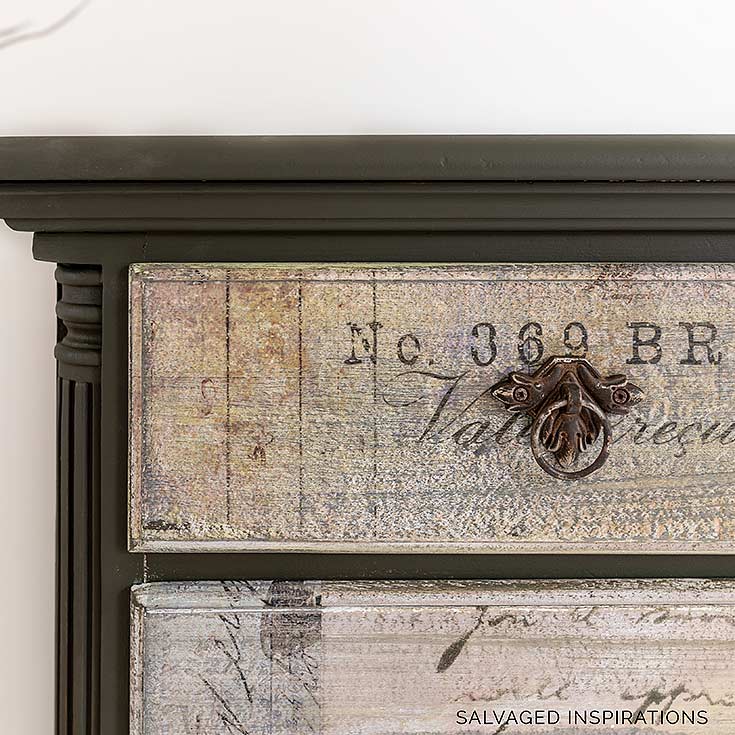
Step #3:: Rub-On Furniture Transfer
I used ReDesign with Primas Monarch Grace Furniture Transfer but it was nowhere near large enough to cover the full front.

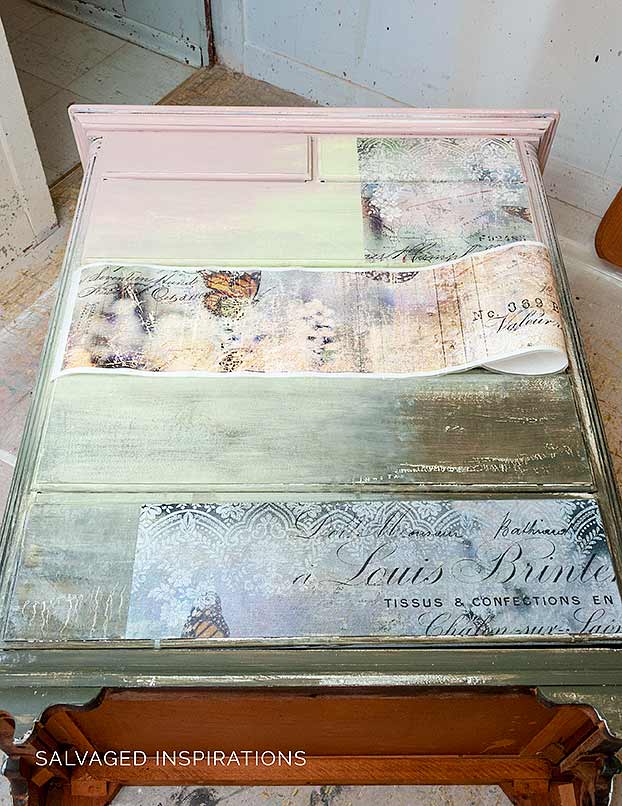
I cut it up and rearranged the pieces randomly on the dresser front.
QUICK TIP:: I find it SUPER helpful to lay the piece on the floor so I can ‘play’ around with the transfer positioning. I also find it way easier to rub on the transfers when the piece is on it’s back rather than standing vertically.
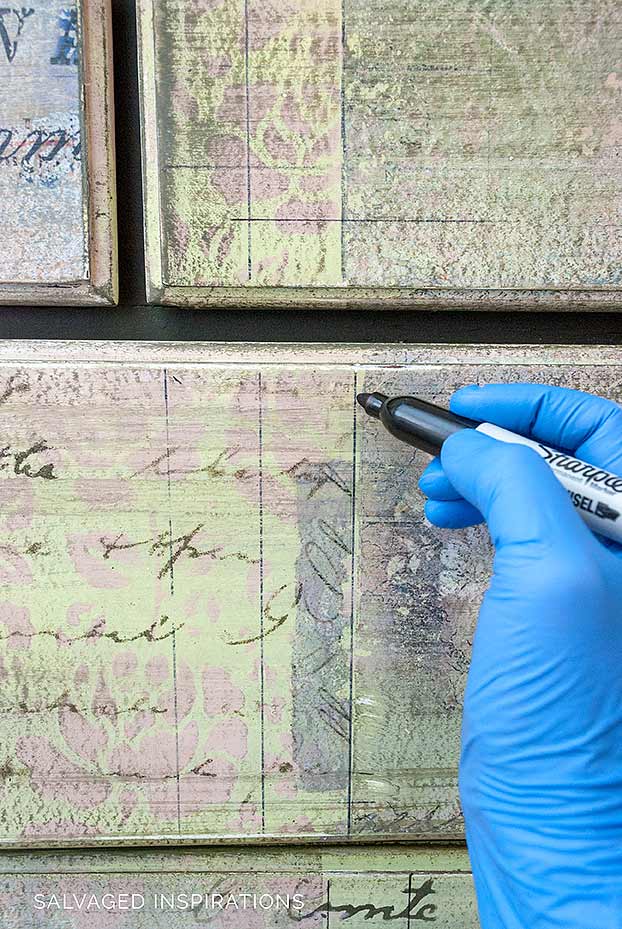
Step #4:: Add Wash + Stencils + Sharpie Lines
Once the paint had dried I started adding my stencil designs.
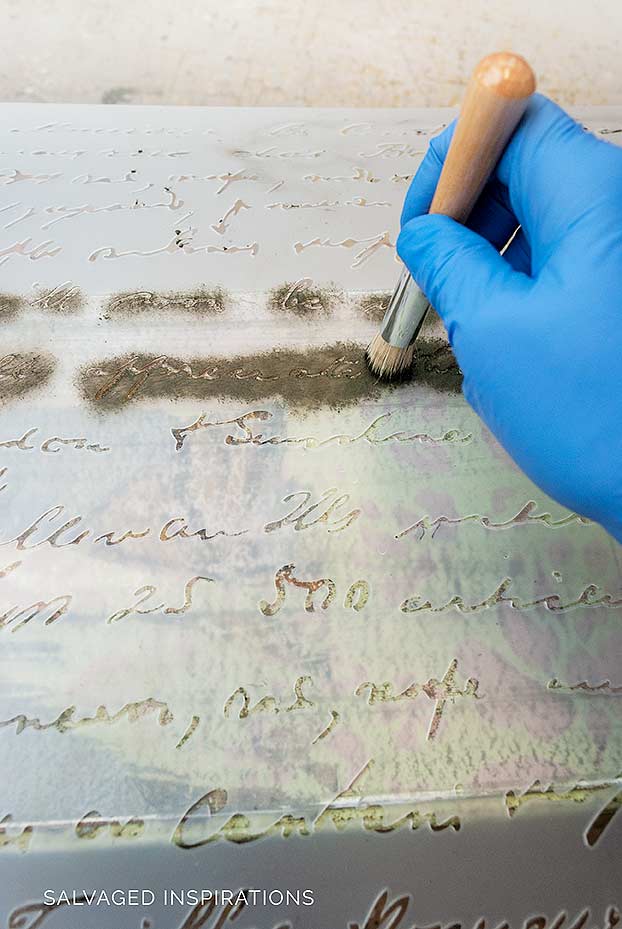
When the stencil designs were dry, I added a very light wash of Collard Greens all over the front. Then added my black lines with a ruler and a Sharpie. There are thin black lines in the Monarch Grace Transfer, so this tied the piece together nicely.
QUICK TIP:: Adding elements of the original design (color, pattern, texture or in this case black lines) can really tie a collage all together!
I didn’t draw these straight lines freehand but I couldn’t hold the ruler + Sharpie + camera all at the same time. 😉
Step #5:: Sand + Topcoat
When everything was dry, I sanded over everything with a 220 grit to distress and blend. Some areas were distressed more than others. It’s fun to play around with the sanding to reveal the base paint colors underneath.
Once I topcoat with Clear Wax and Gator Hide the top, these colors are going to pop and have even more depth!

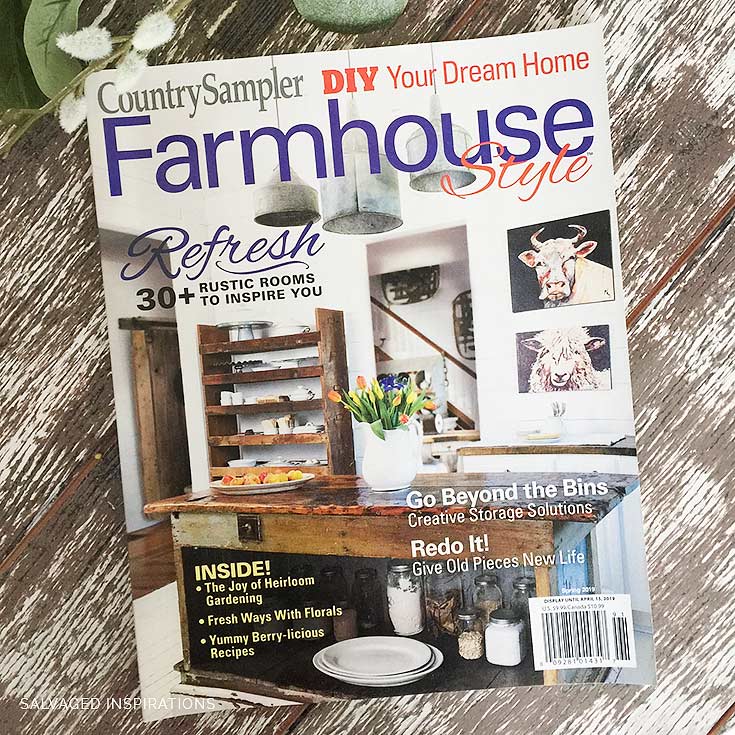
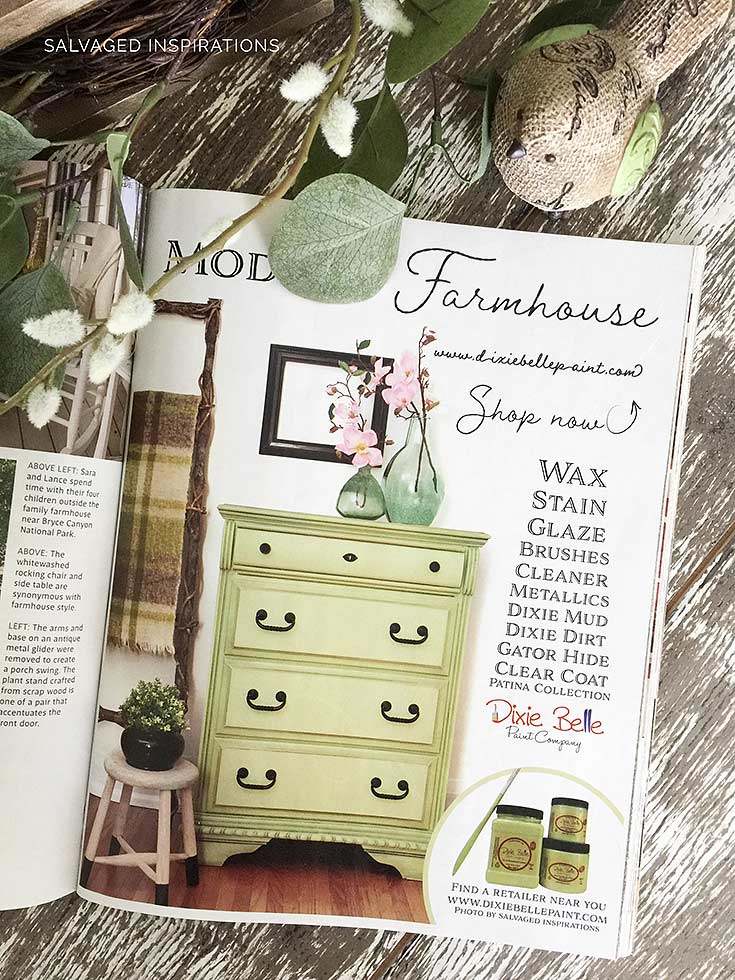
And before I let you go, if you follow me on Facebook or Instagram you may have already seen this, but check this out! Remember my little Farmhouse Green Dresser? This curb-shopped cutie is now a full page ad/feature in Country Farmhouse Magazine. I just had to run out and buy this April issue and share with you!
And now for the lucky winner of last weeks Book Bundle Giveaway! A BIG thanks to everyone who participated!
NICOLE M.
CONGRATULATIONS!!!
An email has been sent to you. Please contact me within the next 48hours to claim your Book Bundle and $50 Amazon Gift Card. 🙂
![]()
LET ME KNOW WHAT YOU THINK OF THIS BUTTERFLY COLLAGE DRESSER MAKEOVER… OR FEEL FREE TO ASK ANY QUESTIONS YOU MAY HAVE… I ALWAYS LOVE HEARING FROM YOU.
Happy furniture painting my friends!
Denise x
RELATED POSTS::
How To Apply Furniture Transfers
Adding Graphics | Vintage TeaCart Makeover
Pottery Barn Knock-Off Buffet Makeover
Stop Bleed Through When Painting
5 Ideas To Update An Old Desk
PIN AND SHARE!

Talk about late to the party! lol. I have just come across this article and am absolutely STUNNED! What a fantastic job you did on this dresser, and so good that you did a full tutorial too, as it’s finally given me the courage to have a go with collage which I’ve wanted to do for ages, but not had the confidence. I haven’t looked at the rest of your blog yet to see if you’re still adding to it, (I do hope you are) but was so excited by the article that I simply had to write and tell you.
Judi in the UK
The party door is always open Judi and I’m so happy this piece has inspired you to give a collage a go! Yes, I still post a new makeover every Tuesday. I’m so happy you’ve found me here on the #siblog… WELCOME!🌸
Thank you for showing such a gorgeous makeover (although I cringed when I saw the original because I LOVE to see wood grain). Antway, I think I will be attempting something like this very soon. The finish is fun and subtle and would be perfect on an old toy chest I have. THANK YOU!!!
Hi Ellen! Thank you. So glad it’s sparked some ideas for your old toy chest!… and no need for the cringe. The cherry wood grain you see is laminate.
Will black lettering from a transfer show up on a dark teal color?
Hmmm, I’m guessing it would. But how pronounced it would be would depend on how dark that teal is. If you peel back the transfer and hover it over the dark teal, that may give you a good idea if you like the results or not.
This is gorgeous, I actually have a dresser I’d love to do this to. Just hope I have the patience to do it. Your work is always inspiring and congratulations on the magazine coverage, you deserve it…
Thanks so much Kim! And the collage goes pretty quick once you get into it. It’s like grade school fun all over again! 😉
Denise, I am looking back at this dresser and I am not sure about how the transfer works. The Prima Redesign does not have a good tutorial so I hesitate to invest in something that I will mess up before I even get it on the piece. I have an idea!! Could you do a video showing how to apply a transfer to a small something? I bet it would be a huge hit!! Love your work and how you can pull colors together to make a rainbow!! XOXO
Thanks Cecilia, you’re too sweet! 🙂 And ya, I’ll see what I can do for you re furniture transfer video… good idea! 🙂 🙂
Another spectacular piece!!!
Thanks so much Teri! XO
Congrats on a beautiful piece, just love it and you have given me lots of ideas for a piece I am working on currently. Can you tell me about the water/vinegar spray. Is it a mix of the two if so what ratio or did you spray with each one separately? I’m gathering my paints right now.
thanks Elaine and sure, the vinegar and water mixture for distressing is super easy. I have mine mixed about two-thirds water – one-third vinegar. While the paint is still wet or partially wet, I give it a spray and let it get a little drippy. If you find it’s too much, just dab at it with a paper towel until you like the results. Hope this helps… it’s a fun process. 🙂
A bit late commenting, but was busy & wanted to give your post my usual undivided attention. You slayed this beast! It is no longer a beast, but a muted, gorgeous chef-d’oeuvre.! All the steps involved came together beautifully & proves that shortcuts do not pay off.. Someone, somewhere, will be thrilled to own this.
No such thing as a ‘late’ comment… I love hearing from you ANY time. 🙂 Beast, clodhopper….you really had in for this one LOL. I hope it goes to someone who loves it as much as I do. Have a great evening. XO
Denise you did it again!!! I didn’t get the notification in my email. I just popped onto your blog and I am so very glad i did. I absolutely love this piece. I see one of the stencils (the words) but i don’t really see any other stencils. Tell me again why did you draw the lines? I am in awe of your work. Every single time. Will you post a picture on Instagram once you have waxed and all? I admire you so much.
Hi Cheryl!! Thank you! I used the Sharpie to replicate the lines that were in the Monarch Grace Transfer. When you see the dresser ‘live’ and up close, its these small details that really unify the entire look. And yes, I have posted to IG… thanks for following me there Cheryl… much appreciated. 🙂
Hi Denise, on the bottom drawer where the flowers were stenciled, what color what color was the drawers before you stenciled and what color did you use for the stencil? I’m trying to get this look and I’m confused. Thank you thank you
O.M.G. spectacular! I HAVE TO try this. Thanks so much for sharing!
Thanks Marcia! And if you give it a go, I’d love to hear/see how it works out for you. 🙂
This is beautiful and inspiring. True art work. I just started with chalk paint. Love the shabby chic look.
Your site is clear and beautiful.
WendY
Sweden
Hi Wendy, WELCOME! Thanks so much and have fun experimenting with your chalkpaint!
MAGNIFIQUE !!!! 🌺🏵💐💖
Thank you Severine!
This goes way beyond traditional furniture DIY. This is art and it is spectacular. Someone is going to go crazy over this. I’m a Master Gardener and I can think of five friends of mine who would jump at a chance to buy this because we have a very active group of Monarch Butterfly habitat enthusiasts..
I really enjoy your posts and appreciate the fact that you regularly try to stretch your skills to new areas. Too many bloggers are way too predictable but you have some really fresh ideas.
Much appreciated, that’s very sweet Kathleen… thank you! 🙂 I suppose my skill-stretching is partly selfish though. I get really bored doing the same paint techniques all the time. I’m guessing your creative side feels the exact same way about your gardening. 🙂 🙂
Ooh wow! Beeyooteefull! You knocked this one out of the park! Thank you for sharing it.
Thank so much Dee! xo
Denise, your work is really amazing. I love everything you do and find your blog and tutorials so helpful and inspirational ! I am an aspiring furniture painter but hope some day to make it a full time endeavor. Thank you so much !
Janice
Thank you so much Janice! And have fun on your furniture painting journey. I’m still learning new things even after all these years so it’s an exciting business to be in. 🙂
Awesome job; it looks phenomenal. Hardware change was a good call.
Thanks for inspiration.
Thanks Cynthia! I have so many sets of that old Chippendale hardware from all the pieces I’ve removed them from. I’m going to have to think of ‘fresh’ way to use them! 🙂
This is so pretty and so unique!! It may have given you trouble, but aren’t those always the ones that turn out amazing?? XO
So very true! Thanks Christy, hope your day is fabulous! XO
Hi Denise. I am in awe of this beautiful butterfly dresser. The color palette and stencil collage go together perfectly. And your tip on laying down the dresser on it’s back to do the collage is pure genius! I NEVER would have thought to do that! Gorgeous makeover. And a big congrats on being in another magazine. I can’t think of anyone more deserving. Thank you for inspiring all of us readers:)
Thanks my friend!!! XO And ya, I use to use green tape to try and hold transfers and stencils on – but they would fall off as I was repositioning and it just didn’t work as well for me. I find it SOOO much easier to map out my patterns and stencils when it’s laying flat! 🙂
Gorgeous! The butterflies are the perfect touch. Great makeover! Thanks for sharing.
Thanks Debra! XO Hope your day is going well. 🙂
absolutely gorgeous!! the colors with the wording and esp. the butterflies which always make me happy!!
Thanks CC. Butterflies make me happy too! A travel destination on my bucket list is to one day go to El Rosario in Mexico to see all the Monarchs that migrate there. I think that would be amazing! 🙂
Absolutely STUNNING!
thanks Linda! 🙂
Good morning Denise,
Wow … Love this Butterfly collage… thank you for the full process guide… this is a wonderful inspiration for the one project I wanted to do for a couple years… all your projects are interesting but this is the one talking to me!!!… Not sure if I will use worlds maps or copies of Klimt paintings but I will definitely try your techniques later this year!
All the best!
Claudette
Omgosh, world maps or Klimt painting collage would look AMAZING! I saw that “Lady In Gold” [stolen] painting documentary… very good but sad. Love Klimt’s work… very interesting. Have a great day Claudette! x
I love this so much! What a fabulous job you did – genius using so many different mediums. Once again, you inspire us!
Aw, thank Allison! It was fun using all the different mediums. The collaged front came easy but I must have tried 3 different paint finishes on the side and top before I settled on the green. Glad I went simple tho. It showcases the butterflies nicely. 🙂
Love it! Absolutely beautiful
Thanks so much Carolyn! 🙂
Love the collage…the colors are beautiful. Changing the hardware was amazing would you share were you buy the drawer pulls. I have a dresser with the same hardware.. The new hardware makes all the difference. Thanks very much for always sharing..I found you by accident one day when I was searching for something…been the best happy accident since.
Hugs Debi
H Debi and welcome… so glad you stumbled upon the #siblog! 😀 I have an extensive hardware ‘stash’ from collecting knobs and handles from old pieces and picking up different hardware when I see something I like on sale or at the ReStore, but these were bought at Hobby Lobby. 🙂
OMG Denise! You never cease to amaze me. This is a real beauty xxxx Well done you!! I love it!
and congratulattions to the Book Bundle winner, Nicole!
Thanks my friend! Can’t go wrong with spring-inspired butterflies, right?! 😉 And can’t wait to get your gorgeous books off to Nicole… I know she’s going to LOVE them. 🙂
The butterfly dresser is stunning! I can’t imagine how many hours you put into making this plain dresser a showpiece. The blending of the colors and transfers is so lovely!! I love seeing what you create every time I read your blog. Happy Spring!! XOXO
Aw, thanks Cecilia, you always put a BIG smile on my face. Happy Spring to you… and a HUG too. 🙂
Absolutely stunning makeover Denise! Your furniture transfer to stencil collage is seamless! I hope you update the post with the dresser after it’s waxed because I’d love to see how all those colors and textures pop. Pinned 🙂 Congratulations on the magazine feature ad! Well deserved my friend. xo
Thanks Marie! Yes, once it’s waxed it will deepen the colors for sure. I spent so much time fiddling with paint colors, layering, blending on the top and sides [until I decided to go with the solid green], that I wasn’t even sure if I was going to have a Tuesday post this week… I know you get it…lol. 😉 Also, congrats on your Waterfall Feature my friend. Very exciting and well deserved too.:) Hugs XOXO
Congratulations on your newspaper article! You must be so happy with that!
Thanks so much, Elizabeth – I’m over the moon happy! xo