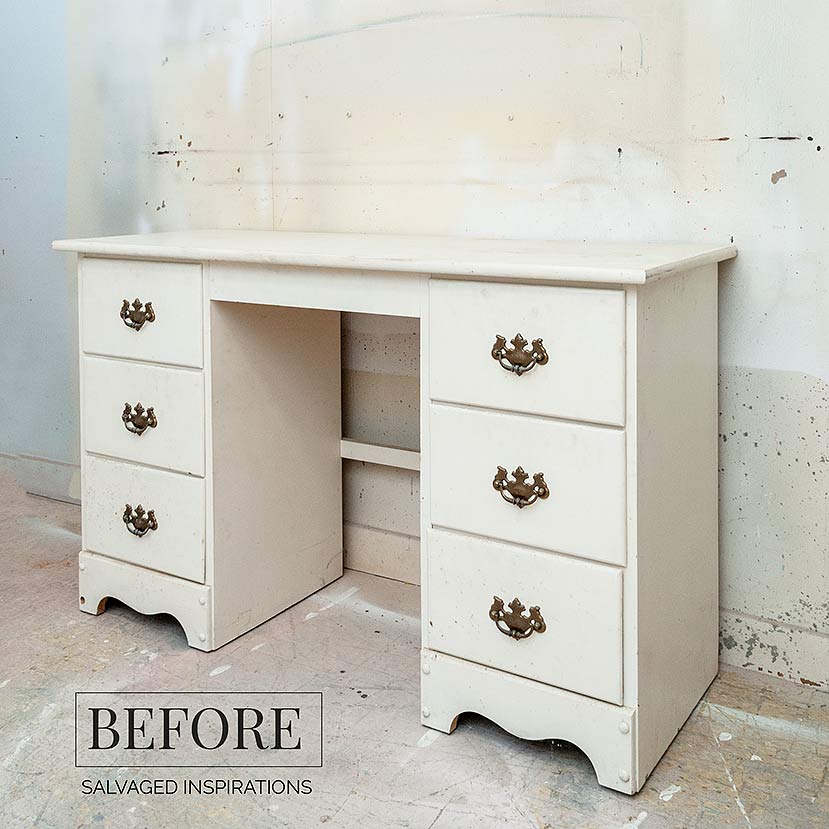
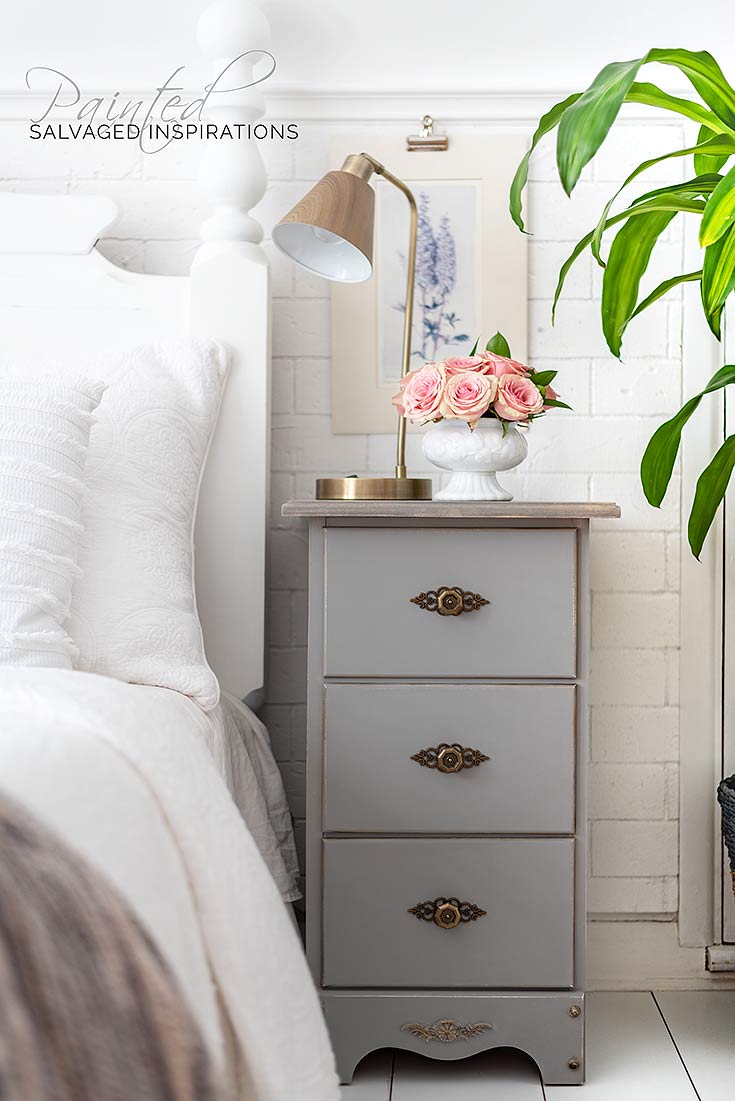
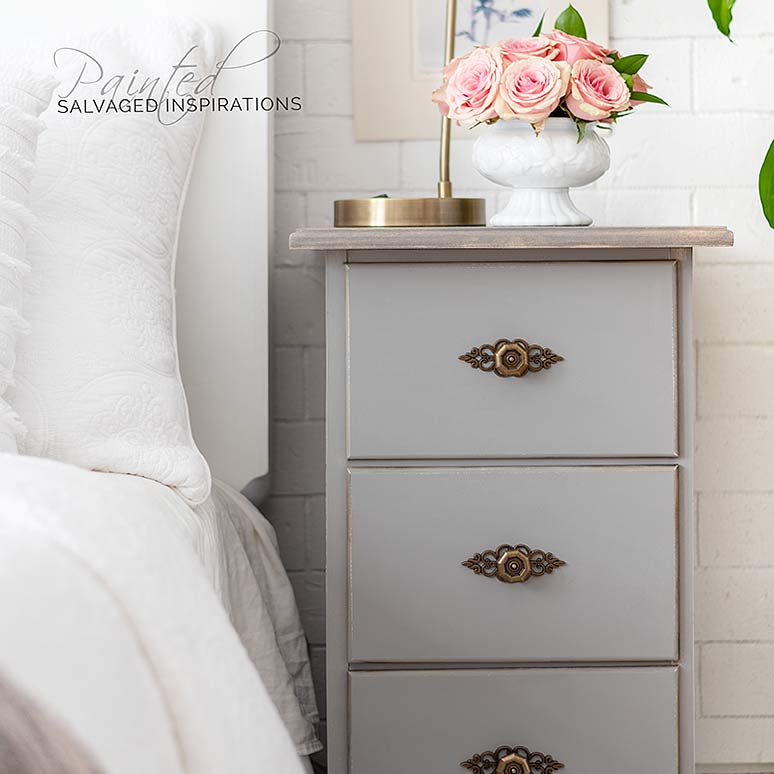
NOT SURE WHAT TO DO WITH THAT OLD BORING DESK? TODAY, I’M SHARING HOW I TRANSFORMED A DATED CURB-SHOPPED DESK INTO THESE GORGEOUS PAINTED NIGHTSTANDS!

I promise today’s makeover will make you take a second look at every plain-old-desk that has ever been abandoned curbside or donated to a thrift store!
You may have seen these desk to nightstand makeovers on Pinterest. They’re usually done using shapely vintage desks. You know – the ones with the scrolly legs and all their intricate details… (which I’m itching to get my hands on one of these btw!), but I haven’t seen too many desk-to-night-table-makeovers pulled off with an “average” looking desk.
This is another inventory piece I can cross off my list… woohoo… and I have to admit, I’m always amazed at what a coat of paint and new hardware can do!
Paint is my hero.
THIS POST IS SPONSORED/CONTAINS AFFILIATE LINKS TO PRODUCTS I USE. YOU CAN SEE MY FULL DISCLOSURE HERE.
SOURCE LIST::
-
- CurbShopped Desk – SALVAGED
- Sponge + Water + TSP + Shop Towels
- Bondo
- Straight Edge + Measuring Tape
- Furniture Clamps
- Sandpaper + Tack Cloth
- Dewalt Sander
- Circular Saw
- Plunge Router (similar)
- Paint Brushes
- Tobacco Road Gel Stain
- Hurricane Gray Chalk Mineral Paint
- Warm Gold Gilding Wax
- Clear Wax
- Satin Clear Coat
DIY PAINTED NIGHTSTANDS::
Before I get into the How-To, a big thank you to my friend Larissa at Prodigal Pieces. She recently did a similar desk to nightstand makeover including a video (which I’ll link to at the bottom of this post) which gave me the confidence to try this makeover. 🙂
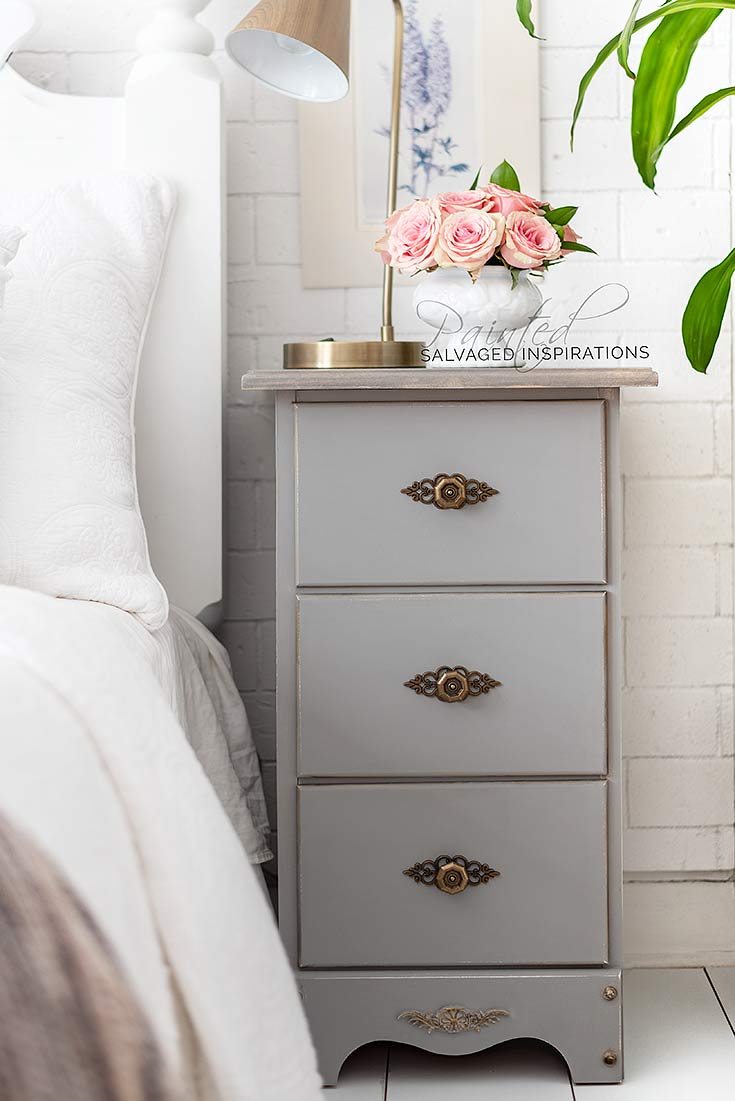
Step #1:: Added Applique
I have NO idea why I started with this step but I added an applique using these moulds to the bottom skirt even before I disassembled the piece.

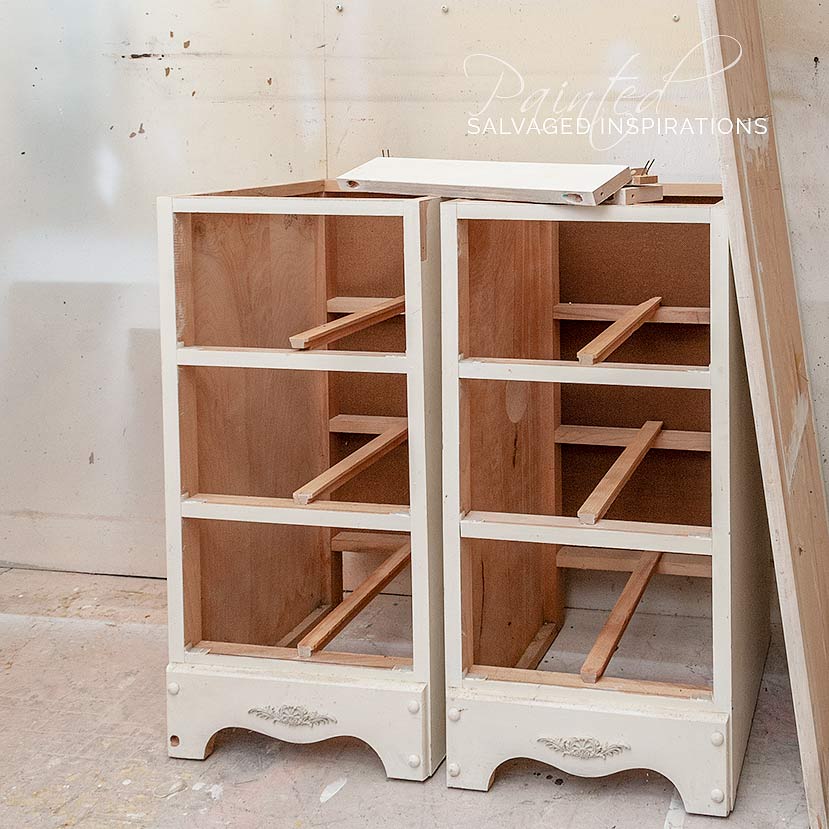
Step #2:: Disassemble The Desk
This was easier than I imagined. I removed the screws that were holding on the top and midsection pieces and then gave it a few good whacks with my hammer. I was surprised at how quickly it came apart. Within about 15 minutes it was all disassembled.
Here the drawers are MIA because I was cleaning them and filling the existing hardware holes with Bondo.
Step #3:: Measure And Cut
I measured my 2 tops at 17″ x 18″ which included a 1.5-inch overhang using a skill saw/circular saw with a guide to cut the desktop into two nightstand tops.

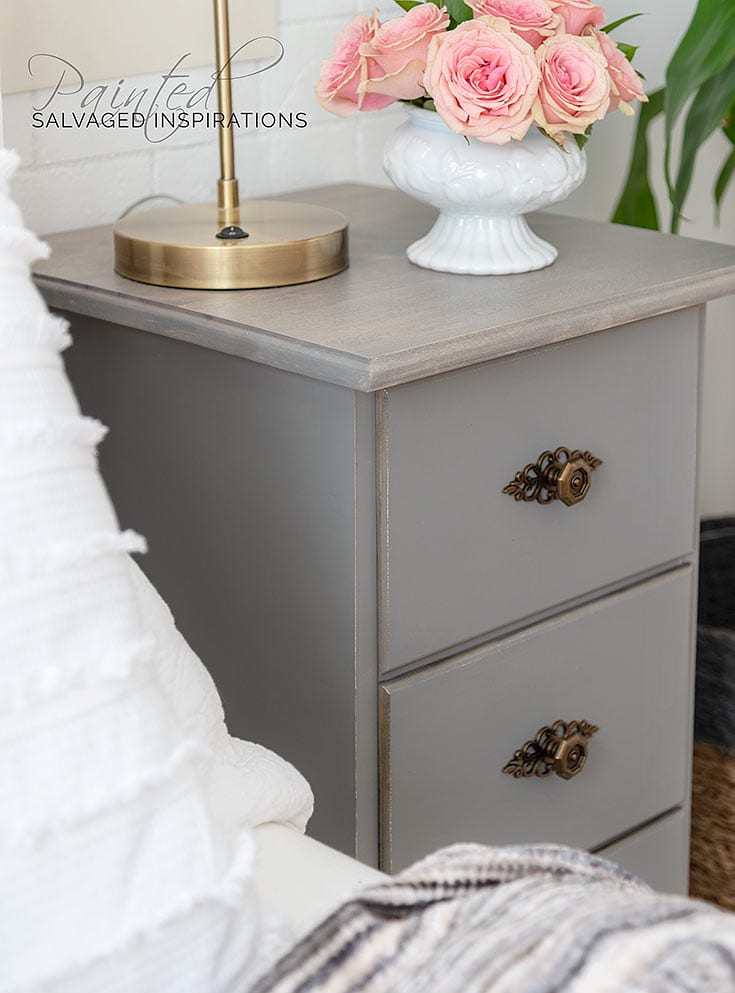
Step #4:: Router the Edges
This was my FIRST time using a plunge router. I’ve had this tool sitting around for a year so I was excited to try it. WOW! Now that I see what a difference a routered edge makes, I can’t wait to try out different bits and profiles!
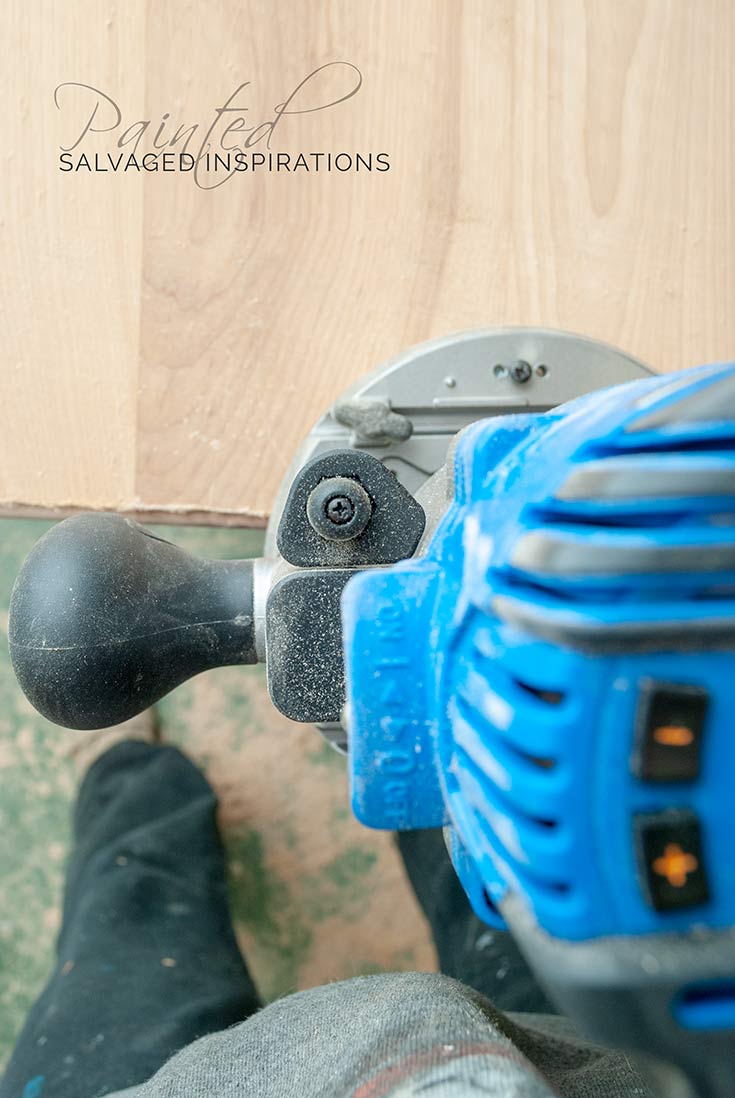
Check this out!
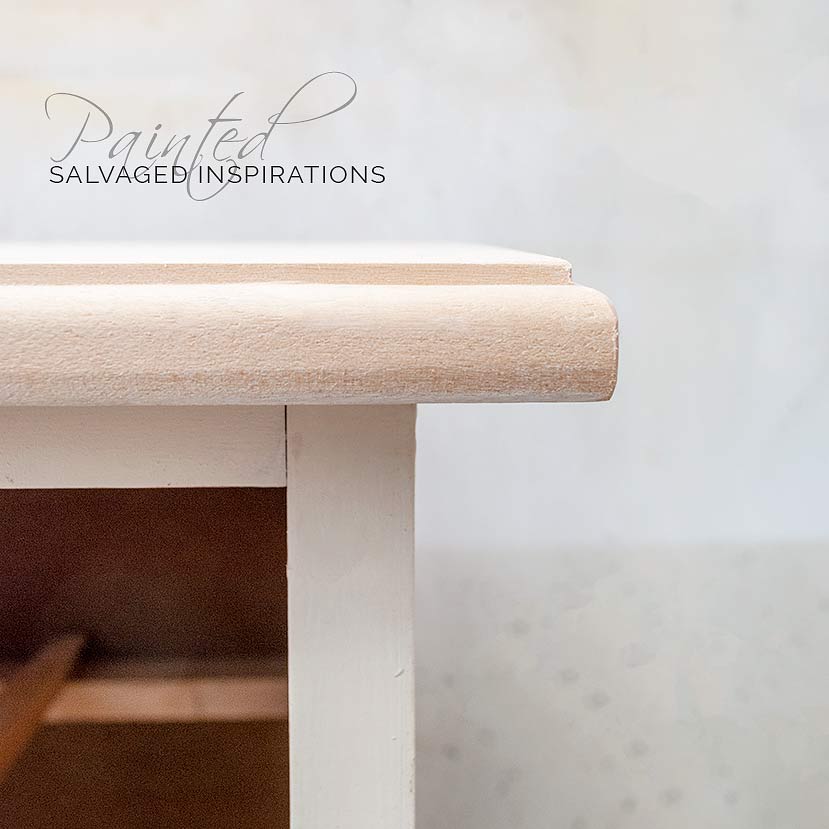
If you don’t have a router, a clean cut with a nice sanding of the edges will work very nicely too. 🙂
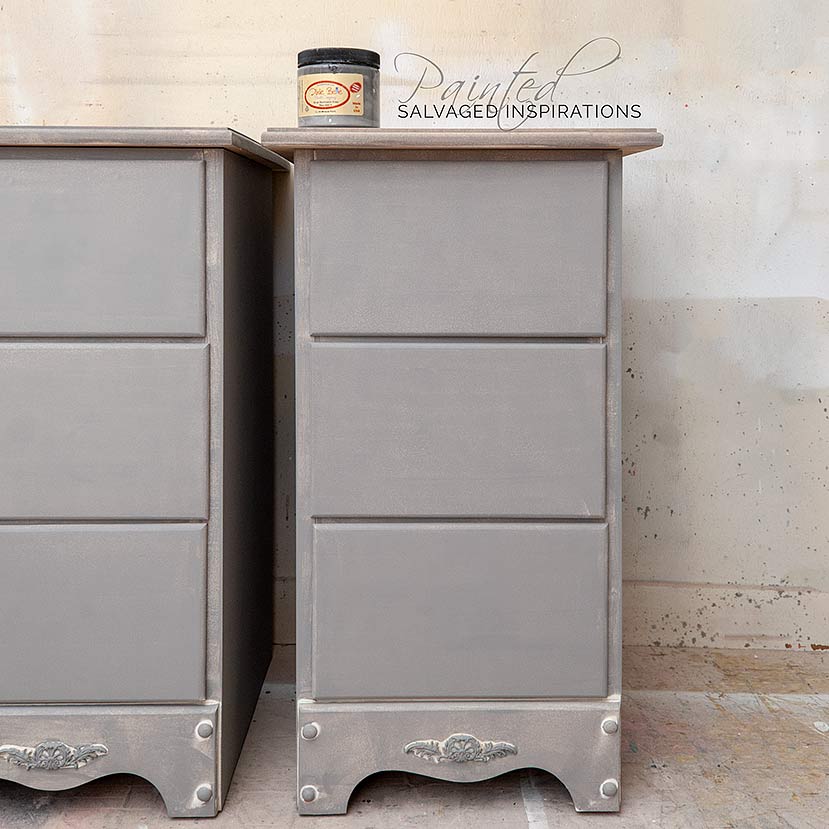
Step #5:: Sand – Stain – Paint
Once the tops were cut to size and the edges routered, they were sanded to a super smooth finish. I stained the tops with this water-based gel stain and the bodies were painted in this deep gorgeous gray.
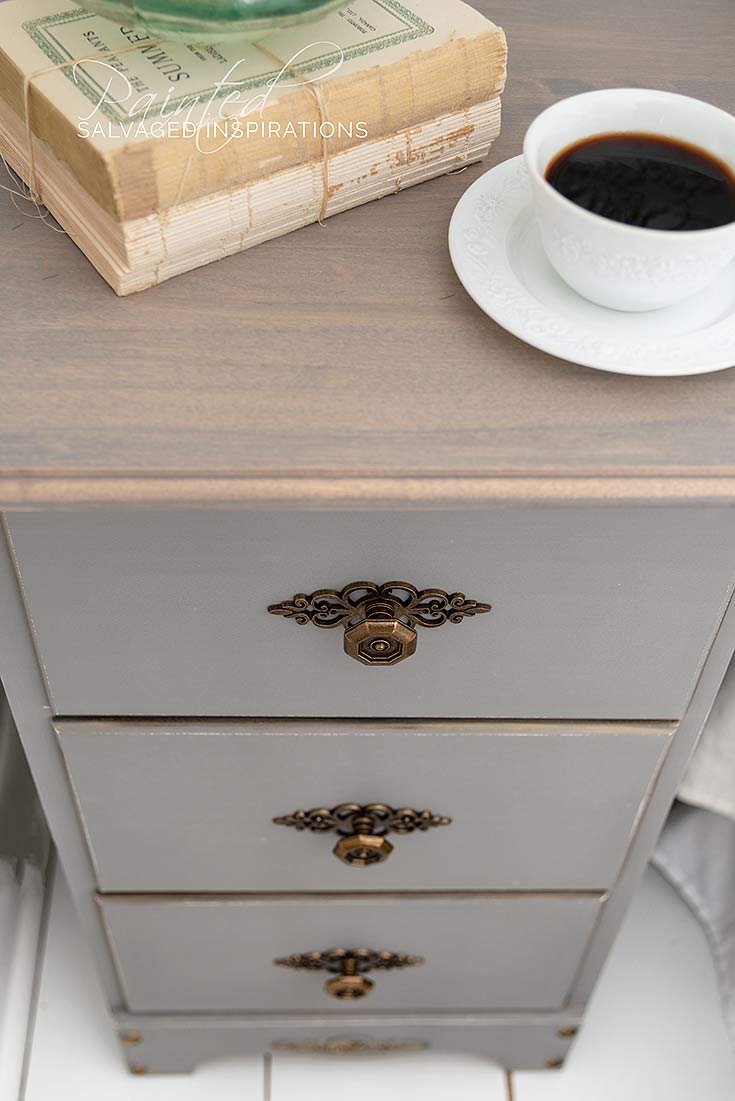
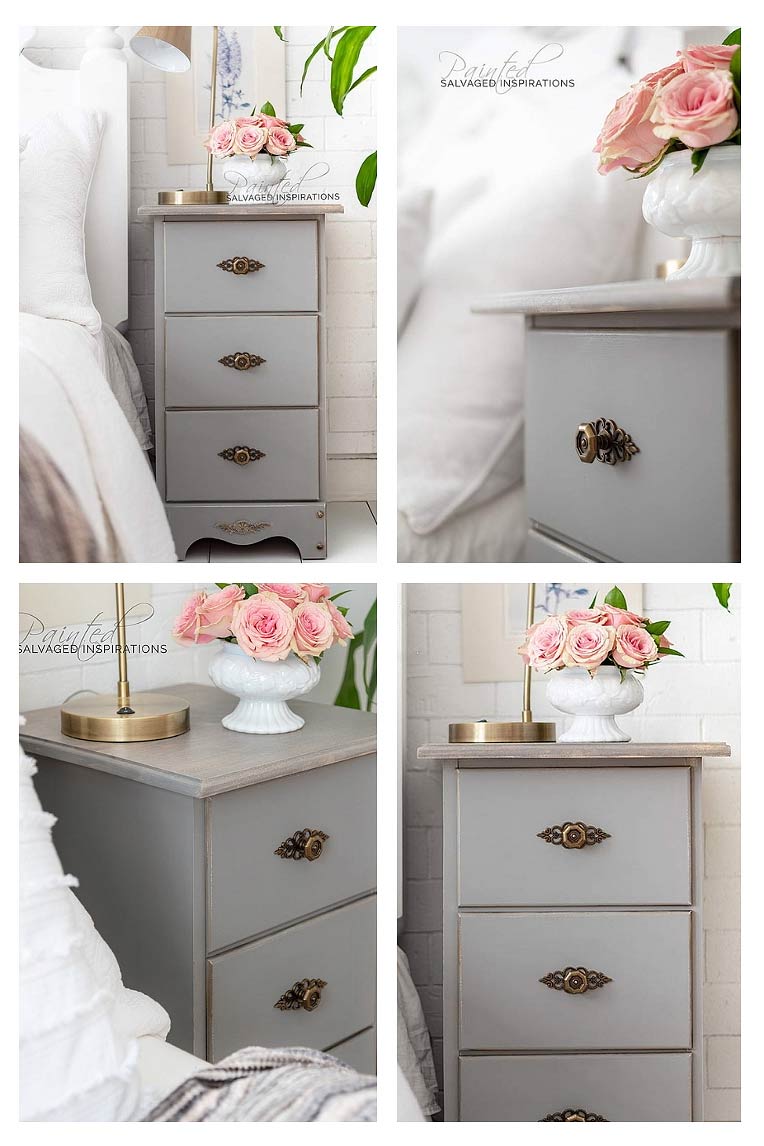
Step #5:: Hardware & Details
The finishing details were the knobs and a touch of gold. The hardware I picked up from my local ReStore and I added a slight shimmer on the applique and lip of the drawers with this gilding wax.
What do you think?

LET ME KNOW WHAT YOU THINK OF THIS MAKEOVER… OR FEEL FREE TO ASK ANY QUESTIONS YOU MAY HAVE… I ALWAYS LOVE HEARING FROM YOU.
Happy furniture painting my friends!
Denise x
RELATED POSTS::
How To Apply Furniture Transfers
Adding Graphics | Vintage TeaCart Makeover
Prodigal Pieces Desk To Nightstand Vid
Stop Bleed Through When Painting
5 Ideas To Update An Old Desk
PIN AND SHARE!


Just lovely Denise! Thanks for the inspiration. This is on my to do list. 🙂
xo, Do
Thanks Do! 🙂 It was a fun makeover!
Beautiful! And so inspiring! One question- What product did you use in the IOD mould ? I have a couple of these, but don’t know what would work on furniture. Thanks!
Thanks Lisa! I used this paper clay here. 🙂
What a great transformation!! I have completed plenty of vintage vanities into nightstands but I have never seen a desk turned nightstands!! You did.a beautiful job!!
Thanks Cindy! I’m itching to get my hands on a vintage vanity and/or desk. I’d love to try this on a piece like you did!
What????!!!! This is blowing my mind. This solves my problem of having unmatching night stands!! Which is a makeover artists thing that I just have learned to live with. Thank you!
So glad it’s sparked an idea Audra. And love your name btw… so unique!
This is fantastic.
Thanks Harjith! 🙂
Beautiful and inspiring. Having retired a year ago I am new to restoring and creating something new from something old. I am also new to your site and so look forward to seeing what you create. YOU do beautiful work and your instructions and tips are so helpful. Thanks.
Thank you and WELCOME Joanne! I hope you find some amazing old pieces to restyle and have fun with. Beware though, it’s kind of addictive…lol.
Awesome makeover Denise!
Thanks so much Linda! XOXO
I love them ! So much more useful than the desk. Perfect colour as well!
Thanks Cynthia! 🙂
As usual I love the repurpose/makeover. You are very talented. Now if I were going to make these and sell them, I think I might also mention to the customer that if you had a piece of glass or wood laying around at home, you could also make this into a nice desk…LOL. Sorry couldn’t resist. I think this would have made a beautiful vanity with a kidney shaped top on it. I love what you did though and the hardware you purchased is beautiful for this piece.
Okay, that’s funny LOL! And the Restore Hardware – $1 each… can you believe it?! I bought like 20 of them and this is the second project I’ve used them on! 😀
I spotted those appliqués when you first posted a pic of the desk as is & wondered if you had added them or were already there. Glad that’s cleared up, LOL. They turned out lovely and so much nicer to look at than just a desk Larissa’s video is great too. Keep them coming!
You have a good eye my friend. Ya, it was a funny start (appliques???) but it worked…lol.
Inspired: a coup de maitre! And 2-for-1 is icing on the cake. You amaze me, Denise: and I look forward to the day in my crazy work-driven life when I have the time to stir up my own creative juices and transform junk into treasures! You will be my mentor and my muse 😉
I can ‘feel’ your creativity Suzy and I’m cheering you on from my end! 😉
Hi Denise. I’m loving these two adorable night tables. You always know how to bring a plain piece to the next level and add some glamour. The gold highlights and knobs really make them shine. Beautiful work as always.
Thanks so much, Monique! XOXO 🙂
Total genius!
Thanks Meredith! XO
Denise, you made the plain desk style nightstands look as gorgeous as the shapely vintage ones! Love the combination of hurricane grey and up in smoke voodoo stain. Nice job, as always!
Thanks and I really like this duo together too! I’m kinda addicted to this Tobacco stain…LOL.
Ha, LOL, tobacco was my second guess!
LOL… I’ll bet you would have got it on first guess if you’re brain wasn’t still on vacay LOL 😉 🙂 😉 Good to have you back my friend. XO
Dearest Denise,
You had me at appliqué! I will never look at an desk the same way again, ever!
I adore this project and cannot WAIT to find a quiet little desk waiting to be loved with a new purpose in it’s life!
Cheers! Suzanne
….”quiet little desk”… omgosh Suzanne I LOVE that!!!…. I should have used THAT as my title! 🙂
Beautiful job! The routered top looks great ( I may have the courage to try one now!). Thanks for the inspiration.
Thanks so much, Laura! Larissa’s tutorial encouraged me to give it a go so I hope this encourages you! XOXO 🙂
Hi, I’ve been following you for years and I’ve tried several nightstands from desks after seeing you do one quite awhile ago. They came out gorgeous! Twice, though, I’ve had to use a textured roller and mud to fix the ripped away insides of desks with middle drawers. After the textured sides and matching tops, I put on glass knobs and they were unbelievable! I sold them right away! If not for you, I wouldn’t have ever thought of doing this! Thank you so much for sharing.
Also….I’ve had a router for over a year and I’m sort of scared to use it, LOL. Since you tried it, I guess I’ll have to get u
The courage to take it out of the box! Your are the best! Lillian L’Esperance
Lillian, I’d love to take the kind credit your offering but this is my very first time making night tables out of a desk… so I think another blogger encourage you LOL! That said, if I’ve inspired you to give that router a try (mine was sitting on the shelf for a year also!) I’ll take a little credit for that…woohoo! 😉 Super heavy duty tool that requires care/diligence while using it – but now that I know how easy it is to create gorgeous profiles, I think I’m hooked! XO
LOVE this SO much!! Now to find an old desk . . .
Thanks Julie! 🙂
Love this transformation, Denise! Thanks so much for providing links to all the products you used; I’m ordering some of them now!! What was the process with your finishing coats – wax and then clear coat?
Carol
Thanks Carol! 🙂 Yes. For most of my makeovers, I protect the top with heavy duty topcoat (eg poly, gator hide etc) and then wax the body… which is exactly what I did for these night tables. 🙂 Have fun with your project(s) Carol!
See, this is why I never want to miss one of your posts! Creative, ingenious!
You’re so sweet I just want to reach out and hug you Kellee! Thanks 🙂 …. and hope your day is going great. XO
Hugs to you!! You are my furniture spirit sister. LOL
LOVE IT! <3 🙂
I’m amazed at the stuff you find for free! I must live in the wrong place 😂. Love these! I’ve ignored many an old desk. I’ll have to quit being so picky!
I’ve ignored my fair share of these desks too! And ya, we have bulk days around here every 3-4 weeks so I’m always keeping my eyes peeled. 😉
Absolutely beautiful! You do amazing work!
Thanks so much, Connie, appreciate it! XO
I love this Idea!!! I have two of these desks in my garage, and no one seems to want desks anymore. Thanks so much for this great idea!!!! And they are a smaller version for people how have small bedrooms !!
Ya, great for people with compact spaces and I’m guessing they will sell faster than a desk, but we’ll see. 🙂 I know if you tried this you’d do something SPECTACULAR Julie! XO
Now that is just fantastic. Love the idea of cutting down the *common* desk…great nightstands.
Thanks so much! 🙂
Gorgeous as always! I’m always impressed with how SOFT your pieces look. I just want to hug it. Is that because of the wax?
Aw, thanks Jenna! And ya, it could be a combo of the wax (I find the DB Wax leaves more of a velvety looking finish rather than a waxy finish…if that makes sense??) and sanding between each layer. ??? Not sure but huge compliment – Thank you!!
Amazing transformation, Denise! Your work and photography are always so professional looking. I have a desk in my basement I would like to try this on. Do you think night tables might sell faster than a desk?
Thanks Nicki! And hmmm, I’m not sure. My guess is yes — but feel free to check back and I’ll let you know. 🙂