.99¢ DIY FALL WREATH MAKEOVER | A THRIFTED WREATH MOULD AND PLUMES FOUND ON THE SIDE OF THE ROAD TURN INTO A GORGEOUS FALL WREATH | YOUTUBE VIDEO
Hi sweet friends. Can you believe the first day of fall is only 2 weeks away? Spring and Fall are my favorite times of the year so I’m excited and ready. Today I’m sharing my .99¢ cent DIY Fall Wreath for my front door! I wanted something organic-looking and absolutely gorgeous. My sister gifted me this grapevine wreath that she picked up from a thrift store and I used this ‘pompas’ look-a-like grass that I picked off the side of the road. It grows abundant here in Ontario and is already dried and ready to go.
It’s also Trash To Treasure Tuesday. I’m joining my T2T girls and sharing links to their projects below. I’m looking forward to seeing what they’ve created and I hope you join me on the tour as well!
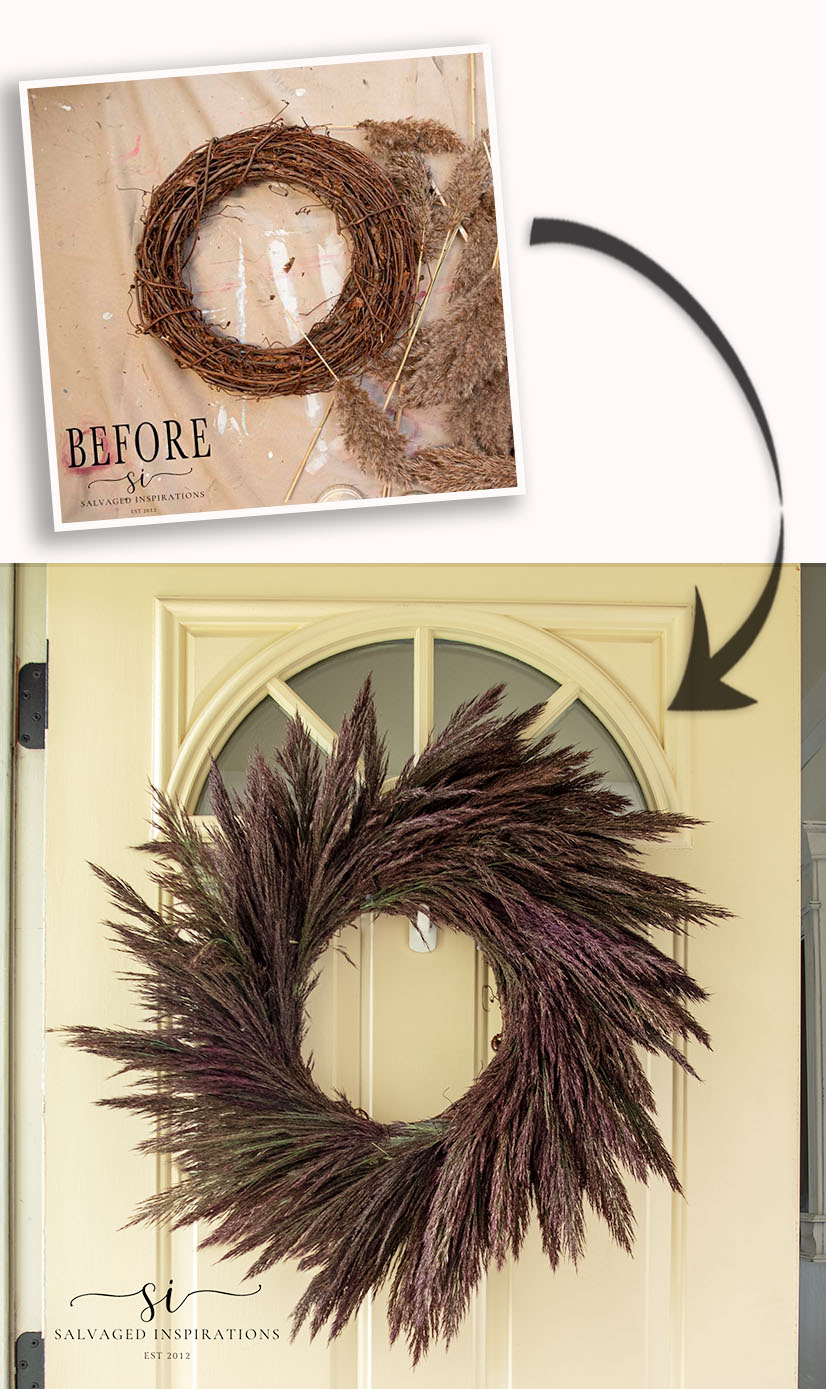
Here’s the thrift grapevine wreath frame my sister gifted to me along with some of the organic grass I was going to use. (More on this below!)
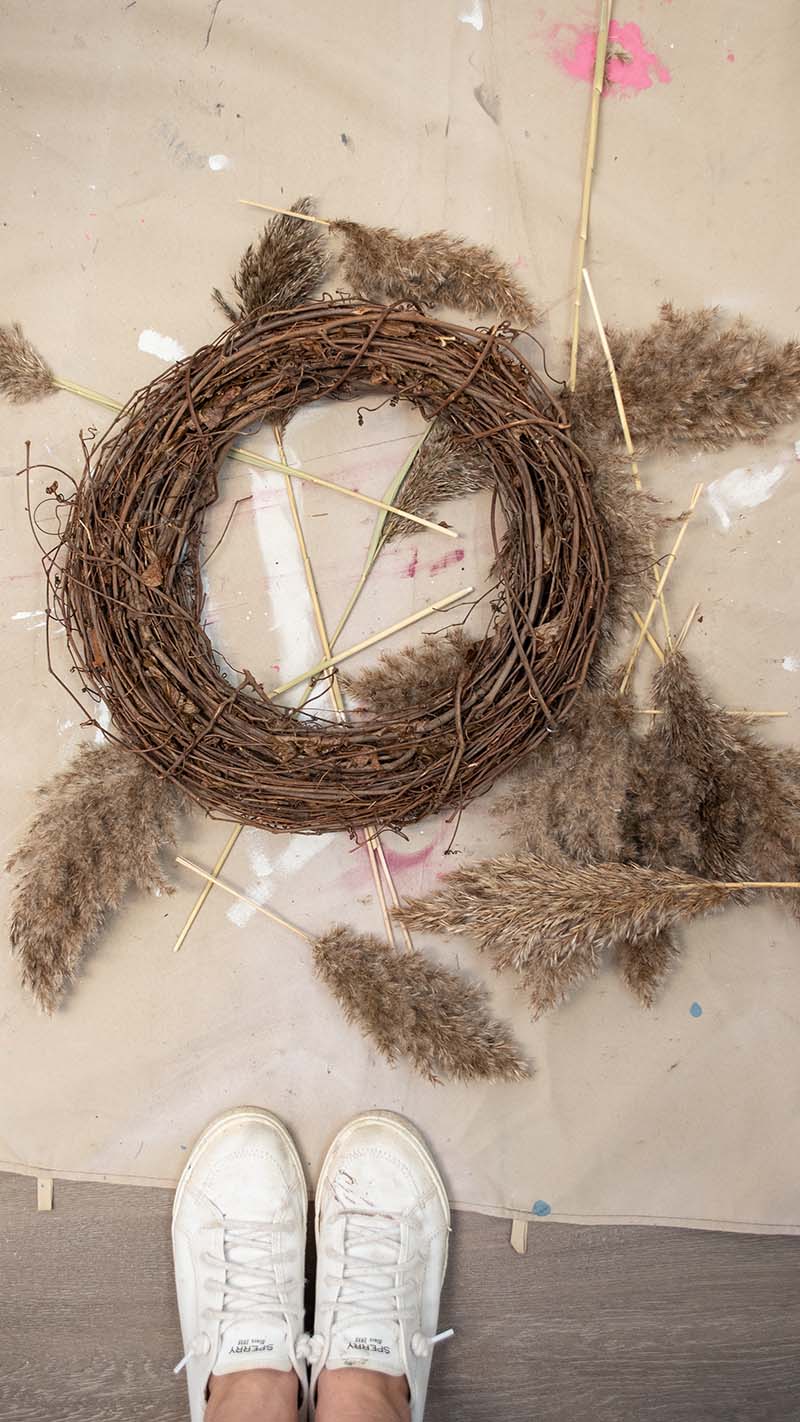
The wreath frame measures 12 inches but it doubles in size once all the dried grass is added!

THIS POST IS SPONSORED/CONTAINS AFFILIATE LINKS TO PRODUCTS I USE. YOU CAN SEE MY FULL DISCLOSURE HERE.
WHAT YOU’LL NEED
.99 Wreath Frame – SALVAGED
Grass/Plumes From the Side of the Road – SALVAGED
Black Floral Wire
Hot Glue Gun
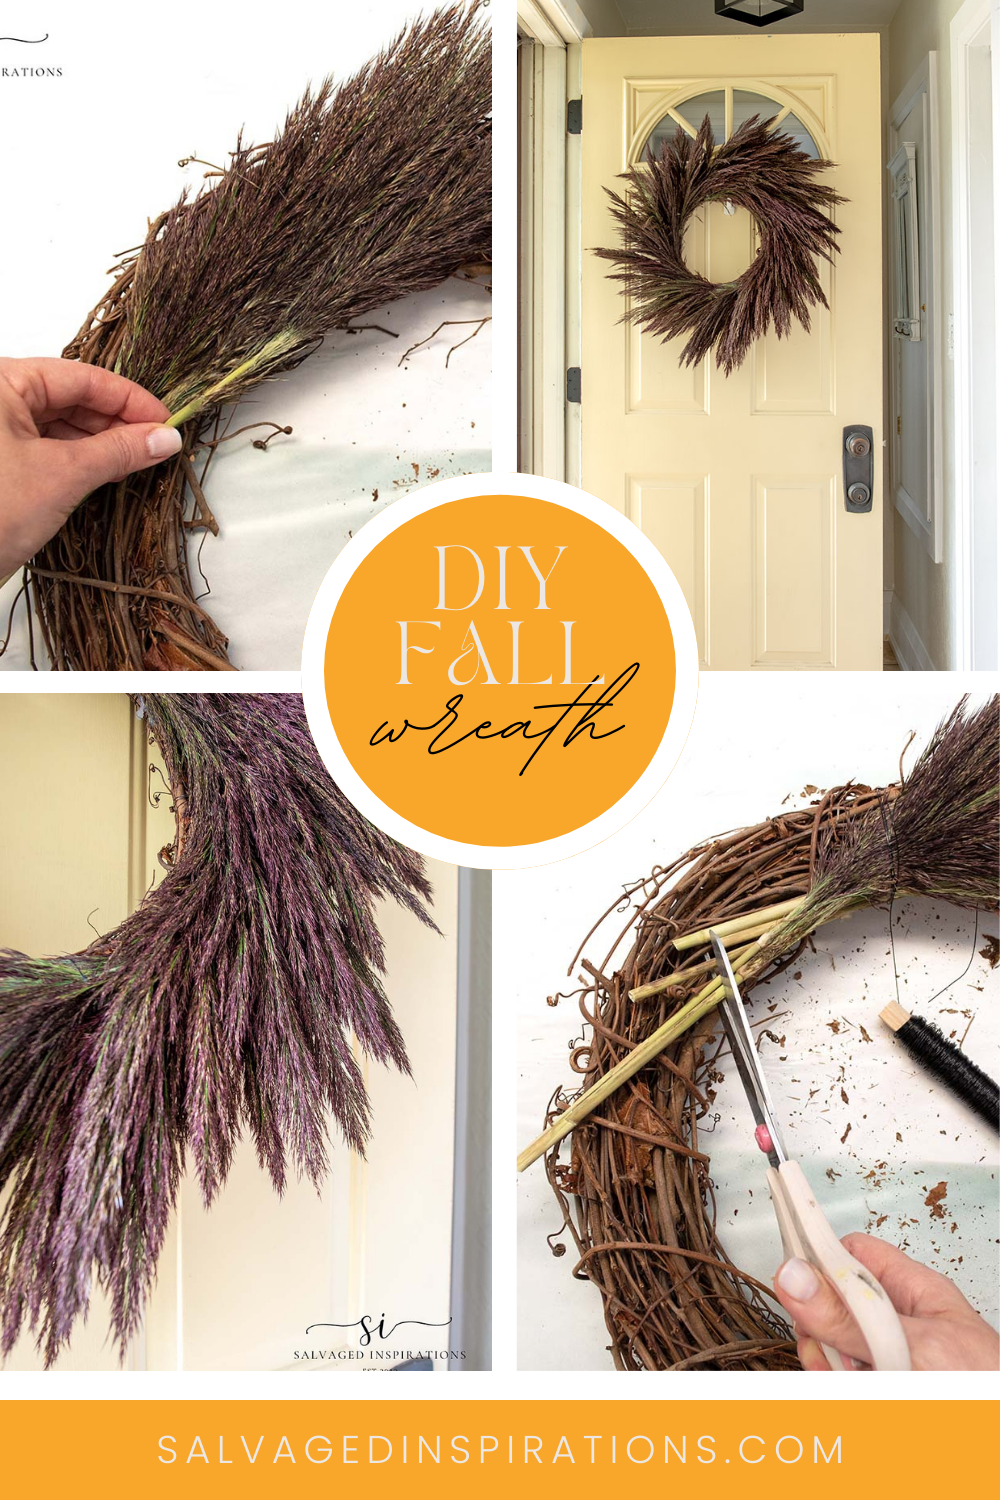
DIY FALL WREATH
I used these phragmites reeds that grow abundant along the sides of our highways and fields here in Ontario. They are very invasive and we have them everywhere. And thank goodness, because I needed A LOT MORE than I posted in the before pic! My sister and I headed out on Friday evening to pick a generous bunch. I’m really glad we did because I have to say I like the ones we picked better than the ones I had on hand for the before pic.
There are SO many ways to make fall wreaths using supplies gathered from outdoors. I hope this easy DIY Wreath sparks some ideas for you!
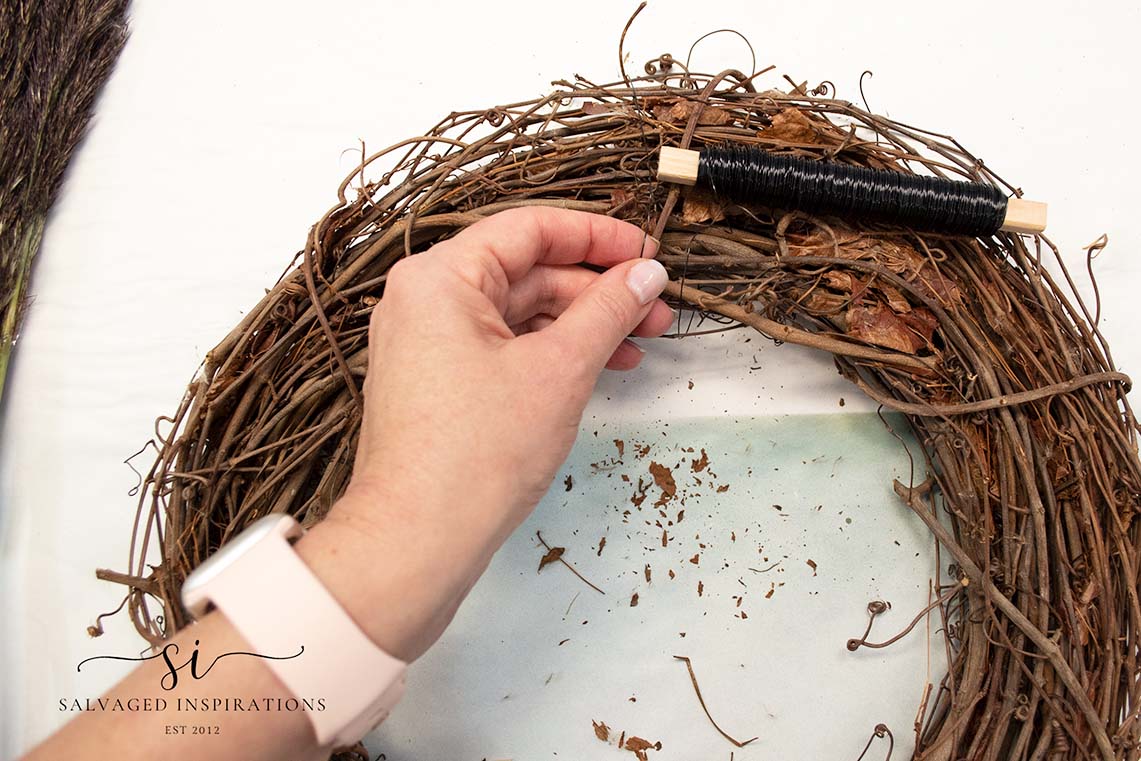
SECURE THE WIRE ON WREATH
I started by securing the floral wire to the grapevine wreath with this Decorative Floral Wire I bought afor $1.50 at Dollarama.

I created a loop and threaded the wire underneath to create a knot just like you would when tying a knot when threading a sewing needle. Then I wrapped it around snuggly 4 times and tucked one end into the grapevines so it wouldn’t scratch my door.
SECURE THE GRASS
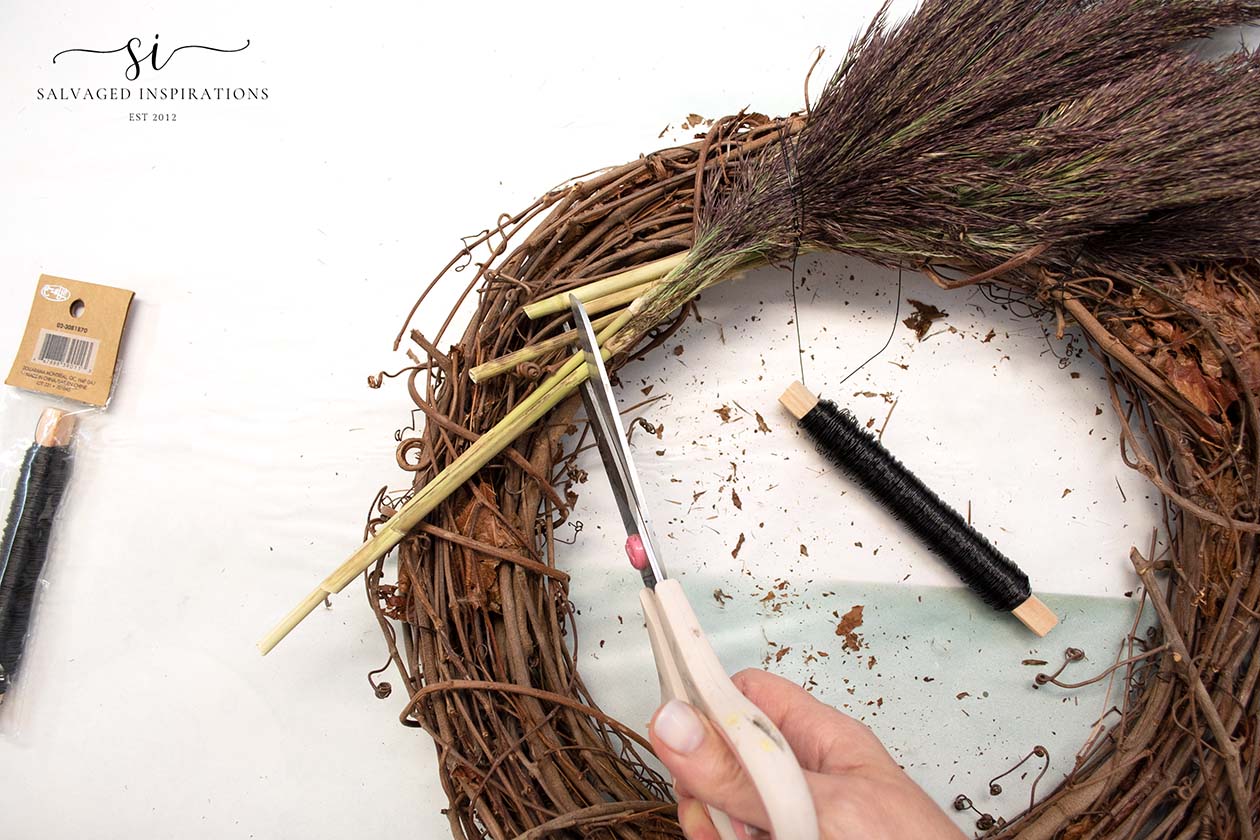
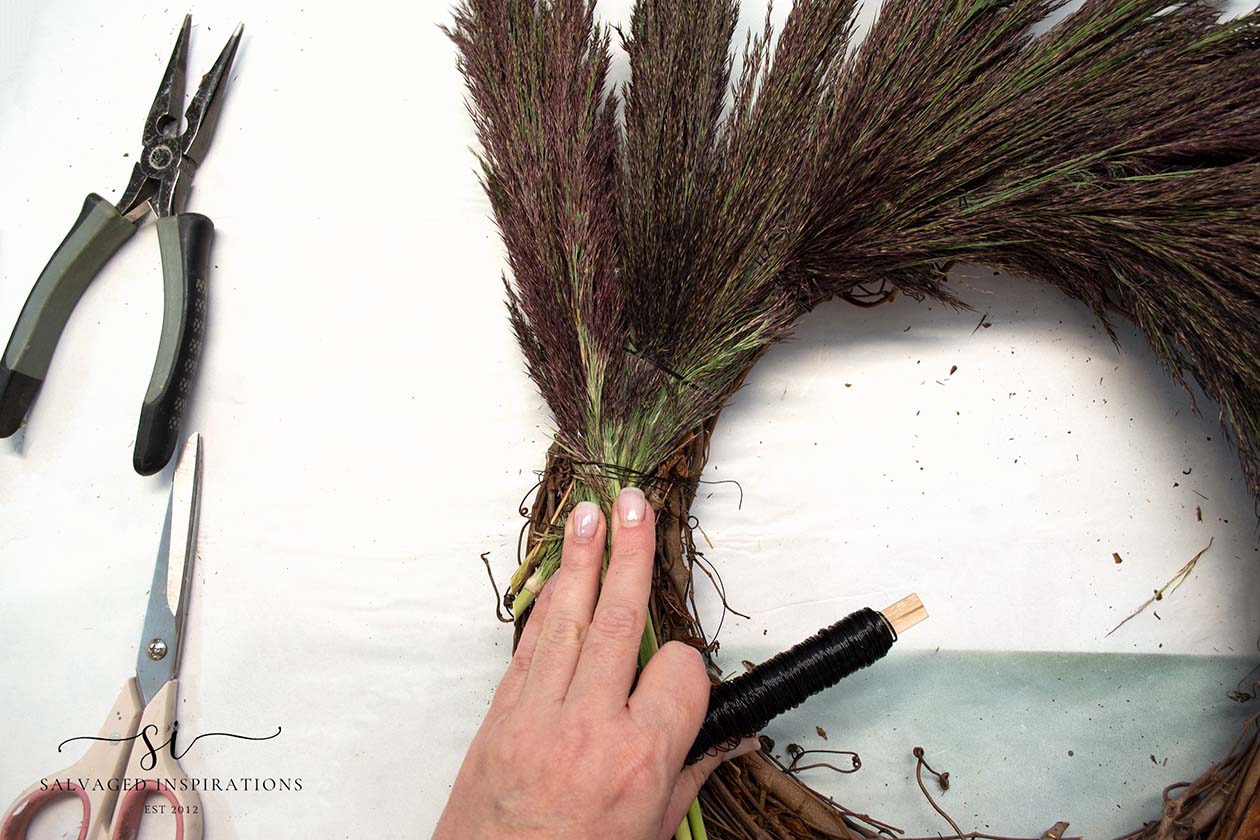
I’m not a floral designer so I watched this video on How To Make A Lavender Wreath. Jenny from Jenny’s Wreath Boutique has awesome tips on how to lay grasses, florals, or lavender onto the wreath and secure the stems properly. I followed her tips and started laying the grass on an angle and securing it with floral wire.
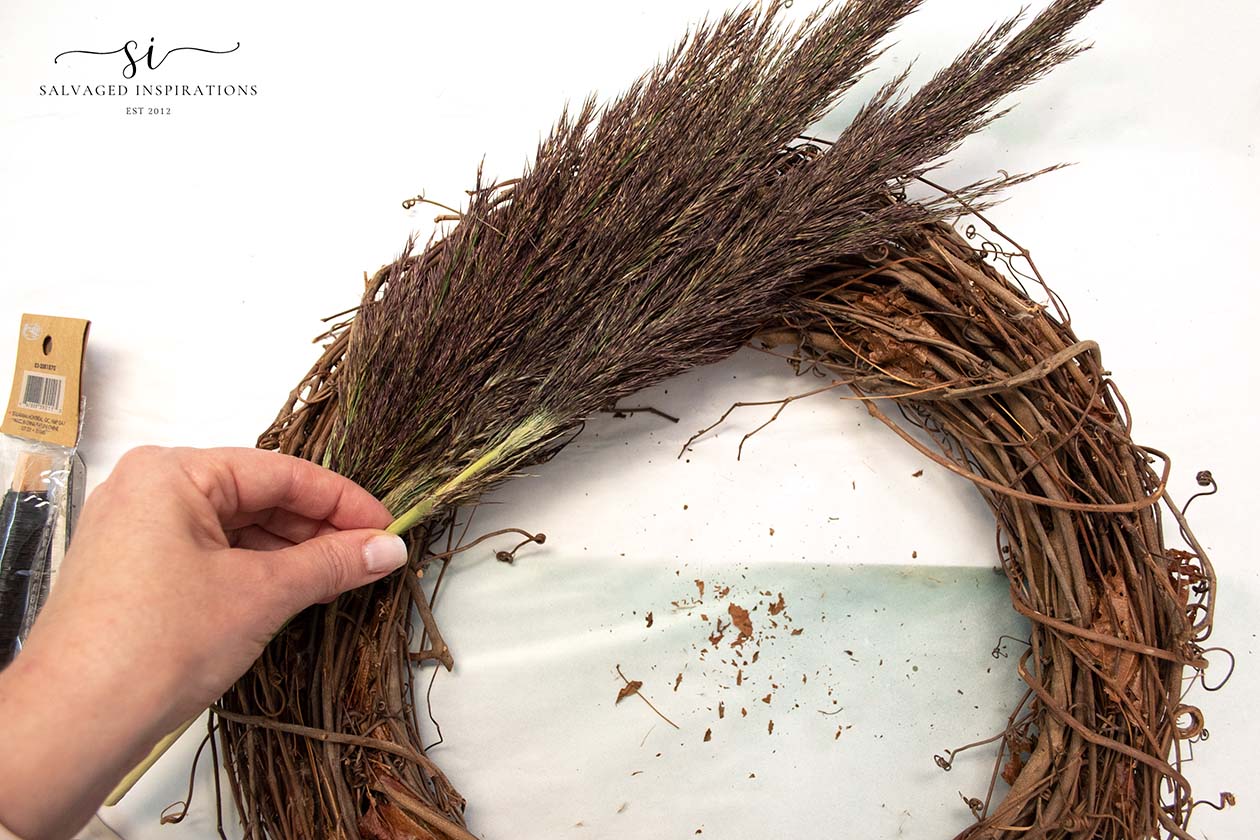
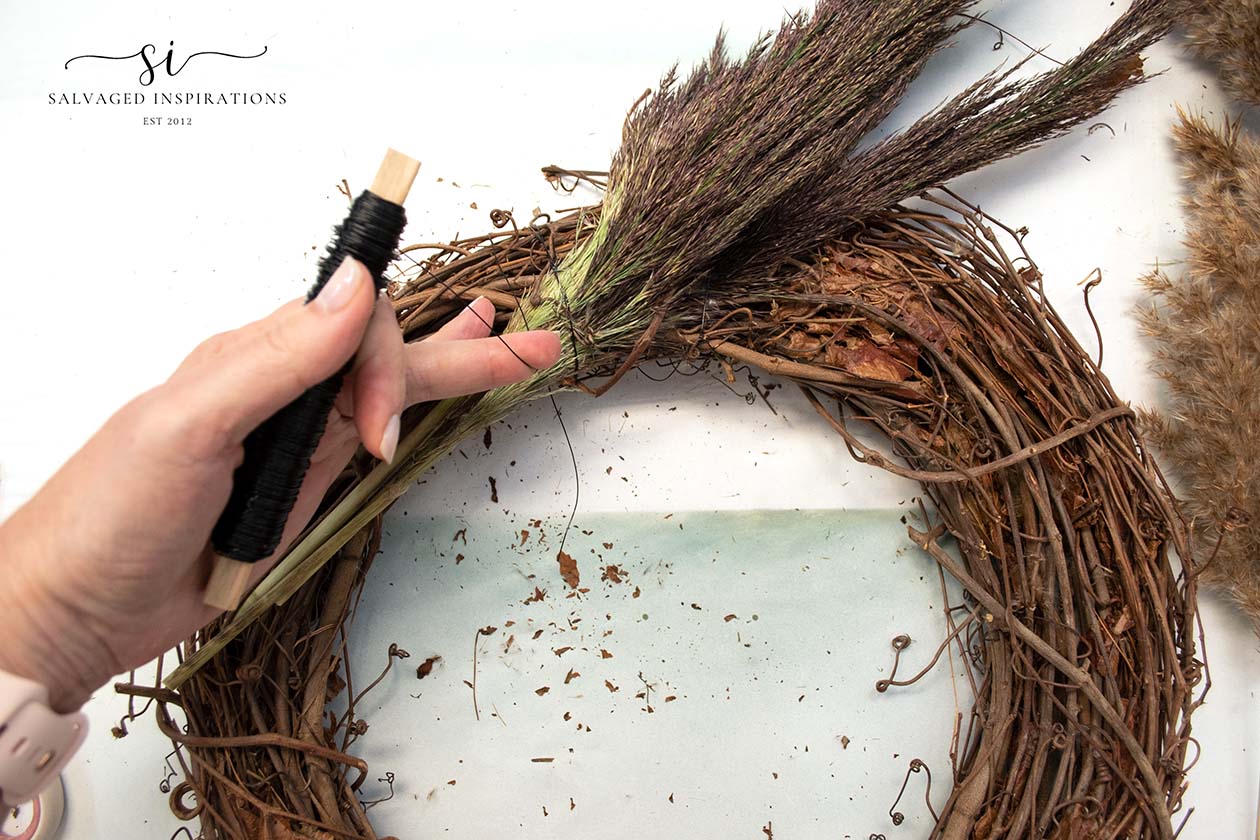
To make things a little easier and cleaner, I cut off the long stems that were sticking out. Then taking another little bunch of the reeds (3 or 4) I overlapped them onto the ones I already secured making sure to cover the wire.
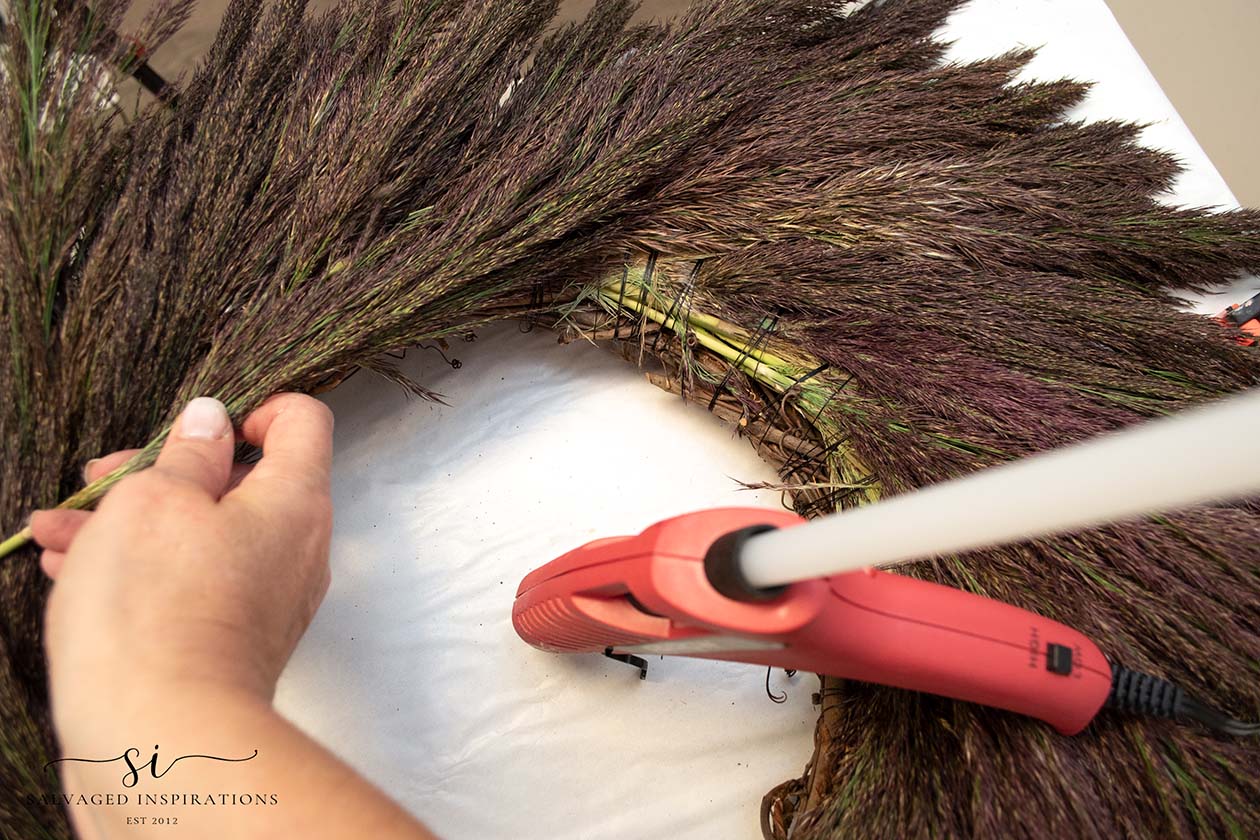
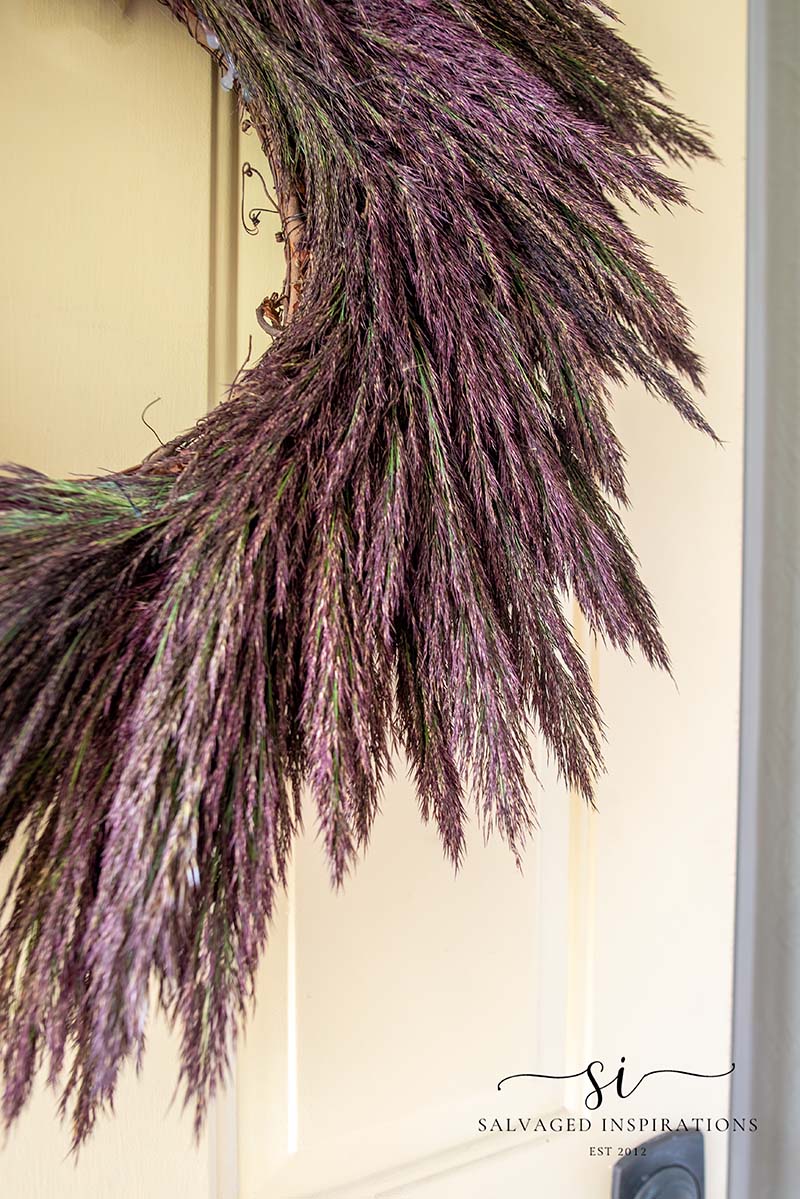
I went ahead and worked my way around the entire wreath. Can you see the purple hue on this grass? I didn’t notice it while I was picking it because it was dark out. But as I was putting this wreath together, I started taking notice of all the colors! Really beautiful!
Once the entire wreath was covered, I noticed a few areas where the grapevine and wire were exposed. To fill this in, I glued a few pieces of grass onto the frame using a hot glue gun. Now you can really see the purple hues! Just wait until the light hits it!
FINISHED FALL WREATH
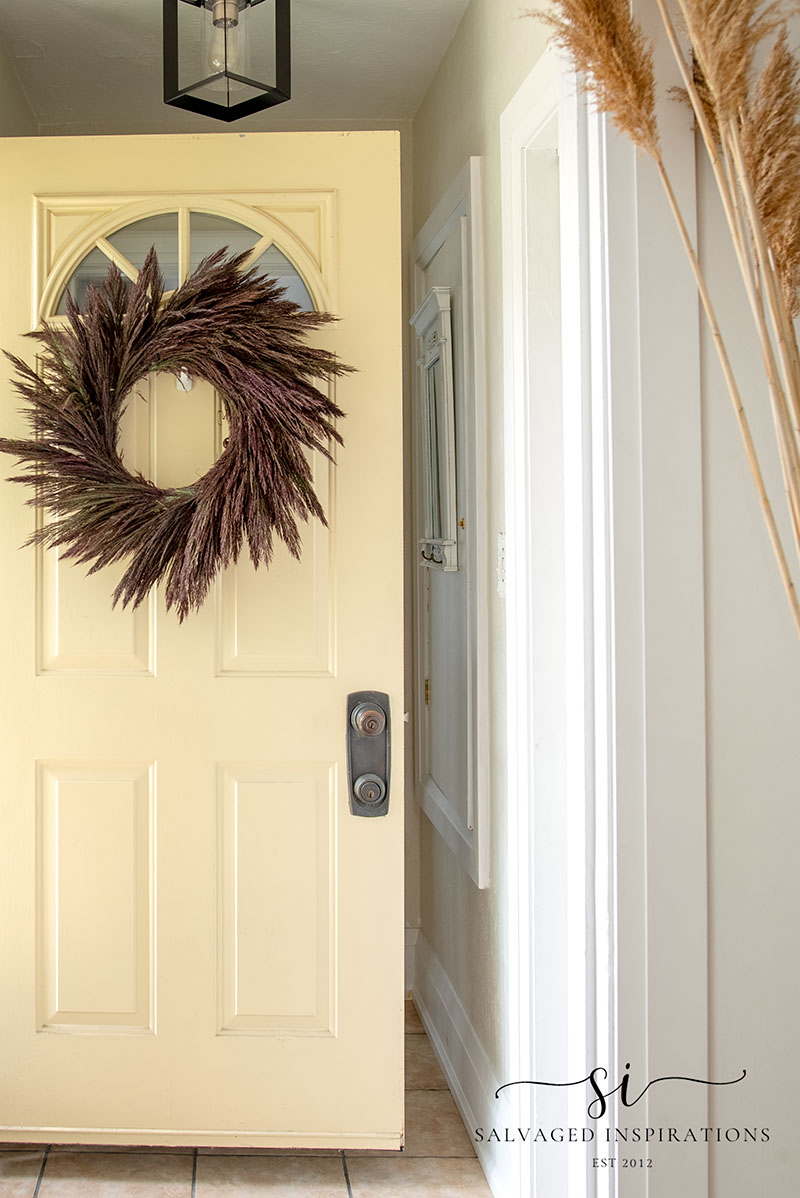
Here’s the finished look. It turned out even larger than I originally thought (a little over 24 inches in diameter) but I LOVE the contrast and texture on my front door!
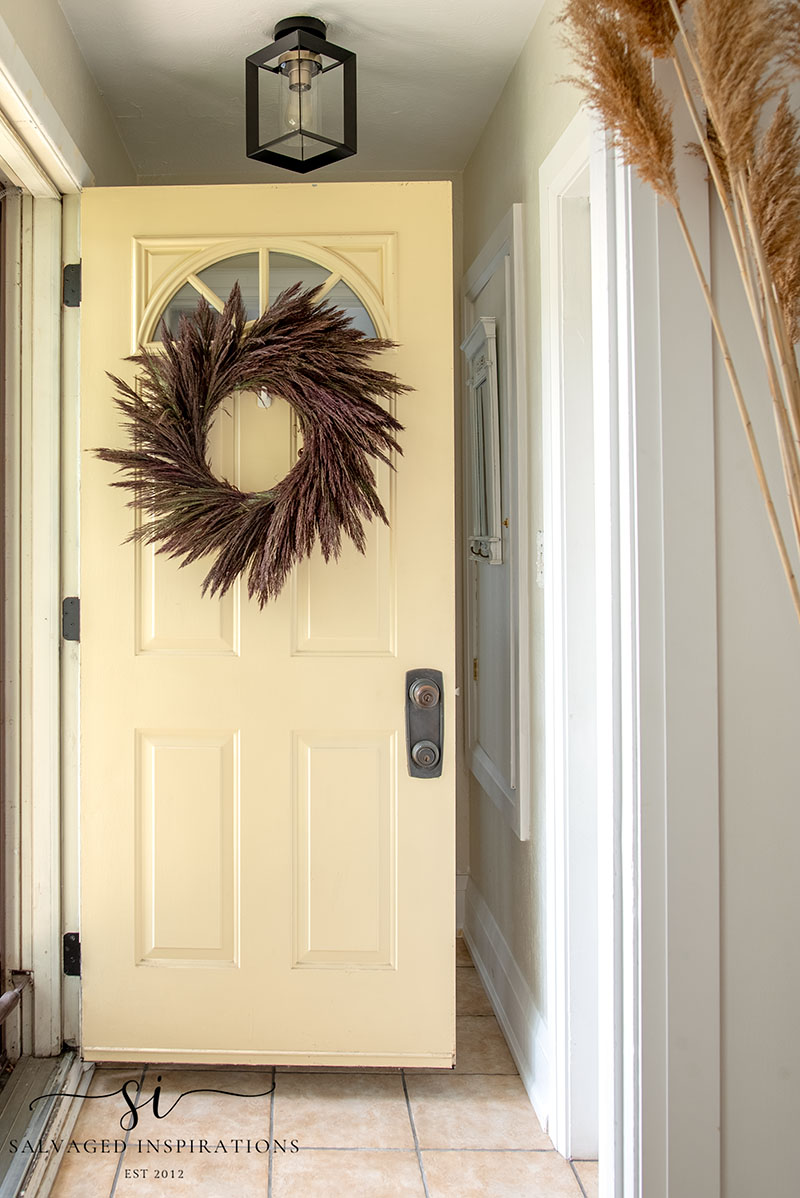
What do you think? It’s not perfect but I think I did pretty darn good on the first try!
Check out this gorgeous color when the light hits it!
I bought an Air Brush Kit for this project (I’ve ALWAYS wanted to try Airbrushing!!!) hoping I was going to airbrush some fall color onto this wreath. But I like the natural color so much, that I’ll have to wait and try out my new airbrush on another project.
YOUTUBE TUTORIAL
Here’s a step-by-step tutorial on YouTube. If you have any problems viewing it below, feel free to watch it on my YouTube channel HERE. Our #siyoutubefamily is already a community of 40.8K so don’t forget to subscribe if you haven’t done so already! So exciting, thank YOU! 🙂
And now for some Trash To Treasure FUN!
You’re going to LOVE what my creative Trash To Treasure ladies do! 🙂 Below are the BEFORE photos. Visit the links underneath to see the amazing AFTERS and learn how they did it! I’m heading over to take a peek as well! x
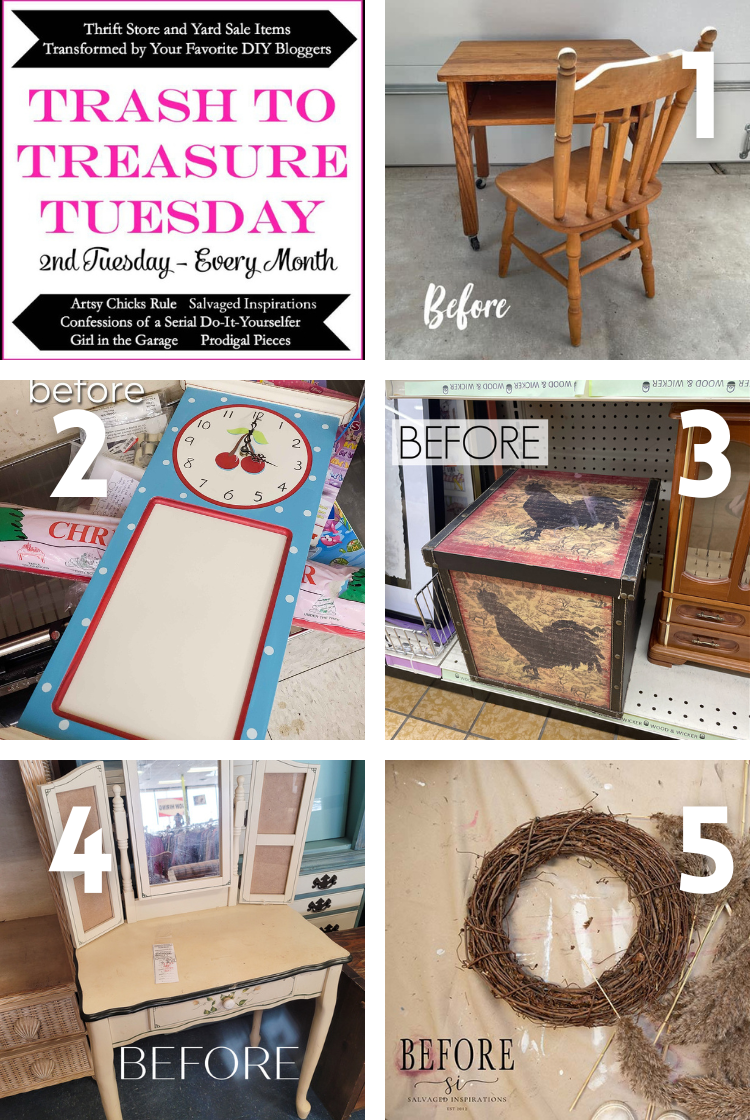
1. CONFESSIONS OF A SERIAL DIYER
2. PRODIGAL PIECES
3. GIRL IN THE GARAGE
4. ARTSY CHICKS RULE
5. SALVAGED INSPIRATIONS (HAPPY YOU’RE HERE!)
Here’s another look at this .99¢ DIY Fall Wreath made out of reeds from the side of the road. I hope it’s inspired you and given you some ideas for your projects!
***Psst, I have something exciting planned for YOU next Tuesday. I’m joining four of my blogging besties and we’re bringing you a generous giveaway sponsored by Dixie Belle Paints. I can’t wait to share all the details. See you then!
LET ME KNOW WHAT YOU THINK OF THIS MAKEOVER OR FEEL FREE TO ASK ANY QUESTIONS YOU MAY HAVE… I ALWAYS LOVE HEARING FROM YOU. IT MAKES MY DAY! 🙂
Happy painting my friends!
Denise x
RELATED POSTS::
$12 DIY ICE-SKATE WREATH
HOW TO PAINT FRENCH DOORS BLACK
REPURPOSED DESK INTO NIGHTSTANDS
HOW TO REVAMP AN OLD DESK
PAINTED SECRETARY DESK
PIN AND SHARE!

It’s beautiful
Thanks so much Denise!🤗
Hi Denise. I already left a comment when you first posted this wreath but I’ve just watched your YouTube video and had to comment again. Thanks for showing and explaining so concisely how to create a natural wreath. They are so expensive to buy and you made it practically for free!
I’m so happy you found the tutorial helpful Monique! I had a lot of fun putting it together and I have to admit I love the way it looks on my front door! Enjoy your weekend my friend. XOXO
I hve a lot of floral traing… You did a great job! It is stunning!
Ohhh thank YOOUUUUU Linda! I had a lot of fun putting it together!🤗
It’s so pretty Denise! Love it!! xo
Thanks so much Nancy! XOXO
That’s the best price on a wreath I’ve seen, and it turned out so good! I’m sure there’s a store out there selling these for like $200…. haha!
My sister sent me a text pic of a similar but smaller one selling at Michaels for $120 so for sure! Thanks so much Jen! XOXO
Gorgeous!
Thank you Mary!🤗
You’re so thrifty! FREE grass on the side of the road… now that’s the way you do it. It’s beautiful and looks great on your door. I have been searching for a neutral wreath idea. Thanks for sharing. xo 🙂
FREE is always good, right!?!😆 Thanks so much my friend. XOXO
What a beautiful addition to your door! I wouldn’t change a thing. Thanks for always inspiring us.
Aw, thanks so much Nan!!!💜
This looks beautiful on your front door Denise. Now I’m on the lookout for roadside reeds!😀
Thanks Nicki! I hope you find some because this is a really fun ‘organic’ project! XOXO
This looks amazing, Denise! What a wonderful free resource for wreaths! XOXO
Oh I know, we have them everywhere! They are great for crafts or decor. I have some in my l/r and bedroom in large vases… they look awesome! Have a super day my friend! XOXO
Hi Denise. Oh how I LOVE wreaths on the front door. You nailed it! Beautifully done project for pretty much FREE!!!!
Thanks so much Monique! I love wreaths on front doors as well! XOXO
While I know autumn is inevitable and I do enjoy the season, I’m just not in any rush to get there because the winter months after are SO LONG. 🙂 Your entry is beautiful, Denise!
So true, especially here in the Toronto area! I wish Fall and spring both lasted a little longer!🍂 thanks my friend! XOXO