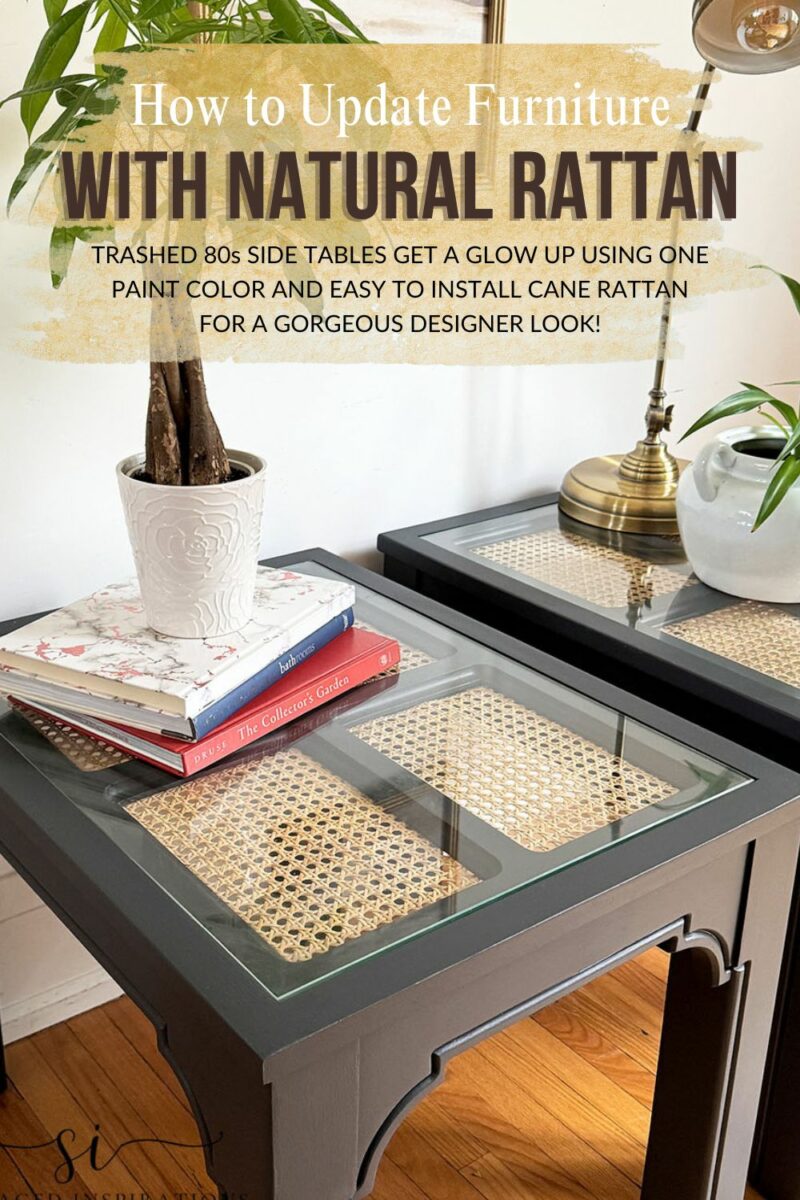
A STEP-BY-STEP TUTORIAL ON HOW I UPDATED THESE TRASHED CHINESE CHIPPENDALE END TABLES INTO A GORGEOUS DESIGNER MAKEOVER| YOUTUBE VIDEO
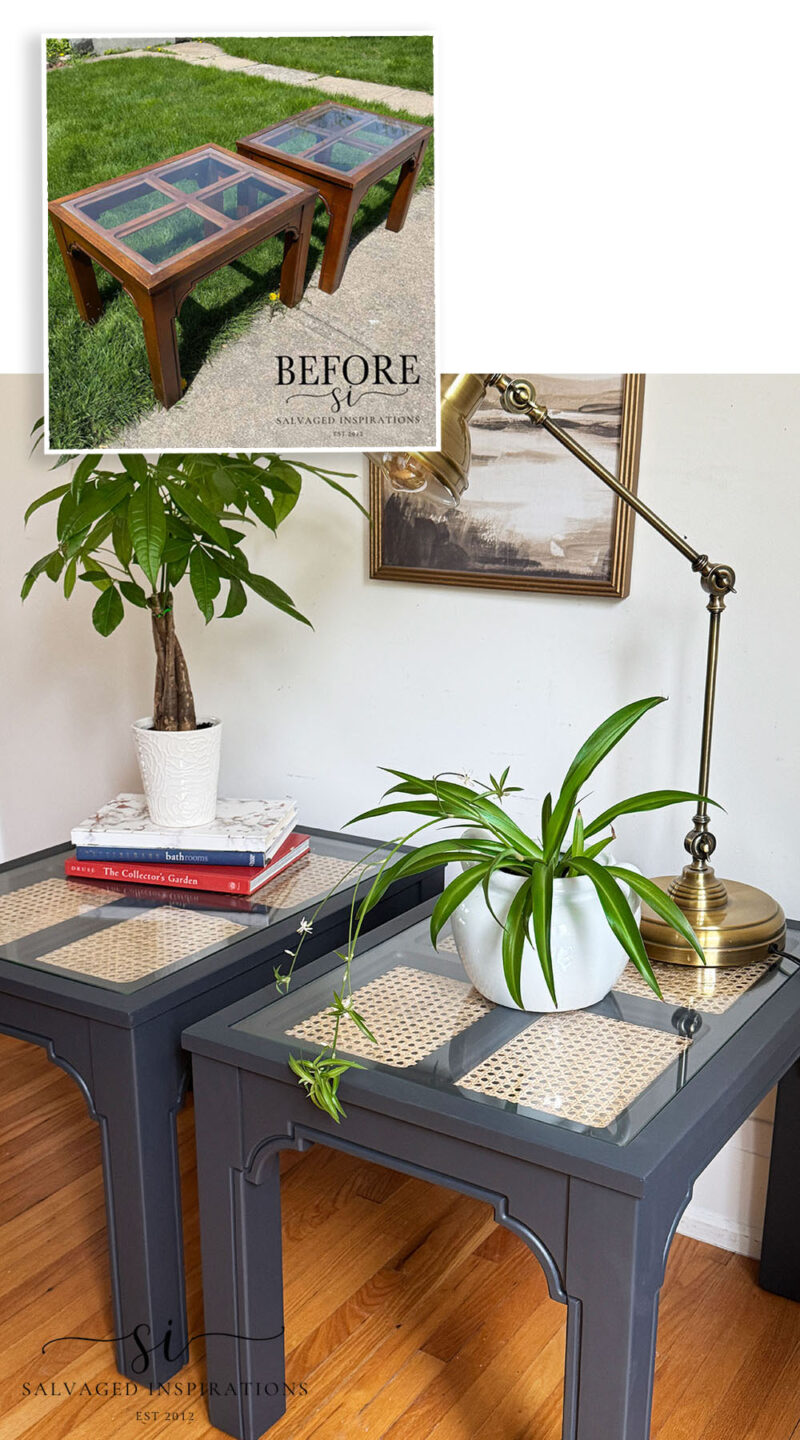
Hi, beautiful friends! Spring is in full swing here, and it feels great. I’ve started cleaning up the garden and have even mowed the lawn twice. That may not sound overly excited but after our long, freezing, cold winter, I’m so into it. I also have a sweet surprise and proof of spring for you at the end of today’s post. Aside from working outdoors, I’ve also had fun restyling and upcycling today’s salvaged find. While I was antiquing with my friend over the weekend, Terry spotted these trashed Chinese Chippendale End Tables. I put on the brakes, and we loaded them into my FUV. I can’t wait to share how I transformed them from the 80’s to designer beauties!
In today’s post, I’m also sharing –
- Why use a CLEAR primer
- A quick and easy way to update with one paint color
- How to add cane rattan to furniture
- And more!
*As an Amazon Associate, I earn from qualifying purchases. There are affiliate links in this post to other companies/products I use and love as well. You will never be charged extra when you purchase through these affiliate links. If you purchase from my links – A BIG thank you for supporting me and the #siblog! To see my full disclaimer, click here.
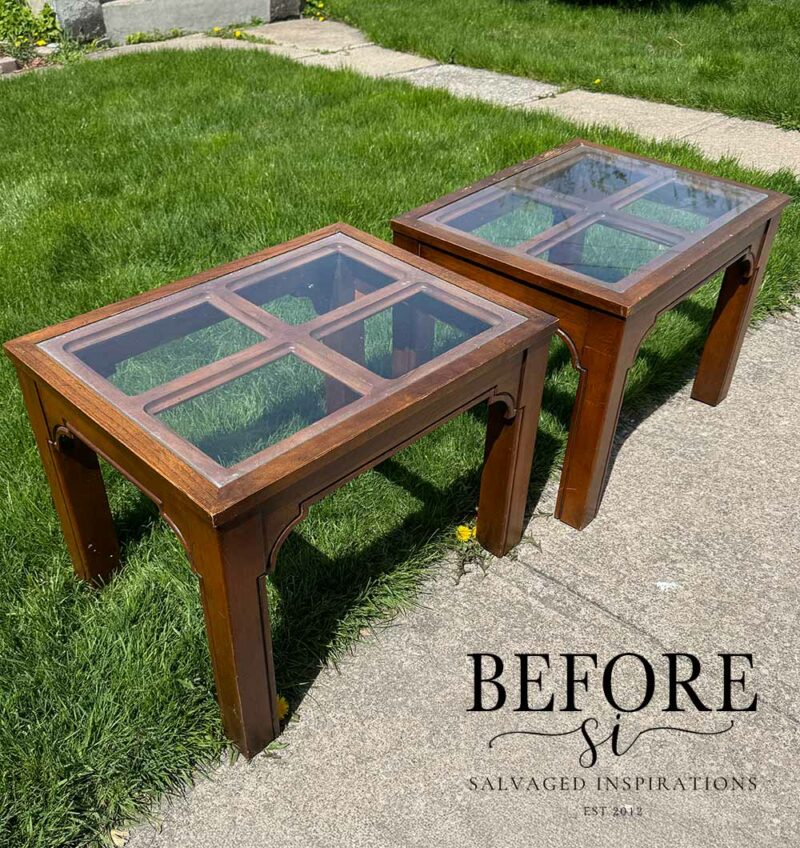
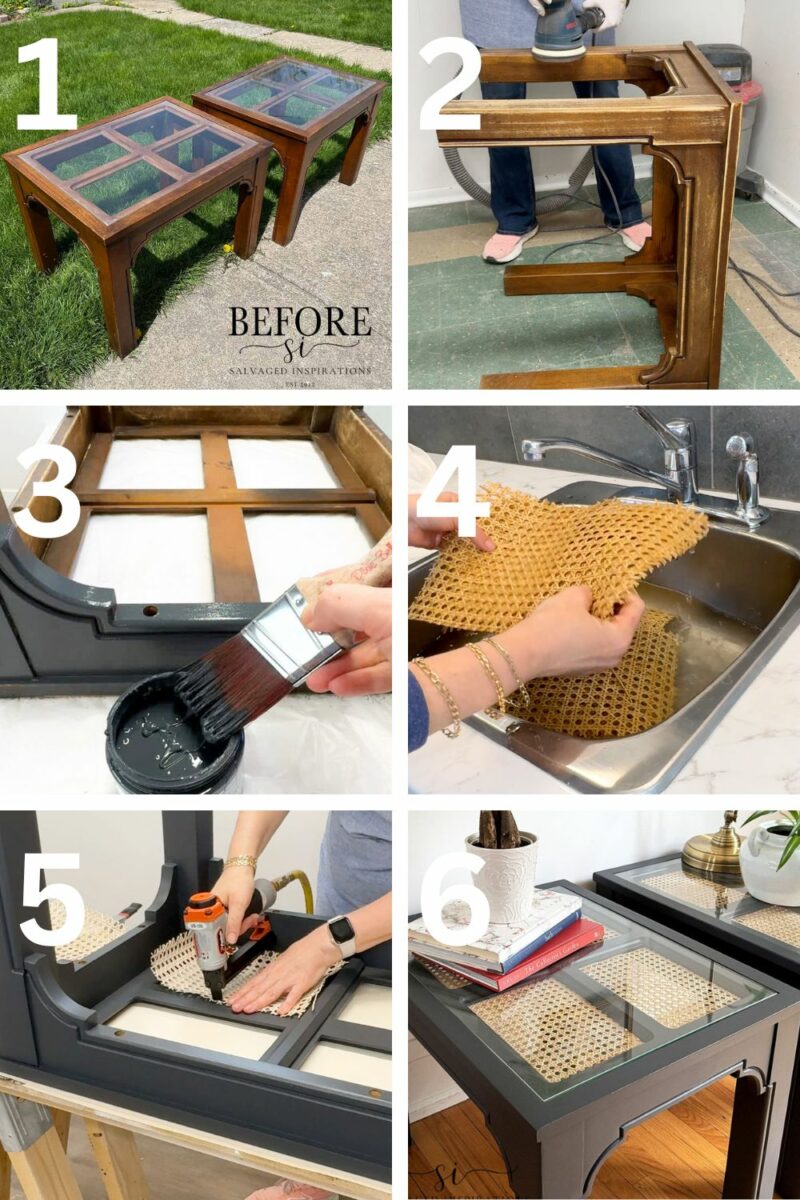
Below are the Chinese Chippendale tables we found curbside. That lattice pattern is a dead giveaway—it mimics the fretwork seen in classic Chinese-inspired Chippendale pieces. There are no markings on the back, so I’m guessing these reproduction tables might be Ethan Allen, Drexel or Basset as they were commonly made by these companies in the 1980s.
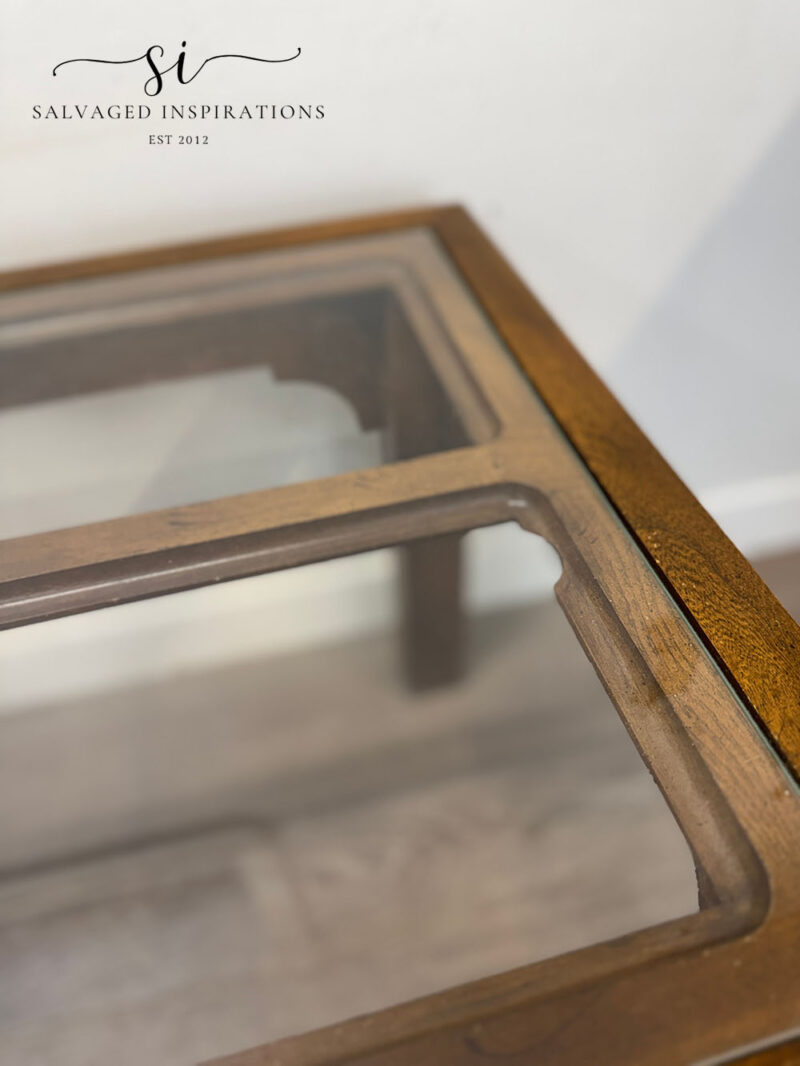
When I brought them down to my studio, it was time for a better look. The glass inset tops are a modern adaptation, as the original Chinese Chippendales were usually solid wood or marble. The glass and wood base were all in great shape. A little wear and tear, but nothing a restyle can’t take care of.
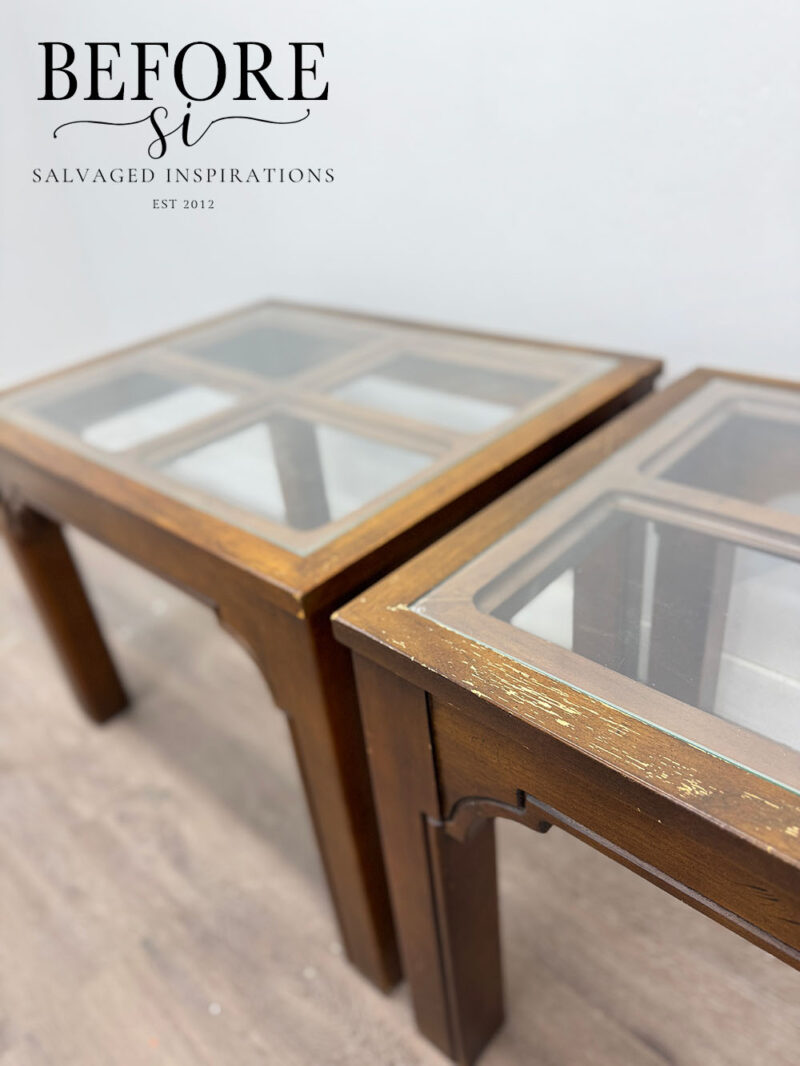
The only damage I could see was this piece of wood missing from the lip under the glass top.
THIS POST IS SPONSORED/CONTAINS AFFILIATE LINKS TO PRODUCTS I USE. YOU CAN SEE MY FULL DISCLOSURE HERE.
SUPPLIES
Chinese Chippendale End Tables – SALVAGED
White Lightning Cleaner
Auto Sponge
Sanding Sponge
Two Part Wood Epoxy
Bonding BOSS Clear Primer
2″ Angled Paint Brush
Black Sands SILK Mineral Paint
All Natural Cane Rattan (8% off as of writing)
TOOLS
Plastic Putty Knife
Bosch Orbital Sander
Pneumatic Upholstery Staple Gun
5″ Interface Sanding Sponge for Sander
CLEANING/PREP
To start preparing this piece for its makeover, I removed the glass tops and cleaned these tables with a heavy-duty furniture cleaner, and a large automotive sponge. To get the dust and dirt out of the grooves, I used a dollar store brush.

SCUFF SANDING
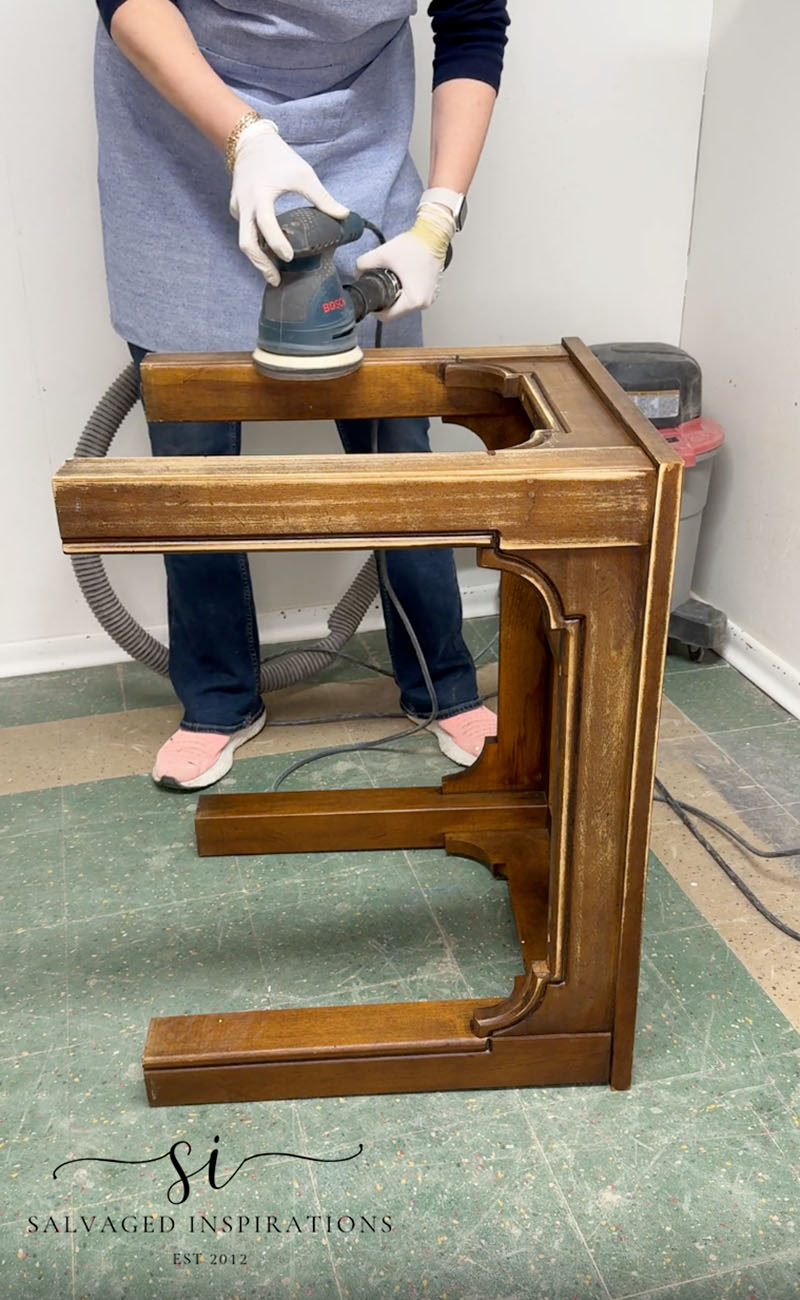
Once the tables were all clean and dry, I brought them into my sanding room for a good scuff sand. I used my Bosch Orbital Sander with a 120-grit sandpaper. I also added this sanding sponge attachment to easily get around the curves. And if you can see my NO DUST sanding set up here. It’s inexpensive and works amazing!
I’ve been asked why I clean my tables before I sand. First, I don’t like working with dirty furniture. Especially if it’s been found curbside, I like cleaning it right away. Also, I don’t want to grind or sand any oils, dirt, or grime into the wood with the sander. Thirdly, if you sand and then use water/cleaner, it opens up the wood grain. In many cases, that may be just fine, but I prefer to clean, sand, and then use a tack cloth to remove all the dust before priming.
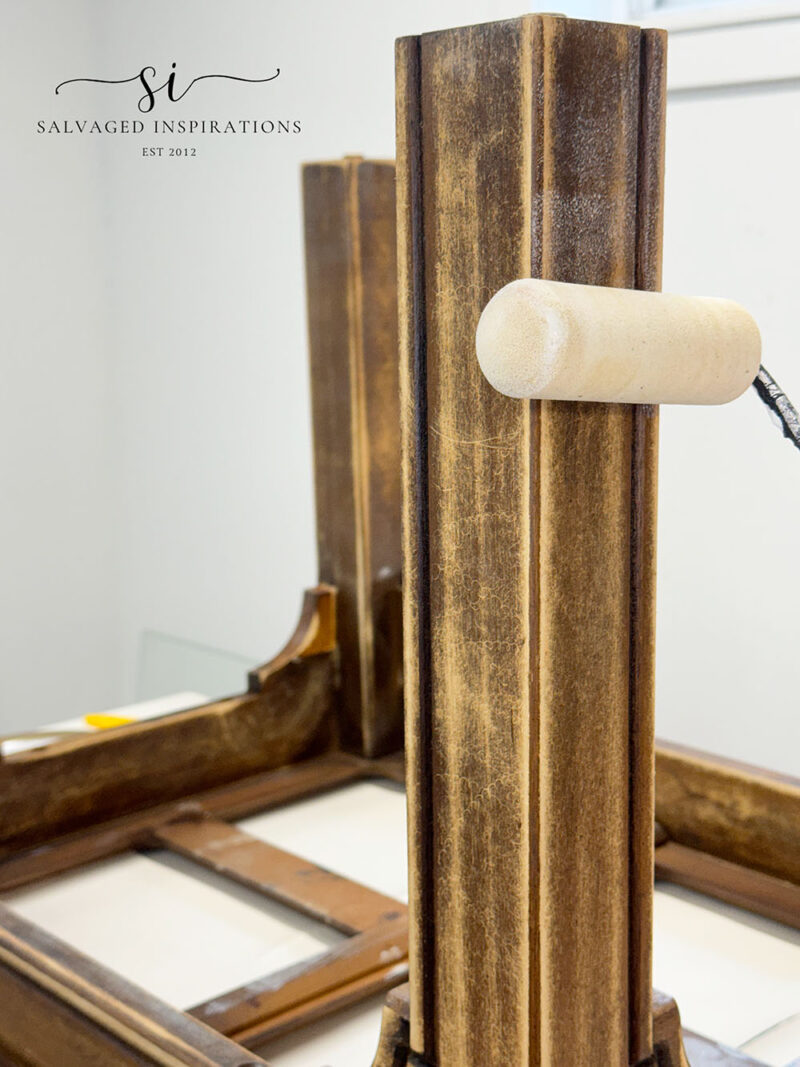
CLEAR BONDING PRIMER (WHY IT MIGHT BE A GOOD CHOICE)
I recently ordered some more stain-blocking CLEAR bonding primer. Unlike traditional white or gray primers, a clear primer seals the surface without altering the wood’s natural tone, making it a great option when you want to preserve some wood detail or avoid color distortion. Great if you do distressed or vintage finishes, where you want some original finish to peek through. And just like ‘regular’ white or gray primers, it also helps improve paint adhesion and can reduce blotchiness, odors, and bleedthrough.
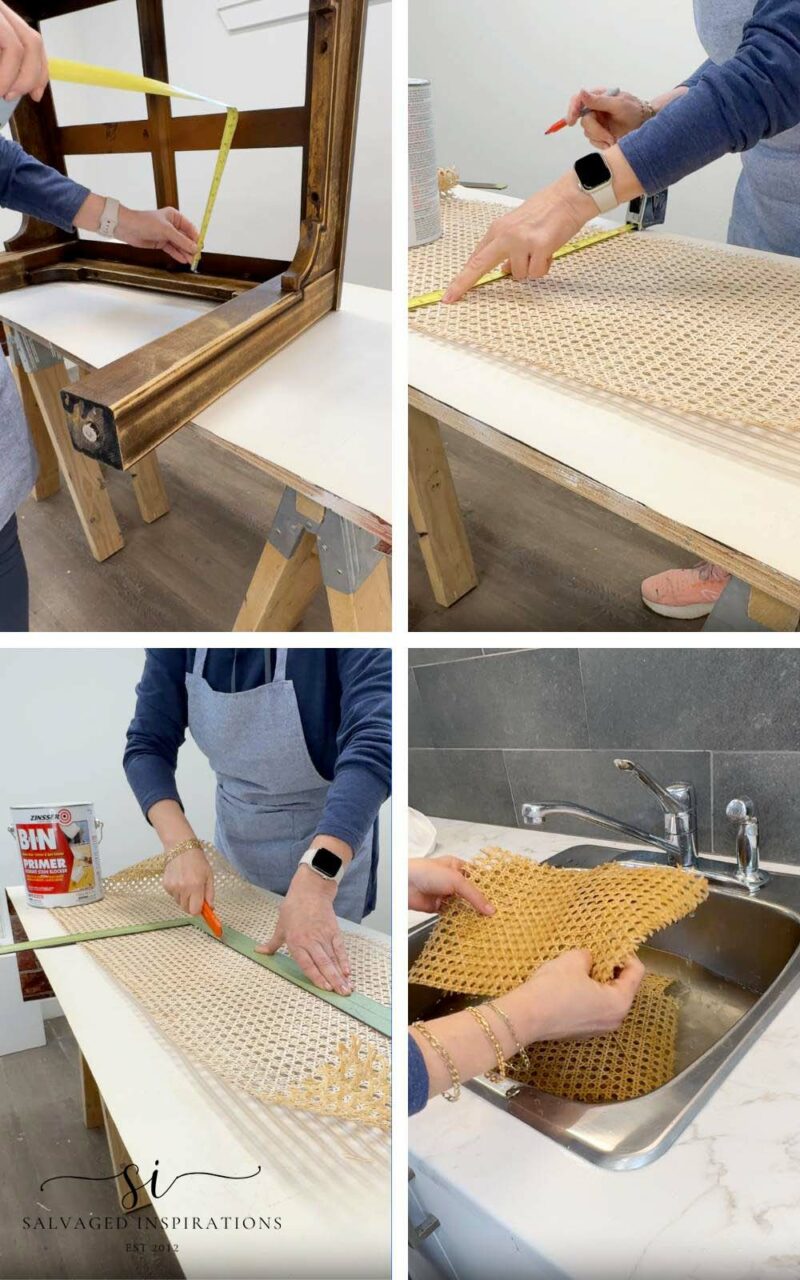
PREPPING CANE RATTAN
To prepare the cane rattan for installation, I rolled it out onto a table. It feels stiff and wants to roll back onto itself so I use two paint cans on either end to hold it down. Then using a measuring tape, I measure the length and width of the table inserts where the rattan will be installed. I transfer those measurements to the rattan and cut it using a straight edge and a box cutter. Once cut to size, I add some water to a sink and soak the rattan for a half hour. This softens it up even after it’s dried overnight. This step makes it so much easier to install.
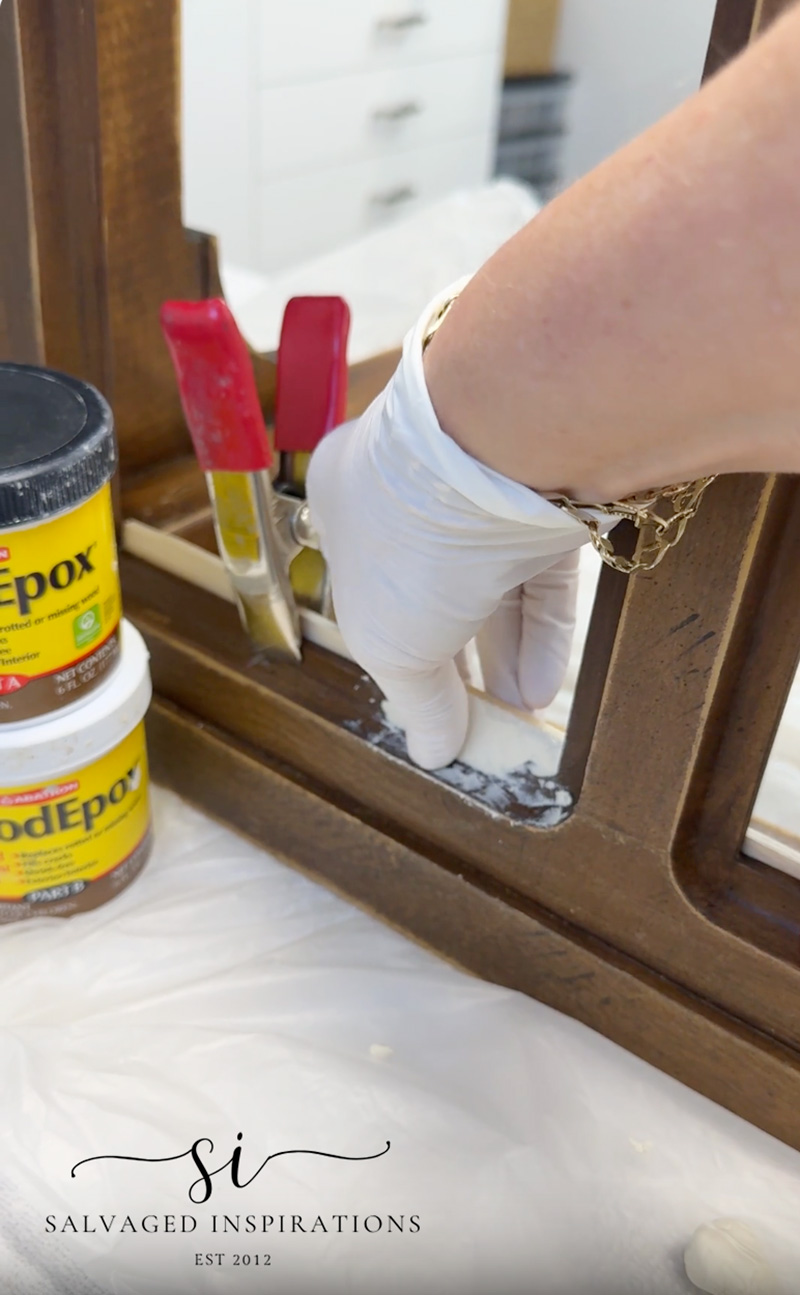
EPOXY REPAIR/FILL
To repair the missing piece of wood, I used this two-part Wood Epoxy. It’s really fun and easy to use. It reminds me of Play-Doh! I take equal amounts of parts A and B and knead them together in my hands until the color is uniform. Then I mold it to the missing area. For extra support, you can add some nails to mold the putty around. This works as a rebar or a DIY short reinforcing bar. I also used a paint stick clamped to the back of the table to get a smooth, straight finish. This WoodEpox is very maleable, so it molds to curves easily.
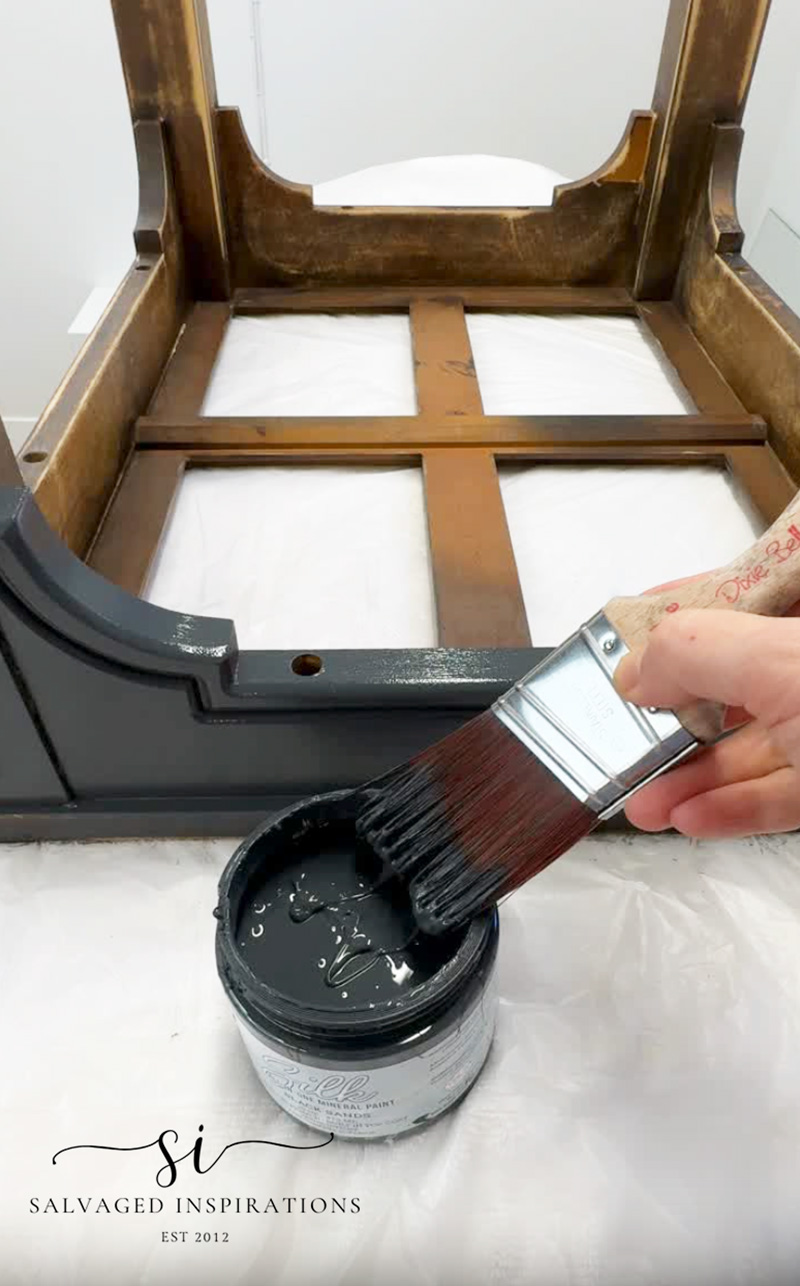
PAINTING BLACK SANDS
Now for the fun part – paint! I was originally going to use Coffee Bean – a gorgeous brown black, but then changed my mind to Black Sands SILK All-In-One Mineral Paint. This is a classic soft black. I painted two coats for full coverage. This paint can be sprayed on OR brushed on. It self-levels beautifully. The primer and topcoat are included, so it’s a huge time saver as well.
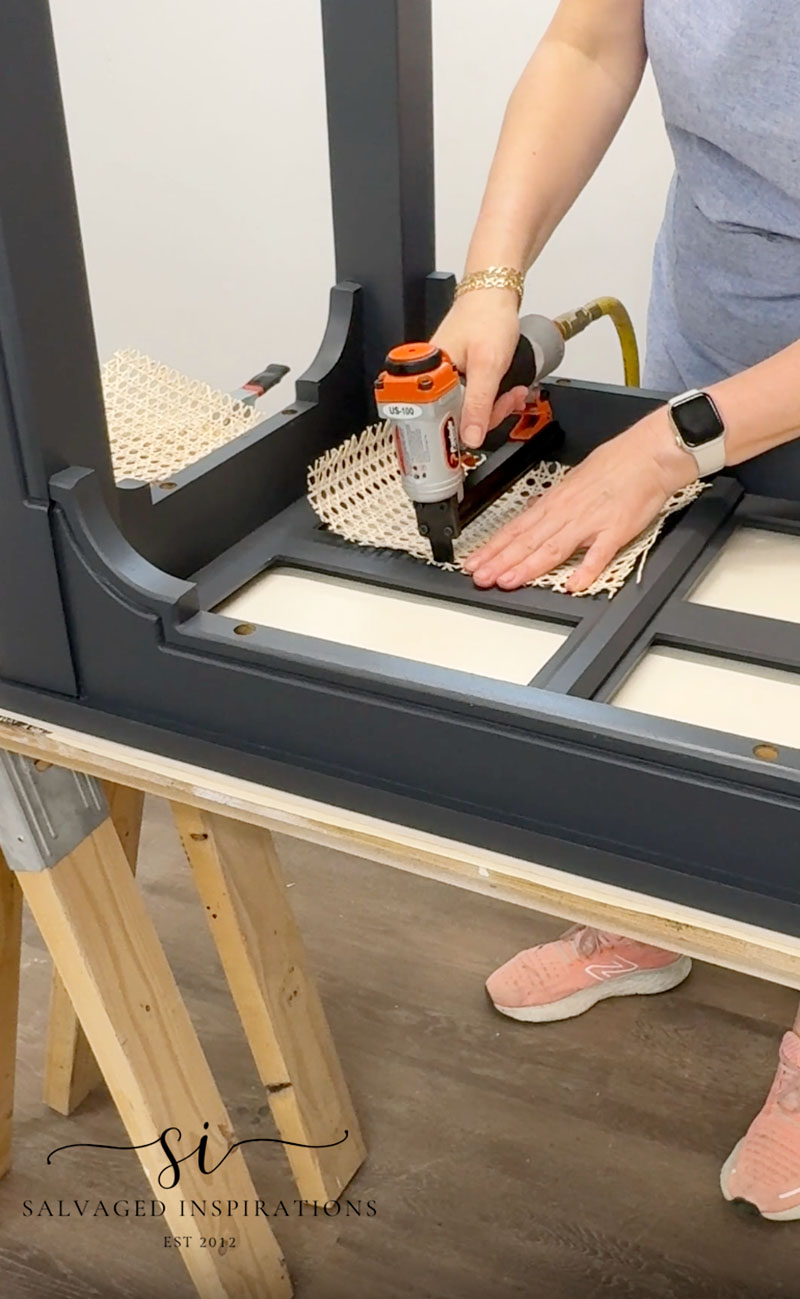
INSTALLING CANE RATTAN + GLASS
Once I had brushed on two coats of paint and let everything dry overnight, I came back the next morning to install the cane rattan onto these tables. I like using a pneumatic upholster gun, but if you have a manual stapler, that will work just as well. To install, I placed the (previously cut and soaked cane) squares onto the back with the front side facing down. I like to use one staple on each side, stretching the rattan out before I staple it all in. I’m sharing the full demo for you in the YouTube tutorial at the end of this post.
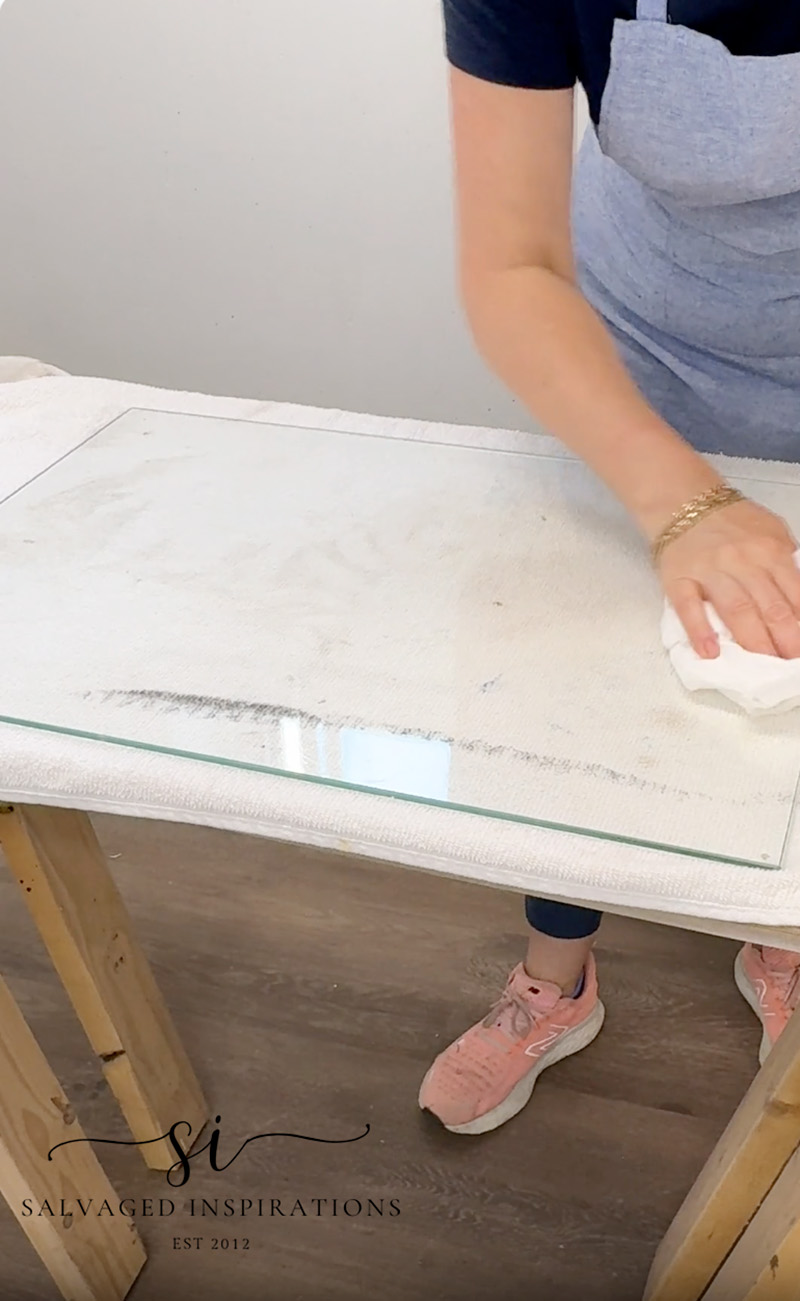
As I mentioned, the Silk All-In-One paint includes the topcoat; no spray finish was required. The last step was to clean the two glass inserts with some window cleaner and put them back onto the end tables.
PIN AND SHARE 🤗
STEP-BY-STEP END TABLE MAKEOVERS
THE BIG REVEAL…
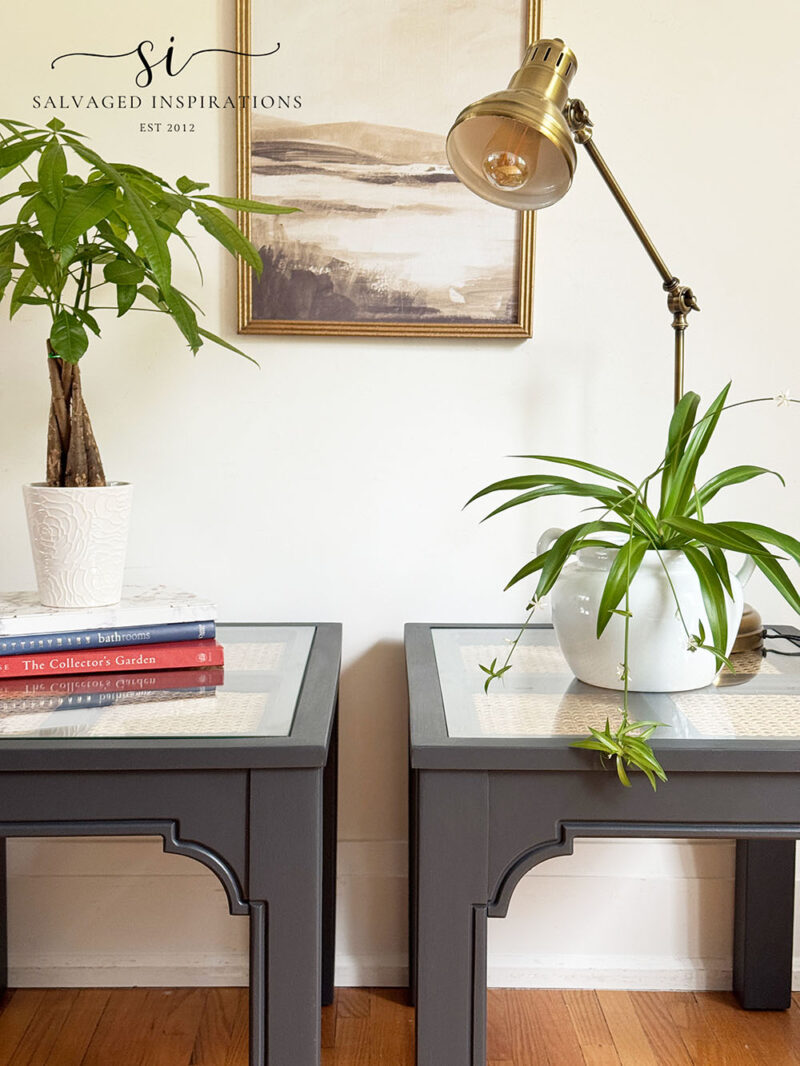
Here’s the finished look! What do you think?!
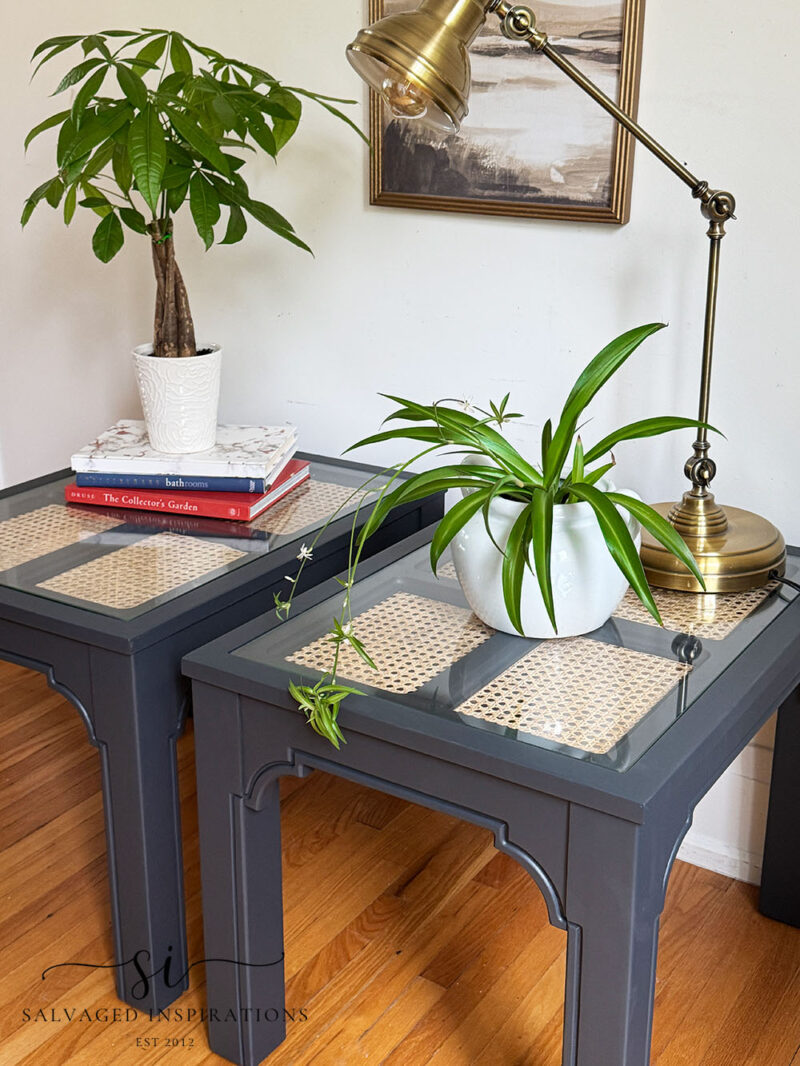
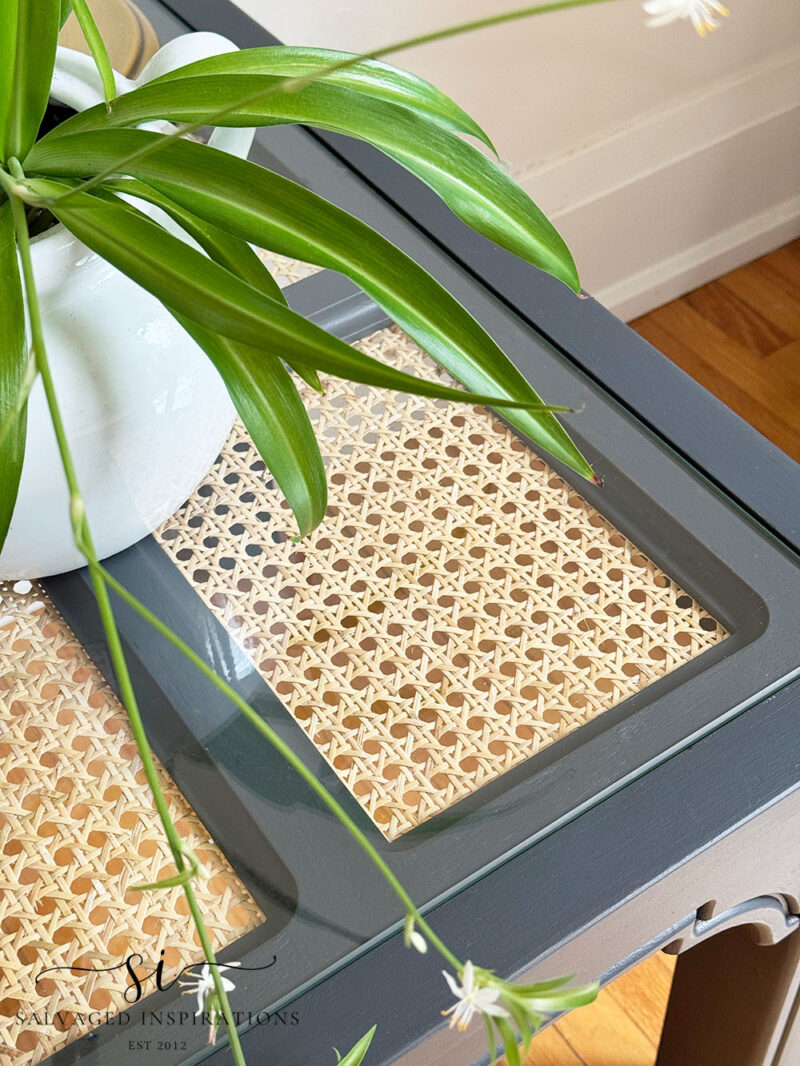
I love the contrast between the natural rattan and soft black finish!
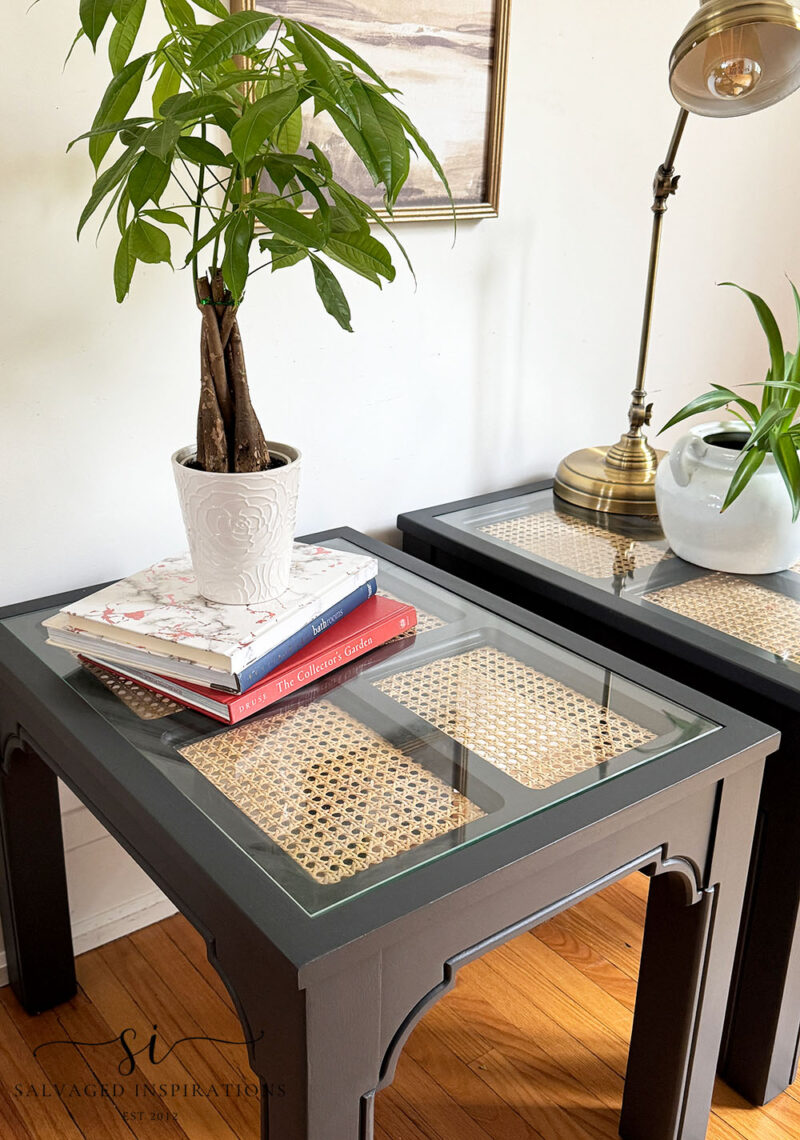
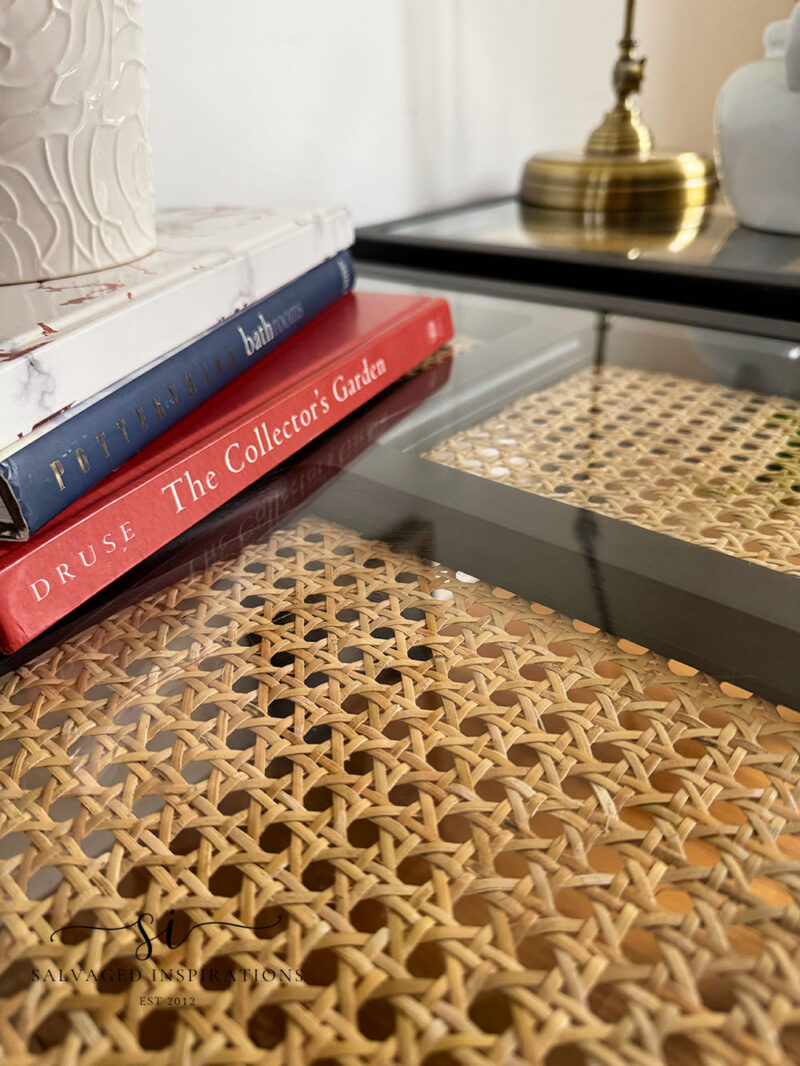
The pattern and texture of this natural cane is absolutely beautiful.
YOUTUBE TUTORIAL
Here’s the full step-by-step YouTube video tutorial for you. Our #siyoutubefamily is already a community of 58K, so don’t forget to subscribe if you haven’t done so already. You’re the BEST, and I appreciate your support! 🙂
Here’s another look at these Chinese Chippendale Rattan Tables before and after. I hope it’s inspired you and given you some ideas for your upcoming furniture painting projects!
These trashed tables went from heading to our landfill to being stylish and very usable. Thank you so much for being here and for following along. If you have a question or want to say hello, I’d love to hear from you below — you always brighten my day!
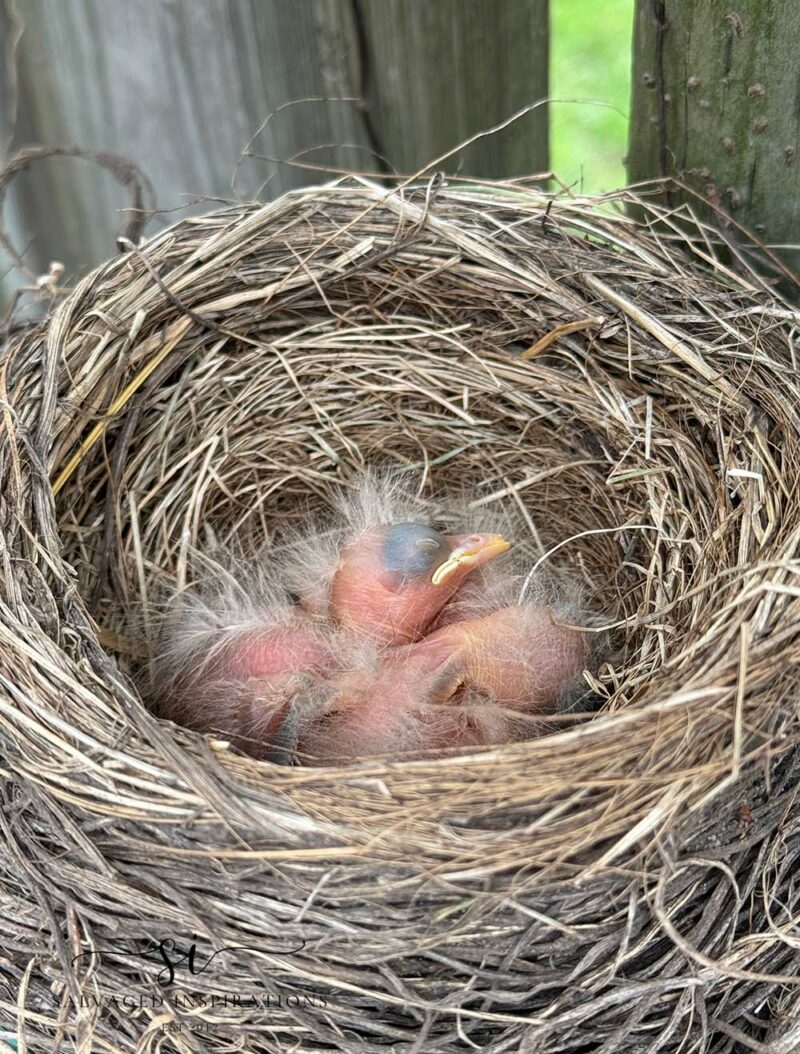
And I can’t forget to share this sweetness with you. When I went to do some spring cleaning at the side of my garage, I found a nest with three blue robin eggs on a ladder. This ladder is hanging on my side fence at about 4-5 feet above the ground. It’s such an odd place for a bird to make a nest when I have trees and bushes all over my property.
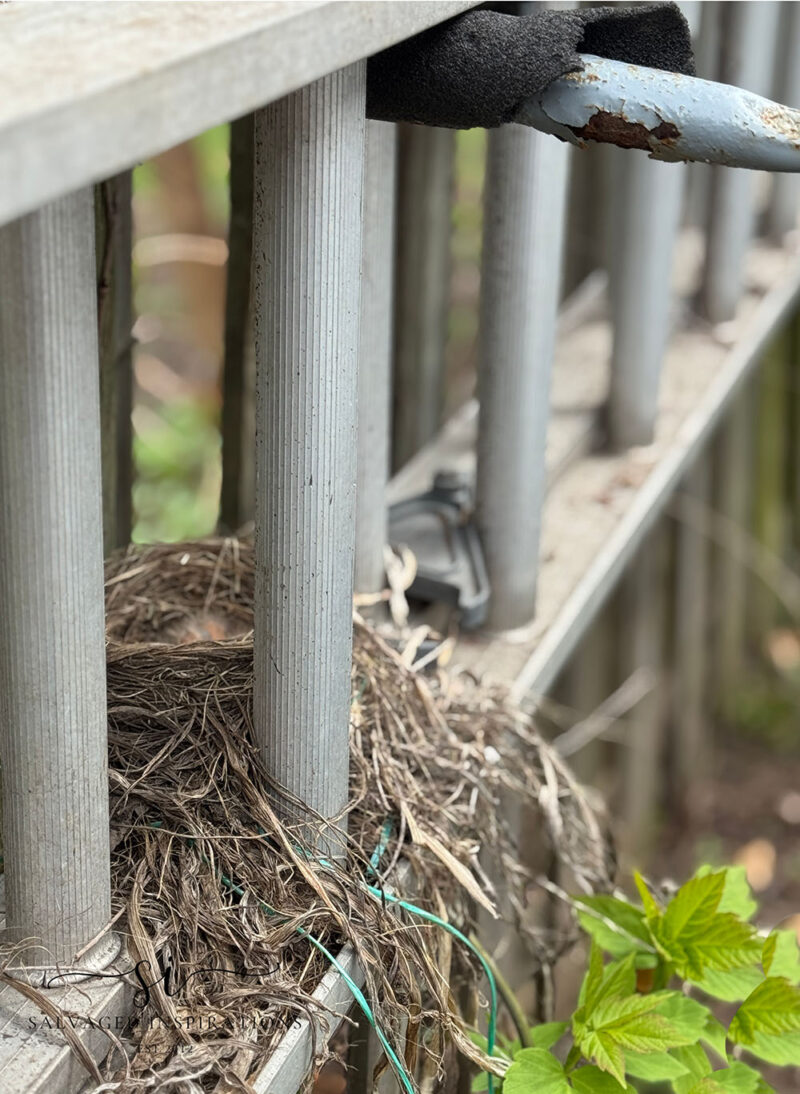
But so far so good. They JUST hatched, and all three are doing well! 😃
Happy painting, sweet friends! 💙
Denise x
RELATED POSTS:
1970s DRUM TABLE MAKEOVER
DIY WEATHERED WOOD DRESSER | TAKE #1
HOW TO STAIN WICKER
VINTAGE ROSE DRESSER MAKEOVER
NATURAL RATTAN THRIFT TABLES
PIN AND SHARE! 🤗

So elegant and classy now and – oh my goodness – those baby robins!! I hate to say that they stole the show, lol. Thank you for sharing!
Thanks and I totally agree, those 3 cuties definitely steal the show.💙 Mother nature is the best!! Enjoy your week. XOXO
Amazing re do. Love the black. The rattan turns them up a notch. Beautiful job as usual.
Aw, thank you so much Margaret, appreciate it and so glad you like the ‘new’ restyled set of tables! XOXO
Great job with all the work that entailed. The rattan really added to it. And those baby birdies! Too cute!
Thanks my friend, these tables were a great find! And yessss, they are too sweet! Have an amazing weekend. XOXO
These tables turned out amazing thanks to your vision! The rattan, paired with the black leveled them up beautifully! The baby birds are adorable, thanks for sharing!
Hi Nicki and thank you! I enjoyed working on these even though my vision changed half way through, lol. I’m happy I ended up going with the black as well. And yes, the baby birds are soooo adorable! Enjoy your weekend my friend. XOXO
Hi Denise. These end tables turned out beautifully. Adding the rattan was genius. I had no idea wetting rattan softened it up and made it easier to work with. On a side note, your new little bird friends are precious:)
Hi Monique!😊 yes, soaking the rattan makes a HUGE difference. You can soak it before you cut as well. Thanks so much and ya, I think my new little friends are precious as well! Have a wonderful week! XOXO
I love this combination you used. It really looks good together. Love the baby birds. 🥰
Hi Tammy!😀 Thank you – you can’t go wrong with a classic black, right?! Happy you enjoyed the baby birds as well. I peeked in on them today and they are growing so fast!
That was a lucky find and you made the tables look fantastic! I love that shade of black – very sophisticated and the contrast with the rattan is lovely. Enjoyed the baby birds too, thanks for sharing.
It was a lucky find and I really enjoyed ‘playing’ with this set. And I’m with you Marion – I love this soft shade of black as well! Classic. You can’t go wrong. Thanks so much Marion and glad you enjoyed the baby birds. Have a wonderful week! XOXO
Nice recoup, Denise! I wouldn’t have ever thought of that use for caning. I’ve worked with caning on a chair (ugh!), and I know you’ve used it on small doors, but this is unique. You are amazing!!! I also pinned.
It must’ve been a young mama bird to choose such a strange place for her nest. But those little fuzzy faces are just adorable.
The cane/rattan can be a challenge to work with so kudos to you for taking on a chair. I don’t think I’d be that brave but I’ll bet it looked fabulous once you refinished it! And yes those fuzzy faces are so adorable. I hope all three do really well in their new (oddly placed) home. I have to admit, it’s kind of fun taking a quick peek at them everyday. I wait until mama bird is gathering worms so I don’t disrupt the routine/caregiving.😊 Have a great week and thanks so much for the PIN Catherine!💙
That was quite a roadside find and they now look amazing. Do you have Canadian links for the sanding sponge attachment and the attachment for dustless sanding? I would be interested in purchasing these. By the way, thanks for sharing your baby robins. They are so cute.
Hi Jaye and thank you. I love these types of roadside finds/makeovers. Here’s the Canadian link for these Sanding Sponges For Orbital Sander. And heres the link to the dustless sanding adapter, but you’d have to measure your sander/shopvac to get the right fit. Hope this helps. When you click on one of my links Amazon is supposed to recognize the country and send readers to the appropiate site, but it doesn’t always work 😕 so I appreciate you reaching out and asking. Have a great week!💙 … and ya, I’m watching the mummy bird collect worms right now b/c its a rain day – so sweet!
Thanks for sharing. Both the tables and the nestlings. The face only a mother could love.
Yes, they are kind of ugly-cute! … the baby birds… not my tables!😂
Thank you for saving these tables! The black looks clean and soft and the rattan gives these tables a fresh new life. Great job! Awe, Spring time birdies 💚
Thanks so much Jewels and yessss, aren’t they sweet!? I’m looking forward to checking in on them every few days.💛😄💛
Black and rattan is a beautiful combination and these tables turned out lovely. Curious 🧐 How did you get those in your FUV? Something tells me you’ve done this before. 😆 I’ve had some pretty hilarious furniture rescues over the years. Pinned 📌 Thanks for sharing. Enjoy the rest of your week. xo 🙂 😘
Ya, it’s not my first rodeo…!😆 Thanks for the chuckle and the PIN my friend. Wishing you a fabulous week as well. XOXO