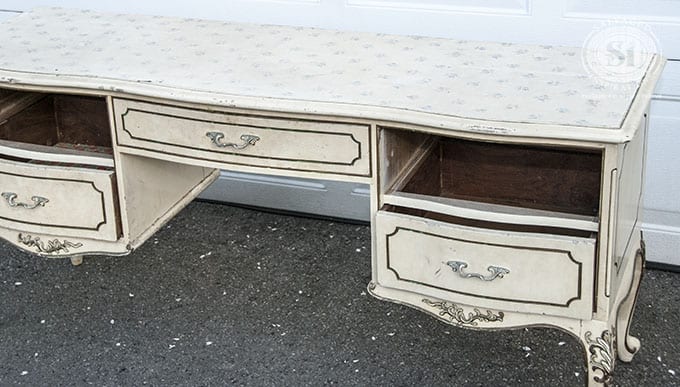
Hi friends! Today I’m sharing How to Remove Contact Paper in Minutes – literally minutes! Here’s a quick look at the salvaged piece I was having trouble with.
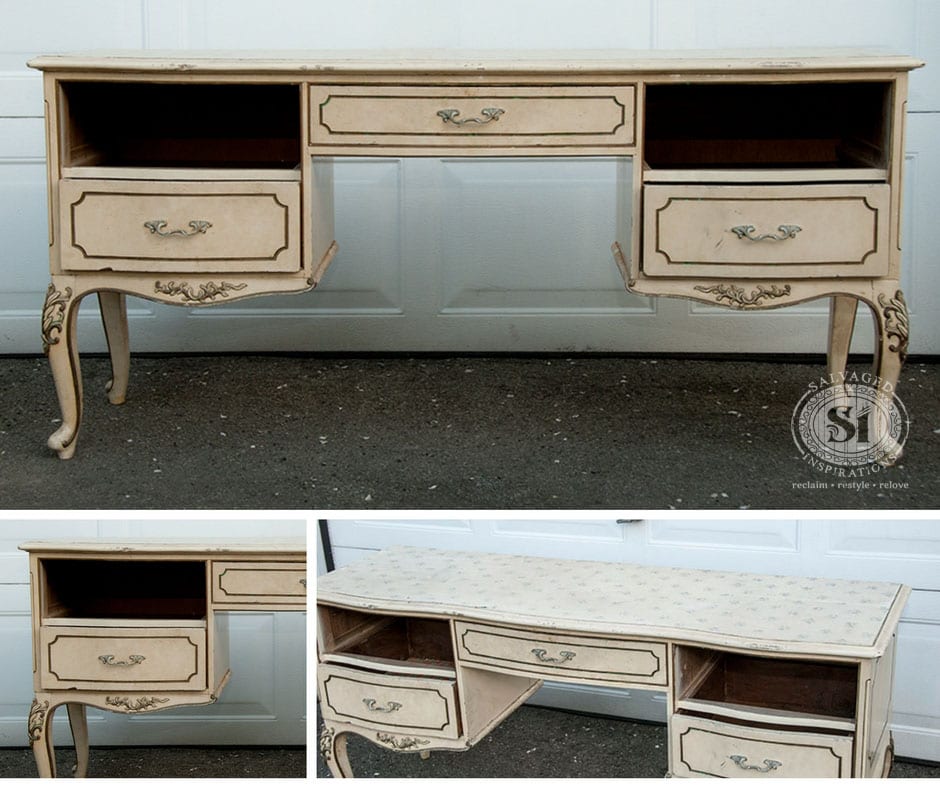
Last week, I posted this beautiful french provincial desk on Facebook. MMM brought it home after picking it up from a side street in Toronto’s west end. It’s such a gorgeous desk with solid wood construction, beautiful bones and detail. What a great find!
One of the things that needed to be removed before painting was the old contact paper adhered to the top. When I tried to peel this sticky stuff off, it was like trying to peel off my own skin – not happening. For those of you who have worked on older furniture, you already know, the longer contact paper has been adhered, the more fused to the surface it becomes.
As a side note, it does touch my heart that someone loved this desk enough to take the time to do this. I imagine this decorative paper was thoughtfully purchased to match the manufacturer’s finish and then lovingly applied to hide the chips and scratches. I guess it warms my heart because it reminds me of my Mum. She always lined our drawers and cupboards in colorful florals. The pretty paper symbolized a sense of pride and care for our furniture and home.
So, let’s get back to giving new life to these old treasured pieces. {big smile}
As mentioned above, if you’ve ever tried removing old contact paper, it can be a pain in the you-know-what. This is my new favorite tool…

 I’d only heard good things about heat guns and how handy they can be. Until now, I’ve been improvising with an old hairdryer. A hairdryer works well for tasks like removing veneer and contact paper, but can take a longer time due to limited heat capacity.
I picked up this super cheap heat gun for under $20. For that price, I figured I’d give it a try to see if it lived up to everyone’s rave reviews… and it does! If an inexpensive one like this works so well, I can only imagine what a heavy duty one can do! The time and effort this heat gun saved me is amazing! If you’ve been on the fence about getting one, like I was, it’s well worth it in my opinion.
The entire top took me all of 5 minutes to peel off!
On the highest setting, it burned the paper and stripped the paint right off. When I lowered the setting and focused on 1ft squares, it released the adhesive for easy removal. I was really surprised at how fast the contact paper peeled off, especially after the struggle I had with it earlier. 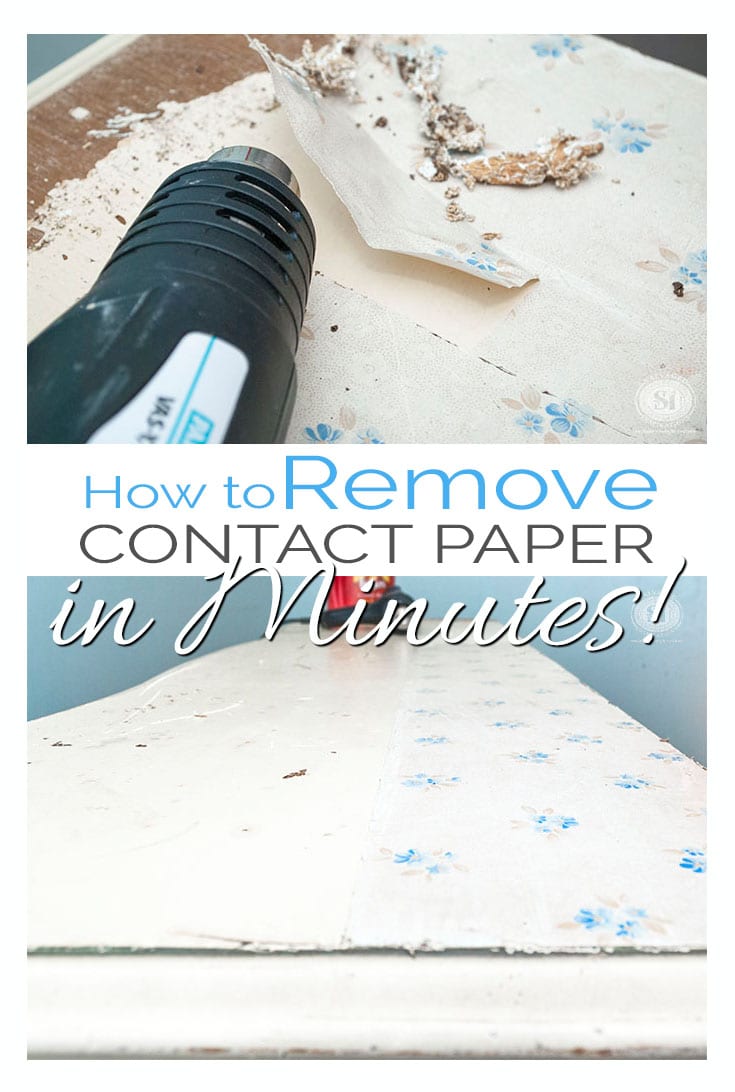 I’m still working on this desk but be sure to check back in next week to see the new look. 🙂
I always love hearing from you so chime in with any thoughts or tips on how to remove old contact paper.
Have a great day and happy painting friends!
Denise x
_____________________________

I’m so glad I felt inspired to google what to do because my fingers were hurting. This saved us hours on our last 2 shelves. We’re renovating an old church where we run a non-profit community theatre.
I’m so glad this helped you out and saved you some time Matt! 🙂
When you remove the contact paper with the heat gun, does it leave sticky residue behind? If so, what is the best way to clean that off? Mineral spirits, vinegar?
Hi Jennifer! No, it didn’t really leave any sticky residue (that I noticed) but I did sand it down right after. Mineral spirits would definitely do the trick though. 🙂
I am redoing a chair that had mod podge flowers adhered at least 25 years ago any ideas on how to get it off? I will say I was stripping a rocker and thought hey I will try it on the other. It kinda worked, but other then making a sticky glue mess on a bit of paper came off.
Hi Tracy. I would try wetting a bath towel and then ringing out the excess water and lying this damp towel on the decoupage and let it sit. For a few hours if need be. Then take a scraper and scrape off the flowers. If that doesn’t work, wall paper remover spray may do the trick. And sanding is full proof if you’re going to refinish the piece anyway. Hope this helps. 🙂
Hi, Denise
Is it really works or save way? I mean to say that is it not may damage to the furniture.
Regard
John Smith
Hi John! This really works amazing but it would damage the wood (burn it) if I was to hold it in one spot for too long. When working with any type of tool, it’s good to be extra cautious (read the manual/instructions!) and work safely.
Hi Denise. I always love reading your informative blogs and learning new painting tips and tricks. I especially appreciate the way you never “put down” someone else’s handiwork on an old piece of furniture you are about to re-style. You are always very sensitive and understanding of how styles change. It’s clear that you respect the former life your furniture had. Your blog is a pleasure to read and follow!
This is a huge compliment… thanks Monique! And if I haven’t said so before, I appreciate you taking time out of your busy day to stop by – you always put a smile on my face. 🙂
Amen…..couldn’t agree more. Have a blessed day. 😀
Thanks Sandy and you as well! XOXO
Thank you for this useful and time-saving tip for removing contact paper. When I am out buying things at auctions to put in my shop, I often find drawers that have contact paper on the bottom inside and this is will be a big help to me. Note: I find often that the bottom of the drawer is cracked under the contact paper and may have been used to hold the bottom together. It is an easy fix to put a new bottom in a drawer, but for any of us who don’t care to go to that trouble, if you see contact paper in drawers, turn them over to see if the bottom board can be repaired or needs to be replaced.
Ginene
This is a great tip Ginene…thank you! x
I have three French Provencial pieces that are not made with wood tops – more like a laminate top. Customer wants the tops only dark stained like wood and rest of each piece (sides, front, legs, etc.) painted with chalk paint. HOW CAN I DO THE TOP TO LOOK LIKE DARK NATURAL WOOD??
I have lots of Annie Sloan Chalk Paint and stains in my stock. I just need to learn the technique. Thanks.
Hi Alice! Faux wood can be achieved with glaze and a wood graining tool. I’ve never tried this technique but I’d like to! If you give it a go – I’d love to hear your results. Here’s a vid tutorial that may help you out.
Your description of the previous owner’s handiwork was lovely and thoughtful. I’m looking forward to the final project.
Thanks Patricia… still working away on it but it’s looking good. Enjoy your weekend. 🙂
Hi Denise! Great to find a fellow Torontonian who blogs! I quite enjoy learning all of the amazing tips that all my favorite bloggers have to offer. I have a heat gun but would never think to use it to remove contact paper! I’m thrilled as I swear the previous owner of my current home must have been a Contact Paper Ninja! It’s everywhere!! So thanks for the info – I need all the help I can get!
…a contact paper ninja…LOL! Well, bust out your heat gun Sandy because you’re going to be a contact paper REMOVER NINJA! 😉
Great find and great idea…. Slightly off topic but while it’s on my mind…once dresser is finished in chalk paint, can it be aged/distressed using Polycrylic?…. And if so do you have a tutorial for this…. I’m a bit averse to wax/dark wax and would prefer to use something like Polyvine?
For sure David. I’ve never used Polyvine (so unfortunately don’t have tutorial for you) but I’ve heard rave reviews. This wax like varnish does come in various colors so you could use this to antique/age your finished chalk painted piece.
Hi Denise. That’s a great tip. I STILL think it’s amusing it’s called Contact PAPER when
it is really plastic. Except for one wall in my old kitchen, I reserved Contact Paper to cover boxes and books. When I took the old Contact Paper off, the drywall came with it.
Does the heat gun work like that on wallpaper?
Phyllisa
Good point Phyllisa…contact plastic would be more appropriate! And yes, a heat gun will work on removing wallpaper or pretty much anything with a stuck on adhesive. These guns get super hot though…so caution should be taken not to burn the paper… or yourself. Like I mentioned, when I had mine on high and kept it in one place for a few extra seconds, this plastic started smoking and burning and the paint underneath started bubbling off.
Hi Denise, would you happen to know how to paint and update kitchen cabinets that are like a thick laminate? Are there special primers and paint etc.? Thank you, love your blog.
Hi Maggie! Yes, you can buy primer and paint that is specific to laminate and tile. Zinnser, Kilz, Glidden, White Knight, Sherwin Williams…many name brands to pick from. Great project btw! 🙂
Super tip Denise! I never would have thought to use a heat gun. Hmmm… I’m saving this tip for sure! 🙂 Beeeeuteeeful desk! 🙂
Thanks Christina! I was cursing like a trucker trying to get this contact paper off at first… so this tool saved the day. 😉
I think I need a heat gun, if I can use them to take price stickers off. It takes forever to get them off!
Thanks for the tip. I like your project piece.
Hi June! Sticker frustration… I hear ya..lol. If you don’t have a heat gun, try using a blowdryer for price tags/store stickers. 🙂
Thanks for sharing. Your work is genius!
Thanks so much Jessie 🙂
Thanks for taking the time to post a great tip. What comes as natural for some of us, isn’t natural for all of us.
For sure… I wish I was a natural at a lot more things…LOL. 😉 Have a great day my friend! x