Last week I transformed a horrible looking writing desk in Part 2 of my Road-Rescue Series. Today I’m going to show you exactly how I repaired the top by sharing some easy tips on how to remove veneer.
Although it looks like a big job, with these quick tips, removing veneer is not as hard as you might think.

A little 101 on the topic… a lot of furniture is veneered. And just because the veneer is peeling, scratched or damaged doesn’t mean the furniture can’t be salvaged and re-styled to be beautiful again.
If the veneer is in fairly good shape with just some minor flaws; uplifted areas can be glued back down, gaps and cracks in the veneer can be filled in with wood filler, and scratches can be sanded out… just don’t sand through the veneer like I did on a previous project!
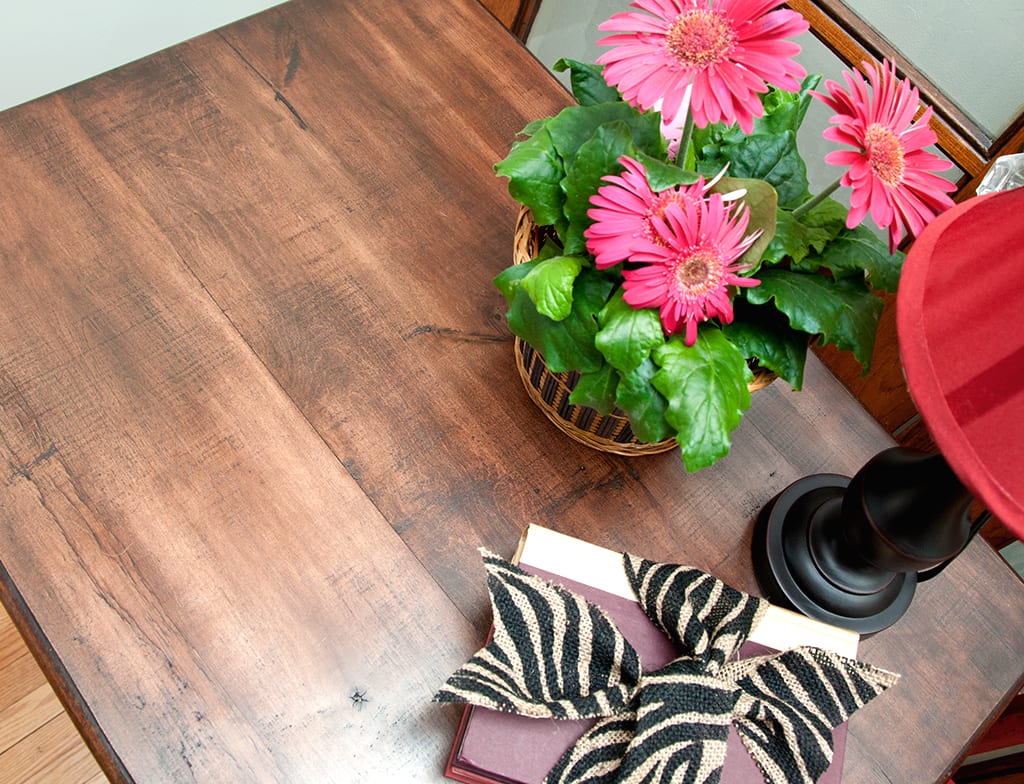
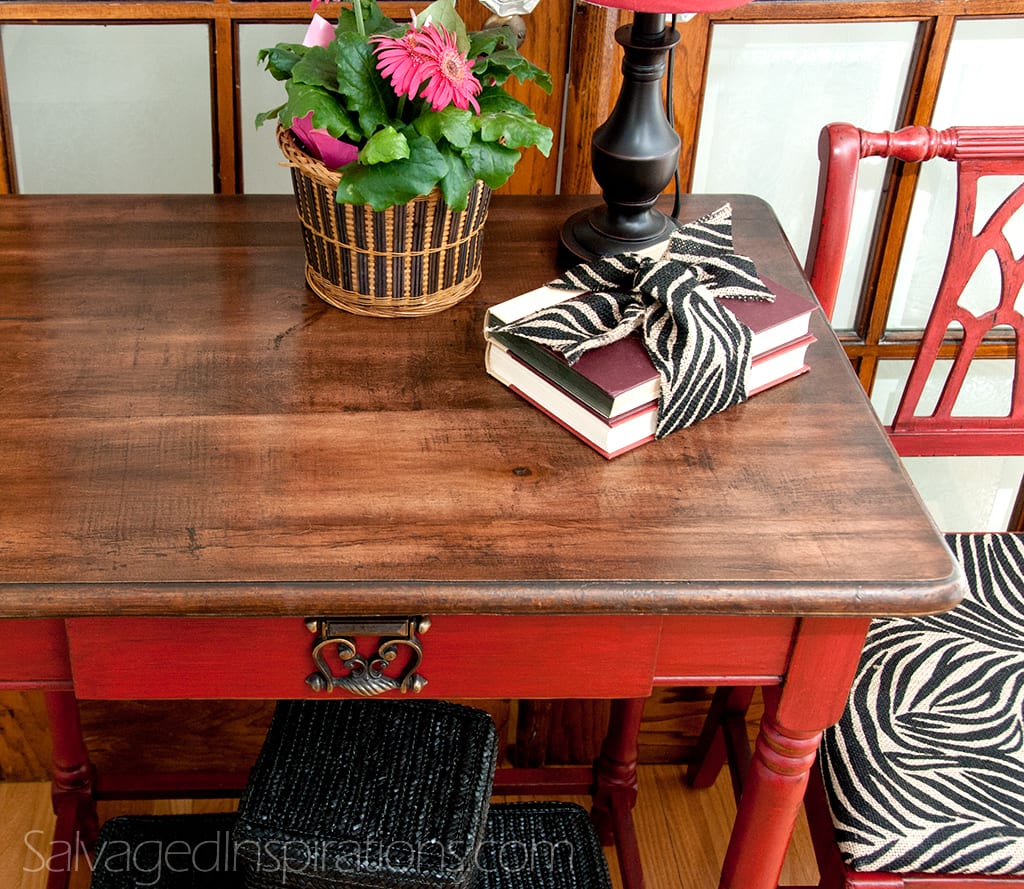
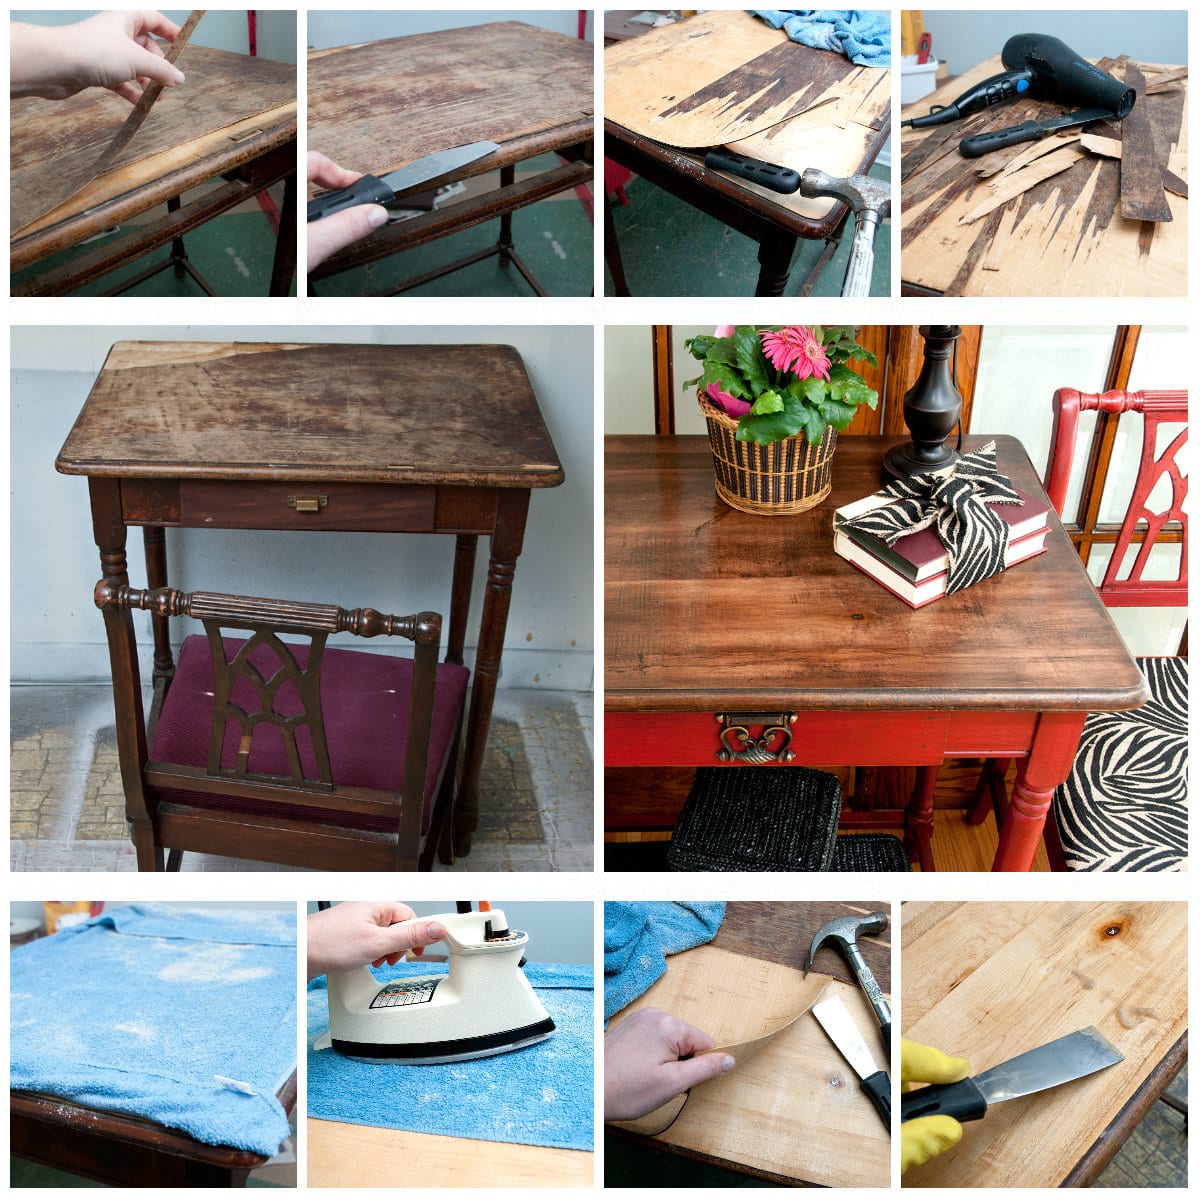
If the veneer is in really rough shape, removing the veneer and painting or staining the wood underneath can turn your piece into a show stopper! Here’s the same writing desk after the veneer was all removed. The wood underneath was stained with a GF Gel Stain and then aged to create this old world look.

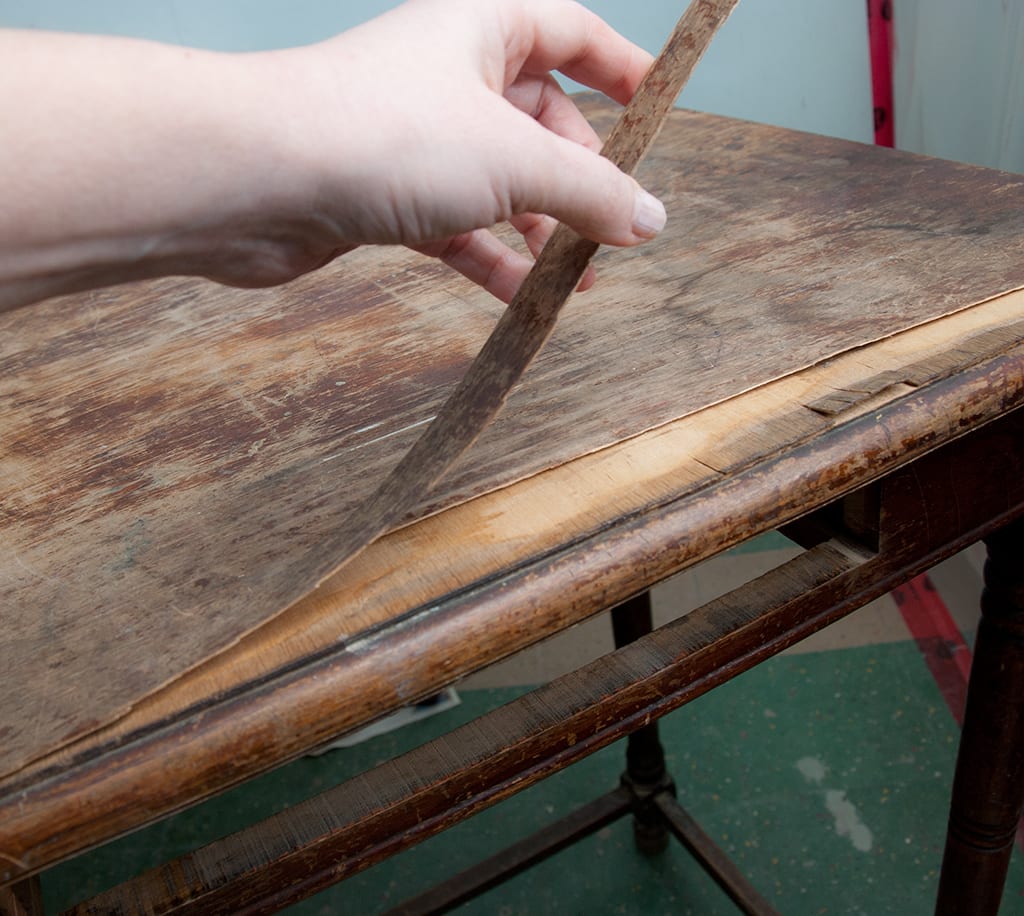
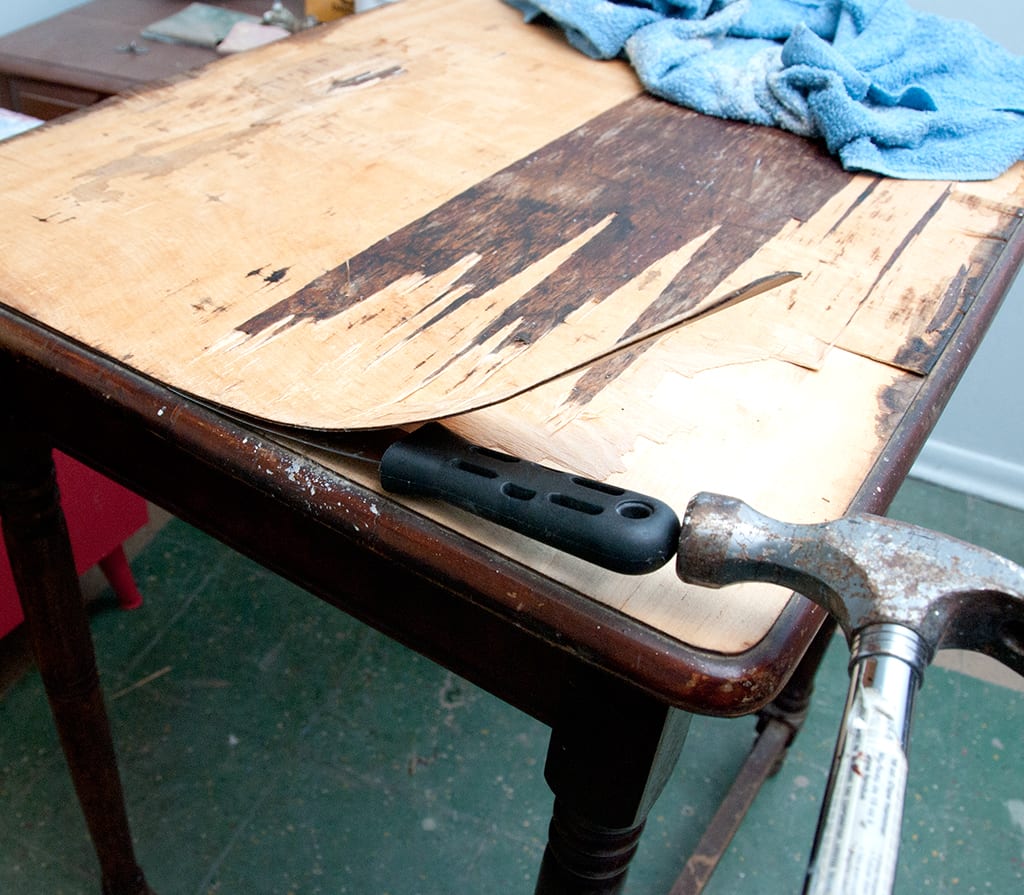
1. Remove loose pieces of veneer by hand. As you can see I didn’t wear gloves… and yes… I did get a splinter or two! Do as I say… not as I do…lol!
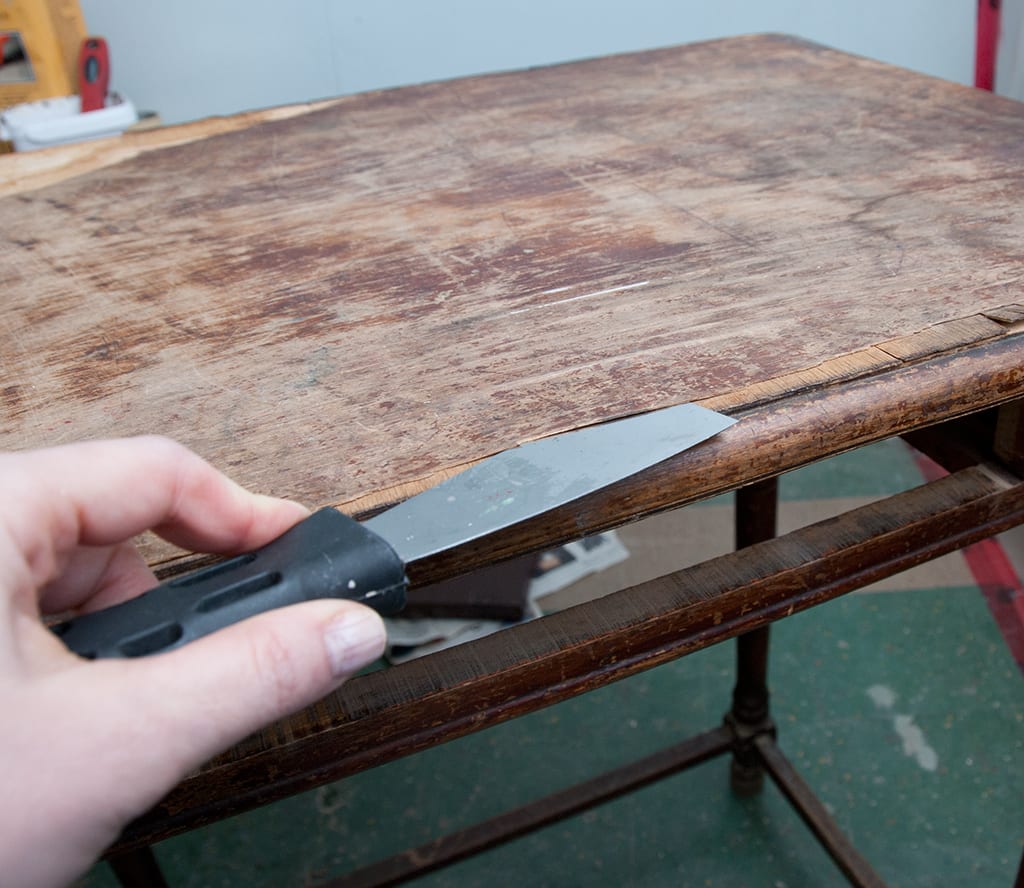
2. Use a metal putty knife/scraper in a HORIZONTAL position to pry off the veneer. It’s important to hold your tools horizontal to the veneer at all times being very careful not to gouge the wood underneath. I used this smaller putty knife I had on hand, but a wider one will help get the job done even faster.
3. If your “people-power” couldn’t get all the veneer off, use a hammer. Use the leverage of a hammer on the end of your putty knife to apply more force on the veneer.
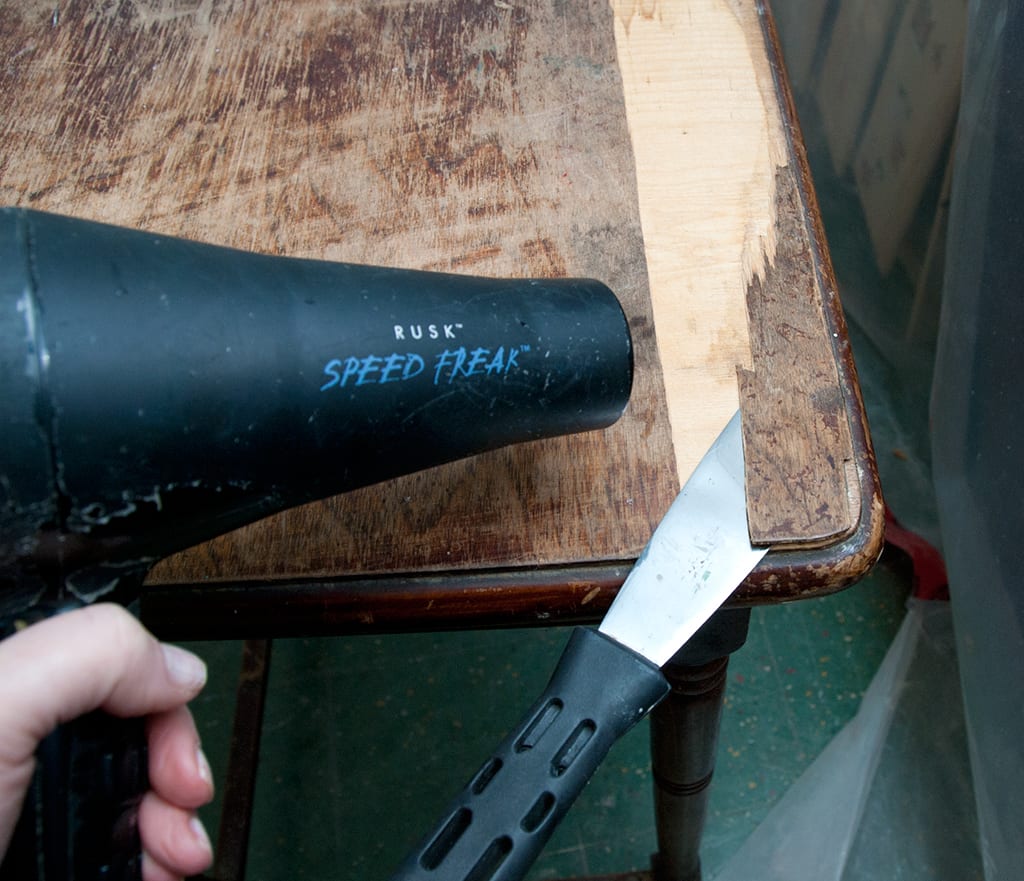
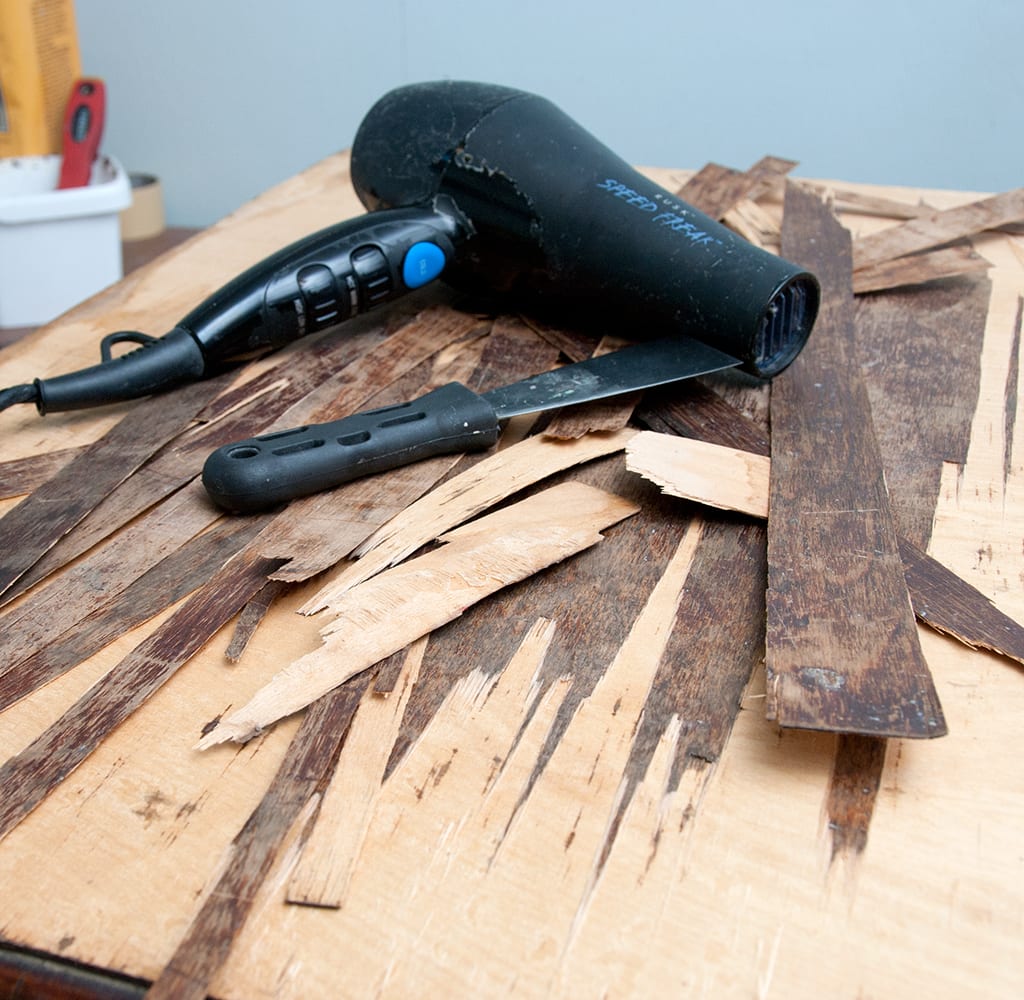
4. Use an old blow-dryer and your putty knife. Turn the blow-dryer on high and hold it a few inches away while using your putty knife to pry off the veneer. The heat from the blow-dryer will heat and loosen the glue so the veneer is released more easily.
5. Wet an old towel in hot water and ring out the excess. Place a hot ringed out towel on the veneered surface and leave it on for several hours. The moisture will loosen the veneer glue and then you can use a putty knife to pry it off.
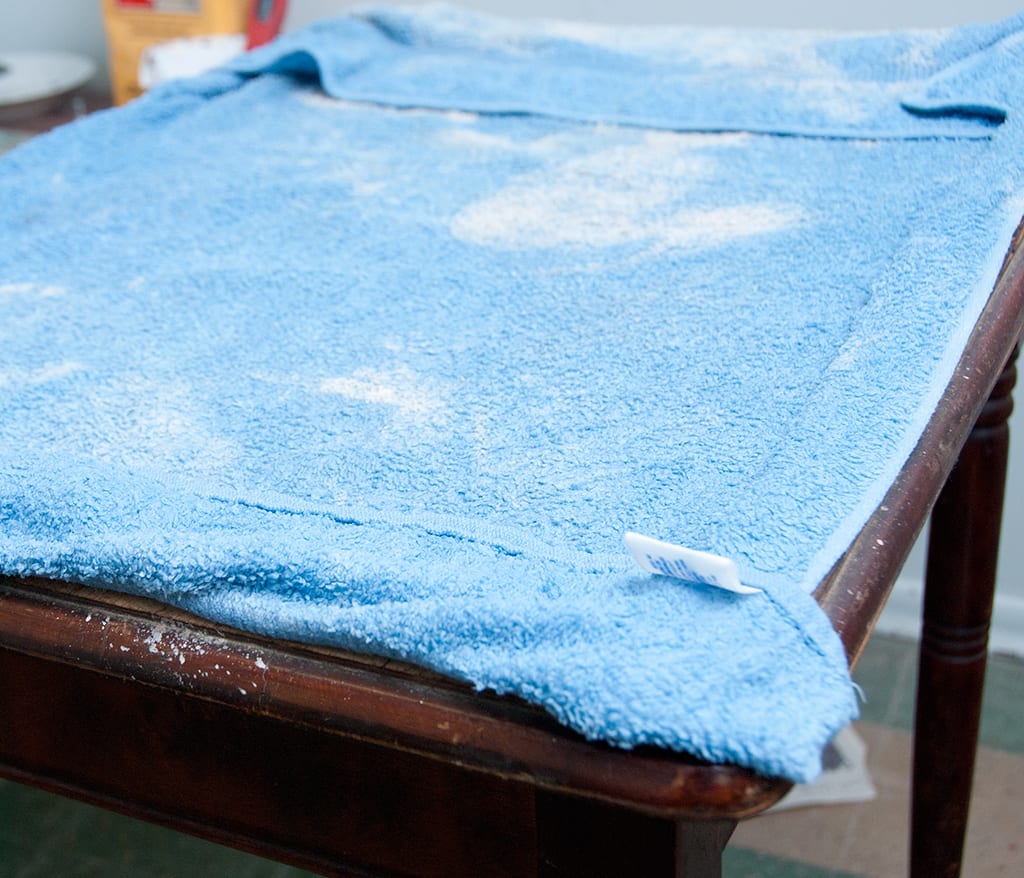
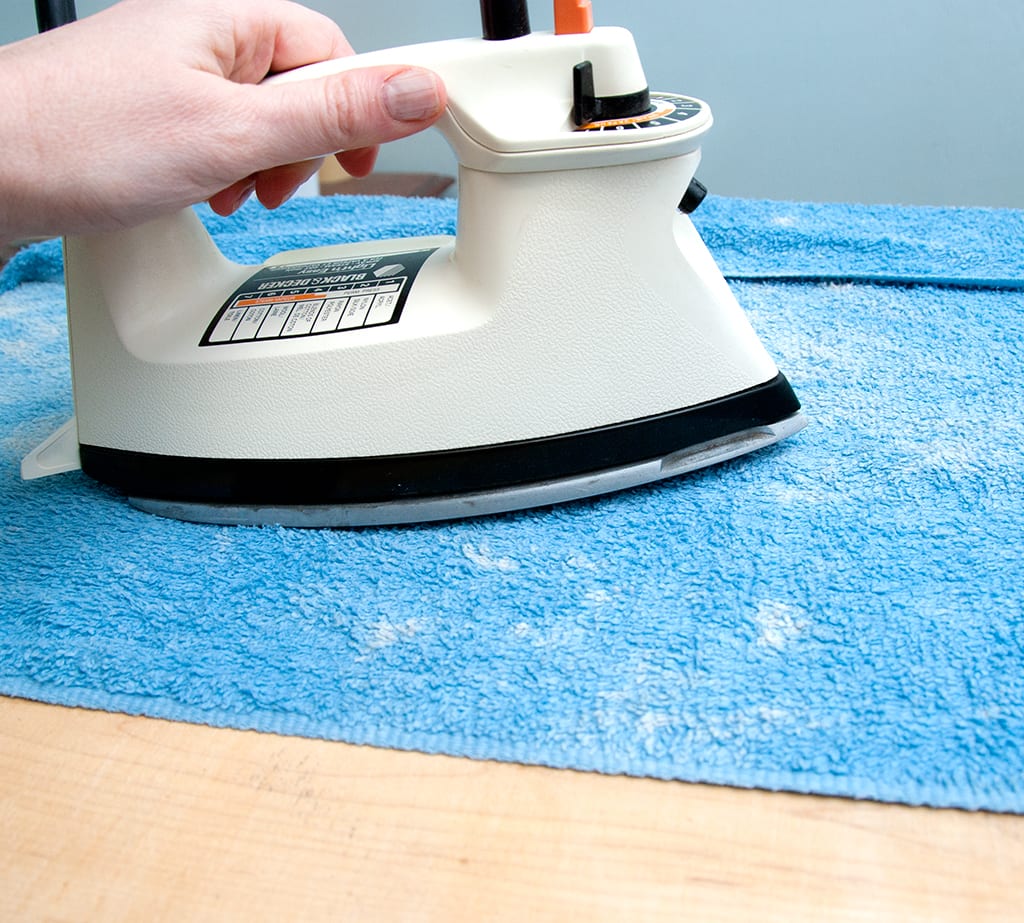
6. For any remaining stubborn pieces of veneer, use an old iron on high or steam setting. Place the heated iron on high setting on top of the damp towel and hold in each area for 30 seconds or so. This will soften the glue and help lift the remaining veneer.
7. After all the veneer is removed, you will have some glue remaining. Use a Putty knife/scraper to scrape off the glue residue and clean and dry thoroughly before staining or painting.

So there you have it! Removing veneer may take a little time but it’s not difficult! And to make things even easier for you, here’s a convenient PIN’able reference with all the tips!
Have you removed/refinished any veneered furniture… do you have any additional tips or tricks? Have a question about removing veneer? Leave me a comment because I LOVE hearing from you!
Denise x
_____________________________

Try a Rockler store. They carry lots of veneer.
Great tip, thank you!
Sand the painted surface and the transfer will work
Hi, I removed the veneer using your method….worked perf ! But I can’t seem to figure out how to get the glue off without buggering up the nice wood top.
Can you give me some pointers please.
Thanks, Susie
So glad it worked! Have you tried using a wet/damp towel with the steam setting on your iron? If you lay the damp towel on top of the glue and then let the hot iron (with steam) sit in one position for say 30 seconds (just be careful not to burn the towel), this should loosen the glue for you. It should peel up with a putty knife.
I have my great grandmothers sewing machine that I actually learned how to sew on. It’s a 100-year-old treadle machine in a wood cabinet. Well the top of the cabinet which is veneer has peeled away and needs replacing. I don’t even know what kind of veneer it is. Where do I begin with this? Where do you purchase veneer? I want to have it out on display and use it from time to time. It’s a workhorse and only need to replace the leather on the treadle from time to time. I want to honor my Nana for all she has taught me. So any help would be greatly appreciated. Thanks
Me, too! That is exactly why I am reading this article!
Hello! This was a great article! At first I was scared and then it was so fun to remove the veneer off a small buffet I’m working on. So satisfying! The veneer is also between seams on the underside of the top, I’m having a hard time removing because it’s wedged in there. Do you ever take your pieces apart? This doesn’t look like an easy come off top.
Thank you for any help!
Hi! Thanks for the helpful info! I removed the veneer from the top of an old Buffett but there is glue left on the wood. I tried a heat gun to loosen it and scrape off. And then I tried sanding. It just won’t come off. Maybe it’s too deep in the wood grain? Any suggestions?
This has been a helpful article. But do you find there are multiple layers of veneer? I picked up an antique sewing table that had peeling veneer & now that I have 1 layer off I see it looks to have a second layer. It is cracked & separating. Should I remove the next layer or try to glue it down like you mention at the beginning of this article?
Hi Jennifer! Some pieces do have more than one layer. If so, I usually peel up both pieces if there is a solid piece of wood underneath. If it’s subboards (boards butted together) I would glue it down. Especially if you’re planning on painting and it’s in good shape.
Looks great! Do you have any advice on a veneer covered China cabinet? It was chipping in some places so I originally tried wood filler and sanding but I can’t decide if I should try to make that work or if I should use your tips and try to remove it. I’m nervous because there are drawers and decorative molding at the top and I don’t know how veneer removal would work with that. I tried sanding one of the sides of the cabinet with a laminate primer just to make sure it stuck to the shiny surface but even after wiping it with a wet cloth the primer turned a pink tint from the veneer which is why I’m leaning towards just removing it all. Any tips?
THanks for this. I tried a dress steamer and I think it has possibilities. I also used an old iron directly on the veneer. Got the iron a bit glue-y but it worked. I used a stiff paint scraper with a beveled edge and a hammer. Most of it came off with the help of the iron easily, but some parts were really stuck on there. I was going to paint it so it didn’t matter if I didn’t do a perfect job.
All great tips thanks, Joan! I’m glad it’s working for you. 🙂
HI Denise, You inspire me to make all our old furniture have a new life. I have 2 small Victorian chests of drawers, they are veneered, but due to age parts of the veneer is peeling off. The drawers have added decorative edges and in shape are curved, so the ironing technique would not work so well. Would you advise me not to even try? This could be a very fiddly job. I tried removing veneer off the top of a large dresser and dug a hole into it, which I have had to fill with wood filler, ruining a lovely piece of oak.
I have not seen you tackle curves and decorative features on your site, or perhaps I have simply not found that post yet.
Any advice most welcome, many thanks, Katy
Curves can be tricky for sure and along with added decorative edges – not easy! I’m wracking my brain to think if I had a piece/tutorial for this but nothing is coming to mind right now. If there’s too much detail and the ironing technique seems daunting, personally I would not try. Possibly the better solution would be to glue down the veneer in spots where needed and fill in the rest. (if your planning on painting). If you want to get it back to the pristine Oak finish, a (wood) furniture restorer may have some helpful tips for you. 🙂
You are a true lifesaver! I accidentally sanded through the veneer on a vintage Widdicomb nightstand I picked up at an estate sale and wanted to cry. Thanks to this post I’ve successful removed the veneer and have a smooth wood surface to work with (and hopefully make gorgeous!)
How did you create that aged/old world look on your piece? Or do you have another blog post where you talk about it?
Again thank you!
I’m SO happy this post is helpful to you Christina. Good luck with your Widdicomb nightstand! As for the aged look, are you referring to the stained top or the paint finish?
My mother has a cedr hope cest that i am cleaning up. if cedaris the wood nside of chest chances are the sides and top are cedar…right?
It really depends on the chest Bradley. Sometimes they are cedar-lined (because cedar repels odors, moths, insects etc) but they CAN be different wood or veneers on the outside. If the wood looks the same on the inside as the outside, it’s cedar. 🙂
I’m going to refurbish a cedar hope chest as well. It’s in bad shape so I think I have the veneer off. Bradley how did your renovation go?
Great job. Clear and concise passage. Greatly appreciated.
Thanks Tiff! x
I have a pretty dining table. I’m in the process of removing the old veneer, which was in rough shape. The wood under it isn’t pretty. At all. So now I’m stuck figuring out how to refinish it without anything lovely to start from. Any thoughts?
Hi, I have been procrastinating removing the veneer from my grandmothers’ cedar chest for the last five years (yikes). Some of the veneer was damaged and I peeled it off by hand, exposing the absolutely gorgeous but unfinished cedar underneath. So, I know that the wood under the veneer is something worth seeing. But, what should I do to the cedar to make it hold up for another 80 years? I’m especially interested in ideas for the top. This particular cheat was damaged by my mom (as a little girl) painting it with nail polish. I have my own little girl now, and I want something I can wipe off if history repeats itself!
Hi Carolyn! Yor grandmothers’ cedar chest sounds beautiful. If there’s really nice wood under that veneer, maybe showcase it! Strip the veneer. Sand the top for a nice smooth finish and pick a stain you like. For a durable easy to clean topcoat, poly would be the best bet. It sounds like a great project and will last for another 80yrs! 🙂
Hi
I’m trying to take veneer off an antique cabinet. It’s proving very stubborn. I have tried all your methods above and to no avail. Is it possible just to sand the remaining veneer ?
Hi Melanie! You certainly can sand off the remaining veneer. But depending on what the veneer is glued to will depend on the results. For instance, if the veneer is on top of MDF or plywood, sanding leaves an awful mess and then even primer and paint won’t make it look good. If it’s an older piece and you have some ‘real’ wood underneath, sanding should work just fine. Hope this helps. 🙂
Hello! I was given an older wood kitchen table but the veneer was pretty rough so I decide to remove it. After removing the veneer I found that certain spots on the table top started to split and bow a little, do you have any helpful tips to fix this issue?
Hello,
I have a 1924 baby grand piano that I’m in the process of restoring. It has a mahogany veneer on both the inside and outside of the cabinet, and seems to be applied over a birch or poplar laminated plywood. The outside veneer is ~0.105″ thick, while the veneer on the inside is~ 0.025″ thick. The long, flat section of the piano cabinet (~5ft long x 12″ high) was exposed to moisture and water, and has de-laminated. I’m resigned to the fact that this section has to be cut out and removed, and replaced with a new laminated substrate.
Once this substrate piece is added, I’m going to have to remove the entire original outside and inside veneer, and then add a new mahogany wood veneer to the entire outside and inside of the cabinet. I need to match the original thickness dimensions of the cabinet, and keep the surfaces smooth and even with each other.
Am I thinking this through correctly? What laminate substrate material would you recommend? What method should I use to remove the old outside and inside veneer surfaces?
Any advice you can share with me would be greatly appreciated.
Thanks,
Bill
Hi Bill! I’ve never restored a piano or have had to be overly particular matching up veneer pieces. I’m guessing that would take a lot of patience so my hat is off to you for taking such loving care of your 1924 baby grand… what a great project! Here’s a site that has some excellent infoHere’s a site that has some excellent info and advice on restoring pianos. I hope this helps. 🙂