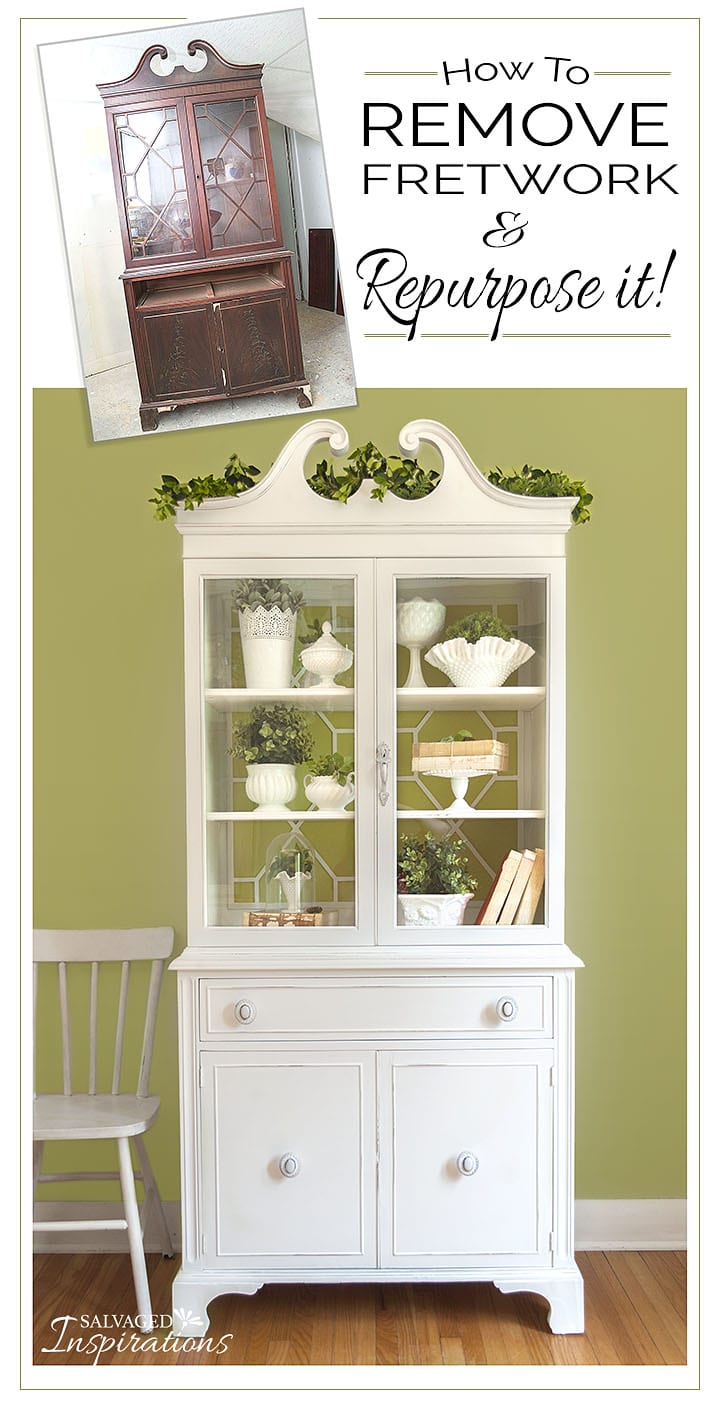
I’m excited to share today’s furniture makeover with you. I took a chance and tried something new – something I’ve never seen done before – and I LOVE the way it turned out! I can’t wait to hear what YOU think!
First, let’s chat about fretwork. You’ve probably noticed a lot of furniture painters are removing the fretwork from vintage cabinets to create a modern look. Personally, I’m a little addicted to vintage detailing and find it hard to get rid of anything. After all, it’s these exact details I seek out when I’m buying furniture to paint. So, this got me thinking. How can I repurpose the fretwork while still giving this piece an updated vibe?
Then it hit me.
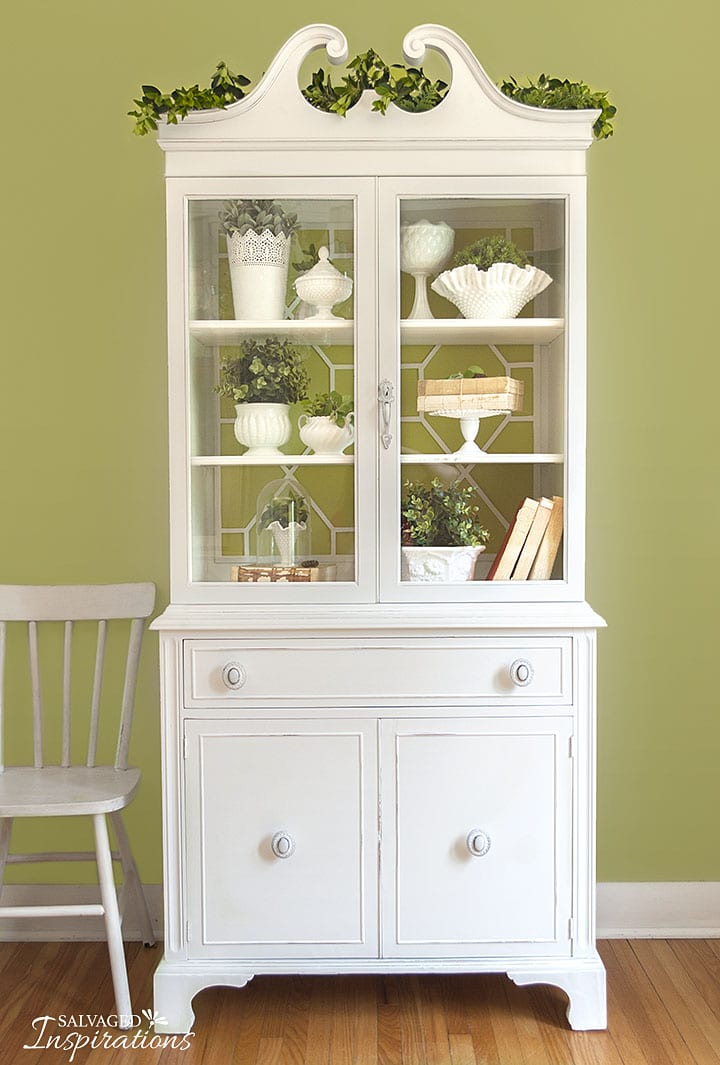
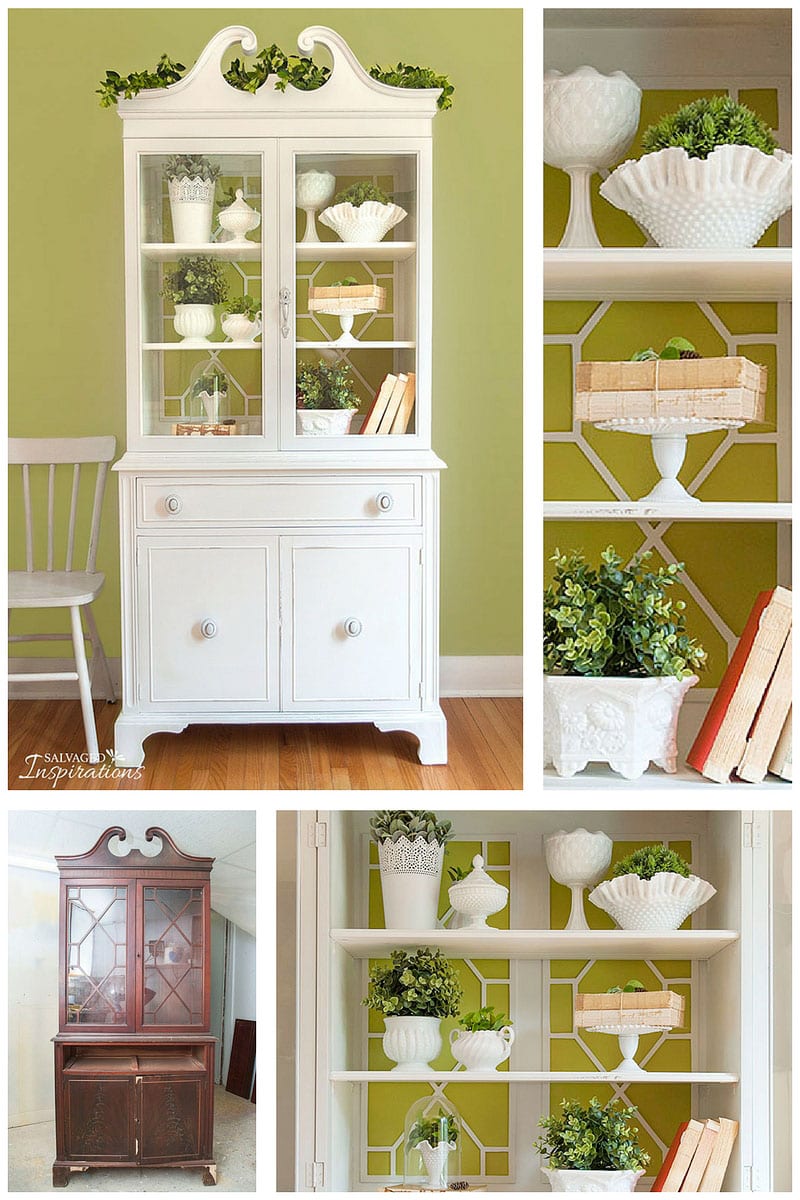
With the growing popularity of stencilling, decoupage, adding wallpaper or fabric to the back of a cabinet, why not adhere the original fretwork for additional detail! This keeps the integrity of the piece while repurposing it! And, it creates a restyled one-of-a-kind-treasure that will blend in beautifully with an updated decor.
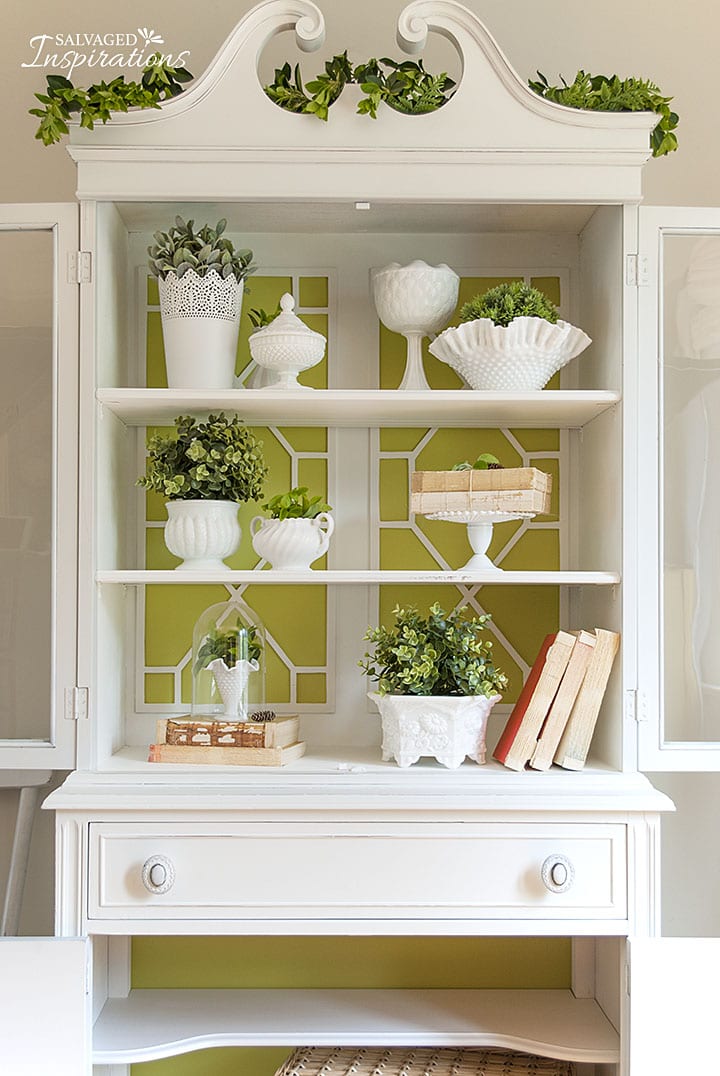
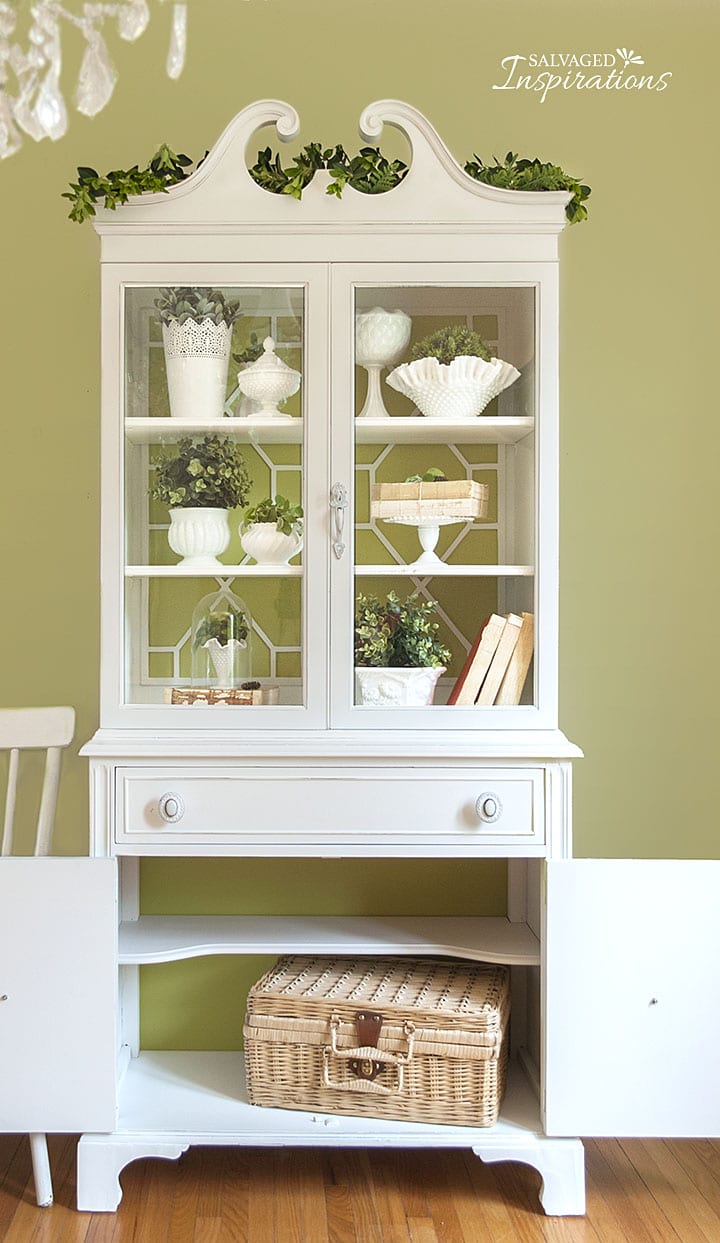
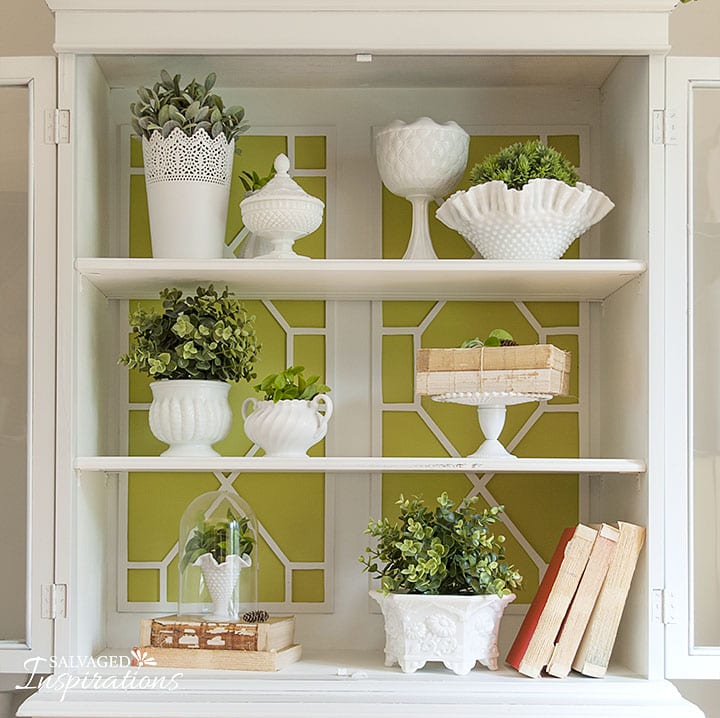
The 411 on this Vinatage Cabinet: The entire cabinet (including the fretwork) was painted in General Finishes Snow White. With some leftover paints, I painted the backing with a custom mixed vibrant spring green (almost identical to SW 6710 Melange Green). Once the white fretwork was attached, the green and white contrast really makes it pop! What do you think?

How to Remove Fretwork
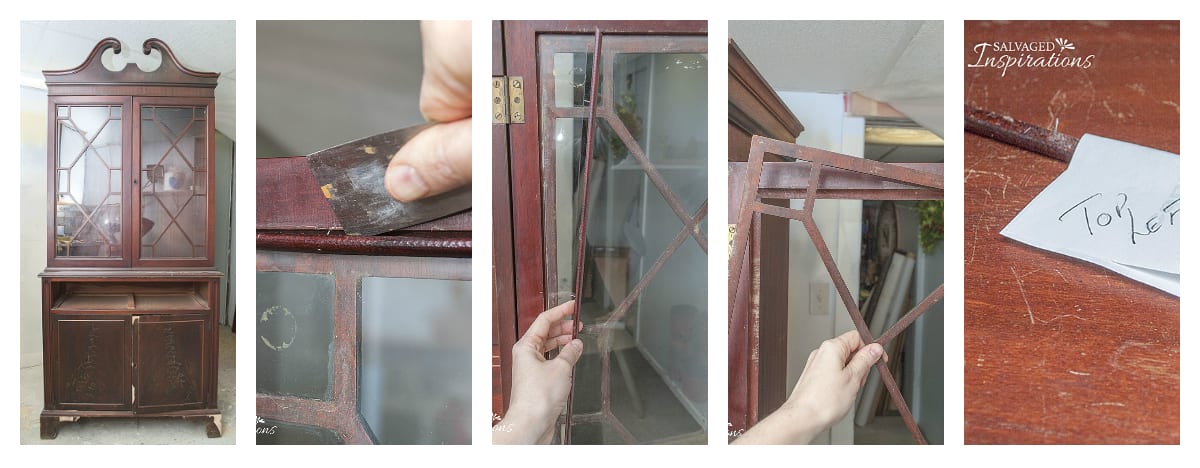
On these types of cabinets the fretwork and glass are usually held in place by a 1/4″ round piece of wood mitred at the corners to fit snugly together. A few small nails hold everything in place. These can easily be pried off with a flat edge screw driver, putty knife or even a butter knife if you don’t have access to tools.
1:: Locate the small nail heads and place your flat edge beside it. Gently pry loose the 1/4″ round with a putty knife, flat screwdriver or butter knife.
2:: Carefully pull off the top, bottom, and ONE long side. (Only 3 sides need to be removed!)
3:: Gently ease out the fretwork and prime/paint it the color of your choice.
4:: Label each 1/4″ round with a sticky note and leave the nails in place. (Be sure to read on and I’ll explain why below!)
How to Add Fretwork onto The Back of A Cabinet
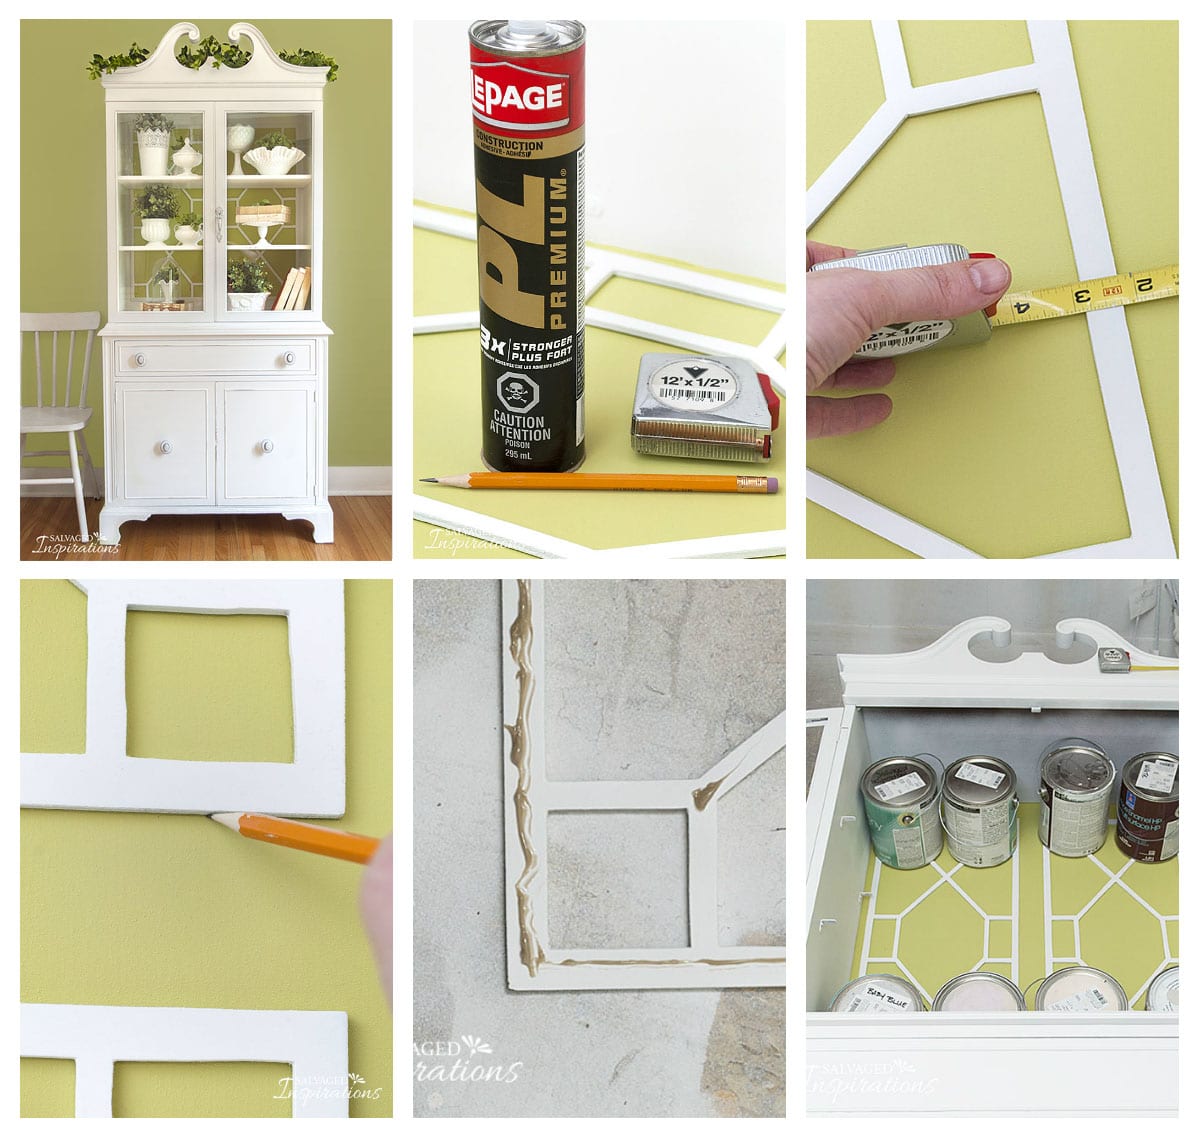 1:: I laid the cabinet on it’s back and placed the fretwork where I wanted it. I liked the looks of the 2 panels separated with 2.5 inches between the panels and around the sides. You could place them vertically, horizontally, or butted up together. Whatever is visually pleasing to you.
2:: Once measured, I held the fretwork in place while I marked its position by tracing with a sharp pencil.
3:: Using LePage PL Contractors glue (which takes a full 24hrs to adhere but will never come off), I added glue onto the back and then positioned the fretwork back within the pencil guide lines.
4:: I weighed it down with paint cans and waited for the glue to dry.
5:: After 24hrs, I removed the paint cans and stood the cabinet upright. I primed and painted around the fretwork to create the snow white border.
How To ReInstall The Glass on a China Cabinet
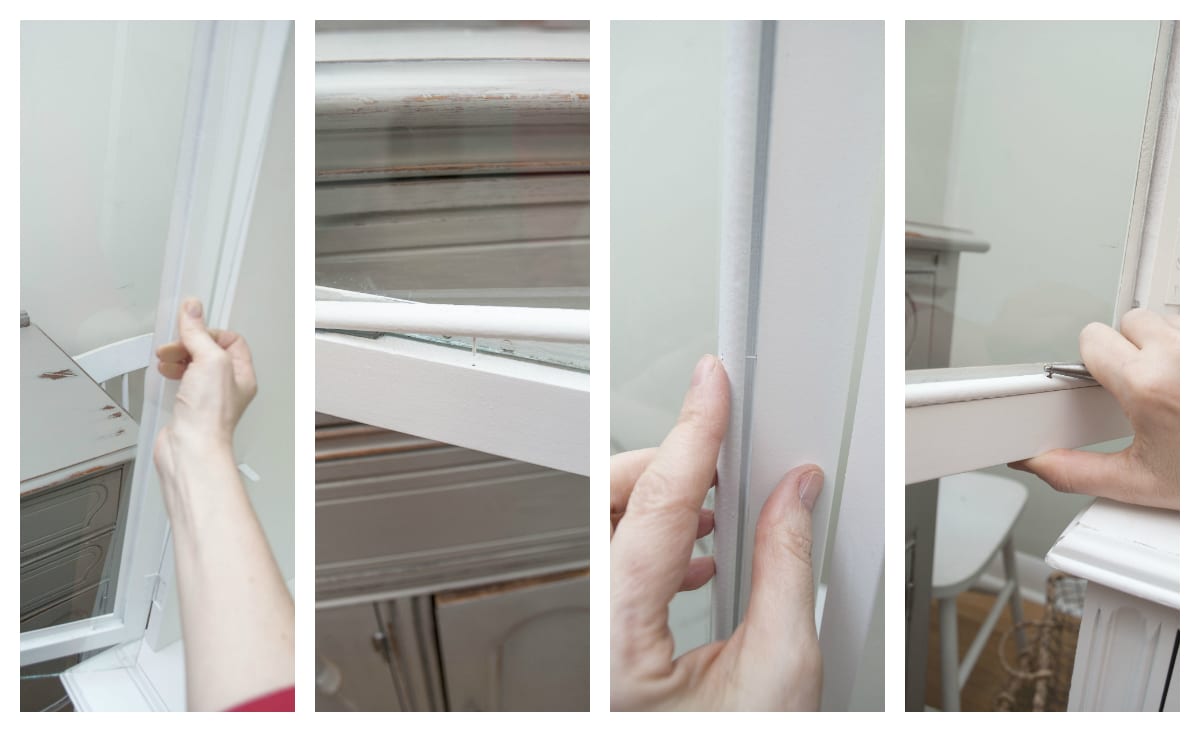
So, here’s why I label each 1/4″ round and leave the nails in place. It’s MUCH easier to use all the original pieces!
It takes a little finagling to get the nails to line up perfectly again, but it’s much easier than cutting new 1/4″ round, and then either shooting or hammering in new nails to affix. I can’t tell you how many times I’ve had to buy new pieces of glass when doing it this way! So frustrating and costly. I find using the original (if possible) keeps the integrity of the vintage piece and makes the process SO MUCH easier.
1:: Place glass in the frame making sure to put the long side under the lip of long 1/4″ round that was left in.
2:: Take the first labeled 1/4″ round and line up the nail holes.
3:: Gently press in with your fingers.
4:: If the nail doesn’t go all the way in, I use needle nose pliers to apply pressure.
5:: Continue with each piece until they are all in.

Since you removed the fret work, didn’t that leave space between the glass and the quarter round when you reinstalled it in the original nail holes? How did you compensate?
Your cabinet is beautiful! I’m considering trying another never before seen idea and I would love your opinion. I do not have a solid wall in my dining room. I am considering taking the back off of the top of my cabinet refinishing the whole cabinet and placing it in front of the window and letting the light shine through. A, I crazy?
Hi Beth! I’ve never heard of this done before but YOU sound like an innovator! 🙂 Before you restyle/paint it for that specific area, I would take the back off and see if you like the look. 🙂
I think you are a genius. It’s so beautiful!
Thanks Kay! 🙂
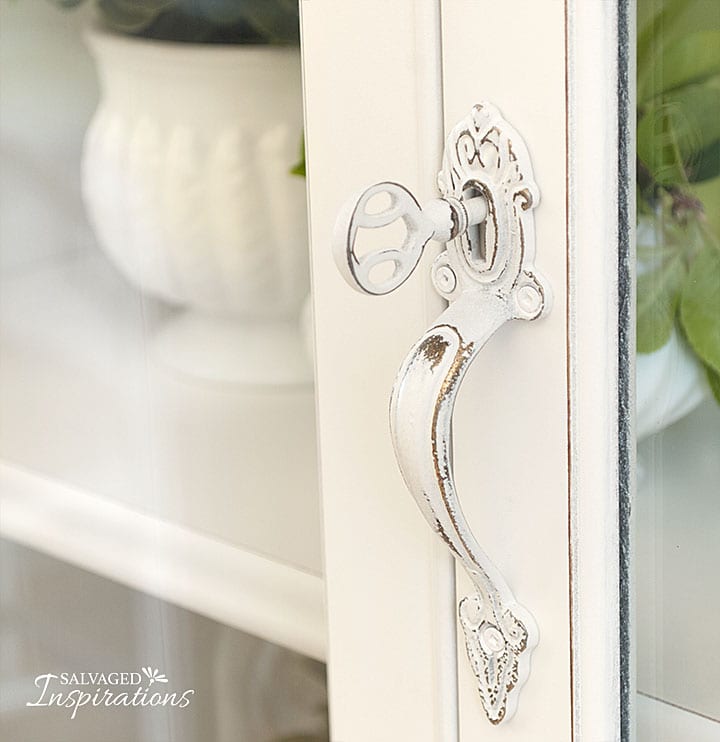
That’s beautiful. Can you tell me where you found the cabinet handle with the skeleton key? I love that and am looking for one, but I’m not having much luck.
Thanks, Mindi! And yes, the key was original to the cabinet. I found the handle w keyhole at Hobby Lobby. I painted them both to match and installed. 🙂
Lovely transformation! I’m definitely going to try this, but what about the finial? Is it missing Or left off intentionally?
Thanks, Annette! And yes, it was MIA when I bought this piece.
WOW! What a wonderful idea! It looks beautiful! I’m working on a very similar piece right now and that’s exactly what I’m going to do it! Thank you so much!
Thanks Susan and have fun! 🙂
I just stumbled upon this from another blog and so happy I diid! I have a similar piece waiting in my garage. I didn’t know how to take the fretwork off for painting. Thanks for your tutorial!
Hi Valerie and WELCOME! So happy you’ve found the #siblog and that this tutorial has been helpful. Have fun restyling your china cabinet… I hope it turns out exactly as you envision it! 🙂
Great idea and stunning project. I love the new look
Hey Denise, how did you get that type of great ideas. Your DIY projects are really awesome for home decorations. Great job.
Thanks Amanda! 🙂
Gorgeous transformation. I have a similar piece I’ve been afraid to tackle. Love your milk glass too! If you are ever curious about your pieces check out our group, https://www.facebook.com/groups/Ilovemilkglasstoo/?ref=bookmarks, we help indentify pieces.
Thanks Amy! This is a very small sample of my sister’s milk glass collection. She’s been picking up beautiful pieces over the years. I’m going to pass this FB link on to her. 🙂
Hi Denise!
Absolutely beautifully recreated!! Interesting color combo…and vibrant background for accessories!
Thanks Rebecca! Green is one of my favorite colors. 🙂
FABULOUS! I may have to steal this idea, so so clever!!
Julie
Thanks Julie! And thanks for the share and the shout out on your FB page. 🙂
You’re so innovative, Denise. I always keep the fretwork & now this is an updated option. Cabinet looks stunning, especially how you staged it. Thanks for giving us the 411 on it too.
Thanks Tracy! 🙂 I’m glad its sparked some ideas. If you’ve collected some fretwork, you could turn a plain-jane-piece into something spectacular!
I love this idea Denise! Like you I have a hard time getting rid of the detailed fretwork but it does ‘date’ the piece and sometimes makes it difficult to see into the cabinet. You’ve come up with an awesome solution. I’ll definitely be trying this out. Thanks for sharing 🙂
Thanks and pleasure Annie – glad you like the idea! 🙂
Perfect re-purpose! I too love the vintage touch and would have struggled to get rid of it. This is the perfect solution. Thanks for another great tutorial…keeps my mind going!
What a beautiful way to honor this piece! It is so so hard to remove details, but this satisfies the purist in me!
HI! Your cabinet is GORGEOUS! The ” spring green ” is not my favorite color, BUT, the overall result is beautiful. You are so clever to even think of moving the fretwork! So many people would have just discarded it! LOVE, LOVE, LOVE it!!!
Hi Tess!!! 🙂 Thanks so much! And yes, instead of throwing these pieces away, I really hope this sparks some ideas for these vintage details. 🙂
Your work s just st beautiful!!
Thank you Maryann <3
Hi,
I just subscribed to your blog and am so thrilled I did! What a gorgeous job! I love it. You have some vision. I noticed there wasn’t a drawer; I’m thinking you made one? Beautiful!
Hi Janet and welcome! Thanks for the subscribe. 🙂 I had taken the drawer out for repair before I took that pic, but it is the original drawer.
It looks lovely. I have a small China cabinet with fretwork. I may just pinch your idea, hope you don’t mind xx
Not at all Tania… that’s why I share. 🙂
I love this! You did a wonderful job. Thank you for sharing.
That is Exquisite thinking and you did a Beautiful beautiful job!!
Love the finished product. I have a similar piece that I’ve been dreaming about what to do with…and now I know! Thank you for the inspiration and the detailed post. Can’t wait for the weekend to get here so I can get going. You’re the best!!!!
I have a very similar piece that I was going to sell. After seeing what you did, I think I would love to do something similar and update the piece! Such an excellent way to repurpose and keep the look fresh!! LOVE IT!
Absolutely gorgeous! I have a question, I just finished refurbishing an entire bedroom set for my granddaughter. I used GF Snow White and I had a HECK of a time getting it to have a smooth finish. No matter what I used to apply it or how thick or thin the paint was. What did you use to apply it? also, how did you prep the actual piece; i.e., sanded, primed? Thank you so much.
Hi Beatriz! This piece took a while to sand, repair missing/broken veneer, fill, patch and prime. Because of bleed through on these types of pieces, I used BIN Shellac Primer and the piece was sprayed, not brushed. Having said that, I use A LOT of General Finishes Paint and whether I spray, brush or roll, I never have any problems or issues. Could it possibly be the environment your painting in? Maybe really humid or hot?
Great tutorial on a very clever pice of work! It looks smashing! Thanks so much. I would trace and piece of fretwork I removed for possible future use. Transferring the tracing to another item and painting it on could be another option down the line.
Great idea Carol! 🙂
It’s absolutely beautiful! I knew you’d make her a crowning glory…and you did!! You’re such an inspiration to so many. Thank you 😘
Thanks Mary-Louise <3
You are just brilliant! What a creative idea. I bet more people will catch on to this innovative idea. Love it!!!!
Thanks Monique! [big hug] 🙂 I really hope people do start re-thinking what to do with these types of vintage details on their pieces. There are SO many possibilities. You could size it down and add the fretwork to front door panels – or even to the front of the drawers!
I love ❤️ love ❤️ love how fresh this looks
it’s beautiful
we done my friend
Thanks so much Janet! xo
Now that was a stroke of genius!
Looks great and upcycling the fretwork as a back looks quite beautiful.
I’m also one of those that likes to keep vintage details, otherwise you end up with something every property bros house looks like. (Love them, but it all looks the same).
Big thumbs up girl & nice of you to add the tutorial 🙂
Thanks Chez! I’m like you. I hate getting rid of these gorgeous details. I’ve seen a lot of painters taking off the top mouldings on these cabinets too. It really does ‘modernize’ it, but why not just go buy a basic cabinet and paint it – right? 😉
Exactly! It makes me sad to think all those pretty mounding and such might be in the trash. 🙁
Love, love, love your idea! So pretty!
Me too!…. and thanks Cathy 🙂
Great idea and excellent tutorial Denise! What a gorgeous transformation <3
Thanks Carole! 🙂