 What do old chairs and a Wood Tray-Riser have in common? Absolutely nothing – until my sister asked me if I could make her one! Andrea found these Tray Risers online and fell in love with this idea. The problem was they’re white (she wanted stained wood) and they’re slightly too tall – not to mention sold out at the time of writing this.
Today, I’m sharing this quick project with you in hopes it sparks a few ‘salvaged chair’ ideas. Or maybe you might want to make one of these cuties for yourself… or as a gift! And, you most likely have everything you need because who doesn’t have access to old chairs – right? 🙂
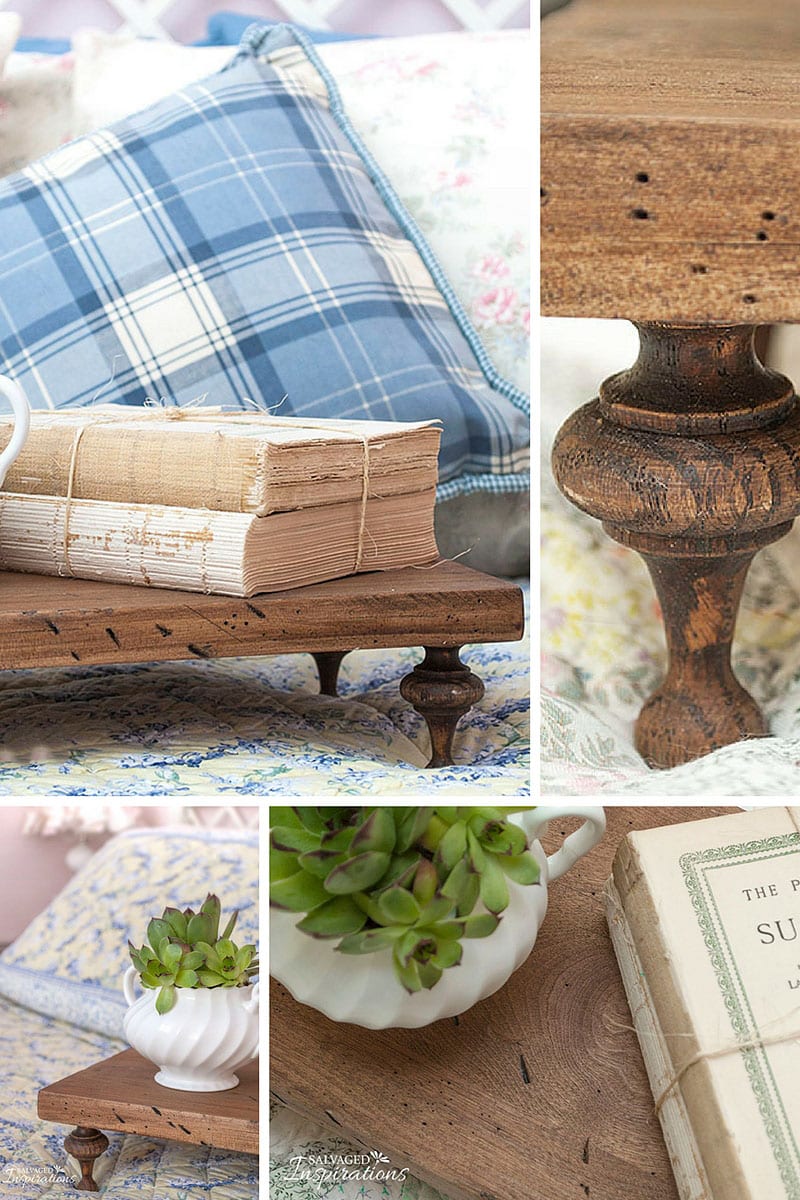
I used a small chair with a solid wood seat (for the reclaimed wood), and 2 old dining chairs with spindles and finials (for the feet). Theses types of chairs are a dime a dozen at any thrift store or garage sale.

SUPPLIES:
- Old Wood Chair & Chair with Finial/Spindles
- Hammer, Utility Knife & Screw
- Wood Glue
- Sand Paper
- Saw
- Sander
- Drill
- Stain
- Paper Towel/Cloth or Rag
- Measuring Tape & Pencil
How To: DIY Reclaimed Wood Tray-Riser
- First, I disassembled the chairs
- Then, I salvaged the parts I needed: The finials from the old dining chairs and the seats off the wood chair
- I measured and marked off the wood seat. I made Andrea’s tray riser 14″x8″ but you can make it ANY size
- With a circular saw, I cut along the lines/measurements
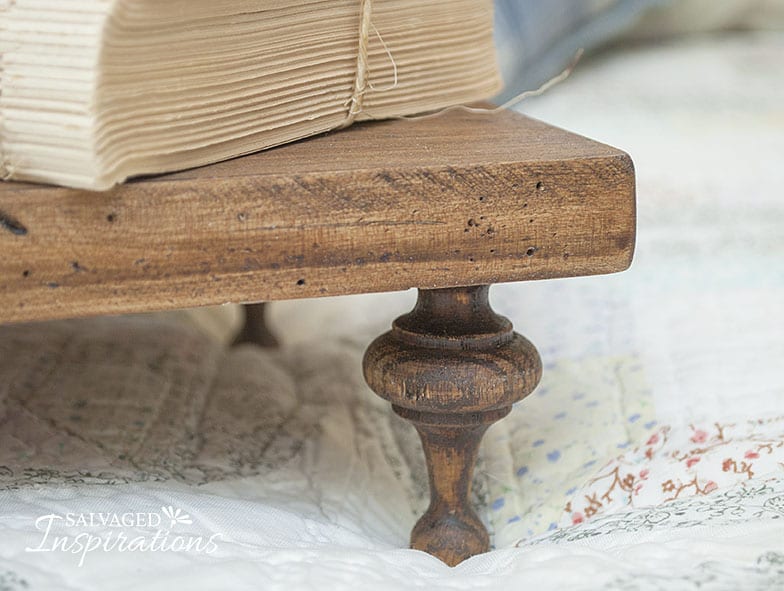
- I sanded down the front, back and sides to removed the original finish and then hand sanded the finial feet and hard edge of the corners
- Using a hammer, utility knife and screw, I banged up the board, created some cuts and used the screw to create worm holes
- I stained the board (and finial feet) with Minwax Antique Oak Gel Stain making sure to get the stain in all the distressed holes and grooves
- Once the stain dried, I measured and drilled 4 holes for the finial feet
- I inserted some wood glue into the drilled holes
- I then added the salvaged finial feet and then let dry

Ten steps in total, but each step only takes a few minutes. Look at how cute this is my sister’s room. I think I’ll have to make one for myself now!


Chime in to say ‘hi’ and let me know what you think of the DIY Wood Tray-Riser. Also, if you have any other ideas on how to salvage old chairs, I’d love to hear them! I’m already thinking of new ways I can repurpose these chair legs! 🙂
Happy salvaging friends!
Denise x
![]()
LIKE WHAT YOU SEE? SUBSCRIBE TO SALVAGED INSPIRATIONS SO YOU’LL NEVER MISS A POST!
FOLLOW ALONG ON PINTEREST, GOOGLE+, AND FACEBOOK FOR MORE INSPIRATION!

Hi. I saw this blog title and was excited to see what you had done. What I can see looks amazing…BUT can you please post a photo of the entire tray? I just could not really visualize the whole thing. 🙁
Hi there Thereasa! If you go check out this post here, there are pics of the entire tray on the bed. 🙂
I love this idea. I volunteer in the local charity shop and we have some sorry looking chairs that often get carted off the to dump and I’m often thinking that the legs look perfect on them. I see some lovely new trays in my future. Thank you for the idea 🙂
Hi Marie! Pleasure…I’m glad it has sparked an idea for those chairs. 🙂
Ahhh…love it!! So unique, way better than any mass produced tray <3
Another idea I'm going to have to try. Thanks Denise
Thanks Annie… and you’re right. 🙂 It may not look as ‘perfect’ as mass produced, but I feel anything made out of salvaged materials [and more importantly] made with love has it’s own special uniqueness. I hope you have fun if you give it a try. 🙂
Great idea, but I could not break up a chair like that. I would just buy the finials or take finials from almost destroyed/damaged chairs.
Thanks Marianne! And yes, if you’re not into taking apart an entire chair, you can go buy or just take off the finials. For the board, I also think repurposing an old drawer face will work. 🙂
I just want to thank you for a previous post you did on how to add height to furniture with the help of T-Nuts and bun feet. I was able to properly attach 4″ high legs to the headboard & footboard of my bed giving it the look I wanted thanks to your very helpful instructions on using the T-Nuts. I had never head of them before and it totally saved me from doing it all very wrong. And the bed turned out beautifully..! Thanks so much…! 😊
Thanks for sharing Patricia. I LOVE ‘successful project’ comments. 🙂 It’s nice to hear follow ups and I’m so glad your head/footboard turned out beautifully.
Love💕The highest compliment-I want one. However, I do not have your skill set to make one myself. Wish I could buy one!
Thanks Kay! If you can’t find one to buy, and don’t want to bust up a chair 😉 an easy way to create one is to buy a piece of wood from Home Depot (they will even cut it to size), and then glue on four pre-manufactured wood finials. Paint or stain to fit your decor… voila!
I think this is one of those things that you don’t realize you need until you see it in the wild – and then wonder how you’ve lived without it. I love that the low profile makes it easy to tuck away when not in use. Great idea and beautiful job!
Thanks Marcia. 🙂 And very easy to tuck away. I can’t wait to make another one so I can use it for staging furniture.
Wow! This is riser is so neat! I can think of so many ways to use it to decorate with. Now, here’s a way you can use up chair spindles, make another riser and send it to me…….HA!
Never hurts to ask….but seriously this is a great idea! Good for you!!
LOL… a woman who knows what she wants isn’t too shy to ask for it! Love it! 🙂
Your sister is lucky that you are so talented and handy. What a cute little tray. Great idea to make it from old chairs:)
Thanks Monique! And I feel like I’m the lucky one. My sister is the BEST! 🙂