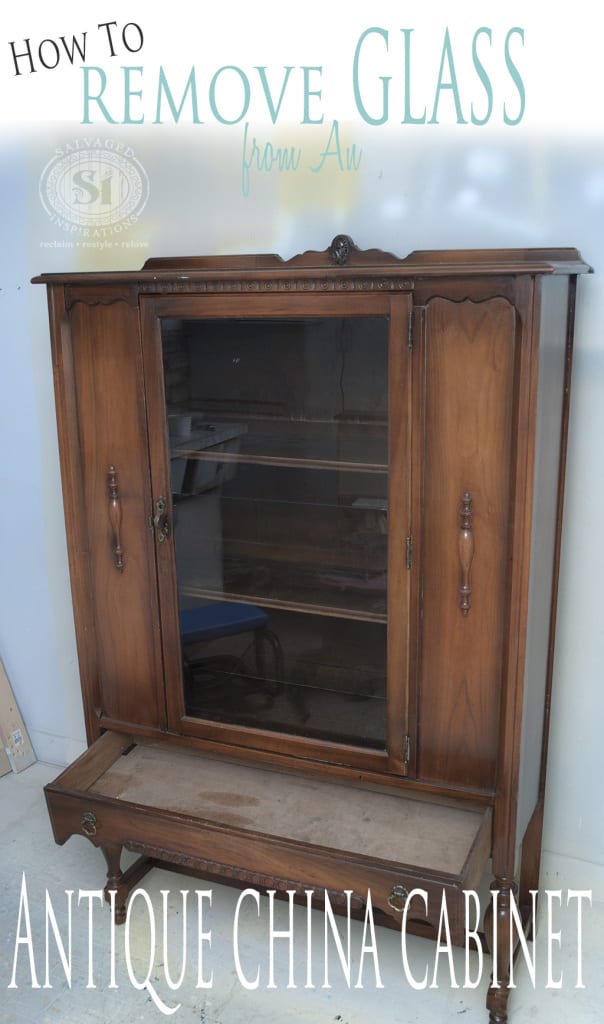
Have you ever wanted to restyle an antique china cabinet and wondered how to remove the glass before painting it?
I’ve restyled a good few of these older cabinets dating back to the 1920’s. I looove working on them because they have great lines and detail.
Although the bones of these old girls are usually solid and sturdy, the glass is often broken/cracked… or there’s fretwork (the scrolly wood detail behind the glass) that needs removing.
It’s hard to tell from the pic below, but this 1930’s china cabinet I’m working on has a horizontal split across the center of glass… perfect opportunity to show you how to remove it!
The biggest fear most people have when removing old glass is breaking it!
I was so nervous about breaking the glass and fretwork on my first china cabinet that I couldn’t muster up the courage to do it! I asked M-M-M to get in there and do it for me.
Don’t let the fear stop YOU from trying. Now that I’ve done a few of these, it’s really NO BIG DEAL!
If you use a gentle hand and take your time, everything will pry away nicely.
To remove the glass, you will need:
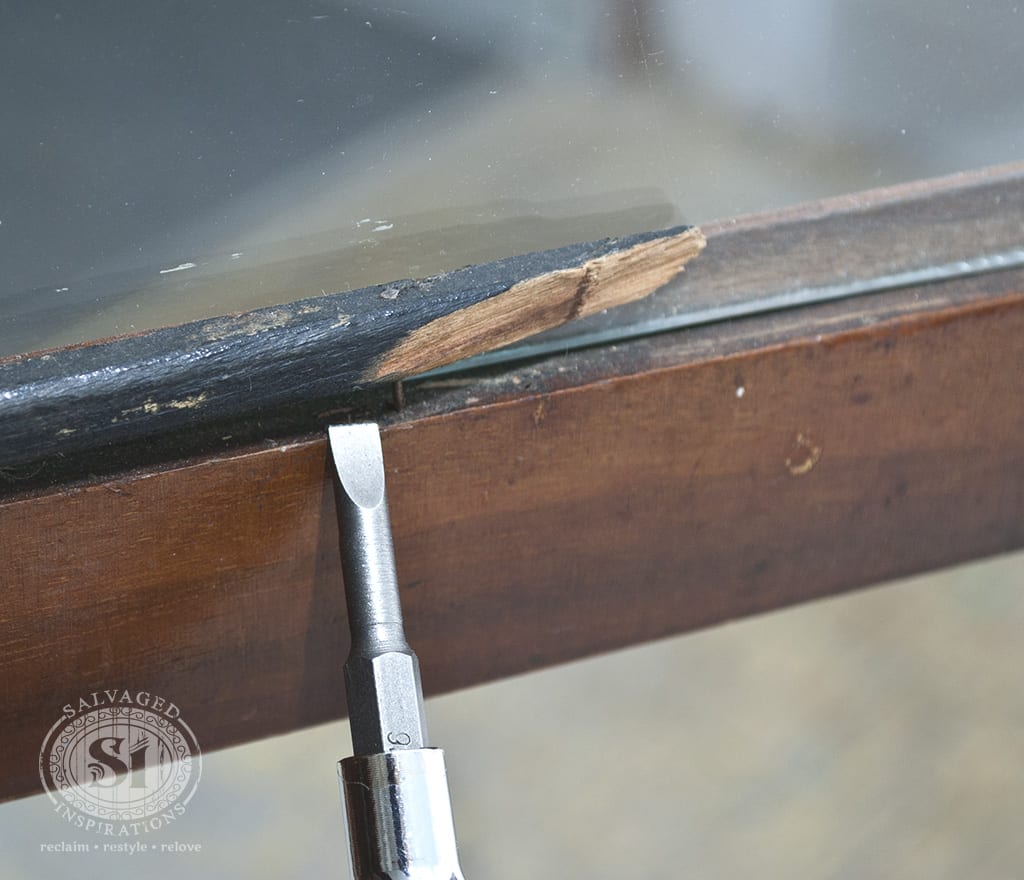
:: A small flat edge screwdriver…or any small/sturdy flat edge tool.
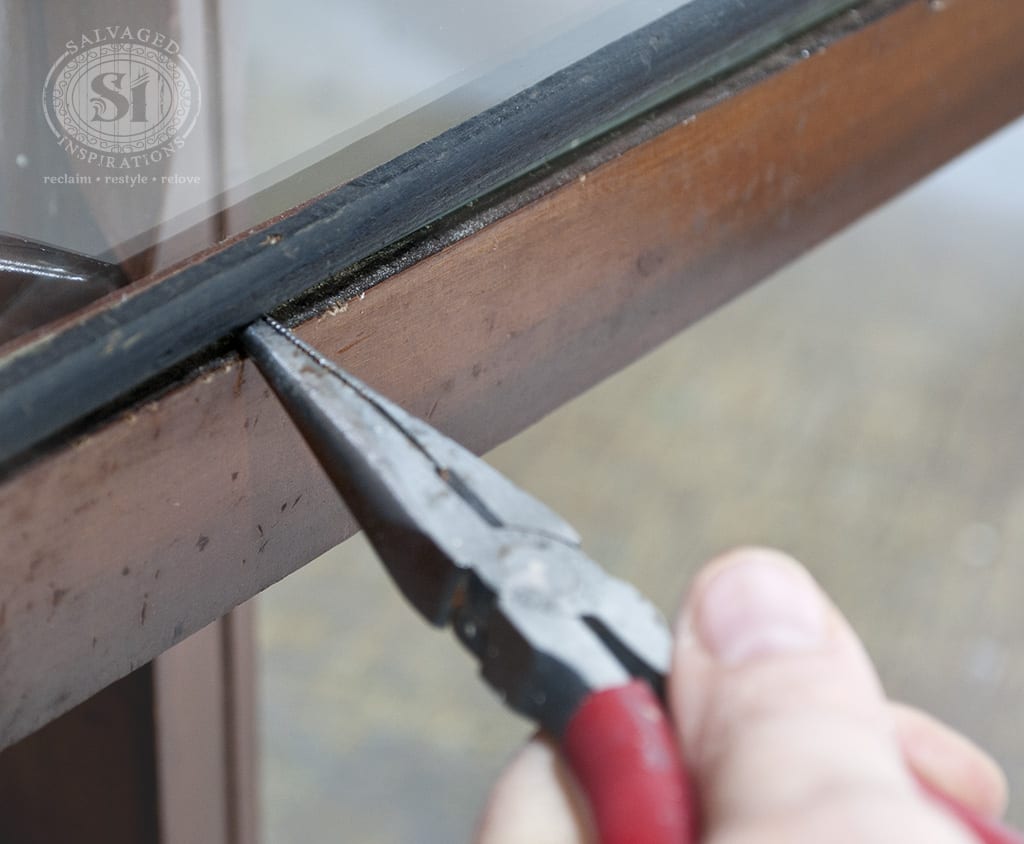
:: Needle nose pliers.

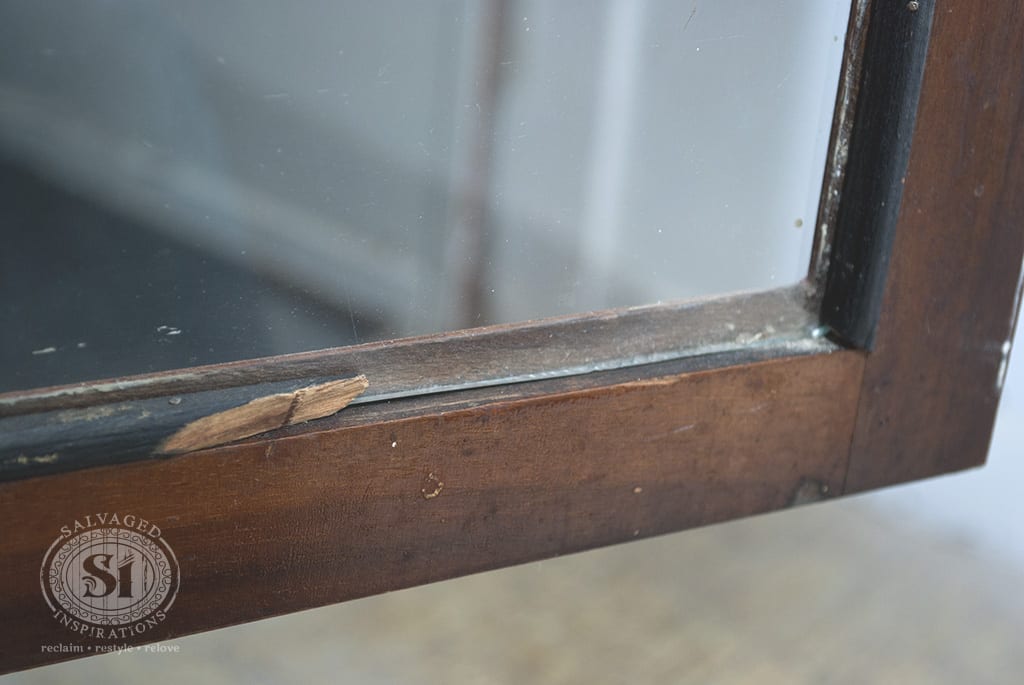
On most of these antique china cabinets, you’ll find four (4) pieces of wood trim mimicking a frame.
This wood trim is perfectly fitted inside the main door frame and then secured and held in place with finishing nails. This is what holds the glass and/or fretwork in place.

On this china cabinet, part of the trim is broken off …and NO – this wasn’t my handy work this time. 😉
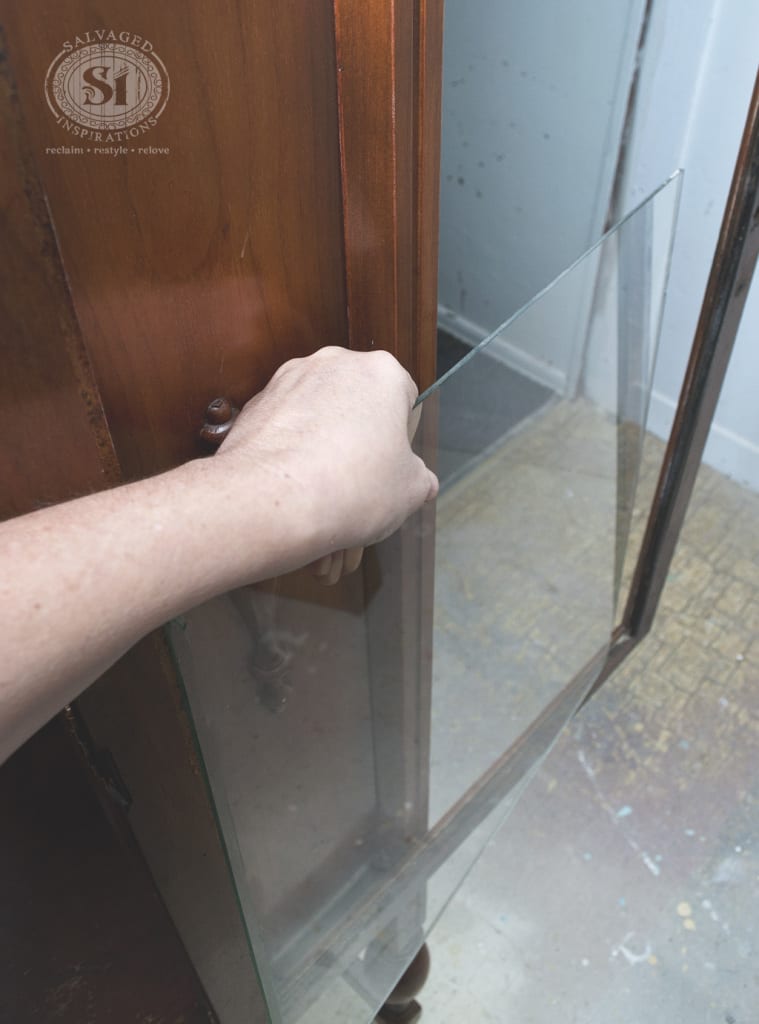
I want to show you the pic below because it’s great view of how the glass rests on the main frame while the wood trim holds the glass in place.
How To Remove Glass from Antique China Cabinet:
Start by using your flat edge screwdriver and gently pry the flat edge under a piece of trim. Once it’s under, carefully lift the trim away from the main frame.
Once you’ve created a gap between the main frame and the trim (and the nails are visible) you can switch to your needle nose pliers to complete the job.
Here I’m using the needle nose pliers to remove the nails. They pull out really easy once the trim has been loosened.

If you can’t grab the head of the nail from the top, no problem.
Use the needle nose pliers to go in underneath the trim and pull the nail out of the main frame while leaving the nail in the trim…no biggie. I always end up doing both.
Then I use the same pieces of trim for the new installed glass (I like to paint them to match the clean new look of the restyled cabinet!) and often if placed just right, I line up the nails into the original holes and then add a few new finishing nails for extra hold.
Once all the trim is removed, you can carefully remove the glass!

Have you ever removed or replaced glass on furniture? Do you have any tips you’d like to add? I love all your comments, questions and suggestions so don’t be shy…chime in!
Catch last week’s Q-T-T here – and if YOU have any ideas or tips you would like to share on the SI Quick-Tip-Tuesday-Series, send me an email!
Related Posts ~
A Small World & A Custom Painted China Cabinet
Replacing Glass with Chicken Wire The Safe Way
Enjoy your day …and be sure to pop back in for the AFTER of this piece!
Denise x
_____________________________
Like what you see? Subscribe to Salvaged Inspirations so you’ll never miss a post!
Follow along on Pinterest, Google+, and Facebook for more inspiration!

I have the glass removed already and have finished painting my china cabinet… any tips on putting the glass and trim BACK IN?? Hopefully I won’t break the glass in the process! 🙏🤞
Thank you for this great lesson!! I’ve used it a couple of times. One thing I might add…especially if you want to save the glass…is that I like to tape the glass in place while I remove the frame. Just to insure it does not come crashing down.
As always, thank you for all the inspiration. I love the colors!!
C
Great tip! Thanks Cara!
Do you know where I can purchase new trim like the above article. I have to replace a piece. I have no idea how I lose things like this and sometimes hardware…
Looking great work dear, I really appreciated to you on this quality work. Nice post!! these tips may help me for future.
Has anyone removed a mirror from the back of a China cabinet. It’s approx. 1980s piece.
Hi, do you know what these “H” style legs are called?
Hmmm, I don’t Clair. I just always refer to it as ‘extra support’ but I’m not sure what the proper name is. If anyone reading this knows, feel free to chime in!
I doon’t see a photo as to what you are referring to but doesn’t the Chippendale style feature some cross pieces in their furniture legs? Like in a Chippendale Wing Back?
I too am wondering how to remove glass from a china cabinet door that has a curved top. The top part of the door is straight, but the upper part of the glass is concealed by a curve or an arch. How do you slide that glass out???
Hi Marianne! If I’m understanding correctly, I think it’s the fretwork that needs to be removed first (which what provides the ‘curve’) – then the glass. The glass should slide out once the fretwork is removed.
I’m having a problem getting the glass inside a 1972 American Drew China cabinet out. The door glass easily removes but glass that plates sit on are my huge issue. Any suggestions?
Hi Tammy! Yes, I know what you mean! Getting the glass/shelving out of a tight china cabinet takes some finagling. I start with the top shelf. Lift it off its place holders and then carefully raise one end (approx up to a 45 degree angle). Then I maneuver it down and place it on top of the bottom shelf. Holding onto the 2 shelves, I raise them both off the holders a few inches, and then carefully angle them to a 45 and then almost 90 degree angle until I can remove them from the front. I hope this makes sense. This is one of those things that is much easier to show than to tell. Good luck and feel free to let me know how it goes. ?
An old post, but hope you will put my mind at ease about this project….
What did you do about the broken trim? I have done several barrister bookcases and side-by-sides, and I look to not replacing the broken trim piece when I reassemble as long as it is accomplishing the task. I have never found the needed size in 1/4 rounds and simply look to minimize the the appearance of the break…. In this case, it would be coloring the raw break the same color as the rest of the trim.
Just one word of caution (learned the hard way!) exercise extreme caution that you are only prying trim and do not have part of the glass in contact with your screwdriver/putty knife! Although, my mistakes have lead to learning how to do stained glass and enhancing the pieces I messed-up!
Where can I find replacement wood and small nails to replace these parts?
You can buy 1/4 round trim and small trim nails at any Home Depot or Lowes Rj.
I just found your post via Pinterest. I just bought a cabinet off Craigslist and it has a broken fret. An advice on how to fix it? Thank you!
It’s a challenge to say without seeing it Jamie, but if it’s a clean break, is it possible to glue it back together?
I like to use a putty knife instead of the screwdriver… sometimes is so tight, the screwdriver won’t go there without causing any damage….
Yes any flat edge that works… great tip Amy!
We just did this for a china cabinet and my one tip is to mark the trim pieces when you remove them. I use a marker and put a R, L,T and B on the trim. As you know, antiques are pretty fussy when it comes to replacing old wood, so reinserting all the trim in original order is important.
This is so good Jeri! I always do this with drawers but never thought to do it with the trim pieces!
I love your work and the tips you share. The only things I would add for removing glass is to (1) have a 2nd person standing by, especially if the china cabinet is standing upright; once the last piece of trim is removed the glass could fall out, (2) Tape off the glass with masking tape in the event the glass breaks, (3) Wear shoes or boots to protect your feet and work gloves to protect your hands.
Safety first and these are great “take care of yourself” tips… appreciate this Patricia! 🙂 Oh, and LOOOOVE your blue & white thrift store china cabinet make-over… it’s gorgeous!
Hello Denise
Thanks Denise providing us useful information. I was looking for how to remove glass . Now i found your blog .
Cool! I did this in reverse. I have a cabinet that was missing the glass so had a piece made to fit & placed it in, along with replacing some missing quarter round. Good as new!
Brilliant Tracy.. bet it looked amazing! 🙂 Another idea (depending on the look your after) is to forgo the glass and use chicken wire. I really like that look on french-country furniture!
Great tips ! A lot of people do seem to pass over pieces with glass because of this, which is a shame.
Also, occasionally you might find glue or a putty-like substance additionally holding the glass behind the quarter round edging trim.
If you do same as these excellent instructions, then using a box cutter carefully, after you remove the nails, or even a thin fillet knife, score (run through) the putty or glue, then you can usually safely get the glass out…. but take it slowly so that you don’t suddenly score up through the wood (gouge or split), that you want to reuse.
Use a blunt Knife to scratch away any putty afterwards if it’s soft & sand with a folded corner of sandpaper, so that the trim will fit back in snugly. If it’s harder glue that you’re dealing with you may need a sharper, short, rigid knife to pare away the glue pieces from the frame and trim.
It’s also probably advisable to use some kind of cotton gloves just to protect your hands from knives, screwdrivers and glass edges when doing this.
Great advice/add-on Chez… thank you! I’ve also come across some cabinets (usually not antiques) where the glass was held in by a rubber strip. There’s a grove in the frame and a rubber strip is stuffed into this grove holding the glass in place. To remove, you take the flat head screwdriver and pry the rubber strip out. Once part of it is lifted, the rest of the rubber strip can be pulled out full length and intact. I hope all this makes some sense because I don’t know the technical terms for this method…lol.
Sounds good. Please tell me how to get the rubber strips and the glass back in! I am chalk painting a china cabinet… Thanks.
Very carefully Suz…lol. 😉 The process is done in reverse. If it’s a larger piece of glass, it’s helpful to have a second person holding the glass in place while you use a screwdriver (or something with a sturdy flat edge) to push the rubber strip back in place.