Hello my painting friends! Have you ever noticed there’s a wealth of information on stenciling; even more information on Milk Paint, but not a whole lot of advice on stenciling with milk paint?
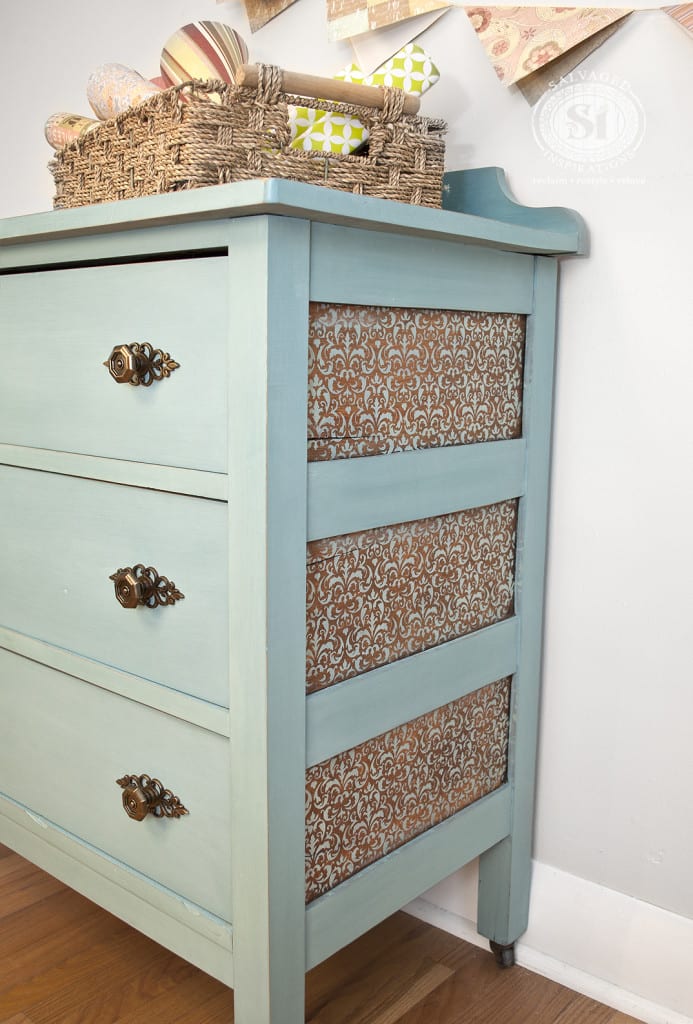
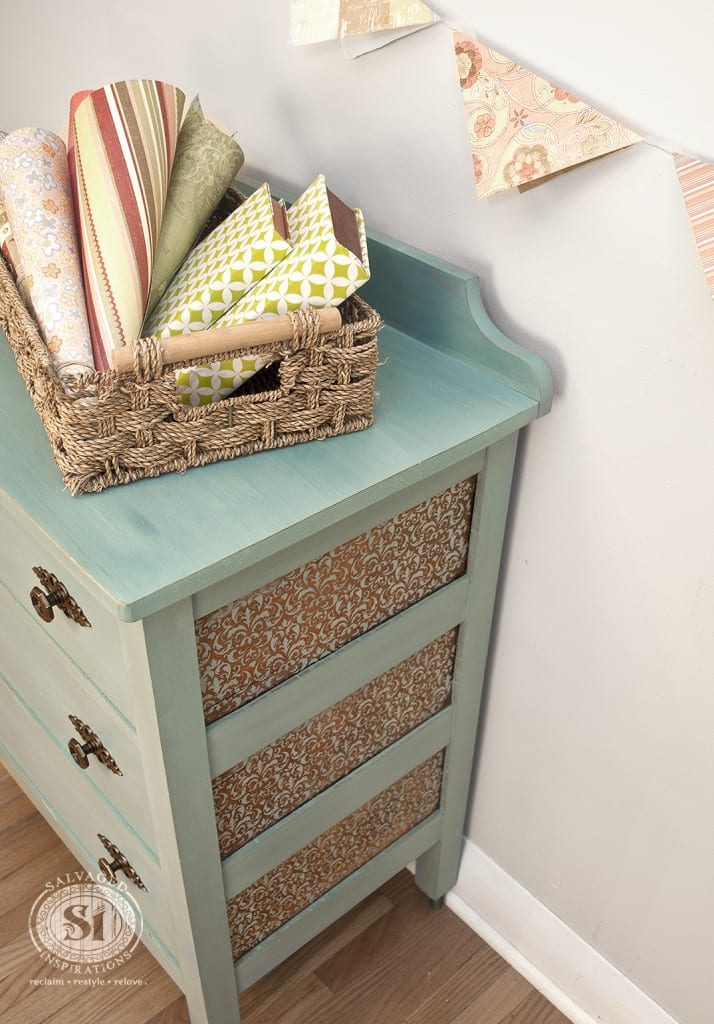
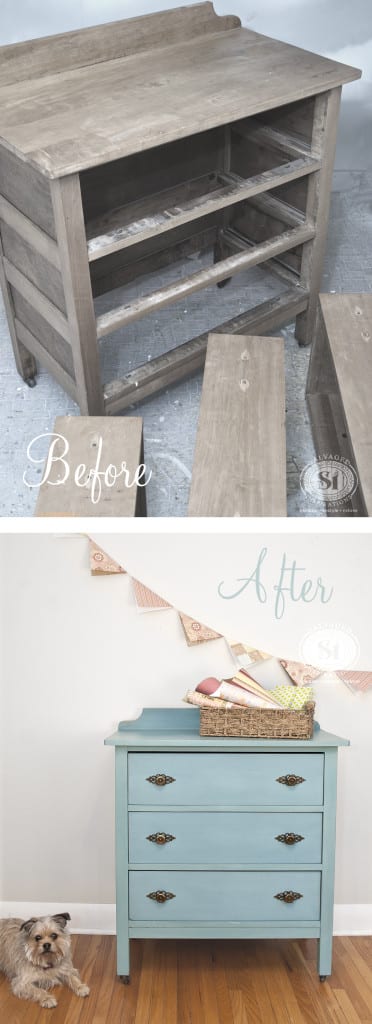
Well, last week on our way home from a chicken-wing and carrot cake dinner {I’m the worst vegetarian ever!}, M-M-M and I salvaged this small primitive dresser. When I saw the cracked-rustic side panels, I knew it was an opportunity to create a peek-a-boo stencil design while leaving some warm wood exposed. As an added bonus – I get to share some Milk Paint Stenciling Tips with all of you! 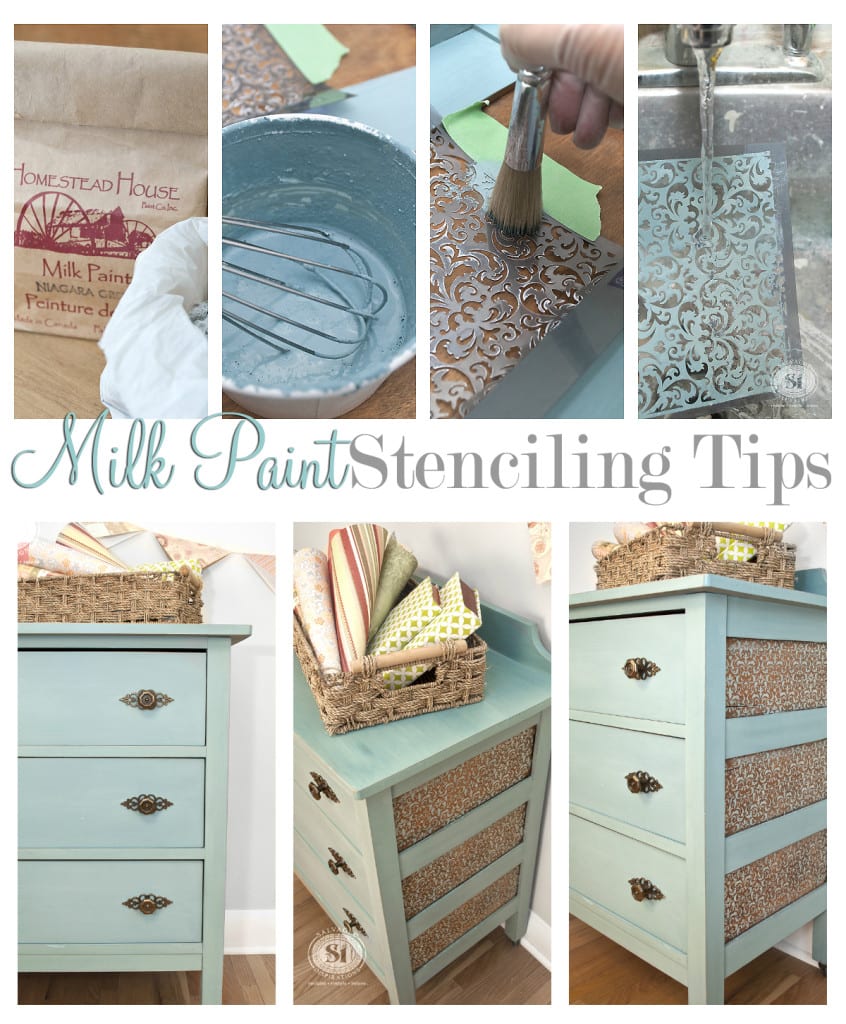
While the basic principles of stenciling apply regardless of what type of paint you use, here are 8 Tips that will turn your milk painted stencil into a work of art!
Tip #1: Secure The Stencil
Painters tape is idea for keeping your stencil in place but don’t hesitate to use your fingers too!

Tip #2: Use A Stencil Brush
With other paints, you can stencil with a small roller or sponge. When stenciling with Milk Paint, always use a proper stencil brush! Because Milk Paint is often more watery and has some natural lumps and bumps, the flat-stiff-short bristles on a stencil brush really help distribute the milk paint.
Tip #3: Bounce and Dab
For best results, bounce and dab. Don’t slide your brush over the stencil or do circular motions because your milk paint will get under the stencil and make a terrible mess. Dabbing your brush in a quick up and down motion will get the paint into all the nooks and crannies of your design.
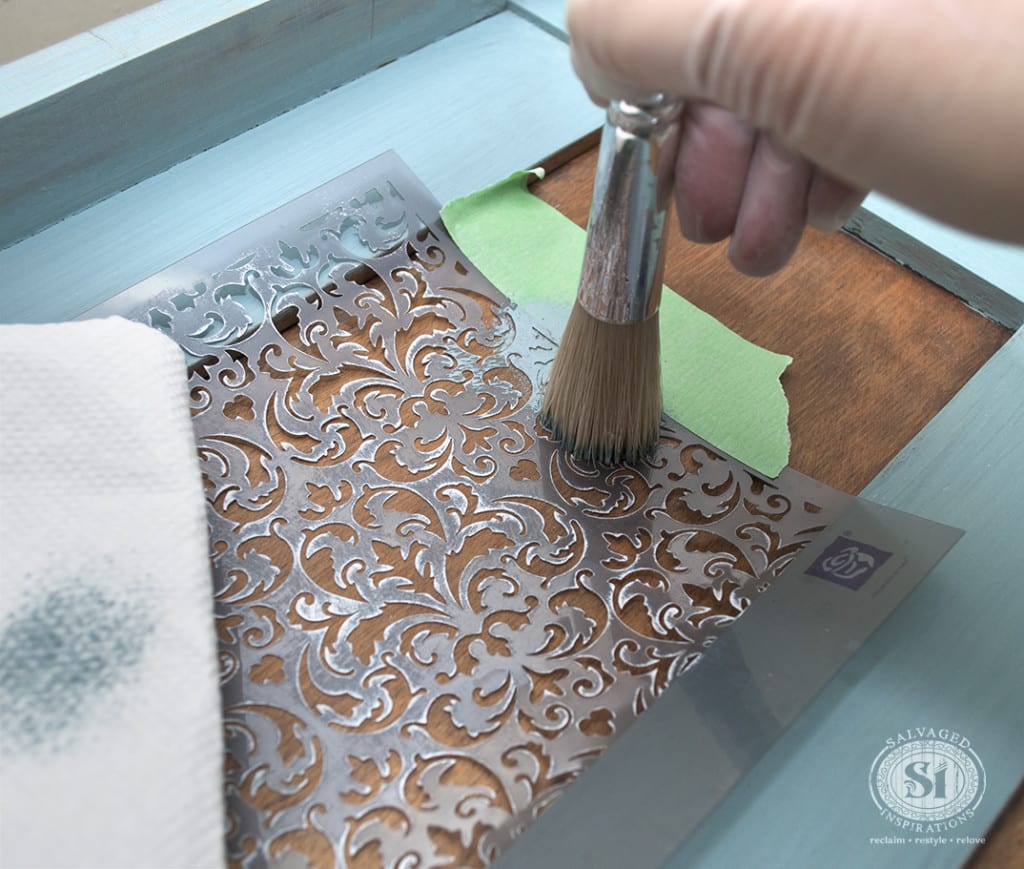
Tip #4: Blot Dry
One of the main complaints when stenciling is bleed through. This is when paint runs or seeps under the stencil and leads to messy outlines so edges don’t look crisp. When I dip my brush into the milk paint, I make sure to just load the tip of the brush by touching the tips of the bristles into the paint. Then I blot and dry even more of the paint on a paper towel. A dry brush will keep your design crisp and clean.
Tip #5: Apply Super Thin Coats
If your first attempt is not dark enough, leave the stencil in place until it completely dries and then apply a second coat. Always apply super thin coats and keep the stencil in place until ALL coats are dry.
Tip #6: Practice Makes Perfect
I know stenciling with Milk Paint may be new to some of you so don’t hesitate to practice on a piece of cardboard before you start your project. When you’re in practice mode, it’s a great opportunity to iron out any mishaps. Practice makes perfect.
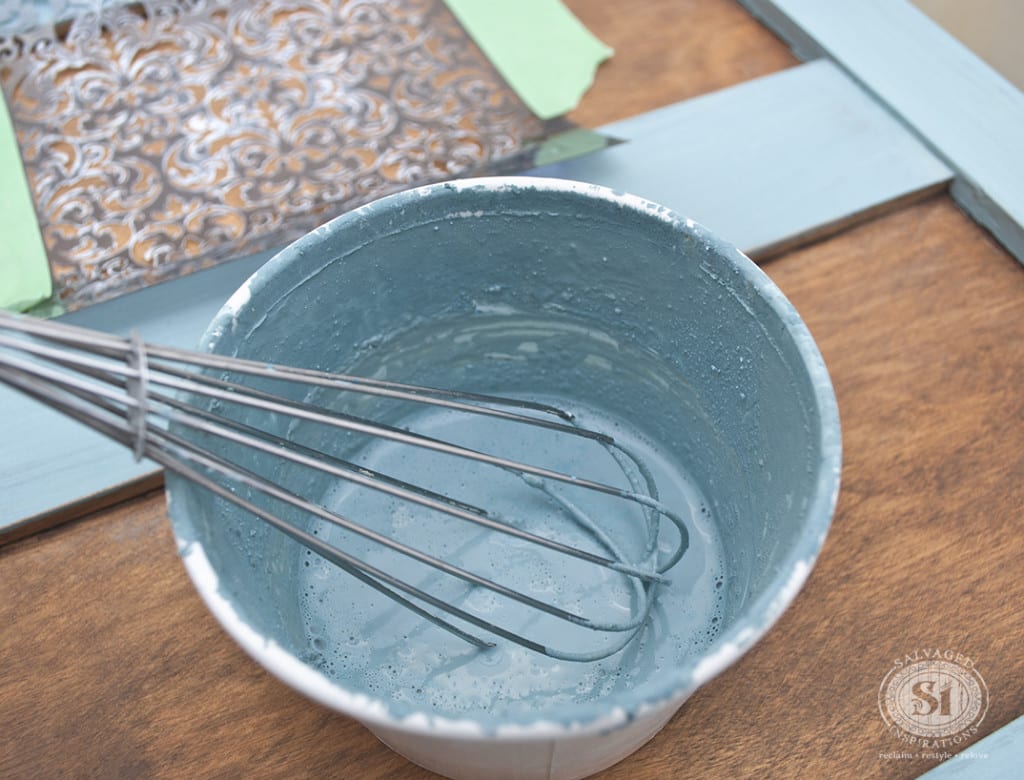
Tip #7: Mix Thicker
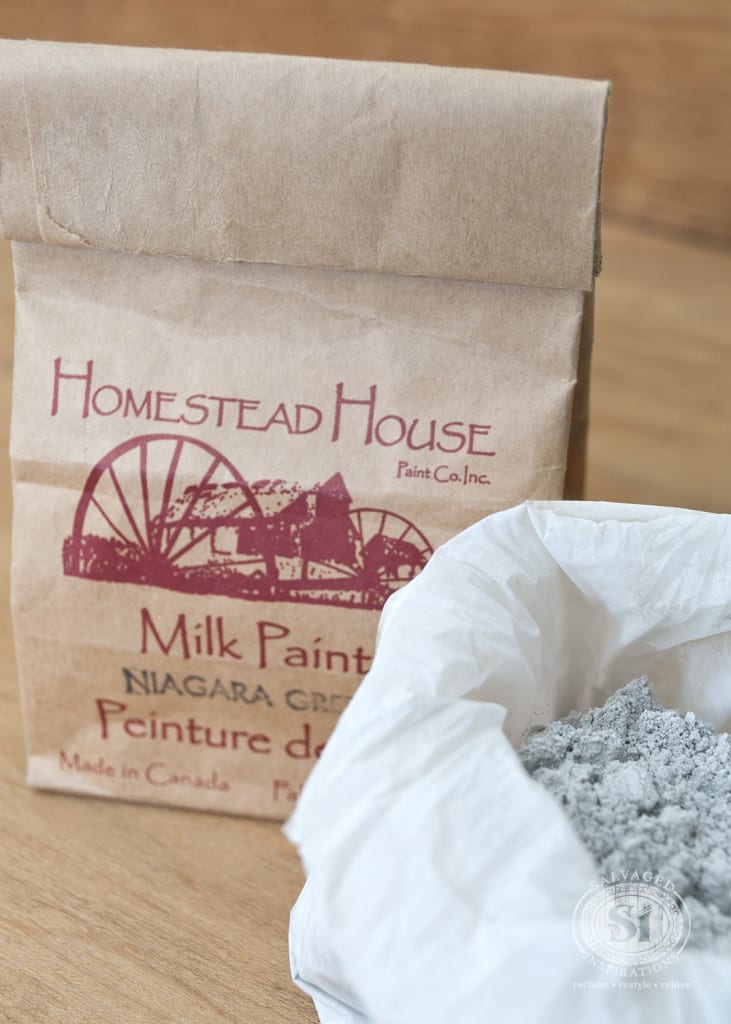
This is probably the BEST tip! Milk Paints are often more watery than say a latex or chalk paint. Mix the milk paint thoroughly and make sure it’s consistency is on the thicker side while allowing all the pigments to dissolve before stenciling so you get continuity in color.
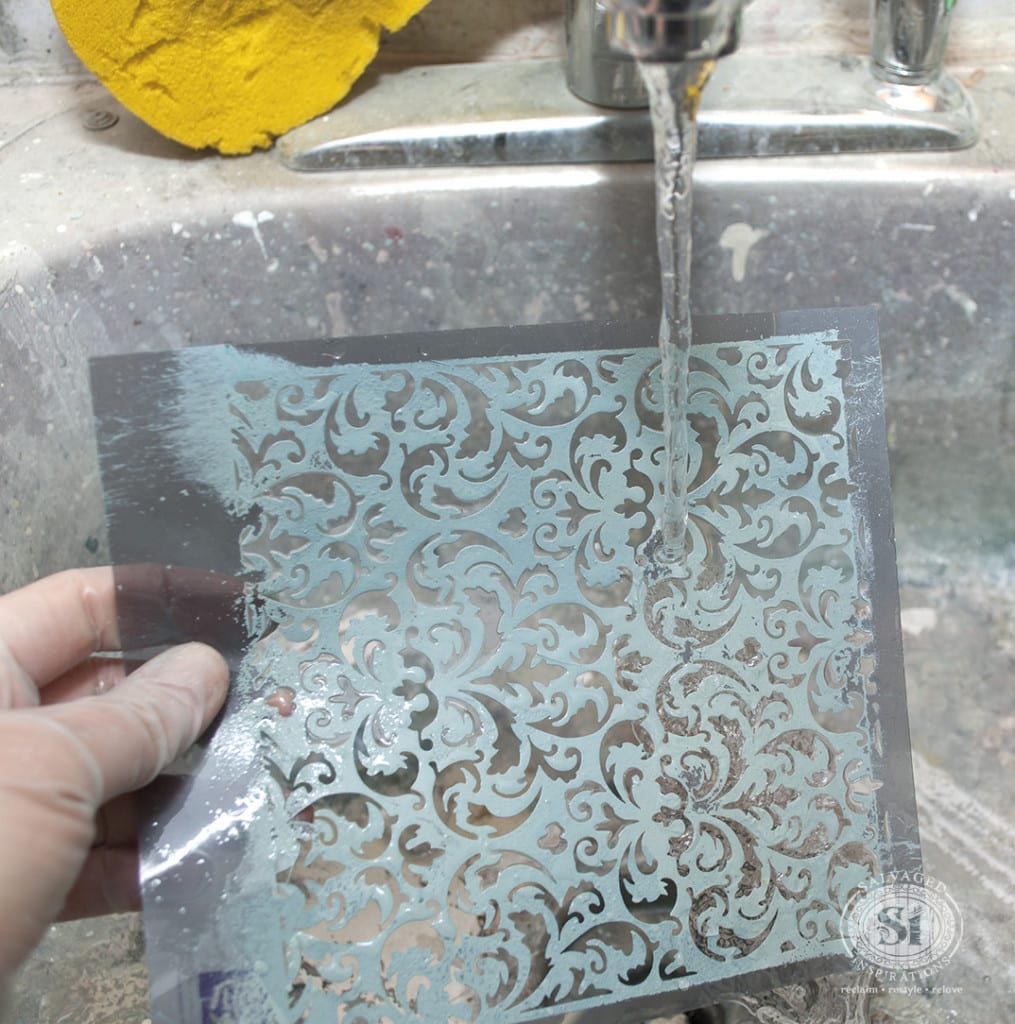
Tip #8: Keep The Stencil Clean
As neat as you may try to be, if you’re using a stencil design over and over again, it’s bound to get messy. It’s important to keep the stencil crisp and clean. The stencil I used for this Peek-A-Boo Dresser is small so I washed it frequently. (I’m getting good use out of this little stencil (wish it was larger!) because it’s the same one I used on this French Country Armoire.)
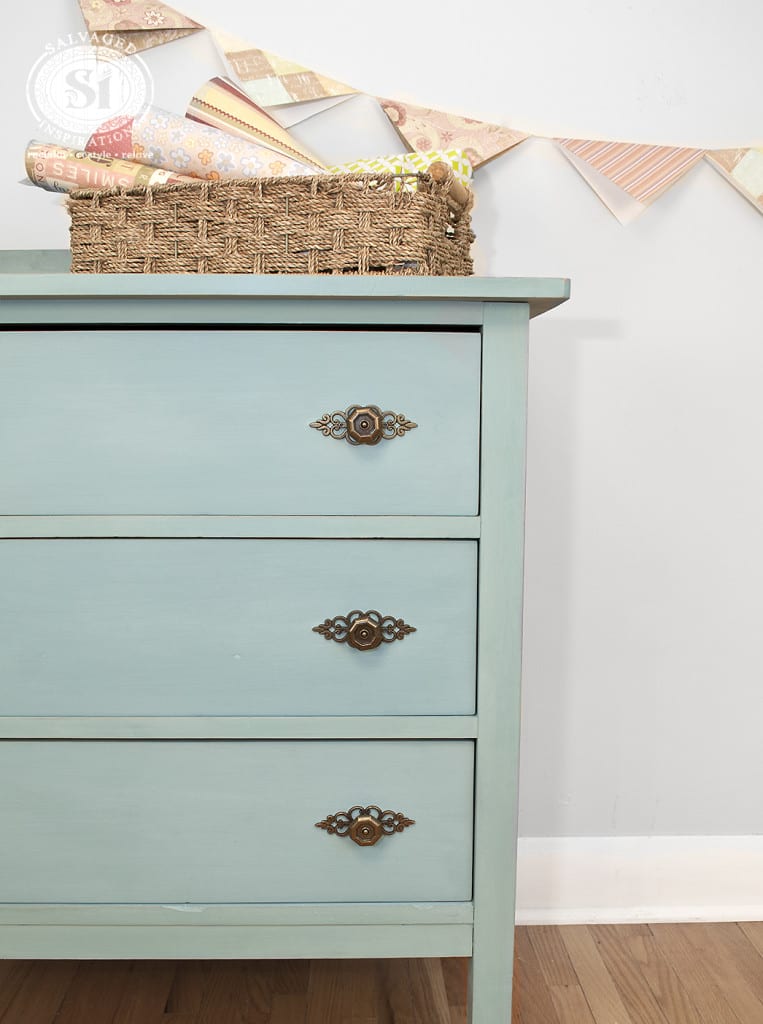
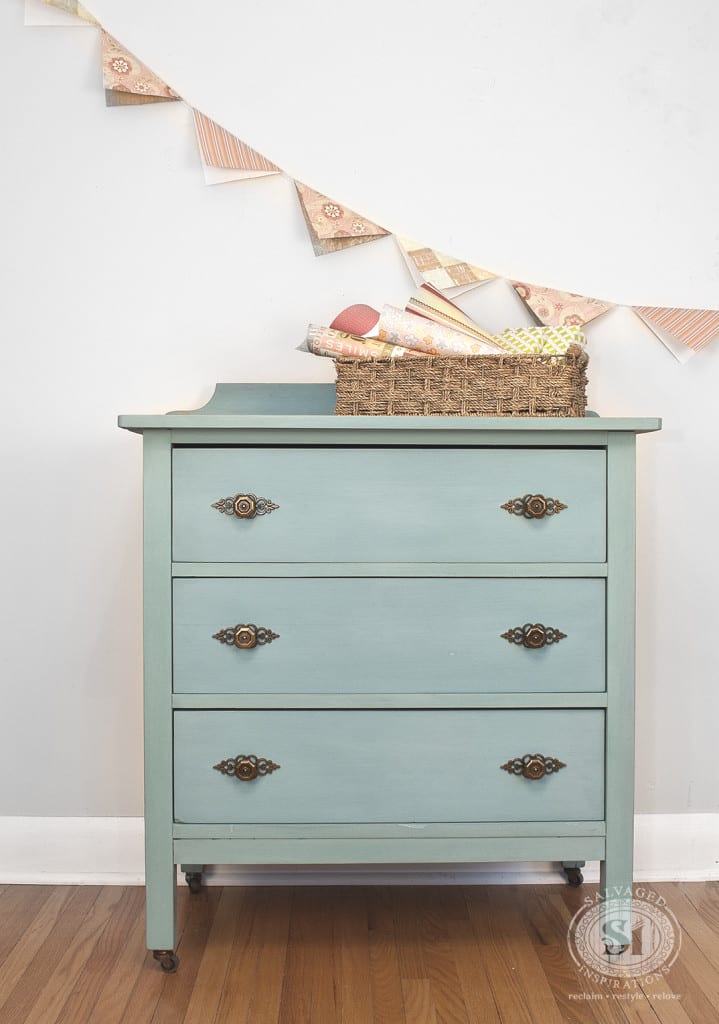
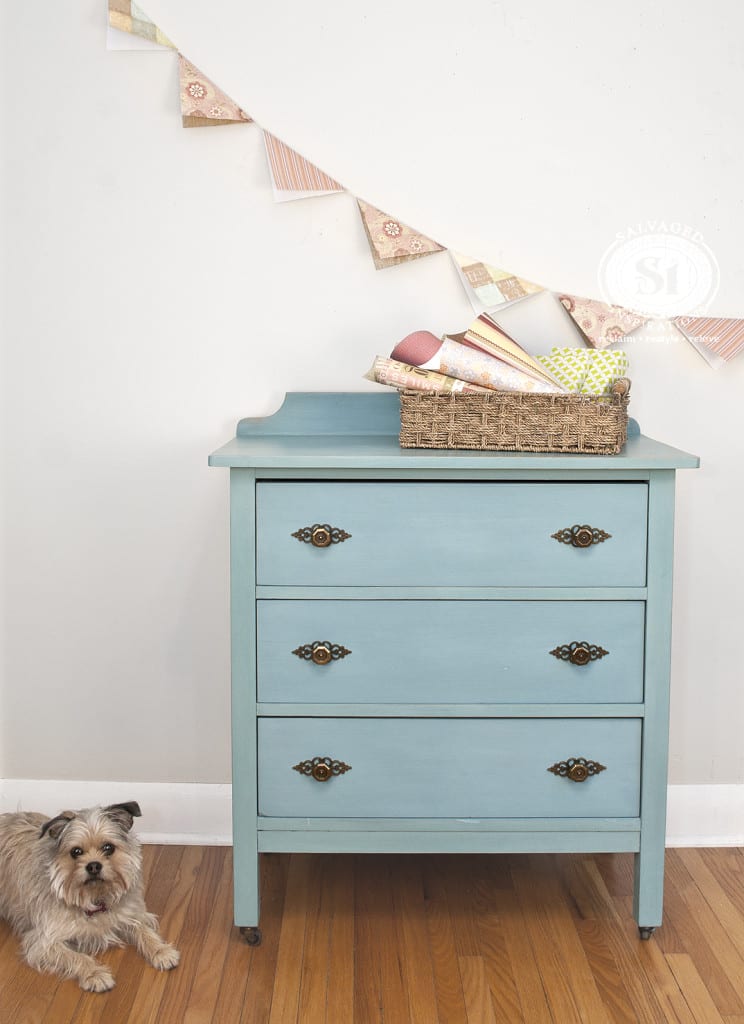
This salvaged Peek-A-Boo Stenciled Dresser is adorable. I’m loving the color (Homestead House Niagara Green) and I love that it has a rustic yet fun elegant feel.
Doesn’t every space deserve an element of whimsical surprise?! 🙂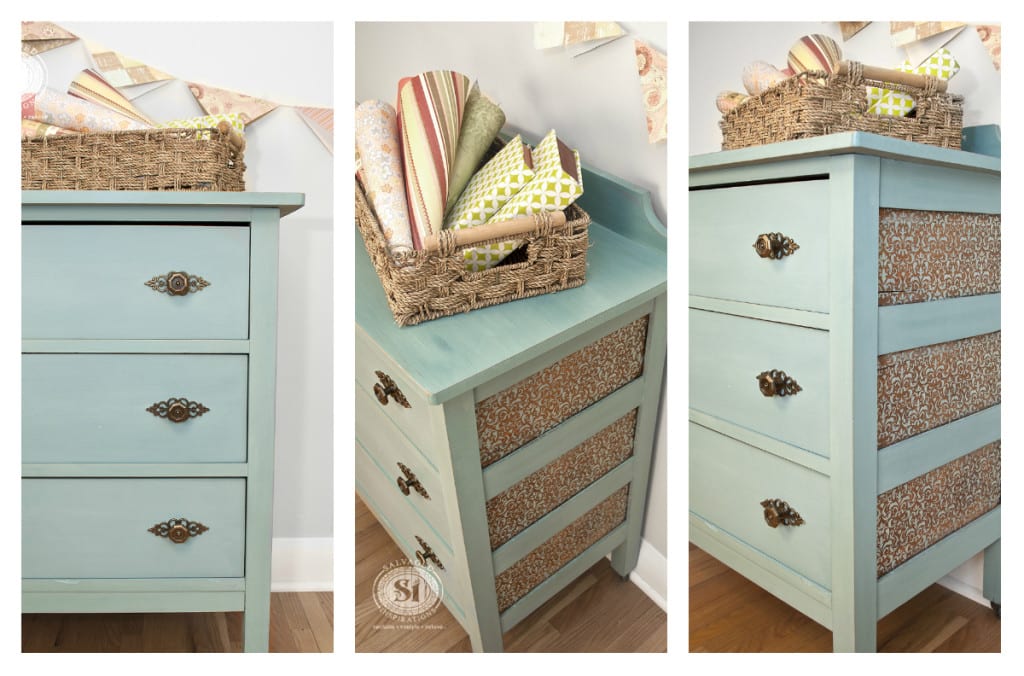

Feel free to leave additional stenciling or milk paint tips below! Always love it when you all chime in!
Happy Painting!
Denise
_____________________________
Like what you see? Subscribe to Salvaged Inspirations so you’ll never miss a post!
Follow along on Pinterest, Google+, and Facebook for more inspiration!

We’re planning on stencilling with milk paint, but I’m concerned about the tannins in the oak bleeding through as soon as we topcoat it.
Did you stain the wood first or just paint over the natural colour? Any tips to prevent oak bleeding through the light milk paint?
I stenciled over the natural color. If you’re concerned with bleedthrough, what about clear shellac? Spray a light coat or two over the wood prior to stenciling with the milk paint and that should do the trick.😊
What a pretty piecr.
Thanks for sharing.
SK on Elderberry
Thanks…love your work!
Hi Denise, I Have quite a collection of stencils, but would love to know (if possible) where you found this particular one. I’ve been searching for this floral for quite a while & can’t find it anywhere. Would really appreciate knowing where it can be found. Thanks.
Tracy, I found this stencil at Hobby Lobby in Rochester NY. On sale for $1.99 or 2.99! But I searched their website for you and found it here.
You’re a doll. Thanks so much for doing that for me, much appreciated.
My pleasure! 🙂
I “happened upon” your website and wanted to make sure you knew that you have one of the best, most informational blogs on repurposing furniture that I’ve ever found! Thank you so much for taking extra time to be unbiased, detail oriented in explaining, and for covering a variety of helpful topics 🙂 Your work is beautiful and I was very inspired to keep on painting with some fresh new tricks up my sleeve!
So happy you “happened upon” the SI Blog… WELCOME! And thanks so much for your kind words… hope to see you here again. 🙂
Thank you soooo much for the info… Never thought to stencil onto original wood finish, love this piece…
Thanks Sharon! x
I love how you always share your knowledge ! I am an experienced creative painter out here on my own, painting away in my basement workshop out in the country. Your blog is always informative for all levels of experience and I appreciate it ! Thank you ! The only stencilling tip I could share is I have had great success stencilling with coloured and metallic waxes using a stencil brush- they don’t run ! 🙂
I’ve never tried stenciling with metallic waxes Cynthia! You’ve just added something onto my “must-try-list”! How exciting! 🙂
Thanks so much for this “inspiration”. How did you seal it?
It’s been sealed/protected with Trewax Rosie.
Denise,
Adorable! And your instructions “point on” as always. You certainly have the luck of finding “gems”.
You always offer your followers a beautifully written project and instruction. Thank you!
Thanks for saying that Phoebe! Motivates me to keep plugging away! 🙂
I loved fact this was a old find, You did a beautiful job, I love that color green, I dont like dark or lime y greens, The stencil was perfect for this piece,I may use this color on a piece, since i have greens in my house, Thanks for show.!!
I love this color too Ruth! I also used it on a coffee table redo which you can see here…so cheery and vibrant!
Great look. Love the stencil on the bare wood – so original! Could you please share how you got the stencil flat enough butted along the edges in order to avoid the border of the stencil? Did you just push the stencil down with your hand? I was really tempted to cut off the border on my project but didn’t want to ruin the stencil. I must sound awfully thick. Do you understand what I’m trying to ask? LOL Again, lovely work Denise.
Excellent question Tracy!:) Unfortunately, I don’t have an exciting answer…lol…I just use my fingers to hold the stencil down into the corners/sides as best as I can and dab away! The stiff bristles on the stencil brush really help with this though. Even if the stencil isn’t perfectly flat, the bristles will still get in there to do the job!!!
Great thanks for the info.
Gorgeous job, what a clever idea! Thanks so much for the tips, too, I never thought of stenciling with milk paint. =)
Pleasure…and thank Zovesta! 🙂