Hi guys! After a few takes and a lot of procrastinating, I finally finished my chair upholstery project… and I think they turned out pretty amazing even though I took some shortcuts. I don’t claim to be an upholstery expert, and anything I do with a sewing machine is up for debate and sometimes a good laugh, but I thought I’d share this makeover anyway. Hopefully, it will inspire you if you have a similar chair project you’ve been putting off – because if I can do this ANYONE can do this – seriously!
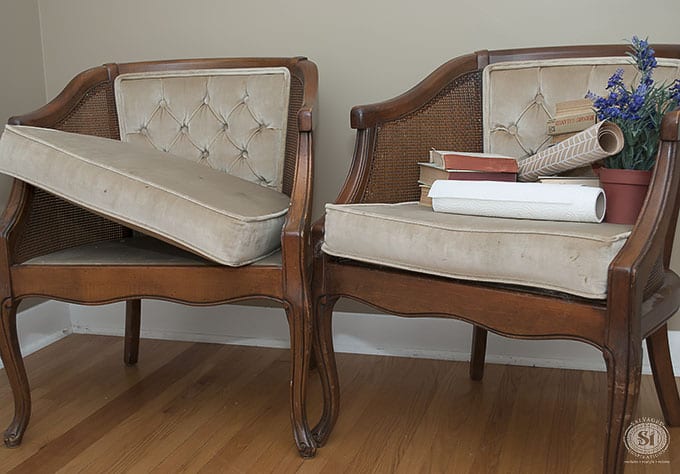
You may remember these chairs. I found them curbside in excellent condition but the old upholstery wasn’t looking good. When I tried painting over the fabric, it didn’t go well at all. Both the tufted back and the seat cushions turned rock hard and cracked like a scorched desert floor. If you’re curious about how NOT to paint fabric you can see the post here.
THIS POST CONTAINS AFFILIATE LINKS TO PRODUCTS USED. YOU CAN SEE MY FULL DISCLOSURE HERE.
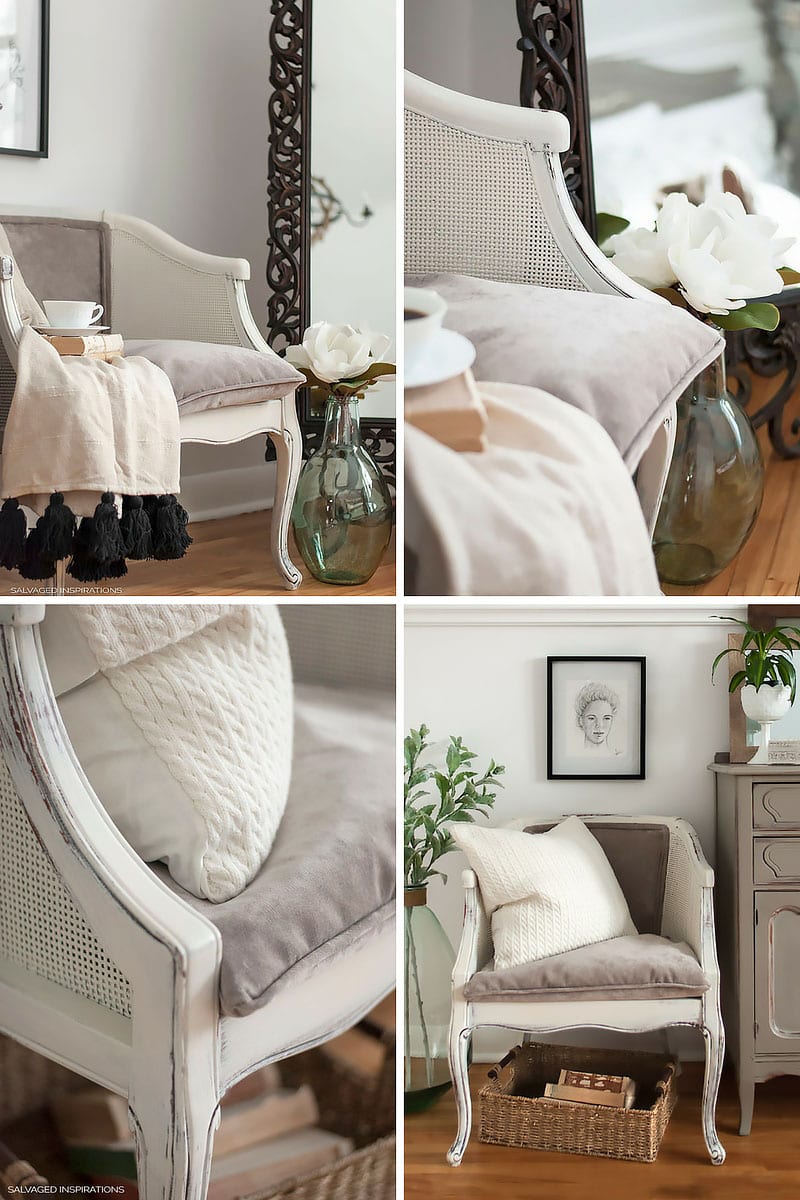
So, take two. My goal was to recover and create an informal-comfy-salvage-style-chair the quickest and easiest way possible. I wasn’t into taking the chair apart or removing any of the old fabric. Instead, my vision was to paint and distress and then create oversized soft seat cushions with a matching back to look and feel soft, casual and inviting. Mission accomplished. 🙂
SOURCE LIST::
- Chairs (Salvaged | Curb Shopped)
- Buttercream Chalk Mineral Paint
- Paint Brush
- Fabric (mine was a $3/meter sale upholstery end!)
- Ruler or Straight Edge
- Scissors or Rotary Cutter
- Measuring Tape
- Upholstery Gun (similar)
- Sewing Machine
- Cotton Batting
- Pillow Filler (I used down feathers from pillows I already had)
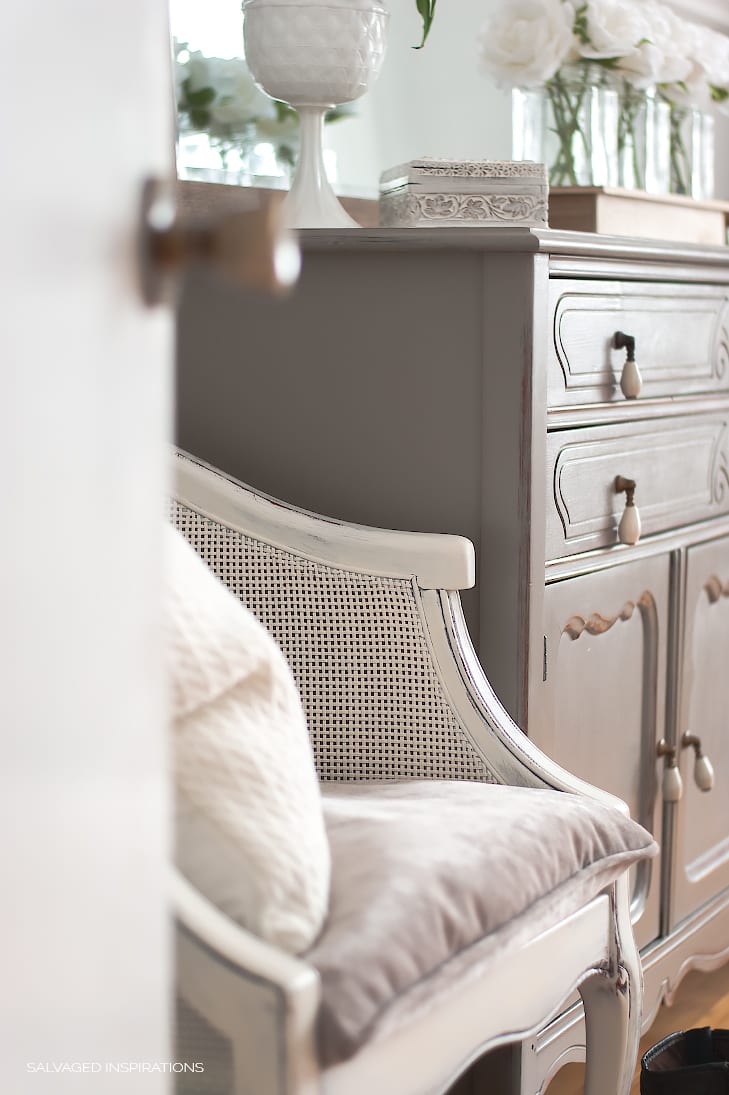
The day before I started recovering this chair, I painted the wood in this warm soft white. I used a brush for the body but found the weaved sides were taking too long to cover. I ended up pulling out my spray gun and giving it a few coats which covered it beautifully.
7 SHORTCUTS & TIPS FOR DIY CHAIR UPHOLSTERY::
Tip #1. Measuring
Measure to determine how much fabric you will need to recover your chairs. If you’re inexperienced – like me – what I like to do is take the basic measurements of the chair along with a few pictures of the project on my cell. The associates at Fabricland (or any reputable fabric store) will help determine how much you need. I like allowing for a little extra for any slip-ups. 🙂
Tip #2. Pneumatic Upholstery Gun
Like I mentioned, I’m not an expert, but it’s my guess that any upholstery job is WAY easier with a pneumatic upholstery gun. I LOVE this tool and it’s perfect for upholstery and craft projects.
Tip #3. Cover Existing Piping
To create the appearance of ‘new’ piping detail on the back of these chairs, I cut a 2-inch strip of fabric and used my pneumatic upholstery gun to staple it snuggly around the existing piping. I started by adhering it wrong side up and then flipped it over so no cutting was required and all the staples remained invisible.
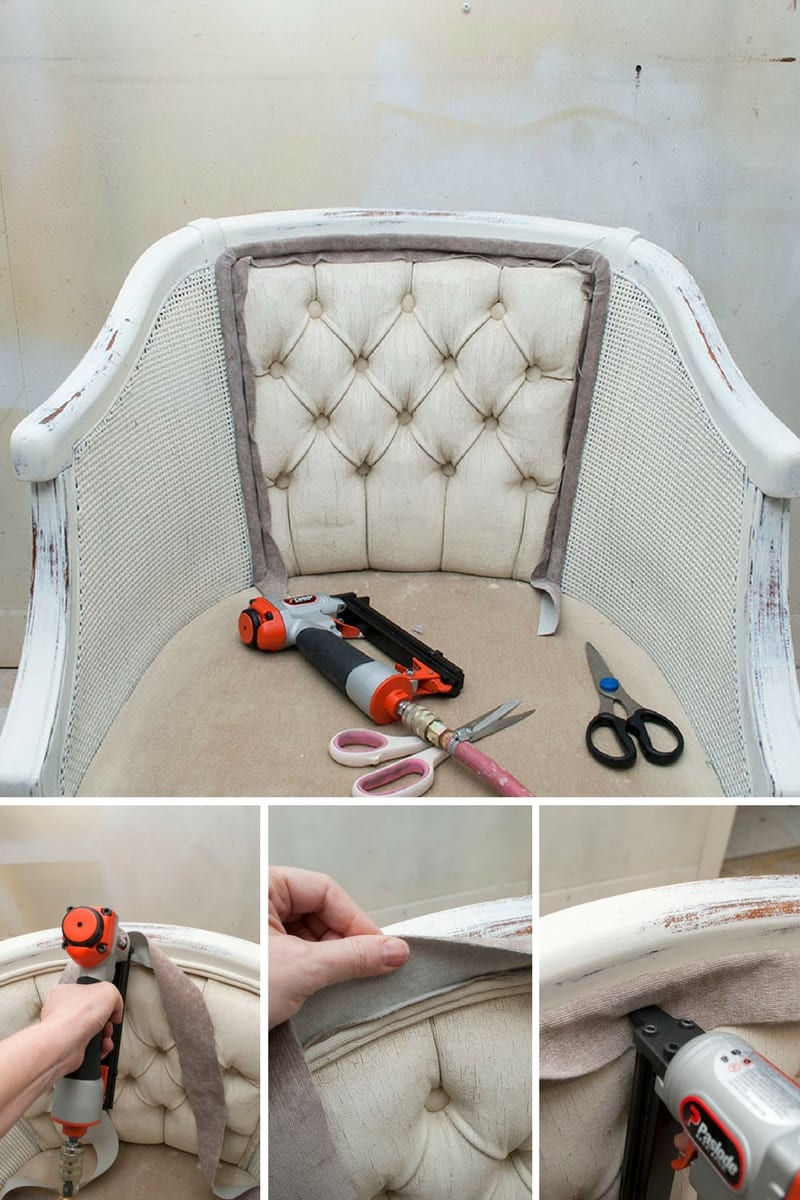
Tip #4. Cover Existing Back with Batting
To create a smooth look on the back of these buttoned chairs, I placed some extra cotton batting. This really helps to create a soft layer under the new fabric.

Tip #5. Pull The Fabric Tight For No-Wrinkles
Placing the top of the fabric on the top of the chair (wrong side out) staple along the top being sure to get right into the crease and into the frame so no upholstery staples will be visible. I found the key to a no-wrinkle fabric was to adhere 3 staples along the top – then pull tight and add 3 on the bottom – then pull tight and repeat on each side. This helped to hold the fabric in place before shooting in ALL the staples.
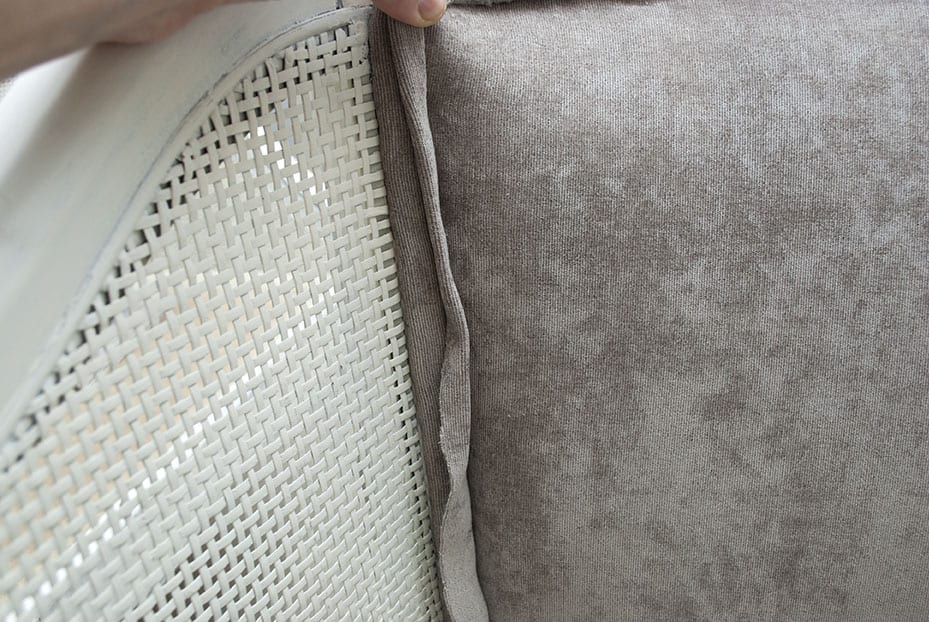
Tip #6. DIY Pleat
I really didn’t feel like sewing – or at least do as little as possible so I cut the excess overhang fabric down to an inch and then folded it over and stapled to create a pleat on either side. It looks more like a pleat than piping but I’m pretty happy with it. I think it adds a little extra detail and hides all the staples beautifully.
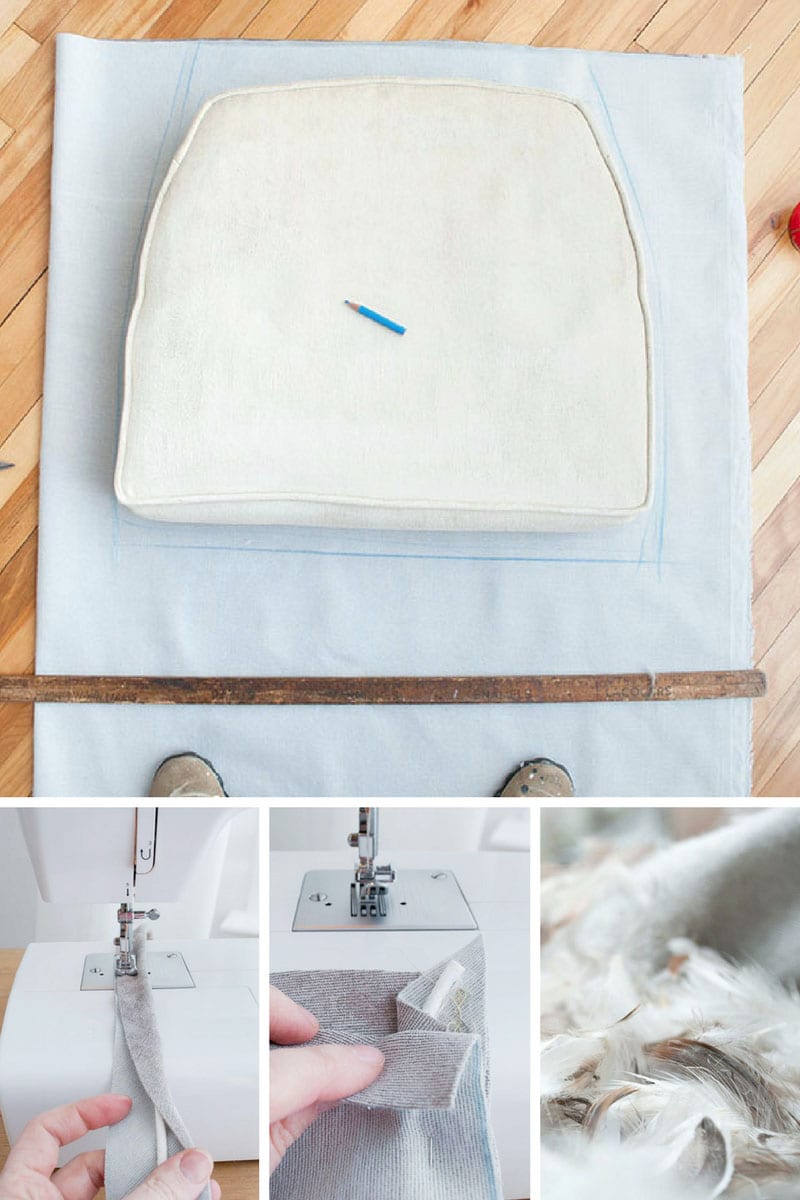
7. Sew & Stuff Oversized Seat Cushions
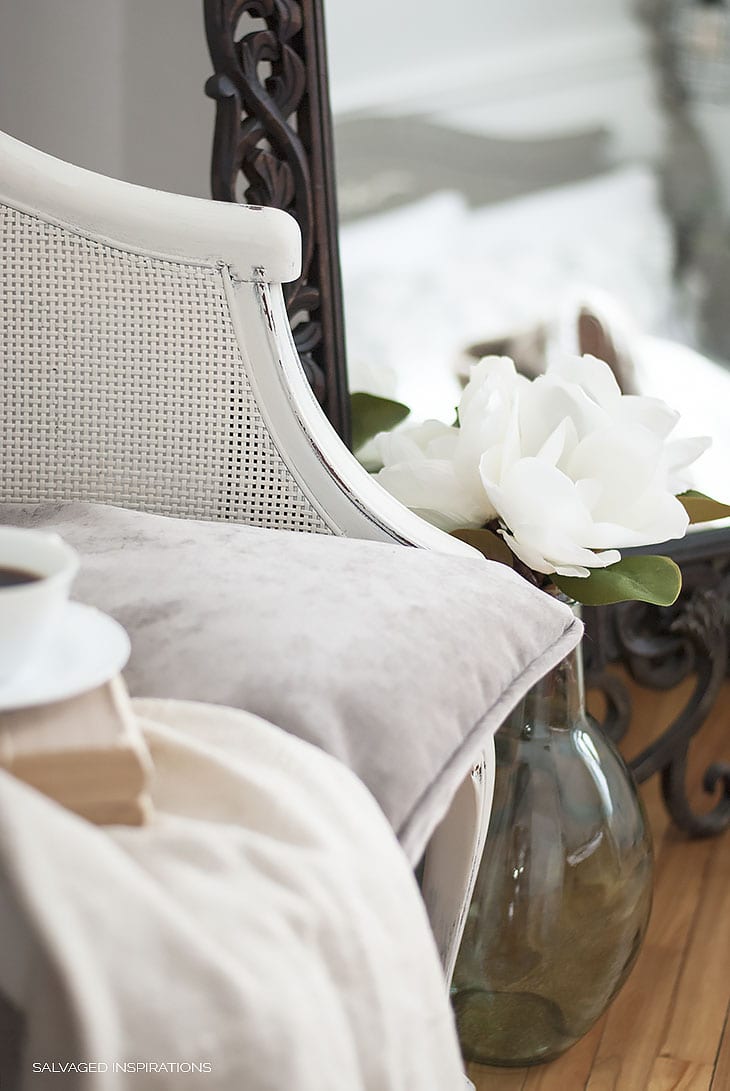
I like the idea of soft and comfy so I did an easy to sew oversized throw cushion for the seats. It’s not fitted so the measurements didn’t have to be perfect and if you can sew two pieces of material together (right sides together), you can do this! I went a little fancy and added piping to the front which looks great. I used down feathers from pillows I already had to fill these cushions.

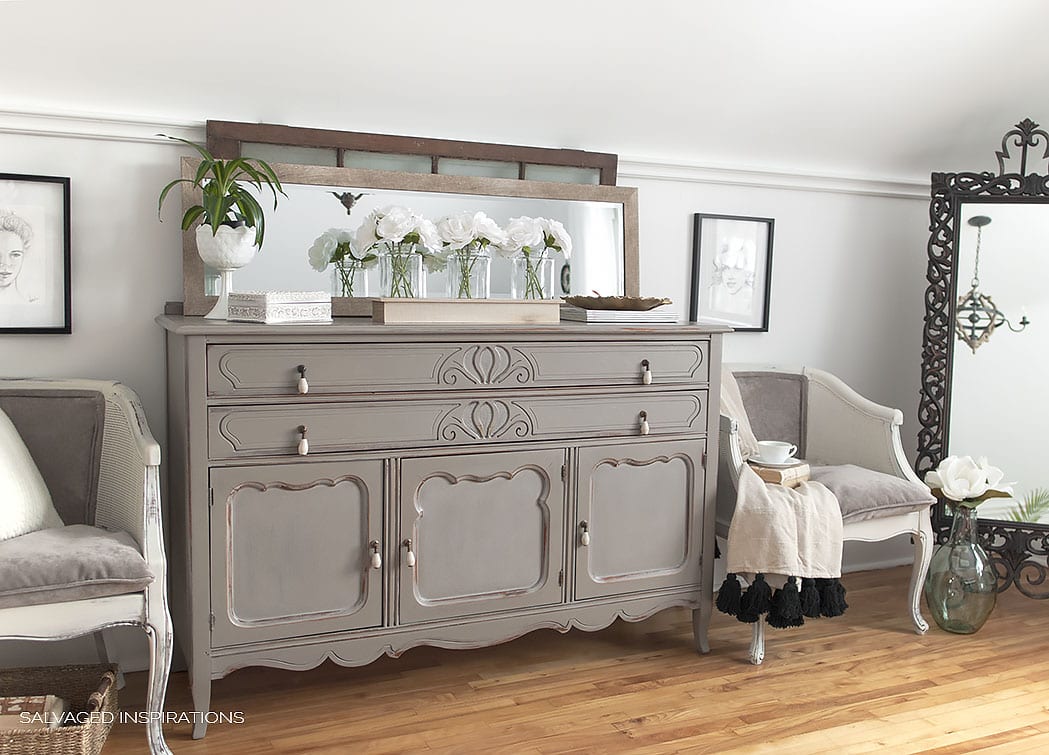
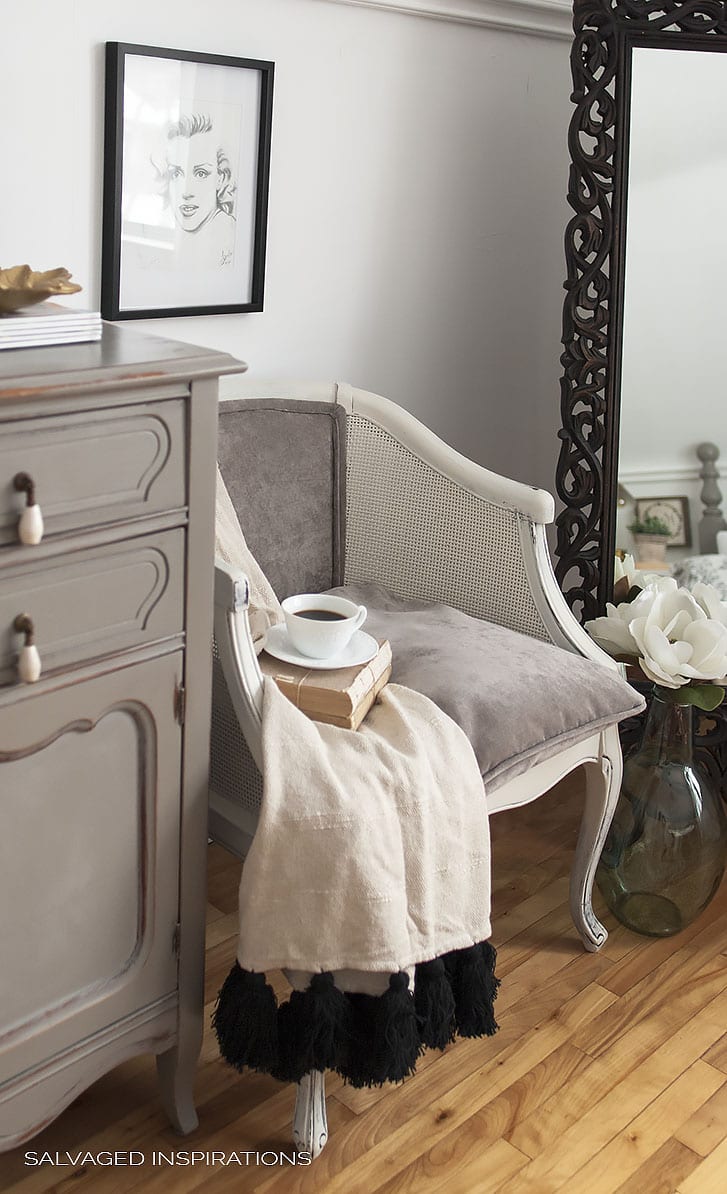
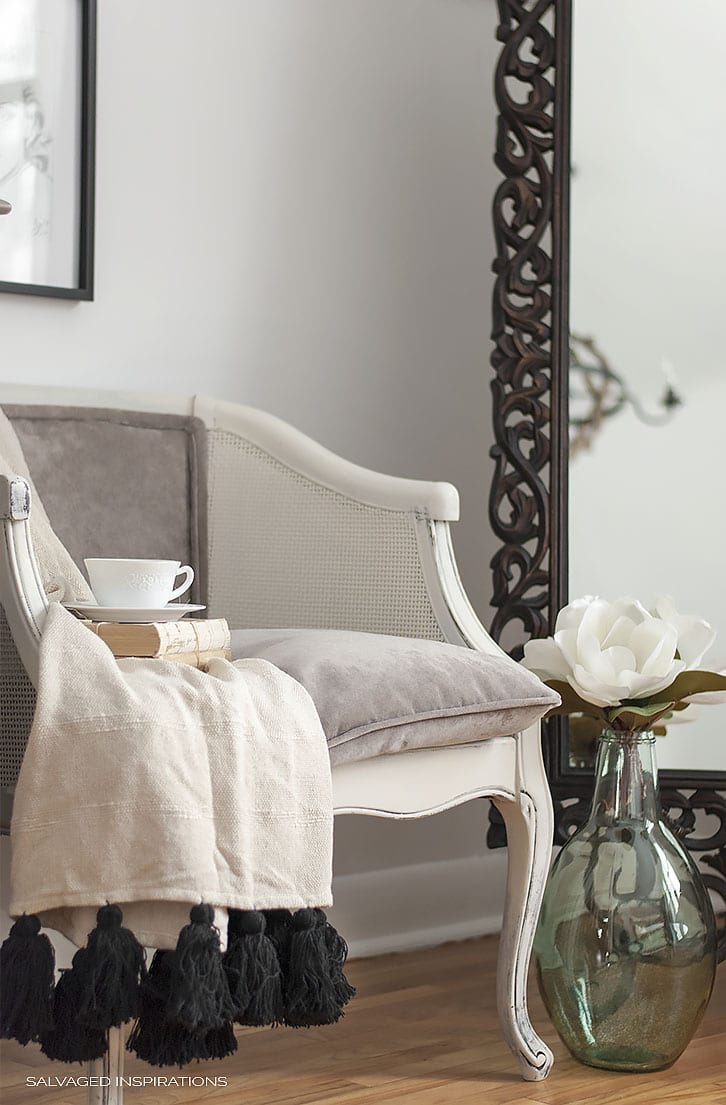
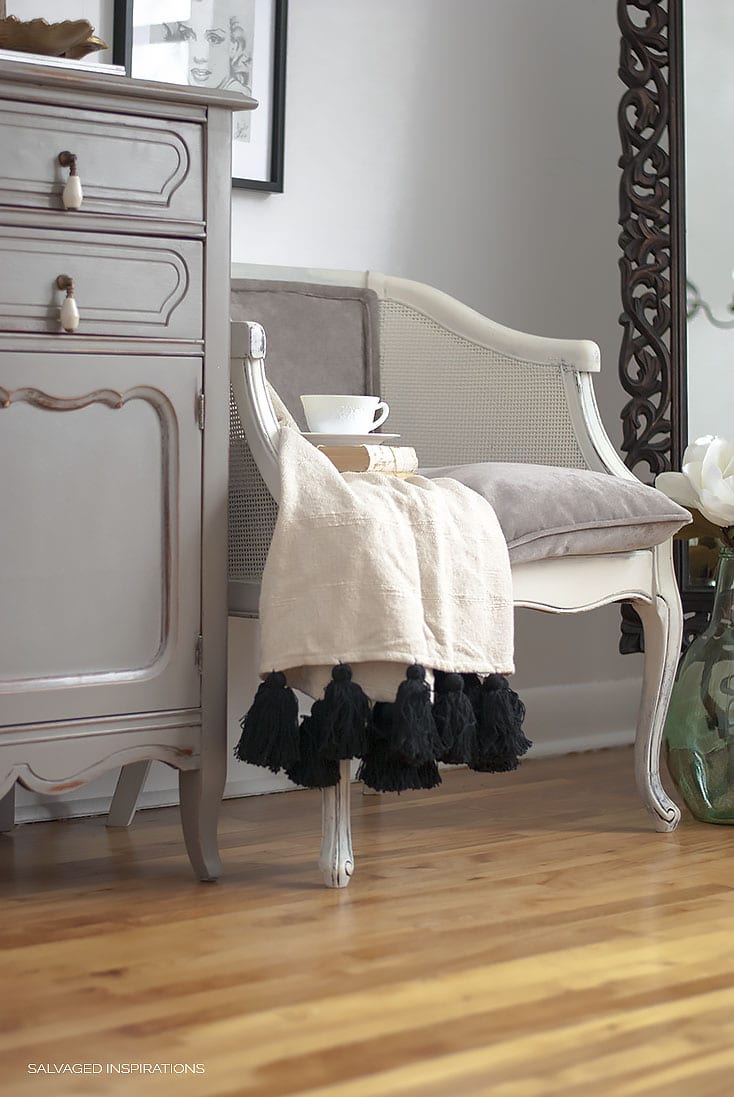
Add a throw pillow and blanket along with a cup of coffee and a good book and voila! I have two good looking salvaged-styled chairs for my bedroom! I already had the paint, batting, piping and down feathers and I was lucky to find this upholstery end on sale for $3 per meter. The total cost for both chairs was $13 and a full day of my time.

HAVE YOU EVER TAKEN ON AN UPHOLSTERY PROJECT? IF YOU HAVE ANY TIPS OR SHORTCUTS YOU’D LIKE TO ADD OR HAVE ANY QUESTIONS, FEEL FREE TO CHIME IN… I ALWAYS LOVE HEARING FROM YOU!
I hope you have an inspiring creative week!
Denise x
![]()
LIKE WHAT YOU SEE? SUBSCRIBE TO SALVAGED INSPIRATIONS SO YOU’LL NEVER MISS A POST!
FOLLOW ALONG ON PINTEREST, GOOGLE+, AND FACEBOOK FOR MORE INSPIRATION!
PIN AND SHARE!


Gorgeous transformation! Your grass cloth bedside table DIY is stunning. Fantastic vision.
This is an example of the kind of tutorial that is helpful and inspiring. Love the pics, the attention to detail, SO INSPIRING.! I did my own chair using this and it turned out great. Sold quickly to boot!. Thanks Denise.
Hi Louise! Glad this was helpful and SO HAPPY it turned into a quick sale for you. 🙂
Oh, Clever girl! You did wonders with the old gals! They look beautiful in the space. Thank you so much for sharing your inspired vision (and process) with us!
Thanks Ellen!!! 🙂 I’m really liking them too. I’m so happy I found the fabric on sale. I love the neutral but if I want pops of color in the future, so easy to add with throw cushions. 🙂
Really amazing makeover..they don’t look like the same chairs. I love them, you did a fantastic job. Thankyou for sharing the details, they will help me with some of the projects I have planned. Jacque
Oh, I’m so glad you like them and you found the shortcuts and tips helpful Jacque. Have fun with your projects. 🙂
I would never have thought to cover the existing piping – brilliant! Your chairs look fabulous, Denise – great save!
Thanks Marie! Ya, the recovered piping turned out even better than I thought it would so I’m glad I gave it a try! 🙂
WOW jow awsome you have done a fantastic job the chairs are gorgeous!!! Anazing find too .
Whats the colour of the dresser thats so beautiful 😍 too
Love the look bravo 👏
Aw, thanks Ruby! They were a great find. 🙂 The dresser is restyled in AS French Linen.
YOu did a great job. Didnt quite follow how you did the pleat on the sides? You cut one inch folded it over and stapled? Where did you put the staples? I think the chiars look great and I really like the way you did the bottoms. It gives them a really neat look / style
Thanks MarieSandy! Yes exactly, I cut the excess fabric down to about an inch and then folded it in half to create the pleat. The unfinished edge went under the piping. Then I stapled it securely (right in the crease) on the opposite side of the piping. I hope that makes sense. I wish I had taken more pics when I while I was working on it but I was wing’n it! 🙂
Such a serene vignette you have created. No wonder you procrastinated; what a daunting task. The chairs are beautiful with those soft seat cushions – so much better than the original structured seats. Inspiring!
Hi Jenny – thank you! 🙂 The sewing part (for me) was more daunting than using the upholstery gun for sure. I’m really pleased with the oversized cushions too. Great cuddling seat for me and my dog Gidgy. 🙂
Once again, you outdid yourself! I am continuously impressed with your talent and creativity. You inspire me and so many others! Thank you for sharing! The room looks fantastic!!
That’s a huge compliment Celeste…thank you! hugs
Absolutely gorgeous
Thank you, Marianne! x
OH well done Denise I know that you have been struggling with these chairs ……but they look really great now…..its an ‘high 5 to you girl ‘
Thanks Sue! And ya… this project started back in 2016..lol
Denise, I’m impressed. Beautifully done.
Thanks so much Mary! 🙂
Hi Denise
Your post is awesome! How you create this. Really nice.
Thanks
Love what you did with those two chairs. I never would have imagined them so updated and cute.
Thank you Monique! I had fun restyling them. 🙂