A WARPED TRASHBOUND VINTAGE TABLE GETS A BEAUTIFUL NEW LIFE | YOUTUBE VIDEO COMING THIS WEEKEND!
Hi creative friends, I have a doozy of a makeover for you today! This ornate vintage table I found curbside ended up being in far worse shape than I expected. It had a noticeably warped top that had me wondering if it was even worth saving. Instead of giving up or replacing it, I decided to treat it as a learning opportunity and figure out how to fix a warped wood table top using a few simple techniques. And while it didn’t turn out perfectly level, the transformation is pretty amazing. You know that old joke about the ‘wood stretcher’? Well, I didn’t stretch this wood… but I definitely had to figure out how to bend it back into shape, and I can’t wait to hear what you think!
In today’s post, I’m also sharing –
- How to bend wood and fix a warped table top
- A new-to-me product that fills in wood rot
- How to stain old wood… without using stain
- And my FAVORITE paint color that I always keep in my inventory
*As an Amazon Associate, I earn from qualifying purchases. There are affiliate links in this post to other companies/products I use and love as well. You will never be charged extra when you purchase through these affiliate links. If you purchase from my links – A BIG thank you for supporting me and the #siblog! To see my full disclaimer, click here.
Bonus, it’s Furniture Fixer Upper Day! If you’re new here, on the fourth Thursday of every month, I join four super-talented friends (Christy – Confessions of a Serial DIYer, Kathy – Petticoat Junktion, Natalie – A Ray of Sunlight, and Gail – My Repurposed Life) to share our before-and-after furniture restyles. I’ve included the links at the bottom of today’s post and I hope you join me in seeing what they’ve created this month! I always learn something new from these talented ladies.

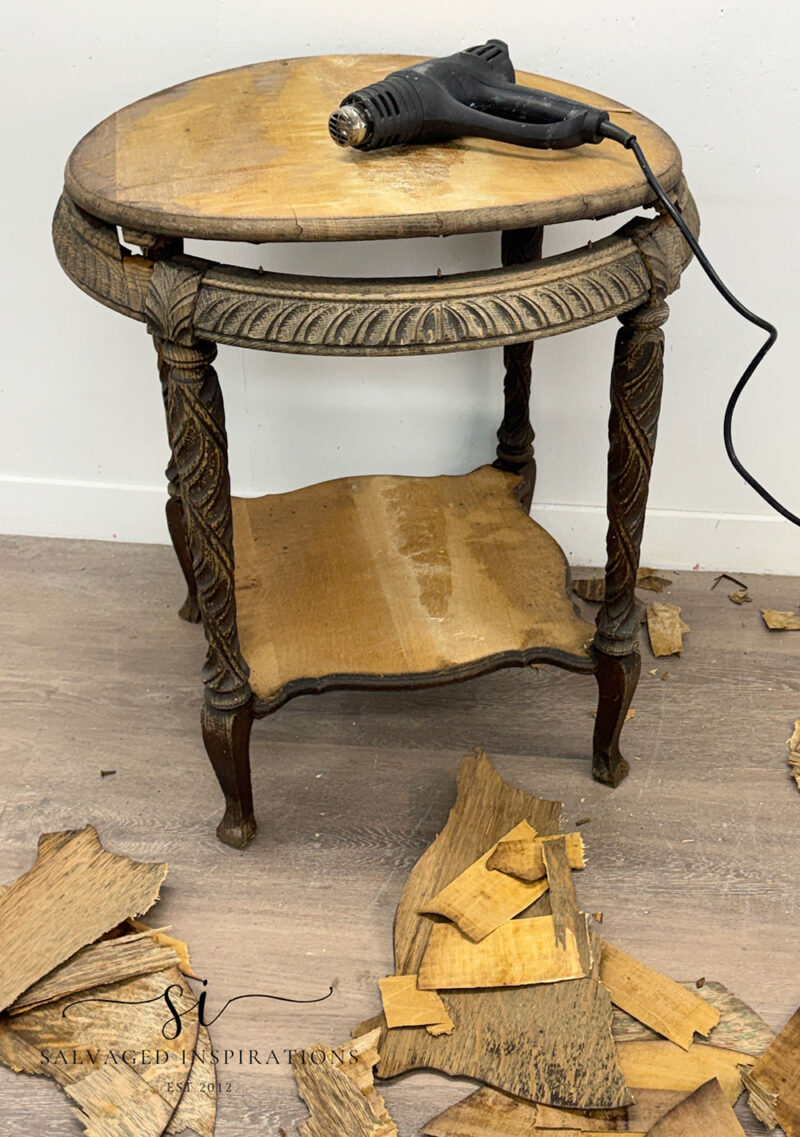
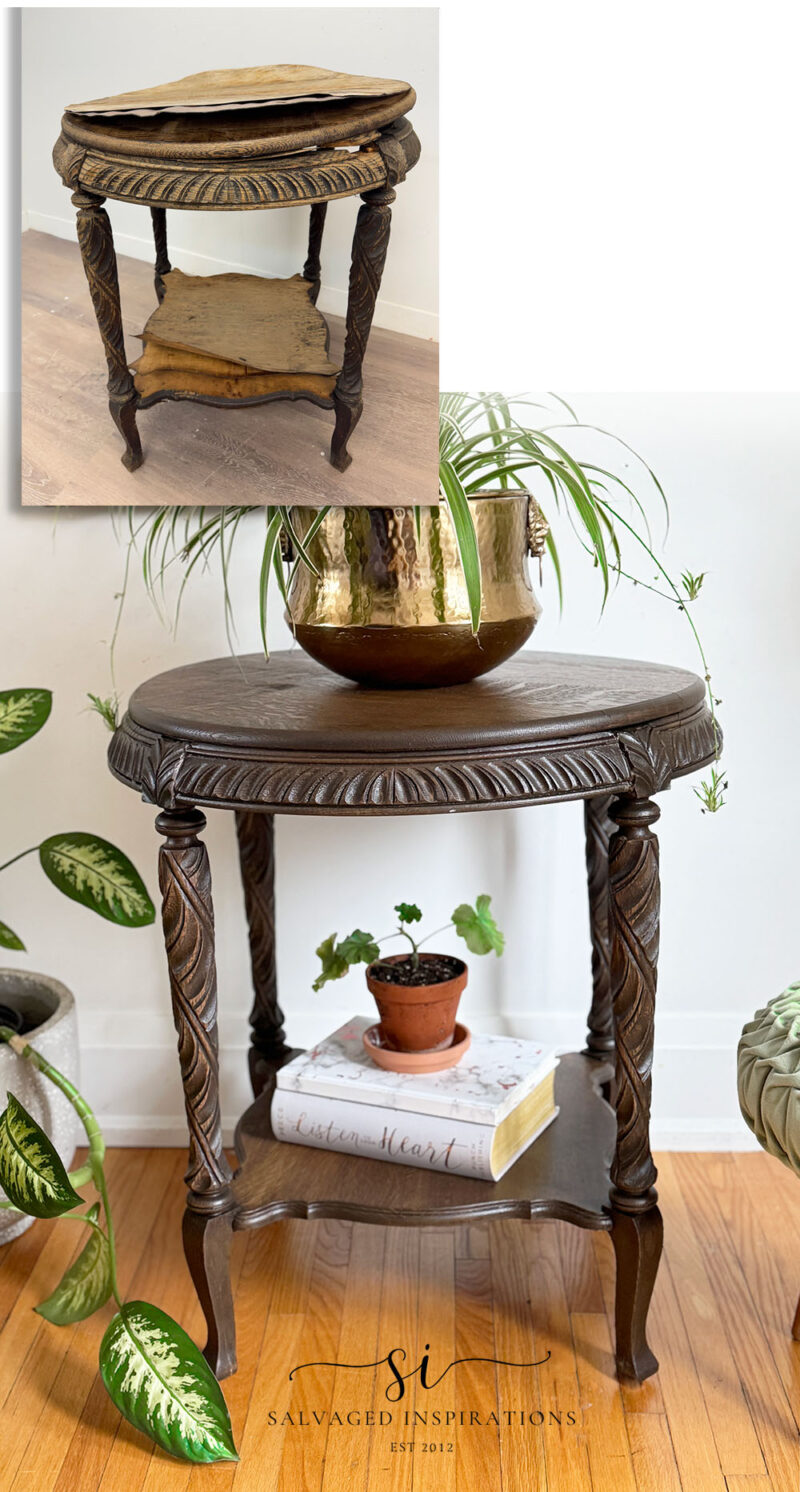
Below is the vintage table I spotted out to trash while I was walking my Gidget girl. I was too far from my home to carry it all the way back. So, I was hoping it would still be there when I drove back out to grab it.
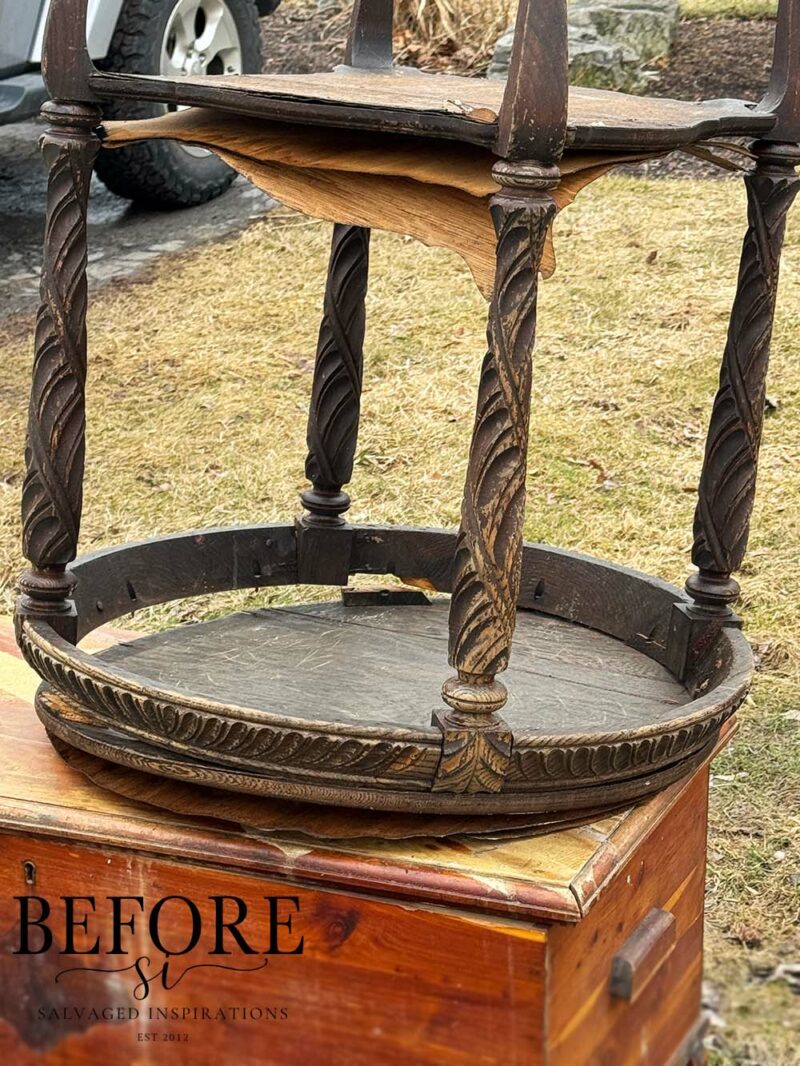
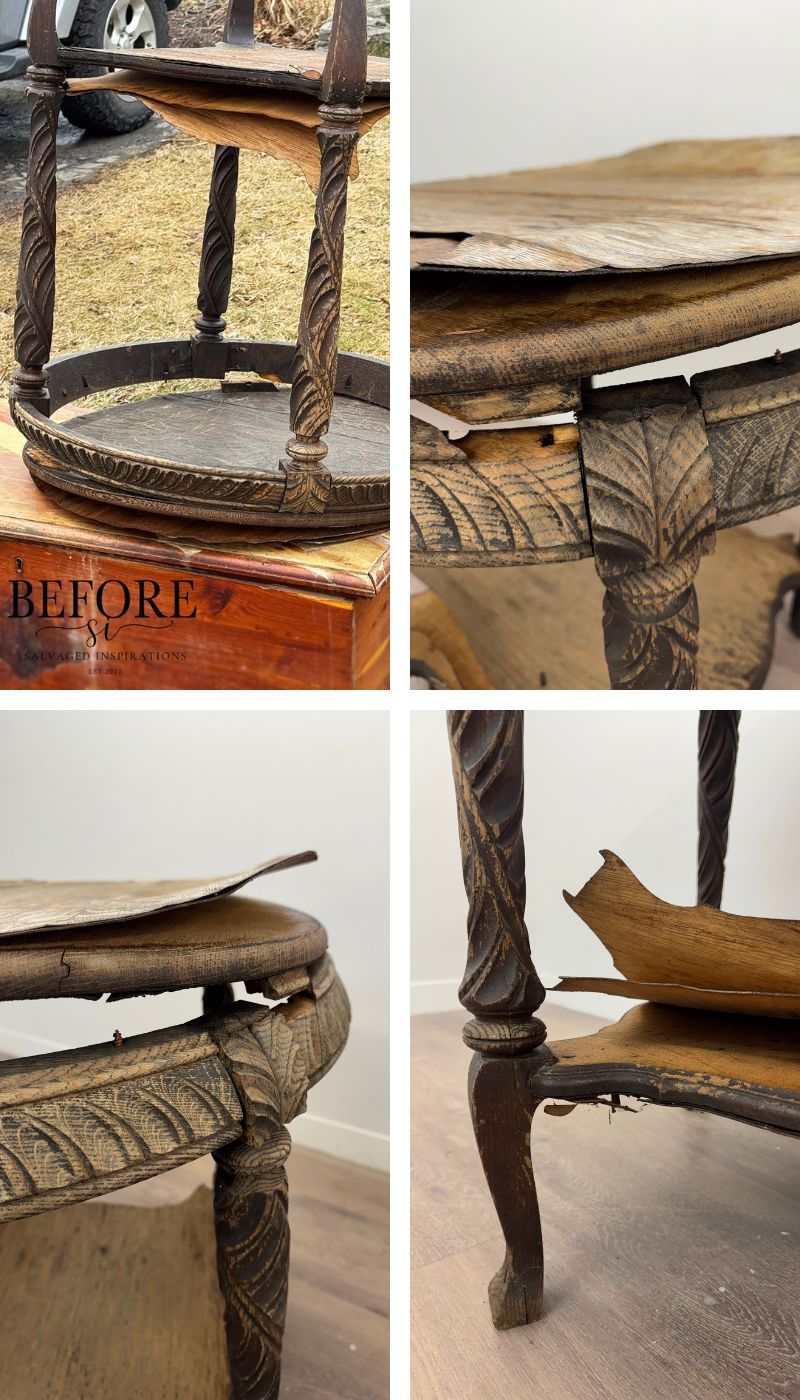
Once I got it home and brought it down to my studio, oh my goodness! This table was in much worse shape than I thought. Look at this poor thing.
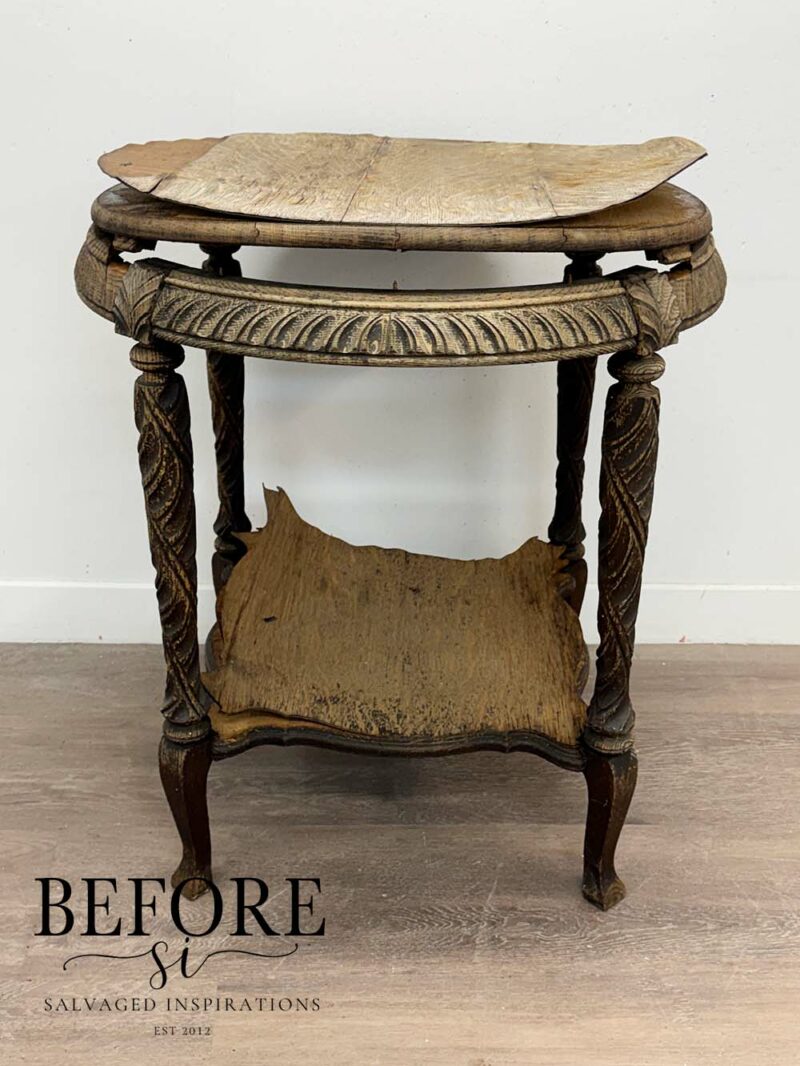
Layers of veneer were peeling off. Pieces of trim were broken off. There was some wood rot. But what stressed me the most was the warped table top. It was REALLY warped! Much more warped than I originally thought.
THIS POST IS SPONSORED/CONTAINS AFFILIATE LINKS TO PRODUCTS I USE. YOU CAN SEE MY FULL DISCLOSURE HERE.
Before we get started, here are a few simple tools and supplies I used for this project. You may already have some of these on hand!
SUPPLIES
Round Vintage Table – SALVAGED
White Lightning Cleaner
Auto Sponge
Sanding Sponge
Abatron Wood Restoration Kit (13% Off as of writing)
2″ Angled Paint Brush
Continuous Water Mister
Umber SILK Mineral Paint
Gator Hide Topcoat
TOOLS
Heat Gun
9 in 1 Painters Tool
Carbide Scraper (20% Off as of writing)
Plastic Putty Knife
Bosch Orbital Sander
Astro Euro HVLP Paint Sprayer 1.7mm Nozzle
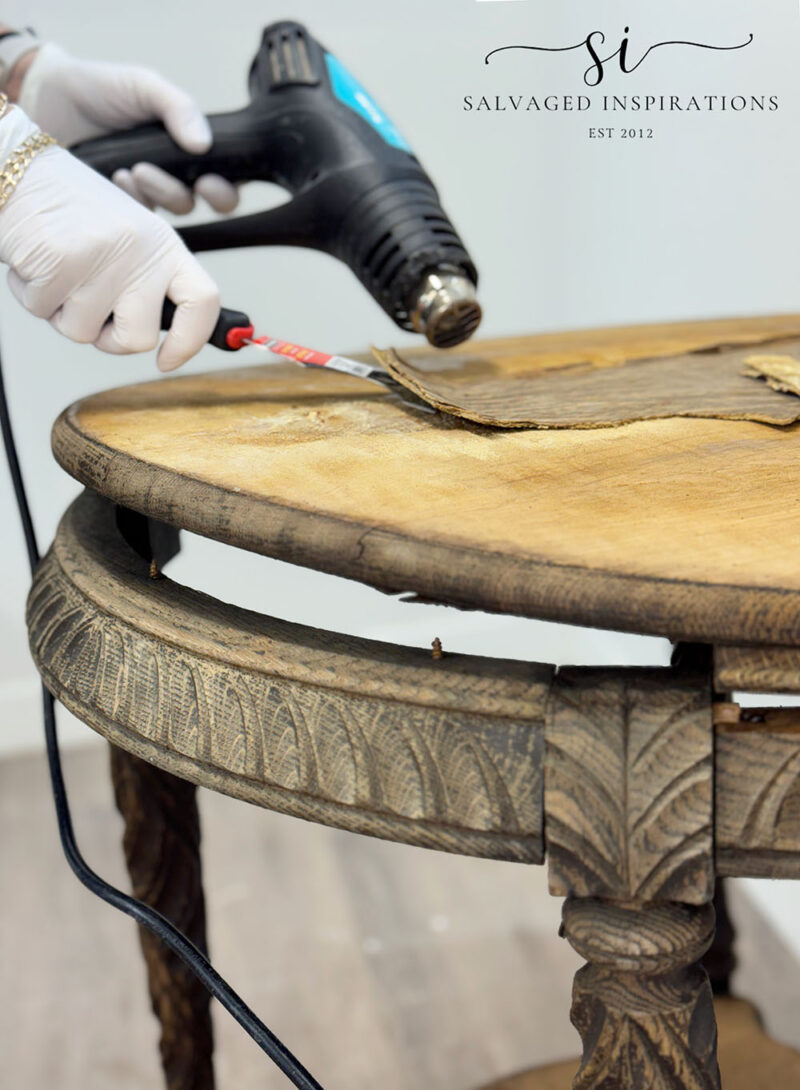
PREPPING THE TABLE
To start the prep process, I removed the veneer using my heat gun. Much of it just flaked right off, and the areas that were still adhered, the heat loosened them up nicely so they pulled up easily as well. If you’re ever having issues removing this thin layer of wood on your pieces, I have a full tutorial on How To Remove Veneer – 7 Easy Tips HERE.
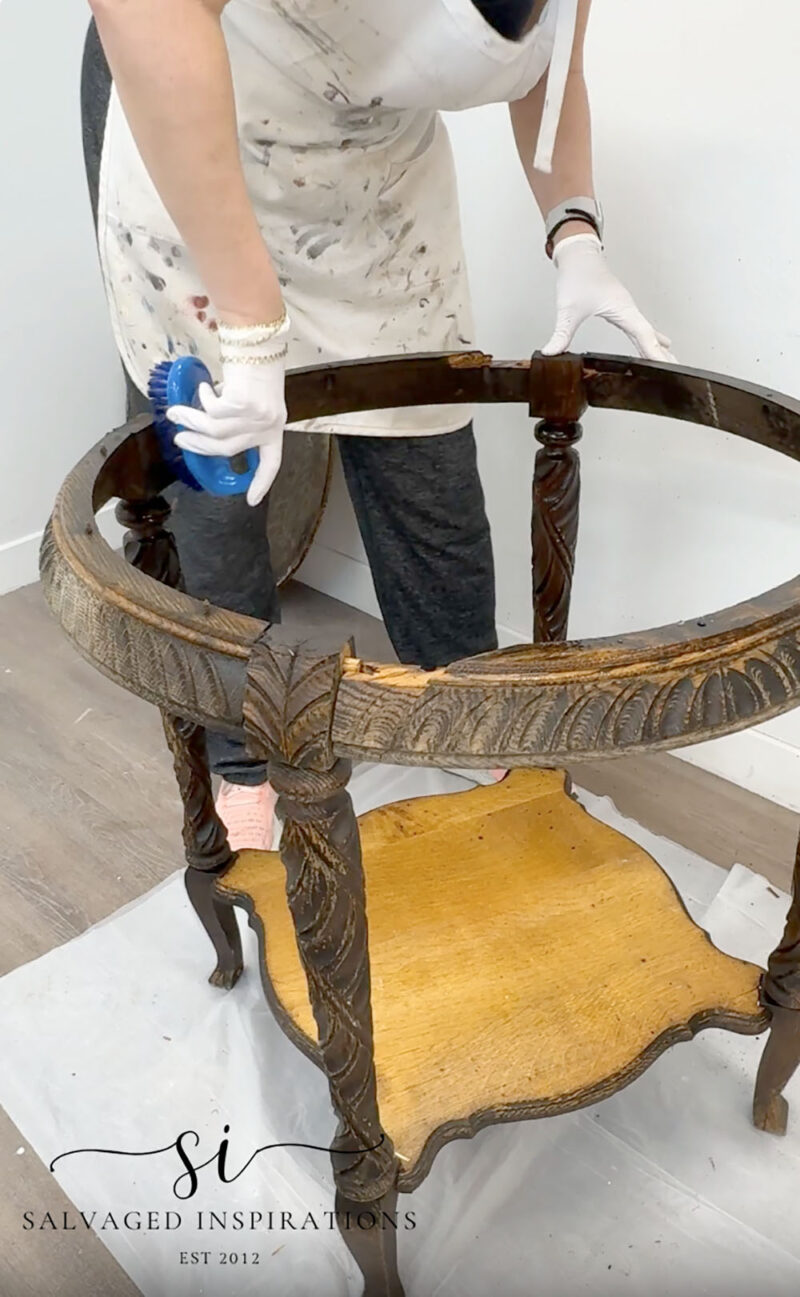
Once all the veneer was removed, I unscrewed the warped wood table top from the body and removed the broken pieces of trim.
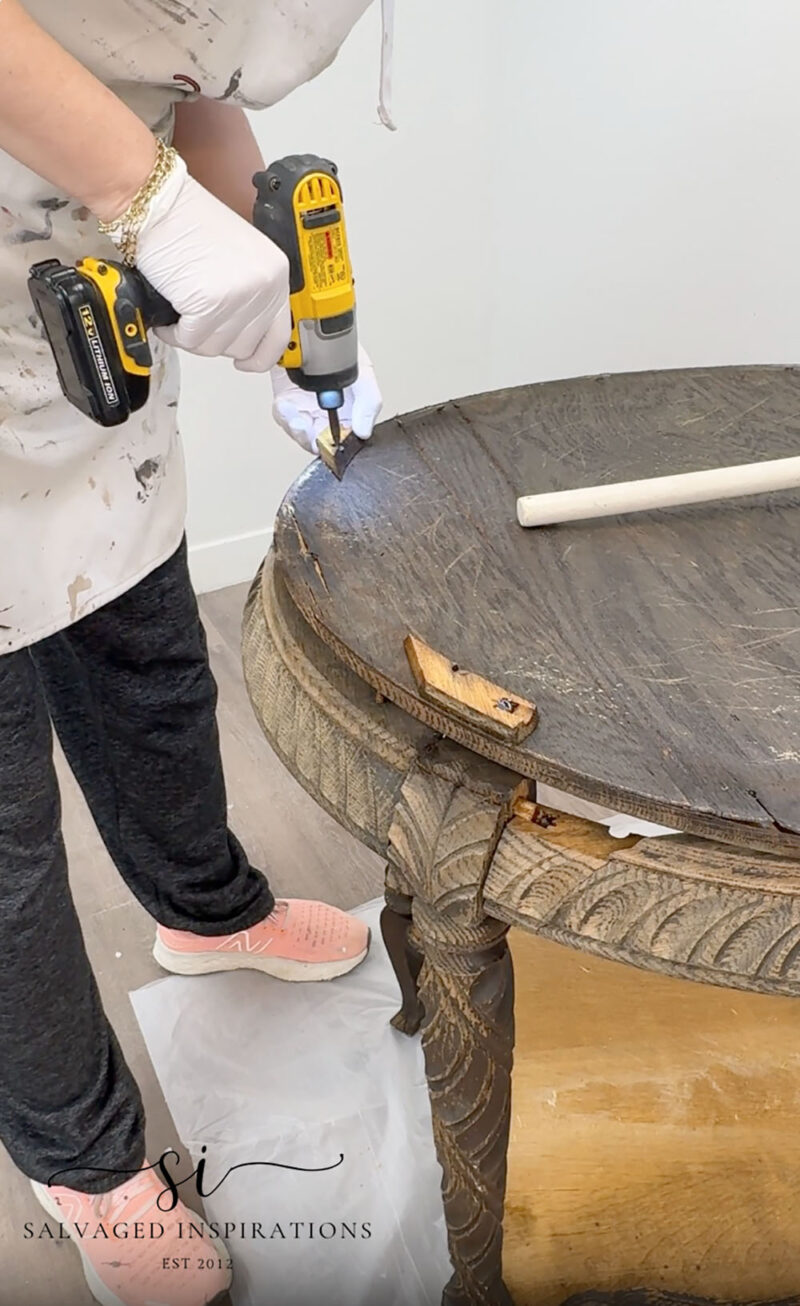
This made it much easier to get into all those nooks and crannies and give this piece a thorough cleaning with a heavy-duty furniture cleaner, a dollar store brush, and a large automotive sponge.
HOW TO FIX WARPED WOOD
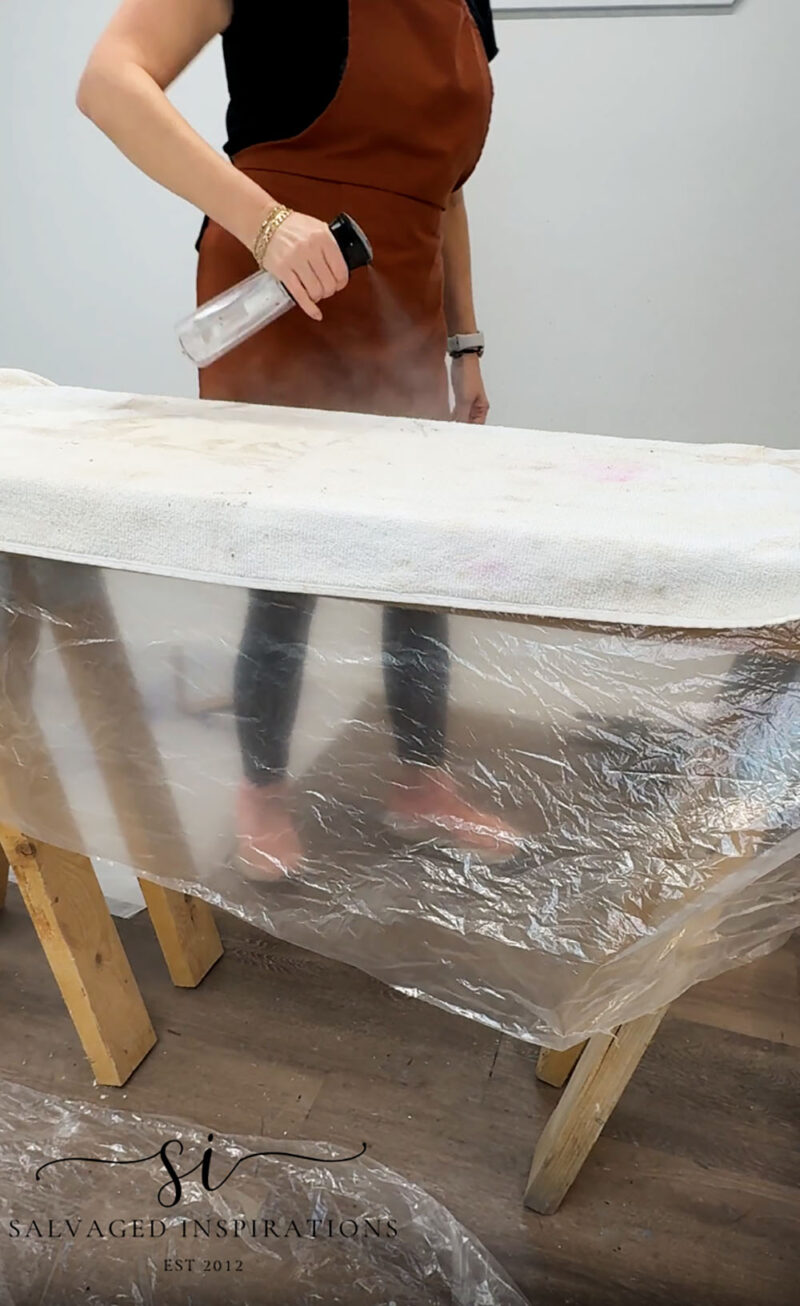
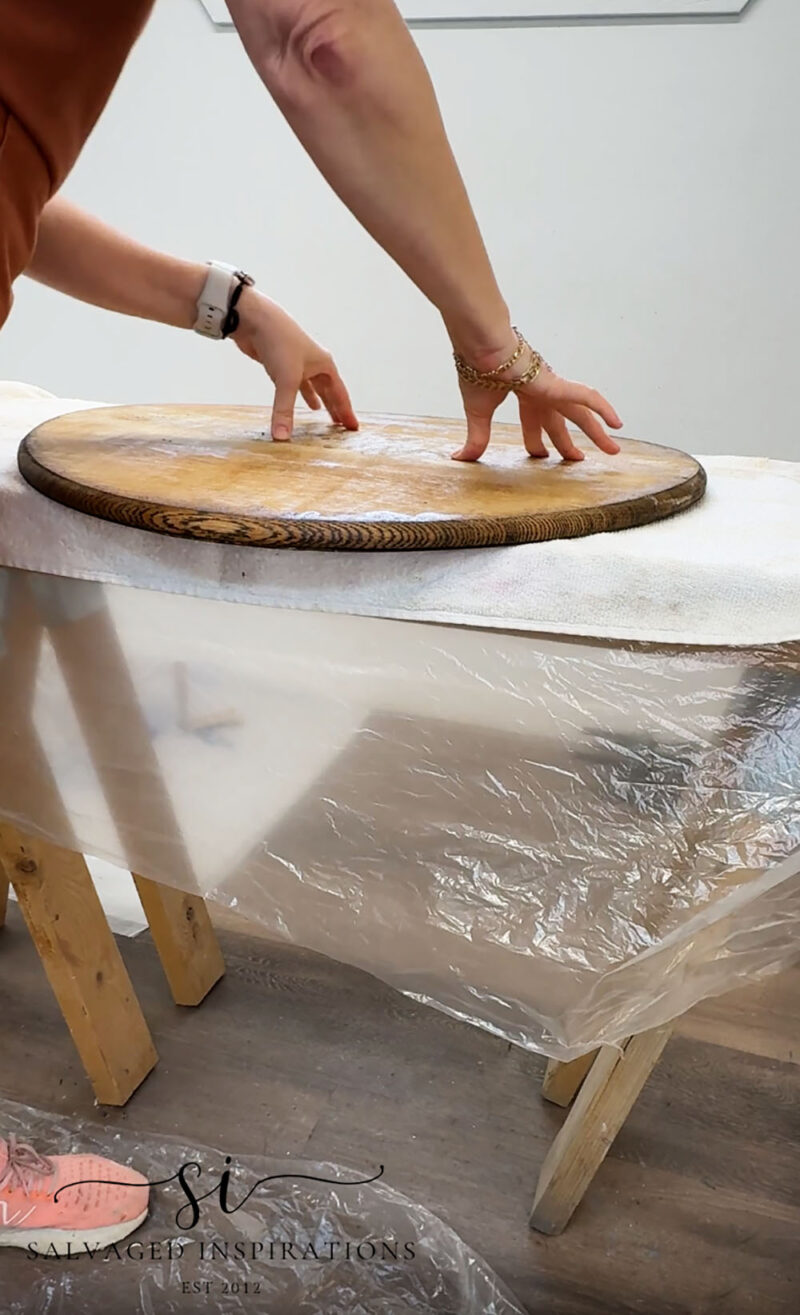
As I mentioned, I originally thought this wood tabletop was so bent out of shape I would need to cut a brand new top. But then I thought, why not use this curbshopped table as a learning moment? Let’s see if I can’t straighten this damaged wood using heat, a damp towel, steam, and weights. After the tabletop was removed from the base, I sprayed a large towel with a continuous water mister and laid the round piece of wood onto the table with the cup facing down. The theory behind this is to have the dampness go into the wood boards and reverse the cup. You have to be careful and watch the progress so the wood doesn’t start cupping in the opposite direction. Doing it with the dampened towel on a flat surface took 2 full days! And although it started out on the work table, I ended up moving it to the floor and adding a super heavy vice grip on top to weigh it down.
Here are 5 Tips to repair a cupped or bowed wood table top. Before saying no to a piece or throwing a warped piece away, I hope this encourages you to give it a try!
1. Use Moisture and Weight
This is one of the simplest methods and the one I used to straighten this round wood top. And it works especially well for mild warping. Start by lightly dampening the concave (curved inward) side of the tabletop using a spray bottle or damp cloth—no soaking, just a light mist will do. Then place the tabletop on a flat, level surface and stack evenly distributed weight on top (books, paint cans, anything heavy you have on hand). Leave it for 24–72 hours in a dry space and check on it periodically. As the wood dries, it can gently relax back into shape.
I left mine for 48 hours, checking on it periodically to make sure it wasn’t buckling in the opposite direction. I also added a heater and fan in the room so the room had good circulation. Periodically, I also placed my dad’s old large vice grip on top to add some weight.
2. Apply Heat and Moisture
For more stubborn warping, a little heat can help speed things along. Lay a damp cloth over the warped area and use a warm iron on medium heat, no steam setting. I would use an old iron for this. The combination of heat and moisture helps soften the wood fibers. After heating, immediately apply weight or clamps to flatten the tabletop as it cools and dries. This method also takes some time so a little patience is needed.
3. Clamp It Flat
If the warp is more noticeable, clamping can make a big difference. Honestly, I was afraid to do this for this top because I thought the wood would just crack. It was soooo dry and old I didn’t trust it would hold up to this process. But if your wood is in better condition, place the tabletop on a flat surface and use sturdy clamps to gently pull it into position. You can also use straight boards on either side (like a sandwich) to help distribute pressure evenly. Tighten the clamps gradually—don’t force it too quickly—and leave everything in place for a couple of days. This method works well when paired with a bit of moisture beforehand.
4. Add Support Underneath
Sometimes wood needs a little extra help staying flat. Adding support underneath the tabletop can both fix and prevent future warping. Attach wooden cleats or metal braces across the underside, running perpendicular to the direction of the warp. Be sure to allow for a bit of natural wood movement (don’t over-tighten). This is a great long-term solution, especially for tabletops that will see regular use. I won’t be selling this table but if it had turned out perfectly level, I would have reinforced it like this.
5. Flip It and Let Gravity Help
This one couldn’t be easier and is worth trying before anything more involved. Flip the table upside down and leave it that way for a few days in a dry, climate-controlled space. Sometimes gravity alone can help ease a slight warp, especially if the piece has been sitting unevenly for a while. It’s not a guaranteed fix, but it’s an effortless first step that can make a noticeable difference. If this doesn’t work, go back to step #1 and add a damp towel and some heat.
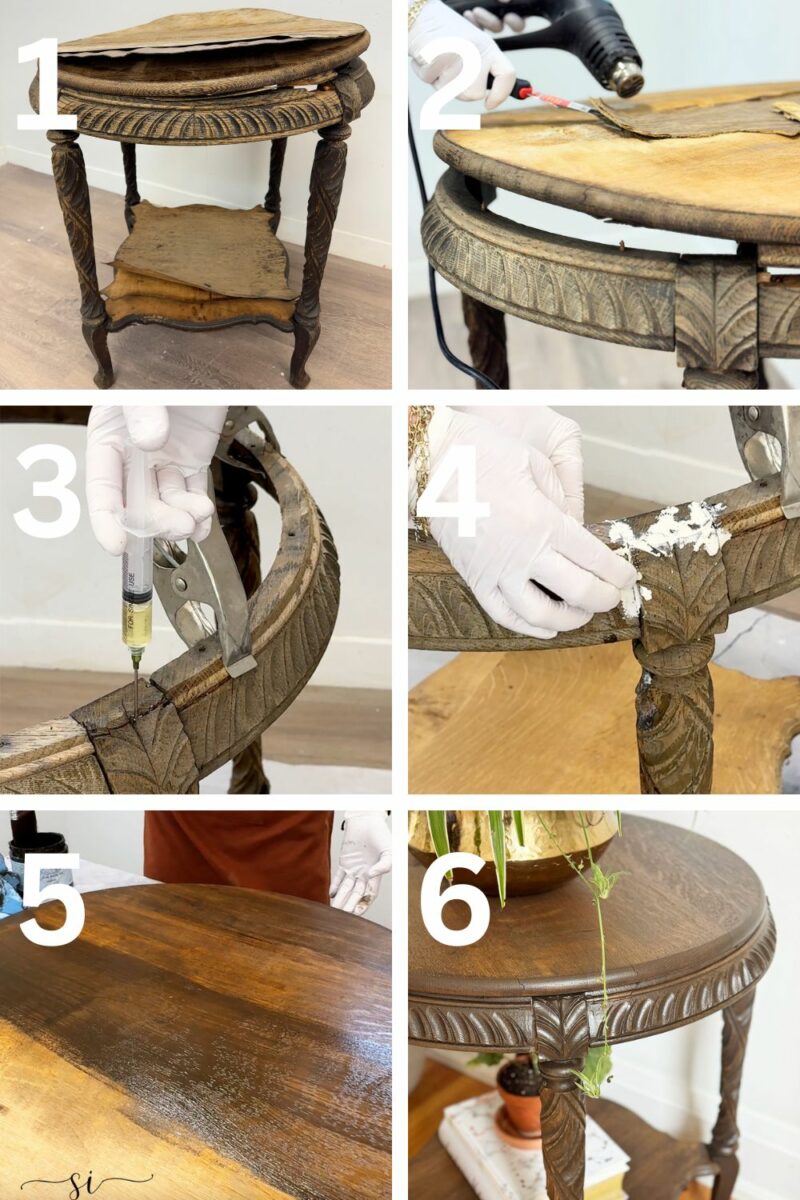
HOW TO FIX WOOD ROT
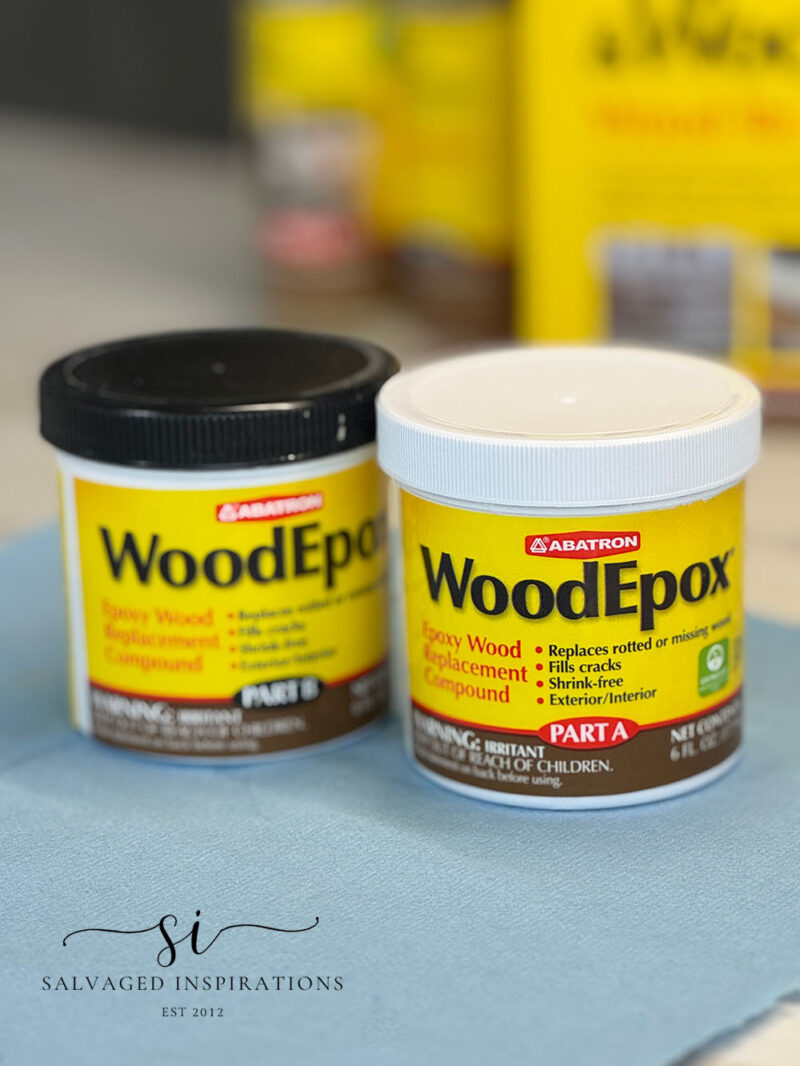
Last week, I received an email from a reader (Elizabeth) who introduced me to a product she has been using and loving. It’s replaced her wood filler and Bondo! She mentioned it has a little learning curve, but she has been so happy with the results. Stronger. Faster. Less smelly. She’s been using it ever since. The timing of this email couldn’t have been better because this table needed a good glue-up AND help with rotted wood areas. With rave reviews like this, I ordered the Abatron Wood Fixing Kit the next day! Thank you, Elizabeth! 🙂
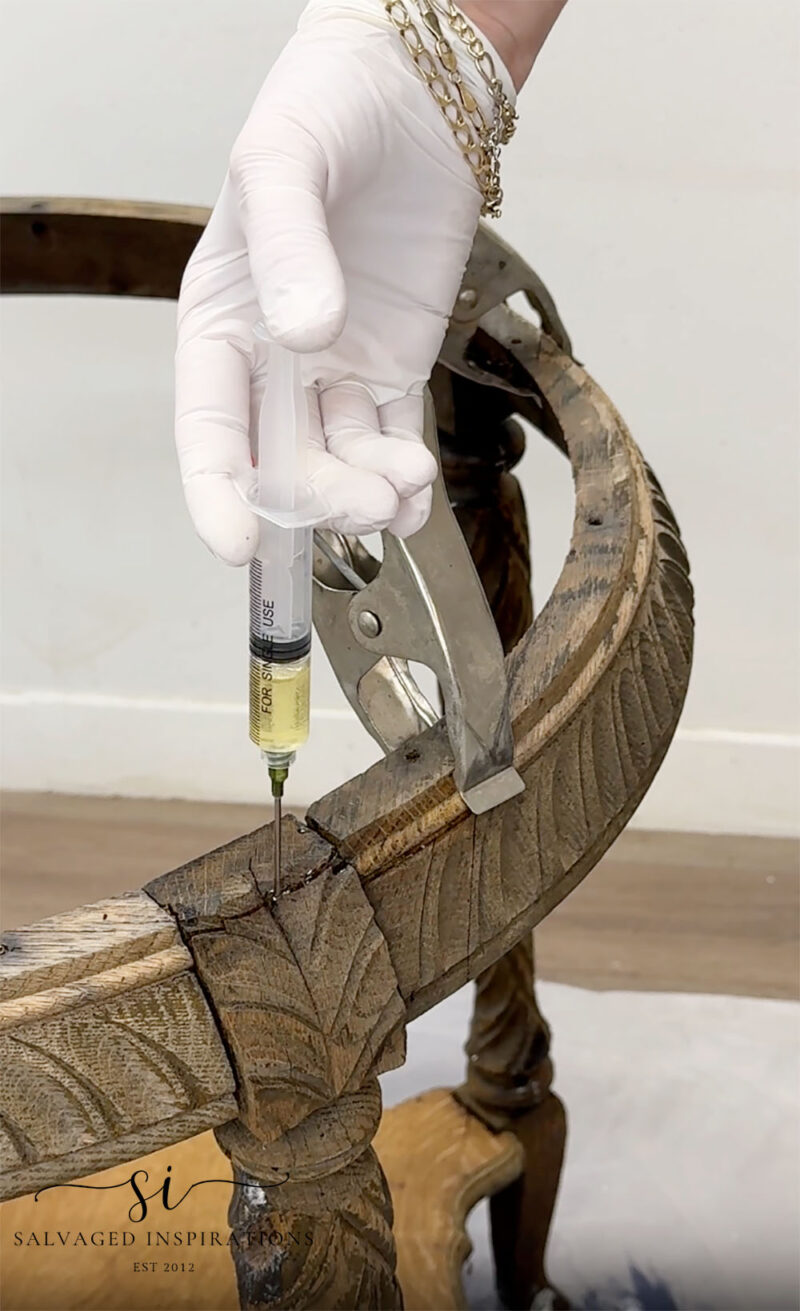
I’ll be sharing more on how I used this product in this weekend’s YouTube tutorial, but here are the basics. I pieced the table back together the very best I could using wood glue. After my glue-up was dry, I mixed equal amounts of the Epoxy A+B and waited the 10 minutes recommended on the instructions. I added the clear mixture to a glue syringe and injected it into all the areas of the wood that were rotted.
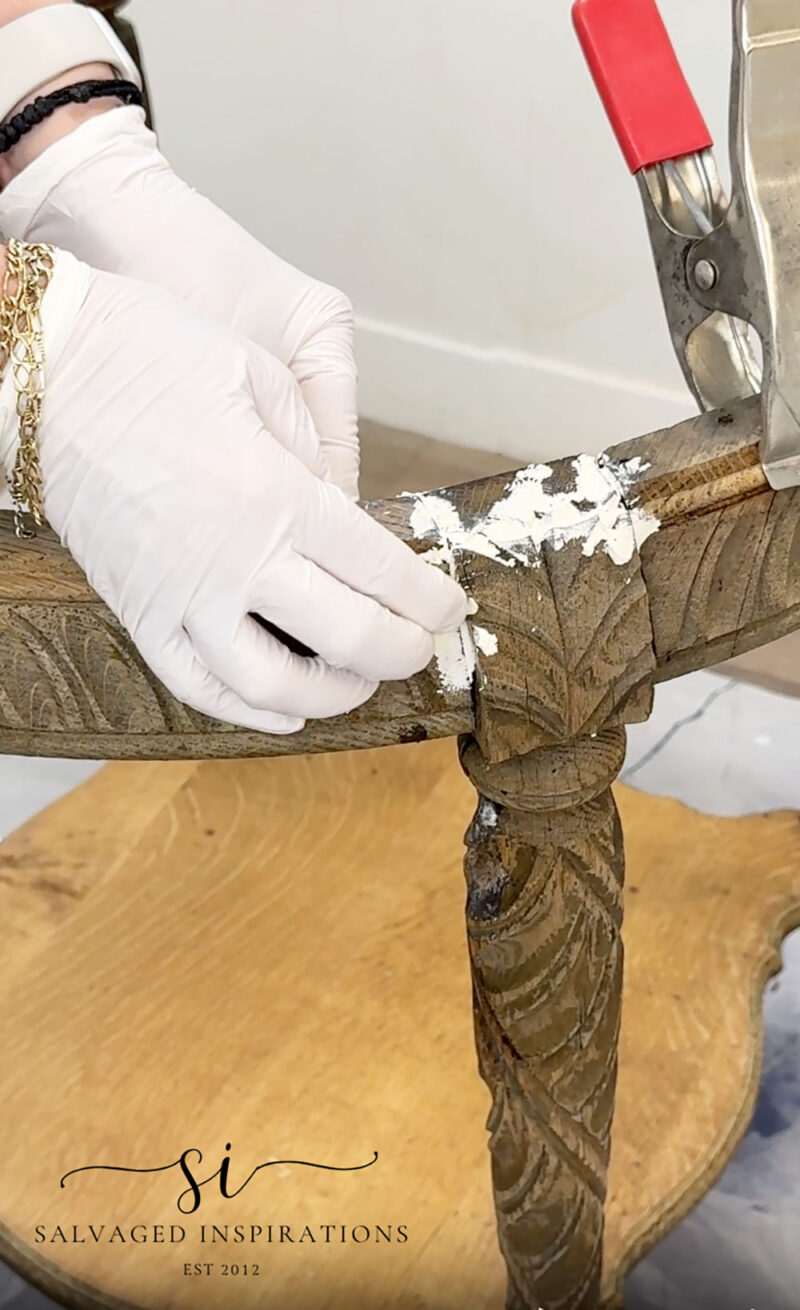
Then using the WoodEpox, I mixed equal parts A+B and kneaded it in my hand until the color unified. Gloves are a must! It’s super soft to mix and there is a longer open time than Bondo – about 20 minutes. Once it was mixed, it was easy to press into the rotten wood cracks, holes and crevices. It’s also easy to mold to the funiture curves and details using a little rubbing alcohol and damp cloth.
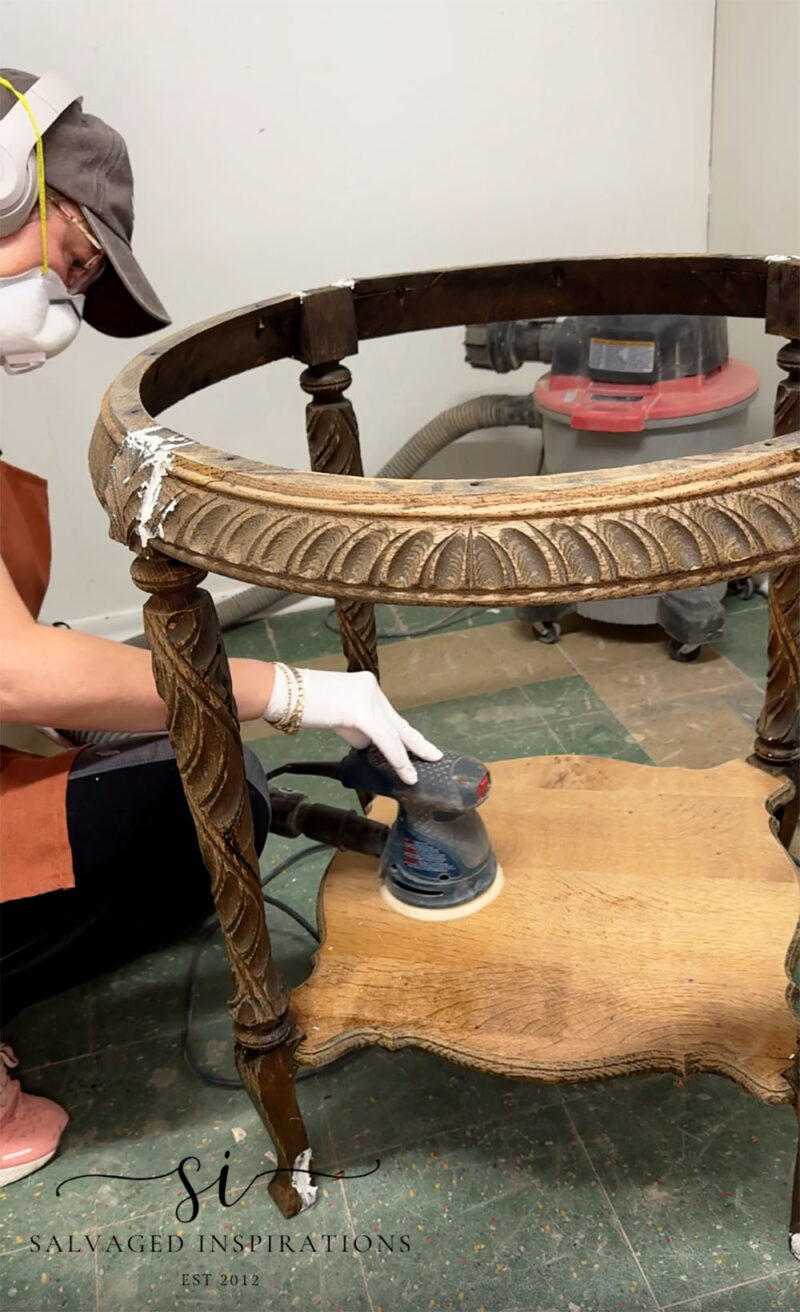
SAND
I left everything to dry overnight and then brought the table into my sanding room. I used my orbital sander and an 80-grit sandpaper to remove the finish on the bottom and top tier. The curvy legs and carved details were hand-sanded with a 180-grit sanding sponge. I use this an inexpensive system to turn my regular sander into a dustless sander. The attachment I use is under $15 and works amazing. You can see the full DIY Dustless Sander post here.
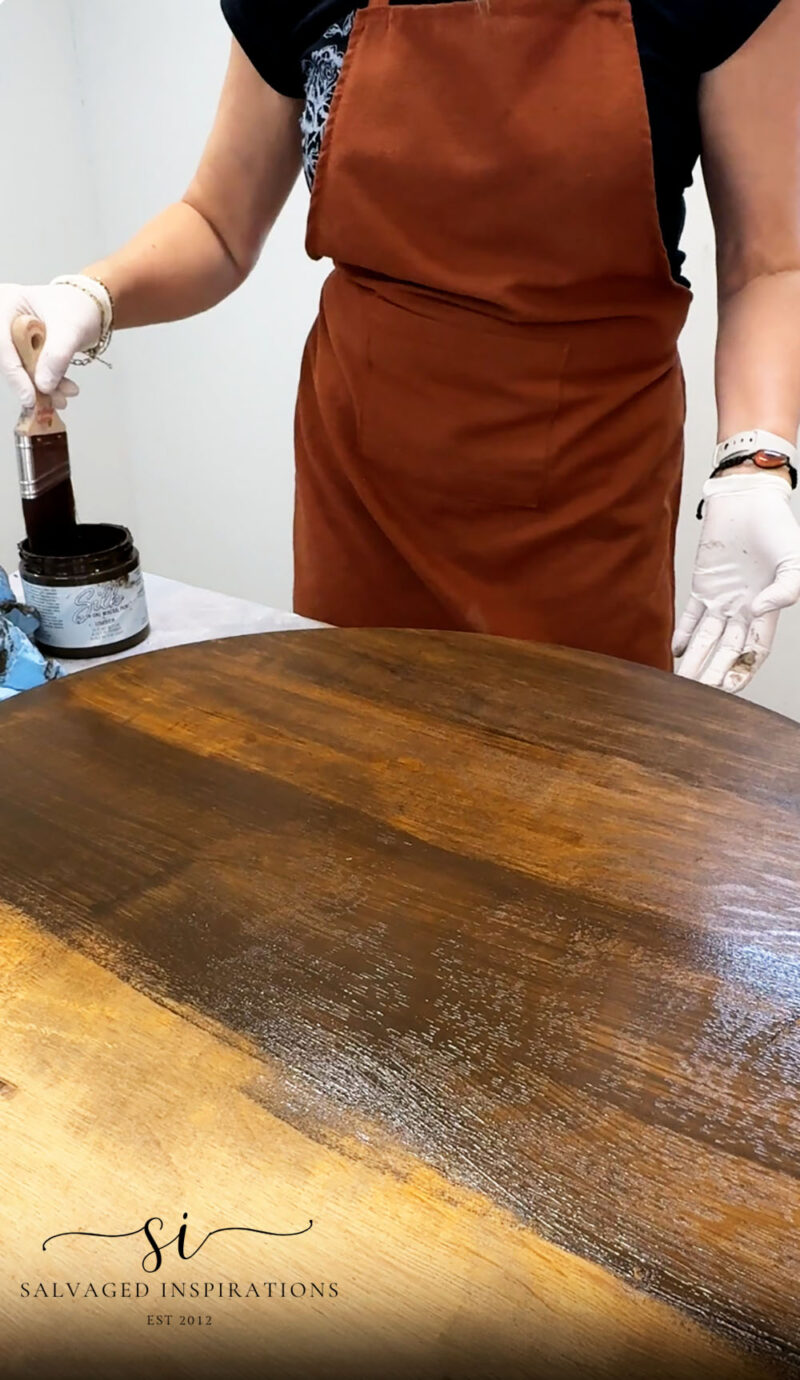
UMBER PAINT WASH/STAIN
After ALL that prep work, this was the super fun, easy part! Staining with my favorite paint wash method using my favorite paint color for stain – UMBER!
Here’s how I do it…
- Mist my paintbrush with water
- Mist the wood with water
- Dip my brush into the paint
- Working in small sections, apply the paint
- Wipe the excess off using a shop towel or a lint-free rag
- Repeat
If smelly stains aren’t your thing but you LOVE the rich look and character of stained furniture, this is the perfect beginner-friendly method. It’s goof-proof because if you don’t like it, you can wipe it back and start again. (Which I’ll be sharing in the video… I actually had to scrape down the top on the first try!)

But check out the difference between the Umber paint-washed stain and the raw wood. Night and day. And it looks even better once it’s all dry and topcoated!
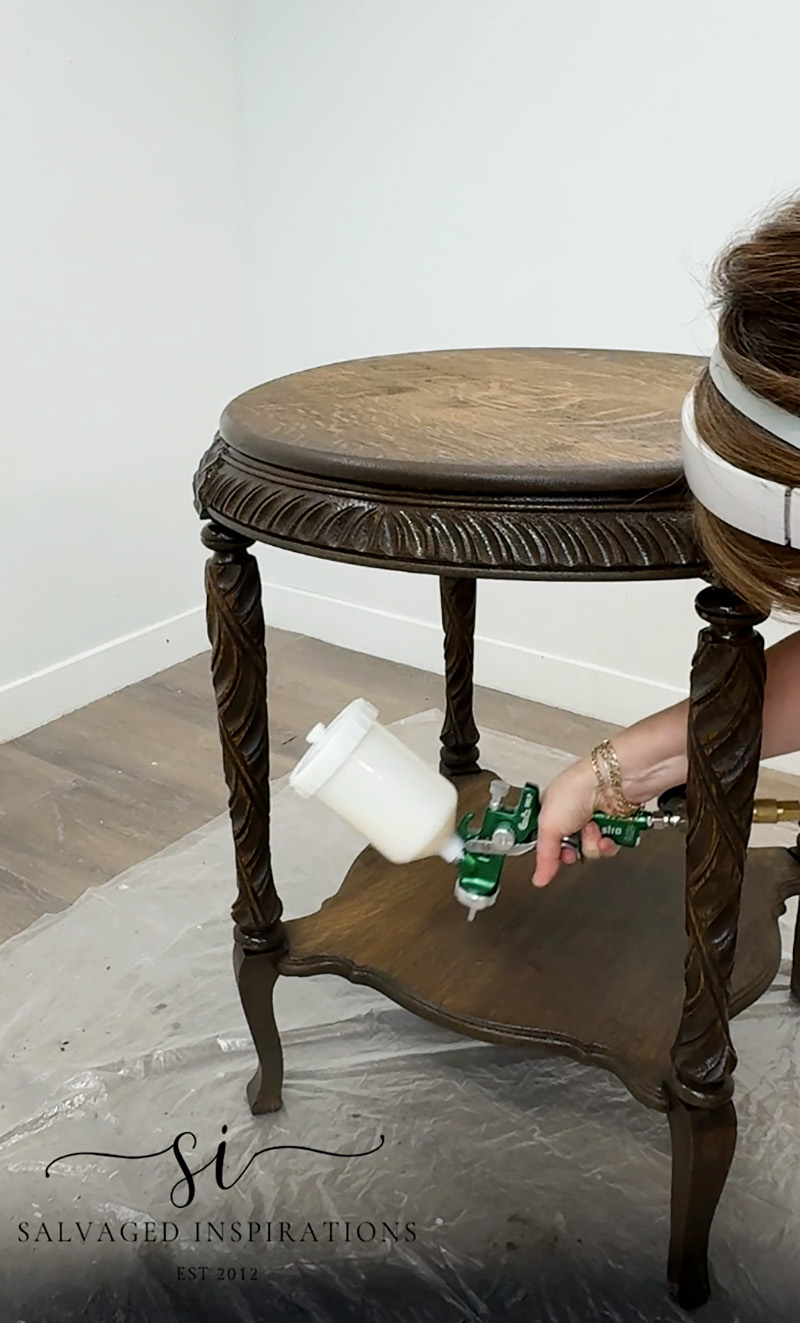
DURABLE TOPCOAT
For the final step, I sprayed three coats of this Gator Hide topcoat with my AstroEuro HVLP spray gun using a 1.7 mm nozzle. This is my favorite spray finish. It’s durable, water-repellent, and great for high-traffic pieces. I used this on my 1/2 kitchen table makeover 6 years ago, and it’s still holding up strong.
PIN AND SHARE 🤗
THE BIG REVEAL…
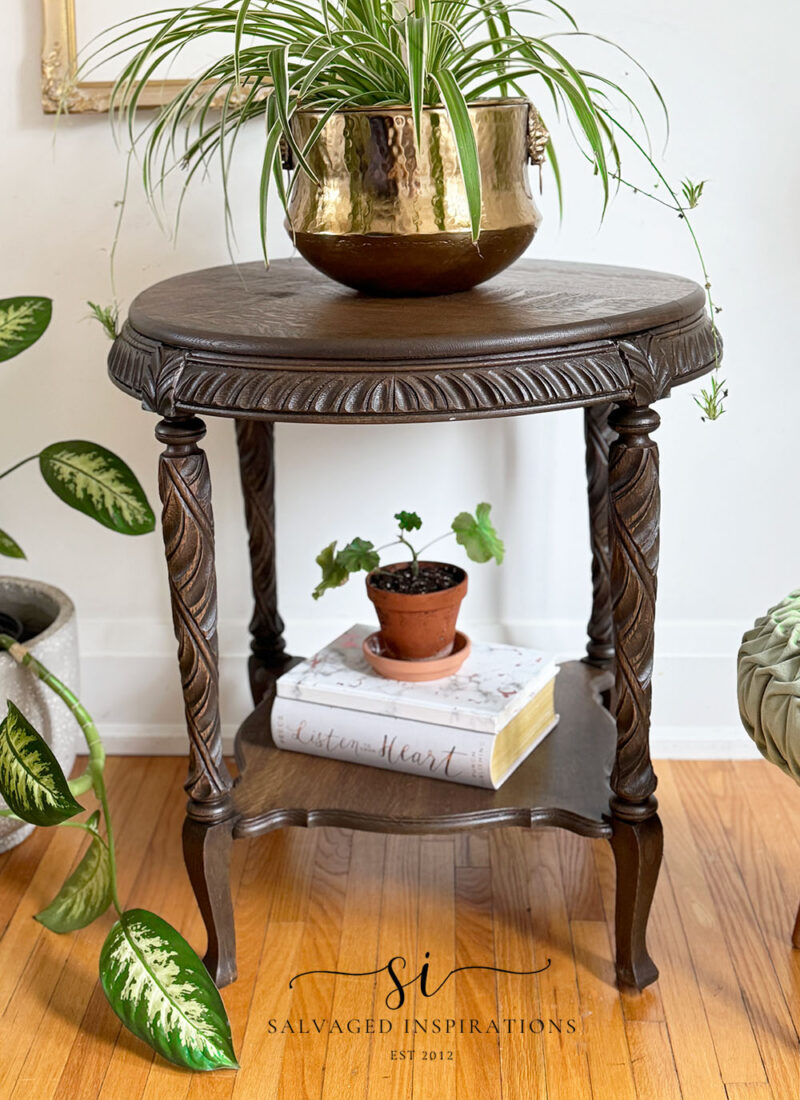
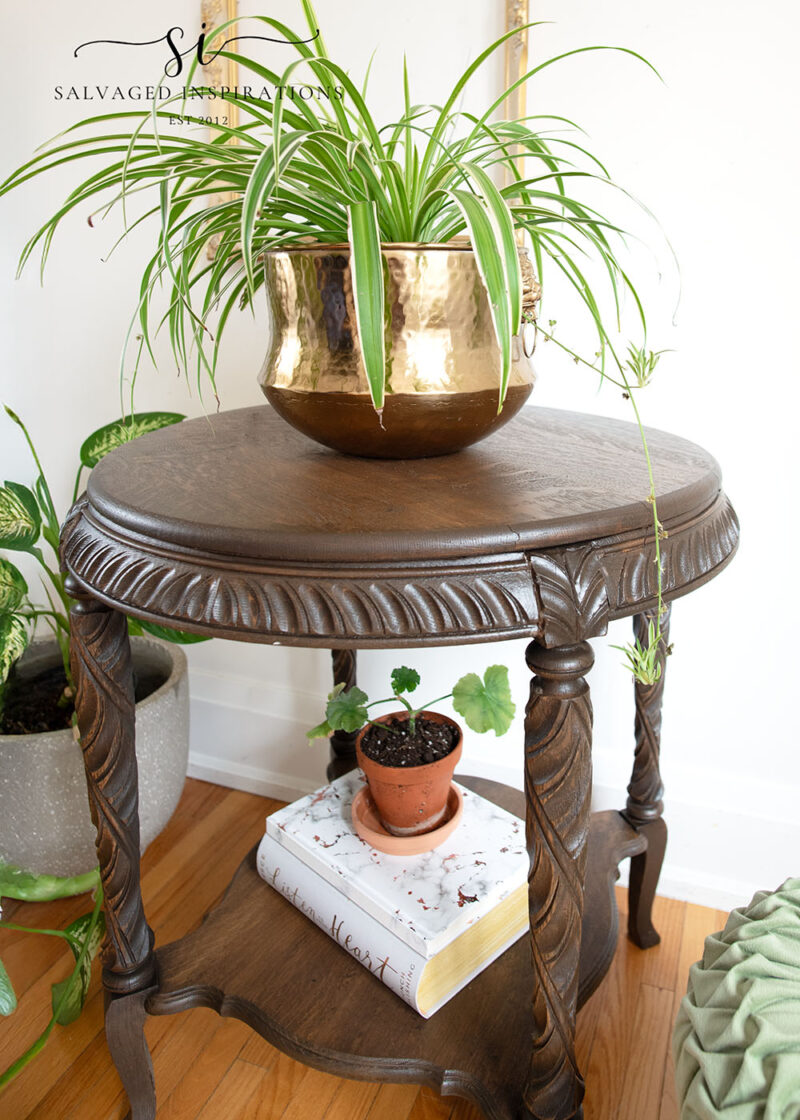
Here’s the finished look! I can’t wait to hear what you think!
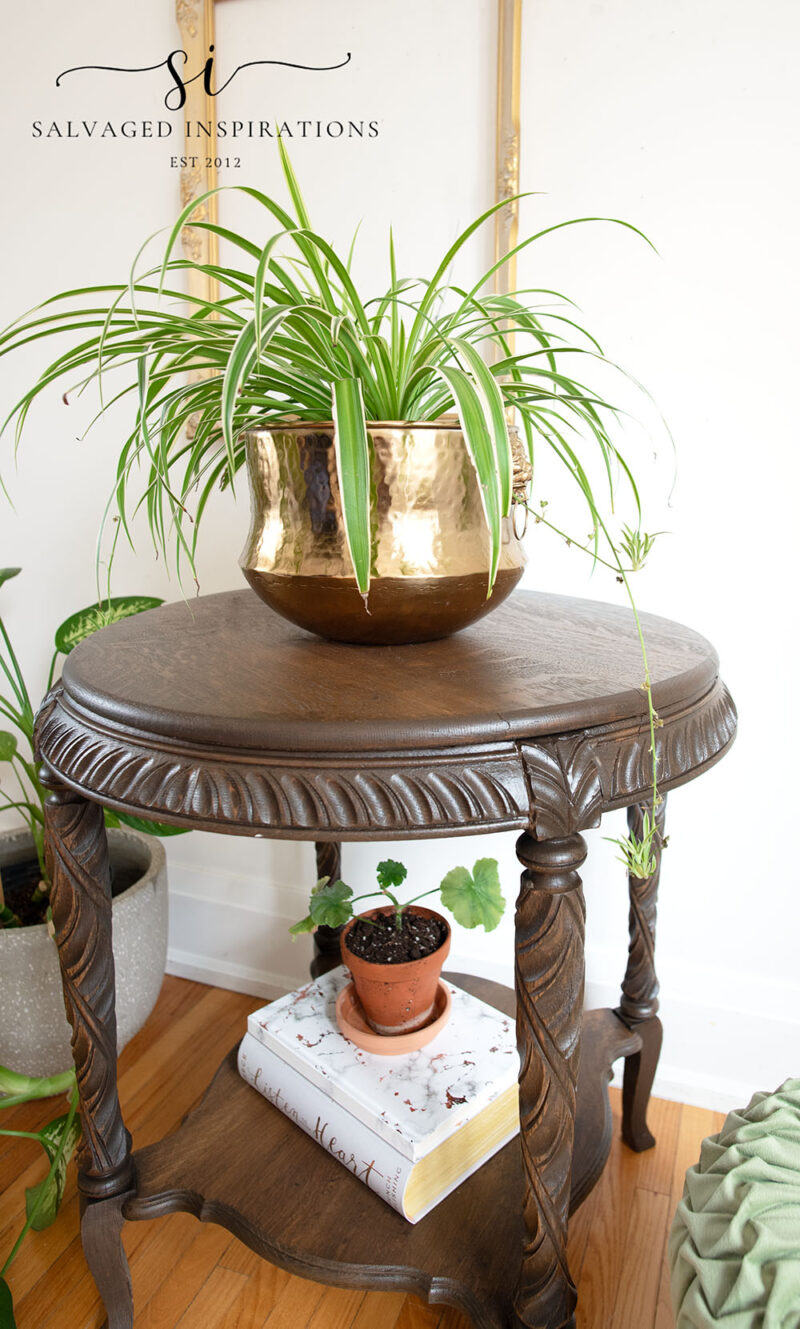

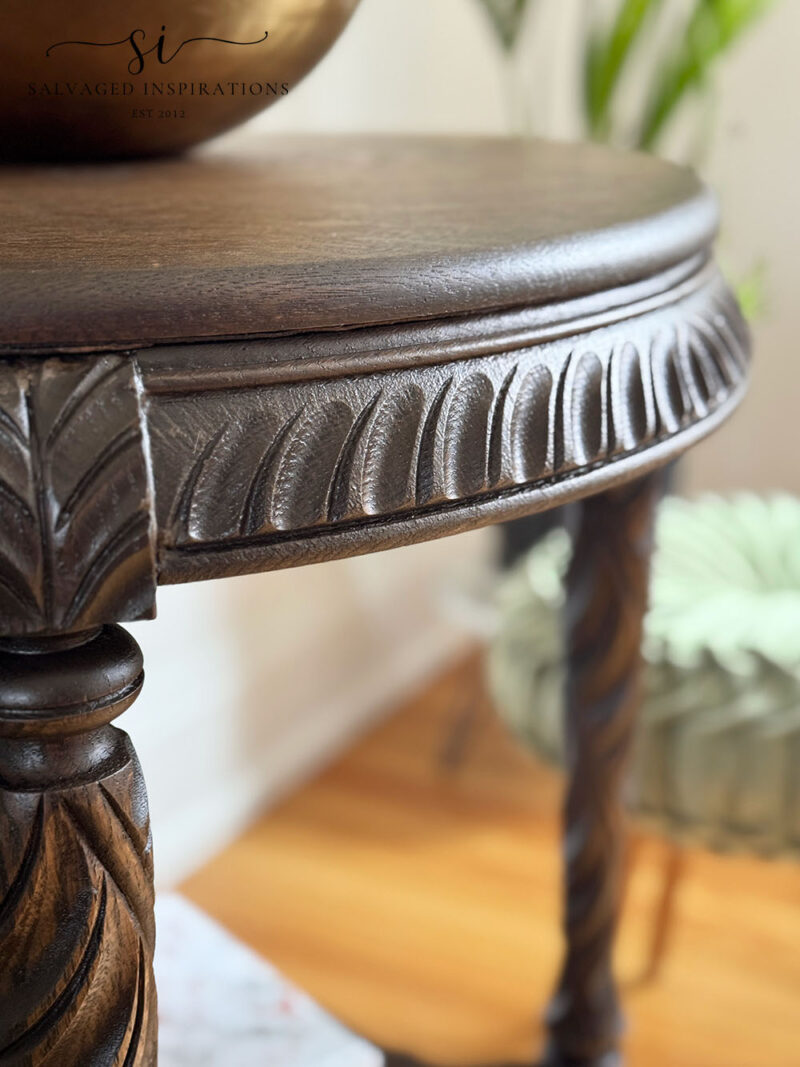
And here’s a close-up of the paint wash stain. I absolutely LOVE UMBER as a paint wash. It looks so rich and is so easy to do.
In the pic below, you can see that this wood top is still not 100% level. But compared to before, I’m pretty darn proud of myself and sooooo happy I tried this technique. I learned a TON on this piece!
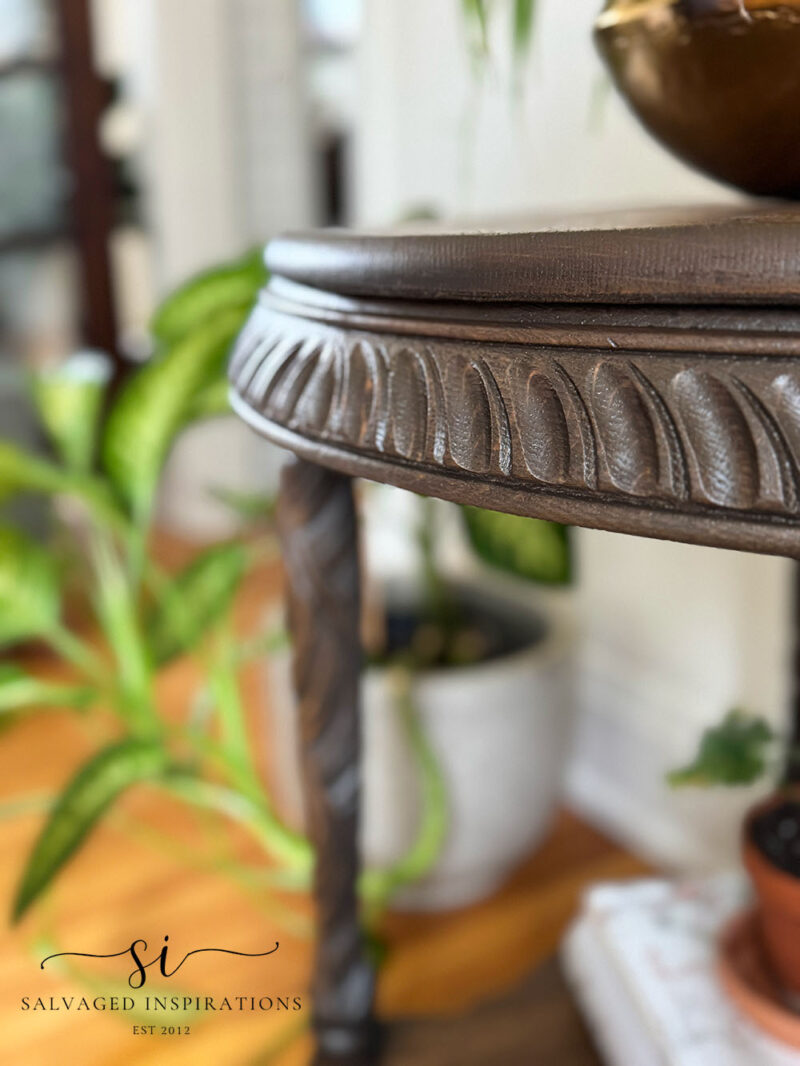
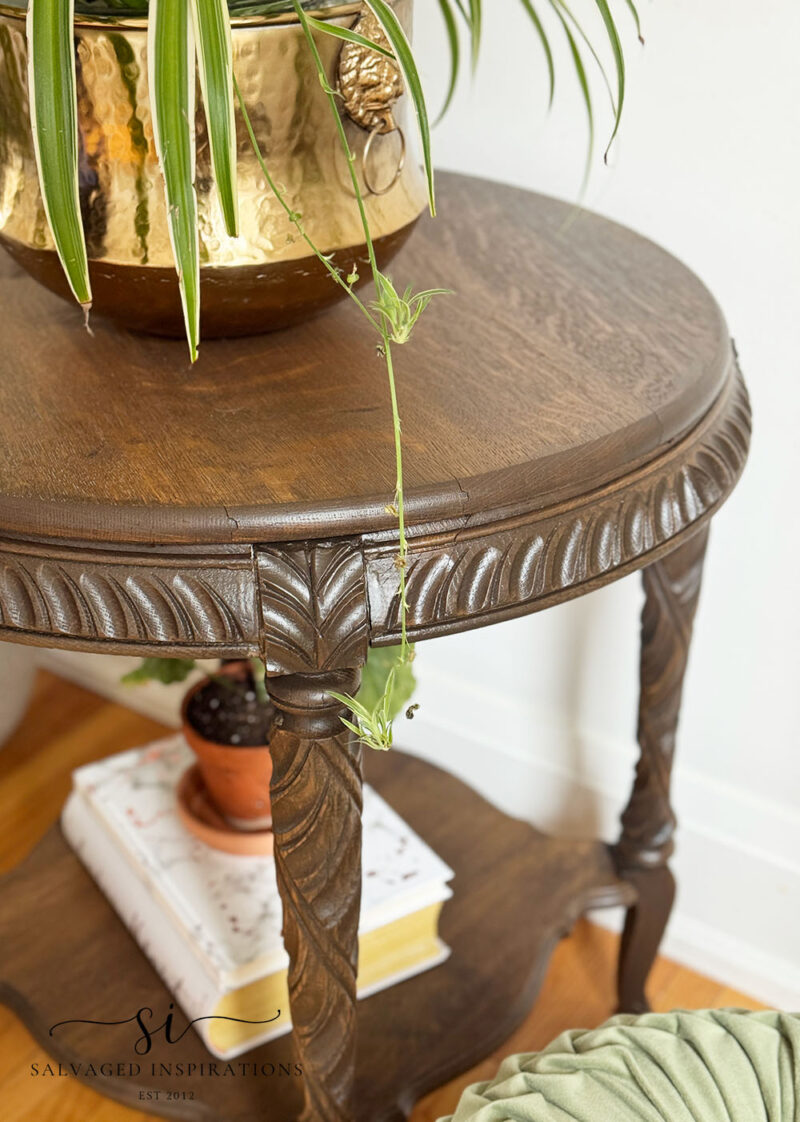
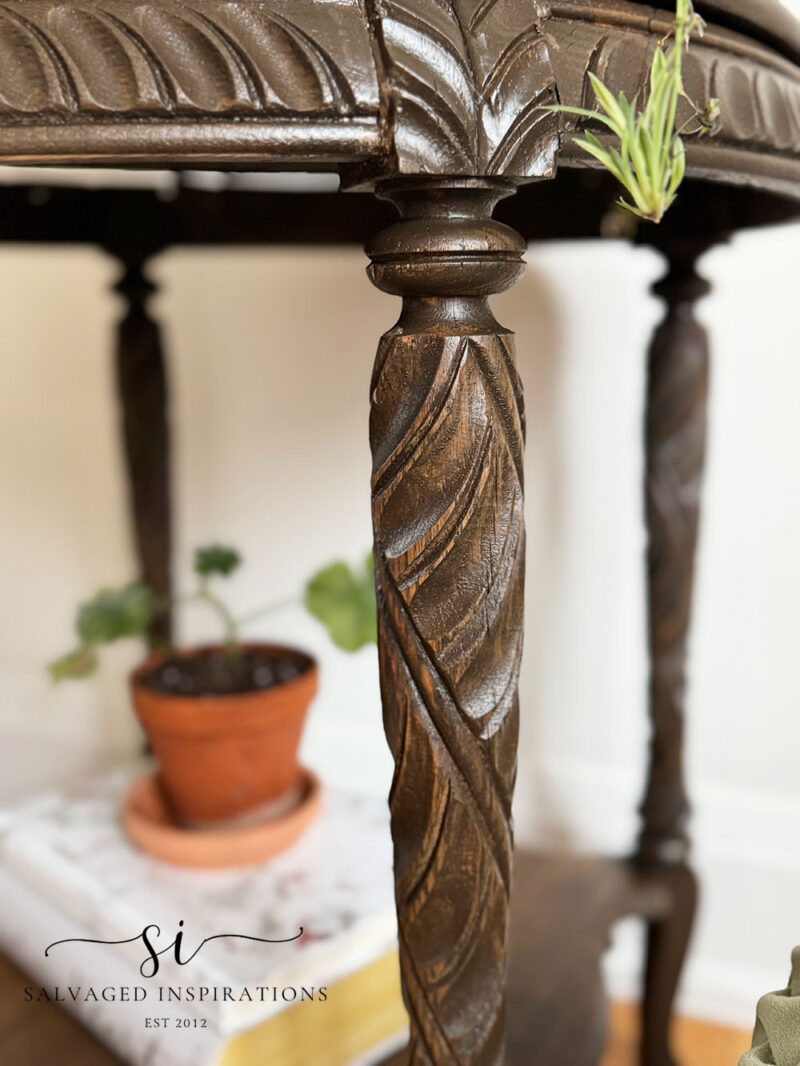
And check out these gorgeous carved legs. They look vintage-fabulous, don’t they?!
YOUTUBE TUTORIAL
I’ll have the full step-by-step YouTube video tutorial for you this weekend. Our #siyoutubefamily is already a community of 57.4K, so don’t forget to subscribe if you haven’t done so already. You’re the BEST, and I appreciate your support! 🙂
And now for some FURNITURE FIXER UPPER FUN!
You’re going to LOVE what these creative FFU ladies do! Below are the BEFORE photos. Visit the links to see the amazing AFTERS and learn how they did it! I’m heading over to take a peek as well!
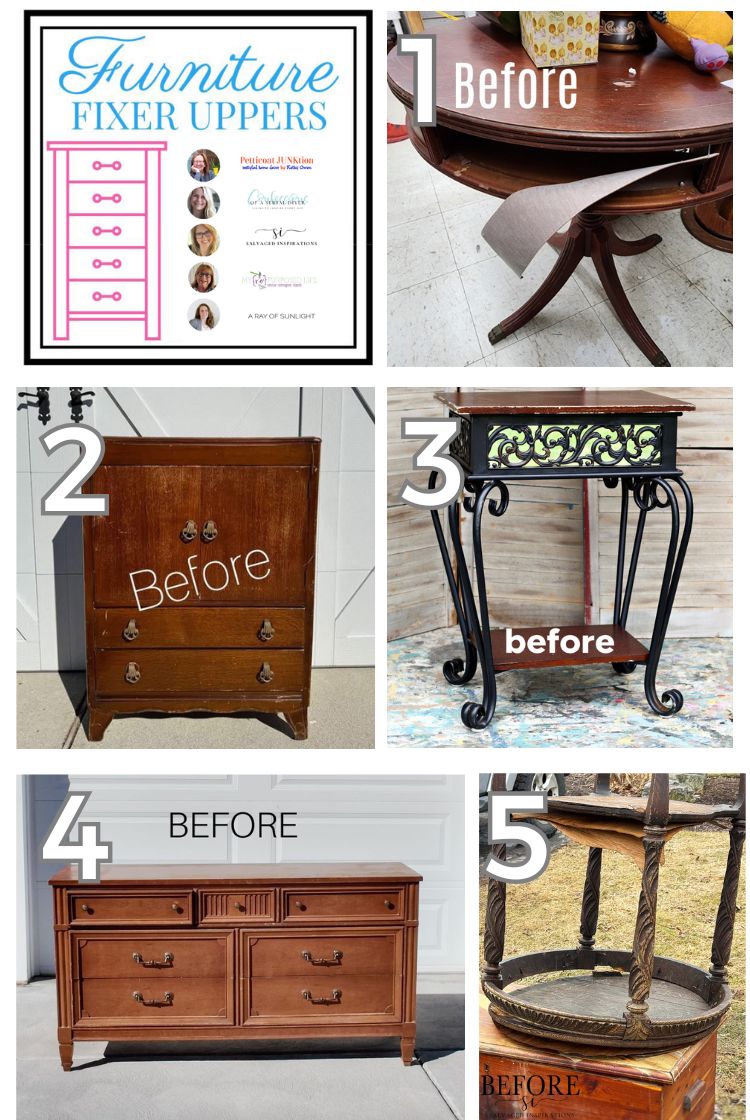
1. MY REPURPOSED LIFE
2. CONFESSIONS OF A SERIAL DIYER
3. PETTICOAT JUNKTION
4. A RAY OF SUNLIGHT
5. SI (HAPPY YOU’RE HERE!)
Here’s another look at this trashed vintage table before and after. I hope it’s inspired you and given you some ideas for your upcoming furniture painting projects!
Finding this ornate wood table curbside was a real blessing – this makeover taught me not to overlook a piece if it has uneven wood! From trying a new product to fill in the wood rot to bending the wood back into shape, I’m proud of this makeover even though it’s not a seller. I can’t wait to hear what you think of how this table turned out and what you would have done with it. If you’ve ever tackled a warped piece yourself, I’d love to hear what worked for you—feel free to share in the comments. I’d love to hear from you below — you always brighten my day!
Happy painting, sweet friends! 💙
Denise x
RELATED POSTS:
1970s DRUM TABLE MAKEOVER
CACTUS PAINTED SIDE TABLES
HOW TO CREATE AN OLD WORLD PAINT FINISH
$12.49 PAINTED SIDE TABLE
YELLOWSTONE PAINTED GLASS TABLES
PIN AND SHARE! 🤗


Awesome job.
Thanks Rebecca!🤗
That spider plant will thrive on that table due to all the energy & love that was put into this rescue! This is an amazing feat that showcases your talent. It’s happily back to its gorgeous original self. Very well done!
Hi Tracy!!!🤗 I think the spider plant looks right at home on this table as well, hehe. I’m also loving the brass planter I bought at Homesense, it goes really well with the traditional look. Thank you and have a great weekend!
Wowza!! I am 100% blown away by what you accomplished with this table. It looked to be just too far gone to rescue. You are amazing and worth following. I can see I have a lot to learn from you.
Thank you Donna, I love a good Wowza!😊😉 I thought the top was maybe too far gone to rescue as well. I was prepared to cut a new one – but so happy I tried this technique!
Hi Denise! I saw the before picture and thought wow! If anyone can transform and repair this table, Denise can and what an amazing job you did!
Hi Cheryl!🤗💙 Thanks so much for the vote of confidence! It was an interesting piece to work on and I learned a lot! Enjoy your weekend. 🙂
Hi Denise…WOW!!!! You knocked this one out of the park. Amazing save. I never could have imagined that sad little table could be so beautiful. I’m in love!!!!
Hi Monique!🤗 Thank youuu! I was so happy it was there when I drove back for it. It was an awesome piece to work on and learn something new!
Amazing job! You are an artist in every sense. I always think of the history of and old piece. If they could only talk.Thank you for giving us ideas and insperation.
Hi Helen, thank you!😊 Oh yaaaa, this table has some stories to tell,lol! Enjoy your weekend!
I didn’t think even you could save this poor wretch of a table, but once again you worked your magic with amazing results! Brava! It’s so gratifying to see total garbage saved and transformed into something so beautiful. Your artistry is amazing.
Aw thanks so much Maureen! I’m really happy this poor wretch of a table didn’t end up in our landfill as well. I don’t know how old this table is, but with this makeover, it still has a few years of good use left in it.🤗
Holy moly! You did it! It’s the pieces that are the worse of the worst that give us the most gratification no matter the amount of work. It’s gorgeous, Denise. I’ll definitely be trying the new product. Less stink is for me. Thanks for sharing. Pinned 📌
Enjoy the rest of your week. Xo
Thanks… and less stink is for me too!😆 Have a fabulous weekend. XOXO
This table makeover is INCREDIBLE, Denise! I agree with your other commenter, you were very brave for taking this piece on, and thanks for sharing. WOW! 🤯
Thank you Nicki, I’m so happy you like it! I love working on these ‘junk’ finds. It’s such a great learning tool because it’s guilt free even if I muck it up.😄
Wow! Can hardly believe the finished piece was the original curb salvage: you did great! My one question is, did you have to do anything to the bottom shelf besides remove the old veneer? I reeeeally like doing paint washes too instead of messing with old school oil-based stains😜. You pulled off another one in high style, Denise! As always, thanks for being so generous with your knowledge and experiences on this exciting journey of lifelong learning! We love you tons! OXO
Hi Suzy!!🤗 I did nothing with the bottom shelf other than remove the old veneer and give it a really good sanding. The bottom shelf was perfectly straight and level. And I REALLLLLY like a paint wash looking ‘stain’ as well. So easy, right?! Wait till you see what happened mid wash on the table top in this weekend’s YouTube turtorial. I ended up scraping it with my carbide scraper mid way – and it still turned out amazing. Goof proof imo. 😉 Have a wonderful weekend. Hugs
I’m (almost) speechless . For starters – this piece had gorgeous details and design Love it !
But, it’s condition was Disasterous. I am in awe of your dedication to your craft. And you thoroughly documented this process for all of us! Amazing work I’m so glad you are keeping this one. It will give you a smile whenever you see it, and inspiration if you have any doubts on doing a future challenging project.
Thank you for sharing this journey. It’s such a beauty now. BRAVO
Thanks so much P and I agree, this piece has such gorgeous details and design… and it WAS pretty disastrous!😆😆😆 I’m really glad it was still there when I went back to pick it up. No pressure makeover and I learned a ton! I actually went back a second time to pick up that chest this table was sitting on as well,but someone had nabbed it up. Thanks for joining me on this one and enjoy your weekend! Hugs
A-MAZING! Wow. You are in a class all your own with your perseverance and skill set, Denise. What a beautiful save!
Hi Anita!🤗 So glad you like it. I really enjoyed working on this one!💕
Okay this was super helpful, but also can we talk about how GOOD the table turned out?? 👏 You’d never know it was warped!
Aw thank Natalie, that means a lot coming from you my talented friend!🤗 Enjoy your weekend. XOXO
AMAZING!
You’re a brave soul to drag this gal home! I probably would have snagged it, but wouldn’t have thought about reusing that warped top!
You really outdid yourself on this one Denise. The end result is stunning!
Pinned!
gail
Thanks so much Gail! I learned a lot on this one and the best part is that I get to share what I learned. Have a great weekend! XOXO
Beautiful work❣️⚘️
Thank you Deborah!🩷
This table flip was truly a labor of love and you gave it a new life. I wonderful to see projects like this and be open to the possibilities. You are an inspiration to all of us flippers.
Such a beautiful compliment Pamela, thank YOU!!!💕 We have such an amazing supportive community here and I learn just as much from all of you!🤗
What a fantastic save on this gorgeous piece! I know it was a ton of work, but it was so worth it in the end! XOXO
Thanks Christy! It would have been faster/easier to cut a brand new top but I’m really happy I gave this a try. If I ever come across a peice with a ‘slight warp’ … it will be a walk in the park – easy peasy – and I won’t hesitate to grab it. Have a great day and weekend my friend. XOXO
I’m so happy you find the possible in cast-offs. We are such a throwaway society, it’s heartbreaking, but then someone like you shows people how a bit of work is all a piece needs. Isn’t most everything worth a bit of work? Thanks for doing this, Denise, and sharing with us.
Aw, thank Jeanne! This throwaway pieces are always my very favorite pieces to work on!🤗