HERE’S HOW I TRANSFORMED THIS $12.49 BEDSIDE TABLE INTO A GORGEOUS GLACIER STATEMENT PIECE | YOUTUBE VIDEO
Hi beautiful #sifamily! Today I have an updated thrift bedside table to share. I used a new-to-me paint color called Glacier. I can’t wait to hear what you think!
It’s also Furniture Fixer Uppers Day and I’m joining my FFU crew and sharing links to their projects down below. I hope you join me in visiting their before and afters too.
*As an Amazon Associate, I earn from qualifying purchases. There may also be affiliate links in this post to other companies/products I use and love as well. You will never be charged extra when you purchase through these affiliate links. To see my full disclaimer, click here!
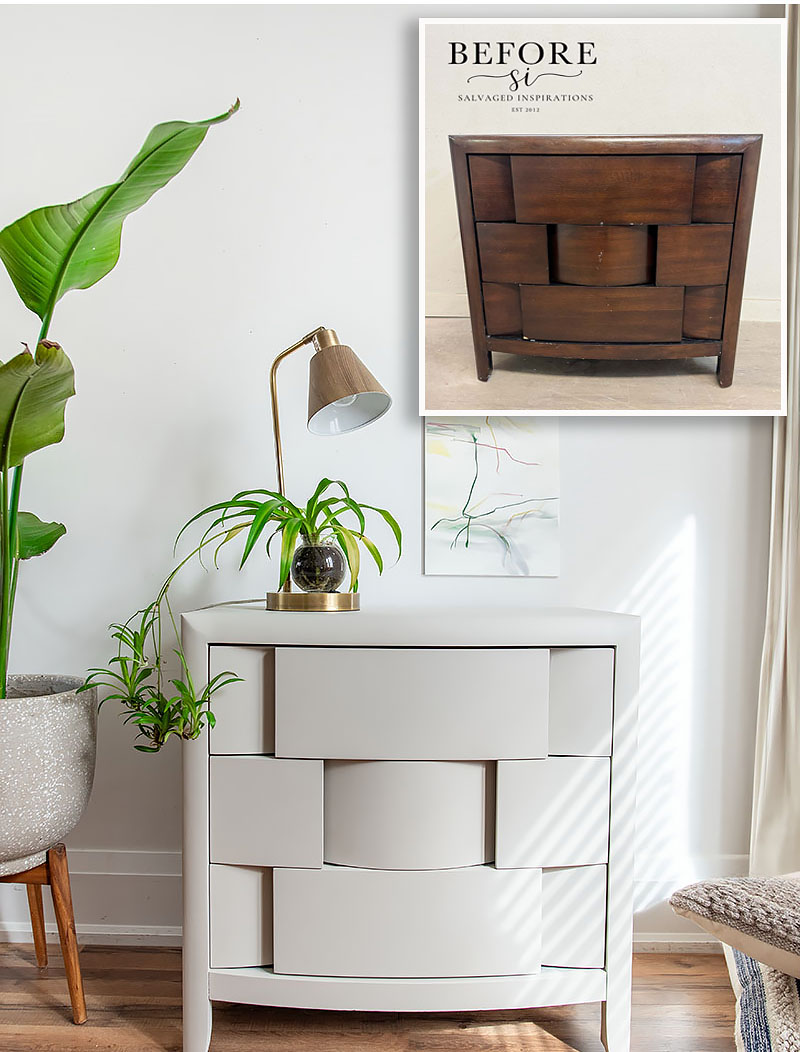
Here’s the thrift store table set I started with. It was hidden in the middle of all the thrift store furniture. I’m guessing someone was planning on coming back for it the next day. Heck, I’ve used that strategy a few times, wink wink. It was priced at $12.49 and with a discount coupon, I was gifted for dropping off some clothes, the total came to $11.29 including tax.
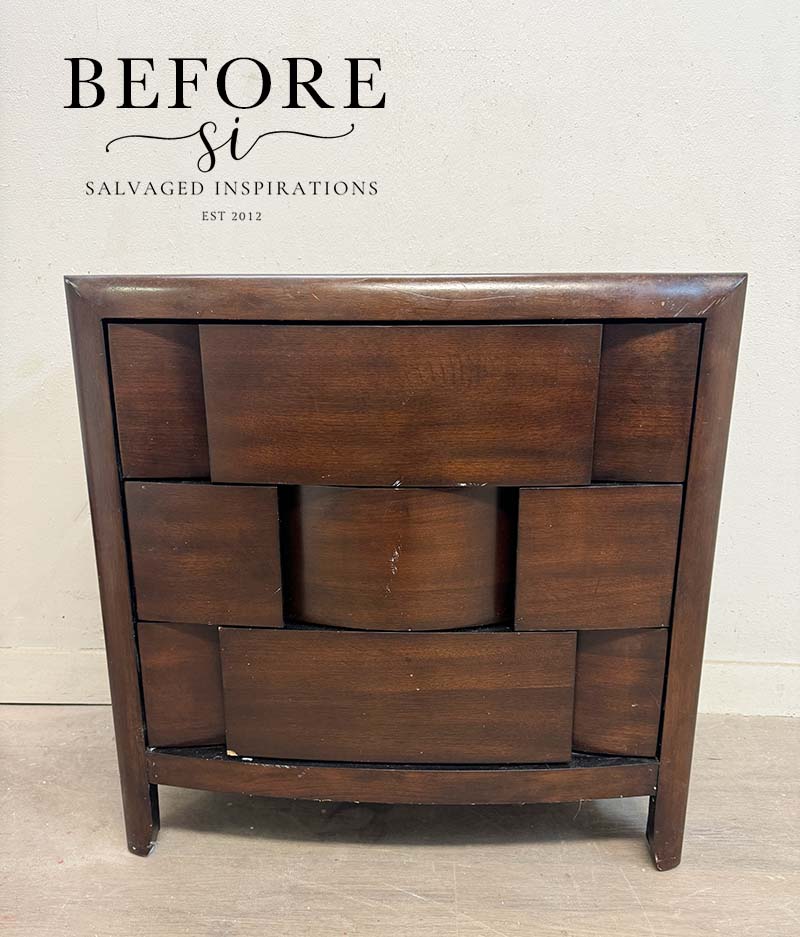
Super good price for this piece and I’m guessing it was priced to sell because the top wasn’t in the best of shape.
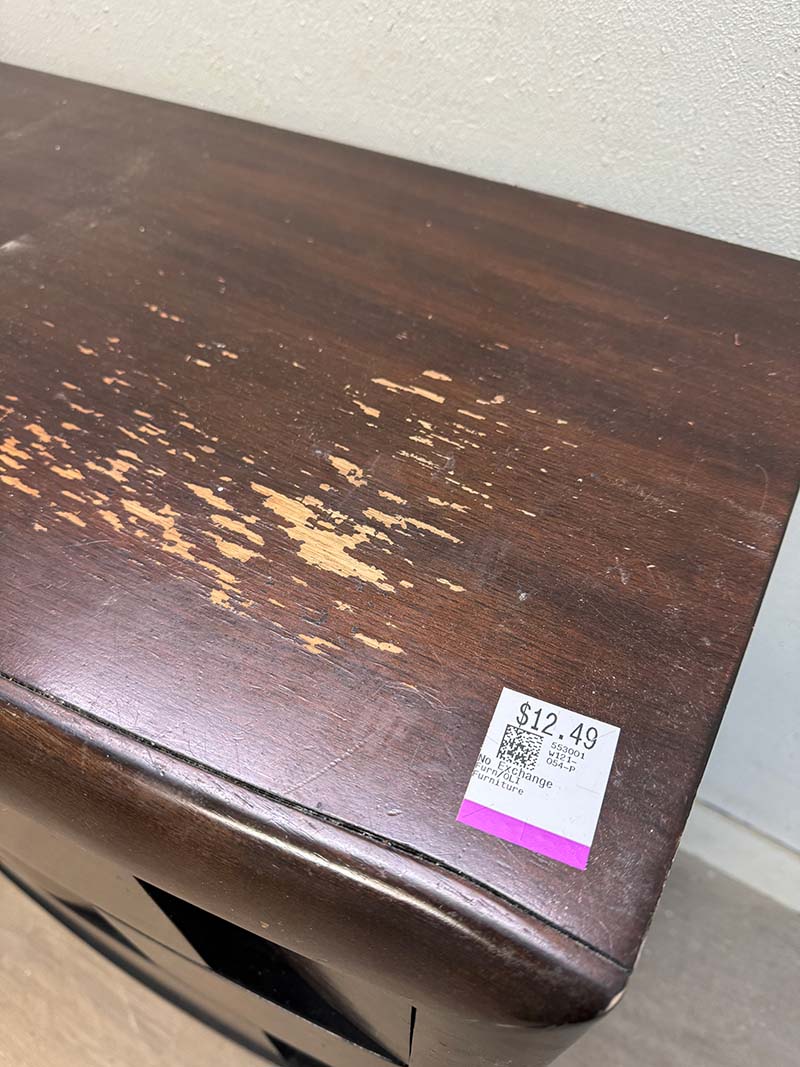
There were also a few drawer chips and scuffing, but nothing too major. The drawers were nice and clean and overall this piece was in good shape.

THIS POST IS SPONSORED/CONTAINS AFFILIATE LINKS TO PRODUCTS I USE. YOU CAN SEE MY FULL DISCLOSURE HERE.
WHAT YOU’LL NEED
Bedside Tables – SALVAGED
White Lightning Cleaner
Wood Filler
Bosch Sander
Astro EuroPro Spray Gun 1.7mm
Glacier Silk Mineral Paint
Bonding Boss Primer
PAINTED BEDSIDE TABLE MAKEOVER
Here’s how it all came together and my thoughts on this NEW paint color…
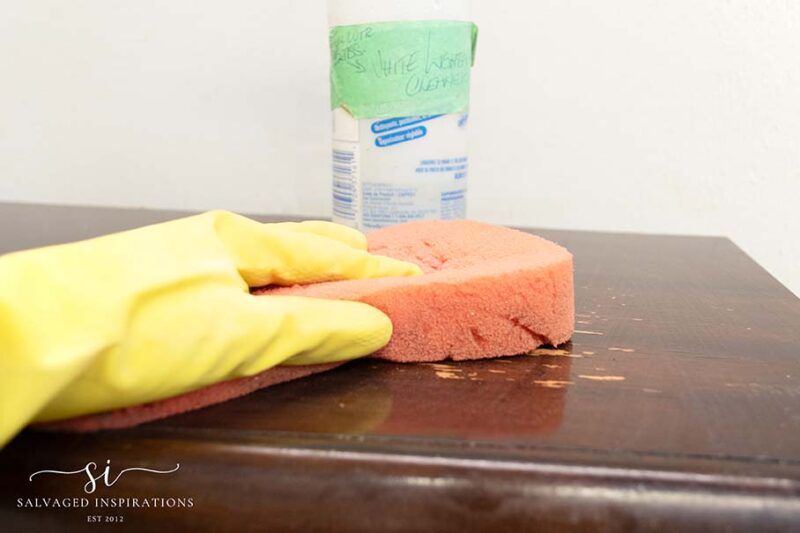
CLEAN/PREP
I gave these tables a thorough cleaning with White Lightning making sure to rinse my sponge and wipe with clean water to remove any residue.
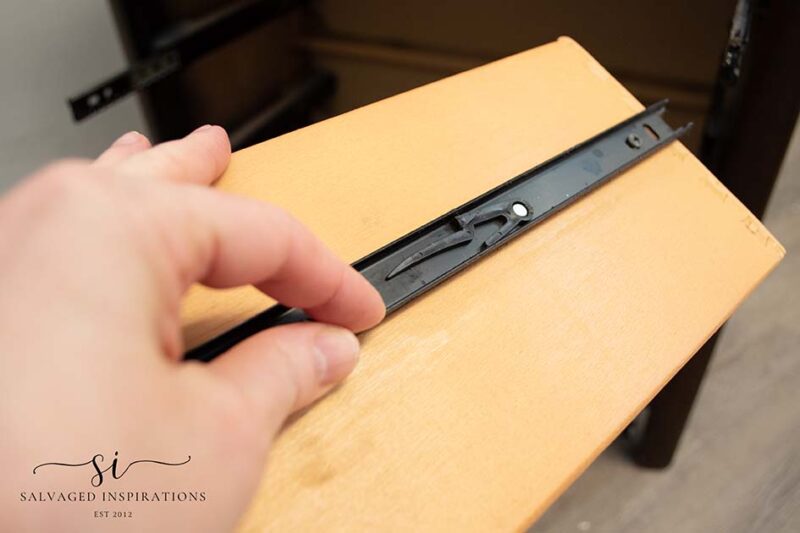
REMOVE DRAWERS
The first time I came across drawer runners like these I was stumped on how to remove them because when you open them fully, they stop and lock. I learned to remove them you pull down on a plastic leaver to unlock the mechanism. They can still be a little finicky to remove as you’ll see in this Saturday’s video, but once I got the hang of it it went pretty smoothly.
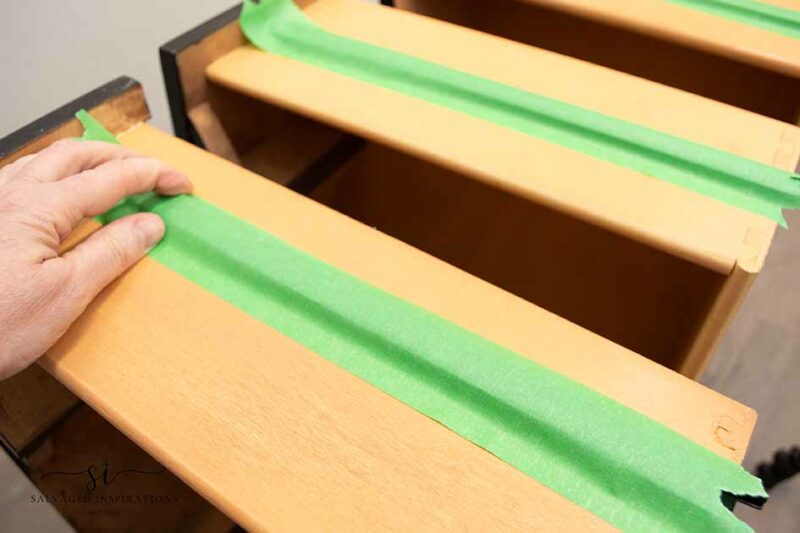
MASK DRAWERS
There was some kind of grease on these tracks to keep the drawers sliding in and out nicely but it was getting on my hands and making a mess. I masked off with green painter’s tape to keep the project clean.
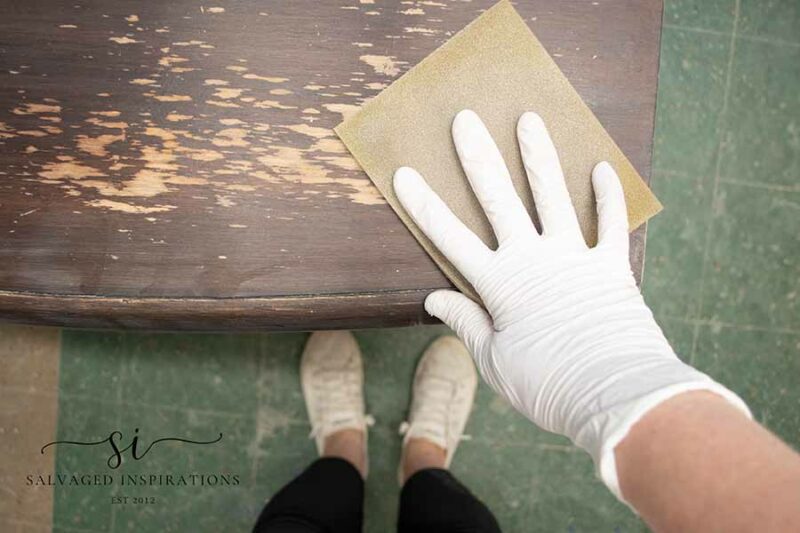
SAND AND FILL
I scuff-sanded all the drawers with a 150-grit sanding pad to give the surface a little tooth for good paint adhesion.
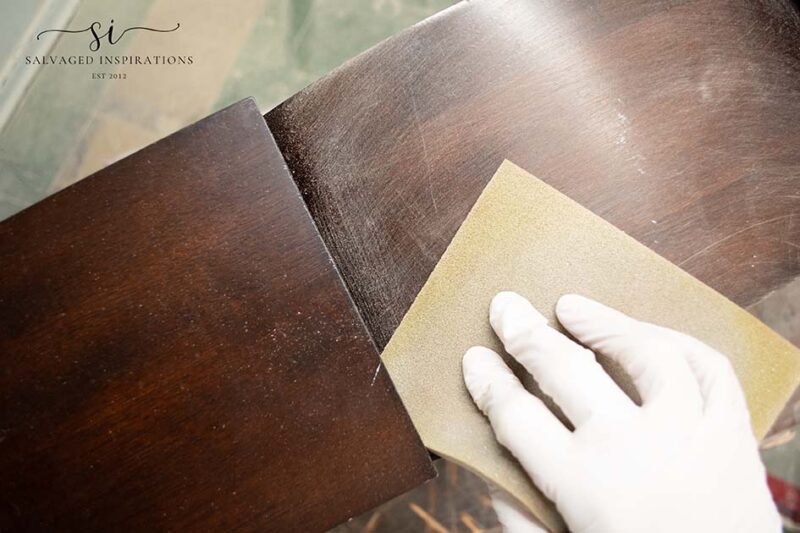
I also smoothed out the damaged finish on the top with the same sanding sponge.
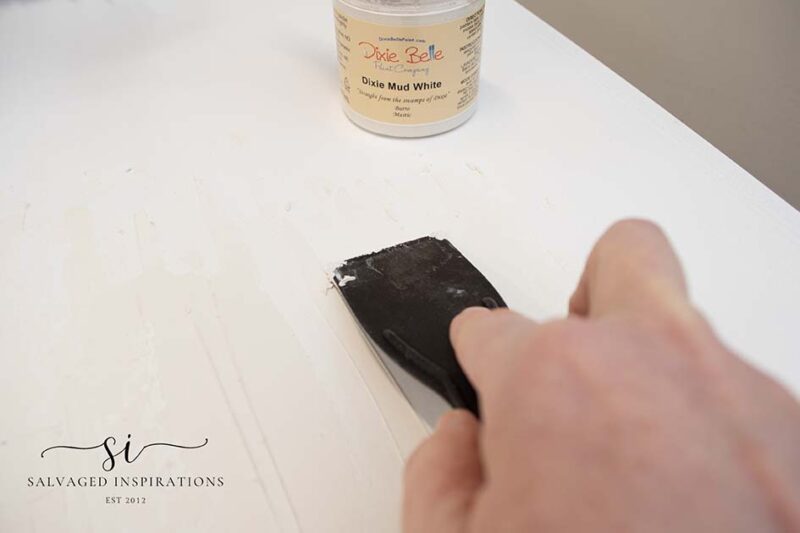
Then I used Dixie Belle White Mud to fill in the chips, scratches, and any damage on the top after I primed. I like putting on one coat of primer first, so I can see what needs filling in. Then the second coat of primer goes on.
And speaking of primer, I used the all-new Bonding Boss again. IM IMPRESSED! The scratch test passed with flying colors. The only caveat with this bonding primer is time. Once it’s applied, it requires 24 hours to do its thing which is bonding to slick surfaces AND blocking bleed-through, smells, odors, stains, etc. I think this primer has encouraged me to start my projects a day earlier…lol. You all know how much I love my BIN Shellac-Based Primer (it dries and kills bleedthrough within an hour and I’m already painting over it) but Bonding Boss has no odor and is cheaper!
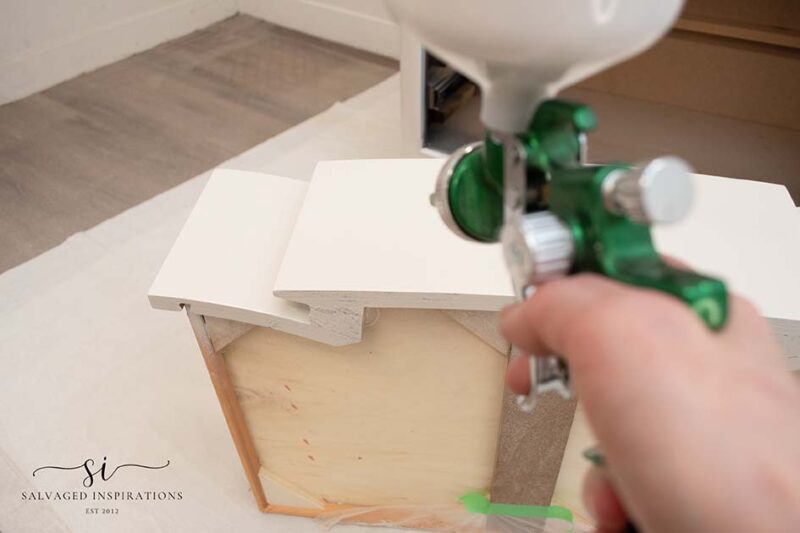
SPRAY PAINTING
Now for the fun part! I had a ton of good color suggestions and some shares of the same piece on this Facebook post – thank you to everyone who chimed in. I decided to go with a neutral I’ve never tried before – this Glacier Silk All-In-One Mineral Paint. This bedside table has modern lines so I believe a neutral will sell much faster. I thinned the paint with 10% water and sprayed it through my paint gun for a perfectly smooth and flawless finish.
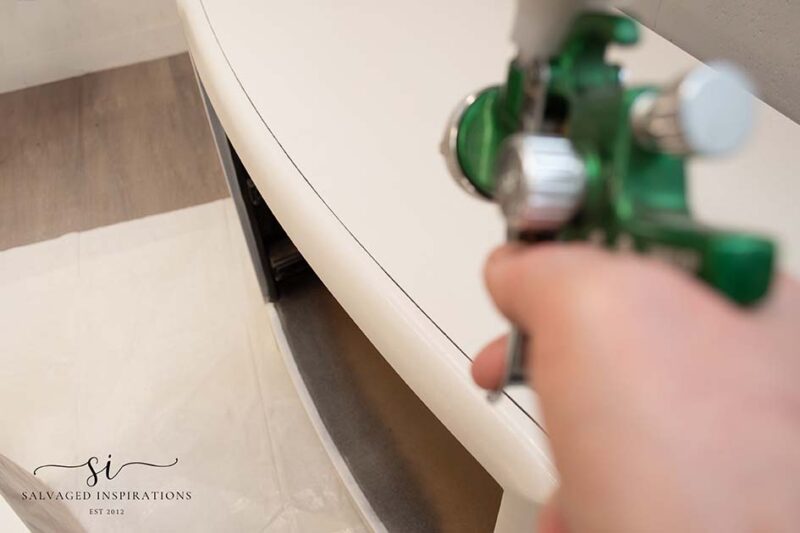
I usually use cardboard to block off areas while spray painting rather than tape it off. But because the drawers were an odd shape, I also added this pre-taped masking film that includes a sheet of plastic. Super handy to keep the inside of the drawers nice and clean. I’m sharing more on masking with this 2-in-one in the YouTube video below.
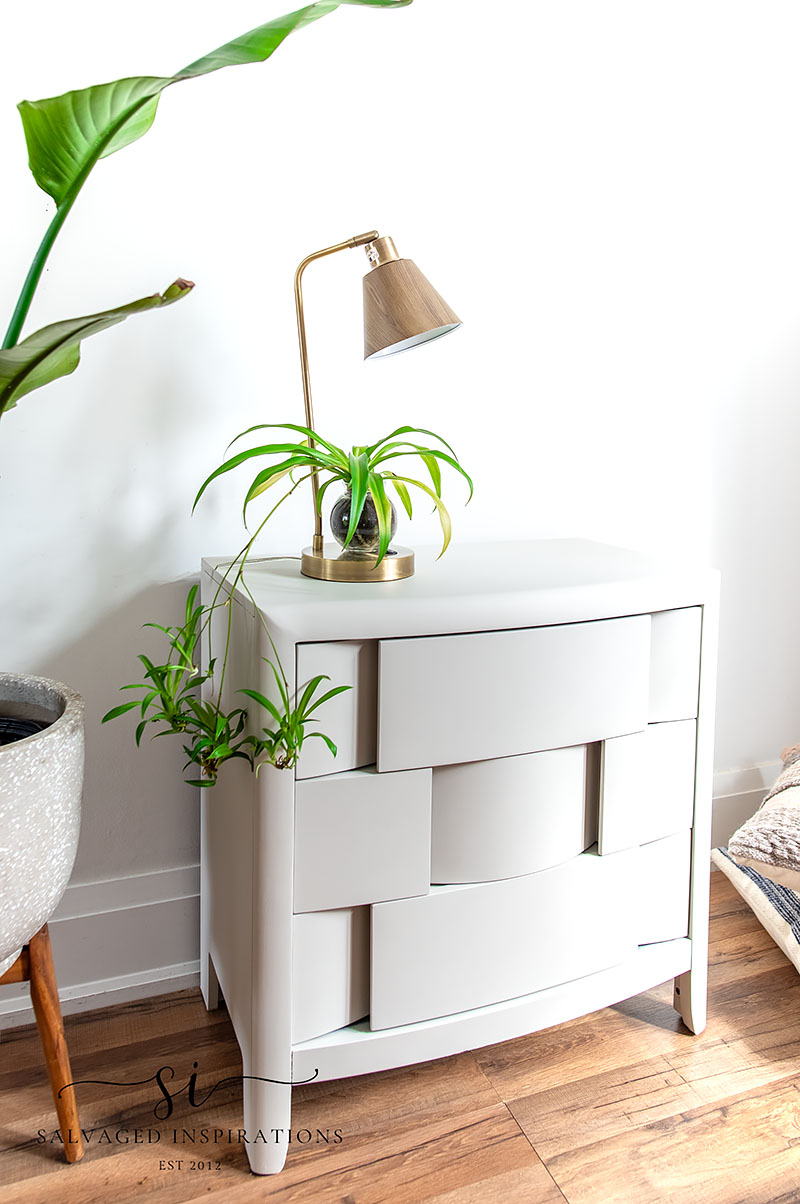
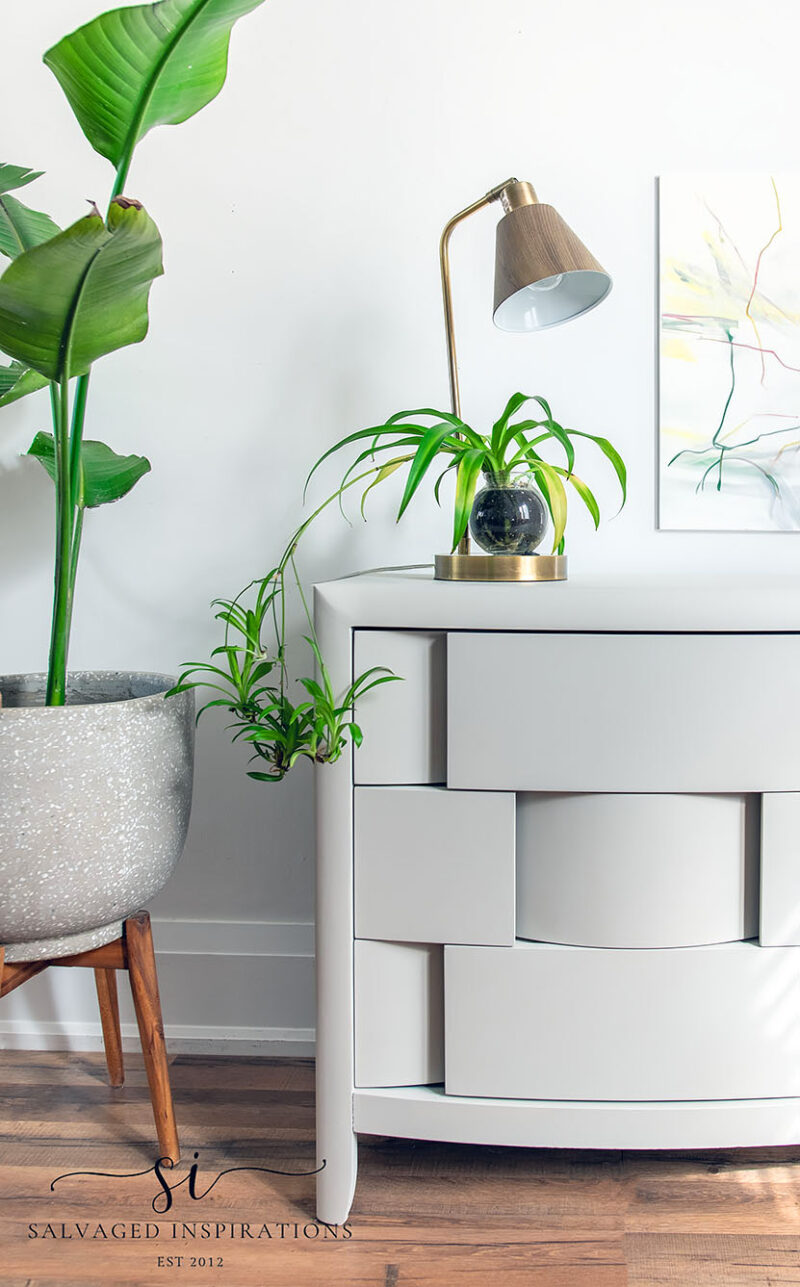
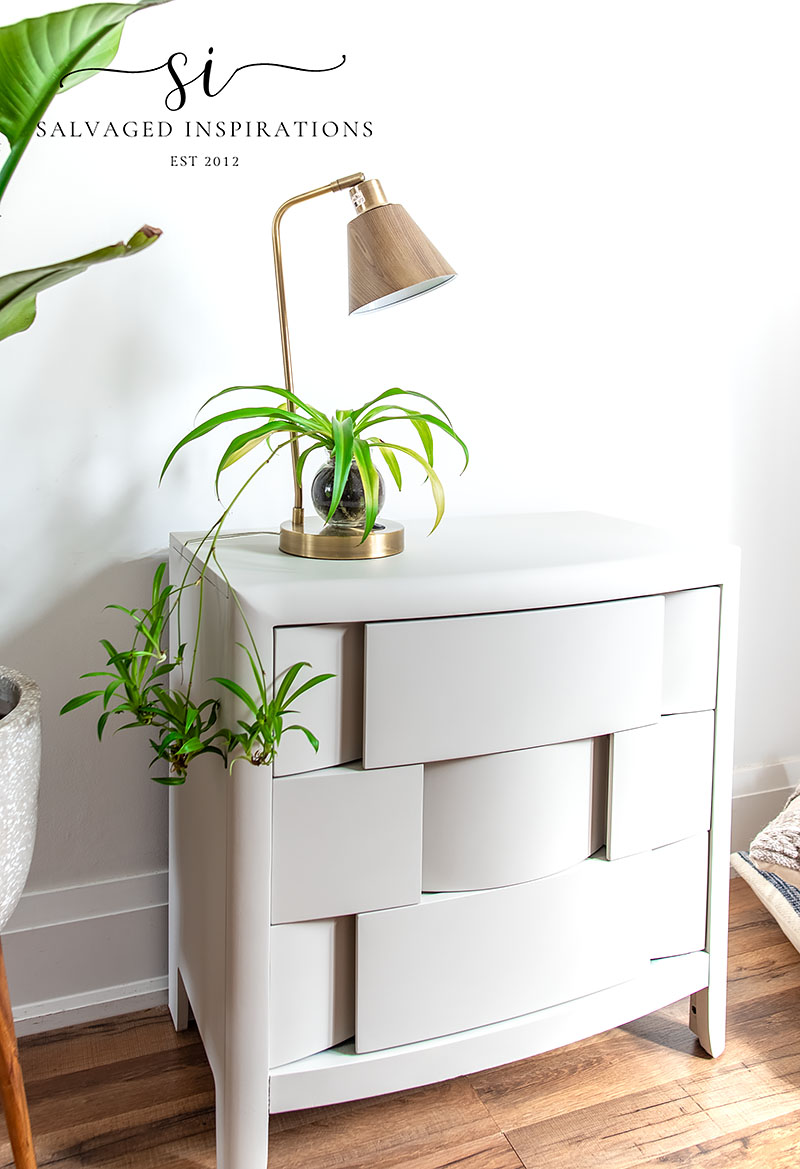
FINISHED BEDSIDE TABLE
Here’s the finished look. Check out the shadows the drawer panels create!
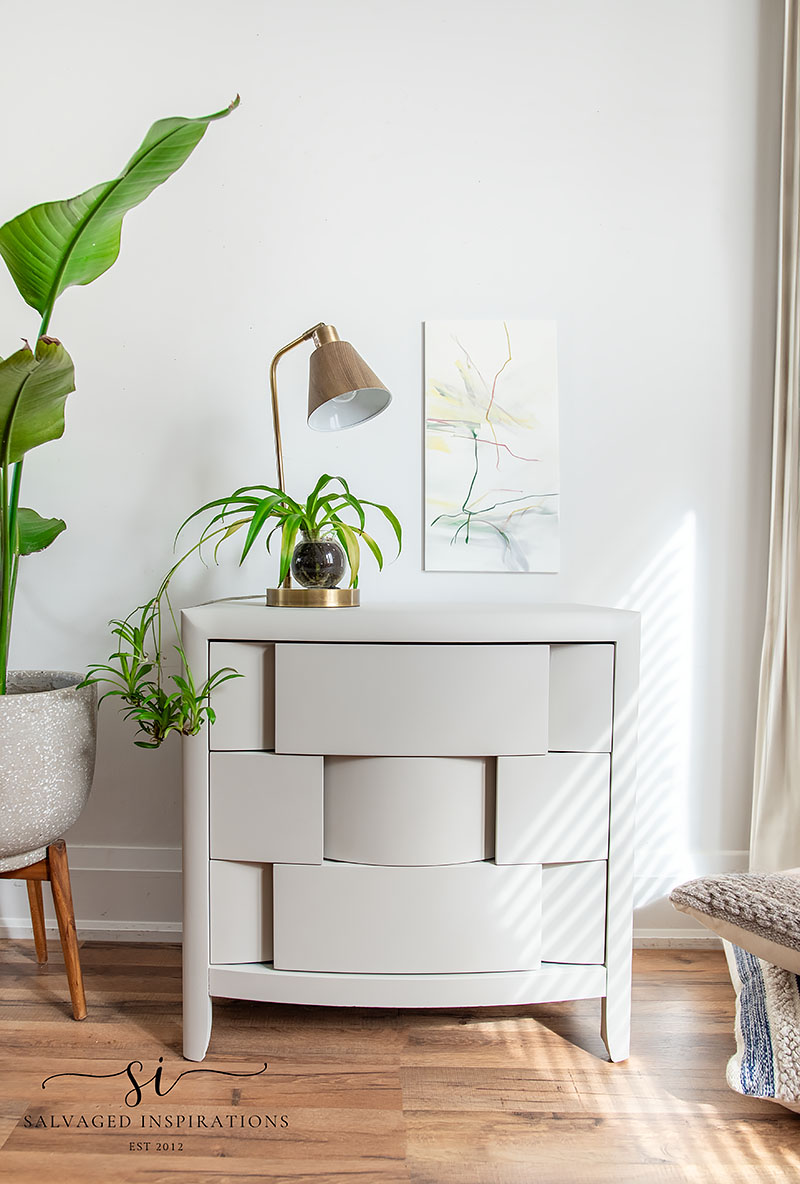
I’m really happy with the super smooth sprayed finish!
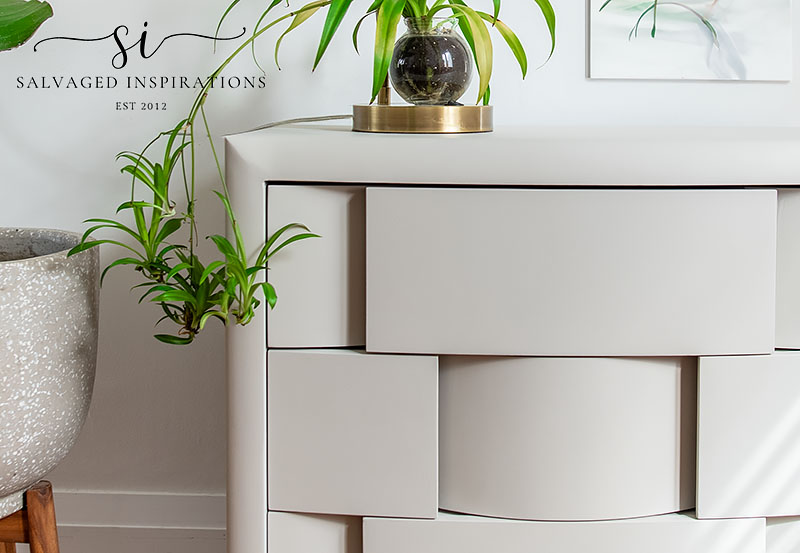
It looks like a factory finish!
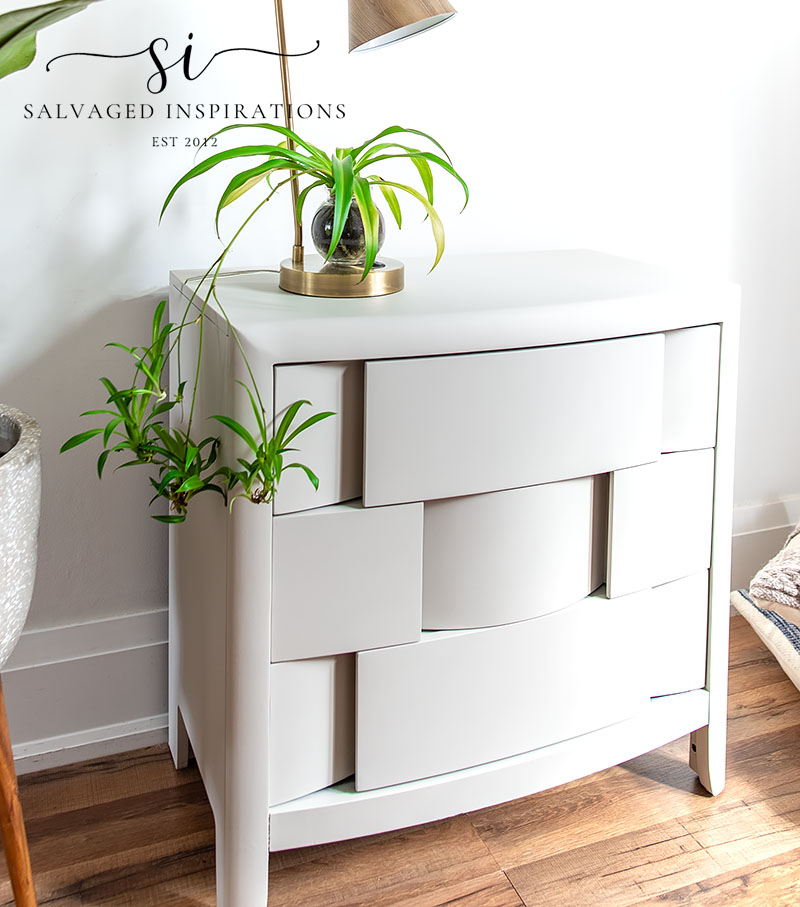
I would describe this Glacier color as an off-white with soft gray undertones. If you’re looking for a ‘cool’ neutral this Glacier paint color is perfect. It’s gorgeous for a modern piece of furniture or home decor. I like my neutrals a little warmer – but that’s just me. It suits this piece. What do you think?
PIN FOR LATER 🥰
YOUTUBE TUTORIAL
Here’s the full step-by-step video below. Our #siyoutubefamily is already a community of 43.5K so don’t forget to subscribe if you haven’t done so already! So exciting, thank YOU!
And now for some FURNITURE FIXER UPPER FUN!
You’re going to LOVE what my creative FFU ladies do! Below are the BEFORE photos. Visit the links provided to see the amazing AFTERS and learn how they did it! I’m heading over to take a peek as well!
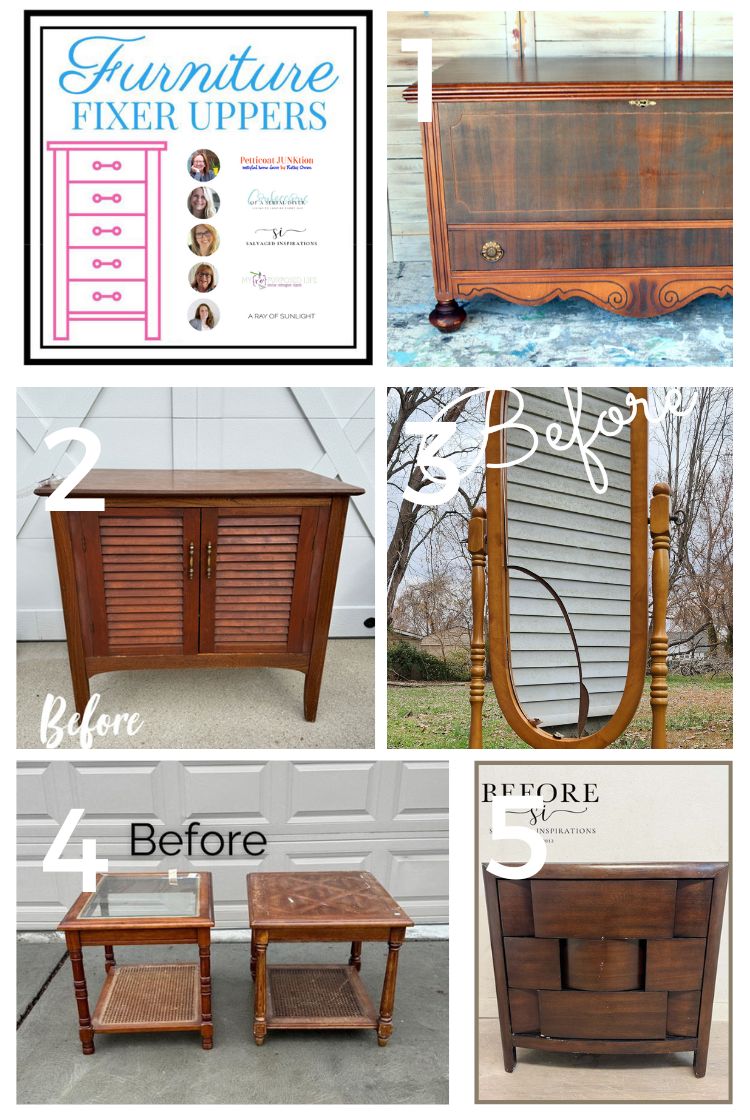
1. PETTICOAT JUNKTION
2. CONFESSIONS OF A SERIAL DIYER
3. MY REPURPOSED LIFE
4. A RAY OF SUNLIGHT
5. SALVAGED INSPIRATIONS (HAPPY YOU’RE HERE!)
Here’s another look at this painted bedside table before and after. I hope it has inspired you and given you some ideas for your upcoming furniture painting projects.
Wishing you a fabulous rest of the week and weekend. I’ll see you back here on Saturday with the full step-by-step video.
Let me know what you think of this bedside table makeover or feel free to ask any questions you may have. I always love hearing from you, it makes my day! 🙂
Happy painting my friends!
Denise x
RELATED POSTS::
HOW TO MAKE PAINT LOOK LIKE WOOD
DIY BOHO NIGHTSTANDS
22 SALVAGED FURNITURE FLIPPING IDEAS
DECOUPAGE ART ON NIGHTSTANDS
HOW TO REVAMP AN OLD DESK
REPURPOSED DESK INTO NIGHTSTANDS
PIN AND SHARE!


A great $12 find and you turned it into a gem!
Aw, thank you! And yes, it was a great find!
It is smiling now. 🙂
Thanks my friend! XOXO
Denise,
Lovely makeover! I like the bedside table before, but WOW! I love the after. The color is perfect.
Do you use a sprayer indoors?
Pinned!
gail
Thank you Gail! And yes, I do use my sprayer indoors. I’m lucky in that I have a designated paint room and sanding room. They aren’t pretty…lol…but they get the job done.
Denise,
I saw the “before” on that piece and I said “UGH! How Ugly!” . I figured even your magic could not turn this turkey into a swan but I have to admit that it is much improved. You turned it from being firewood to something useful and rather attractive. Good Show!
Were you the one on Facebook who said ‘burn it’?😂🤣😂 I think its improved with this new color as well! Thank you Michael!😊
What a beautiful job! Huge improvement
Thank you Wendy! 🙂
As you said, the unusual shape of the front and drawers creates wonderful shadowing which is the only ‘decoration’ needed. I gazed at the before picture trying to imagine what I might try to do but simple is the answer here. However, if you did take a more decorated look I’d love to see what you came up with – just out of curiosity.
I agree with you Audrey. The shape of the drawers is interesting enough and I love the way it creates those shadows! If it were for my own home I probably would have chosen a warmer white or cream, but I hope this ‘cool’ neutral will be perfect for someones home decor. 🙂
Hi Denise, first time I’m leaving a reply. I just loved what you did and how this furniture was beautified into a lovely piece again. Awesome! Thanks for all your tips, they are inspiring.
Hey Soph, I’m so happy you left a comment to let me know you’ve been dropping by!🤗 I’m so happy you love the piece. Sometimes a solid color is the way to go. 😉
What a steal! Love how the bedside table looks in a lighter color now! Pinned!
Thanks for the PIN my friend and ya, it was on for a great price!!
Wow! It’s an amazing transformation. I can’t imagine you even had a second thought about grabbing that piece when you saw it. Even I, an amateur who only does a few things here and there, would’ve grabbed this and put it in my basement for the right time to transform it.
Your Work is always beautiful 😍
Thank you Mary Jo! It really was a steal of a deal. Thrift stores in this area have really increased their pricing so I feel lucky to have found it for so cheap.
you have taken this piece to a whole new level…love the finish!!!
Awww, thank so much Gillian! I appreciate it. XOXO
So pretty! I love design of this little stand and the color is perfect!
thank you Pamela!💕
Wow ! The simplicity of this single paint color is amazingly stunning. Perfect choice.
(I usually prefer a bit warmer too)
The woven look of these drawers is clearly the star of the show.
I can’t believe this piece was there for you – esp at that price !!
I’m sooo glad you are the one to remake this piece.
Any idea of the history of this design ? I just love it.
I wouldn’t know how to let this one go. 🙂
I tried finding this design online and nothing came up. But it’s out there. A few people shared how they restyled this exact same piece on Facebook. I’m always amazed at what paint can do to transform a piece!
Hi Denise. You scored this little dresser for less than $12!!!! OMGGGGG. Beautiful color choice and perfectly painted.
Super good deal, right?! So glad you like the new color. It was fun using it for the first time!
That’s beautiful! And I love Silk paint. It’s one of my favorites to work with. I’ll have to try that sprayer too!
Same here! And it sprays beautifully, I know you’d love spraying it as well!
I really like this bedside table. The color looks great it makes this piece. Almost everything I have seen has been painted white but on this piece it looks great.
Thank you Jordyce!🤗
The paint really updated this piece! It looks SO good now! XOXO
Thanks my friend. It was fun to try a new color! XOXO
Gorgeous! It looks like a designer piece.
Yaaaayyyy, thanks my friend! XOXO
I was just dying to see what you did with this, wow, its stunning. I would LOVE it, the colour and finish, not to mention the actual design, so glad you got your hands on this one, its gorgeous. xx
I’m so happy you love them Janette! Thank youuu!💜
I love your projects! Beautiful finish! I had a question regarding your “slap on leg” technique table. I bought the paste to get that light, watery-colored blue finish, but it came with no instructions. Would you please let me know what you did to get that look?
Thank you so much,
Jill
Thank you Jill! If you’re referring to the chalk paste in this post, you can apply it with your finger, a brush or shop towel and then wipe off the excess. If you find it’s too thick to work with, it can be mixed in with a little water. Hope this helps. 🙂