HOW TO MAKE YOUR OWN BEADED CHANDELIER FOR STYLING YOUR PAINTED FURNITURE OR HOME!

Beaded Chandeliers look amazing but they can be costly! Today I have a special guest post for you created by my sweet and talented sister Andrea! We found a broken beaded chandelier at the Restore selling for $15. The beads on this large chandelier were worth more than the price tag so my sister bought it and DIY’ed this adorable Mini Bead Chandelier for staging and styling my painted furniture. She also wrote this tutorial for you and included all the DIY images. Thanks, Andrea! XOXO
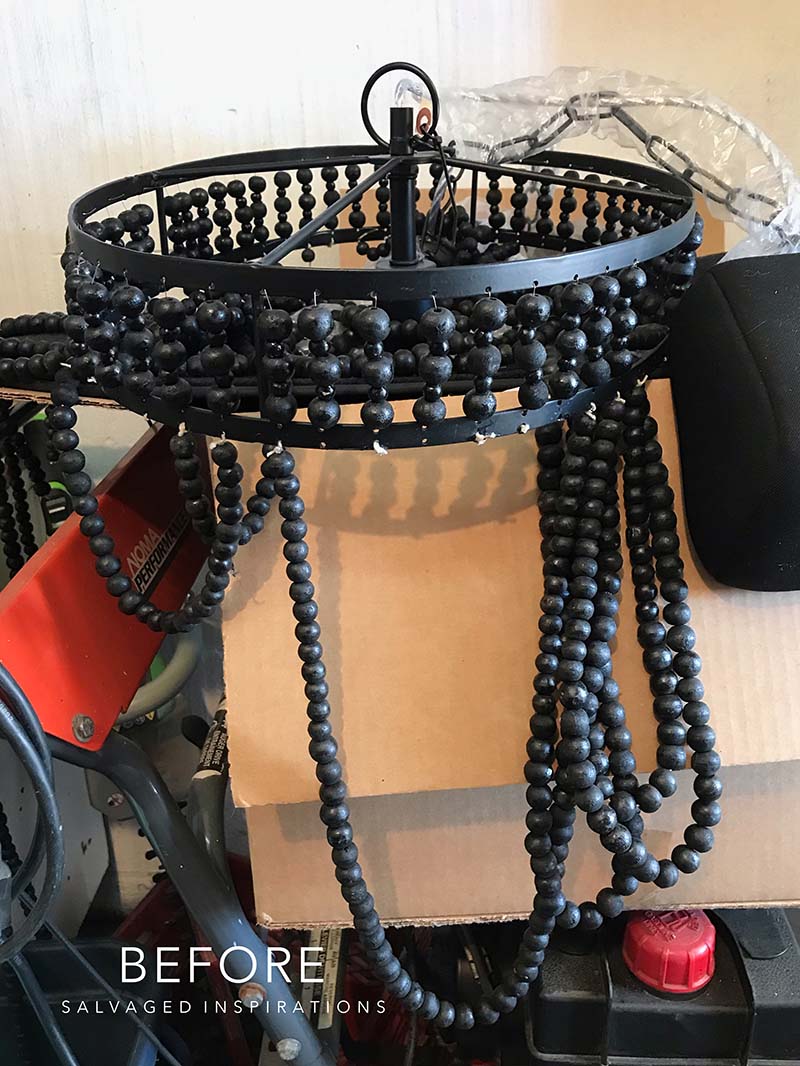
Here’s what she started with. A large broken bead chandelier we found at our local Restore.
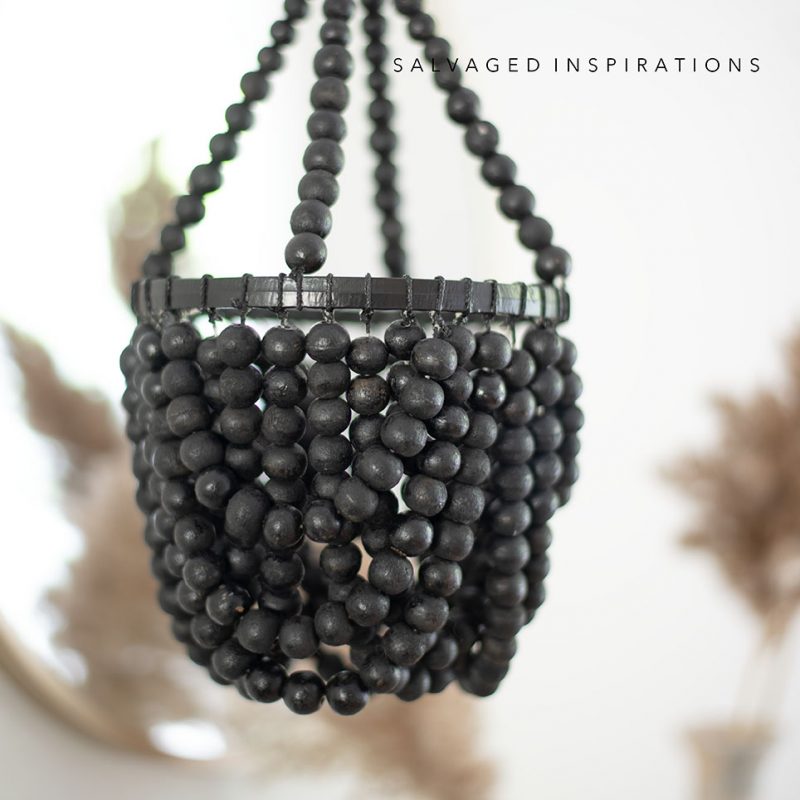
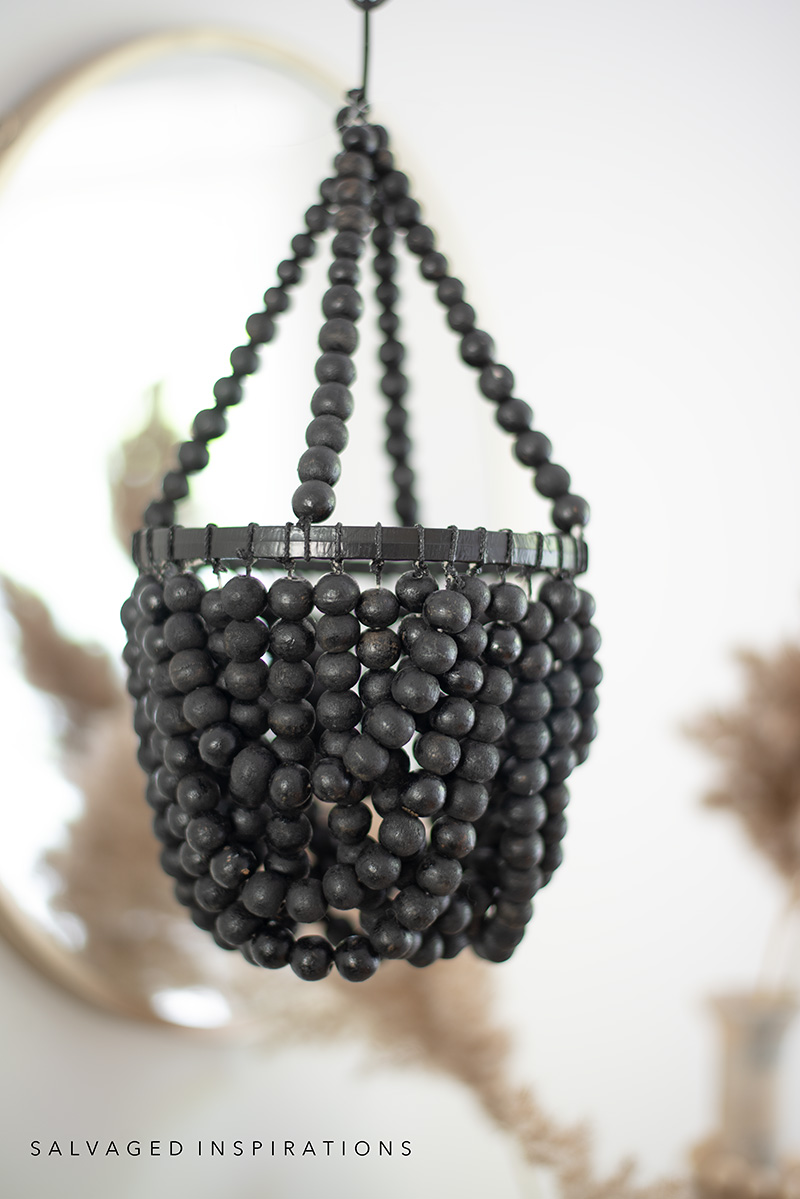
Before Andrea gets into the how-to details – here’s the NEW look! What do you think?

THIS POST IS SPONSORED/CONTAINS AFFILIATE LINKS TO PRODUCTS I USE. YOU CAN SEE MY FULL DISCLOSURE HERE.
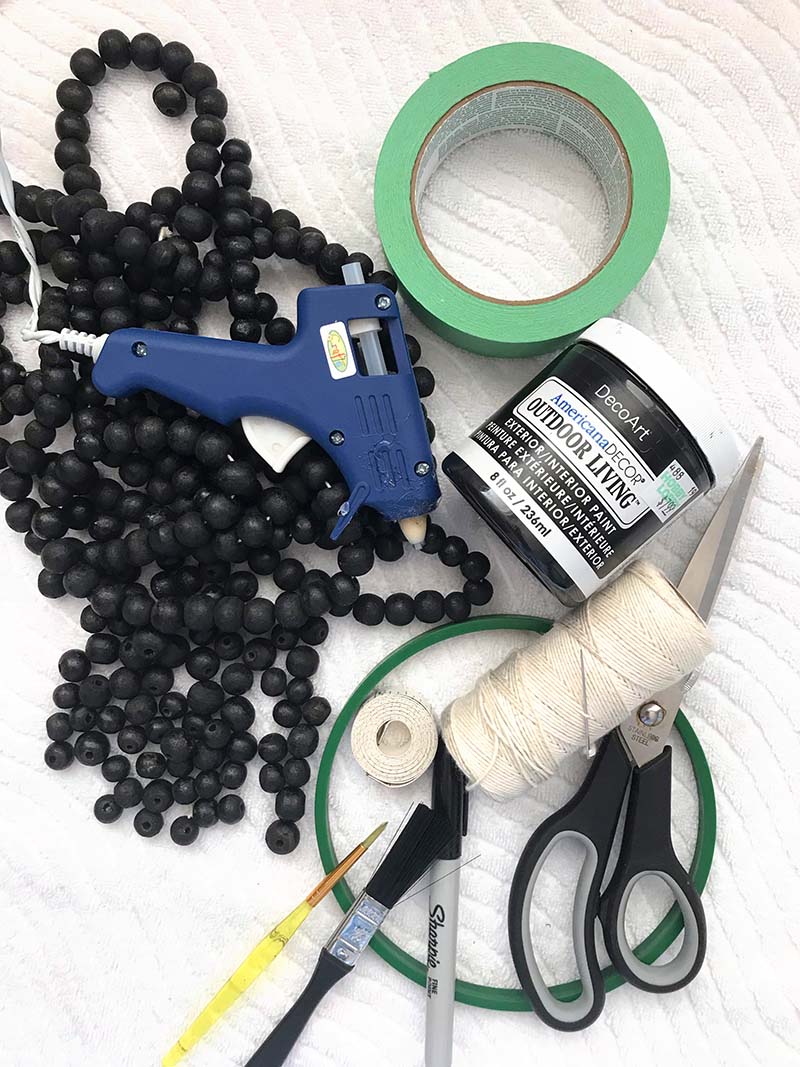
SOURCE LIST
$15 Bead Chandelier – SALVAGED
Wood Beads
Scissors
6″ Embroidery Hoop
Painters Tape
String
Sewing Needle
Sharpie
Measuring Tape
Oval Chain Connector or Keyring
Glue Gun + Glue Sticks
HOW TO – DIY BEAD CHANDELIER
GATHER SUPPLIES
Cut the bead strings off the chandelier or gather the beads you’ve purchased. Put a plastic bag underneath to catch any loose beads otherwise your floor will be covered.
DESIGN & THREAD
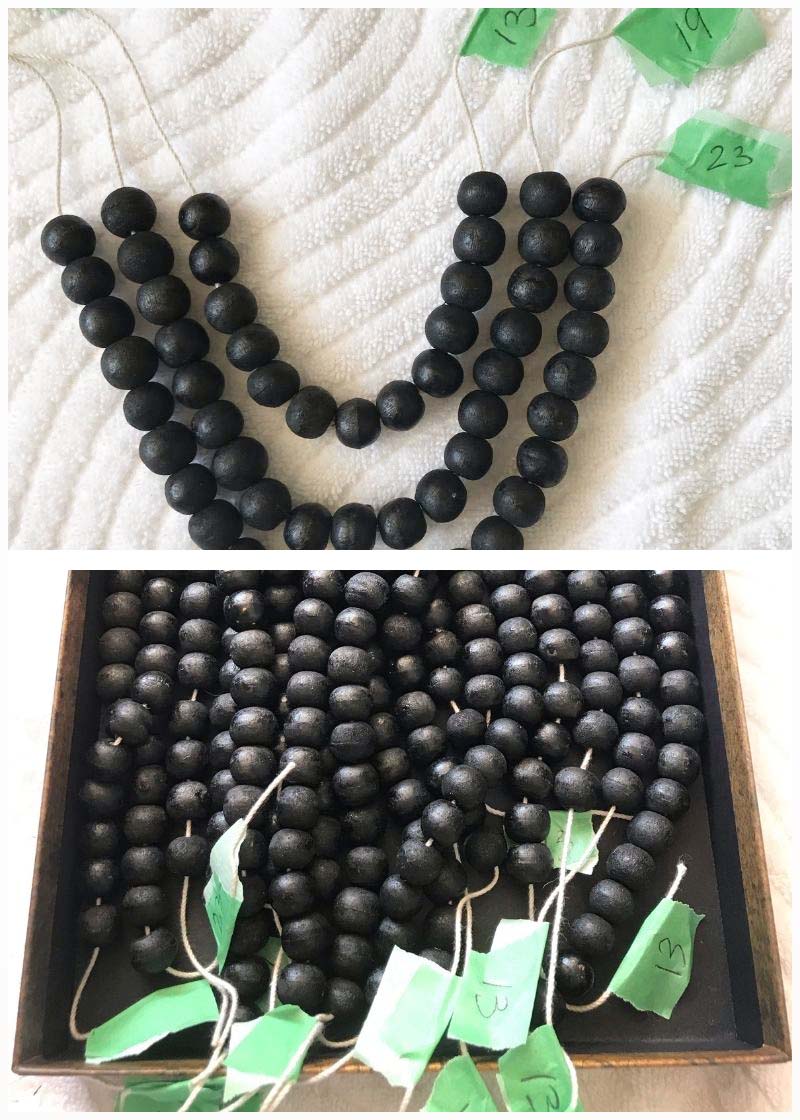
Take your hoop and decide how long you want your strands. Choose the length of string to fit the size of your hoop so it looks visually pleasing to you. I used a small 6″ hoop for Denise’s staging chandelier but the number of beads you use will depend on the size of your chandelier. You’ll need six strands of each length.
For example for the 6″ hoop, I used…
13 beads (for the shortest length) times six strands.
19 beads (for the middle length) times six strands.
23 beads (for the longest length) times six strands.
TIP #1
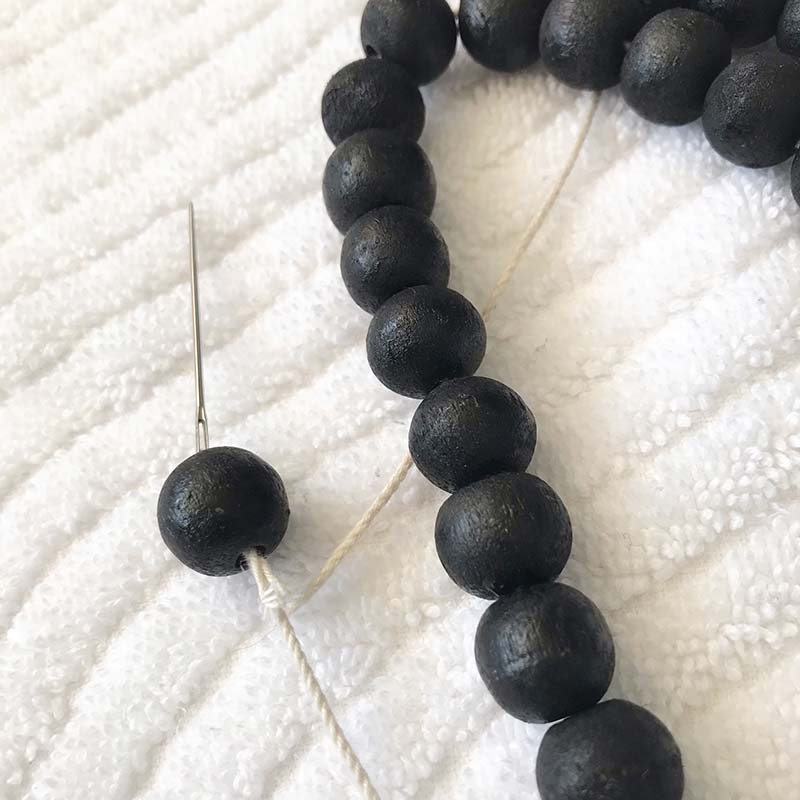
When threading your needle, do NOT add knots. Use painter’s tape on the ends instead of a knot. This is so the beads don’t fall off. With a Sharpie, write how many beads are on each string on the tape. Leave tons of extra string on each end of the beads. That’s so it’s easier for you to knot onto the hoop later. Do this all above your fluffy towel. That way if the beads roll off they don’t roll everywhere.
TIP #2
I used all the same-sized beads. If you want you can go with large beads on the largest strand medium beads in the middle and small beads on the top. Honestly using all the same size beach beads is much easier.
TIP #3
Beads are generally costly. If you can find beads on sale or at a thrift store grab them even if they are the wrong color. Beads can easily be painted or dyed. I spent $15 on this mini chandelier.
MEASURE THE HOOP
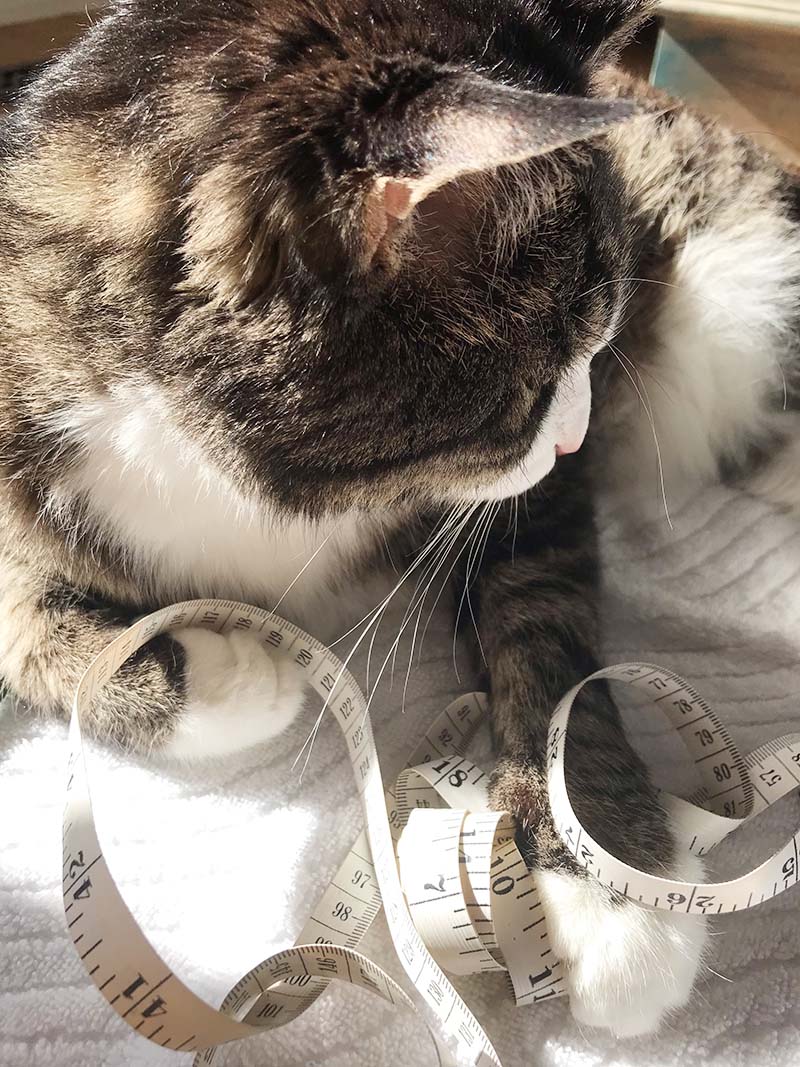
Using the measuring tape mark your hoop with a sharpie approximately 1 cm apart. That’s where you’ll attach each string of beads. To make it easier I taped the measuring tape to the hoop while marking with the sharpie.

Caught in the act! Here, my helper, Tommy is starting to snooze on the job.
KNOT ONTO THE HOOP
Knot one end of the beaded strings to the hoop in this order.
- Short – long – medium
- Medium – long – short
Alternate then loop them back up in a U-shaped. Leave the string long on both sides of the beads to tie. Do not cut the string yet. Make sure all your knots are fairly snug to the bottom of the embroidery hoop. Your bead should be up against the hoop but not too tight.
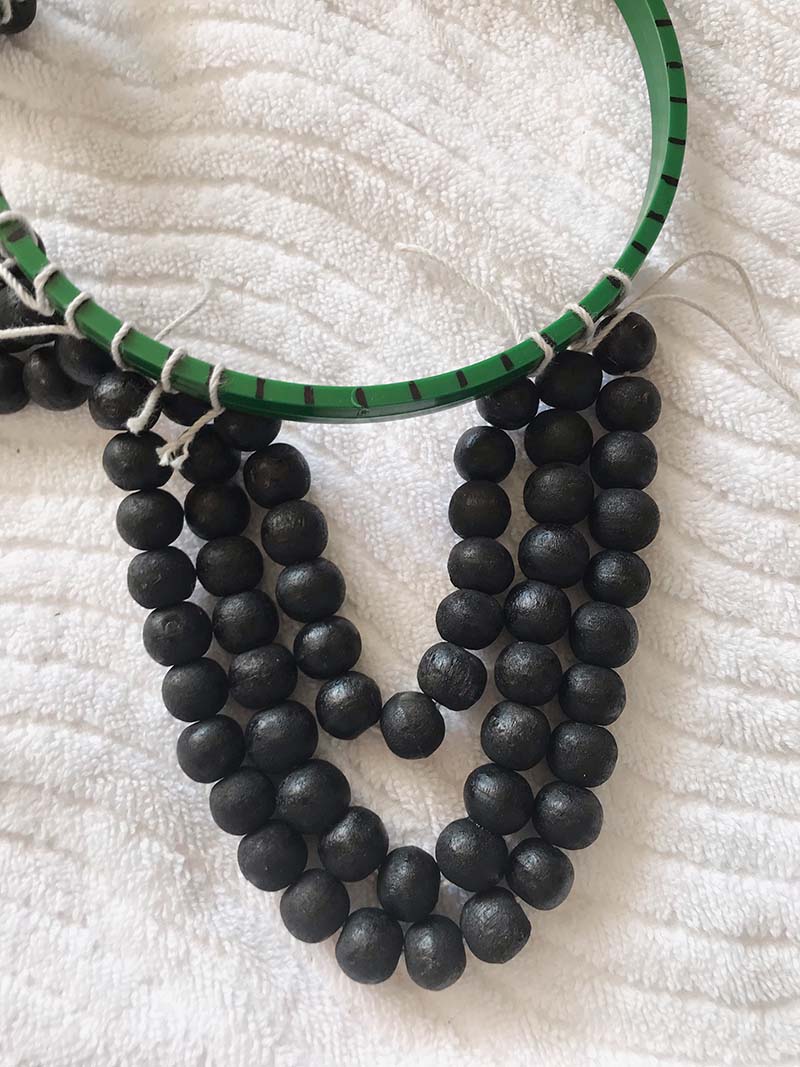
Put an even amount of space between each of your strings tied to the loop. Hot glue them down on the inside of the hoop so they don’t slide anymore. You can ignore the sharpie marks made earlier as they were just a rough guide.
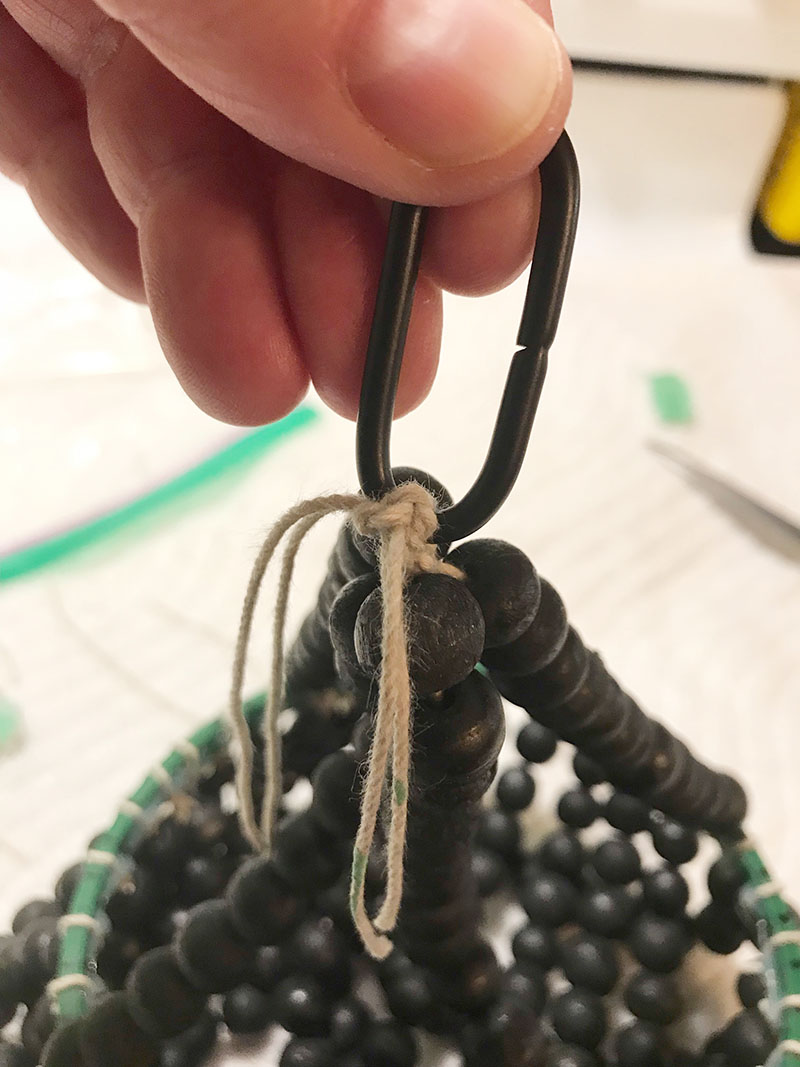
CREATE THE TOP
Make four more strands of beads. I used 14 beads on each strand. This will be attached to the top of your chandelier for hanging easily.
Attach each string exactly 1/4 apart on the inside of the hoop. Glue in place on the back of the hoop then tie all four strands to a metal key ring or chain connector. Glue knots on the inside of the hoop. Now you can cut off all the strings.
PAINT
Paint your hoop and string black to match the beads. Painting the string helps tighten the knots. Hang and enjoy!

THE FINISHED LOOK
![]()
A BIG THANK YOU to my sister Andrea for sharing her creative work today. Aren’t sisters the BEST!!! 💕
 LET ME KNOW WHAT YOU THINK OF THIS DIY BEADED CHANDELIER MAKEOVER. WOULD YOU GIVE THIS A TRY? FEEL FREE TO ASK ANY QUESTIONS YOU MAY HAVE… I ALWAYS LOVE HEARING FROM YOU. IT MAKES MY DAY! 🙂
Happy furniture painting friends!
Denise x
RELATED POSTS::
FAUX LINEN DRESSER
EASY PAINTED CHANDELIER
CONSOLE TABLE MAKEOVER
DIY BOHO NIGHTSTANDS
HOW TO REVAMP YOUR OLD DESK
PIN AND SHARE!


Really a cute idea! I’m glad someone has the patience as well as the desire to do something like this….LOL, read….NOT ME! But I totally enjoyed reading her tutorial and I think Tommy is adorable, and a nice addition to the pictures.
Thanks Sharon! And isn’t Tommy so adorable? It’s going to make Andreas day that you think so. 🙂
Great reuse recreation. $15 definitely worth it for all those beads. Thank you Andrea for reminding us that even those broken items don’t have to be tossed in the trash but can be turned into something useful.
Thanks so much, Joanne! XOXO
It’s very cute but I don’t get how it’s a chandelier. Where does the light come from?
It’s a decorative only chandelier. They can be wired with a light but no need for styling my furniture.😊
Great project! so talented with your creativity
Thanks Betty! Andrea will be happy to hear this!
Cute project! Thanks Denise & Andrea! Such a cute pic of the two of you – and those ice creams look so good! LOL
Thanks Marcia, and those icecreams were soooooo goooood!🍦
Nice to meet you, Andrea, we’ve heard so much about you over the years! I’m looking forward to seeing how Denise uses your adorable beaded chandelier in her gorgeous staging photos. You hit the wooden bead jackpot when you found that old fixture. Very nice upcycle!!
Andrea says “nice to meet you too Marie and thank you… I’ve heard a lot about YOU as well!” And I say, we DID hit the wooden bead jackpot! Have a super day my friend. XOXO
What a sweet gift from your sister Denise! Andrea did a beautiful job and thanks for sharing!
She sure did! Thanks so much Nicki! XOXO
Hi Denise. What a cute little chandelier your sister made. Very nice of you to feature her work. My daughter loves beading and YES, it can get expensive. Thanks for the tips on where to purchase beads for less. I honestly never thought of painting them, nor has she.
Hi Monique! So nice your daughter is into beading… such a great hobby and so relaxing. Andrea loves beading as well. She’s made some gorgeous jewelry and yes, depending on where you source the materials it can add up. I think it’s brilliant to salvage and upcycle!
Loved this project. Your sister did a great job on it. Thanks for sharing.
Thanks Cynthia, Andrea will be happy to hear this! Have a super day! XOXO
The creative gene is strong in your family, and Andrea did a fantastic job! Oh, and Tommy is looking mighty fine. So sweet, those little furbabies. Tell Andrea I love it.
Will do my friend! And yes, Tommy is like a model cat… I think he should be on commercials! 😄