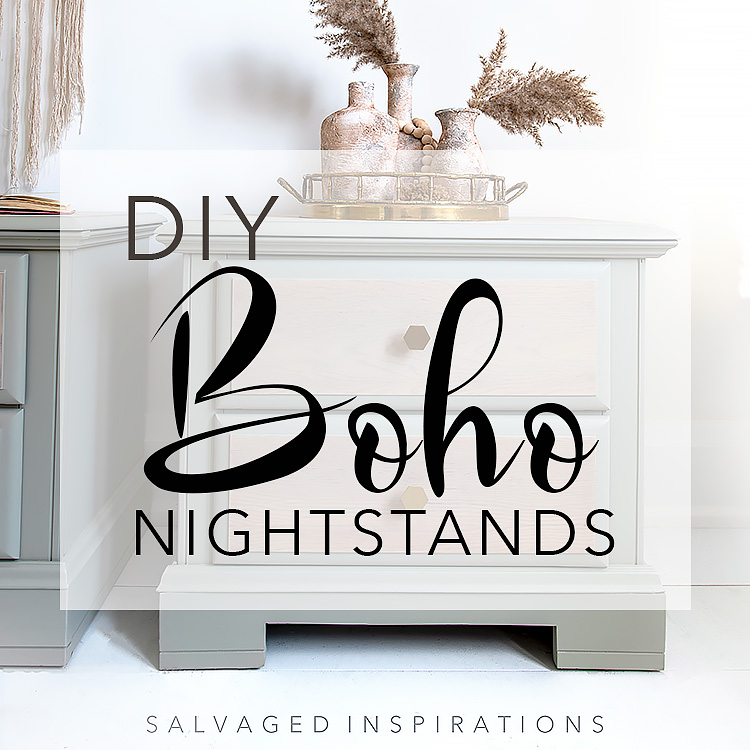
$12 NIGHTSTANDS GET A CHIC BOHO LOOK WITH A NEW PAINT FINISH AND UPDATED BASE!
 Happy New Year! I hope you and your loved ones had a wonderful holiday season. The downtime did me a world of good but I’m SUPER HAPPY to be back! More on why at the end of today’s post… but first, I was going to start 2022 off with a 2021 countdown (your favs!) but I decided to share these DIY Boho Nightstands. I’ll be back this Thursday with the countdown so you can see if your top pick made the list!
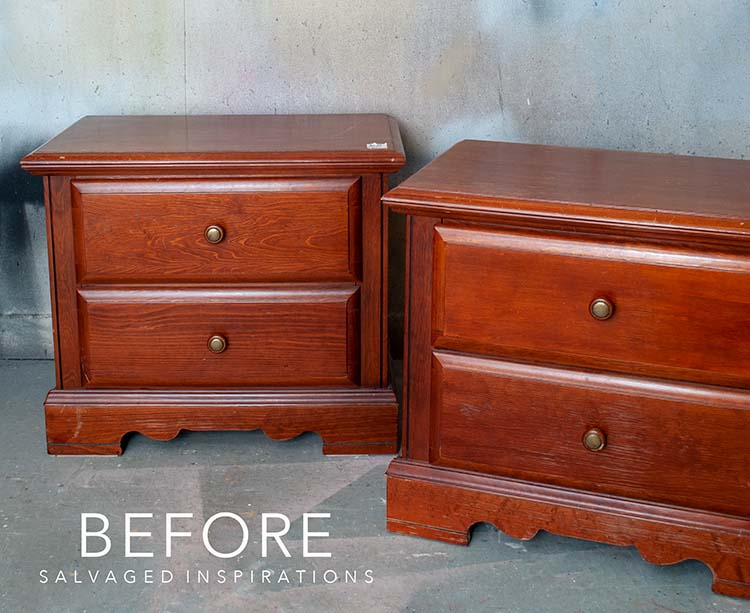
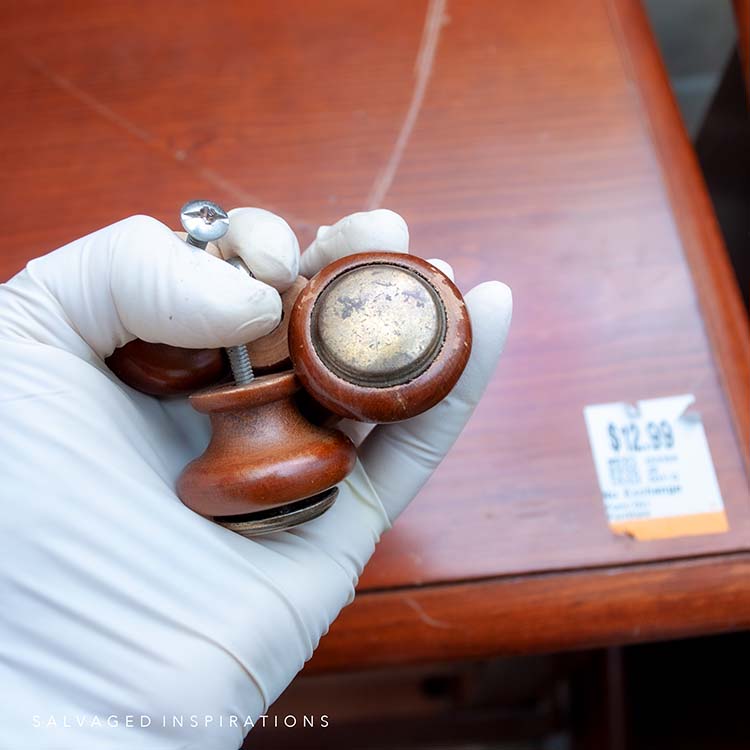
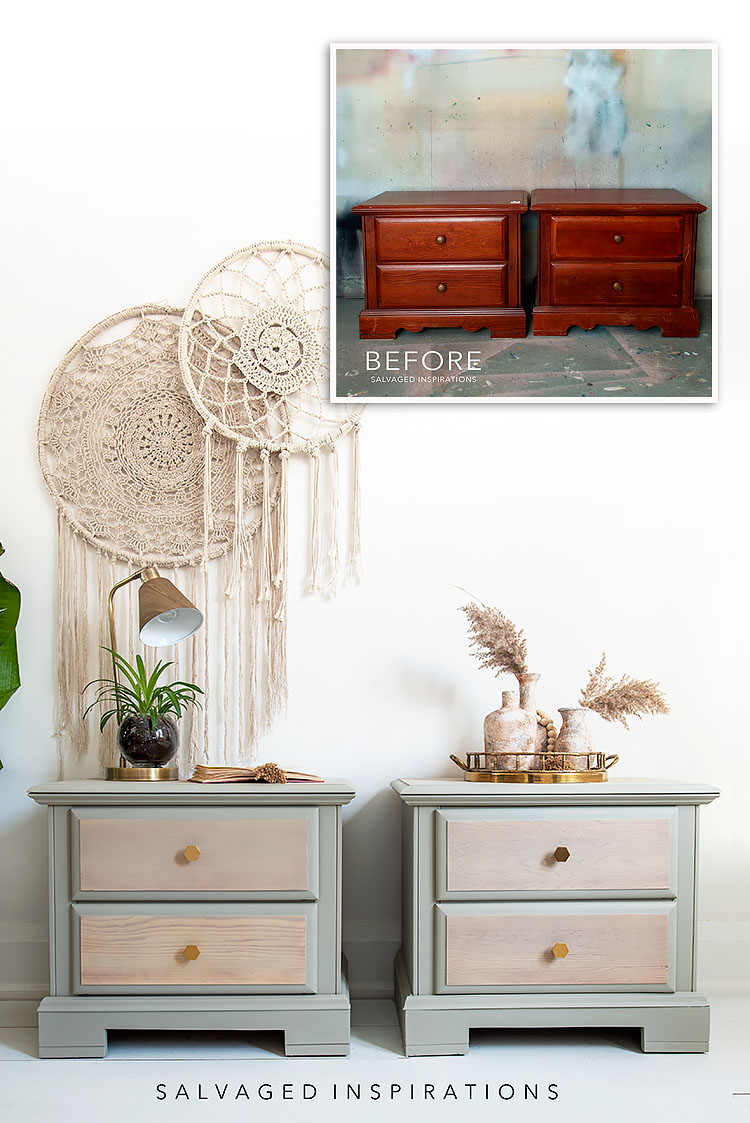
So, NEW year NEW project! I picked up these nightstands from my local Thrift Store for $12! It’s such a cute little set. But as you can see in the pic below, the finish, hardware, and scalloped bottom were really dating these bedside tables.
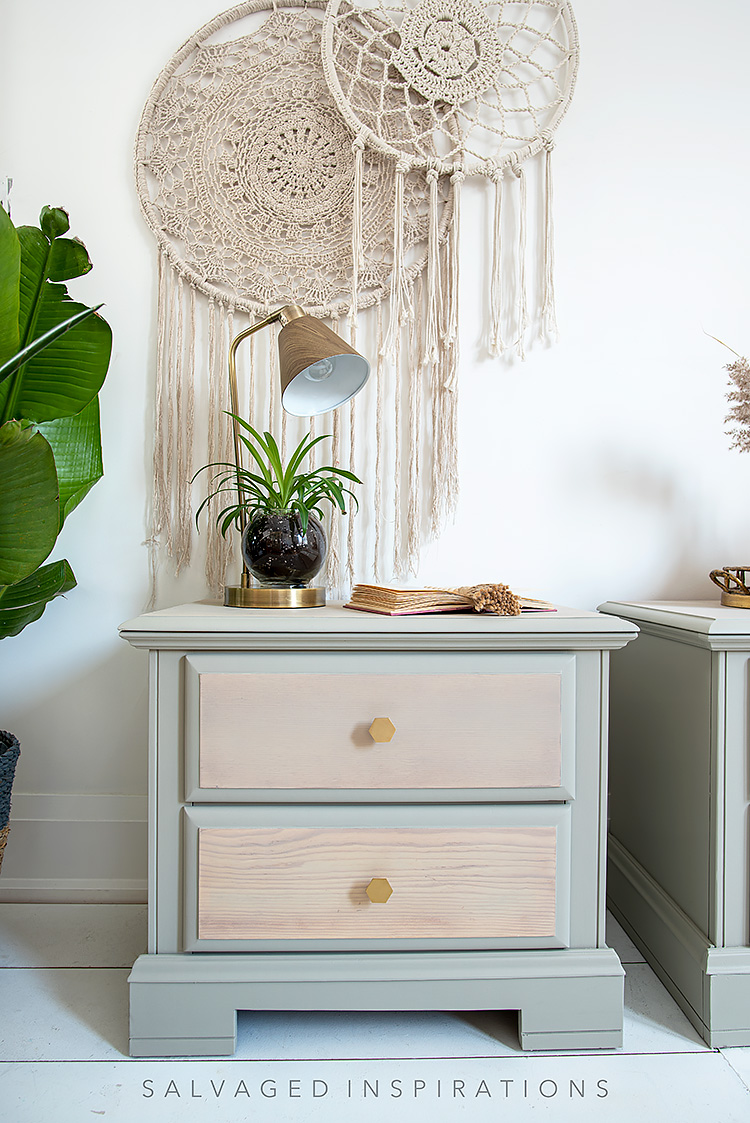
A new paint finish and modified bottom and voila — here’s the NEW Boho look! What do you think?
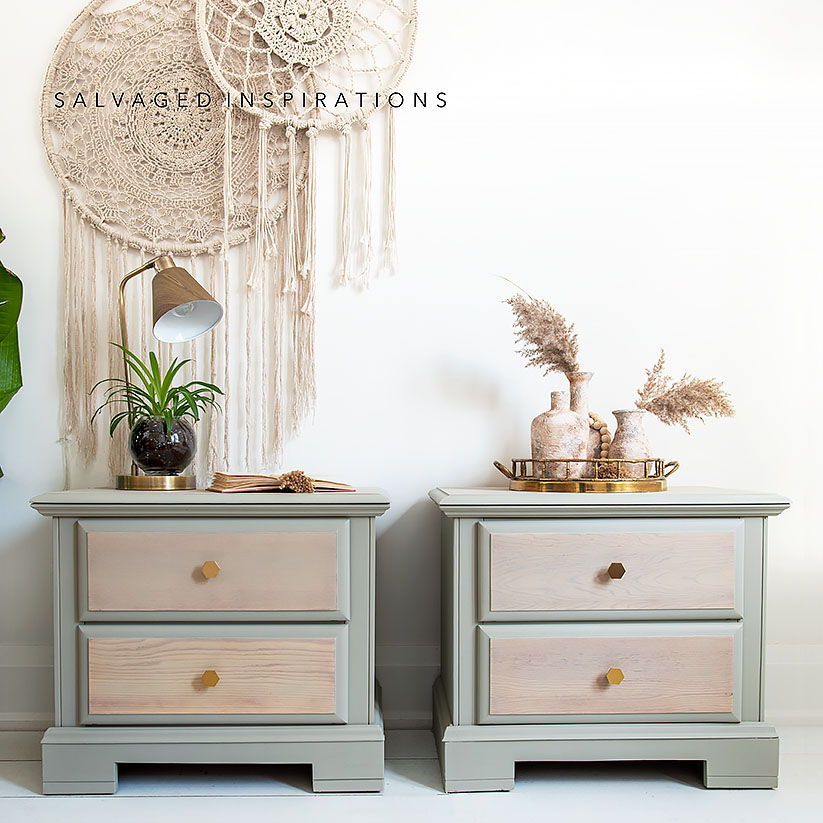
I’m super proud of myself. It was the first time I used a jigsaw on a project of this size and I can’t believe how it updated this salvaged set!
THIS POST IS SPONSORED/CONTAINS AFFILIATE LINKS TO PRODUCTS I USE. YOU CAN SEE MY FULL DISCLOSURE HERE.
SOURCE LIST
Nightstand Set – SALVAGED
Paint Brushes
Shop Towel
White Lightning
Sandpaper | Tack Cloth
Gorilla Epoxy Stick
B-I-N Shellac Base Primer
Sawmill Gravy Chalk Mineral Paint
Dried Sage Chalk Mineral Paint
Satin Clear Coat
TOOL LIST
Dewalt Orbital Sander
Jigsaw (similar)
Framing Square | Pencil
Furniture Clamps (similar)
DIY BOHO NIGHTSTANDS
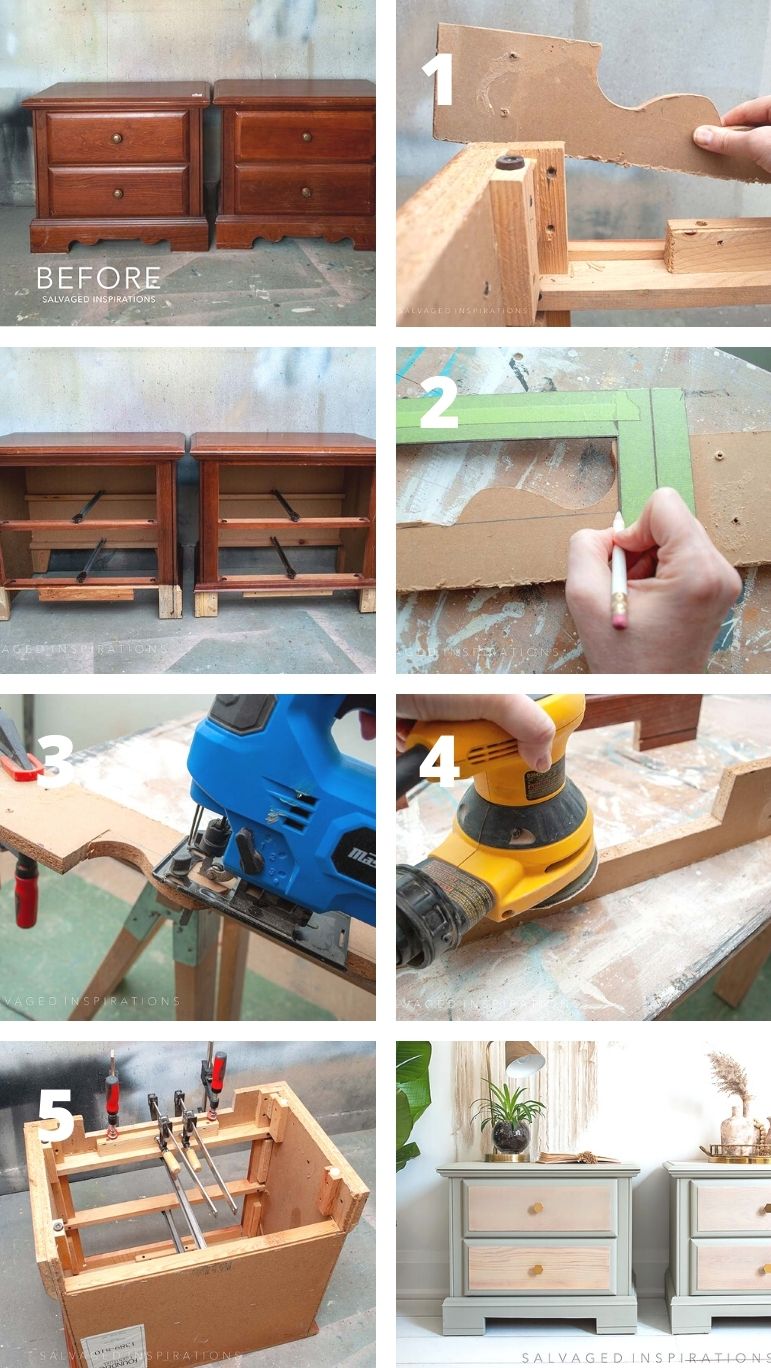
To update these nightstands I painted them in a custom color and trimmed off the scalloped bottom to change the profile of these pieces. There are a number of ways you can cut furniture trim, but I opted to try using a jigsaw.
Here’s the step-by-step…
PREP | CLEAN
I started by removing the dated hardware.
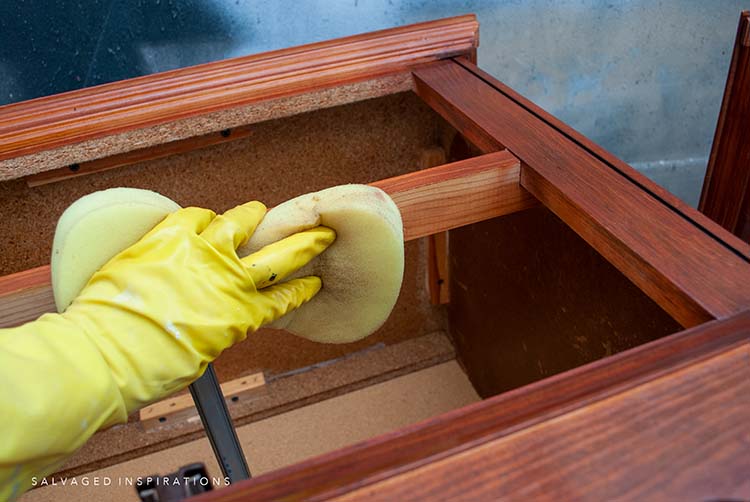
And then giving these nightstands a good cleaning with this TSP substitute. I made sure to lay them on their backs and clean the entire inside as well.
FILL HARDWARE HOLES
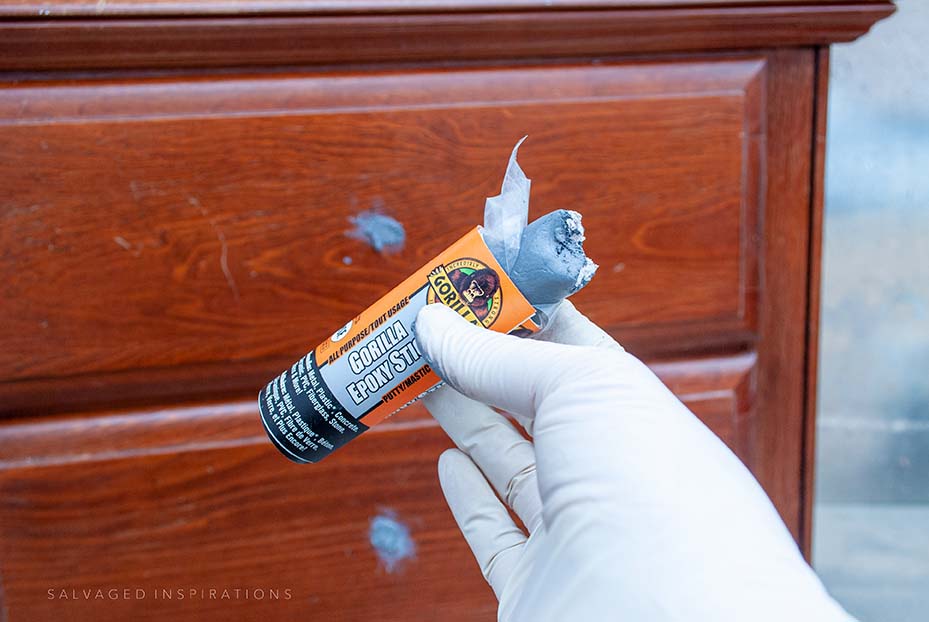
I filled the hardware holes with this Gorilla Epoxy Stick. This product is quick and easy for small jobs. If you only have a few small holes to fill, it can be faster than mixing up Bondo and much stronger than using wood filler products. All you do is rip off a small piece, knead it until the two colors blend, and then push it into the holes. It dries fairly fast and sands down nicely.
MODIFY (CUT) BOTTOM
- To remove the bottom plate I unscrewed it from behind and used a hammer to tap it off. The one nightstand came off with the trim and the other didn’t but I just went with it.
- I used this framing square to measure and pencil in the new straight-edge profile of the bottom. I created ‘new’ feet and removed the scalloped edge.
- These nightstands are made from particleboard, so I used a very tight blade in my jigsaw (more teeth per inch) to cut along my guides. **Just be aware of the wood or material you work with so you use the correct blade.
- I sanded the edges smoothly with 120 grit.
- Then I reattached the bottom plate with glue and screws.
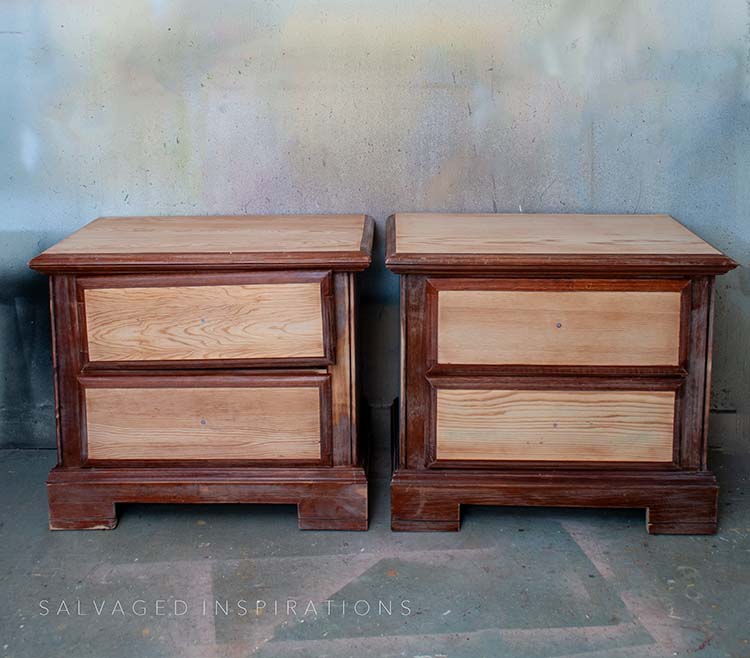
SAND
I sanded the top and drawers of these nightstands with my favorite orbital sander starting with 80 grit and working my way up to 220 grit. The body of these pieces was scuff sanded with my orbital sander using 120 grit. Here’s what they look like in the buff and scuff sanded.
PRIME AND PAINT
I used painter’s tape to tape off the raw wood areas and primed with two coats of this BIN Shellac Based Primer to prevent bleedthrough. I have a full tutorial on how to use BIN Primer here. Once the primer was dry, I brushed on two coats of this gorgeous gray/green custom ‘boho color’ I created using this Dried Sage and Sawmill Gravy in a 50/50 mix.

TOPCOAT/PROTECT
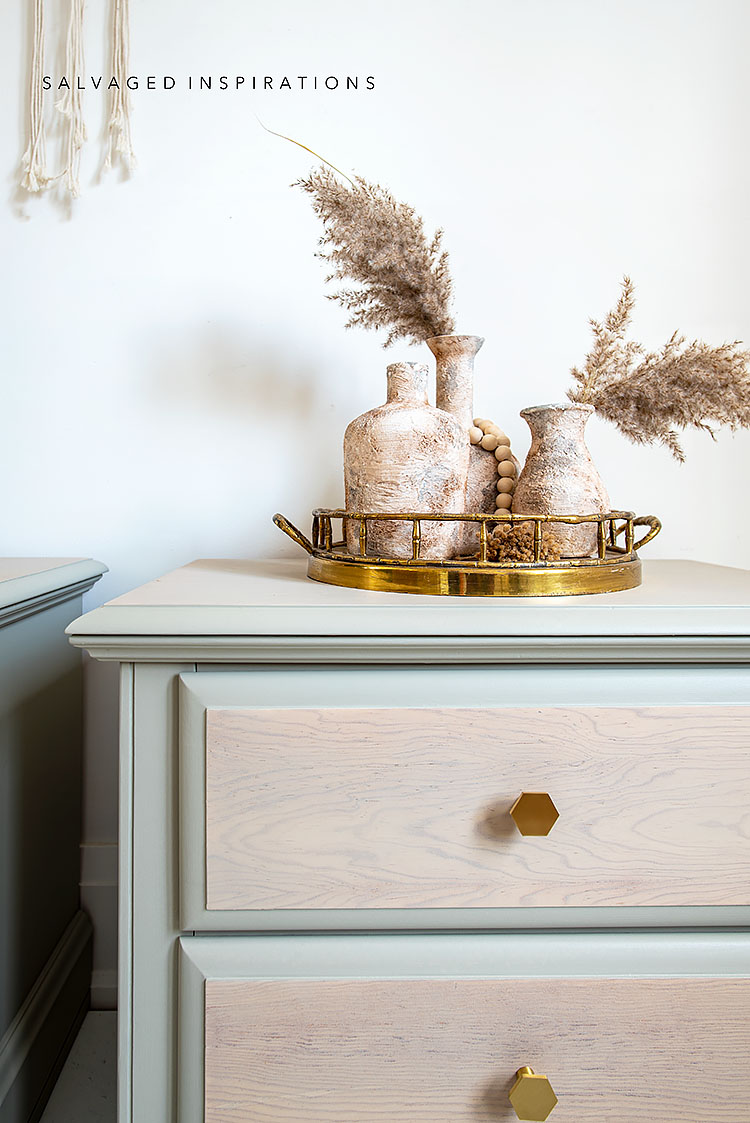
To protect and topcoat, I sprayed three coats of this Satin Clear Coat. For the first two coats, I added a touch of my custom paint to tint it. This lightened the natural wood and tied the piece together really nicely.
NEW BRASS HARDWARE
I bought these gorgeous brass knobs from Amazon and installed them in the same holes I previously filled. Yup. This happens a lot…lol. When I fill the holes I often end up re-using them — but when I don’t fill the holes – I wish I had! Now I’m in the habit of filling hardware holes 100% of the time so I’m not limited to the hardware I can use.

Changing the bottom profile of a piece can totally update the look. Now that I’ve tried it, I won’t hesitate to do this again. And as I always say, if I can do it – YOU can do it! I hope this encourages you to give it a try!
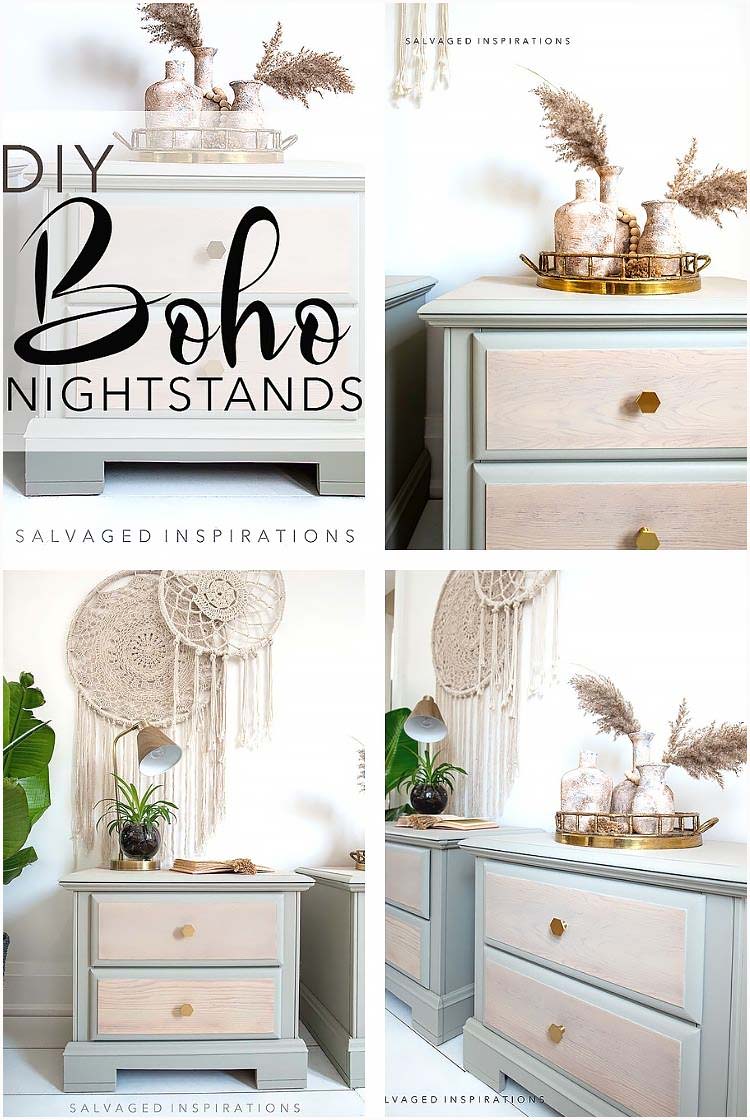
Here’s another look at this before and after. I hope it’s inspired you and given you some new ideas for your projects.
And on a personal note, the numbers for the new variant here in Ontario climbed over the holidays. 🙁 Because of this, a number of things are going into lockdown. No indoor dining or entertainment. Only fifty percent capacity in stores. Gyms, theaters, indoor venues, and museums are closing again. Ugggh. All I can say is it’s amazing to be back painting and sharing with you as it’s keeping me sane through these crazy times.
Wherever you are in the world, I hope you and your loved ones are safe and well, and here’s to a better 2022!
Happy New Year!
LET ME KNOW WHAT YOU THINK OF THIS REDO. FEEL FREE TO ASK ANY QUESTIONS YOU MAY HAVE… I ALWAYS LOVE HEARING FROM YOU. IT MAKES MY DAY! 🙂
Happy furniture painting friends!
Denise x
RELATED POSTS::
TRAY TABLE MAKEOVER
RESTORE ENTRY HALL TABLE
FAUX DRIFTWOOD NESTING TABLES
SINGER SEWING TABLE MAKEOVER
PAINTED KITCHEN TABLE DIY
PIN AND SHARE!

JOIN THE SALVAGED INSPIRATIONS FAMILY!

Hi Denise 🙂 I just did some digging in your archives to find these sweet nightstands. I am giving a makeover to a dresser that has been with me my entire adult and it was time to get rid of the scalloped edge on the skirt. Thanks to your tutorial, it was easy peasy and took no time at all and I love the new look of my dresser!
YAY! I’m so happy you found it helpful and I bet you’re dresser looks gorgeous!! XOXO
Hi, I love these! How did you make the custom color?
I created the custom color by using Dried Sage and Sawmill Gravy in a 50/50 mix.
I have the same nightstand with a matching dresser. Would love to finish them to look like natural wood— didn’t think that was possible until I saw your makeover. Now I think maybe??!!
Yay, have fun with your set Bridgett!
So pretty! I LOVE the custom color! I have a bunch of pieces with the outdated scalloped edges…And, I have a jigsaw! Thanks for the inspiration!
Thanks and my pleasure! Have fun with your projects Donna! xo
These are so beautiful that I want to try it with the similar night stands that I’ve had for 35 years! I’ve never used a sprayer before; could you please recommend a brand that’s obtainable at Amazon or Home Depot? And do you have a post that explains the nitty gritty of using a sprayer? Thanks for sharing your outstanding work and result and for inspiring me!
Thanks Sherri! I’ve been using this Husky Sprayer since 2013 and still love it! But the same technique can be brushed on by tinting your topcoat with a little paint and brushing on!
As ususl – another great rescue.
I have often thought about changing up a piece of furniture by taking off various pieces of trim that dates the item. In the case of your night stands – I wonder if the top piece could have been routed/trimmed to a more modern profile?
Thanks! This piece wasn’t solid wood but particle board with a veneer so I wouldn’t want to router it… but if it was wood – for sure!!!
A job well done. What a lovely makeover, love the peaceful color choice, and the knobs are perfect. I’m loving the macrame wall hangings. The perfect complement for the nightstands. Would love to find some this beautiful.
Thanks so much Theresa! XOXO
Great job on this a pair of nightstands! Squaring off the bottom really brings them into 2022! Pinning!
Thanks Cindy and thanks so much for the PIN!🤗
How did you do the front of the drawers? It’s beautiful
Thank you! The original finish on the drawers was sanded down to the raw wood veneer. Then I top-coated with a satin clear coat tinted with the custom paint color I used. It’s an easy way to lighten up any raw wood!😀
Love this!! What is the paint to satin clear coat ratio that you used?
Hmmm, I eyeballed it but I’m guessing 10% paint to 90% top coat. You don’t need a lot.
Thanks, Denise!
Happy New Year Denise! Thank you so much for sharing. Love your idea of tinting the top coat on the bare wood to lighten the wood. Your night stands turned out beautiful!
Happy New Year Paula! If you have a sprayer, it’s such an easy way to do it! 🙂
Can you send me a link to the sprayer you use? And do you dilute the paint when you put it in the sprayer? Also will chalk paint work in that sprayer?
For sure! I’ve been using this Husky Paint Gun since 2013 and it still works GREAT! And yes, chalk paint works in my sprayer and yes, thinning with 10-15% (depending on how thick the paint is) is beneficial.
Happy New Year Denise! Wow, that’s quite the transformation you gave these nightstands. Beautiful as always!
Aw thanks Marie! I hope your holidays were fabulous and Happy New Year my friend. XOXO
Happy New Year Denise! These nightstands are lovely. You did an amazing job. You definitely brought them in to the next century
Happy New Year Marian!!! Thanks so much! XOXO
As always another great transformation.
Thank you Cindy!💜
Awesome Sauce!
Thanks Deanna! I’m not sure what sauce you’re talking about but it put a huge smile on my face!😉😂
WOW!! What great transformations! Great job on those!!!
Who wouldn’t love them now, right?????
Thanks Michele! I’m thinking I may try them out in my bedroom before I decide whether to sell or not! 🙂
These are very pretty Denise, such a soft finish and color. And thanks for sharing the gorilla epoxy stick it sounds very easy to use. Did you just tape off the front edge top to paint your custom color? Can’t tell from pictures. I love the idea of spraying the topcoat, always end up with streaks or ghosting when using a brush.
Thanks Celia! And yes. I used painters tape to tape off the raw wood on the top and drawers before priming and painting. xo
Beautiful! Love the tint used in the clear coat. I have not tried this and may just do so with a set of night stands that I have. Of course it will be dependent upon getting down to the bare wood on the drawer fronts. Their current color is a cross between a royal blue and a super dark blue – if you can imagine that. I have had them for awhile and not known what to do with them – hopefully will get to them in the near future. I have a couple of other projects in front of them that need to get done.
I have plenty of projects in the ‘que’ as well Barb… I totally get it! Have fun with your bedside tables once you give it a go!😊
These turned out great, Denise! I’ve passed up so many of those nightstands because of the scalloped bottoms. Great job on the updated fronts. Always inspiring. Pinned.
Thanks my friend. I’ve passed up on a ton of these as well!
Awesome job! I love the color . I also love your macramé hangers.
Thanks Rebecca! I found the macrame hangers at HomeSense or Marshalls — I don’t remember which one but I almost didn’t buy them. So glad I did!
Simple elegance! I love these so much! The brass topic it off perfectly. I would have chosen nickel, but the brass really brings it to life!
Thanks, Leslie! I almost used nickel pulls! They looked good as well. 🙂
Beautiful work! It’s a great idea to tint the top coat for the raw wood! Thank you for sharing this idea. And happy new year!
Happy New Year Corinne! And yes, I find it’s an easy way to protect AND lighten the wood at the same time. 🙂
Thanks for the inspiration. I have been staring at my (similar) nightstands for a year, not knowing what to do with them. Now I can’t wait till spring so I can get out in the garage and follow your lead.
Rebecca
Thanks Rebecca… so happy it’s sparked some ideas for your nightstands! Have fun. 🙂
Love the updated night stands and the color is beautiful!! I always love to see what you will do with a dated piece of furniture. You have a talent!
Aw, thanks, Janice! I’m thrilled that you pop in to see what I’m up to. Happy New Year to you! x
These look amazing Denise! I never would have thought to do this but this is a game-changer! Thanks for sharing and Happy New Year. 🎊
Thanks so much Nicki and Happy New Year! XOXO
I love how the nightstands turned out! Thanks for sharing!!!
Thanks so much Nanette and Happy New Year!
Hi, I have been thinking of doing this to my Mother’s bedroom furniture that I had always wanted. It was expensive Well, I got it now I hate it. Queen Anne style. The bottom looks like it has a little Asian curve to it. I like clean lines like yours. So it looks like you toke the front plate completely off. Did you make a new one? Also do you have any suggestions for color of paint? I have blue walls, Cream Headboard, Cream with dark gray trim. Thanks for your help.
Hi Barbara! Yes, I used the original and I did take the front plate completely off and then cut it. You could certainly make an entirely new one as well though! As for color suggestions, I never feel comfortable giving them because color is SUCH a personal choice. What I like may not be your style at all. What I would suggest is go with what you LOVE… not what is trending or what you think you should use. Neutrals are always a safe bet but if you like a pop of color – go for it!
Hi Denise! Looove what you did. (Agai !) 🙂
I cant find d where you explain the finish on the drawers…did I miss it?
All the best,
Lorna
Hi Lorna and thanks! For the finish on the drawers, I sanded them down to the raw wood/veneer and then added a little of the custom color to my satin clear topcoat – just enough to tint the clear coat slightly. I sprayed with the tinted clearcoat 2x and then the last spray was 100% topcoat. Easy peasy. 🙂
Love the results and your step by step approach. You inspired me to refinish a thrifted round end table. Question: the top has some bubbles on the finish. I am sure it is particle board and veneer. Suggestions on how to handle?
Thanks CJ! yes, sand the bubbles down and then fill with wood fill or bondo – sand perfectly smooth. This only works if you’re painting the top though. Hope this helps. 🙂
Love! Love! Love! The custom color is perfect. Love the mix with raw wood. Squaring off the bottom was genius. I want to be like you when I grow up. Happy New Year!
Thanks so much Jen and HAPPY NEW YEAR!🥳
Hi Denise. You absolutely nailed it. These beautiful boho nightstands are fabulous. The paint, hardware, and new streamlined bottom make it hard to believe they’re the same sad looking $12 find:). Stunning.
Aw thanks, Monique! I hope your holidays went well and Happy New Year to you my friend! Hugs
I live this look so much. I am currently in the market for nightstands. You have inspired me. Thank you.
Oh I’m so happy it’s inspired and sparked some ideas. Thanks Kate and have fun with your nightstands… hope you find the perfect ones!😊