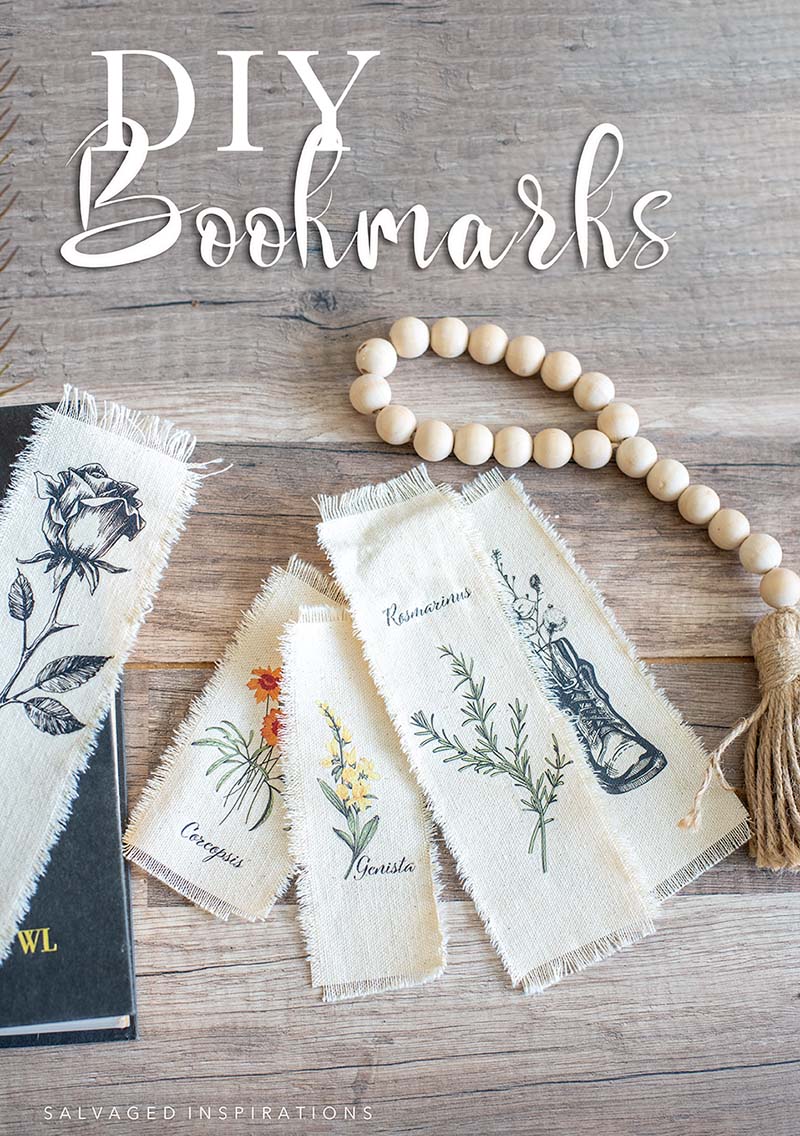
HOW TO TURN SCRAP FABRIC AND LEFTOVER TRANSFERS INTO THESE ADORABLE DIY BOOKMARKS | YOUTUBE VIDEO COMING THIS SATURDAY!
 Hi creative friends and thanks for joining me today! If you were here last week you heard I broke my foot and it’s been a bit of a challenge keeping up my regular routine. A HUGE thank you for all the well wishes I’ve received on social, email, and of course here on the #siblog… super sweet of you! I’ve had more downtime and it’s given me more time to read, which I love! Good old fashion books with actual pages to turn are my absolute favorite. So for today’s Trash To Treasure Project, I decided to create these ADORABLE DIY Bookmarks using scrap fabric and leftover transfers. I also have a really FUN *G*I*V*E*A*W*A*Y for you! Be sure to read until the end of this post for my talented T2T crews makeovers and 3 Chances to WIN AMAZON $$$GIFT$$$ for you as well!
Let’s get started!
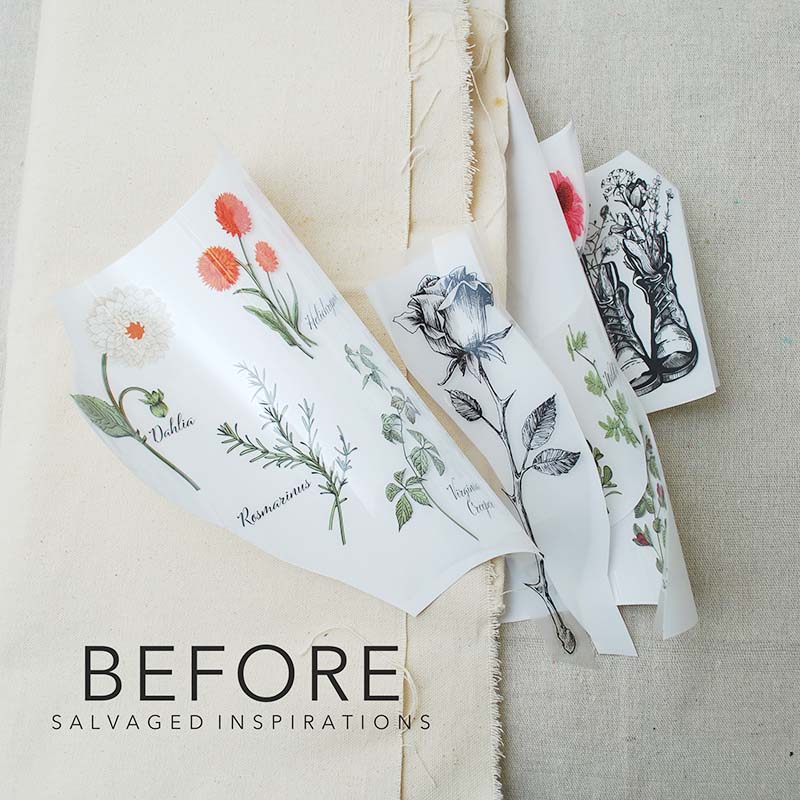
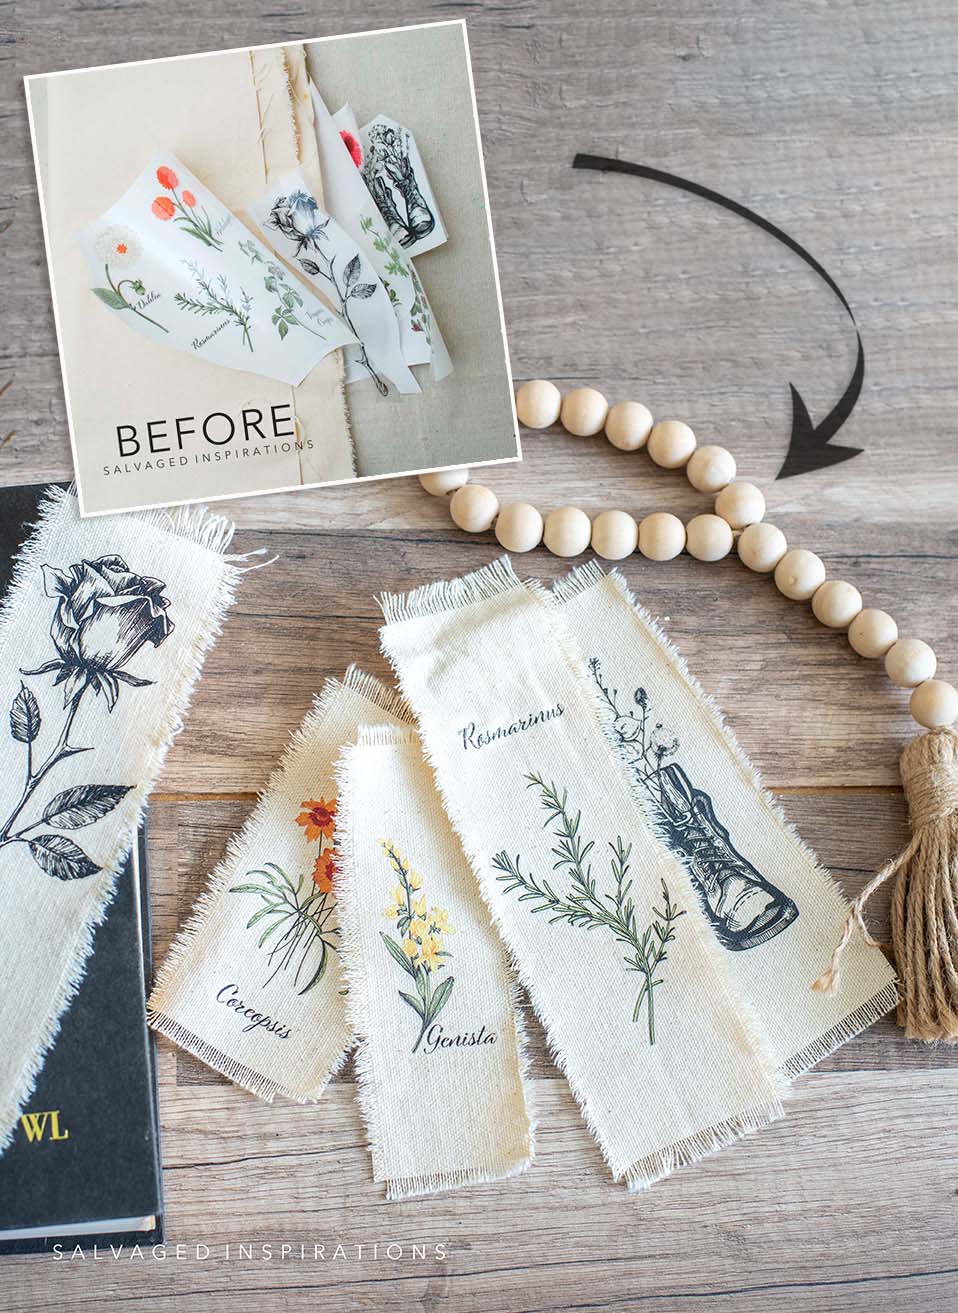
Here are the scrap supplies I started with. A plain piece of fabric and a few leftover floral and botanical transfer pieces.
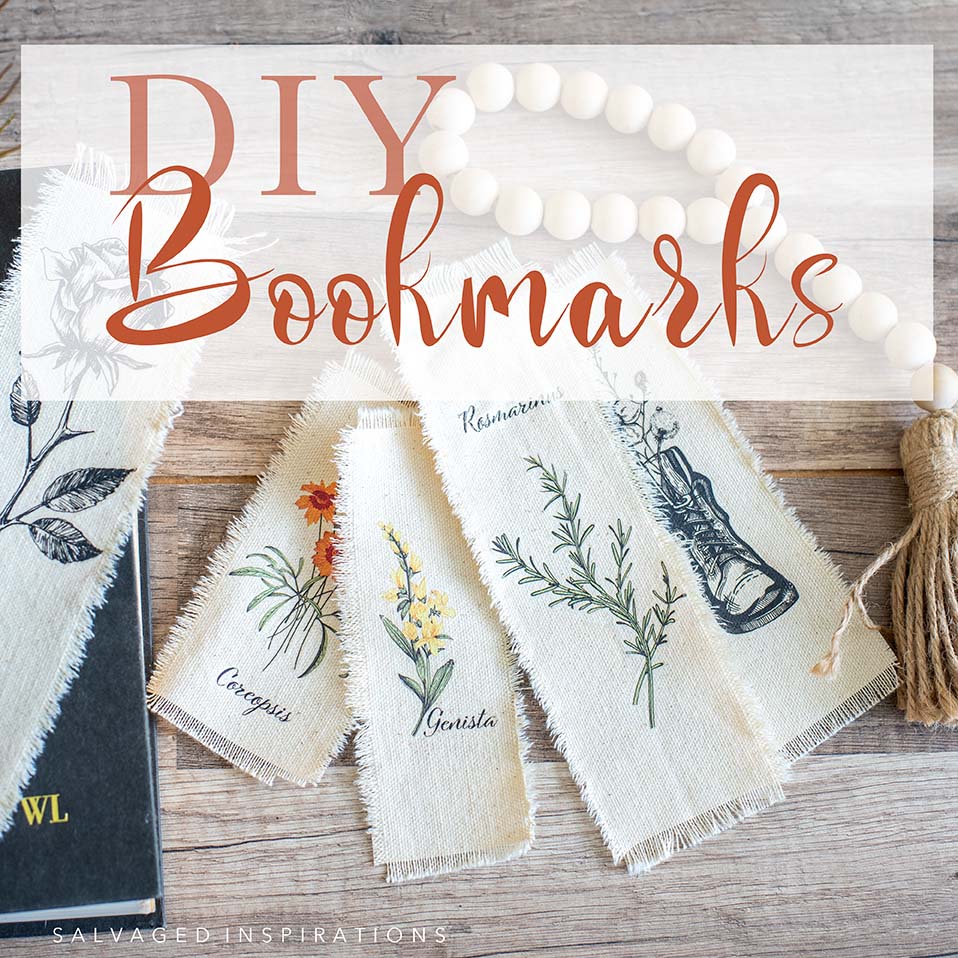
Before I get into the how-to details here’s the NEW look!

What do you think? Aren’t these DIY Bookmarks adorable?!
THIS POST IS SPONSORED/CONTAINS AFFILIATE LINKS TO PRODUCTS I USE. YOU CAN SEE MY FULL DISCLOSURE HERE.
WHAT YOU’LL NEED | SUPPLY LIST
Scrap Fabric – SALVAGED
Botanical Transfers
(or any scrap transfer design)
Sharp Scissors
Iron or Steamer
DIY BOOKMARK
I wasn’t sure I was going to get a project out for this week’s Trash To Treasure with all my hobbling around and appointments. But with the help of my sister Andrea (*insert* We Are Family music by Sister Sledge!) hehe, we had such a good time making these sweet bookmarks. These would make great little gifts or stocking stuffers and are easy enough to do with your little ones or grandkids!
Here’s how it all came together…
GATHER SUPPLIES
I used a leftover piece of canvas-like fabric and a few pieces of leftover transfer. There were a few stains on this remnant fabric but it was easy enough to work around. Any heavier-weight fabric would work great for these DIY bookmarks. You could even use an old denim shirt, cotton tea towel, or an old cushion cover! It’s fun to think outside the box with whatever you can upcycle around your home.
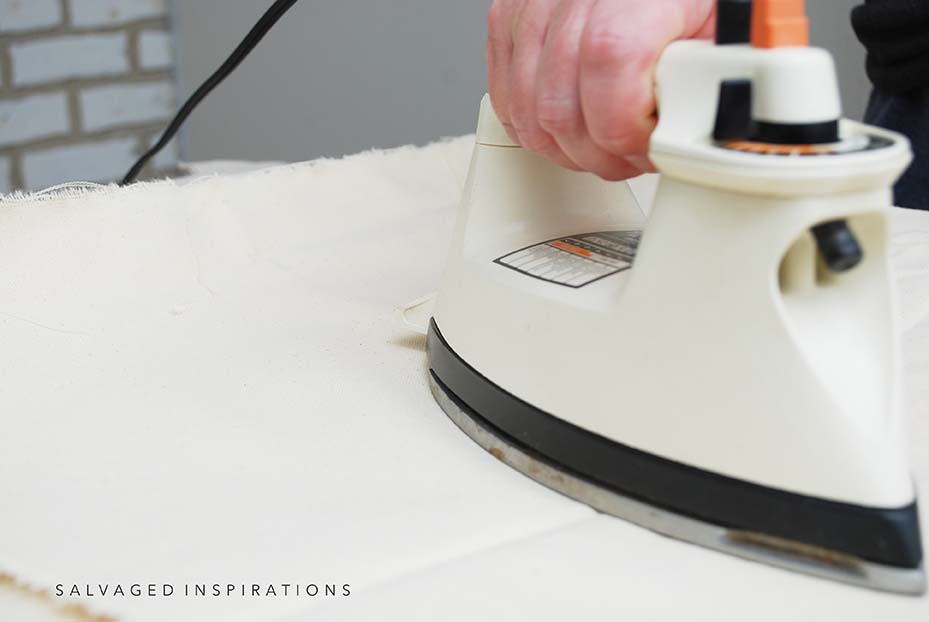
IRON FABRIC
My fabric had been sitting in storage for some time so it was creased and wrinkled. This step is totally optional but Andrea ironed the fabric flat before starting our bookmark project.
TIP – Thrift stores sell older irons (that still work perfectly) for two or three dollars. Keep one in your studio or craft room specifically for these crafty types of projects!
RIP FABRIC TO SIZE
To rip the fabric, we used a pair of scissors to create a small 3/4 inch cut and then pulled both sides of the material to rip on the straight grain. This allows the fabric to rip organically and create a frayed straight edge. We weren’t too picky about the size of the bookmarks. Some are a little longer, some shorter, and some are a little wider. They don’t need to be perfect or all uniform unless you want them to be.

RUB ON TRANSFER
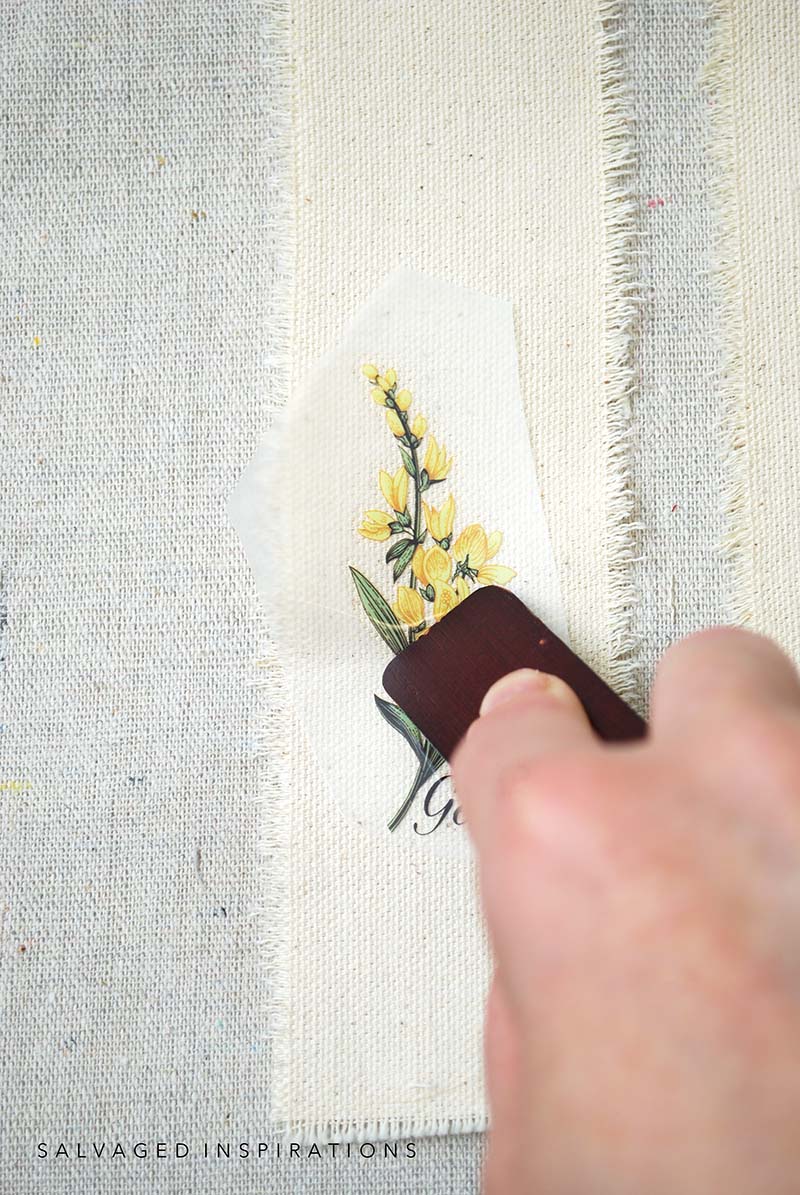
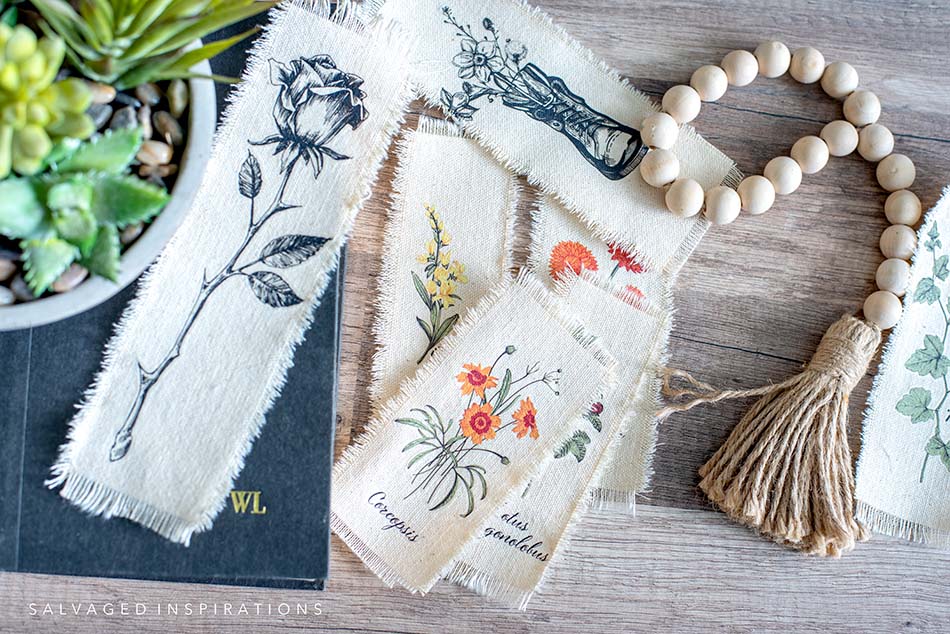
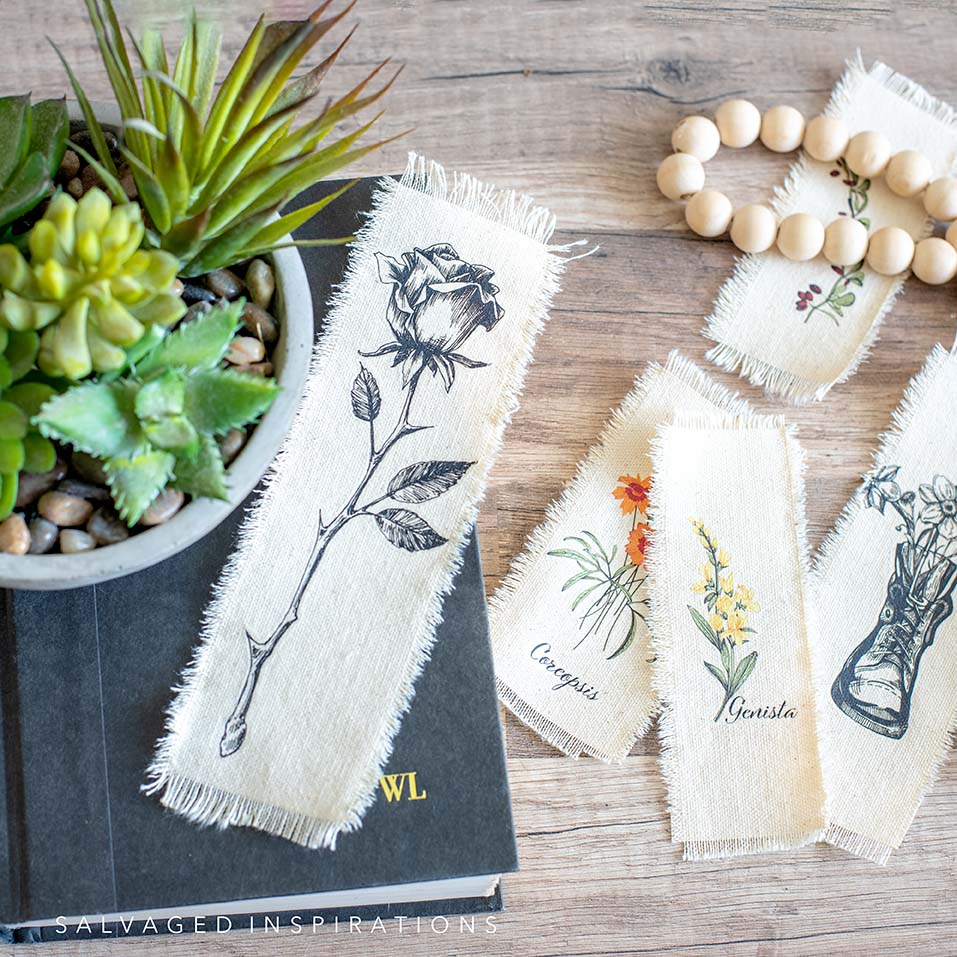
Using leftover scraps of this Vintage Floral Transfer, we cut out the individual florals and botanicals.
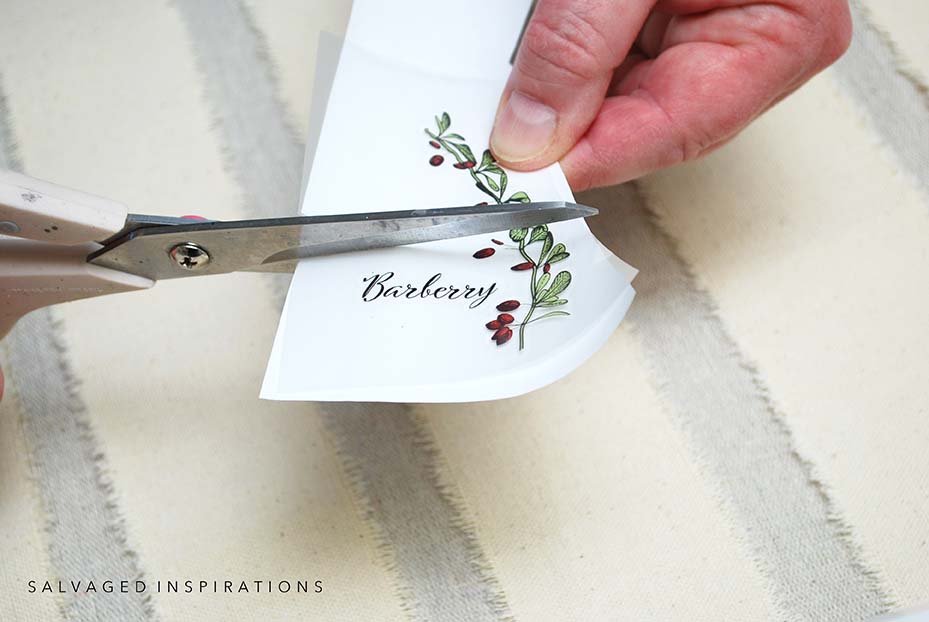
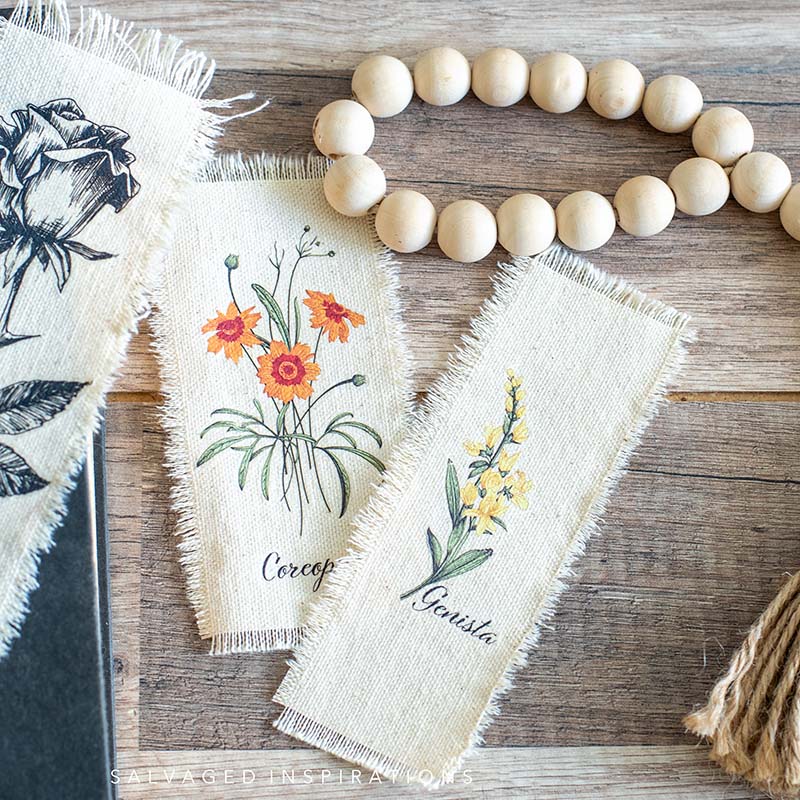
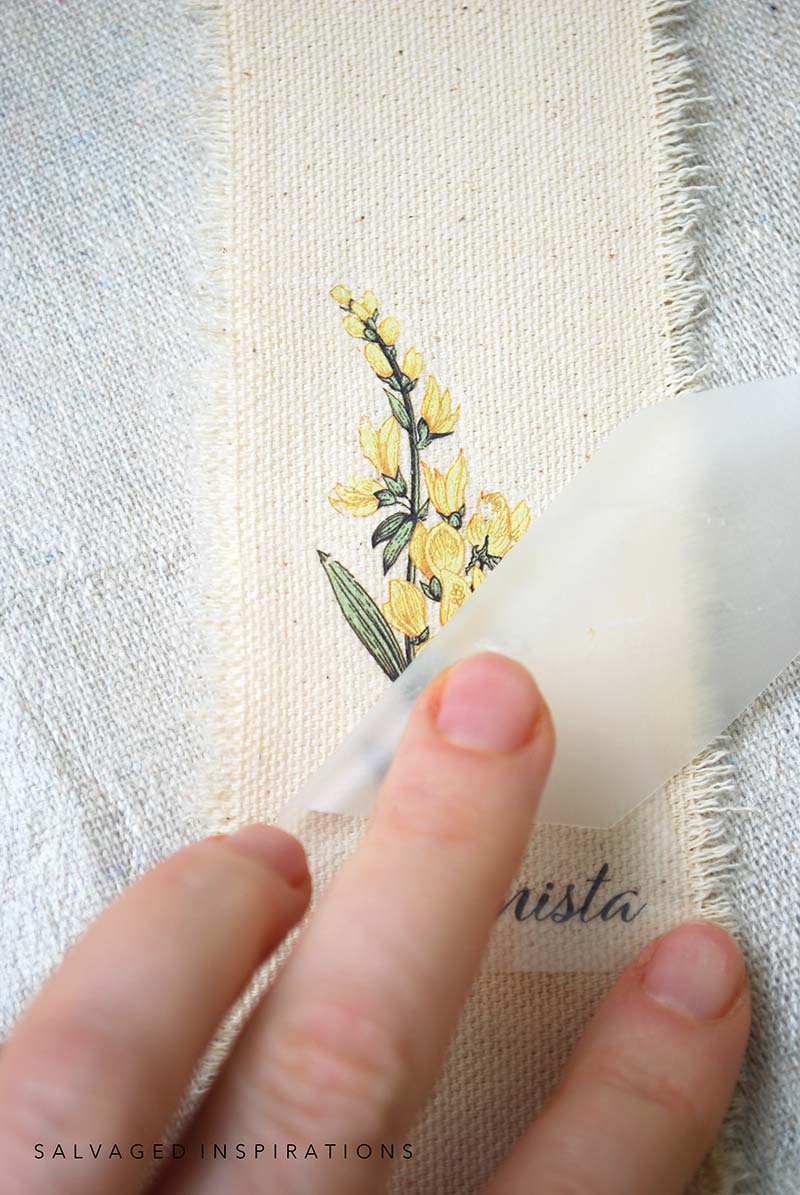
We then used this Rub On Transfer Method to rub the design onto the fabric bookmark. The transfers rub onto fabric super easy. All we did was remove the transfer from its backing, and placed the design on the bookmark where it looked visually pleasing. Then using the applicator stick, rubbed on a hard surface until the transfer design was released from the mylar onto the fabric.
Doesn’t it look like part of the fabric design? You’d never know it was a transfer, right?!
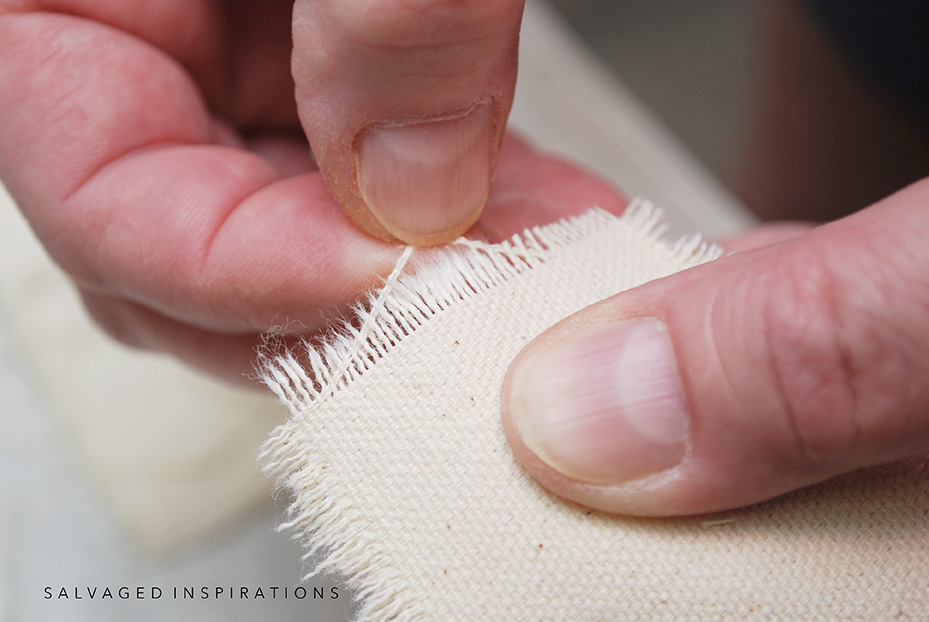
FRAYED BOOKMARK EDGES
To give an organic look on all sides of the bookmark, we pulled the cross threads to create these cute frayed edges.
Here’s the finished look…
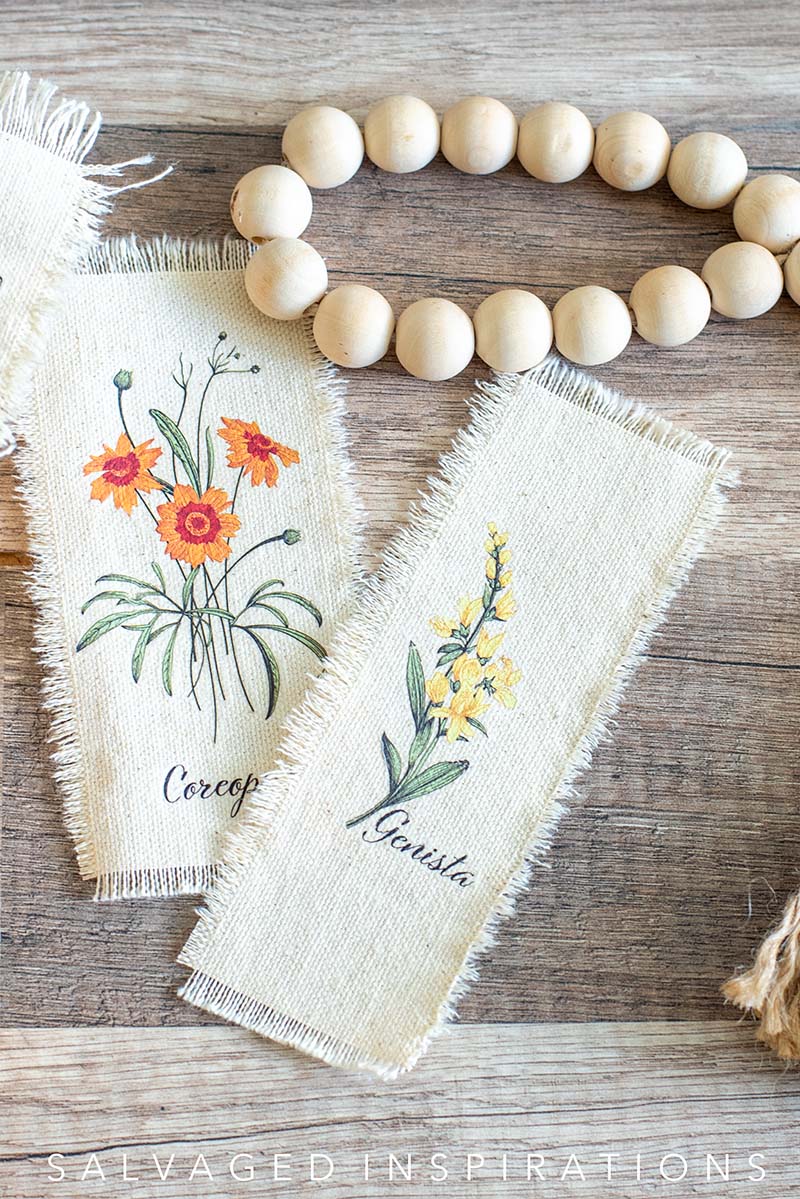
Aren’t they adorable?
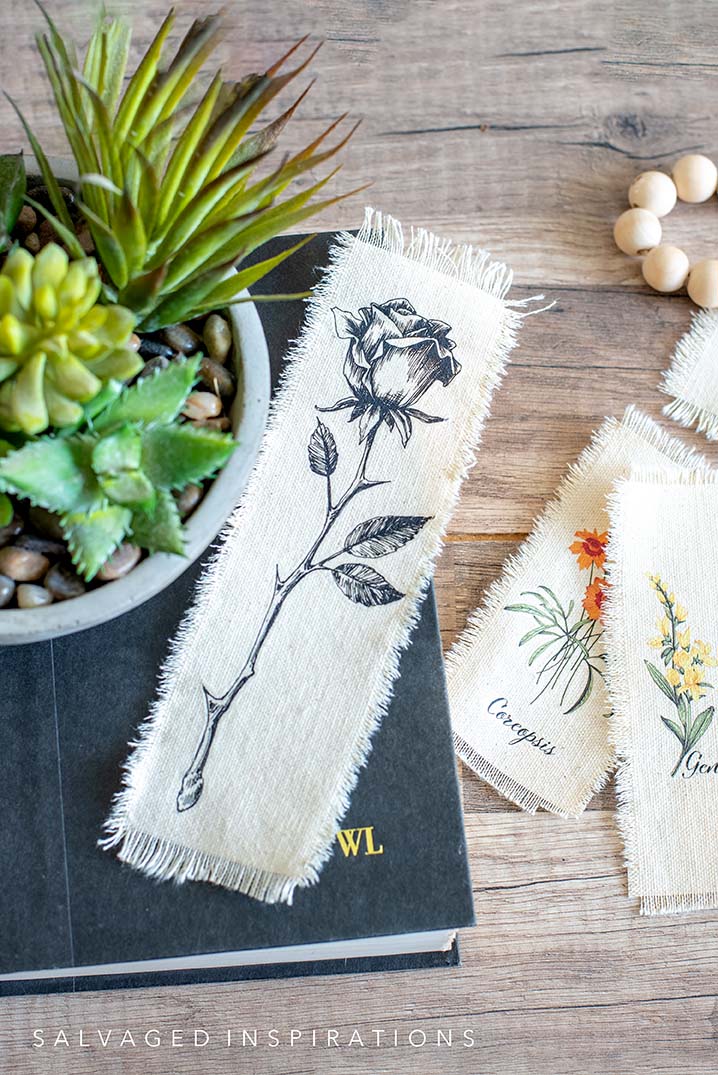
I really LIKE the black and white transfer designs but I LOVE the botanicals!
These would make such a thoughtful gift for anyone in your life who loves a good read… and they are so easy to do!
NOW FOR A FUN **GIVEAWAY!**
To thank you for all the well wishes, let’s have a fun giveaway!
THREE AMAZON $$GIFT$$ CARDS to 3 lucky winners!
I’m also throwing in a copy of The War of Art by Steven Pressfield. A book that I’m RE-READING… yes it’s that good!
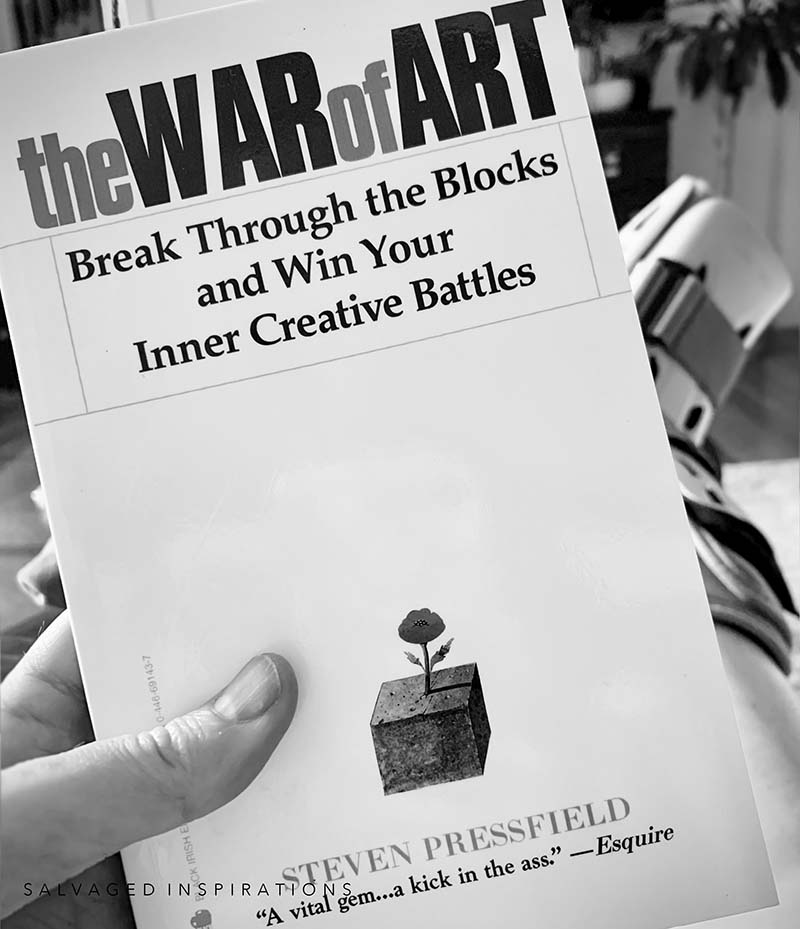
If you’re a creator/artist, OR finding resistance in anything you’d like to pursue in your life, this is an AMAZING READ!
$100 AMAZON GIFT CARD
$50 AMAZON GIFT CARD
$50 AMAZON GIFT CARD
It’s EASY to enter. Just click on the ENTRY WIDGET below and then come back daily to complete more chances to win.
I’m so excited. Good luck everyone! I’ll announce the lucky winners here on the #siblog next Tuesday, Sept 20/2022. Winners have 48 hours to claim the giveaway before another winner is selected… so be sure to drop in next week if you’ve entered! 🙂
AND NOW FOR SOME TRASH TO TREASURE FUN!
You’re going to LOVE what my creative team of Trash To Treasure ladies do! Below are their BEFORE photos. Visit the links below to see the amazing AFTERS and learn how they did it! I’m heading over to take a peek as well! x
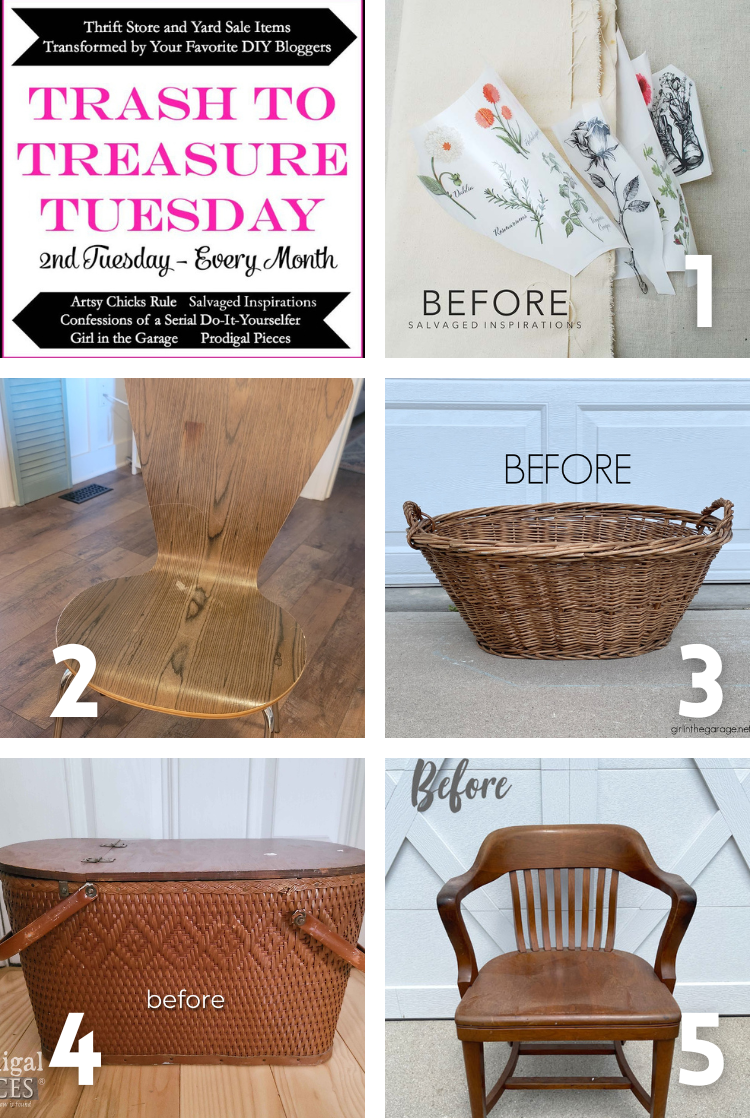
1. SALVAGED INSPIRATIONS (HAPPY YOU’RE HERE!)
2. ARTSY CHICKS RULE
3. GIRL IN THE GARAGE
4. PRODIGAL PIECES
5. CONFESSIONS OF A SERIAL DIY’ER
Here’s another look at these DIY Bookmarks before and after. I hope it’s inspired you and given you some new ideas for your projects!
LET ME KNOW WHAT YOU THINK OF THIS DIY BOOKMARK PROJECT OR FEEL FREE TO ASK ANY QUESTIONS YOU MAY HAVE… I ALWAYS LOVE HEARING FROM YOU. IT MAKES MY DAY! 🙂
Happy creating friends!
Denise x
RELATED POSTS::
DIY ANTHROPOLOGIE DRESSER
EASY NO SEW SWEATER PUMPKINS
HOW TO RUB ON FURNITURE TRANSFERS
TRANSFERS FOR FABRIC
MORNING SUNRISE PAINTED DRESSER
PIN AND SHARE!


They are beautiful. I was wondering if you seal them, so the fabric wont fray and image stays longer?
Thanks! I did not seal them and have been using them everyday – they are holding up perfect! If you wanted to seal them tho, this spray on wax would be perfect… and it’s so easy!
I love this idea! I think I’m going to try it for my bible study group!
Thanks Karen!
Haha I’m doing the same thing for our bible study Christmas party!!
This is super cute! I will try this with my daughter’s book club
Thanks, Adrian!
I LOVE this idea, Denise – these bookmarks look fantastic! I will be trying this. I wish you weren’t nursing an injury, but hope you mend quickly and get back to what you love doing. It’s good, though, that you can appreciate the down time get some reading in – get well soon!
Hi Marcia! Thanks so much and I hope you have fun giving these cuties a try! Enjoy the rest of your weekend!
Super cute, fun and easy. My kind of a project to relieve stress on a bad day.