HOW TO MAKE THESE ADORABLE *EASY* NO SEW SWEATER PUMPKINS FOR YOUR FALL DECOR USING WHAT YOU ALREADY HAVE IN YOUR HOME! | YOUTUBE VIDEO
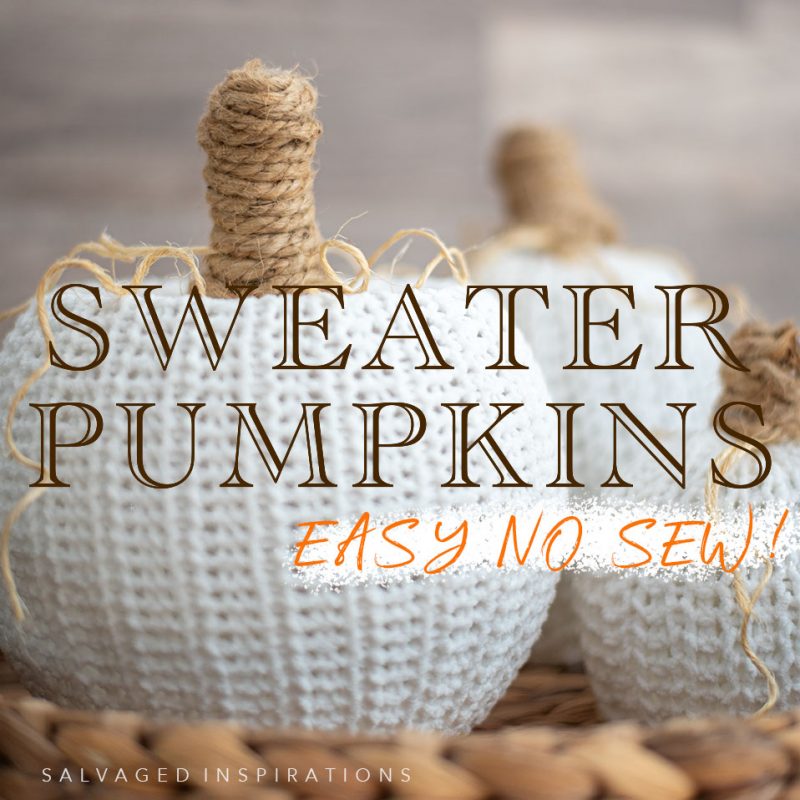
Hi creative friends and welcome back. If you’re new here, a big warm WELCOME! Today I’m sharing how to make these adorable NO SEW Sweater Pumpkins for your fall decor or furniture styling. No fancy supplies are needed. You can use what you already have in your home! All you need is an old sweater and any round vessel!
**This post was originally published on Sept 7, 2022. As an Amazon Associate, I earn from qualifying purchases. There are affiliate links in this post to other companies/products I use and love as well. You will never be charged extra when you purchase through these affiliate links. If you buy from my links – A BIG thank you for supporting me and the #siblog! To see my full disclaimer, click here.
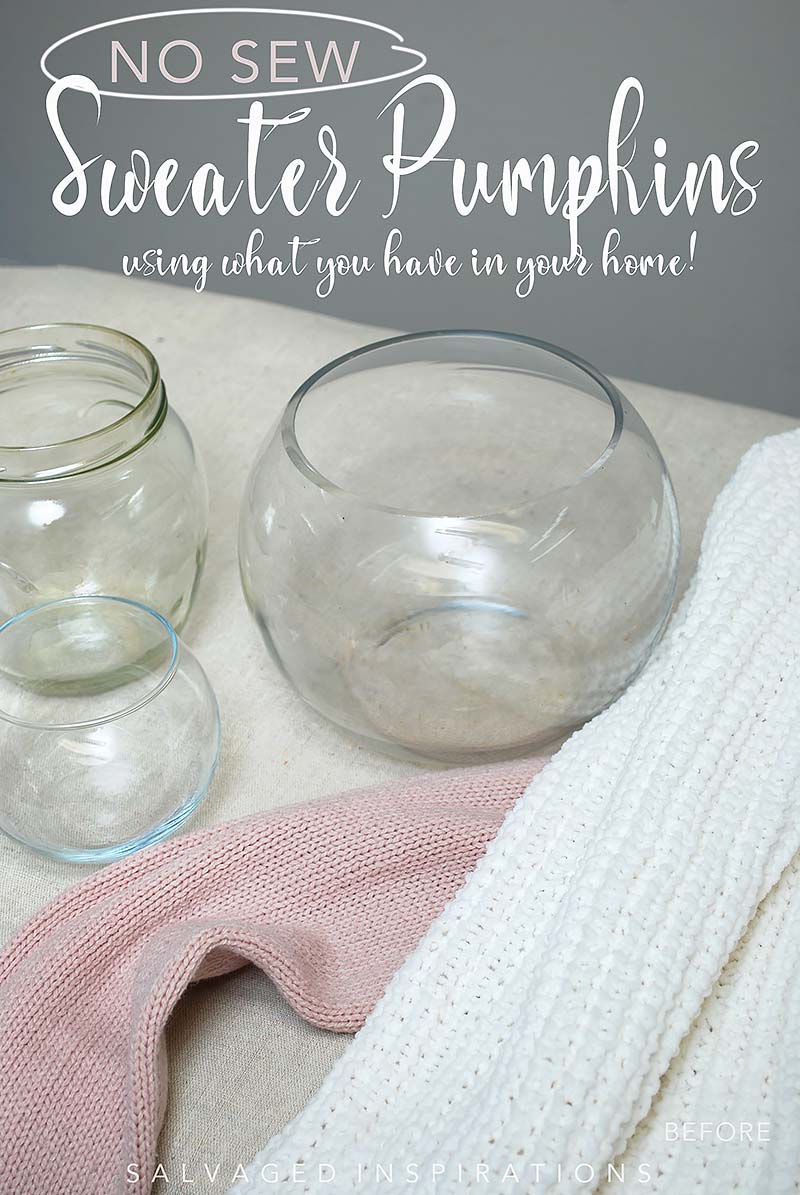
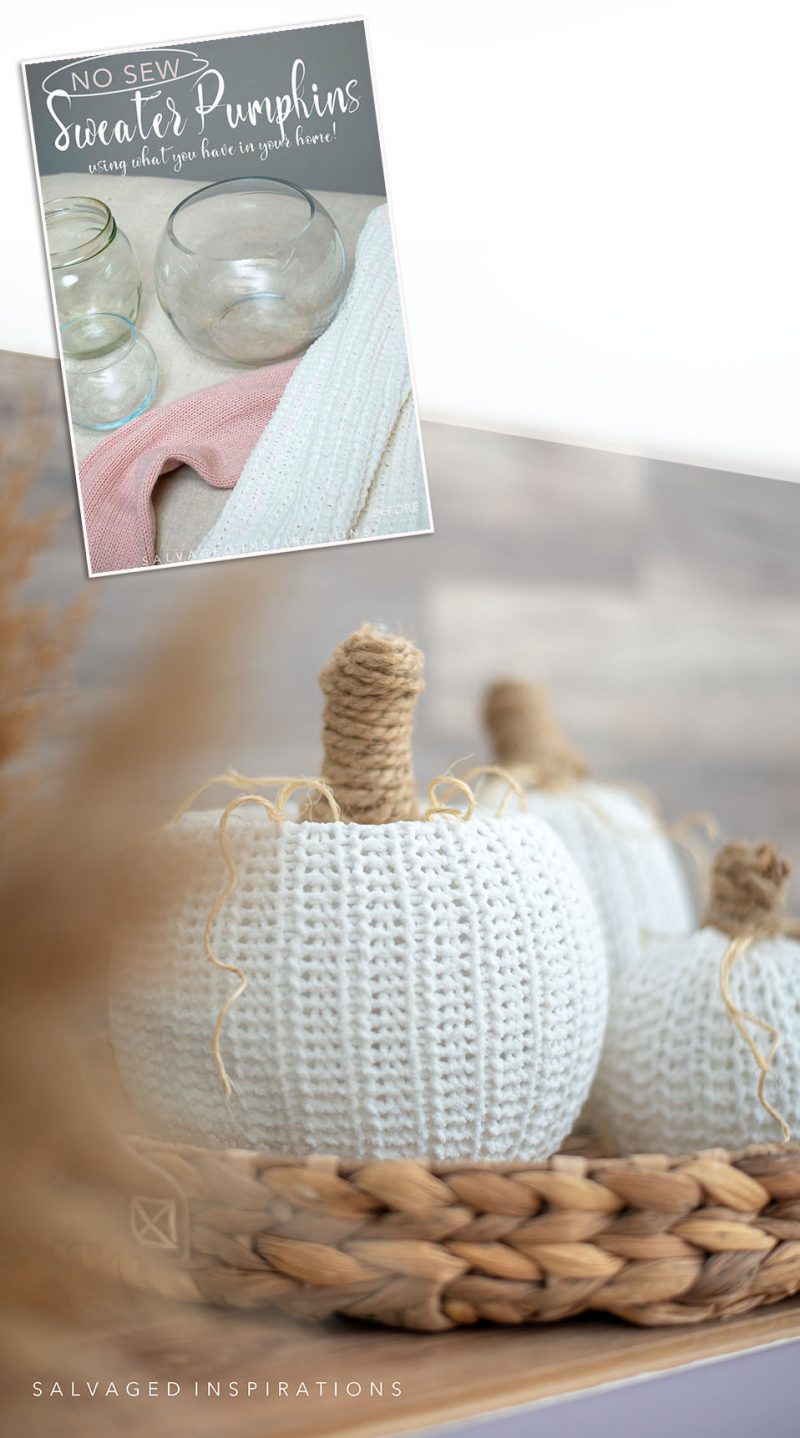
Here’s what I started with. Some old sweaters and a few jars and round vases I had hanging around my home.
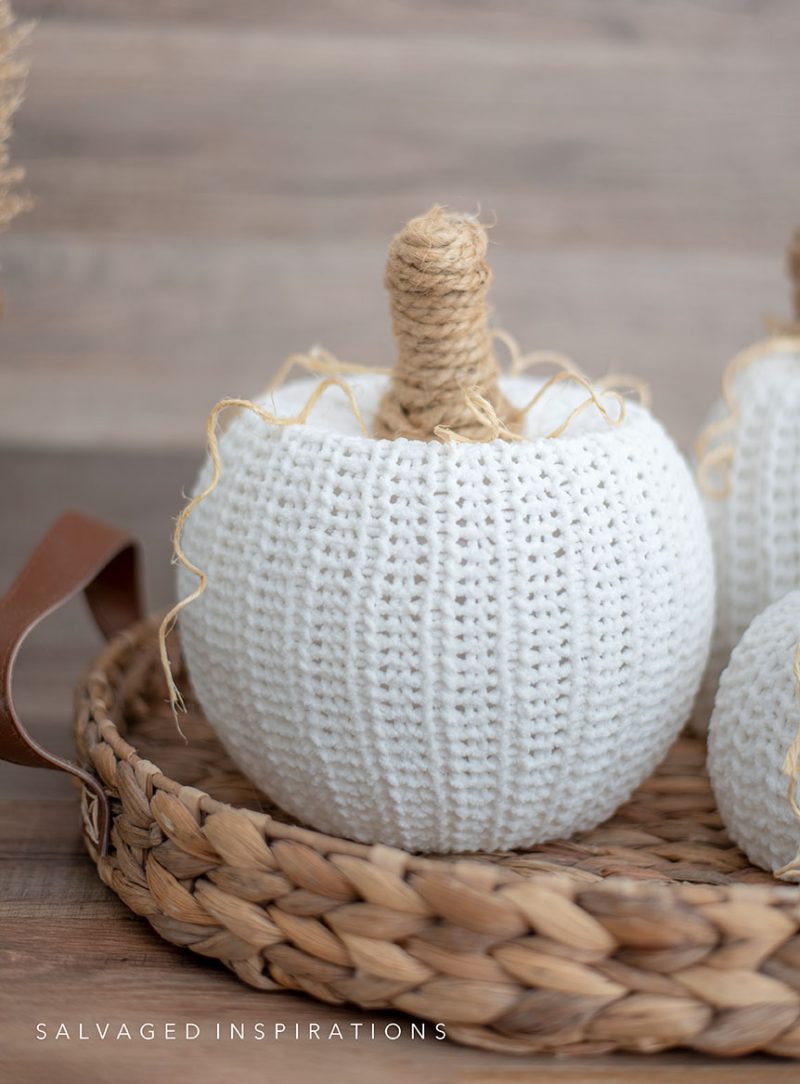
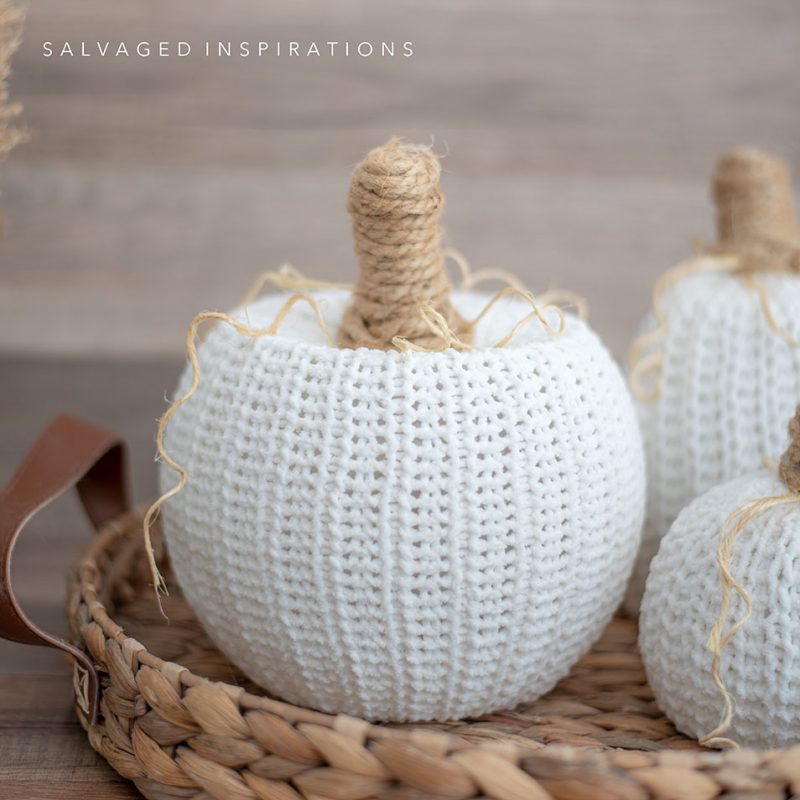
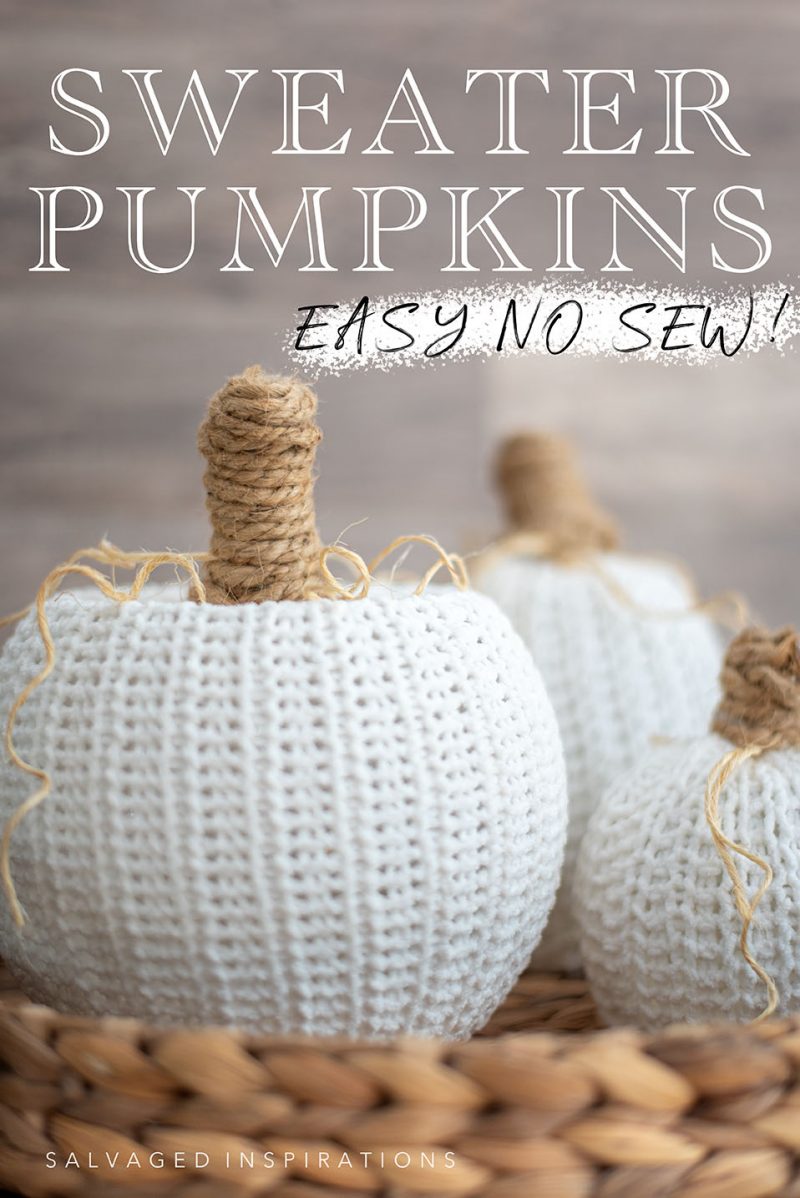
Before I get into the how-to details here’s a peek at the NEW sweater pumpkins! What do you think? Arent, these decor pumpkins super-sweet!?
THIS POST IS SPONSORED/CONTAINS AFFILIATE LINKS TO PRODUCTS I USE. YOU CAN SEE MY FULL DISCLOSURE HERE.
SOURCE LIST
Thrift Sweaters – SALVAGED
Round Jar or Vase
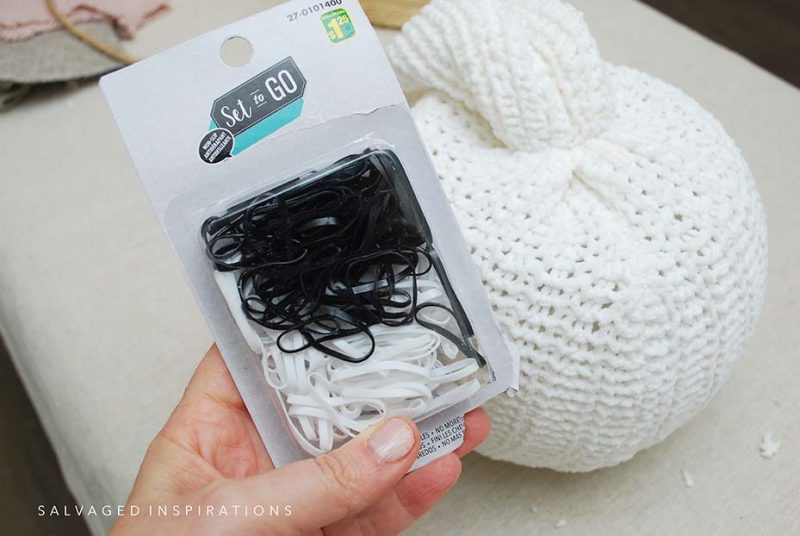
Elastic Hair Band
Mod Podge
Natural Jute Twine String
Natural Jute Rope
Pen or Straws
TOOL LIST
Heat Gun or Hair Dryer
Glue Gun
Scissors
HOW TO MAKE NO-SEW SWEATER PUMPKINS
Here’s how it all came together…
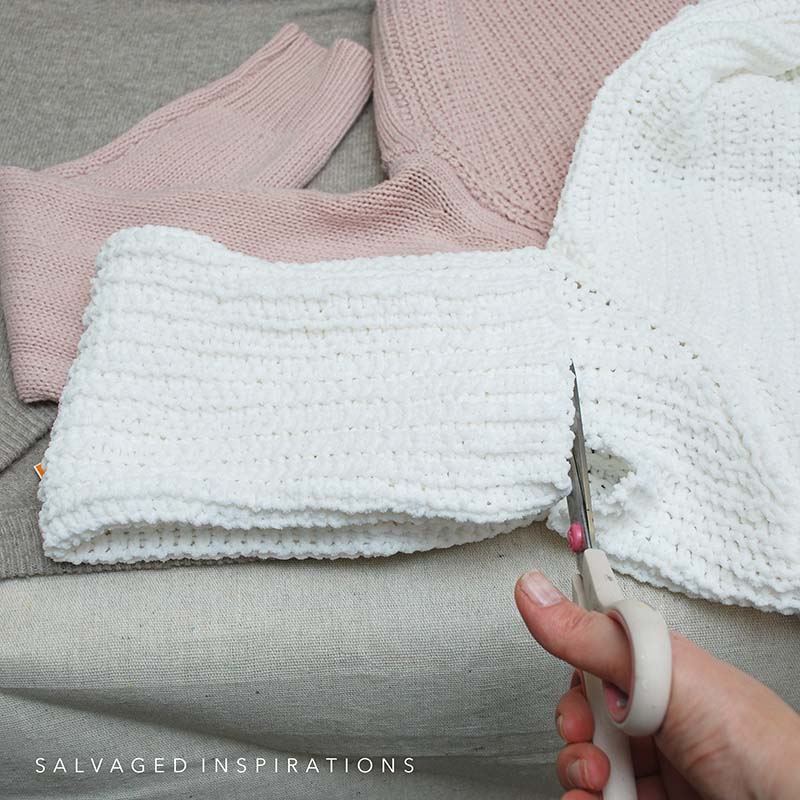
CUT OFF SWEATER SLEEVE
I started by cutting off the sleeves of the sweaters. Rather than cut along the shoulder seam, I made a straight cut towards the underarm which works much better. I originally thought I was going to use a variety of sweater colors, but I ended up liking the look of the white sweater the best. The chunky ribbed sweaters look amazing for this project!
SECURING THE SWEATER TO THE BOWL
Once I had the sleeve of the sweater cut, I fitted it over the glass bowl. The larger part of the sleeve (the shoulder area) went towards the bottom of the bowl and the smaller wrist part went on the top of the bowl. Check which end of the sweater sleeve fits best onto your vessel of choice.
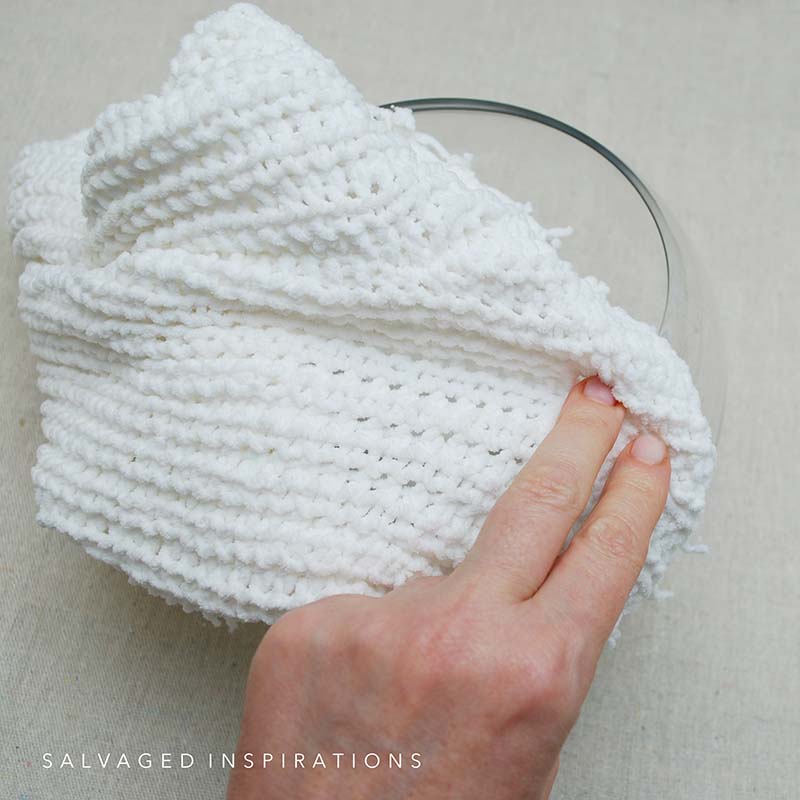
And be sure to keep all the excess fabric up top!
Using a glue gun and working in sections, I glued the sweater to the bottom of the bowl and made sure it was all secure.
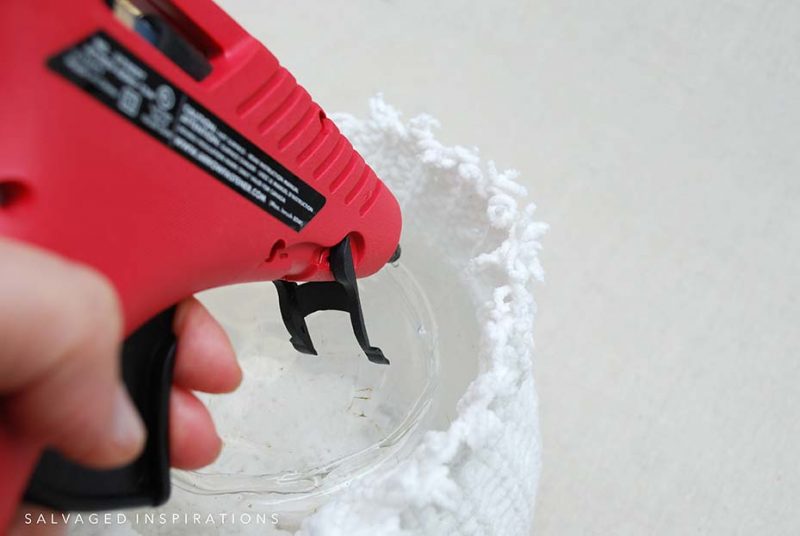
Once it was all dry and the sweater was securely stuck to the bottom, the excess fabric on the bottom was cut off.
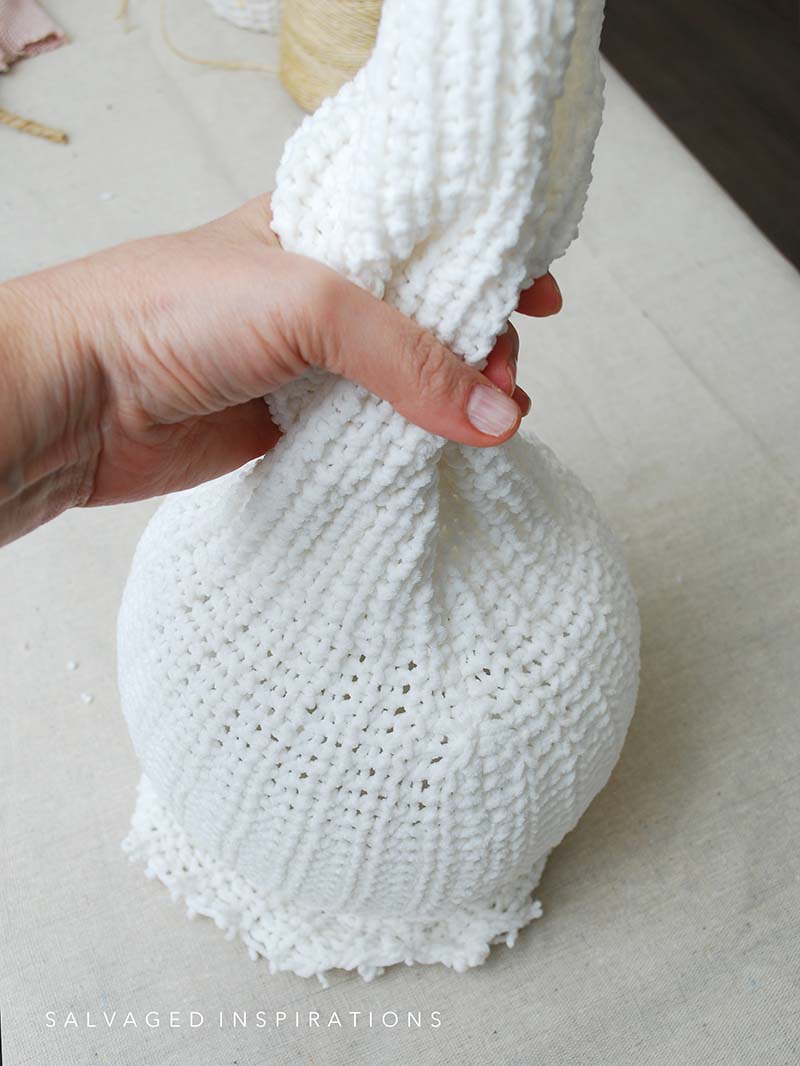
SECURING THE TOP OF THE PUMPKIN
Now that the bottom was all glued and secured, I went ahead and secured the top with an elastic hair band. I buy mine from the dollar store but any elastic band or piece of string will work just as well. I secured the elastic band as close to the glass bowl as possible leaving the excess sweater hanging as seen below.
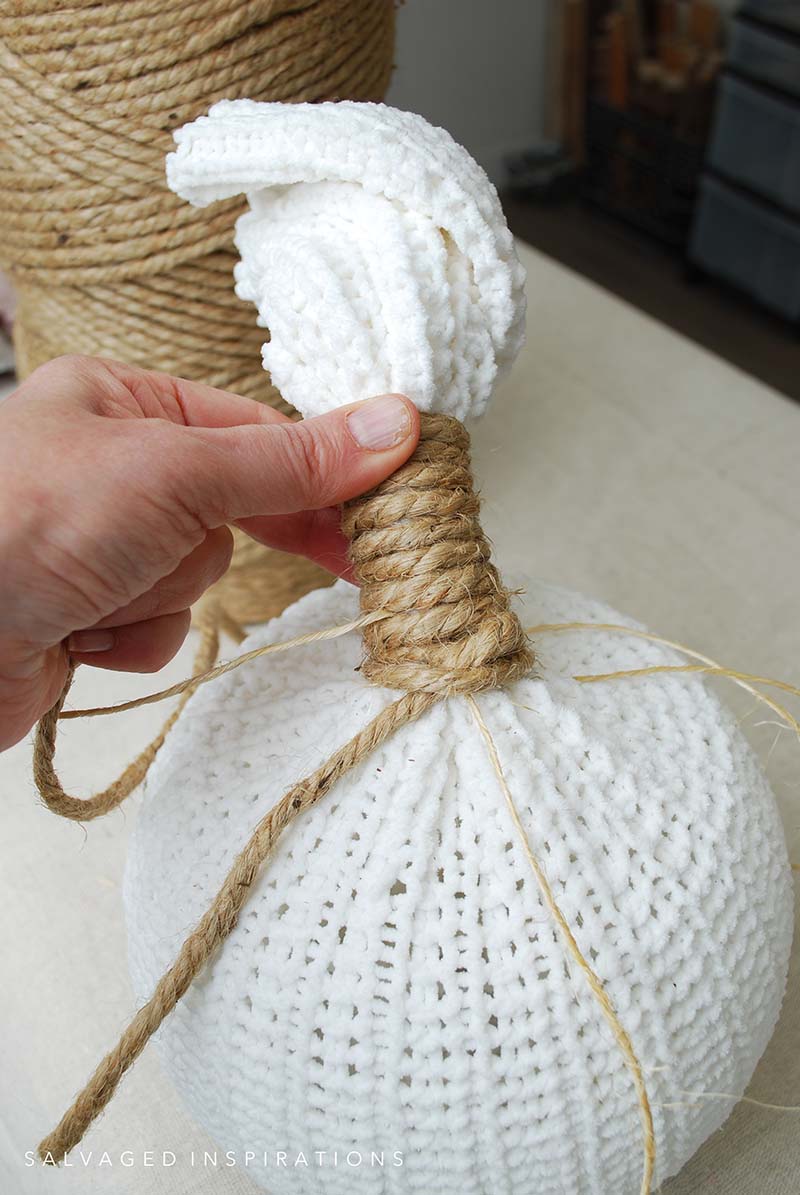
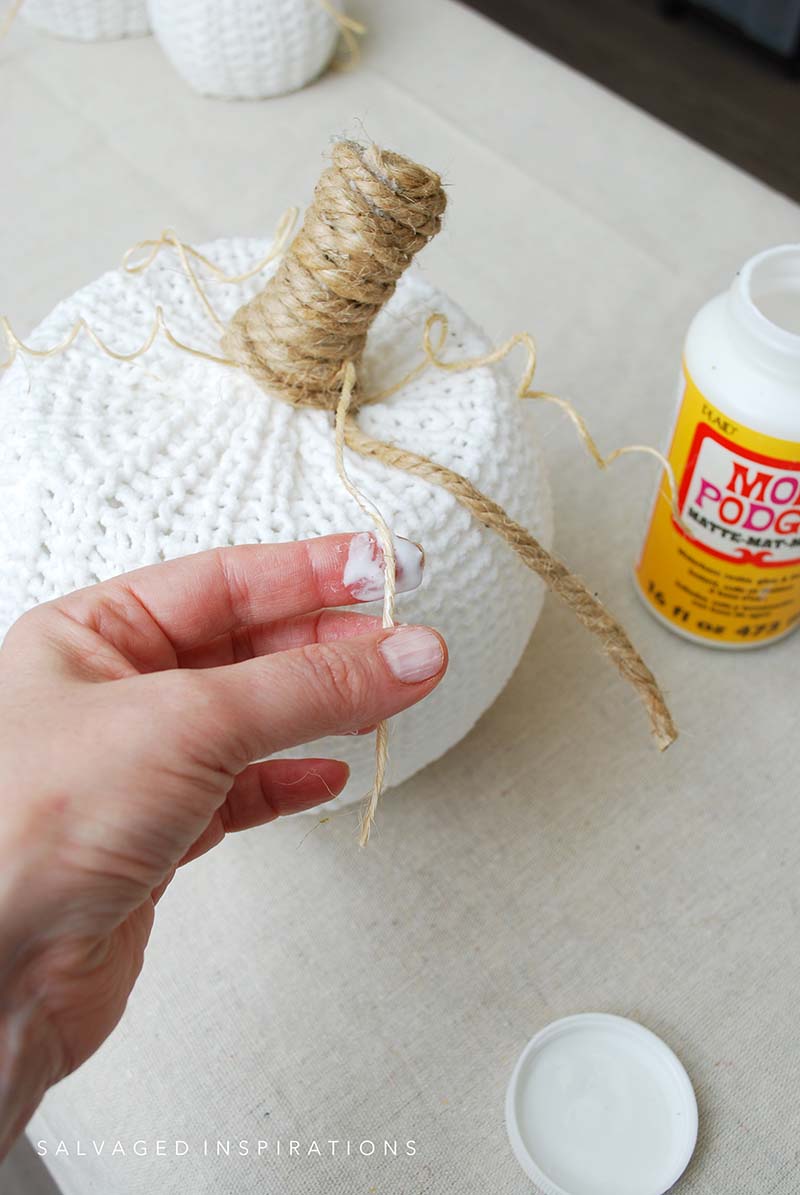
CREATING A STEM
Now for the fun part! To create the pumpkin stem, I used this natural jute rope. If you don’t have any jute rope, you can use yarn or any type of fabric which would look super cute as well! I started the stem by tying it once at the base where I put the elastic hair band. Then I twirled and coiled the jute rope up the excess sweater fabric until I was happy with the look.
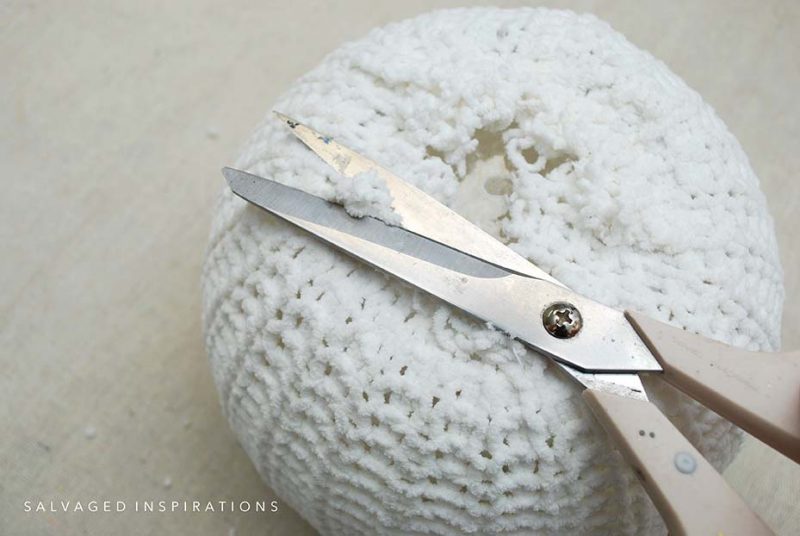
Once I had it to the height I liked, I tied it at the top and cut off the excess sweater fabric with scissors.
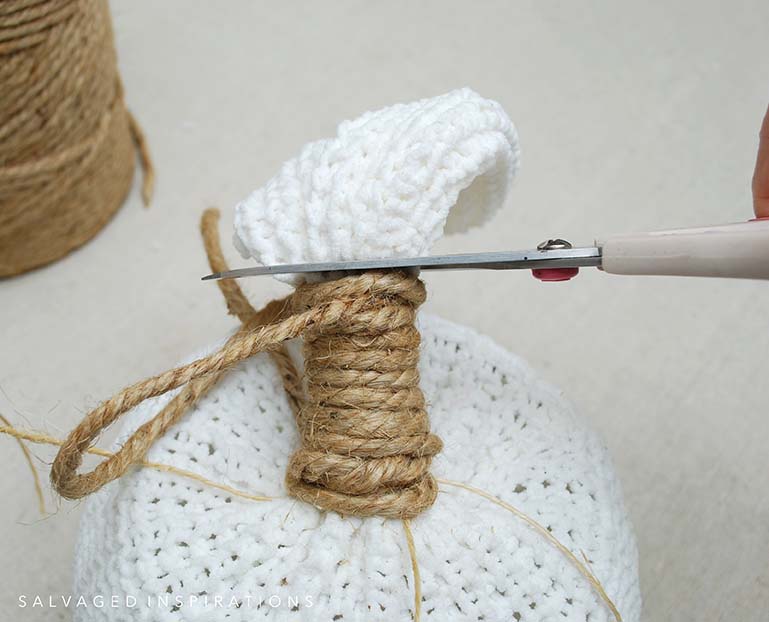
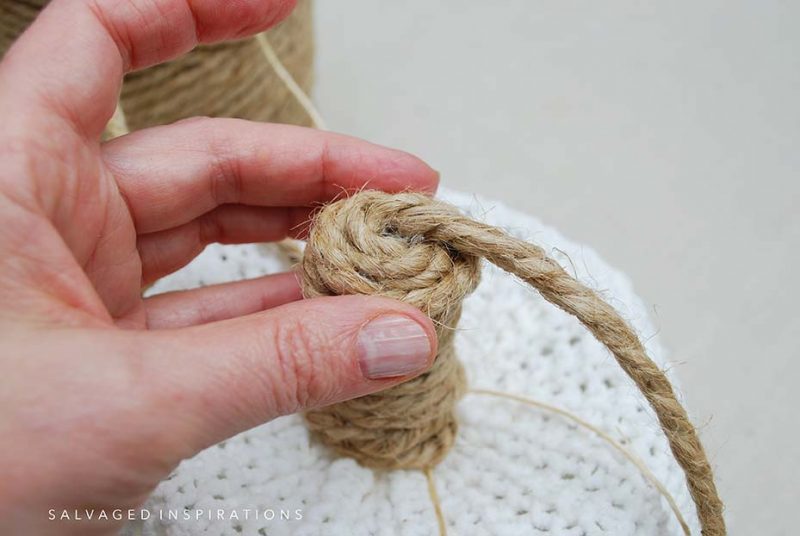
To finish the stem off, I used my glue gun to coil the jute rope around the flat edge of the cut-off sweater. This creates a perfect stem top!
CURLY CUES
Remember the natural jute twine string I tied around the sweater? Here’s where they come into play. If you don’t have any twine string, you could use yarn. If you don’t have any yarn, unravel a piece from the sweater you just cut to make these pumpkins. To make some curly cues for these pumpkins, I took some Mod Podge and rubbed some on the twine string with my fingers. I rubbed it on the full length being sure to get some on both sides.
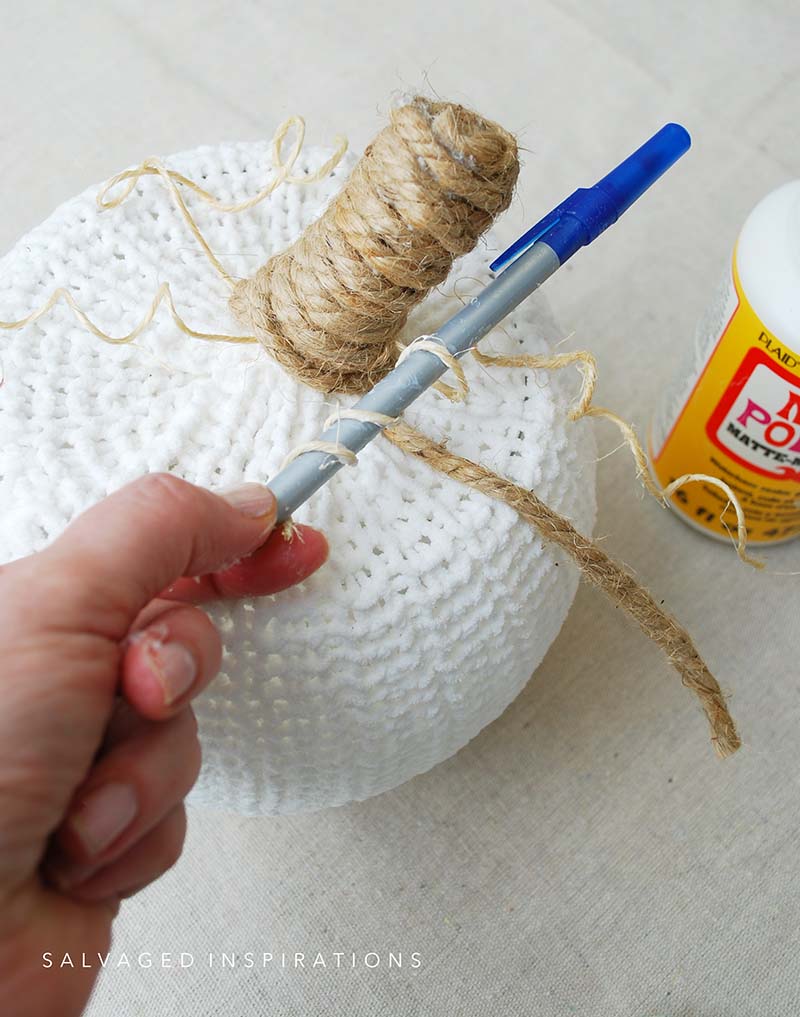
Then using a pen (in the video below you’ll see how I switched over to a paper straw) I twirled the string around the pen. To speed up the dry time I used my heat gun. If you don’t have a heat gun, a hair dryer will work! When it was dry, I removed the pen and was left with these adorable curly cues!
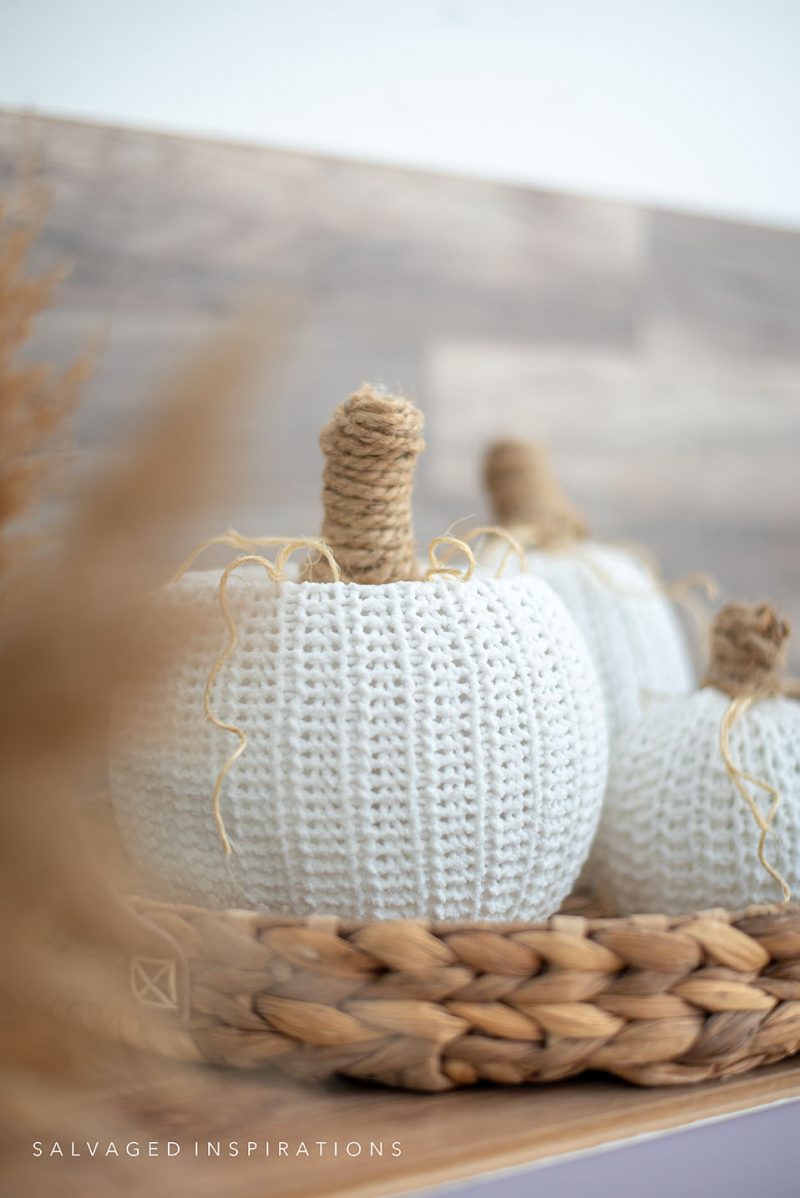
Here’s the finished look!
My favorite is the large one with the bowl facing upright. In the video you’ll see two different ways I created these pumpkins and the EASIER way (which I shared in this post) is the one I like the best. You may prefer the other way so at least you’ll have the option. 🙂
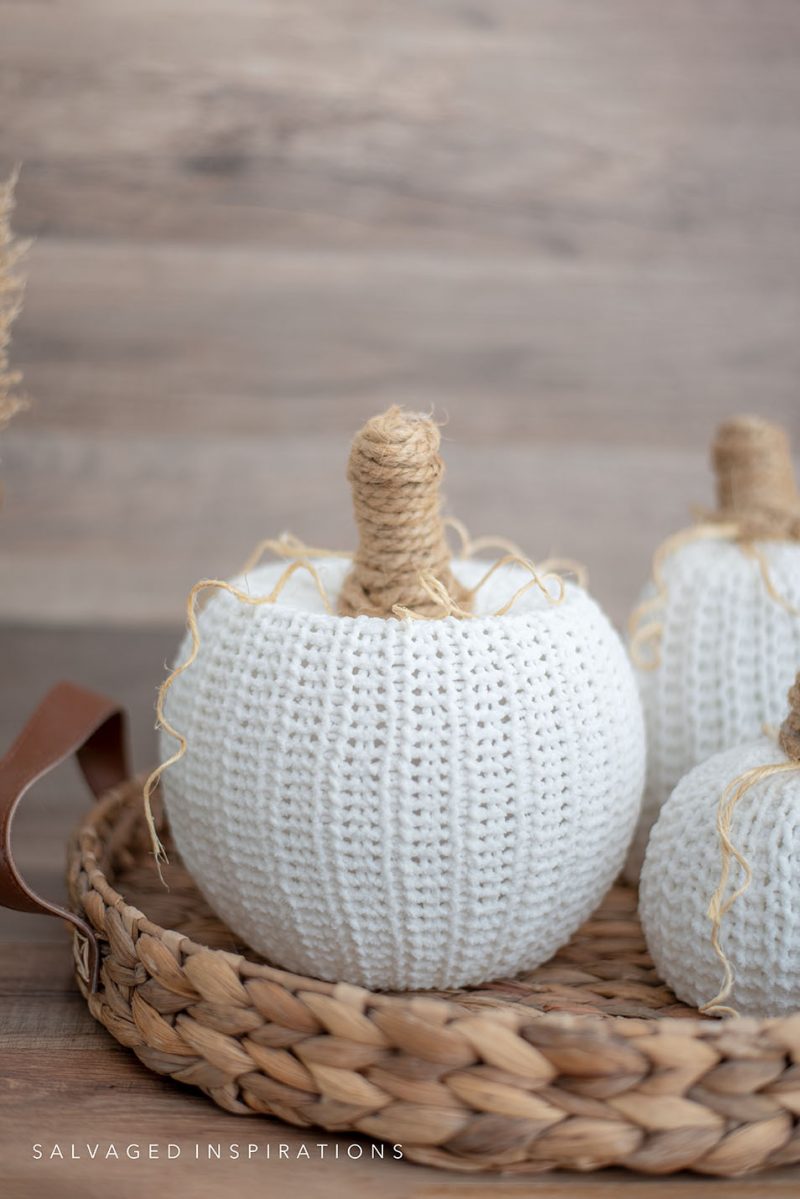
The way the sweater and stem contour the glass bowl looks super cute!
They are so darn adorable. I can’t wait to hear what you think!
YOUTUBE TUTORIAL
Here’s a step-by-step tutorial. If you have any problems viewing it below, feel free to watch it on my Youtube Channel HERE. Our #siyoutubefamily hit the 49.7K (thank YOU!) so don’t forget to subscribe if you haven’t done so already! 🙂
Here’s another look at these sweater pumpkins before and after. I hope it’s inspired you and given you some new ideas for your projects!
If you liked this pumpkin project, you may also like these Gold Leaf Cashmere Pumpkins here!

Or this Gold-Gilded Plastic Fruit tutorial here.

I’ll be back this Thursday with my talented Furniture Fixer Upper Crew with this dated coffee table makeover.

Thanks for joining me today and let me know what you think of these No-Sew Sweater Pumpkins. I’d love to know you stopped by. Like I always say, this wouldn’t be any fun without YOU! 🤗
Happy creating friends!
Denise x
RELATED POSTS::
HOW TO GOLD LEAF PUMPKINS
HOW TO PAINT METAL FURNITURE
CASHMERE PUMPKINS MAKEOVER
FALL PAINT RECIPES | FREE DOWNLOAD
HOW TO TURN WOOD INTO FAUX IRON
PIN AND SHARE!

Thanks for the idea! I love to make décor with my own hands, I will definitely try!
Hi Elizabeth! It’s a really fun project so enjoy! 🙂
Hi Denise, I’M really sorry about your foot. Believe me I know that a boot will make things better. I love the pumpkins and can’t wait to make one. Feel better soon.
Thanks Peggy and have fun if you give these pumpkins a try. I really enjoyed them! And thanks. I’m sure the boot will be much easier as well! XOXO
Hope it heals quickly. Enjoy your projects so much.
I’m so glad you’re enjoying the projects and thanks so much Donna!
These pumpkins are so cute! Will be rummaging today to see if I can try this. But poor you – so sorry about your foot! I’m sending you fast-healing wishes. I had to do crutches a few years back – ugh! Get better soon!
Thanks my friend! XOXO I don’t know if it’s just me but I’m horrible at balancing myself on crutches. I’ve taken to using my mechanic’s chair and office chair with wheels to ‘wheel’ myself around my home.😆
Hi Denise. What an adorable autumn decorating idea. So cute. I hope your foot feels all better soon and you can get away on another trip.
Thanks, Monique and so happy you like them.💙 I think they’re pretty adorable too hehe. 😉
These are a must-try for me – super sweet and looks easy enuf for me to do!😛 And sorry to hear about your foot. Get well soon!
So EASY and fun! If you give them a try I’d love to hear how they turned out for you Nicki! And thanks so much! XOXO
These are so cute and super easy! And oh no!! Your foot? You poor thing! That sounds like no fun at all. Hoping for a speedy recovery, my friend! XOXO
Thanks…so EASY, right?! And ya, the first getaway in over 2+ years and it didn’t turn out at all. Oh well, the foot will heal and I’m grateful it was only my foot… could have been way worse! XOXO
Yikes! Wishing you a speedy recovery.
Thank you Karen!🤗
hate to hear about your foot! take care & take it easy!! never thought about the small rounds as pumpkins – so thanks.
Thanks so much CC and ya, anything round would work great for these!
God Lord !!!! 🤦🏻♀️🤦🏻♀️ Get well soon !!!
Lovely pumpkins !!!
Greetings from Malaga (Spain)
Hello Spain! I love ‘meeting’ readers from around the globe! I don’t think I realized you were from Spain in your last few comments. Thanks for the well wishes Piluca and so glad you love the pumpkins!
Thank you for sharing this wonderful idea.
My pleasure Linda… it was a fun little project!😀
Oh nooooo! I’m so sorry. I feel you, girl. I broke my leg a while back. I’m praying for you and that it will heal quickly because we need more of your amazing projects, like these adorable sweater pumpkins. Take care sweet friend. I’ll be checking in on you… virtually of course. xo
Ohhh nooooo…were you able to paint with your broken leg? They put a temporary cast on my foot in emergency and I’m hoping I get one of those boots in the next few days so I’ll be more mobile. I’m itching to get down to my studio to paint hehe. Thanks for the well wishes! Hugs XOXO
Oh nooo! Wishing you a speedy recovery!
Thanks so much Ruth!💙