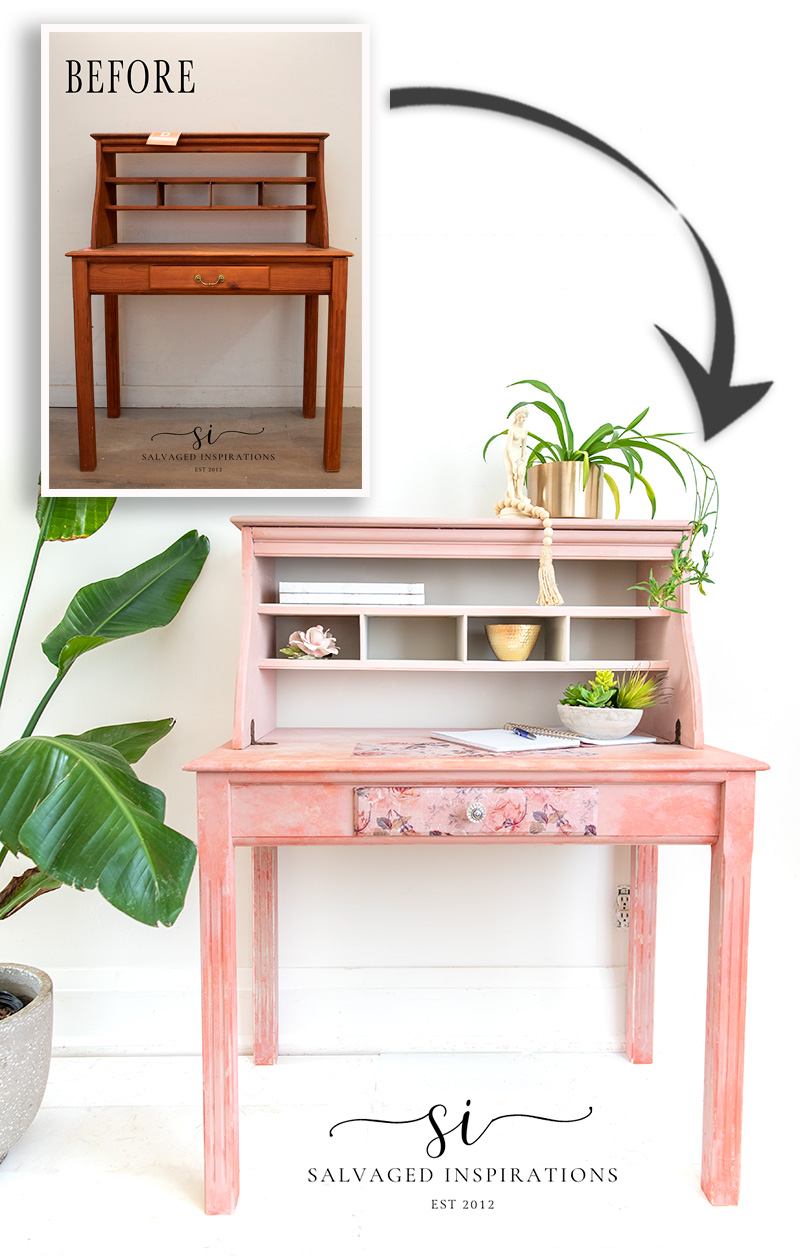
THIS CHALK-PAINTED THRIFT DESK AND HUTCH GET A FEMININE NEW LOOK USING A FAUX PAINT WASH AND FLORALS FOR A CAUSE | YOUTUBE VIDEO COMING THIS SATURDAY!
I have mixed feelings about painting secretary desks and desks with a top hutch. Not because I don’t love them, but because painting all the little cubby holes can be time-consuming. But that said, I’m so happy I picked up this thrift desk. It was a fun makeover and I can’t wait to share where the inspo for this makeover came from!
It’s also Furniture Fixer Uppers Thursday. I’m joining my FFU crew and sharing links to their projects down below. I’m looking forward to seeing what they’ve created and I hope you join me on the tour as well!
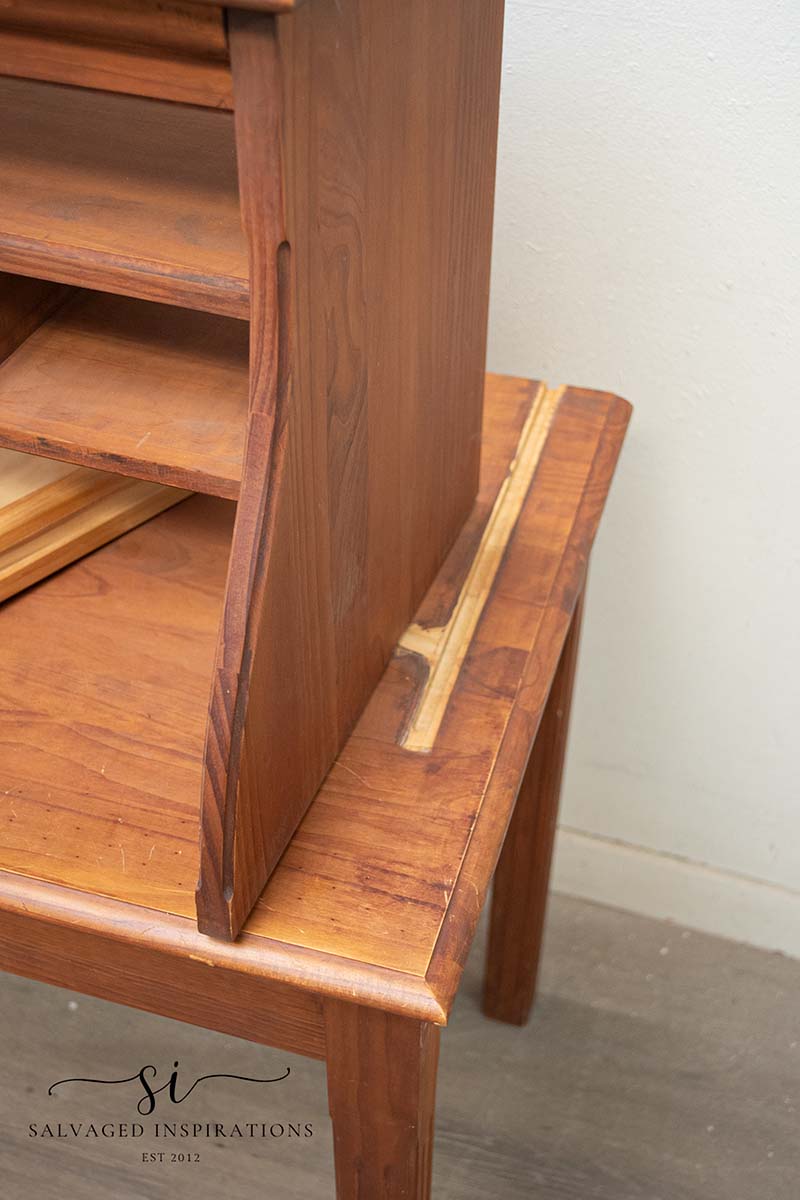
Here’s the salvaged secretary desk I started with. I found it at my local Restore.
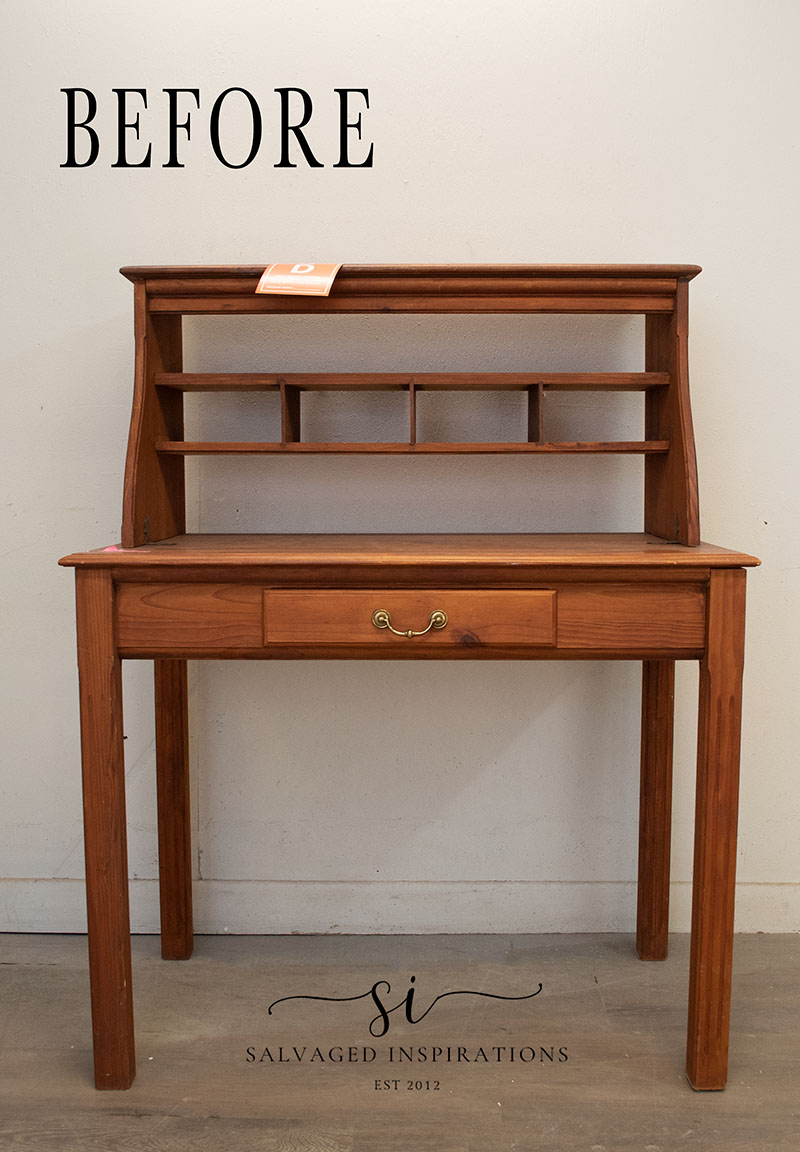
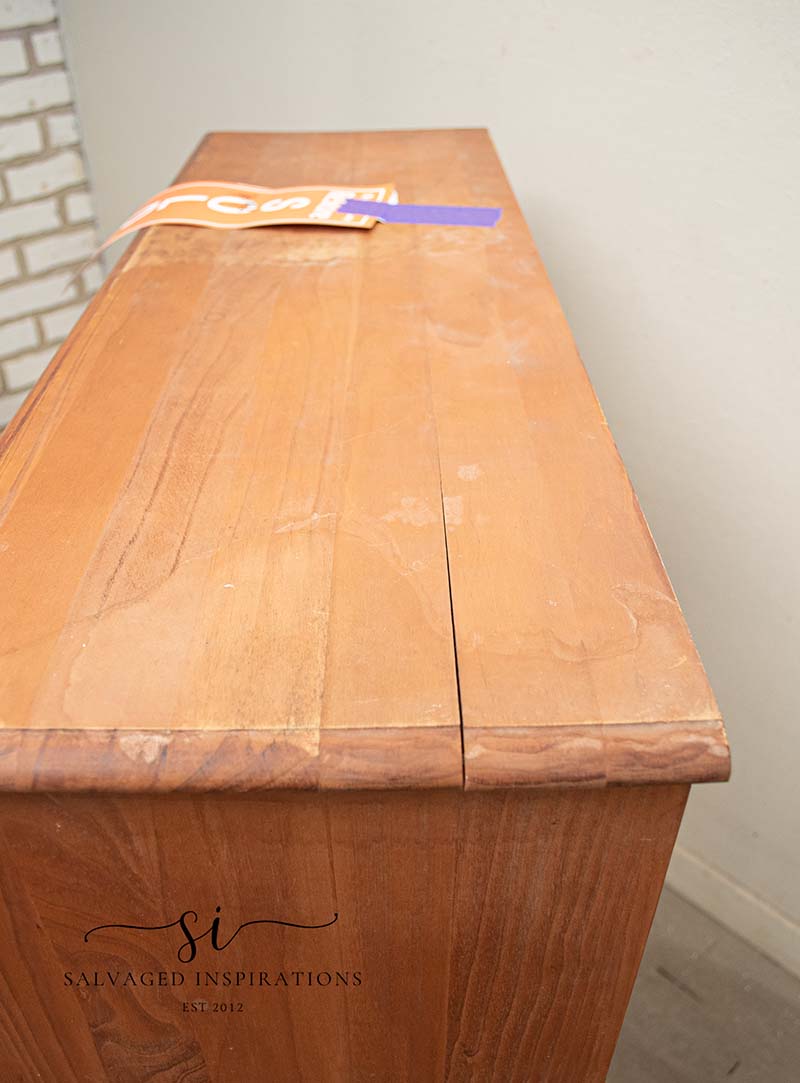
The top was cracked and needed repair. It also had some water damage under the sold sign. I’m guessing the water stains were from a planter sitting on top of this cute desk.
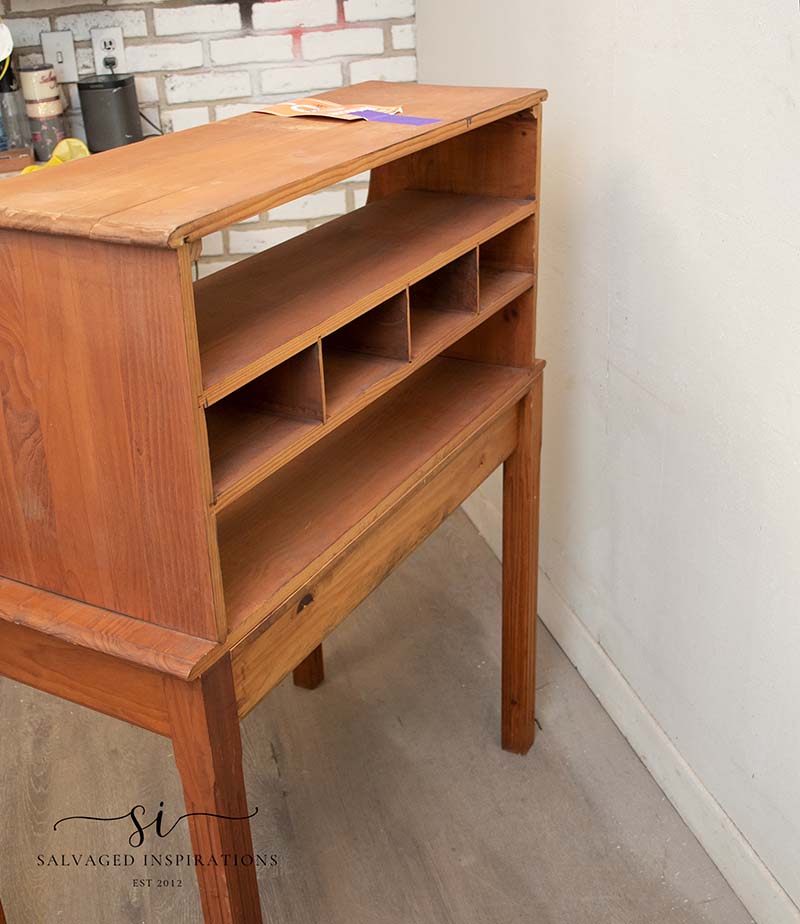
This piece of furniture was also missing the entire back on the top hutch.
THIS POST IS SPONSORED/CONTAINS AFFILIATE LINKS TO PRODUCTS I USE. YOU CAN SEE MY FULL DISCLOSURE HERE.
WHAT YOU’LL NEED
Thrifted Secretary Desk – SALVAGED
White Lightning Cleaner
Bosch Sander (still 25% OFF as of writing this!)
BIN2 Alkyd Primer
Bondo All-Purpose Putty
Sawmill Gravy Chalk Mineral Paint
Tea Rose Chalk Mineral Paint
Cottage Door Chalk Mineral Paint
Florals For a Cause Decoupage Paper
2″ Round Paint Brush
Clear Coat Satin
SECRETARY DESK MAKEOVER
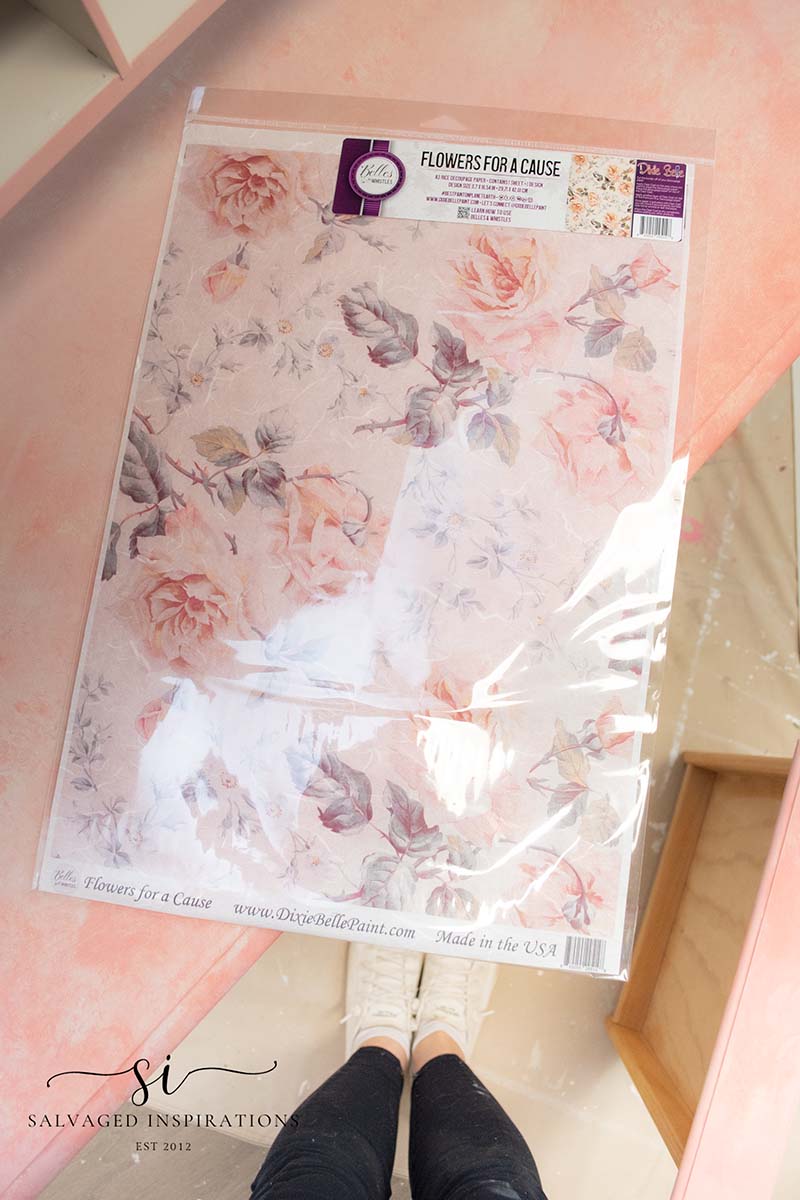
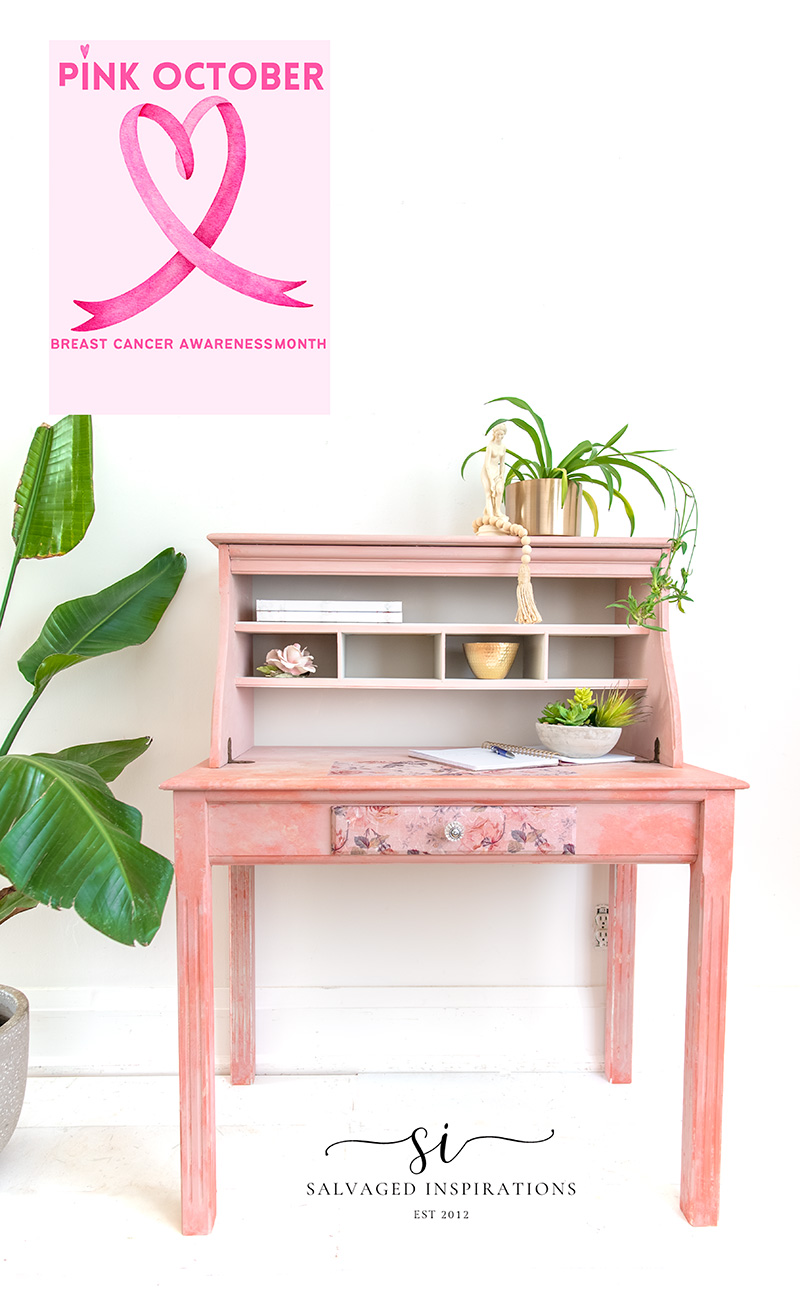
In a few short days, it will be October which is Breast Cancer Awareness Month. Dixie Belle has generously sent me their “Florals For A Cause” decoupage paper which was the inspiration for this desk makeover. 🎀
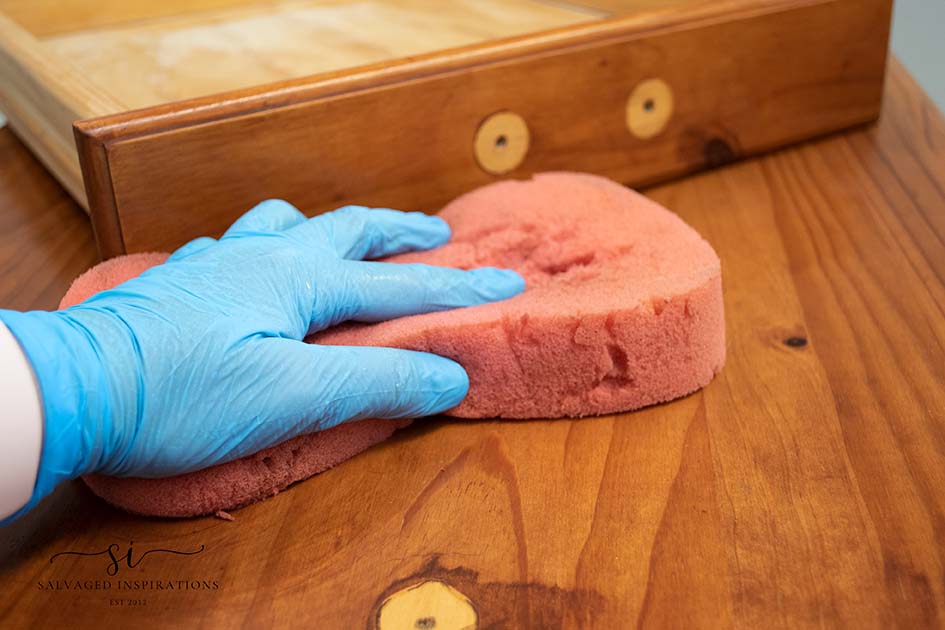
CLEAN & PREP
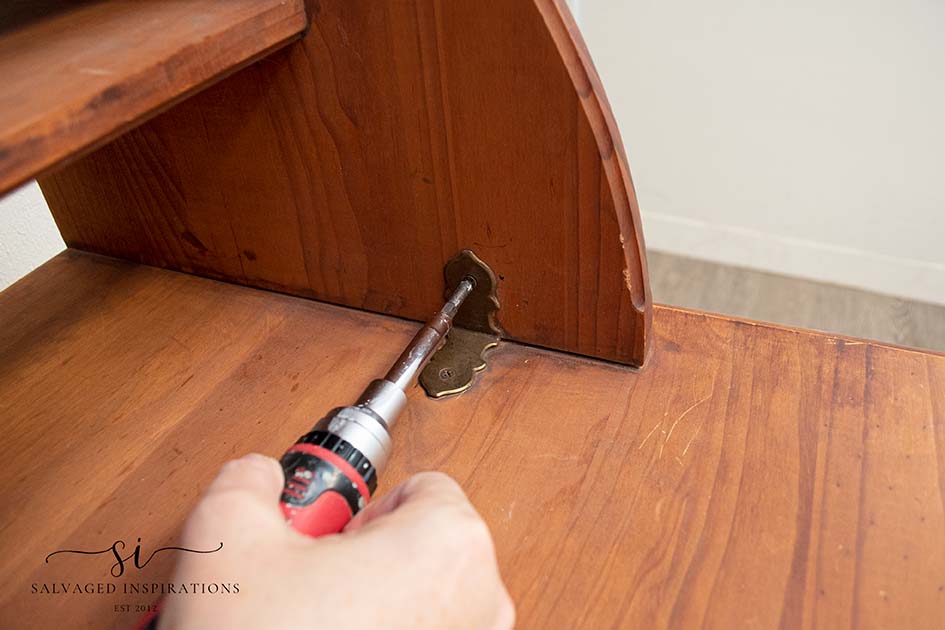
I started by removing the hardware from the drawer and the hutch. Once the hutch was removed from the top, it made cleaning and sanding much easier.
I gave this desk a good cleaning with White Lightning. I made sure to rinse my sponge and wipe the desk with clean water to remove any residue before sanding and priming.
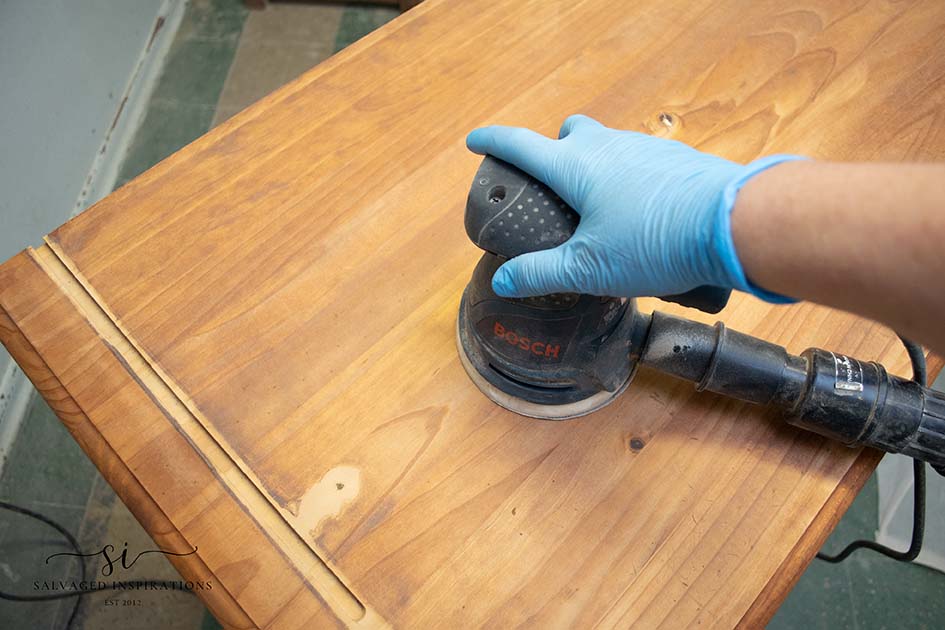
SCUFF SANDING
Once this desk was all cleaned and dry, I gave it a quick scuff sand with my Bosch Sander which is still 25% OFF as of writing this post! I left all the repairs for after my first coat of primer. Partly because repairs are much easier to see after a coat of primer goes on. And partially because I was super curious about the new primer I just bought – BIN 2 Alkyd Primer.
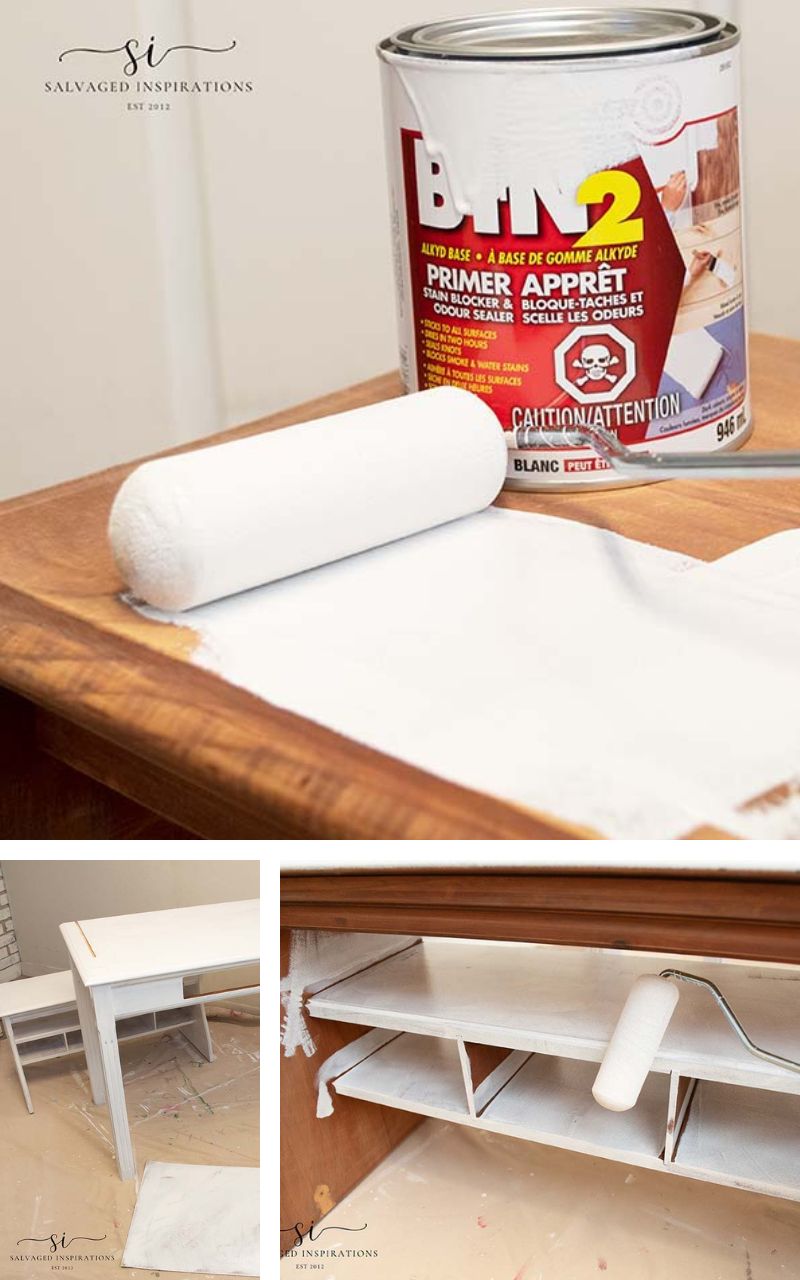
PRIMING (FIRST COAT)
I went to Home Depot to pick up a gallon of my fave BIN Shellac Base Primer. Here in Canada, BIN Shellac Primer use to sell for around $65. During the pandemic, it increased to $80-something-ish and now it’s selling for $110/gallon. 😲 I looked for the BIN Advanced Synthetic Shellac Primer and they didn’t have it so I decided to try this BIN2 Alkyd Base Primer + Stain Blocker.
I found it to be a thick formula but it did roll on with a high-density roller in a nice thin coat.
BONDO REPAIRS
The largest repair on this piece of furniture was the crack in the top hutch. I pulled out my trusty Bondo for the repair. I made sure to overfill the crack. The Bondo dried within 15 minutes and then I sanded it nice and smooth with my orbital sander. Then to test the boundaries of this new-to-me BIN2, I used a paintbrush and brushed on a second coat.
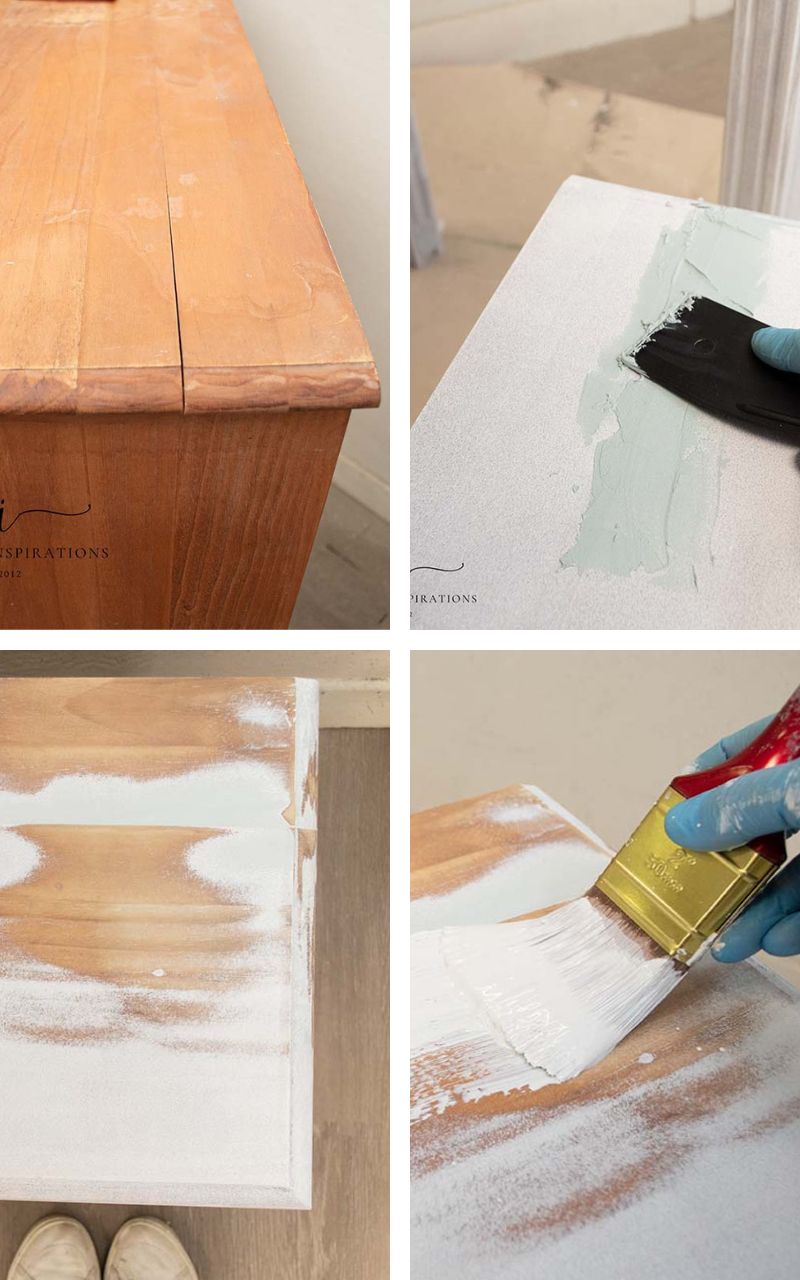
PRIMING (SECOND COAT)
When I tried brushing on the second coat after my repairs, it all went to H*%# in a handbag…lol. The second coat I applied was thick and sticky. It was so sticky I found it difficult to spread evenly on my project. In comparison to my trusty BIN Shellac, I would rate this BIN2 Alkyd Primer like this (10 being best and 1 the worst) …
- Odor – 8/10 It definitely smells better than the BIN Shellact but still has an odor and requires good ventilation.
- Bonding – 10/10 It bonds really well. I did a scratch test the following morning on the first coat and it passed with flying colors.
- Stain Blocking – 8/10 It covered up the bleedthrough nicely although not as good as the BIN Shellac Primer because it takes longer.
- Dry Time – 5/10 It takes much longer to dry. At least two hours or more whereas I can be painting over BIN Shellac within 30-40 minutes.
- Leveling – 6/10 I didn’t find it as easy to smooth out as the BIN Shellac but maybe I need more practice.
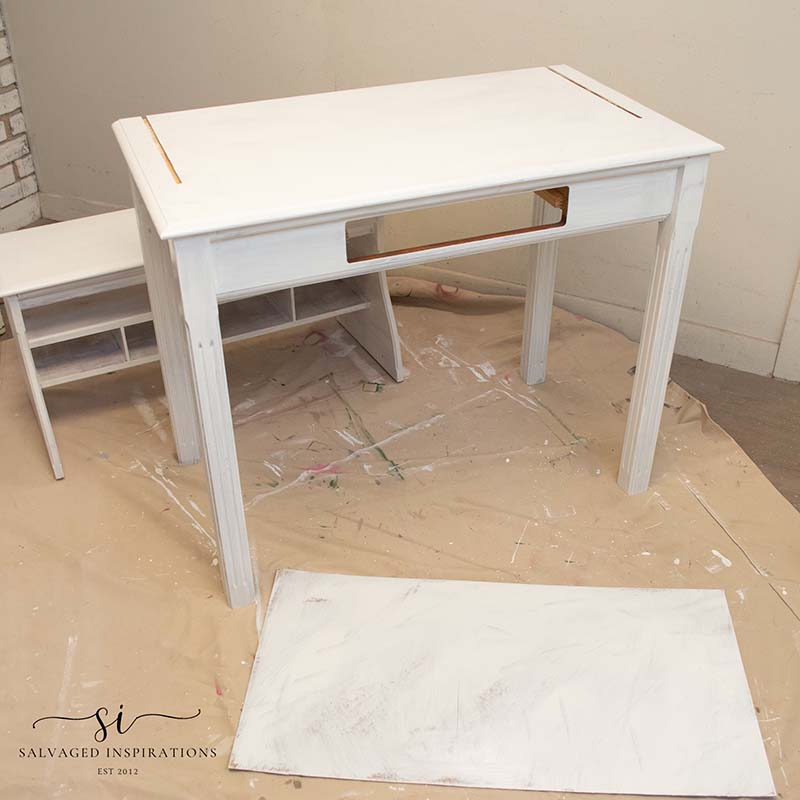
While I was applying this primer with my paintbrush, I decided to go in a totally different direction with my brush strokes to create a faux-textured look. I just got so frustrated trying to smooth this primer out so I just went with the flow. Here’s what the backing, desk, and hutch looked like after the second coat of primer. I’ll also share all this with you in this Saturday’s upcoming YouTube tutorial. I’m so glad you are all loving the videos in addition to the written posts!
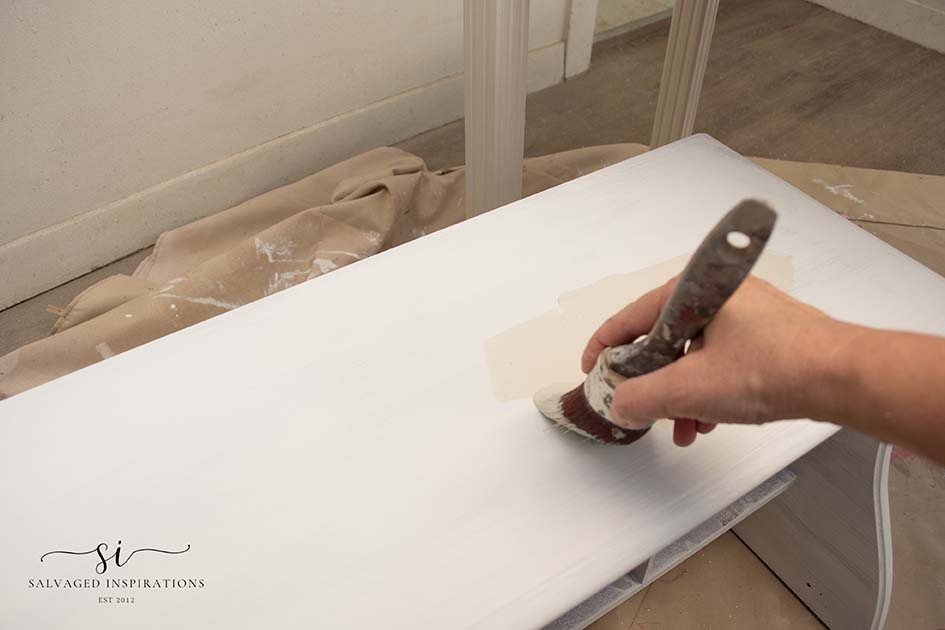
PAINT WASH FINISH
For my base color, I used this beautiful soft beige neutral – Sawmill Gravy. Using my paintbrush I applied the paint in all different directions to create the illusion of some texture.
CUSTOM PINK PAINT WASH
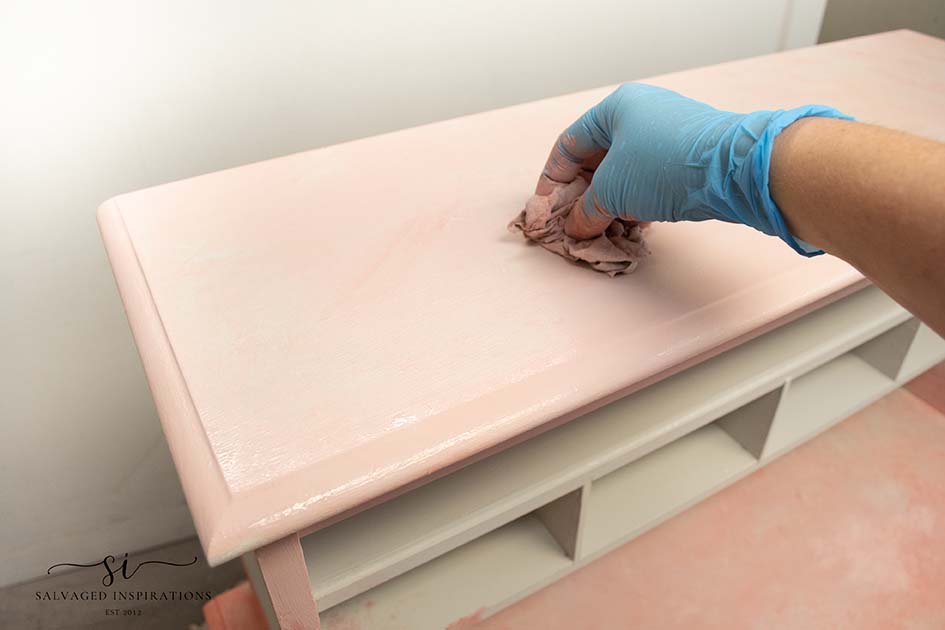
To create my pink variegated watercolor paint wash finish, I sprayed with water and started dabbing and brushing on my darker coral pink Cottage Door Chalk Mineral Paint. I used my water mister to wet the paint again and then dabbed at it with a scrunched-up shop towel. 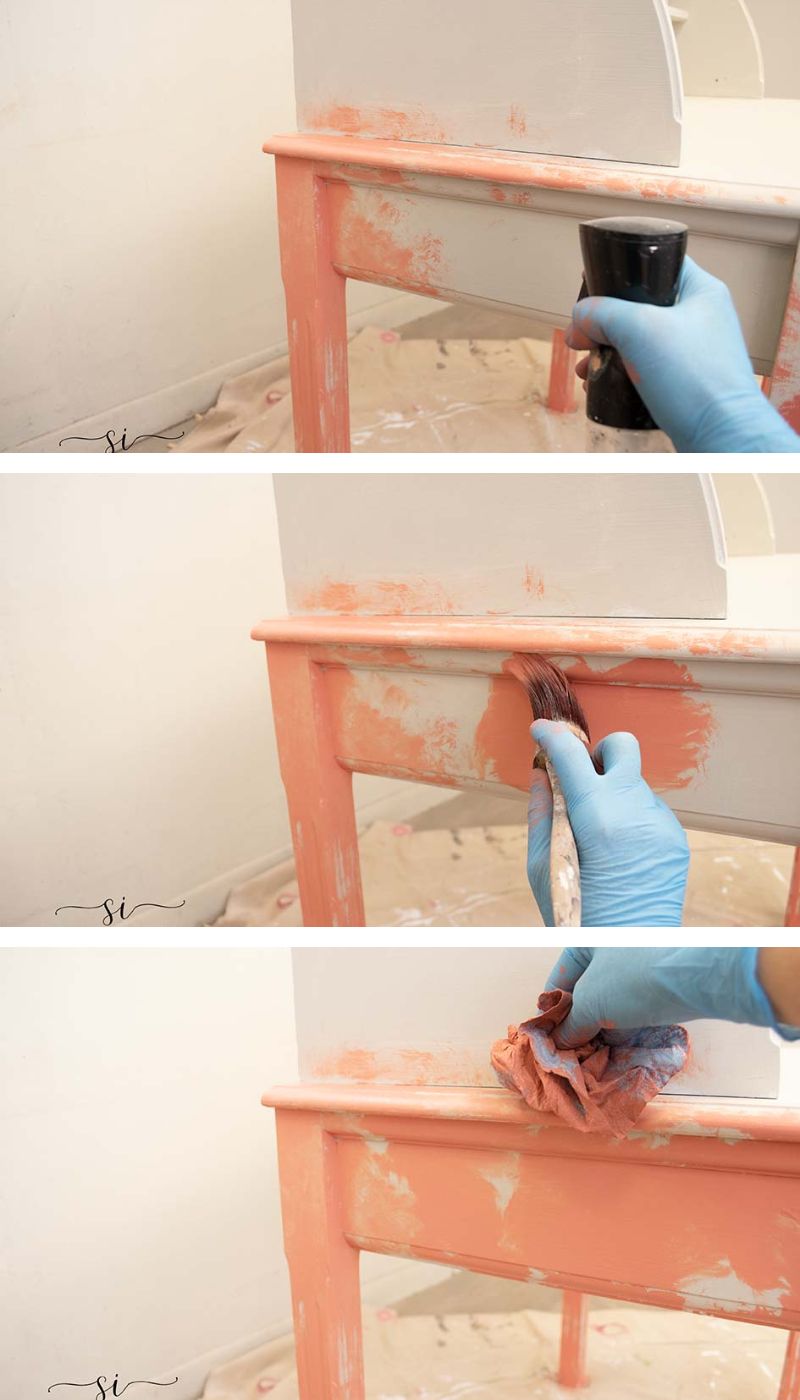
I did the same thing using the lighter Tea Rose Chalk Mineral Paint until I liked the look. There is no right or wrong way of doing this faux paint technique. Just have fun with it. It doesn’t have to look perfect.
FLOWERS FOR A CAUSE – DECOUPAGE
Now for the fun part!! As I mentioned, Dixie Belle generously sent me this Breast Cancer Awareness Decoupage Paper – “Flowers For A Cause”. It was the inspiration for this pink desk. It’s such a beautiful floral design and reminds me of vintage wallpaper!
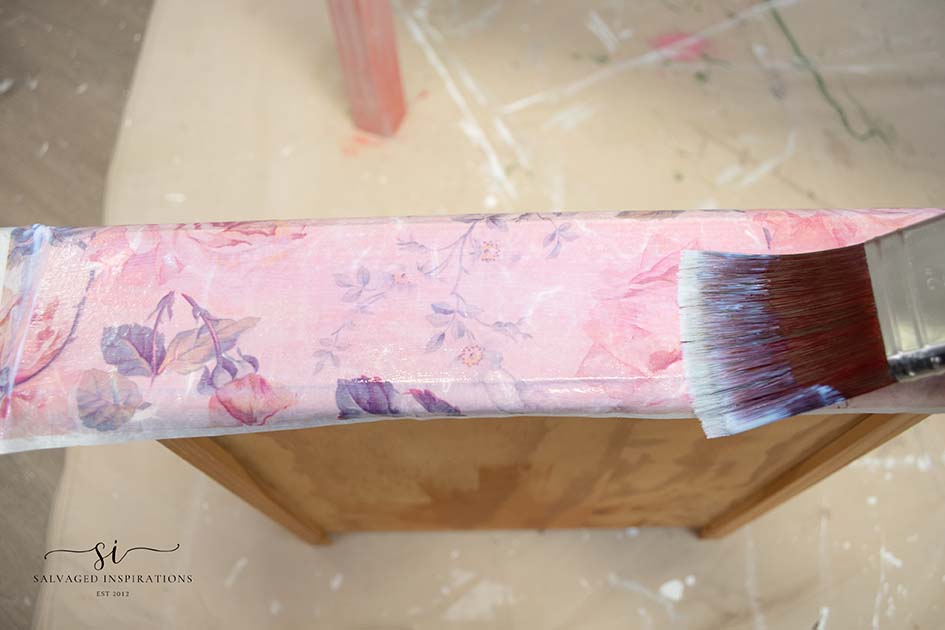
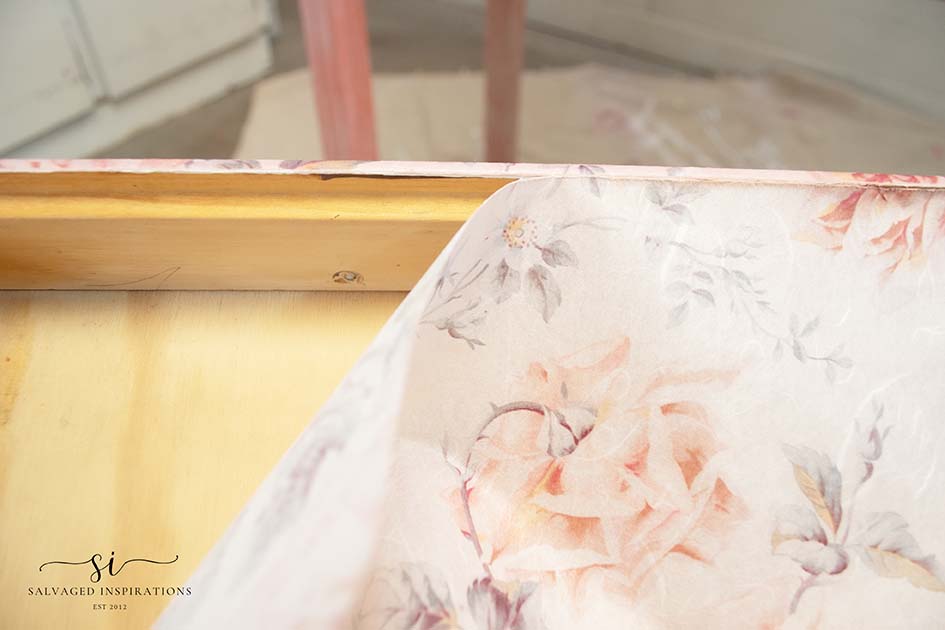
To apply this decoupage paper, I brushed a Satin Clear Coat onto the drawer. Then I laid the decoupage paper over the wet topcoat positioning the flowers exactly where I wanted them. I pressed the paper down onto the drawer making sure there were no creases and wrinkles, and then brushed the topcoat right over the decoupage paper.
No cutting is required to get a perfect edge. I wrapped some 220 grit sandpaper around a wood block and sanded the edges of the drawer.
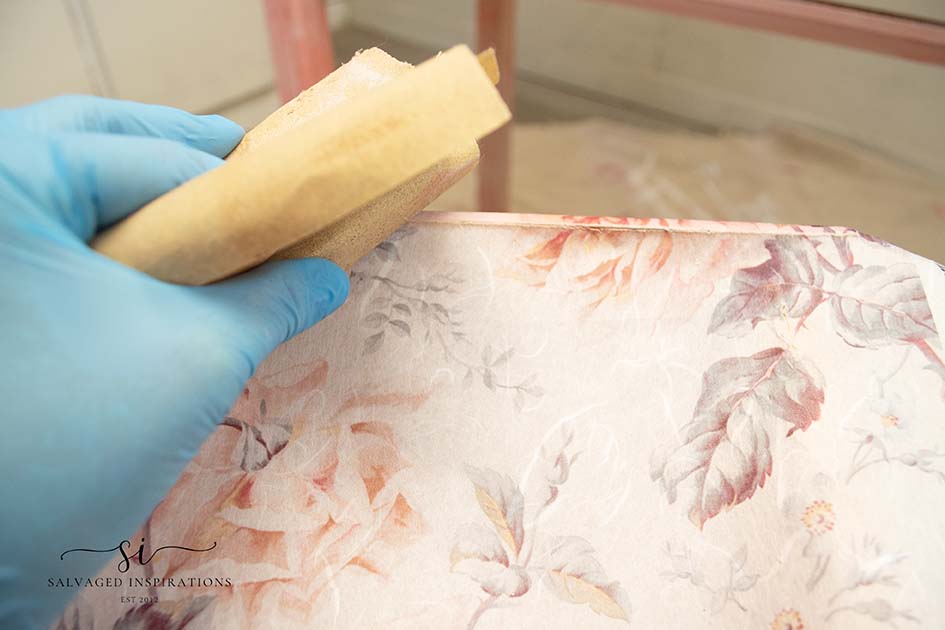
The decoupage paper cuts nice and clean for a perfect edge.
TOP AND TOPCOAT
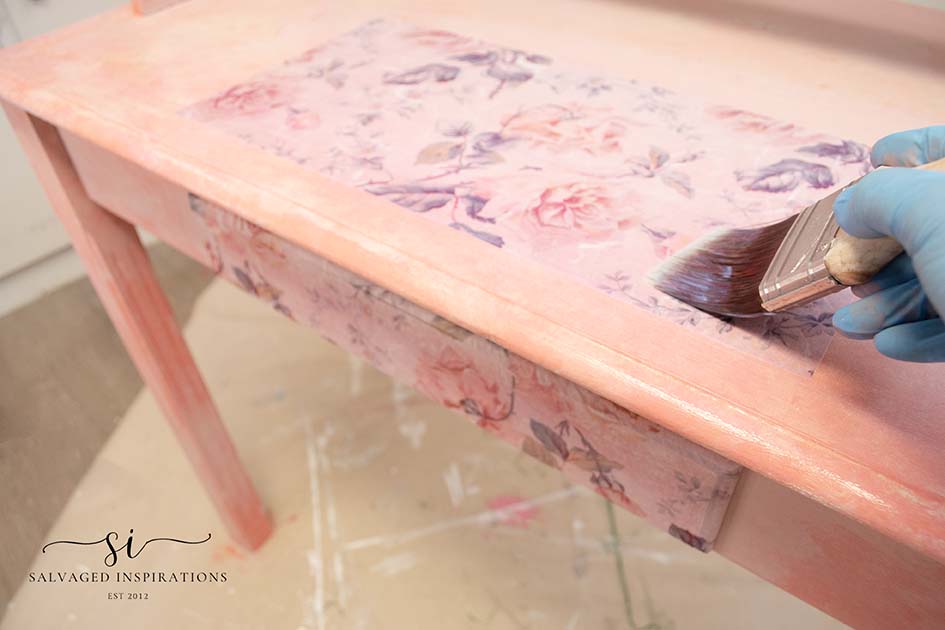
This leftover decoupage paper was too pretty not to use so I created a ‘writing-pad’ area on the top of the desk. I applied it the exact same way as I did the drawer. And then to protect the rest of this desk, I used the same Satin Clear Coat. It brushes on nicely and gives a satin-flat finish with durable protection.
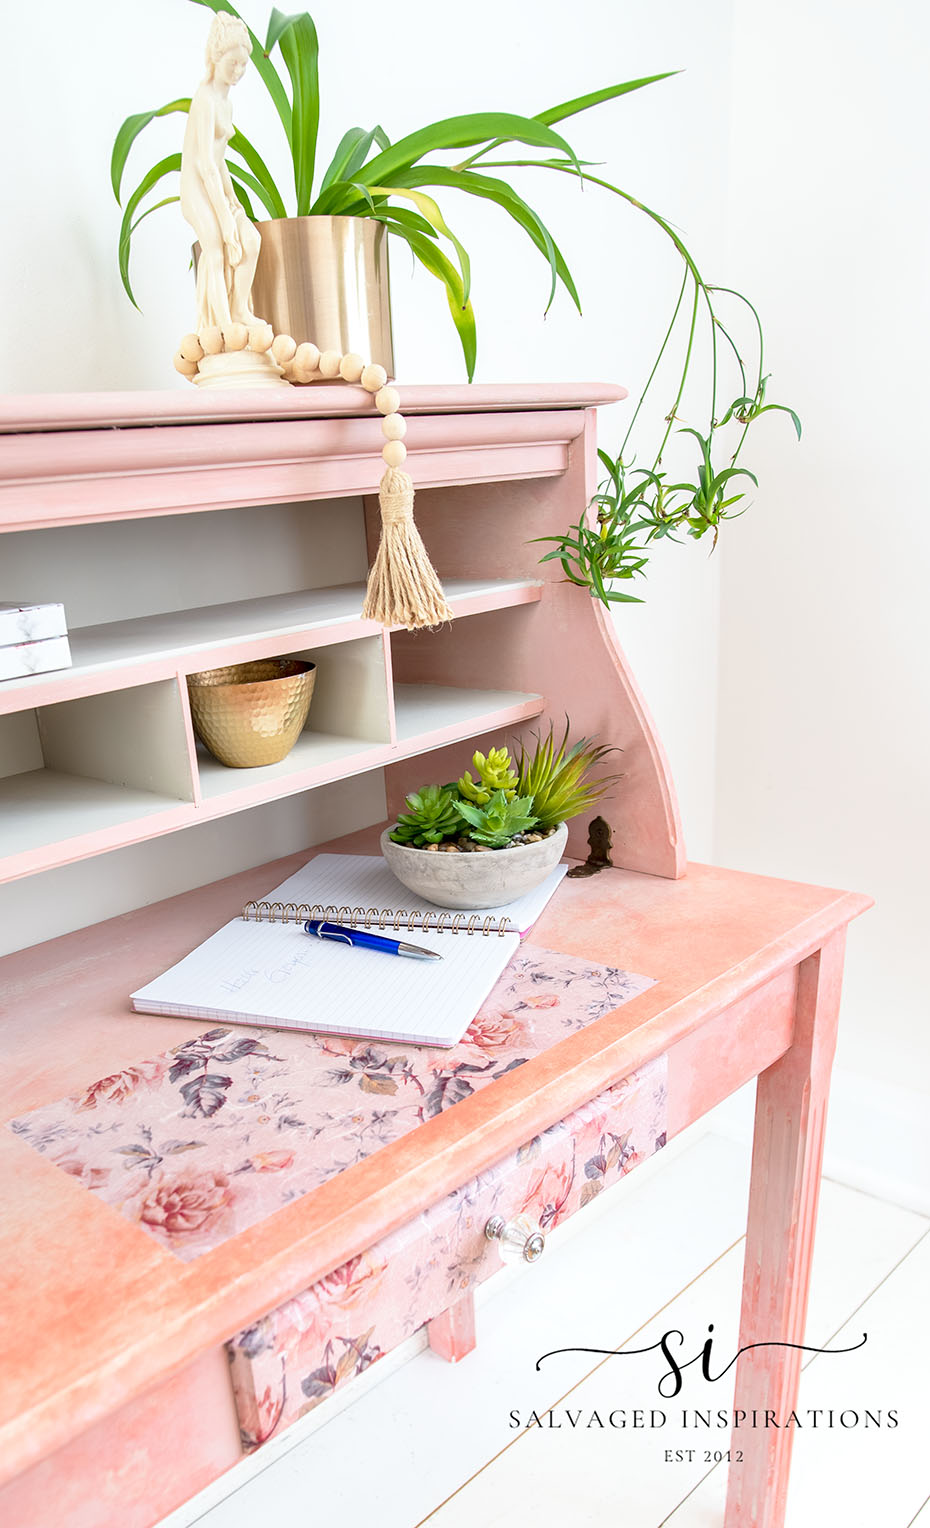
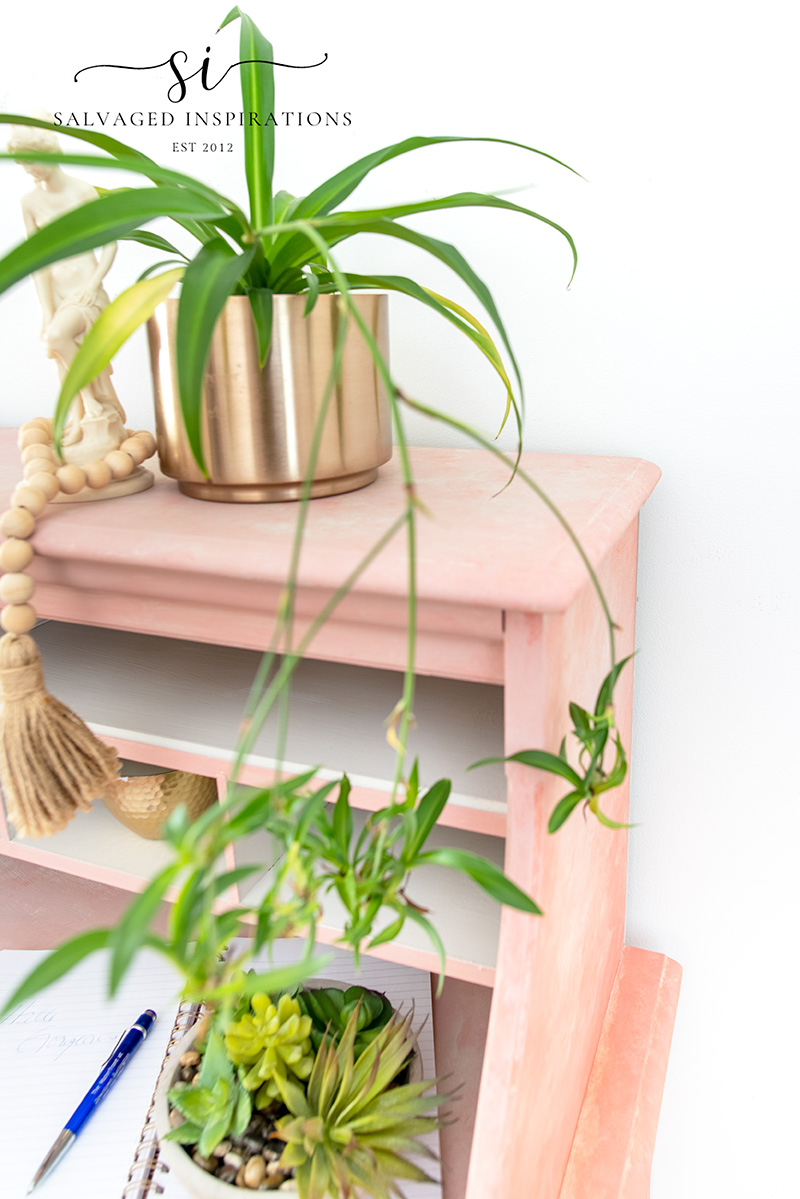
FINISHED DESK AND HUTCH
Here’s the finished look. What do you think?
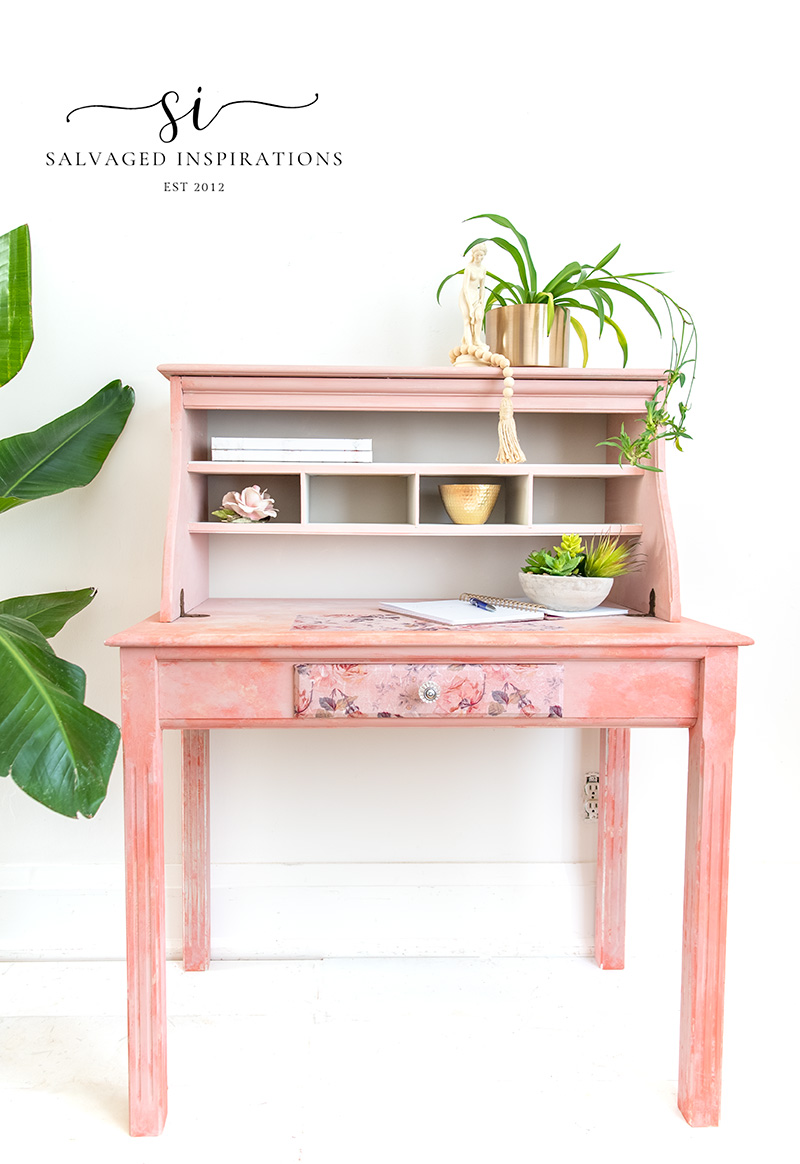
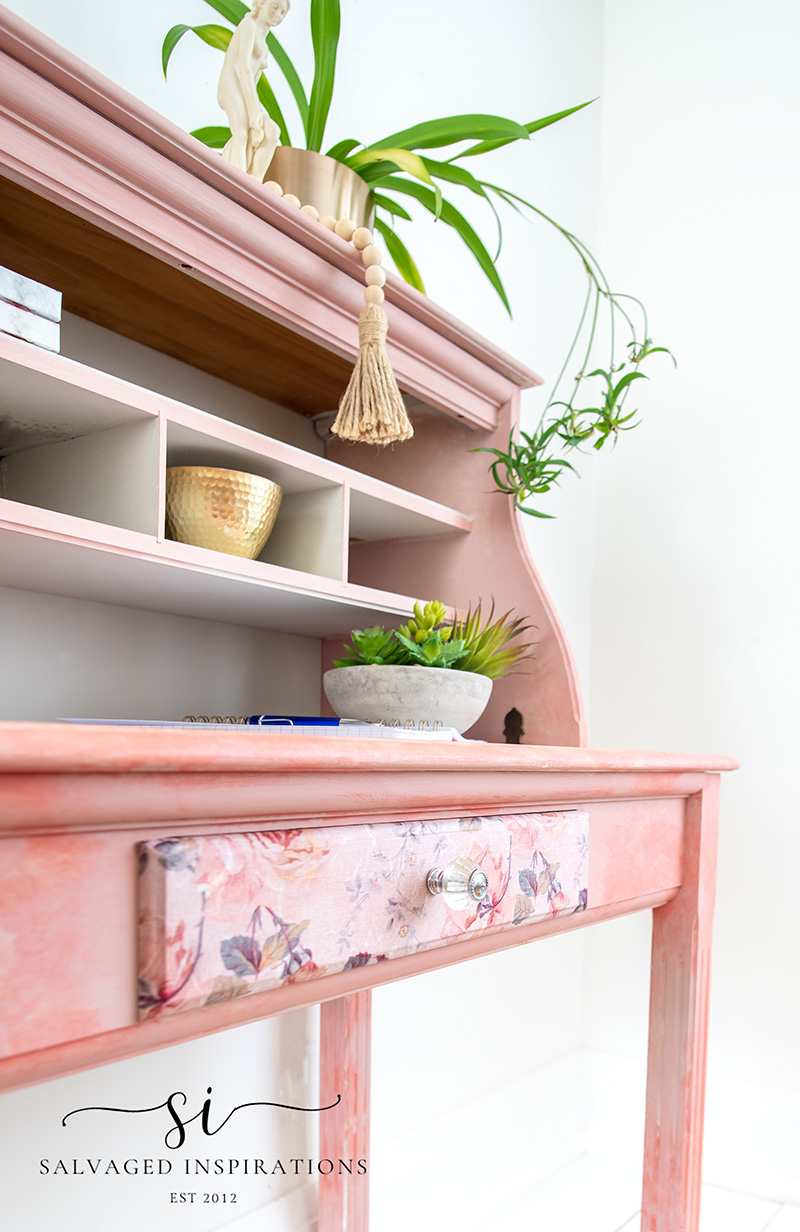
I attached the new backing painted in Sawmill Gravy to match the cubby holes.
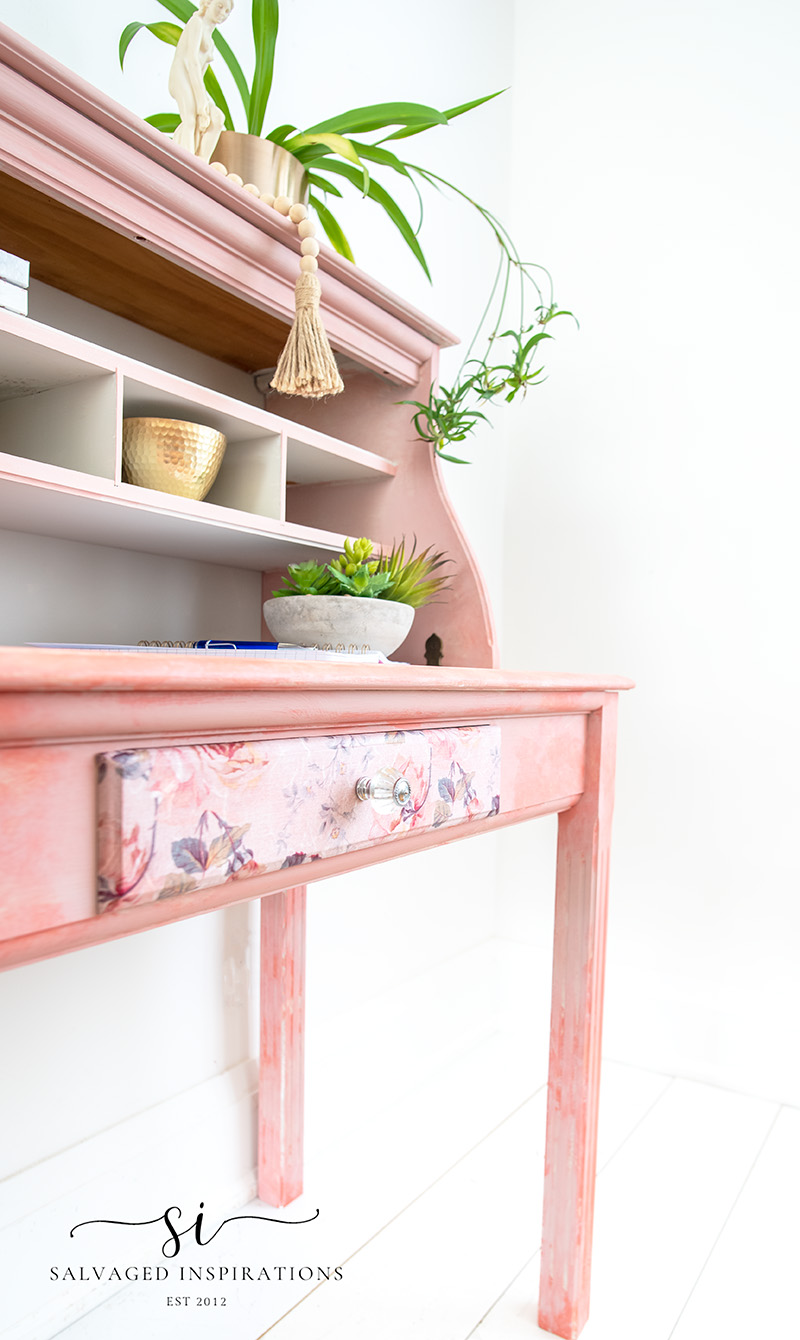
The little floral writing pad area is super sweet and cute!
Here’s the top that was repaired with Bondo. You’d never know, right?!?
And here’s another look at this gorgeous floral drawer. I’m not going to lie, if I had a few more sheets of this decoupage paper, I would have gone crazy with it… half the desk would have been covered! 😉
YOUTUBE TUTORIAL
Here’s the full step-by-step video tutorial on my YouTube channel. Our #siyoutubefamily is already a community of 41.1K so don’t forget to subscribe if you haven’t done so already! So exciting, thank YOU! 🙂
And now for some FURNITURE FIXER UPPER FUN!
You’re going to LOVE what my creative FFU ladies do! 🙂 Below are the BEFORE photos. Visit the links underneath to see the amazing AFTERS and learn how they did it! I’m heading over to take a peek as well! x
It saddens me to say Jen from Girl In The Garage has stepped back from the FFU tour. We wish her all the best… and the good news is we still get to see all her creativity on the second Tuesday of every month for the Trash To Treasure Tour!! 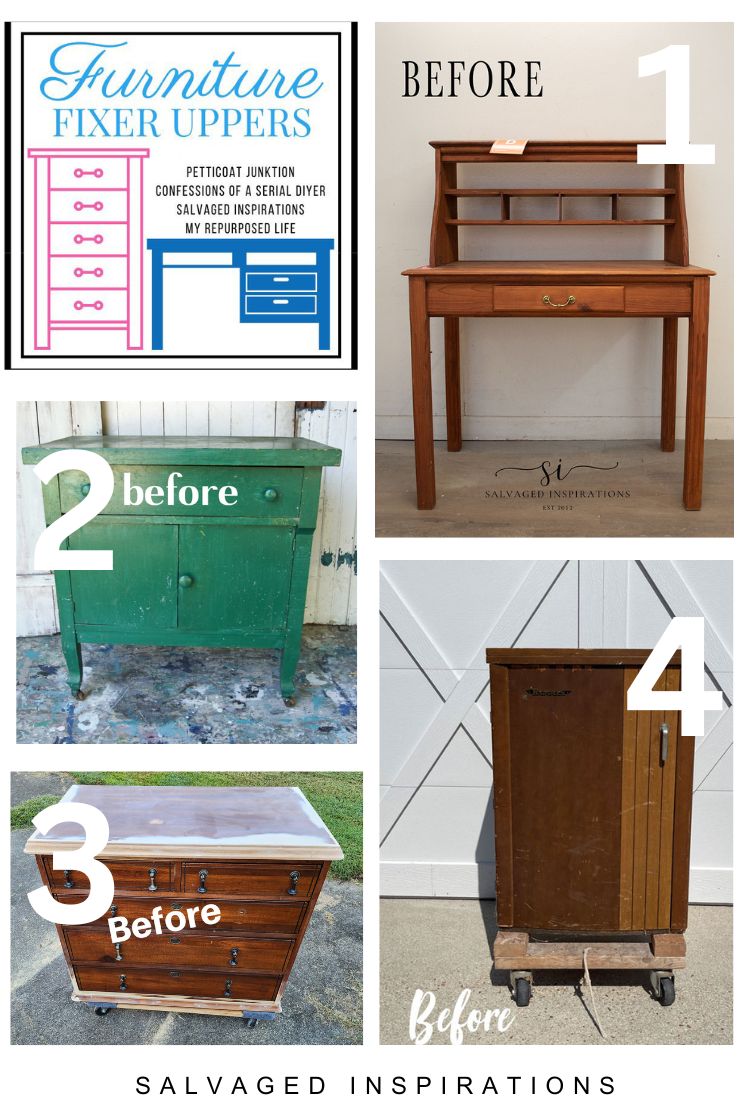
1. SALVAGED INSPIRATIONS (HAPPY YOU’RE HERE!)
2. PETTICOAT JUNKTION
3. MY REPURPOSED LIFE
4. CONFESSIONS OF A SERIAL DIYER
Here’s another look at this chalk-painted thrift desk with ‘Flowers For A Cause’ before and after. I hope it has inspired you and has given you some DIY ideas.
And before I leave today, I want to thank everyone who took part in last Tuesday’s $250 Dixie Belle Giveaway Tour. I had so much fun and I hope you did too! The winner (Angee C.) has claimed her prize — CONGRATS to her!
LET ME KNOW WHAT YOU THINK OF THIS DESK MAKEOVER OR FEEL FREE TO ASK ANY QUESTIONS YOU MAY HAVE… I ALWAYS LOVE HEARING FROM YOU. IT MAKES MY DAY! 🙂
Happy painting my friends!
Denise x

I’ve searched and searched for the Flowers For a Cause decoupage paper you used but cannot find it. Any idea where to purchase it? Thanks Denise!
Hi Sue! I believe they printed a limited amount and they are temporarily out of stock already.😐
When given lemons, make lemonade, is what you did here. Bummer for the primer, but you made it work. Like the 2 colours together too. Great idea on the writing pad area! Turned out sweet.
Yes, you kinda gotta go with the flow…lol. Thanks Tracy! XOXO
Awww, this is such a cutie. The colors match the papers sooo well.
I love the ‘writing pad” idea. You are so creative. Such a nice touch.
This will make someone very happy !
I look forward every week to see your creativity. 🙂
I really hope it makes someone happy and thanks so much P. I love having you here. You always put a smile on my face!🤗
What a pretty desk, Denise! That transfer is just gorgeous. I’ll bet it will sell f-a-s-t! I know what you mean about painting little cubby holes and cubes–NOT FUN!
Sorry you can’t get the shellac. If you are near enough to the US border, could you get it easily?
On your recommendation I tried the Bondo all purpose putty. Boy! Does that stuff dry fast! But it worked like a charm on a very old bench which had been outdoors for several years. Believe me, there were lots of places to patch! Thank you!
Thank Caye! And yes, I’m only about a 30-40 min drive from the Buffalo NY border so I might be due for a cross border trip to your Home Depot!😊 And ya, Bondo dries crazy fast and super hard/durable. Once you get the hang of it it’s a game changer tho. I couldn’t be without the stuff, hehe. 😉
Beautiful makeover, Denise.
The colors and the paper are perfect together. I love that you used the paper for the writing pad.
It’s an awesome project, and I love all of your tips. I need to get some Bondo!
pinning!
gail
I couldn’t be without my Bondo…lol…it’s a game changer. And thanks so much Gail! LOVE what you did with the transfer this month. Looks awesome!!!
This hutch desk is adorable Denise! And thanks for sharing your BIN Primer review.
My pleasure… well kind of😅 and thanks so much! XOXO
I love this paper SO much!! I’ve ordered several sheets of it and it should be here today…can’t wait to use it on something! It was such a great jumping off point for this gorgeous piece! XOXO
I think I’ll order more sheets as well. I wish I had a few more sheets for this project… I would have went hog-wild with it!🤣
That is the sweetest little desk! I don’t care for the uppers on these types of desk too but this one looks great. Beautiful makeover, Denise. Thanks for the helpful review on the stain blocker. I have used this one too and didn’t care for it either. I guess we will just have pay dearly for the good stuff. xo 😘
Good to know it’s not just me that had a little trouble with this primer/stain blocker! I did okay with the roller but horribly with the brush…lol. Thanks so much Do! Enjoy your day my friend. XOXO
It came out really pretty and very boho. Great work!
Thank you Lizzy!💕
Hi Denise. Oh my….I absolutely LOVE how this little writing desk turned out. The beautiful flowered decoupage on the front drawer and on top are the perfect finish. This would be perfect in my granddaughter’s room;). Thank you for your true rating of the BIN 2. Very helpful. I always trust your opinions because you tell it like it is! Beautiful work.
Such a huge compliment, thanks Monique! I think this desk would look adorable in a girls room as well!🌸
Absolutely love your desk makeover. It looks great.
Thank you Linda!🤗
Just adorable! I can picture it in my granddaughter’s bedroom. The colors are a perfect choice for the desk and the decoupage paper? Gotta buy it. You are so talented!
The Cottage Door coral matched perfectly with the coral in the roses, right!?! I’m hoping Dixie Belle shares this piece in their upcoming October campaign for Breast Cancer Awareness. Wish me luck. 😉