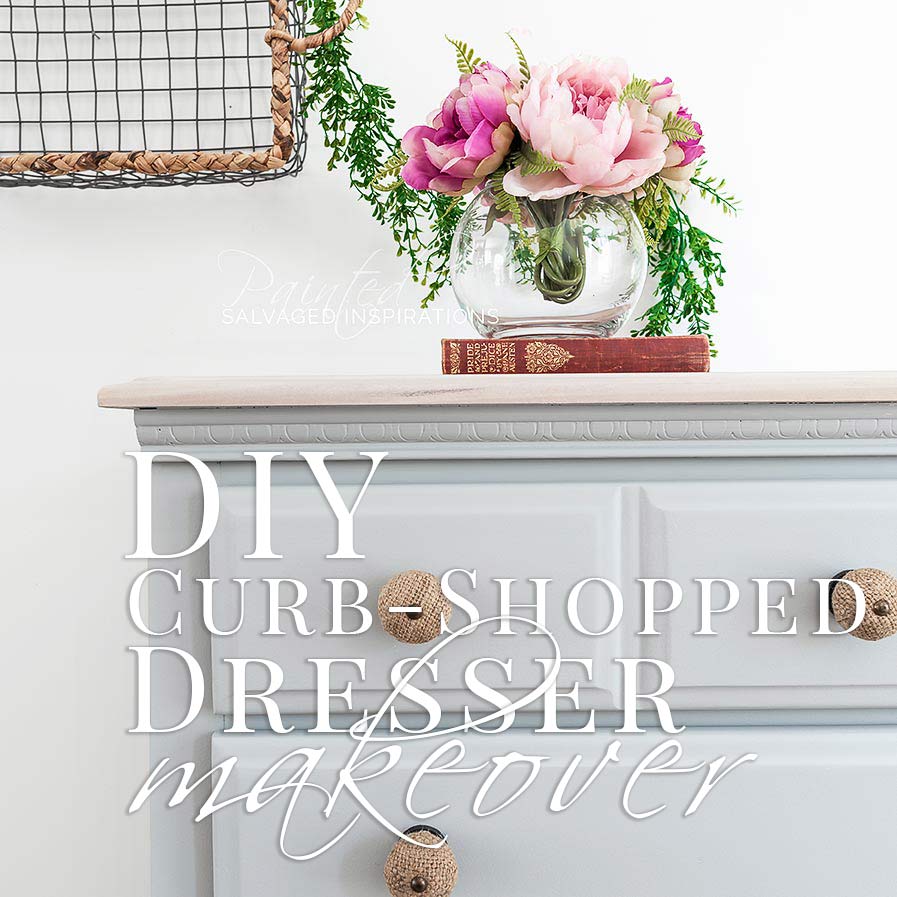
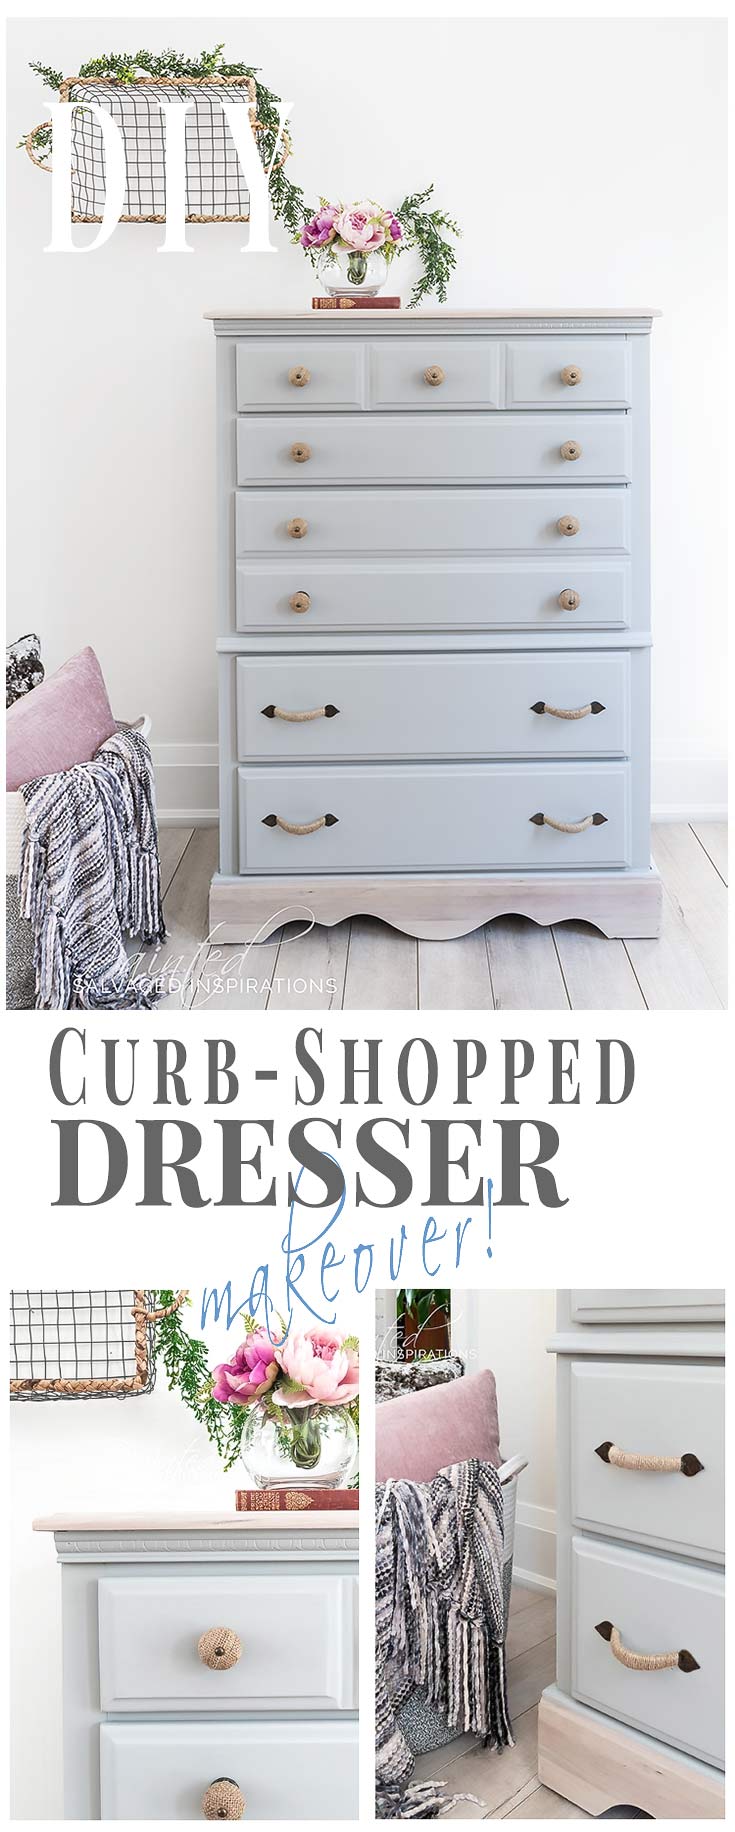
A DIY DRESSER MAKEOVER USING A CURB-SHOPPED 80’S TALLBOY. THIS RESTYLE DIDN’T WORK ON THE FIRST TRY – BUT TAKE TWO IS A MODERN FARMHOUSE HIT.
This DIY Dresser Makeover gave me a hard time and took two takes before I was happy. I worked on it non-stop since Thursday and as my badge of honor for finishing – I have two big blemishes from wearing a sweaty/dusty face mask for so long – no joke.
So here’s what I started with. An 80’s tallboy that was curb-shopped this past summer.
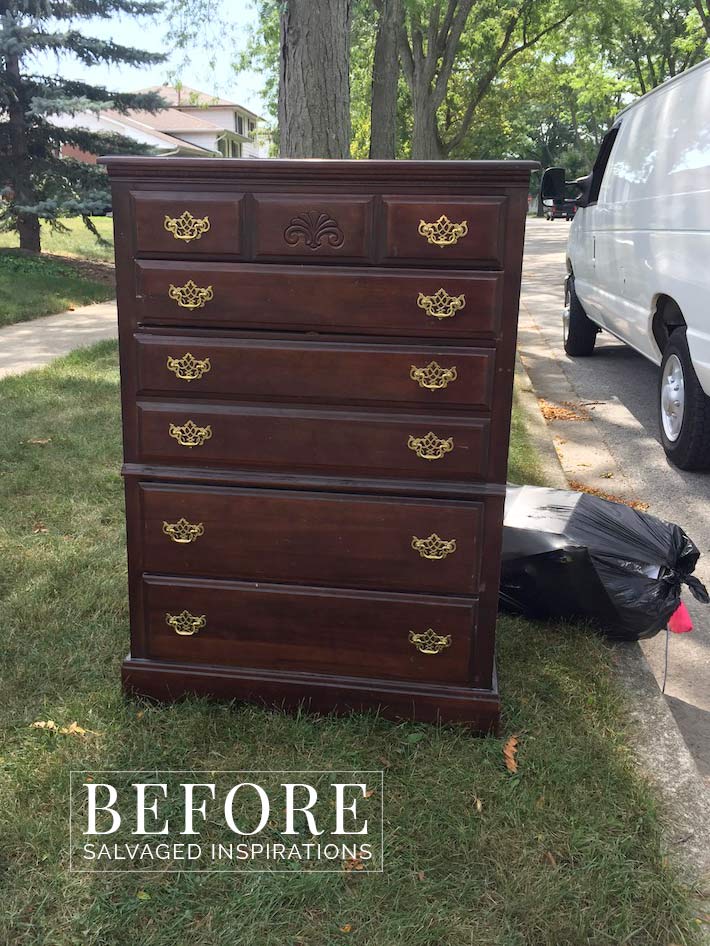
Right from the start, I was unsure what direction to take. If you follow me on facebook, I was asking whether or not to keep the hardware, what color to paint etc. This was a hard piece to get inspired over and it’s a lesson that keeps coming up for me. If I’m not excited or inspired with a piece, leave it until I am!
Here’s take one, my first attempt. My sister took one look and said – “DO NOT POST THAT!” … but I’m sharing anyway: please don’t PIN this though… lol.
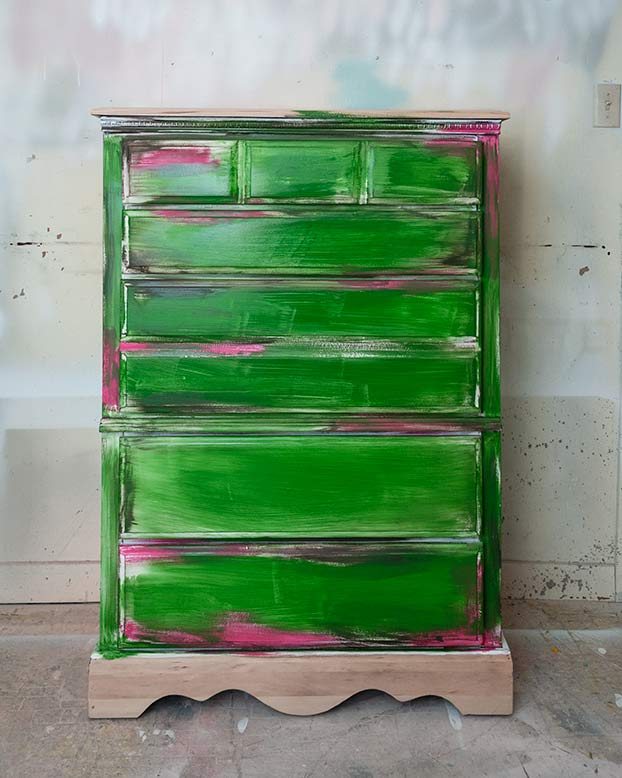
After all this scary was sanded back, it was a custom soft gray and textured hardware that saved the day.


THIS POST IS SPONSORED/CONTAINS AFFILIATE LINKS TO PRODUCTS I USE. YOU CAN SEE MY FULL DISCLOSURE HERE.
SOURCE LIST::
-
- Curb-Shopped 80’S Dresser – SALVAGED
- Bondo [All Purpose] + Putty Knife
- Sponge + Water + Shop Towels
- Sandpaper + Tack Cloth
- Dewalt Sander
- BIN Shellac Primer
- Paint Brushes
- Driftwood Chalk Mineral Paint
- Cotton Chalk Mineral Paint
- Clear Wax
- Satin Clear Coat
- Burlap Hardware
80’S Tallboy DIY Dresser Makeover::
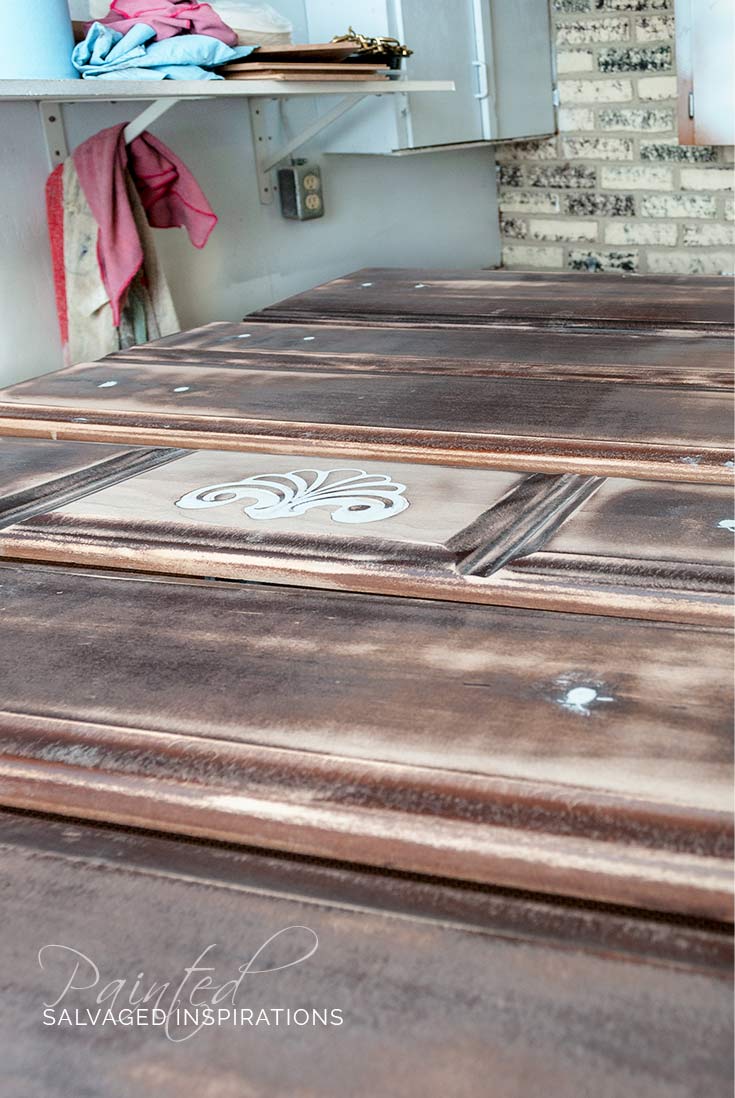
Step #1:: Clean – Sand and Fill
After I gave this piece a really good clean and sand, I filled the dated motif and old hardware holes. If you’re new to the #siblog, I prefer using this Bondo rather than wood fill. It dries really fast. Within 10-15 minutes it’s ready to sand and prime so it saves a ton of time.
Step #2:: Prime
After I sanded down my first messy makeover, I sealed all the bleedthrough and dark green with this BIN Shellac Primer.
Step #3:: Paint
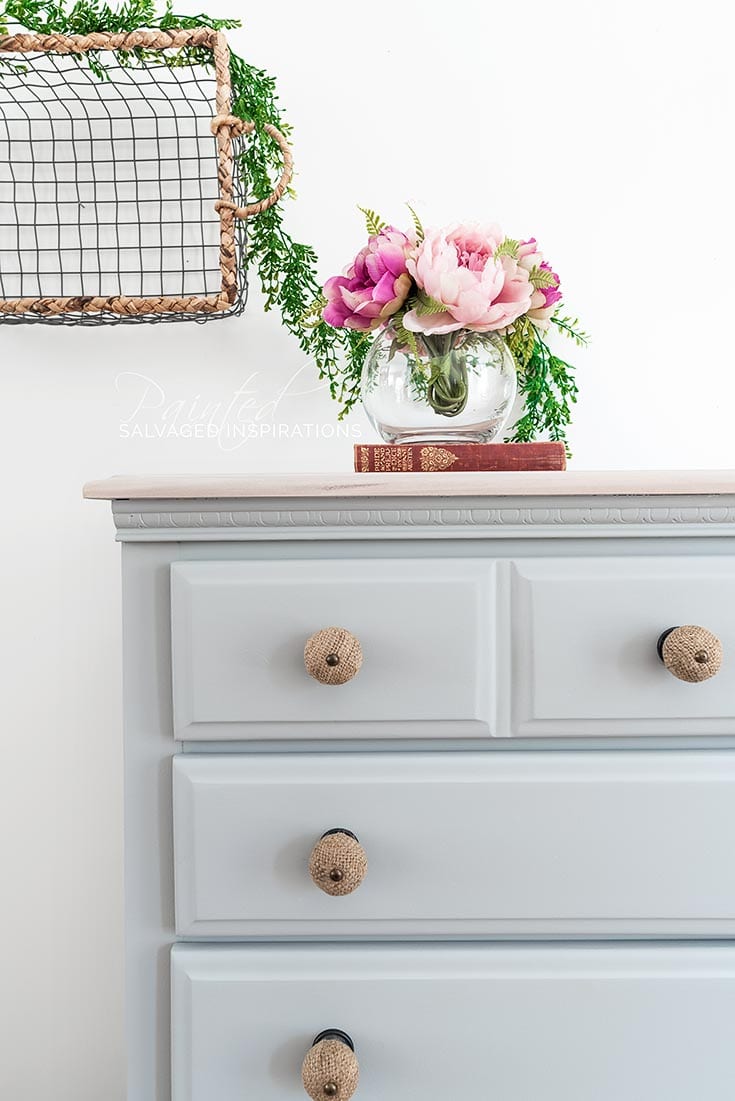
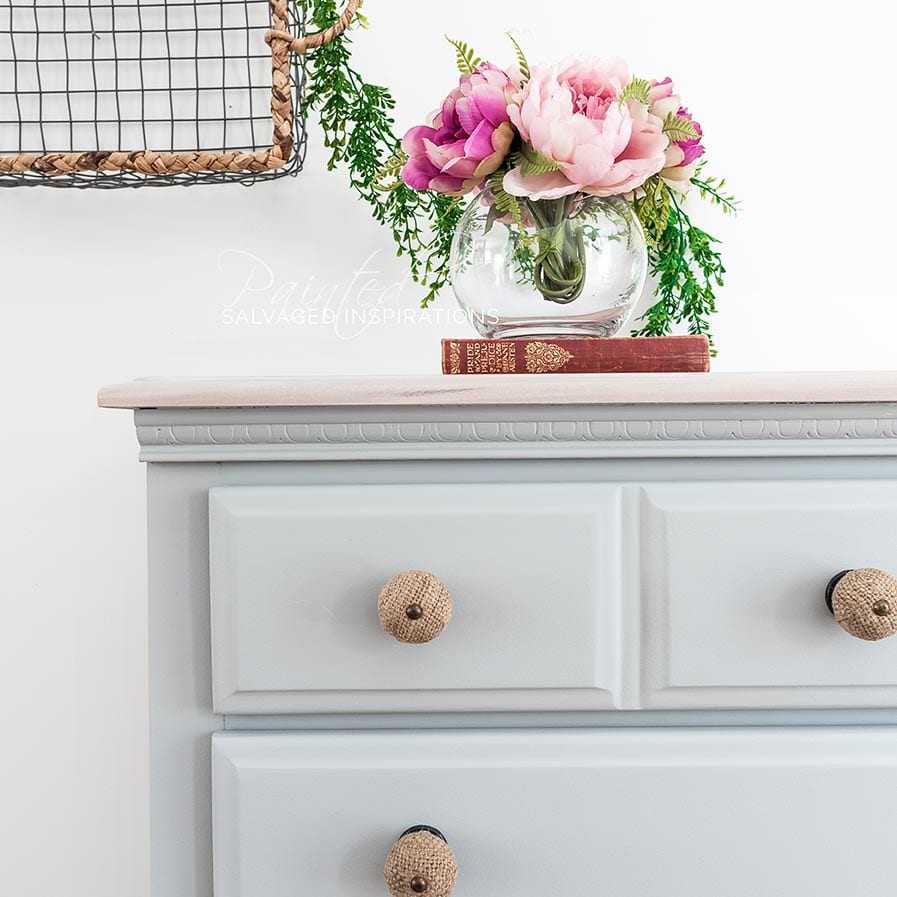
I made a custom blend of Driftwood and Cotton. 3/4 Driftwood to 1/4 Cotton. It’s a beautiful light gray with soft blue undertones that gives a gorgeous modern farmhouse finish.

Step #4:: Whitewash Wood
For the bare wood on the top and bottom of this dresser, I used a whitewash made with Cotton and water. I used this whitewash technique here.
Step #5:: Seal and Protect
For the whitewashed top and bottom I top coated with this Satin Clear Coat and for the painted body I used this clear wax.

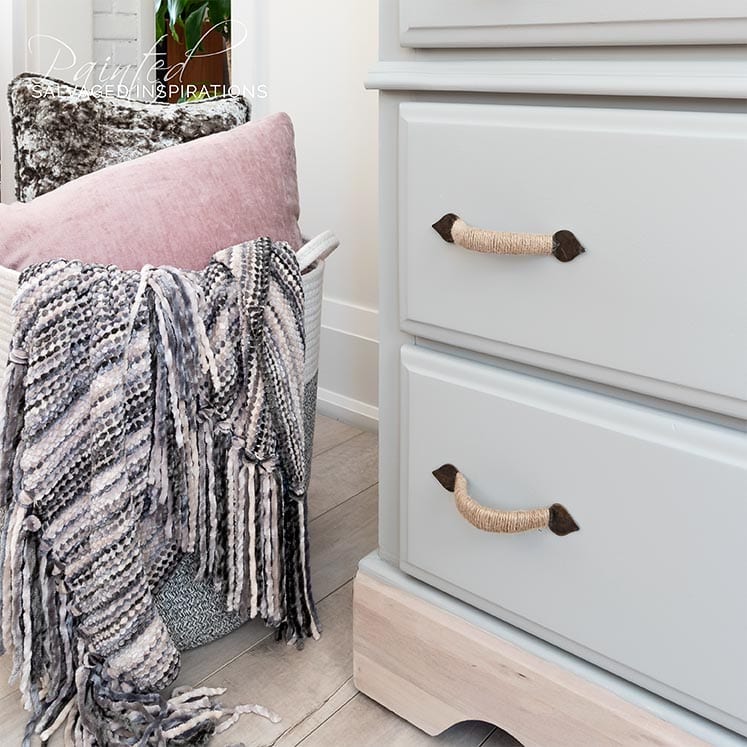
And to finish off this modern farmhouse look, I used burlap hardware to add texture and tie in with the exposed whitewashed wood. What do you think?

Even though my first attempt was kind of scary, it’s fun to try new color combo’s, paint techniques and creative ideas. They won’t always be a hit, but paint fixes everything! 🙂
HAVE ANY OF YOUR MAKEOVERS TAKEN TWO OR MORE TRIES? FREE TO CHIME IN… I ALWAYS LOVE HEARING FROM YOU.
Happy furniture painting my friends!
Denise x
RELATED POSTS::
Weathered Gray Stain | DIY RH Finish
Some Bad Takes and Some Good Advice
Annie Sloan White Wax | Desk Makeover
How To Whitewash Wood Furniture
Stop Bleed Through When Painting Furniture
PIN AND SHARE!

OhOhOh,,, Sometimes things just go south ! I am so glad you shared it tho. We have All been there.
But your persistence took it to a whole new level of calm and so pretty. 🙂
LOVE the new hardware. Love the new color. – which is so elevated with the new hardware.
Beautiful recovery. It’s why you are sooo good at this !
awww, thanks P and we have all been there! I keep reminding myself it’s just paint and to have fun because it can always be repainted! Have a super week my friend. XOXO
Amazing transformation Denise!
Thanks so much Lynn! 🤗
Sometimes you just have to let loose! So glad you didn’t listen to your sister and shared this. Your second take is so much more ‘you’! Love the burlap hardware; where did you find those?
Hi Sara!!🤗 Yes, second take is much more me…lol. I found the burlap hardware at HobbyLobby when Andrea and I went cross border shopping.
Hmmm, the original dresser was so in-your-face masculine it was probably hard to see around it. No wonder you obliterated it with those colors.
The end result is much more neutral and safe and pleasant. Well done.
….”No wonder you obliterated it with those colors” 😂😂😂 Yes, exactly… I’m going with your train of thought Mary! Thank you! XOXO
You know what? I could see Take 1 in a very specific setting – like a punk-themed industrial loft, so I wouldn’t say it was a complete failure. Maybe slap some rivets on there and some pipe-themed drawer pulls and you’d be golden! Haha! Seriously, though, that doesn’t really seem like your style, and Take 2 is very lovely.
Ya, I don’t know where I was going with that first take but it would have needed rivets and pipe to cover the whole darn thing!!!🤣 your very kind Jacqueline, thank you! Hugs
Looks like we’re twins, this is the only other dresser I’ve found on the internet like the ones my family has had for years and I’m fixing up mine as well!
its probably unlikely, but would you happen to still have the old handles to the dresser? they’d be helpful to us as some of ours is broken.
I might, I’d have to check my inventory. Where are you located?
Absolutely beautiful! Thanks for putting the picture of the green one, it’s always nice to know I’m not the only one who starts a project and then stands back and goes, “What was I thinking???” I was curious about the bottom piece, I couldn’t tell from the before photo if that was the same piece or did you change that piece at all? Again, great work. Love the color and hardware choices.
Thanks so much Beth and the bottom is original to the piece – nothing was changed other than it was sanded back and the wood was whitewashed. And ya, I’ve had my fair share of “what was I thinking” moments. 🙂
I love that you weren’t afraid to go bold with the first try, but the softer look is perfection! It doesn’t even look like the original dresser! Beautiful work as always! XOXO
A little toooo bold…LOL. 😉 Thanks so much, Christy! XO
Denise, just a lily note the link to DB
Paint colors is broken.. comes up the same for for both colors.. hope you don’t mind me saying.
I so appreciate you saying, Roseann! Fixed – thank you! XO
Hi Denise. Thank-you for sharing ALL your re-do’s of this dresser. Your honesty and straightforward blogs are what make you stand out and the reason I LOVE following you. The final product turned out amazing. A beautifully stunning dresser that I would love to have in my own home. Impressive transformation, as always:)
Thanks Monique! You always make my day, that’s very sweet. XO
I’’m head over heals for this piece.
Take 2 is perfect! I must tell you, take 1
Made me feel good.. that took courage
To post. Denise, you rock everything you do.
Give your self a pat on the back.
You are by far my fav. Blogger
Roseann, thank you SO MUCH! This comment made me feel good! I’m glad you like the take 2 🙂 and ya, I just want everyone to see that when you’re trying new colors, techniques, styles etc, it doesn’t always turn out like you envision it. But the upside – it’s fixable! 🙂
I definitely like the 2nd edition best! I’ve never seen hardware like that! Too cool! Daughter is remodeling leaning toward beachy, peaceful things & colors. This hardware would sure fit in! Gotta tell her! I’m kinda at a geographical disadvantage for selling refinished items. Do u mind if I ask where u sell most of yours? Love love love everything I’ve ever seen from u! U are definitely an inspiration!
Hi Tammy and thank you! Here’s an article I wrote on pricing/selling your furniture that you may find helpful. For my furniture makeovers, I often get inquiries through the blog and/or social media, and I also post online Kijiji/Craigslist etc. 🙂
Your sister loves you very much. 😀 But I’m glad you posted the first attempt – I appreciate your sharing that. And like everyone else, I love the final result. So serene, and the hardware is perfect. Glad you rescued that dresser and gave it a new, beautiful life!
Thanks for saying so Marcia and yes she does! 🙂 But I’m glad I posted the first attempt too — even though its a little uncomfortable to do so. XO
I’m also working on a similar style dresser that gave me some grief. I couldn’t agree more, Denise, about waiting until inspiration strikes before starting work on a piece. Learned that lesson yet again with my dresser. The custom blue color is beautiful, especially paired with the whitewash top and skirt. The gorgeous hardware ties it all together.
Thanks so much, Marie and ya, it’s a lesson that keeps beating me over the head…lol! I can’t wait to see your dresser makeover.
Beautiful final product! I have a question for you and/or anyone else that uses Hobby Lobby knobs. Do you cut off the excess “screw/bolt part” so that you don’t have such a long piece sticking out on the inside of your project? If so, what do you use to cut it?
Hi Kim! Thank you and great question! I have this Klein Tool Cutter that I use to shorten really long screws when need be. I’ve also seen many furniture painters just leave them be so I guess its a personal preference. 🙂
Wow! This turned out so beautiful!
Thanks Rosemary! 🙂
Here is why I am glad you shared your oops: some people would see something like the curb and keep driving. You have shown what can be done to something that starts out as someone else’s (or your own) mistake.
The end result is beautiful!
I don’t know Patricia. If I had seen this as the green and pink dresser sitting curbside, I might have hit the gas LOL 😉 All kidding aside, thank YOU! x
PS Where DIDI you get that wonderful hardware??
I found these great handles and knobs at Hobby Lobby! 🙂
Beautiful and the timing is perfect as I just started a thrifted dresser that is giving me some grief! The grey and driftwood are a stunning combination but it’s that hardware that gives it the perfect “”zing”. Thank you so much for sharing and yes I’ve had a few of those not so great first attempts. Don’t think I’ve ever gone as far as that green and pink combo though – interesting choice 🙂
I had a vision Barb! The green and pink weren’t complying…lol. And ya, sometimes project feel like they are fighting you every step of the way and then others flow and are soooo easy. Funny how that works, right!
Hello, Denise!
The piece turned out very pretty. Understate elegance, I call it. My question would be, what were you going for with the first attempt? I was thinking that the random colors might have been some sort of sealer, filler, or the base coat of something. But I’m guessing you just had a Jackson Pollock moment!
Thanks! Josh
Hi Josh, have you been reading this blog for years!? I’ve mentioned Jackson Pollock here and here but no…lol… it wasn’t a Jackson Pollock moment (although that sounds much more interesting) it was just bad judgment. I like your “understated elegance” descript btw. 🙂
That’s funny! I’ve been looking at the blog off and on for about a year (I love it!), I haven’t, however, noticed any Pollock references, but I will be checking out those links!
That’s too funny!!!! Great minds 😉
Just beautiful! The gray is a great neutral and the handles add some distinction.
Thanks so much, Barb! xo
Another home run! I’m glad you posted your first attempt in spite of your sister’s advice.. I think that makes the finished product even more of an inspiration. It’s absolutely beautiful!
Gotta share with my SI Family! 🙂 Thanks so much, Laura. Glad you like it. 🙂
That is a seriously amazing transformation! Love it 🙂
Thanks so much, Linda. Appreciate it! XO
Whoops. Just found them on Etsy. Love them.
Hobby Lobby AND Etsy! 🙂
It turned out beautiful in the end. Thanks for posting the GREEN giant. It gives me direction not to stop working on something when I think it is a mess. I also like that you showed the design being covered up with filler. Makes the piece look so much better. I teaches me not to shy away from something with a design, and that it can disappear.
Thank you! 🙂 lol…it was like a green giant Julie! 🙂
Hey Denise:
That first try was pretty scary. LOL. Love the second make over. Did you fashion those pulls yourself? Looks like a great idea.
Scary, right!!! No, I didn’t make this hardware but YES, I’ve seen some DIY’ers [on Pinterest] that have wrapped jute twine around hardware and it looks great! These were bought from Hobby Lobby though. 🙂
Beautiful work, as always, Denise! And thanks for sharing the ‘ugly’. Reassuring to know you don’t always get it right on the first try.
Hi Jeannie! Thanks so much and ya, there have been quite a few makeovers that test me. 😉
By the way, the finished dresser looks AMAZING!
Thanks a lot Karen! 🙂
Beautiful!
Thanks Patricia! x
Thanks for keeping it real and showing everyone that we all have our ‘moments’ ! And if we just keep moving forward, it can all be fixed… it’s only paint after all!
K
Hi Karen! Exactly. It’s only paint. 🙂 Although I know when you put in time and effort painting and it doesn’t turn out on the first try, it can feel discouraging. Every time this happens (and I’ve had my fair share!) I always learn something new though. In this case – I really don’t like strong greens and pink together.
Looks beautiful! I love the hardware – did you purchase them or make them yourself?
Thank you Kathy! And the hardware was purchased from Hobby Lobby. 🙂
Thank you for sharing your take one, Denise. The take two is perfection. That color is amazing and those handles and knobs are charming. Where did you find them if you don’t mind me asking?
Thank you Nicki! Glad you like it and the hardware was bought from Hobby Lobby. Love shopping there when they have their 50% off hardware sales! 🙂
LOVE it! So peaceful to look at!
Peaceful… I like that! Yes, the color is soft and soothing. XO