Have you ever wondered what to do with those leftover craft supplies? Those little bits and pieces that look too good to throw away but seem too small to do anything with?
A few weeks back I shared this Dark Romance Furniture Makeover with you. It was restyled with a ReDesign With Prima Rub-On-Transfer [GIVEAWAY ALERT…so be sure to read to the bottom of this post!] and there were a few tail-end extras. My sister came up with this brilliant idea of a DIY Painted Globe using Furniture Transfers!
I love this idea because we’re always checking out the pretty globes at HomeSense, Etsy, and Anthropologie… so making a DIY replica with leftover supplies was exciting.
Luckily, we already had a few of these old-school globes on hand. I’ve noticed that thrift store globes are getting up there in price. You used to be able to pick them up for a couple of dollars. Now I see them selling for between $30-$40 at Goodwill… whaaaat?! I guess with the popularity of globe art (and there are some stunning examples – just check out this Etsy artist here), prices are bound to rise.
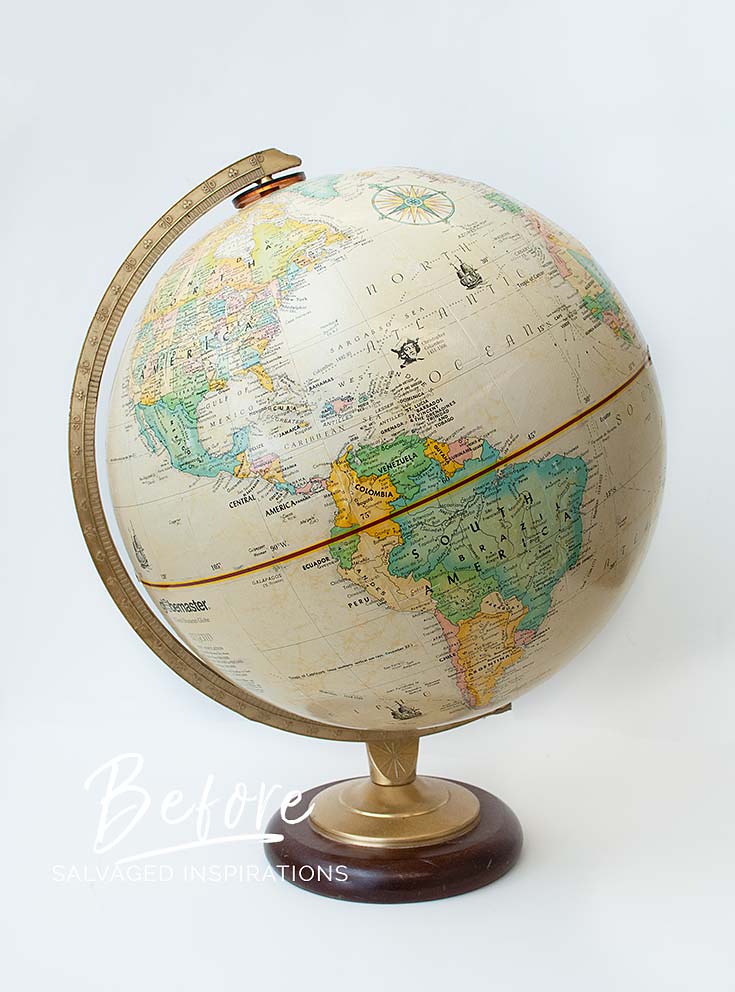
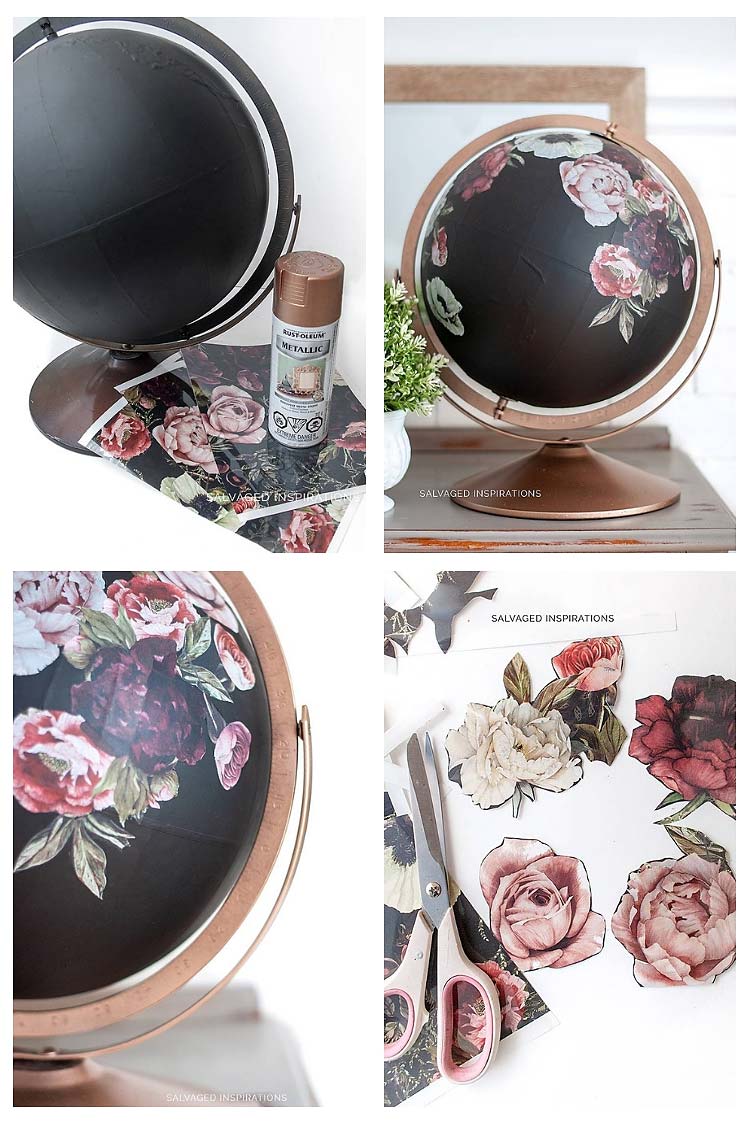
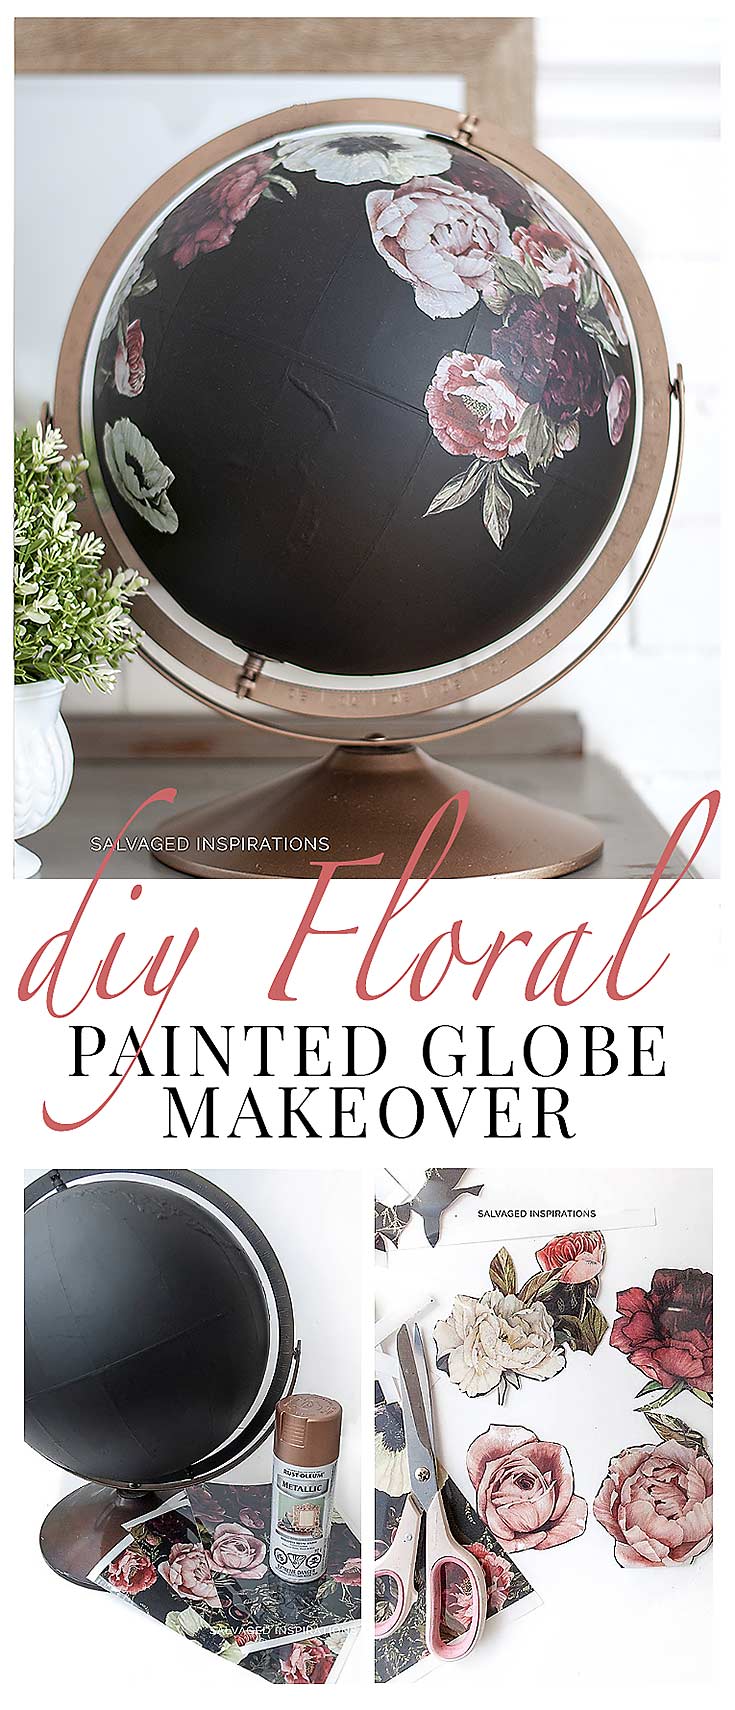
Here’s what we started with – well sort of. I forgot to take a picture of the globe before I painted it black so this is the exact same globe with a different base.
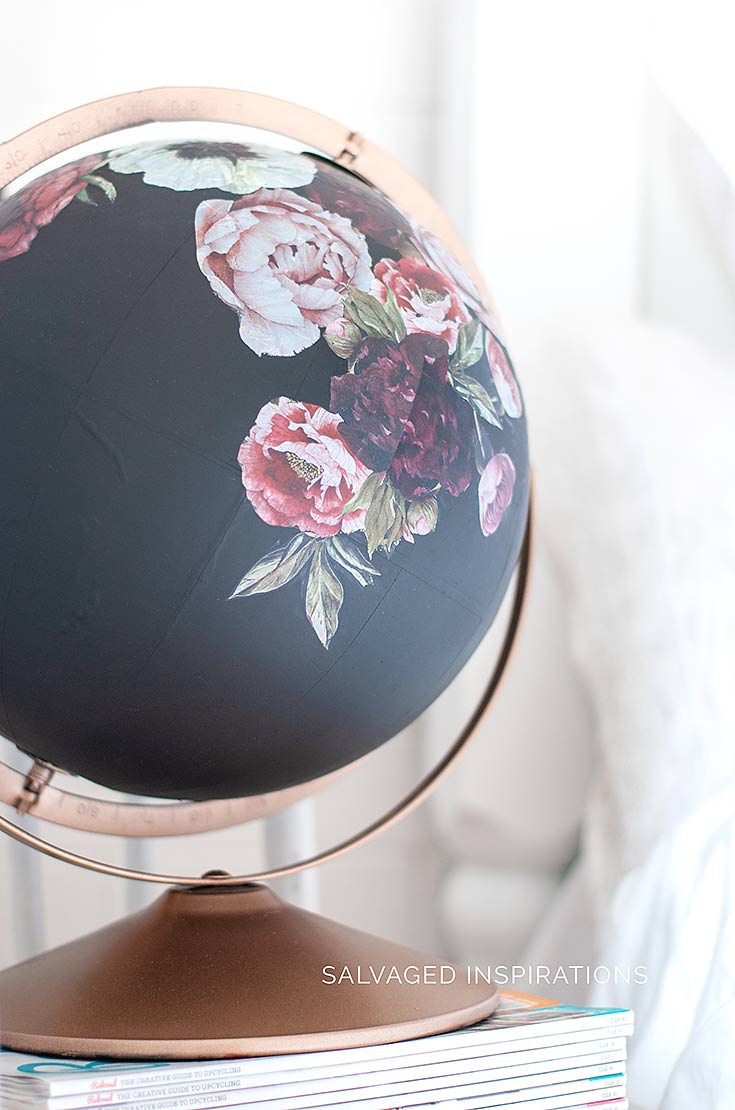
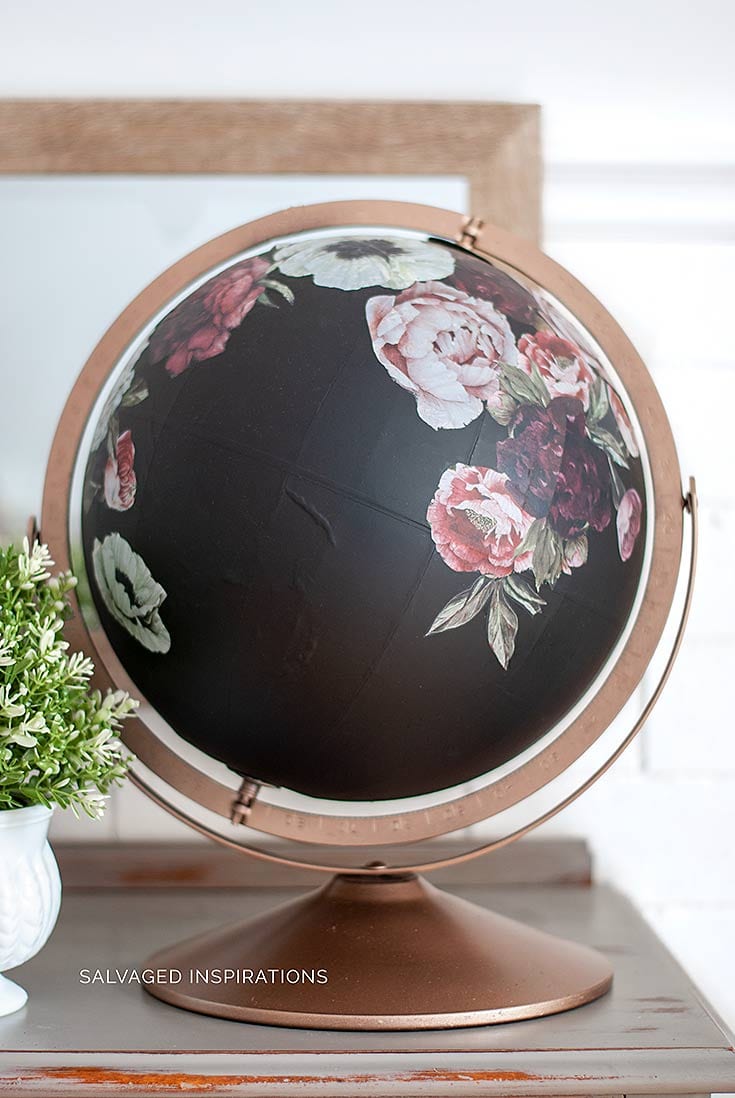
Here’s the painted and floral furniture transfer after! My sister is celebrating her birthday so this is going to be one of her Made-With-Love-Gifts…the best kind, I think. 🙂
THIS POST CONTAINS AFFILIATE LINKS TO PRODUCTS I USE. YOU CAN SEE MY FULL DISCLOSURE HERE.
SOURCE LIST::
- World Globe – SALVAGED
- Black Spray Paint
- Rose Gold Spray Paint (similar)
- ReDesign With Prima Foral Transfer
DIY PAINTED GLOBES WITH FURNITURE TRANSFERS::
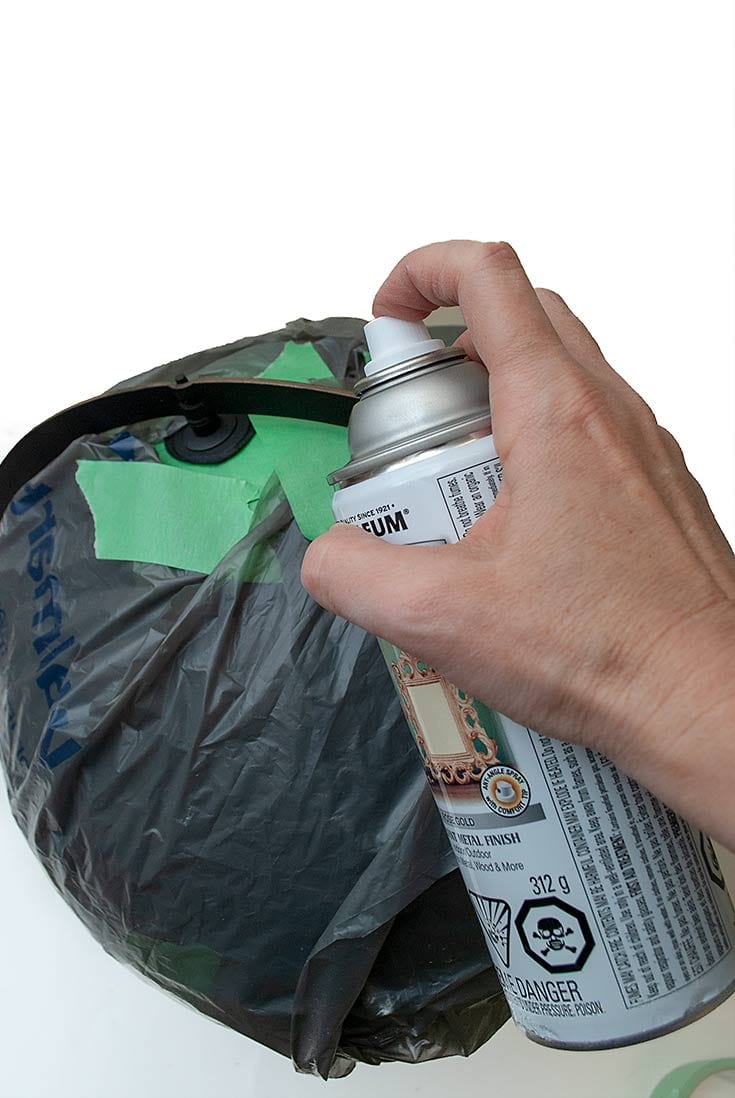
Step #1:: Clean and Mask
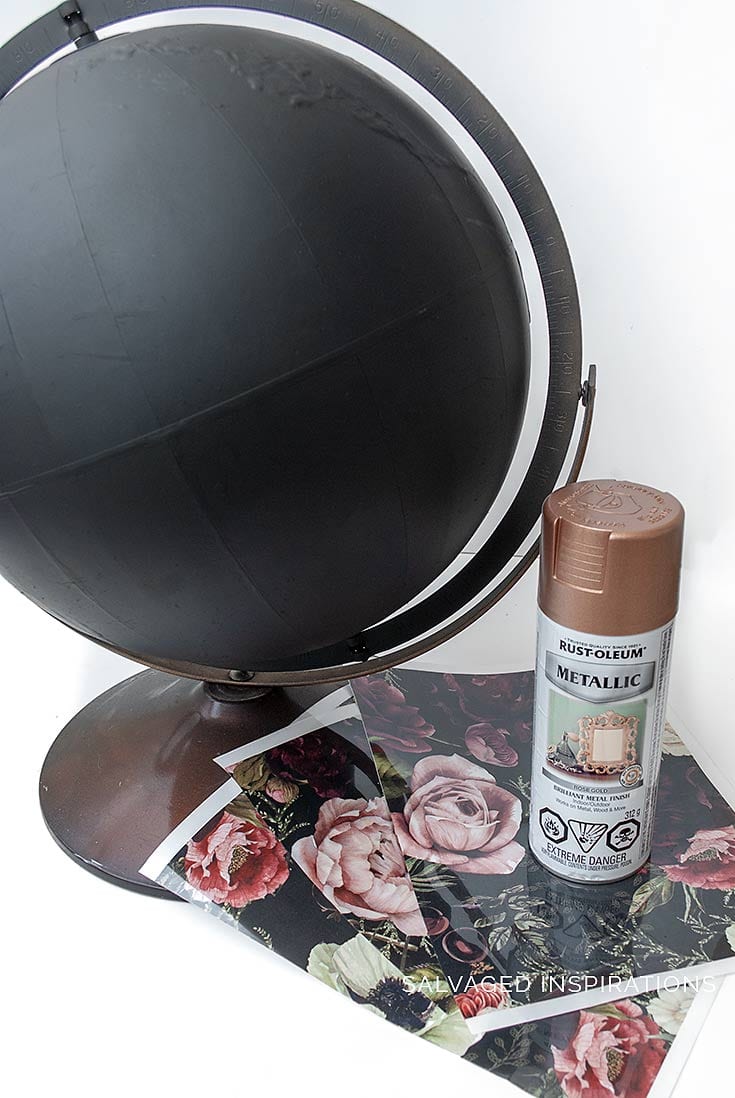
This globe had been collecting dust in a basement corner for years. I gave it a good cleaning and then spray painted the globe flat black with this spray paint.
Once dry, I masked off the globe with masking tape and a plastic bag, and spray painted the base and axle an antique rose gold.
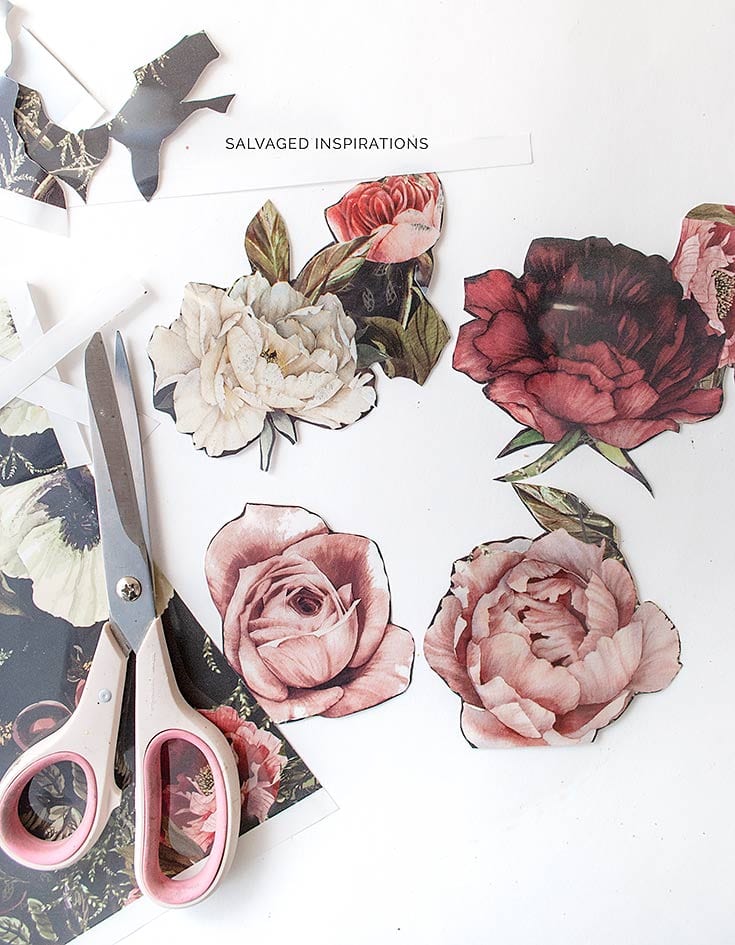
Step #2:: Cutting Out Florals
After the world globe was sprayed black and the stand rose gold, I cut out all the florals from the leftover transfer ends. Once they were cut out, I played around with a pleasing arrangement on the globe before I actually adhered them permanently.
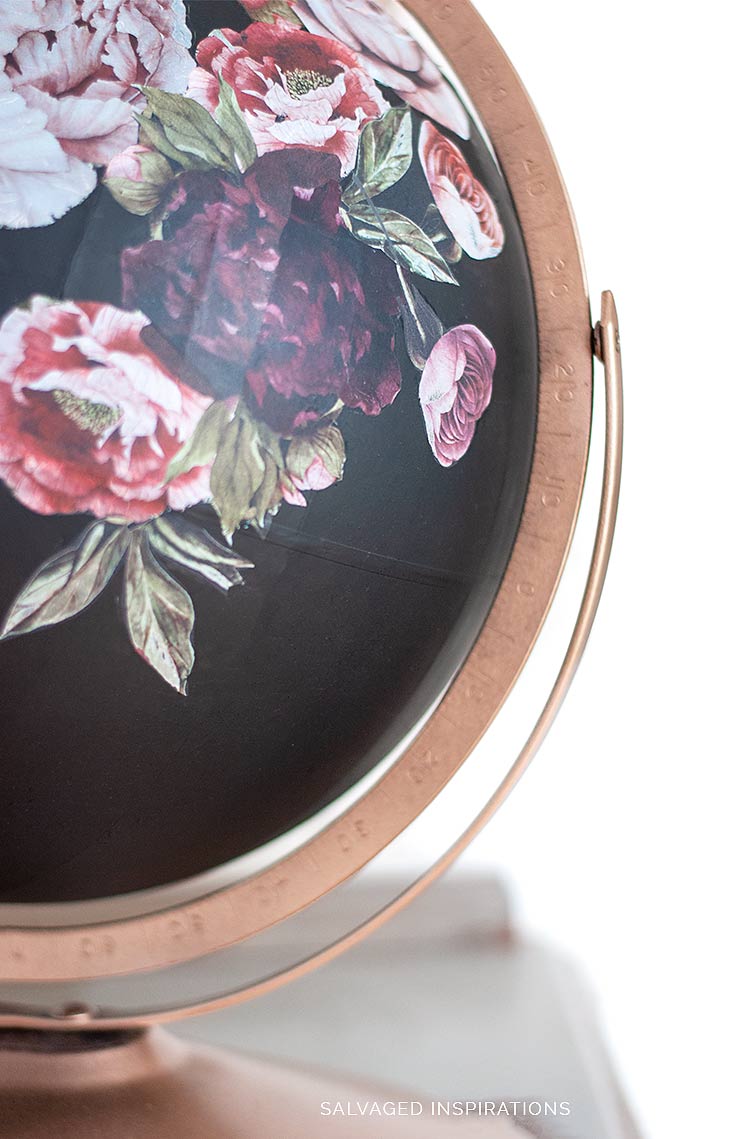
Step #3:: Rub-On
These transfers are really easy to use. Remove the paper backing, lay down the transfer, and rub on with the tool provided. You can see the full Rub-On-Tutorial Method here.
It’s a fun and fast project and I really like the end result. My sister hasn’t seen it yet so I really hope she likes it too. What do you think?
NOW IT’S TIME FOR A FUN GIVEAWAY!
Re-Design with Prima and Salvaged Inspirations (me!) are all about INSPIRING YOU to give DIY a try. We’re giving you a chance to win these rub-on transfers so you can create something beautiful for your home! These Rub-On-Transfers are perfect for furniture or smaller DIY projects!
Included in this Giveaway is 1 ReDesign with Prima Dark Romance Transfer Kit, 1 Cottage Transfer Kit, and 2 IOD Prima Marketing Decor Transfers – French Pots and 12″ Clock.

It’s EASY to enter. Just click on the ENTRY WIDGET below and then come back daily to complete more chances to win.
Fine Printy Stuff: ReDesign With Prima Giveaway is open to residents in the US and Canada. No purchase necessary. Giveaway runs from 12:00 a.m. (EST) Monday, Nov 5, 2018 through 11:59 p.m Sunday, Nov 11th, 2018. The winner will be chosen at random. Winner will be announced on Monday, Nov. 12th/2018 here on Salvaged Inspirations. The winner has 48 hours to contact me to collect the giveaway prize. If your package has not been claimed within 48 hours, a new winner will be drawn. Odds of winning depend on the number of eligible entries received. By entering, all entrants agree to the Official Rules.
GOOD LUCK EVERYBODY!!!
Happy transferring my friends!
Denise x
I’D LOVE TO HEAR WHAT YOU THINK OF THIS DIY GLOBE. FEEL FREE TO CHIME IN… I ALWAYS LOVE HEARING FROM YOU. 🙂
RELATED POSTS::
How To Apply Furniture Transfers | Rub-On
How To Use Gilding Wax on Painted Furniture
90’s Laminate Dresser Makeover
Layering Chalk Paint | Empire Makeover
Furniture Painting With Wax – Pink Wax!
PIN AND SHARE!

Hello, need assistance. I’m looking for the Dark Romance Transfer and I’m hitting road blocks.. I’ve searched all over the web and have had no luck, Hopefully you can lead me in the right direction as you have used . Thank you.
Hi Roni! I looked it up and found the Dark Romance Transer is available on Amazon here. If that doesn’t work try here, here. Hopefully these help and feel free to let me know how it goes. 🙂
Hi Denise. Just wanted to fill you in on TWO little projects I just did. You always inspire me (and your readers I’m sure) to make old things new again and see the beauty in pieces long forgotten. Well, I just made a globe very similar to the one you made or your sister. It turned out gorgeous. I love it!!!!! I painted the base gold and used black chalkboard paint on the globe so I can write pretty words on it at whim:) I LOVE IT!!! I also used gold rub n buff on an old picture frame and it looks phenomenal. I know, simple projects, but I’m gaining confidence while reading your blog. So a THANK YOU DENISE is in order. Xoxoxo
Omg, this makes me SOOO happy! Your globe makeover sounds amazing – I love the chalkboard idea!! And isn’t Rub’N Buff the best?! Thanks for sharing because I LOVE hearing about before and afters too! xo 🙂
Denise: I love reading about your projects and appreciate your can-do attitude, but this project just floors me.
I don’t want to offend anyone, especially you on your own blog, but I have a philosophical approach to this project and it is in opposition to your creative approach . I hope you appreciate another view on this one.
I’ve been around a long time and have seen the cycles. I still have an early 20th C. wood-framed mirror from a 1960’s painting craze. It’s in dark green with black “antiquing.” So I’ve been there and see it before. I do love it when smart and competent women save vintage furniture and I do some of that for my own house. So I’m sympathetic to those who do what you do and share it with others on the internet. Really, I am.
But………I just bought my second globe. Now there’s one by the wing chair for reference when listening to the news and one by the computer table for reference when reading the news online.
Despite giant education system, so many people are ignorant of the world beyond their own home turf. And they have little to no curiosity about that world, so, IMO, we need more useable globes–for little kids, school kids, and the adults — instead of another passing fad for people who need to do something to satisfy their inner artist. There is so much education to be had from even an old globe as national boundaries and names change. Math, history, culture, earth changes, and geographical learning are all right there on the globe. The cycle to some other “pretty” will go round and these learning tools will be back in the thrifts in short order, only this time, cheaper still, and useless for their intended purpose. I’m sad you promote this project, but realize you have the right to do whatever projects you like on your own website and in your own life. I just makes me sad that this time, I disagree with what you are doing this one time. I’m still with you, just hoping you and your readers will think about this. Peace and love, MJ
Hi MJ! I respect your view but I see this DIY project from a different perspective. As you mentioned, the cycle of “pretty” does go round for everything. I totally agree. Trends come and go. What was ‘in’ last year isn’t ‘in’ this year. That’s the cycle of art and creating when it comes to fashion, music, decor, furniture, food and even small diy projects like this one here. Just because something will be outdated in the future – that shouldn’t stop us from creating. As for globe resources, there’s an abundance of old globes and they are still in production today so I’m guessing we won’t run out anytime soon. My thoughts – I enjoyed myself while making it (using a resource that was otherwise collecting dust in a dark corner), I didn’t hurt anyone in doing so, and I made my sister super happy. In my mind, that’s a triple win! That said, I’m still with you too MJ. 🙂
I have several globes so would love to try this out!
It’s a quick fun project to update these globes, for sure! Good luck Sara. 🙂
Such a wonderful idea! I will definitely be on the look out for old globes now. Thanks for the inspiration. I follow your blog and love all your projects.
Thanks Karen, appreciate it! Good luck to you! 🙂
Really love what how you transformed your old globe. Wish I had seen this a few weeks ago – because I just donated an old globe to a charity. Your imagination and creativity never ceases to amaze me.
That’s all for now, Nancy
Donating is ALWAYS a good thing! 🙂 Good luck to you Nancy! x
I love your work!
Thanks Lisa! Good luck to you!
Love all of your work!
Thank you, Eleonora. Good luck to you!
Thanks for the tutorial. I’m looking forward to trying to do something similar.
Thanks and good luck to you Nicole! 🙂
This is such a great idea, thanks for the tutorial.
Glad you like it and good luck Kimber! 🙂
I really love the globe today and the furniture you did earlier with the same transfers. Thanks for the giveaway!
Thanks so much Dianne! Good luck to you. 🙂
Looks great! What a wonderful idea…
Hi Lyndaaaaa! 😀 Thanks so much and good luck to you!! x
I love this and you make it seem easy. Thank you for the tutorial!
Thanks Tracey and good luck! 🙂
I love a good “leftovers” project. This globe is gorgeous!
They’re the best, right! Thanks Katie and good luck to you! Love your work btw. 🙂
Beautiful globe!
Thanks Mechele, good luck! 🙂 🙂
Good job! I always love your work
Thanks so much, Crystal! Good luck to you. x
I love your blog and love to use transfers.
Thanks, Debbie and good luck to you! 🙂
Super creative!
Kelleeeeee, 🙂 thanks and good luck to you! x
I did something similar with gold leaf – but I didn’t wait it prior to leafing. This might be even more beautiful!
I’d love to try this with gold leaf and add it on to the continents! I’ll bet it looks really sharp! Good luck to Angela!
Beautiful.!!!!!
Thanks and good luck Janice! 🙂
I love how this turned out!!
Thanks Vickie…good luck. 🙂
As always you’re a rock star love your style and would love to try a transfer!
Aw, thanks Kimberly… you’re sweet! 🙂 Good luck to you!
Excellent idea! I have an old globe that needs this kind of makeover. Thanks for such awesome inspiration!
Have fun Tammy! Good luck in the giveaway! x
I have been wanting to try this for awhile. I am having a hard time choosing which one to start with first. What is the easiest for a first timer?
Both are SUPER easy. But if I had to choose, a flat surface without cutting out the design might be best to start with. 🙂
I pinned this beautiful globe as soon as I saw it! Gorgeous!
thanks for the PIN Janice! 😀 Good luck to you! 🙂
Absolutely love this idea! I can not wait to try it, hopefully it comes out as beautiful as yours.
Have fun Delicia… and good luck on the giveaway! 🙂