I’ve been wanting to make a Salvaged Inspirations sign with my new logo for months now – so I’m excited to share my DIY Pallet Board Sign with you!
I love the idea of using recycled boards and materials because my business is all about salvaging, reusing and restyling.
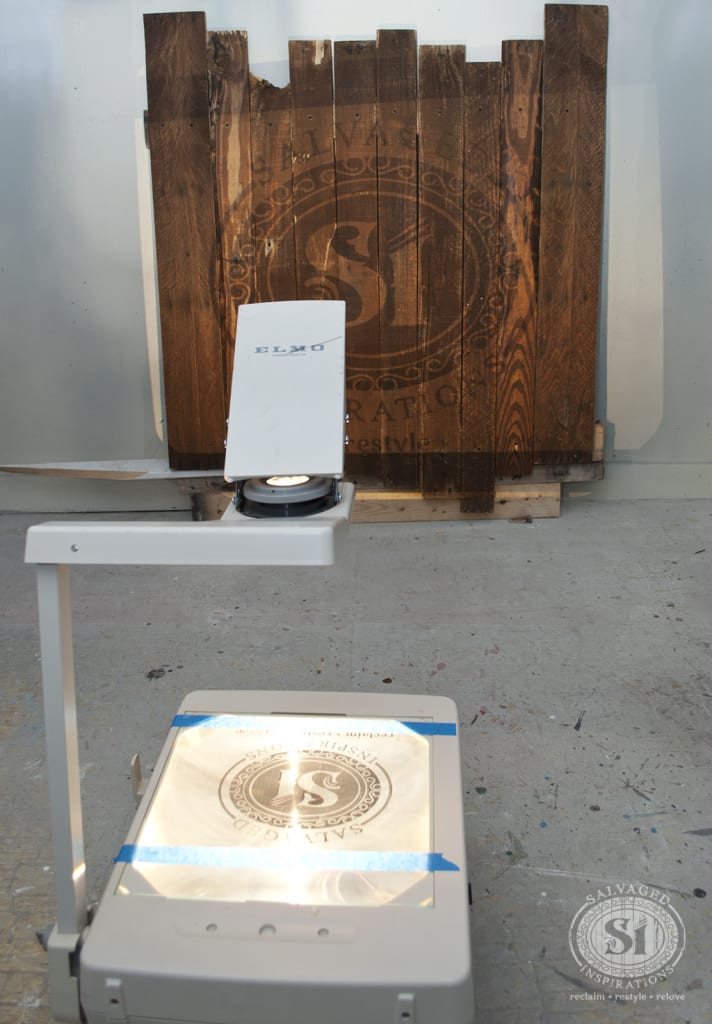
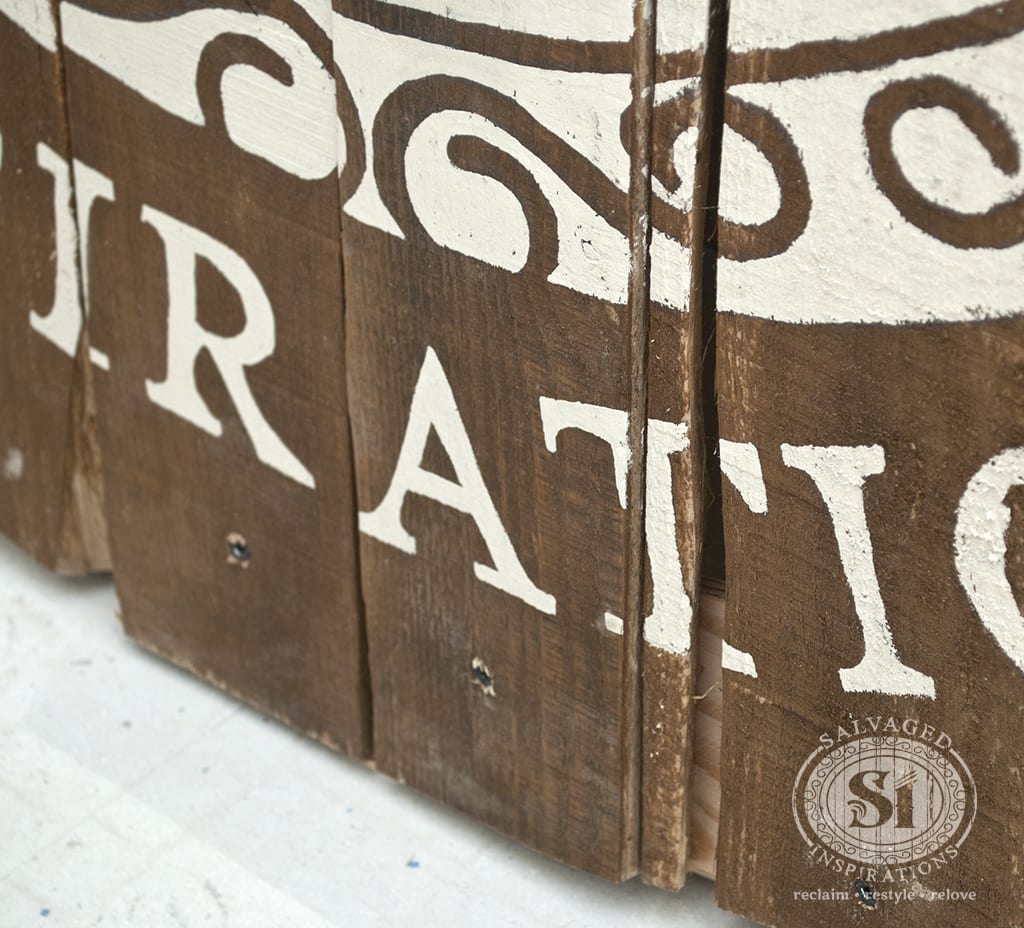
This sign was created using a little left over paint and stain – and I finally had the opportunity to play with my overhead projector that I purchased online for $50 smackaroos.
I knew this old school relic would work some magic one day.
First thing’s first. A big thank you to Melanie at The Painted Bench for ‘donating’ the skid/pallet to me. If you’re reading this Melanie, you saved me from curb-shopping one – so much appreciated! {big smile}
Caution to the rest of you – pallet boards are freakishly STRONG.
I don’t know about you, but I was under the impression that pallet boards were EASY to take apart. I see a a lot of them on the road side or in-behind businesses, and they look as if they’re falling apart.
I WAS WRONG.
Pulling apart this pallet was brutal. While using full force, I was bruised (lack of know how for sure) and repeatedly tortured by splinters. I gave up and asked M-M-M to give me a hand. What was taking me hours took him a few minutes. I suppose a Sawzall (reciprocating saw) and big strong man hands are the key. 😉
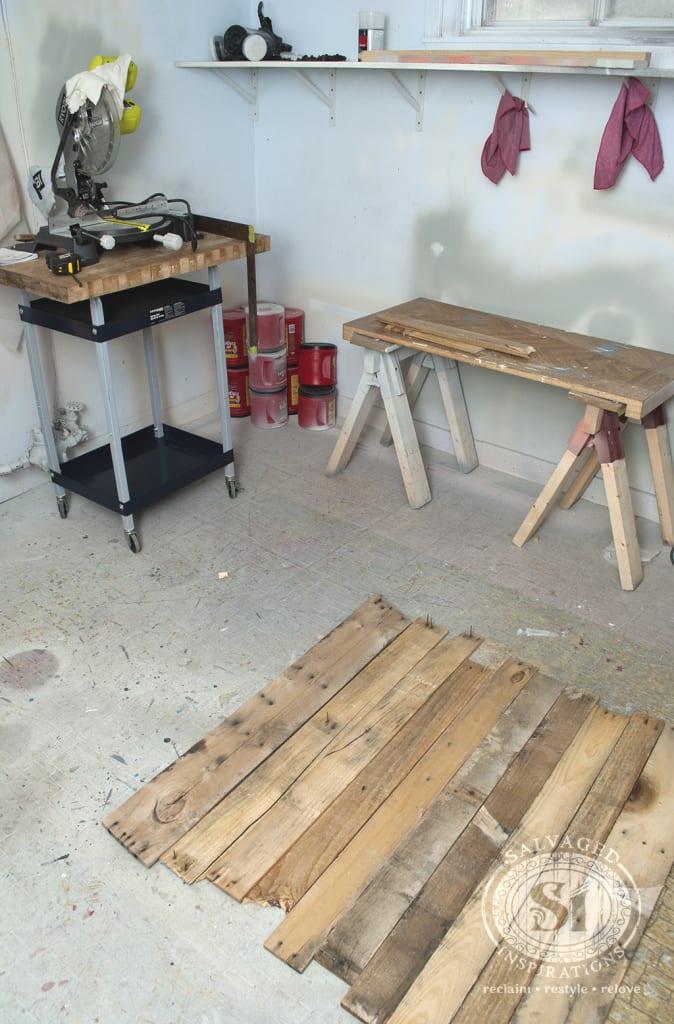
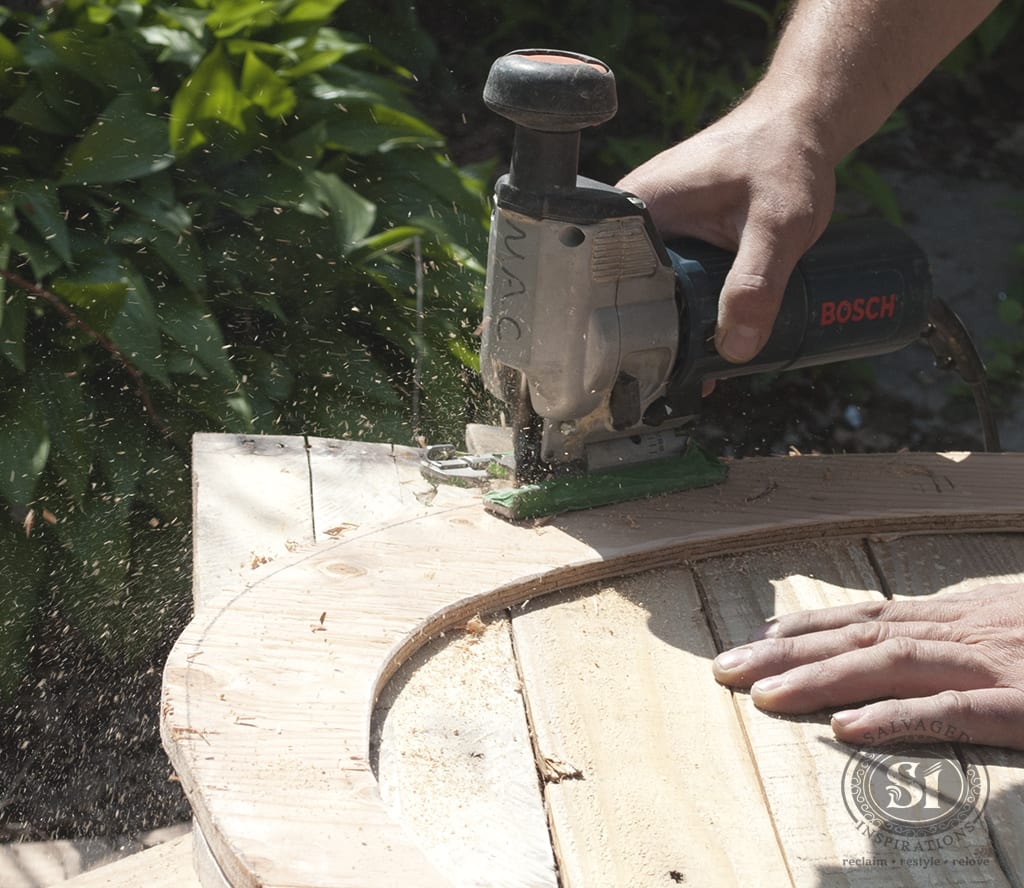
Once the boards were taken apart, I cut the nails that were sticking out from the pallets with my Dremel Tool![]() . This Dremel slices through nails easily and has so many other great applications. As a safety tip, take care not to touch the nails or tool after cutting – they get super hot!
. This Dremel slices through nails easily and has so many other great applications. As a safety tip, take care not to touch the nails or tool after cutting – they get super hot!

Because these boards gave my hands a hard time, I sanded wearing heavy duty gloves.
I used to watch Storage Wars when it first aired. I don’t know if you remember, but Barry Weiss would don his skeletal gloves while rummaging through junk. I found this ‘girly’ version travelling Route 66 and just had to buy them. They’re great for moving heavy furniture – and from now on, they’re a must when working with pallet boards.

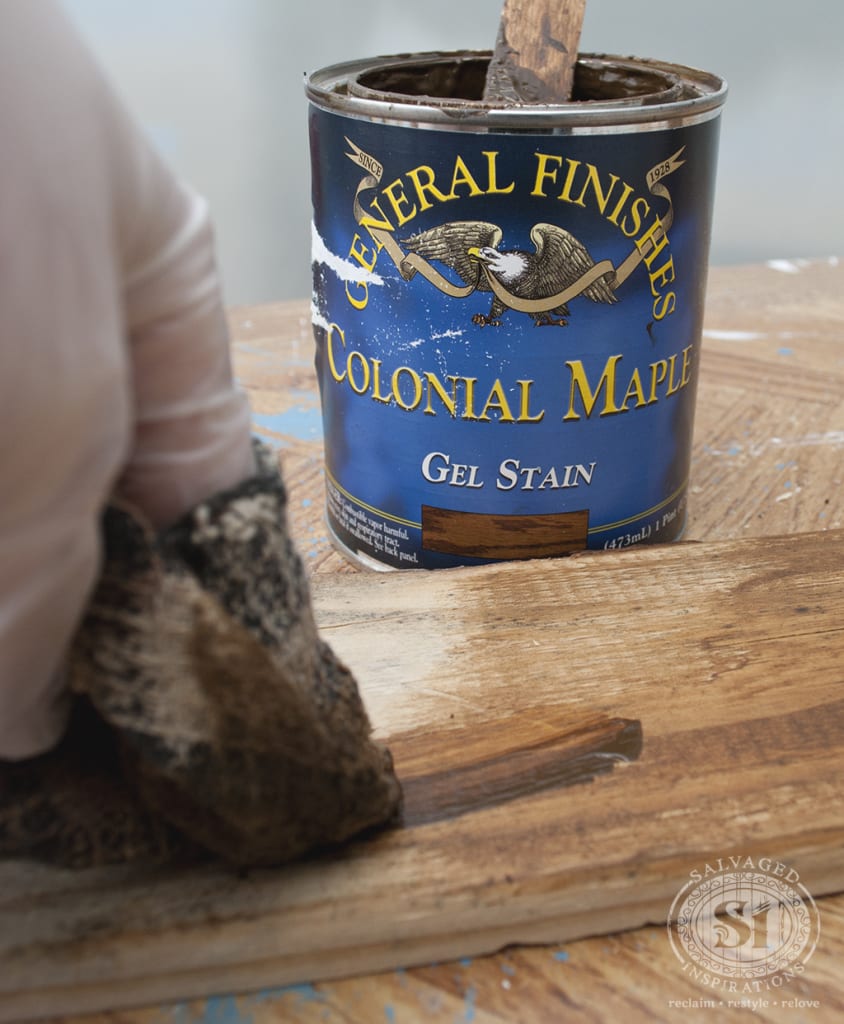
Once the pallet boards were sanded a little smoother, I stained the raw wood with General Finishes Colonial Maple Gel Stain. If you haven’t tried any of the GF Gel Stains, give them a go! These stains are so easy to work with and give gorgeous results. I love the rich tone this Colonial Maple gives these boards.
Once the stain was dry, I printed my logo on a laminating sheet (aka transparency film or overhead projector film) and then set up the projector.
![]()
Old overhead projectors are great for transposing any image, shape or text. Unlike stencils or other printed imagery, a projected image can be printed on ANY home printer, then made as large or small as needed. It’s really convenient for wall murals or large projects.
The key to a perfect projected image is to keep the boards (or whatever surface your working with) straight. If I had allowed my pallet sign to lean against the wall rather than secure it straight up and down, the projected image would have been distorted.
Also, another great idea is to tape the image down and use painter’s tape to mark the floor where the feet of the projector sit. This way if the overhead projector gets bumped or moves, you can set it up exactly as it was.
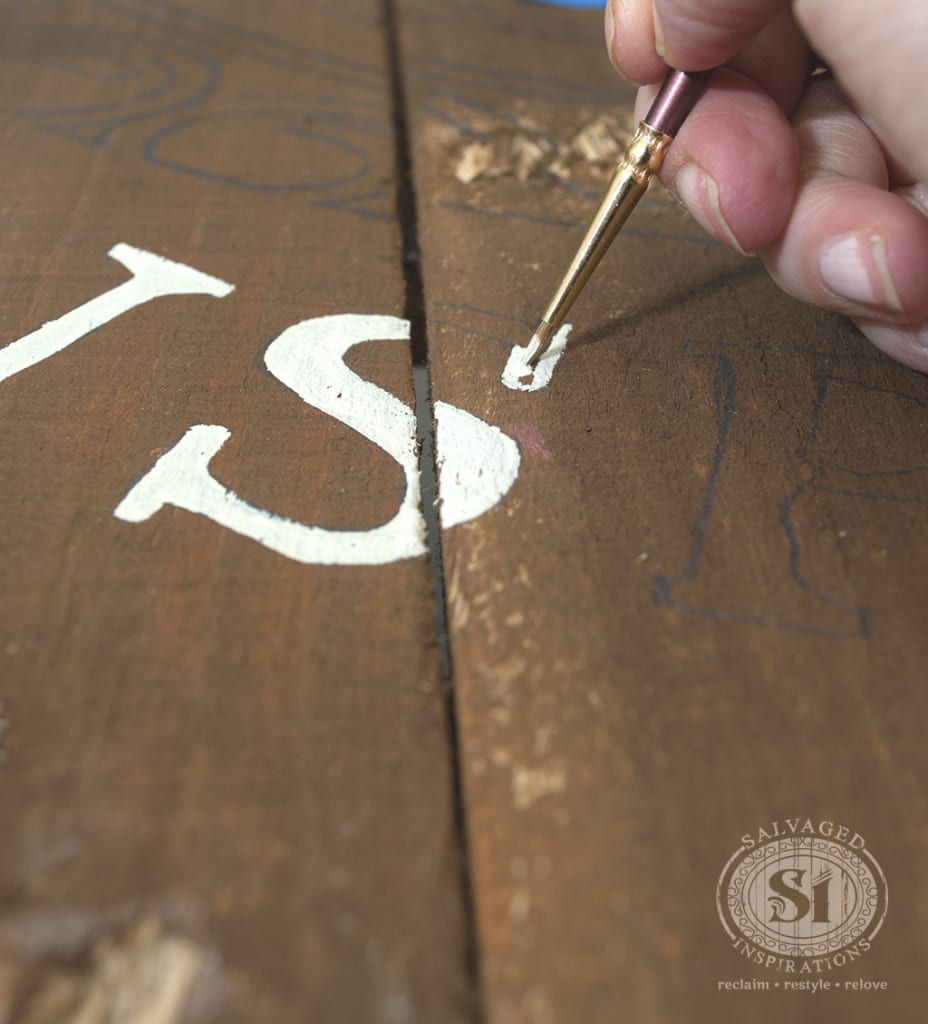
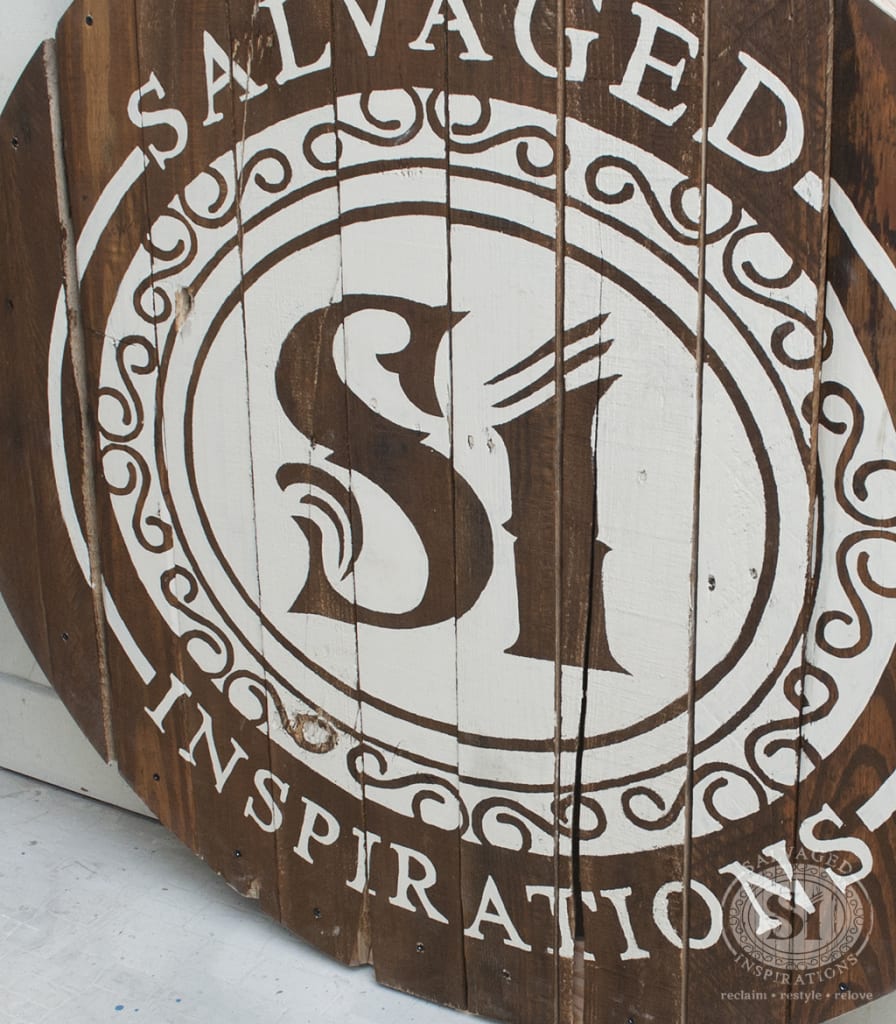
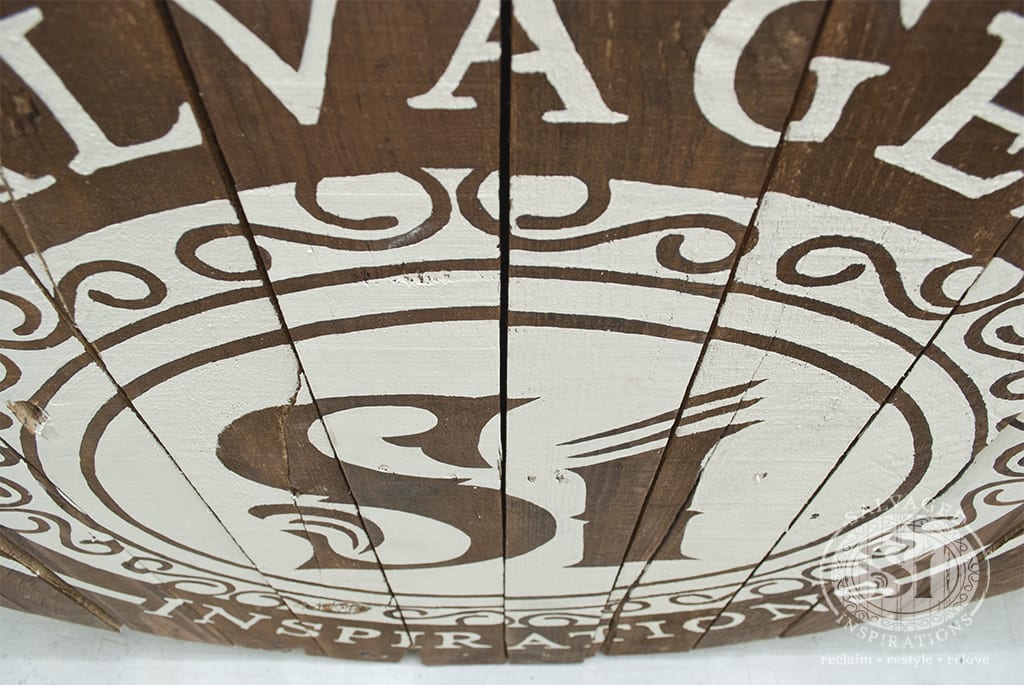
I traced the logo with pencil and then painted with some left over Annie Sloan Old Ochre Chalk Paint.
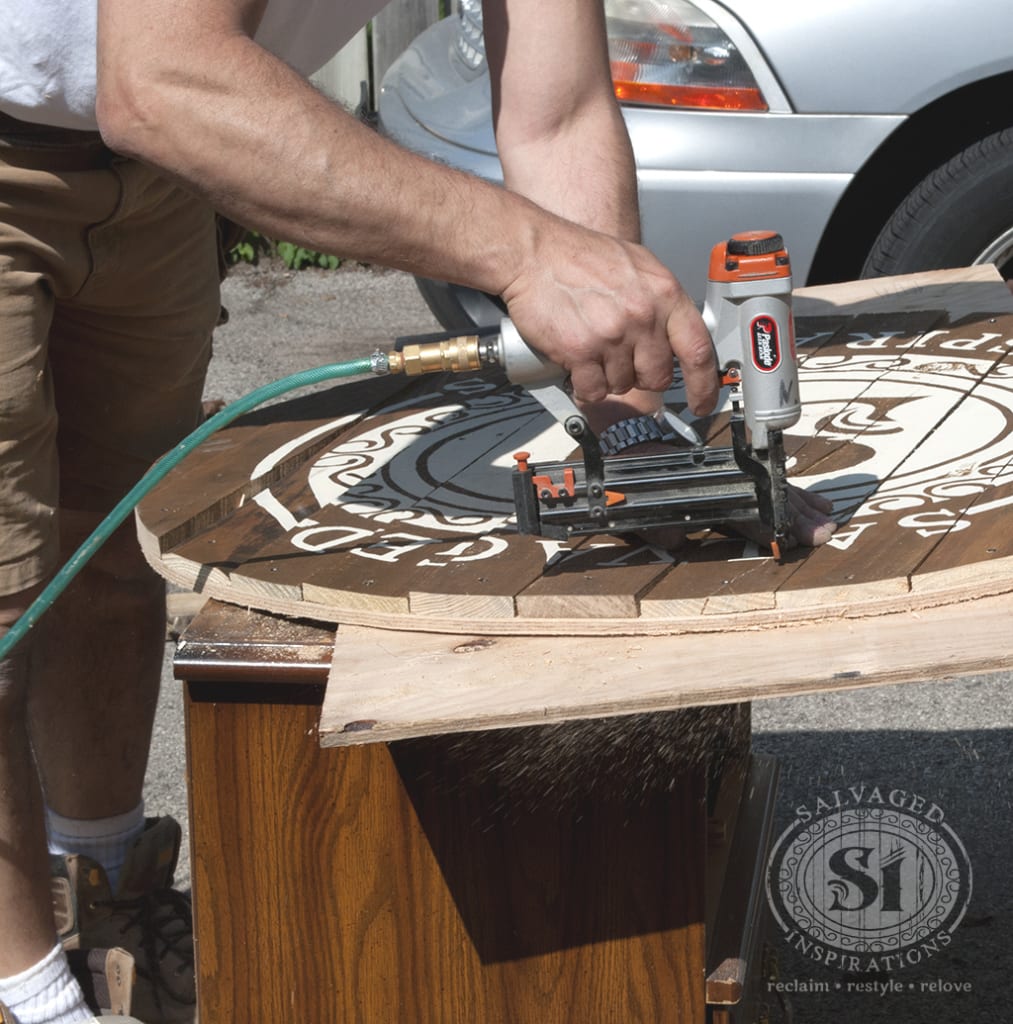
To hold it all together, M-M-M cut an oval shaped backing. We cut out the middle to keep the sign lightweight and easy to hang.
To finish and secure, we attached the sign with nails and screws. See -I wasn’t kidding about the big strong man hands! 😉
And here’s the finished sign… I love it! It looks rustic, recycled and imperfectly chic!
Everywhere I look, I see recycled pallet boards being used in creative ways. These wood boards are being transformed into amazing furniture, shelves, wine racks, patios, walls, floors, and of course – signs! I’ve started an entire Pinterest Board dedicated to pallets if you need some inspiration. 🙂
Have you ever used pallets for a sign or project? If so, how did it all turn out? Feel free to leave a comment below! As always I love hearing from you!
Denise x
_____________________________
Like what you see? Subscribe to Salvaged Inspirations so you’ll never miss a post!
Follow along on Pinterest, Google+, and Facebook for more inspiration!

Beautiful work! I have a questions regarding it’s weather resistance for outside use. Did you do any type of finish over your project when you were done painting the stenciling?
Thanks so much
Thank Suz! I did not. I want my sign to look very distressed/old so no topcoat was used…plus it’s hanging on my wall in my studio/workshop right now so I don’t have to worry about the outdoor elements. If you are concerned about protecting a sign for outdoor use, I would recommend an non-yellowing outdoor poly. 🙂
Your article is detailed give me a lot of information. I will try to draw some text in my old table.
Well done Denise…looks amazing!
Thanks Judy! I hope you have an amazing long weekend. 🙂
I am looking for an overhead (used) now !
Very cool. I would like to do one of these on a wall too.
These old overhead projectors are PERFECT for wall projects!
my husband just made a cool wine rack from pallets, an herb planter for our daughter, planter boxes and signs. I love them, but I ,too, get him to take them apart.
That sounds like some amazing projects… would love a herb planter made from these boards!!! And I don’t blame you Jeri – taking it apart was brutal! 😉
Absolutely fabulous as usual! As for taking pallets apart a you tube video and my hubby were a must lol!
Great minds think alike Melanie because before I brought in the ‘muscle’ – I you tubed it too! – the vid made it look so easy..lol.
Wow, Denise you outdid yourself now! LOL That is incredible. I love your new logo and sign, and all your hard work was well worth it! Amazing, and congratulations for all you do! You have an amazing talent and I am so glad you share all you do with us. I love your blog and FB! Mahalo, Thanks for all you do, your friend Lianna
Thank you Lianna. <3 I've been thinking about you and meaning to send you an email...going to right now. 🙂
Your sign looks amazing!
Thank you Patricia! x
Love this!!!! You and M.M.M. did a great job! Love the old school projector. Now everyone is going to want one!
Thanks Tess! You make me smile – I know of a few furniture painters who are on the hunt for one of these old projectors. And I’m sure M-M-M will be pleased he’s getting some compliments too..lol! x