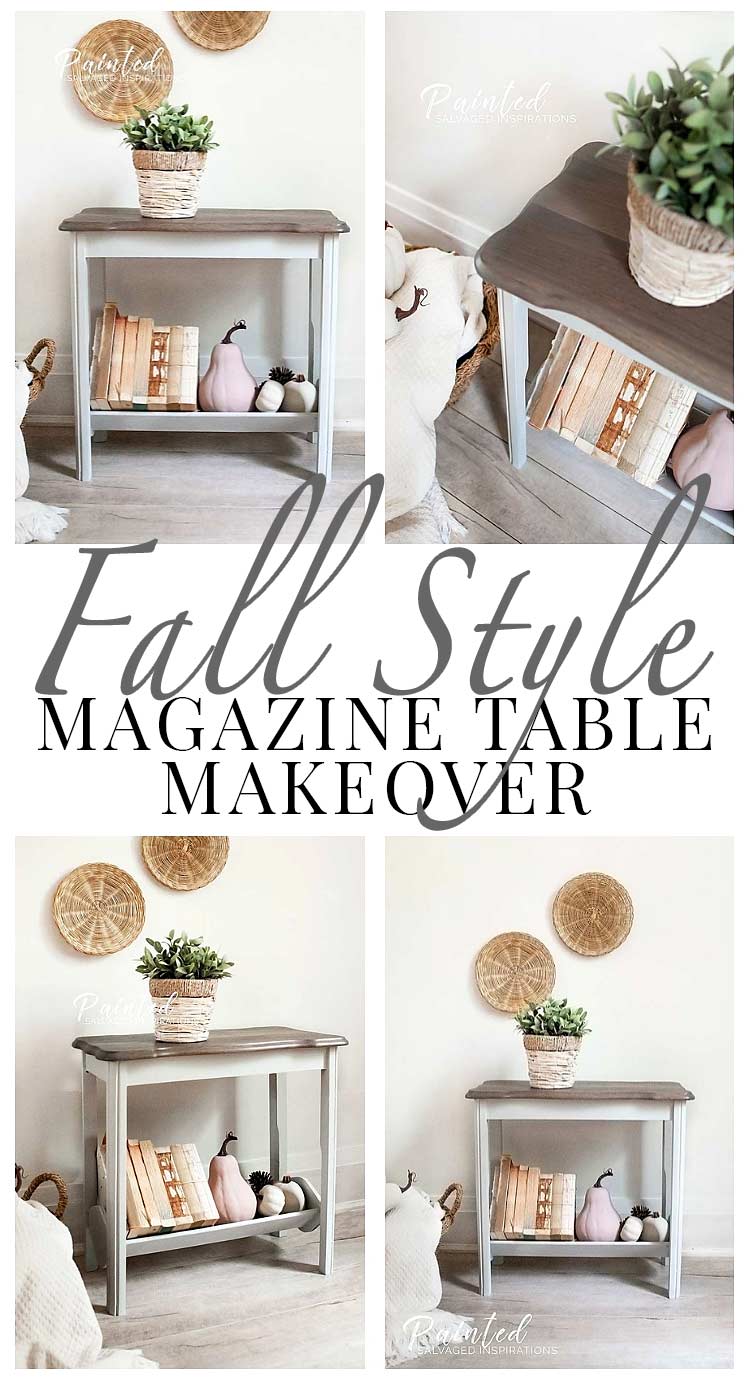
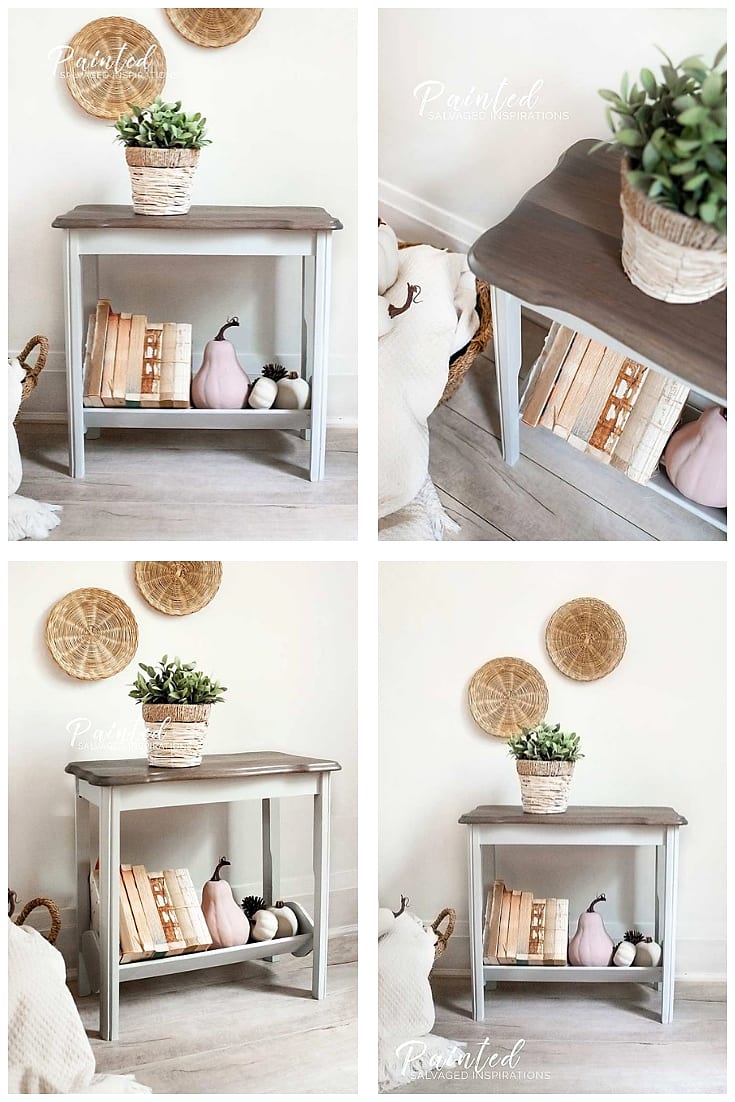
 Hi guys! Have you ever come across a piece of furniture that has SO many layers of lord knows what on the top – it seems near impossible to get off? Well, just wait till you see this baby… this magazine rack table has that and M*O*R*E!
For today’s makeover, I’m sharing one of my “secret-tips” with you. It totally goes against the grain but works wonders… and it doesn’t include using smelly strippers….
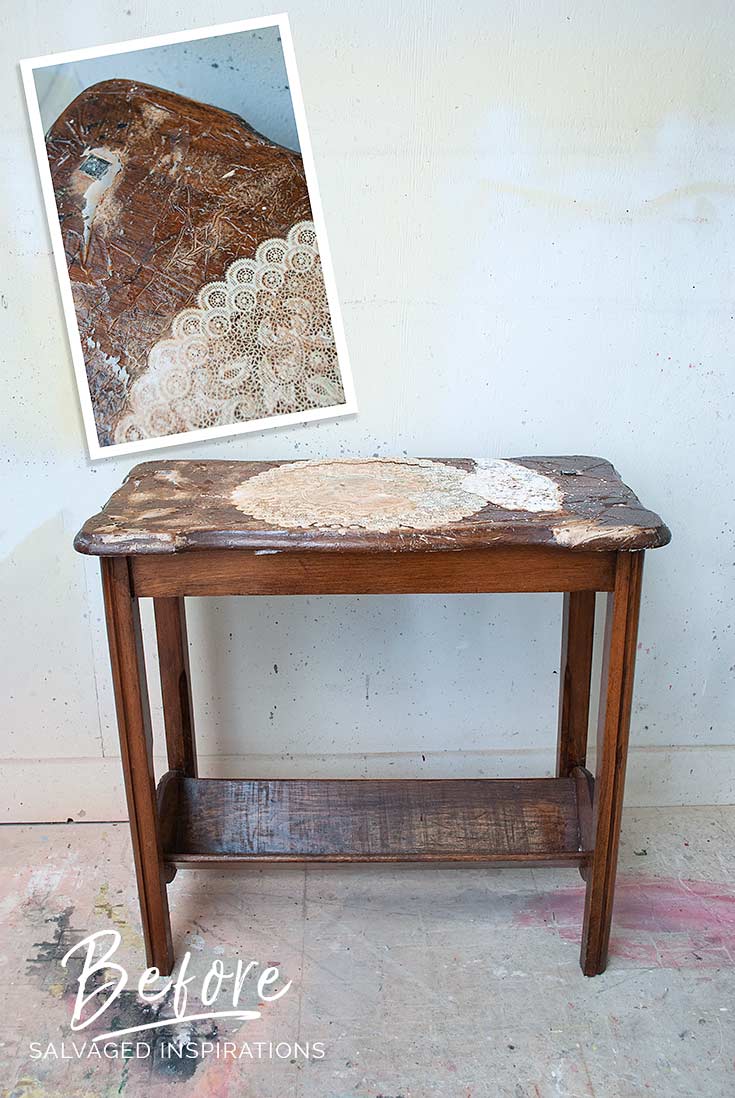
This is what we started with along with a close up of the top. My sister dropped off this cutie to refinish for her. Plastic doilies, glued on magnets, not to mention umpteen layers of topcoat!
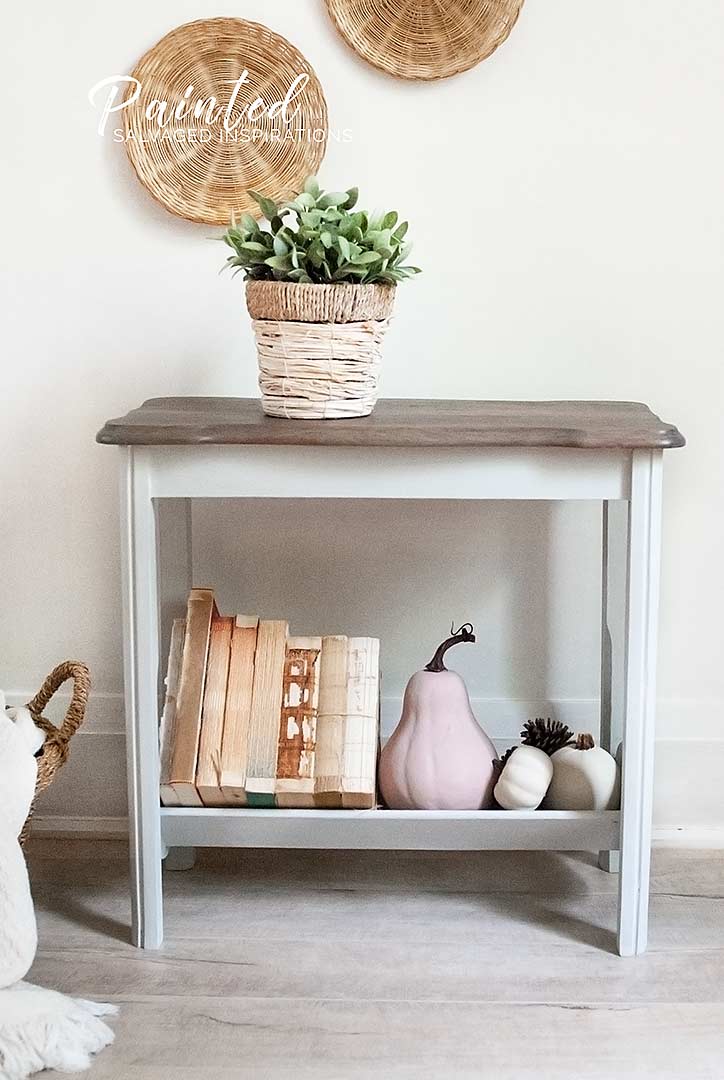
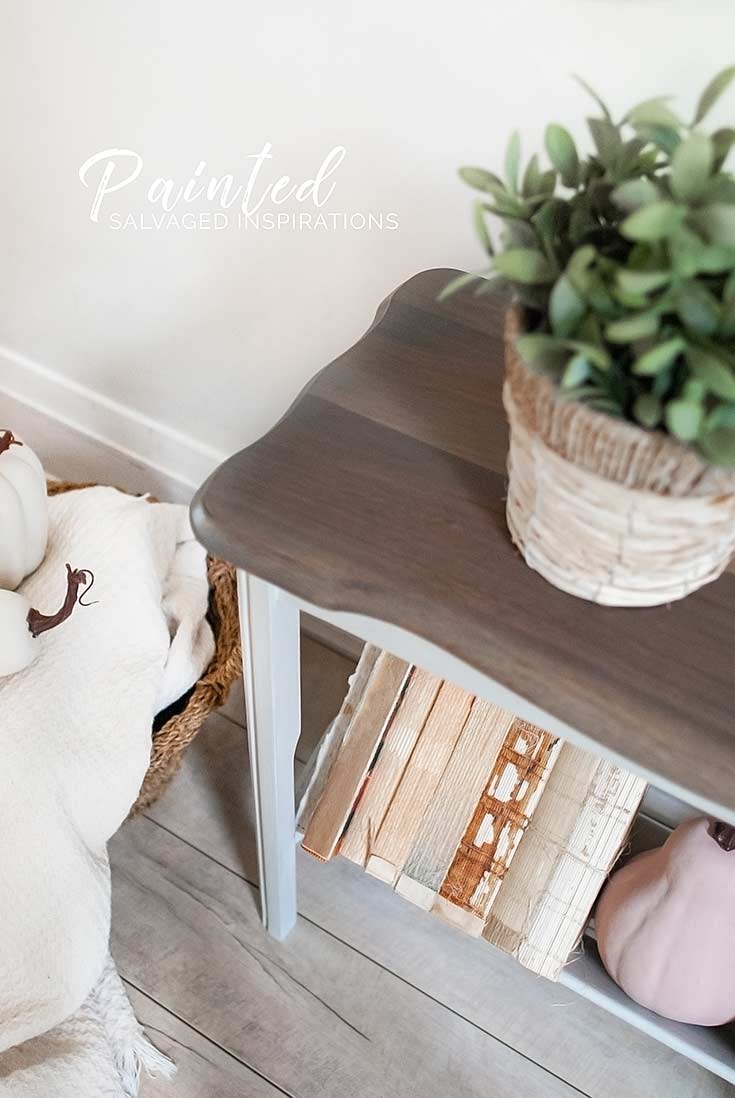
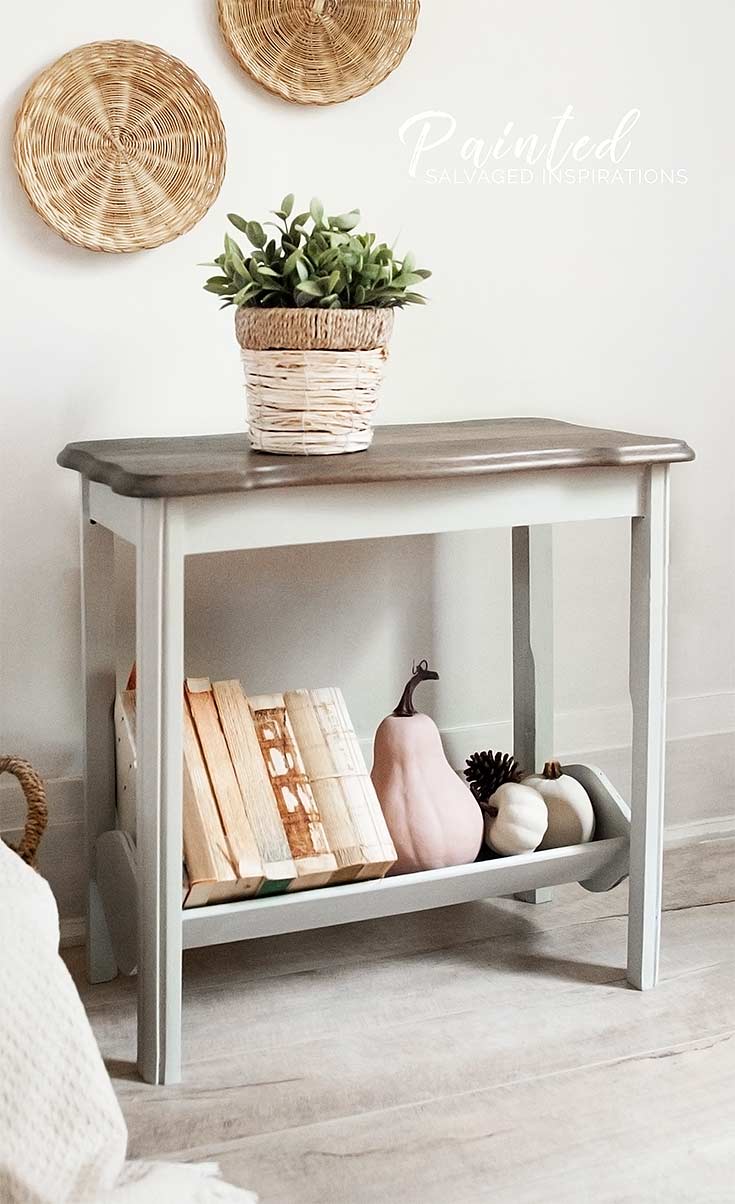
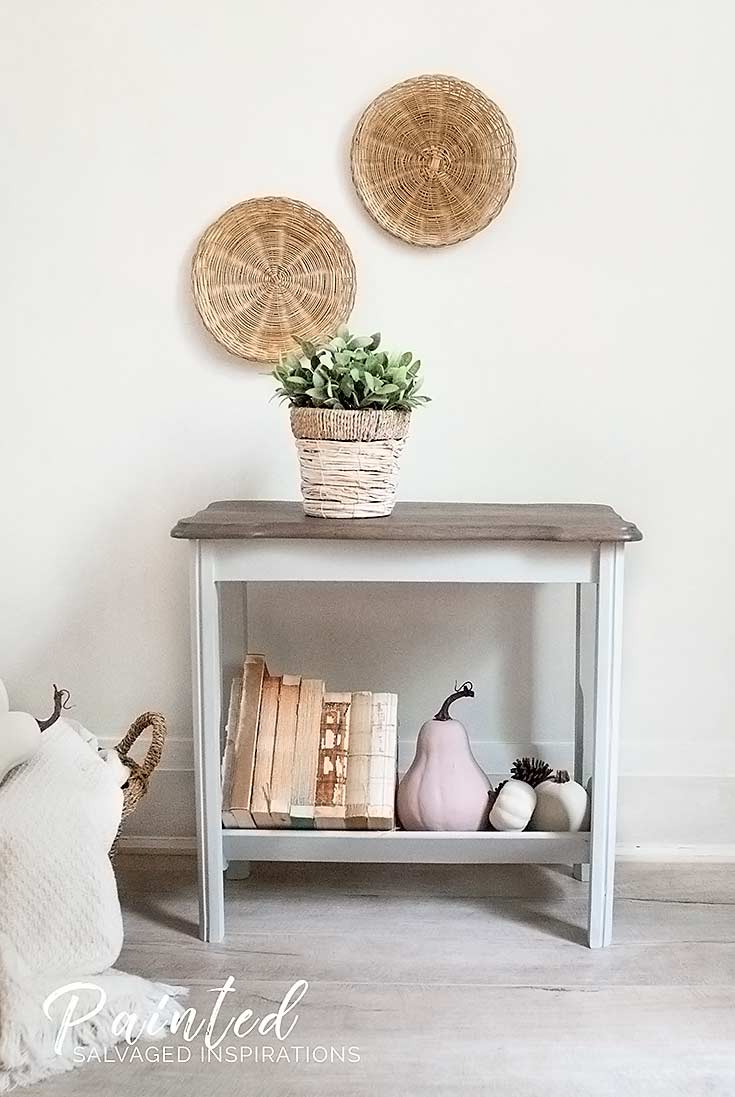
Here’s the cleaned-up version. What do you think? Wouldn’t this be perfect holding bathroom towels, toiletries or magazines, or maybe a plant stand!?
THIS POST CONTAINS AFFILIATE LINKS TO PRODUCTS I USE. YOU CAN SEE MY FULL DISCLOSURE HERE.
SOURCE LIST
-
- Magazine Rack Table – SALVAGED
- Orbital Sander
- Weathered Grey Stain (similar)
- Shop Towels
- Paint Brushes (tried the new mini here)
- Cotton Chalk Mineral Paint
- Driftwood Chalk Mineral Paint
- Gator Hide Topcoat
- White Wax
FALL-STYLE MAGAZINE TABLE MAKEOVER
After trying to get all these layers off with chemical strippers, I ended up using my trusty orbital sander, which I couldn’t live without btw! If you do any type of DIY project of furniture makeover, you need one of these!
The golden rule for sanding wood is to sand with the grain.
That said, here’s my secret tip. When I’m working with something out of the ordinary and I need to be extra aggressive, I SAND AGAINST THE GRAIN!
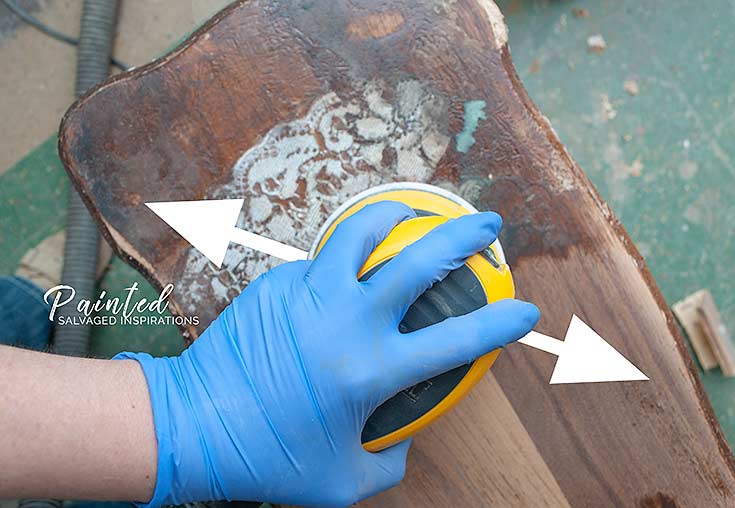
Sanding against the grain with a low grit sandpaper (I used 80 grit) will remove anything in its path. The key to making this technique work is once my topcoat is all sanded off, I smooth the bare wood by sanding with the grain – slowly working up to higher grits until the wood is perfectly smooth again. I used 80 grit (against the grain) and then used 120 and 220 sanding with the grain.
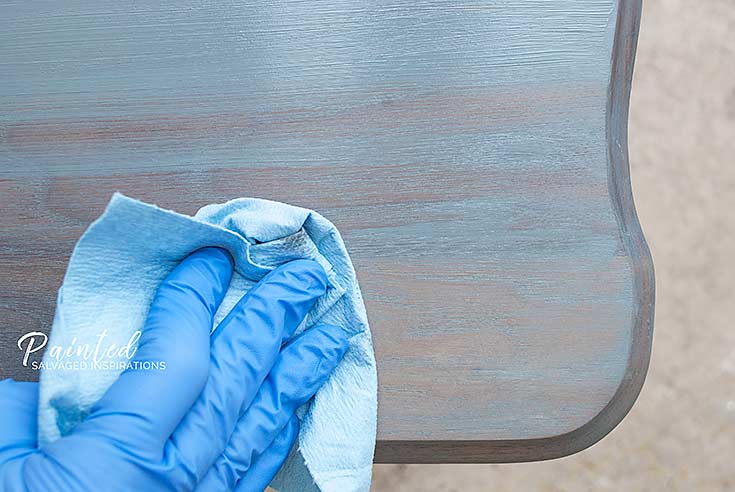
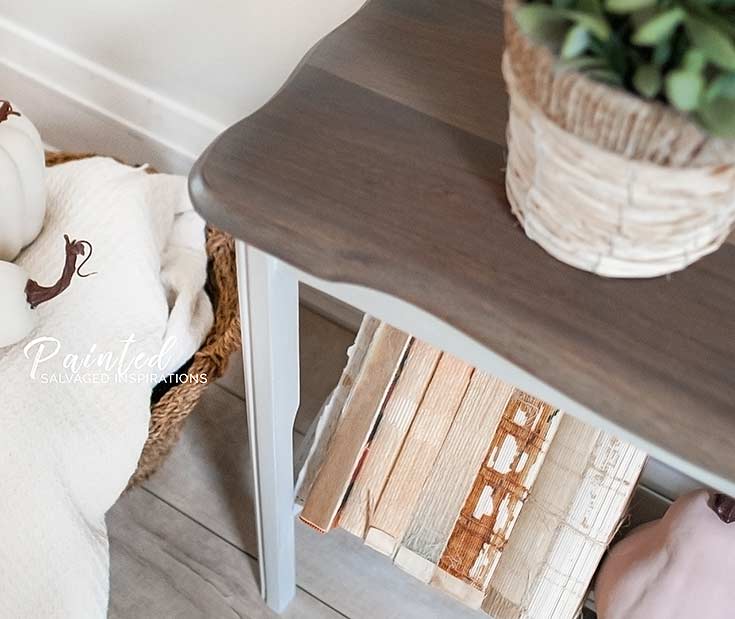
By the time I start staining, the wood is perfectly smooth.
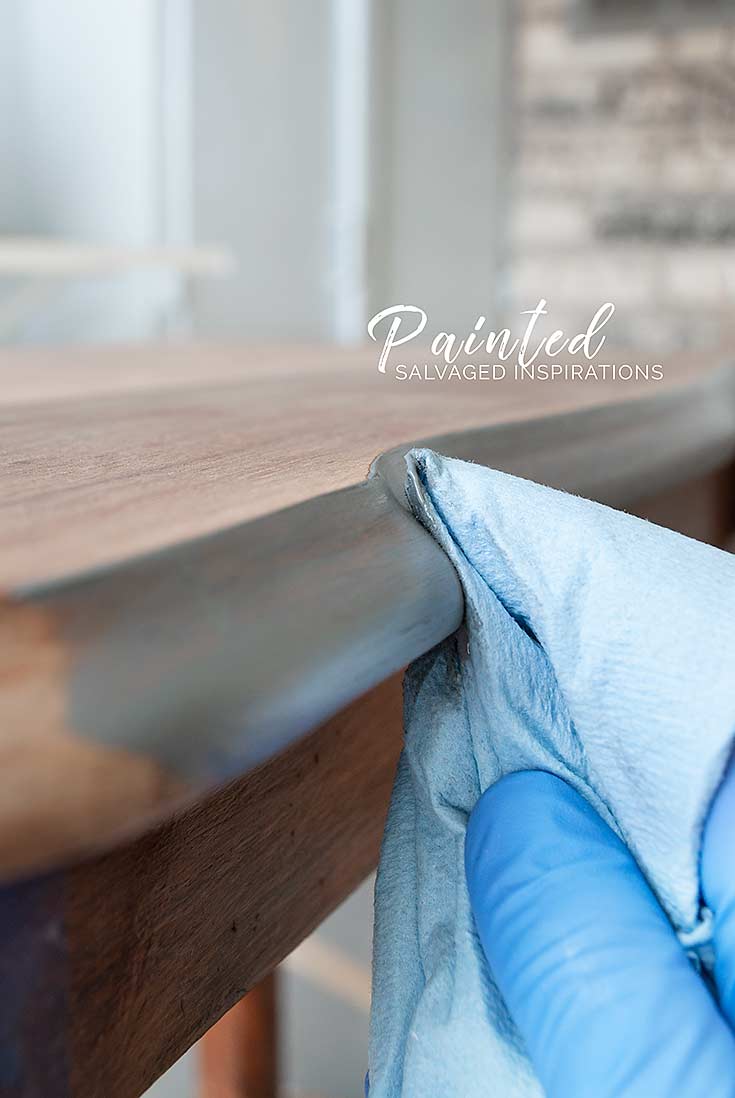
Another quick tip – when I want to cut down on red undertones in a wood, I like to use a weathered wood stain color. Depending on how many coats you use (I only used one coat on this tabletop) it helps cut down on some of the red and orange undertones.

I see different styles of magazine tables at thrift stores all the time and they’re usually selling for next to nothing. Because these tables are easy to find and inexpensive, they make for a great “build your confidence project” if you want to practice a particular painting style or technique… without the guilt of mucking up! 🙂
DO YOU HAVE ANY TIPS ON HOW TO REMOVE LAYERS OF TOPCOAT? I’D LOVE TO HEAR YOUR QUESTIONS AND/OR TIPS AND WHAT YOU THINK OF THIS MAGAZINE TABLE MAKEOVER. FEEL FREE TO CHIME IN… I ALWAYS LOVE HEARING FROM YOU. 🙂
Happy furniture painting my friends!
Denise x
RELATED POSTS
Layered Stormy Seas Vanity Makeover
How To Use Gilding Wax on Painted Furniture
90’s Laminate Dresser Makeover
Layering Chalk Paint | Empire Makeover
Furniture Painting With Wax – Pink Wax!
PIN AND SHARE!


Wow quite a difference in condition between the original top & the original bottom shelf. Guess they thought more doilies on the bottom would be overkill? LOL Love what you did to it. Has a farmhouse look now. Thanks for your tip on sanding heavily across the grain first, I always thought that would ruin it!
lol…thanks Tracy! And cross sanding works great on solid wood but not great on veneer as someone asked here in the comments. I learned the technique from a woodworker’s Youtube channel. I wish I could remember his name because I would have linked to the video.
I would like to know what weathered stain you used. I tried several times but the link did not work. Beautiful table! Thanks
Thanks, Barbara! And I believe the exact weathered gray wood stain I used for this table was found at the Restore on discount but any weathered gray stain like this one here can help cut down on the red/orange undertones.
Great tutorial for removing so much gunk! It turned out so pretty.
Thanks Lizzy! XOXO
I haven’t seen a magazine rack in years. The angle on the bottom shelf is perfect! What a great find and the makeover is lovely. Thanks for sharing. 🙂 😘
Right?! It’s an oldie!🤗 thanks my friend! XOXO
Oh my, that poor little table must be so happy to have fallen into your hands, what a difference. I was so happy to see it come back to life, you did an amazing job as always.
It was a poor little thing, wasn’t it?!😂 Thanks Janette! XOXO
Hi Denise!! The top was a.mess! You definitely gave it new life. It turned out so pretty. Your sister has alot of faith in you. I know why.
A hot mess for sure!! I think my sister has a little TOO MUCH faith in me because I when I saw the top, I wanted to throw it to the curb!😂 Just kidding. Thanks so much, Cheryl! hugs
Although it’s simple, this is one of my favourite makeovers Denise! I would love to find a table like this! I just had two challenging tabletops to sand and it took 6 hours to get back to bare wood (unfortunately I went through some of the veneer on one of them). Would you only recommend sanding against the grain on solid wood or have to tried this method on veneer too?
6 hours shows dedication, Sara! I’ve sanded through veneer many a time and ya, I wouldn’t try sanding cross grain with a veneer – only solid woods. Stay dry today my friend.😊
How did you get the nice brown color on top? Was it just with the weathered grey?
Thanks!
Hi Grace! Yes, it’s the natural wood peeking through the weathered grey stain. Then I top coated with Gator Hide. 🙂
Hi Denise! I am hoping to make the top of a table the color you have on this table. But I am a little confused.. In the supplies list, you have weathered gray stain (similar one) with an Amazon link to a Varathane Wood Stain called Sunbleached. It looks much lighter than the color you have on your table. Is that the correct link? Maybe the color of the stain on the front of the can is misleading and it is much darker than that? Any help you can provide in pointing me to a stain similar to the one you used would be so greatly appreciated! Thank you!
It looks like the link goes to ‘Sunbleached’ which is not available. Maybe try a local hardware, paint, or big box store for what Denise used here.
Oh my Denise, you transformed the magazine rack completely. How beautiful it looks now. Love the darker natural top against the grey legs and thanks so much for the tip about sanding against the grain. I’ll try that next time
Thanks Michelle! And ya, going against the grain works like a charm for heavy duty tops!
Denise, thanks for the tip about using Weathered Wood stain! The little table is lovely! The color is so pretty too. What proportions of the Driftwood and Cotton DB did you use? Also, I finished a piece with dropcloth DB and after I waxed it I went to my booth and it had fingerprints on it!! How can I clean a piece with wax on it? Thanks so much for posting another Cinderella piece. You are the Fairy God Mother of salvaged treasures.
Hi Cecilia! The mix was approximately 80% Cotton to 20% Driftwood. It creates a really beautiful soft/modern grey. As for the fingerprints, often they can be buffed out with a soft lint-free cloth. If that doesn’t work, buffing out the fingerprints with another layer of wax should do the trick. 🙂
First, kudos to you for not walking away from that challenging table top. Magnets and doilies, really! You did a remarkable job on this sad little table, Denise and your hard work paid off. I bet your sister was thrilled when she saw the night and day transformation 🙂
Thanks Marie, she’s really pleased. I’m delivering it to her tonight in exchange for chicken soup dinner. 🙂
Hello Denise… just an FYI here. If you’re ever in Western New York and find yourself craving *homemade soup, I always have plenty.
*Note – will trade for refinished by D@SI pieces of any sort.
Thank You!
Don’t tempt me, Ellie! I’m only a 35 min drive from the border.😉🧡😉
The magazine table looks fantastic. I have two of these at home that belonged to Grandmothers and both tables need new finishes. Thanks for the inspiration.
Beverly
These types of magazine tables were so popular, weren’t they!? I hope you have fun transforming yours B. 🙂
Ssssh, don’t tell hubby but I’ve even used a belt sander across the grain to level out warped steps. But you’re in for a lot of sanding with the grain to get the scratches from the grit out. Amazing transformation! 💓
Thanks… and it’s our little secret Lorin. 😉 hehe
I’m almost afraid to ask how many sheets of 80 grit you went through to get that gunk off!! Beautiful final product!!!
Hi Mary. thanks! 🙂 I think I used 5 of the 80 grit orbital sanding pads but that was because they kept gumming up with the plastic doilies. grrr…lol
You did an amazing job! I learned something new today so that makes it a great day!
Thanks Katy and I’m so glad! You just made my day great. 🙂
Cute makeover Denise! Did you mix or layer the Cotton and Driftwood paint?
Thanks Nicki! Ya, I mixed the 2 colors. About 80% Cotton / 20% Driftwood. It’s a really nice soft grey. 🙂
What a sweet little table Denise. I love how you made it into an adorable farmhouse fabulous book rack/plant stand. Too cute!!!!
Thanks Monique! My sister is happy so I’m glad it all turned out. 🙂