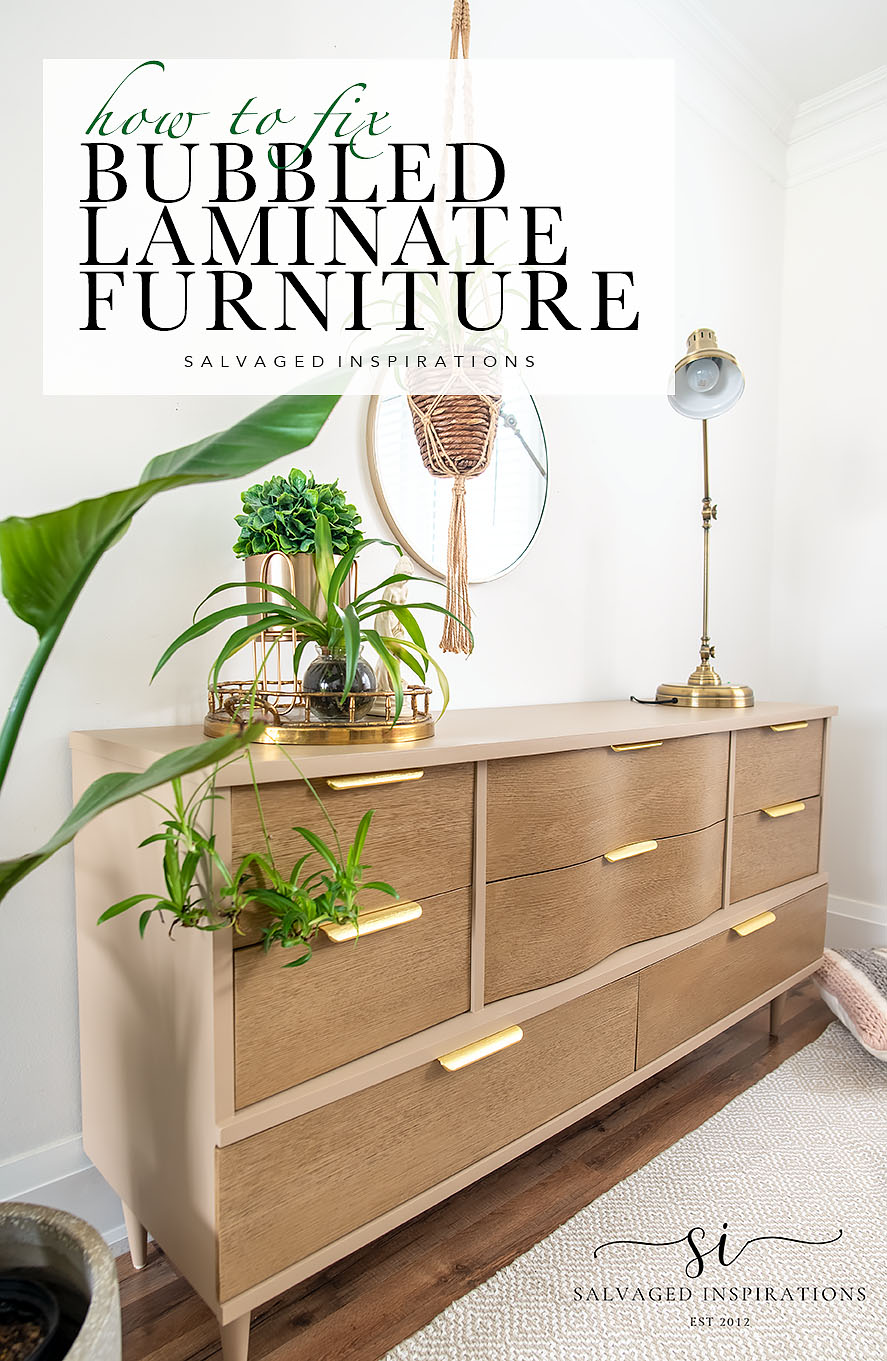
HOW I REPAIRED THIS CURB-SHOPPED BUBBLED LAMINATE DRESSER TOP | YOUTUBE VIDEO
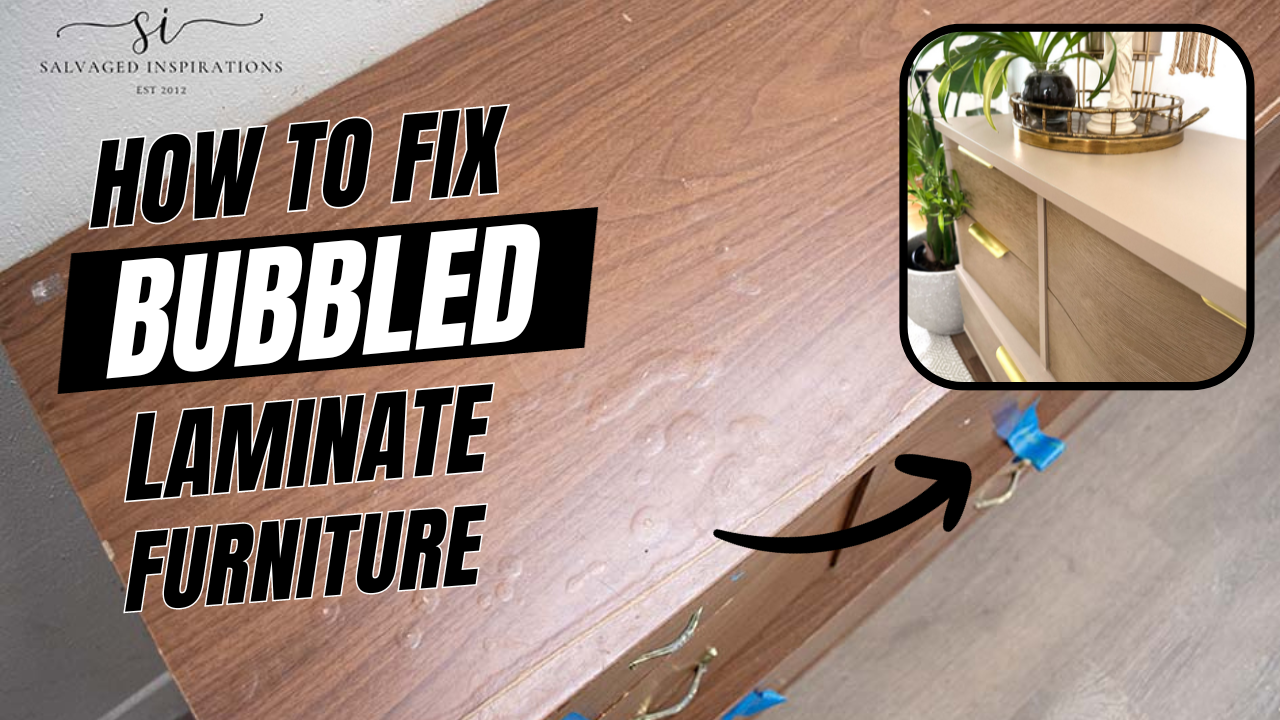
Hi beautiful friends and Happy New Year! I hope you had a fabulous and relaxing holiday. It’s great to be back and I’m excited to start the year off with this salvaged dresser. I found this dresser curbside and I have to admit these are my VERY FAVORITE type of makeovers. Finding a trashed yet well-built piece of furniture that looks like a hot mess, and turning it into a diamond! Today I’m sharing how to fix a bubbled laminate piece of furniture using a sander, woodfiller, paint, and primer.
Challenge on so let’s get started! I can’t wait for you to see how gorgeous this piece turned out.
*As an Amazon Associate, I earn from qualifying purchases. There are affiliate links in this post to other companies/products I use and love as well. You will never be charged extra when you purchase through these affiliate links. If you purchase from my links – A BIG thank you for supporting me and the #siblog! To see my full disclaimer, click here.
Over the holidays I found this eight-drawer dresser curbside. The sad part was I passed it by walking the dog every day for about 5 days running – and it was in pretty darn good condition. Then it rained. When my friend Steph and I passed by it on an evening walk, I decided to grab it. But at this point, the top was damaged from the rain we had.
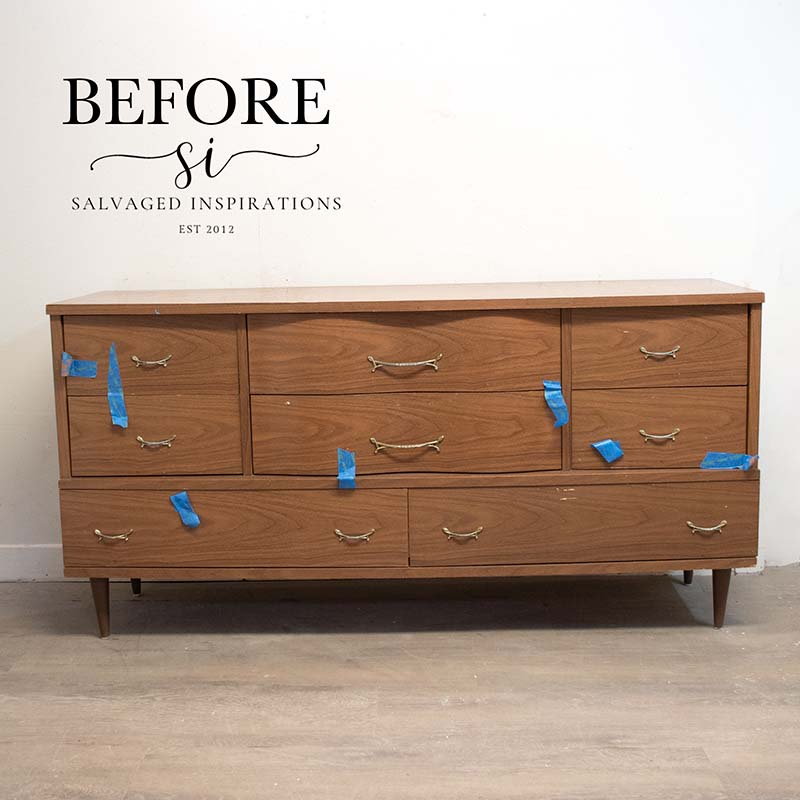
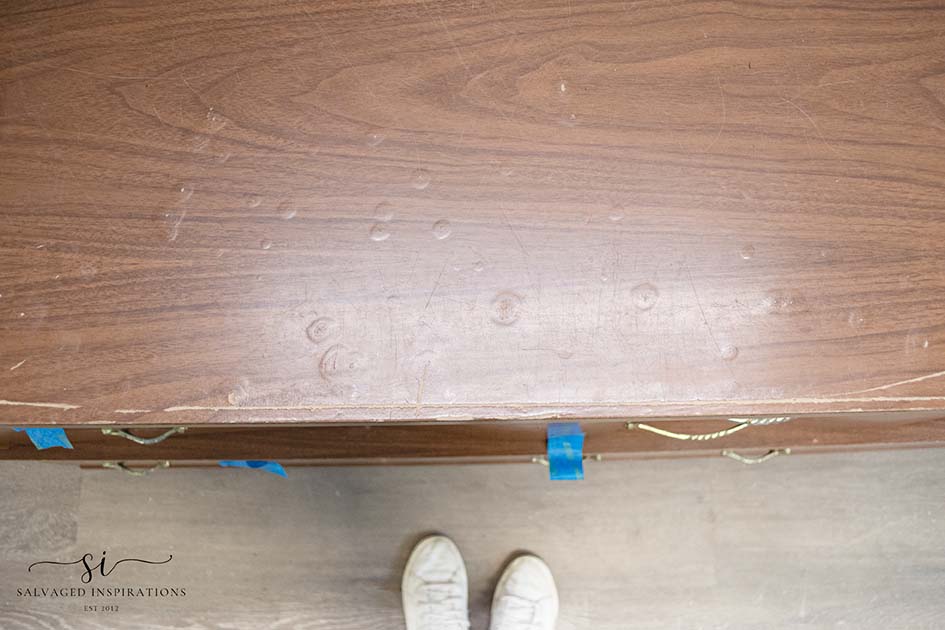
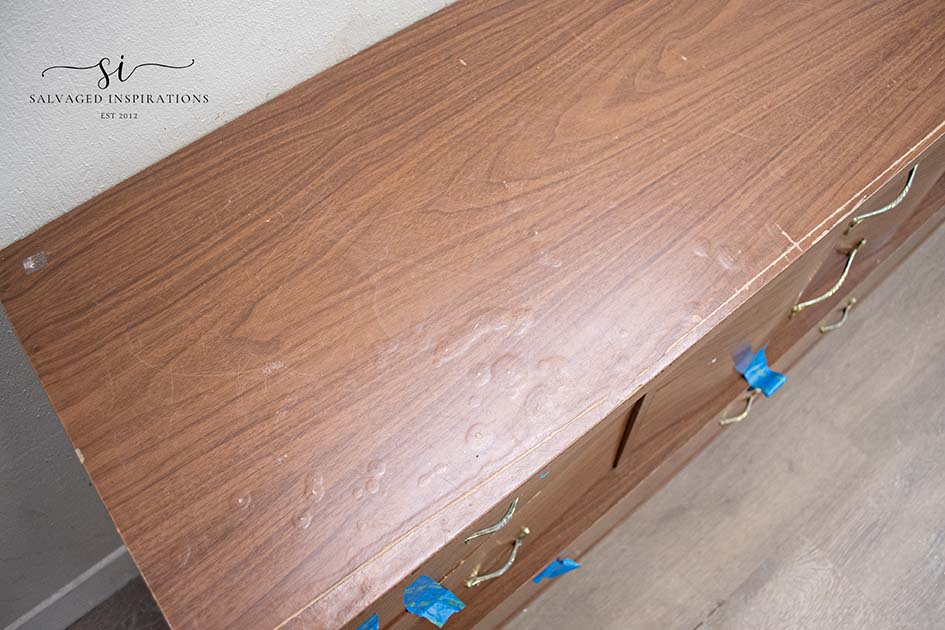
The dresser is structurally sound but as you can see the rain had bubbled the laminate top.
THIS POST IS SPONSORED/CONTAINS AFFILIATE LINKS TO PRODUCTS I USE. YOU CAN SEE MY FULL DISCLOSURE HERE.
WHAT YOU’LL NEED
Curb-Shopped MCM Dresser – SALVAGED
Heat Gun (15% OFF as of writing this!)
Painters Multi Tool
Bosch Sander (25% OFF as of writing this!)
Bonding Boss Primer (COMING SOON!)
Burlap Chalk Mineral Paint
Van Dyke Brown Glaze
Big Soft Brush
Brushed Gold Hardware
Gator Hide Top Coat
WHY LAMINATE BUBBLES
The most common reason for laminate furniture to bubble is excess moisture. Moisture gets between the particle board or MDF and the decorative laminate top. This causes swelling and bubbles to appear. Excessive heat, poor bonding, or installation, and hard wear and tear can also damage laminate furniture.
I’m going to start with how I fixed this dresser top and then I’ll share the rest of the makeover below.
HOW TO FIX BUBBLED LAMINATE
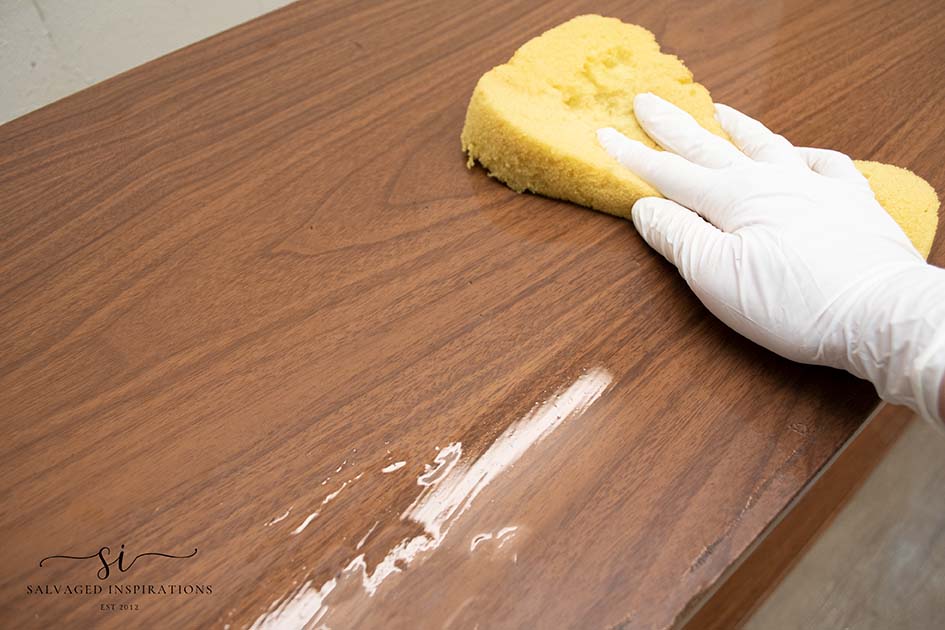
CLEANING
Because this piece had been sitting out for nearly a week, I started by giving the inside and out a really good cleaning.
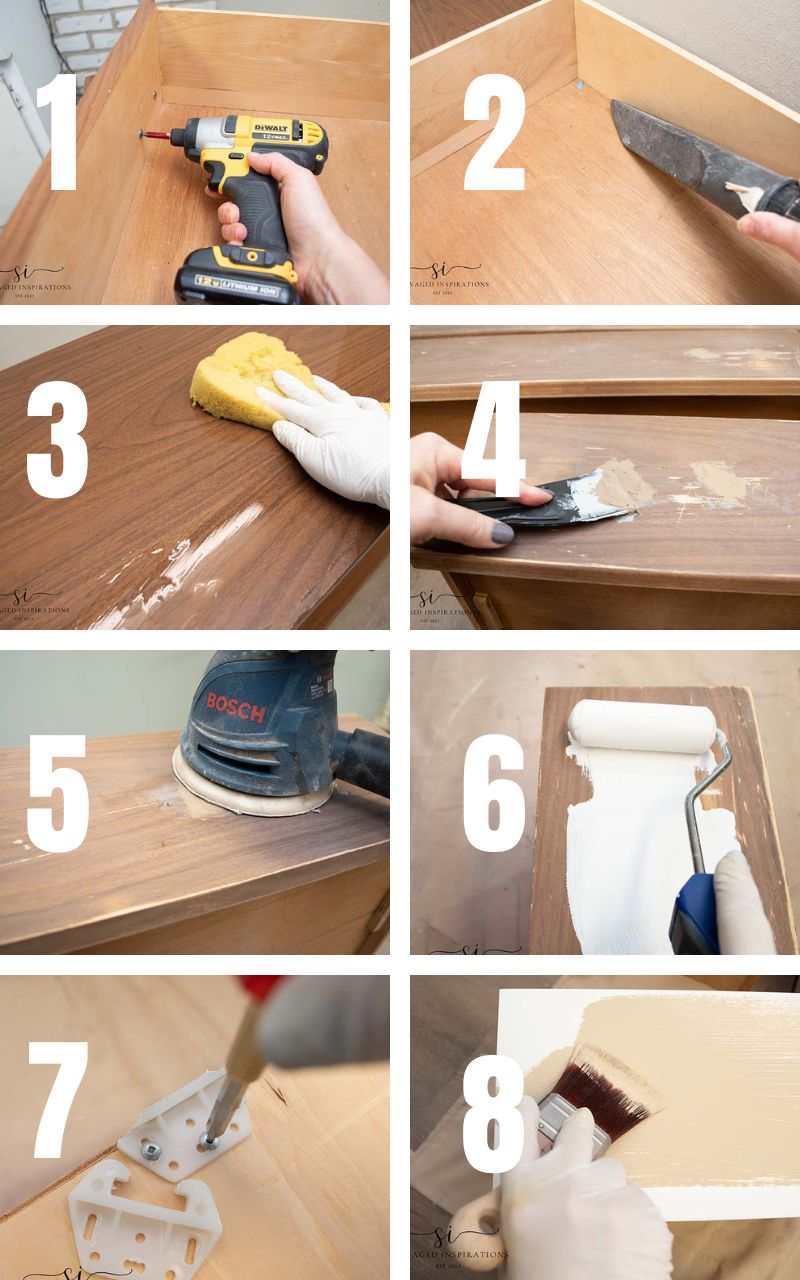
SANDING
Once I wiped everything dry, it was time to sand down the bubbling laminate until the dresser top was perfectly smooth. I used my orbital sander with an aggressive 60 grit sandpaper.
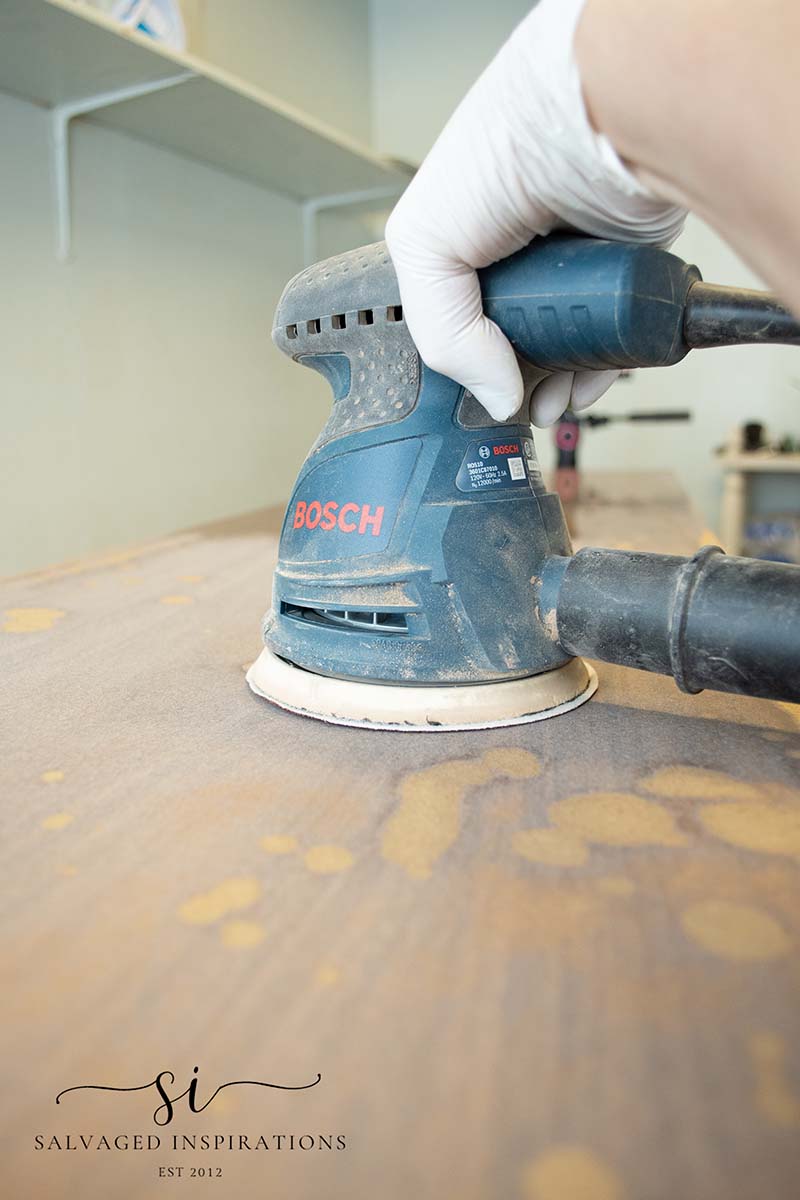
The particle board was showing through once the swelled pockets were sanded down but there was no other way to repair this. I could have cut out each bubble with a utility knife (which is another way of removing bubbled laminate to make sure ALL the moisture is removed from the particle board) but drying the piece out and sanding is just as effective.

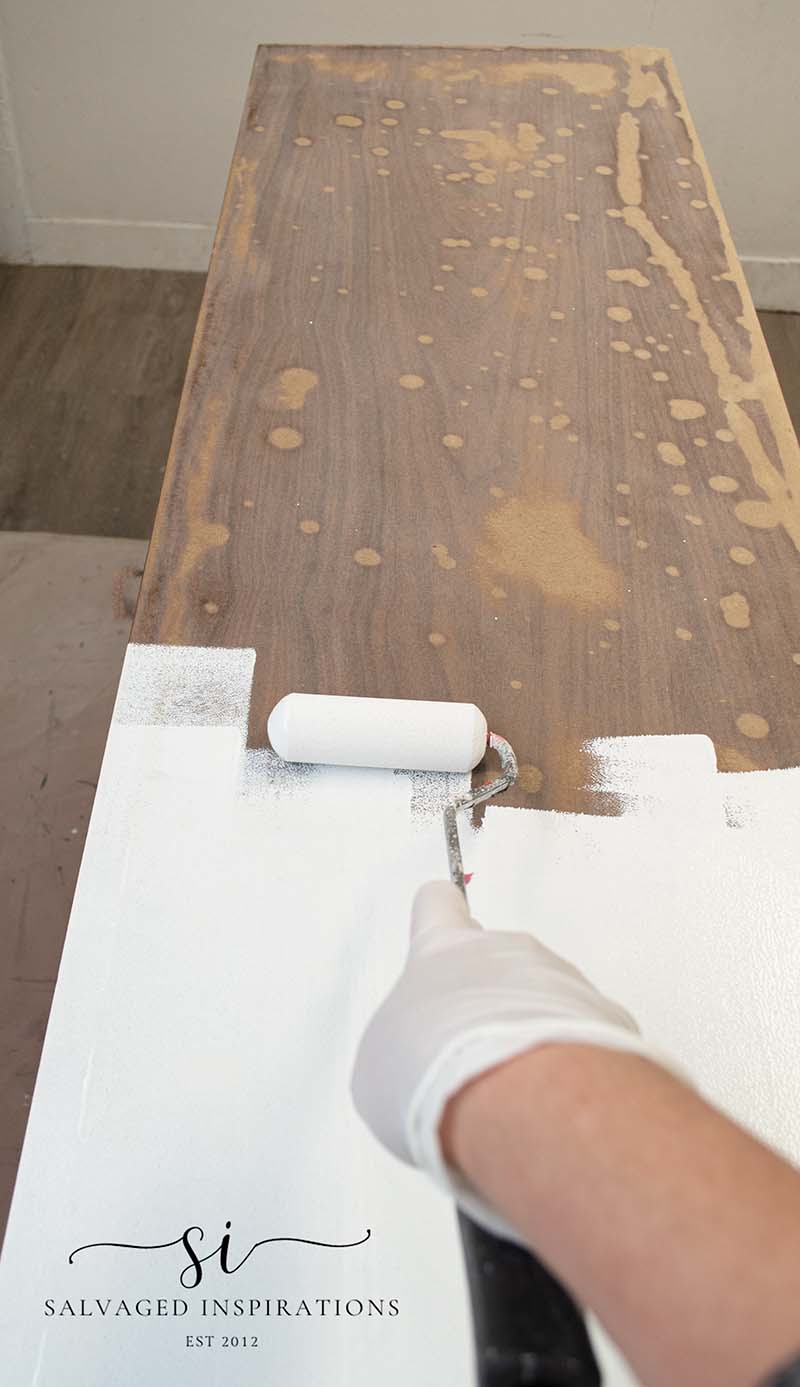
PRIMING
I could have gone ahead and started using wood filler before priming but I opted to seal with primer first. I find this helps me see ALL the little knicks and gouges so I know exactly what needs filling. Dixie Belle has a BRAND NEW product they have formulated which combines their stain-blocking BOSS with the convenience of bonding SLICK STICK! It works amazing and I love that it solves two issues with one product. I believe it will be available at your local retailers and online within the next few weeks!
FILLER
Without using a filler, the particle board or MDF absorbs the paint very differently than the laminate. FILLER IS KEY to a smooth finish. A good portion of this dresser top was skimmed/filled with this White Mud.
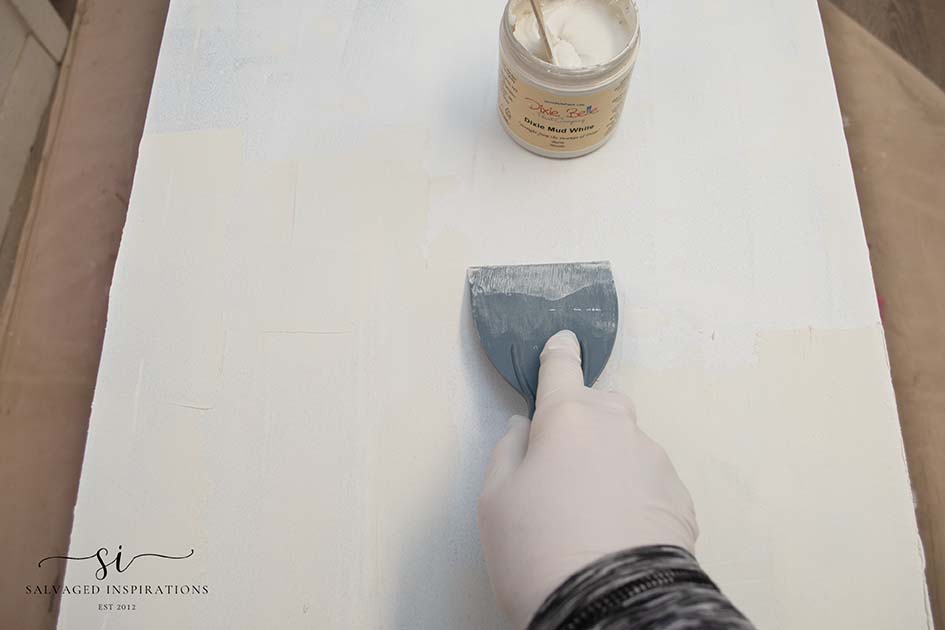
I like overfilling slightly so when I sand, it’s perfectly level and smooth.

PRIME & SAND #2 – FEEL FOR SMOOTHNESS
Once all my wood filler was dry, I brought this dresser into my sanding room to sand it smooth. The entire time, I made sure to run my hand over the top to FEEL my way to a perfectly smooth top. I removed all the dust and gave it a second coat of primer.
PAINT
Now to make it look pretty. Painting time! I chose Burlap for a beautiful neutral and painted two coats using a roller and then smoothing it out with a soft brush. No more bubbles!!

DRAWER PREP
To prep the drawers I followed these steps…
- Removed the old hardware
- Vacumed the inside and outside of the drawers
- Cleaned the inside and outside of the drawers
- Filled the hardware holes with Bondo/Wood Filler
- Sanded
- Primed
- Fixed broken slides
- Painted in Burlap
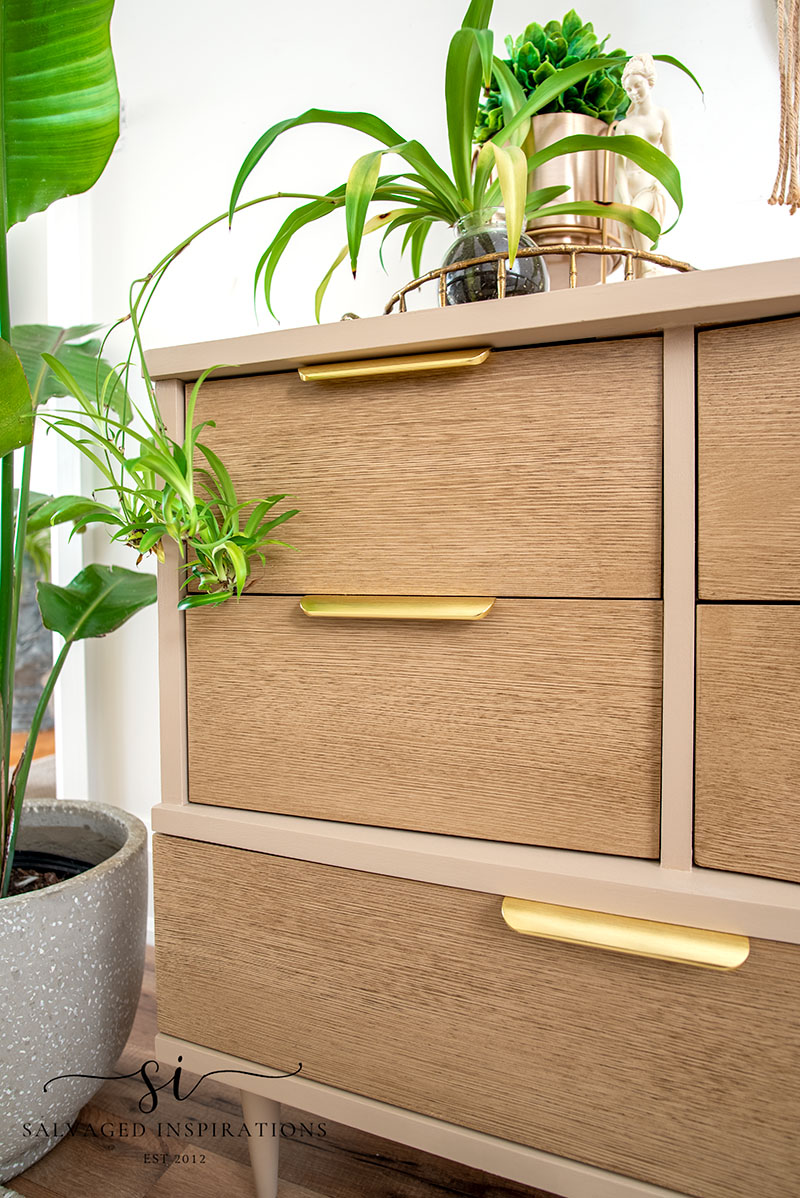
FAUX WOOD DRAWER FINISH
Using this Van Dyke Brown Glaze, I created a faux wood finish on the eight drawers. Soooo much fun to do. I have a full detailed tutorial including a video on how to get this fake wood finish here.

INSTALLING HARDWARE
To give this piece a sleek look I found these brushed brass handles on Amazon. Before installing this hardware I made sure it would work and there was enough space between the drawers. A few millimeters per drawer is needed so the hardware doesn’t brush up against the drawer above.
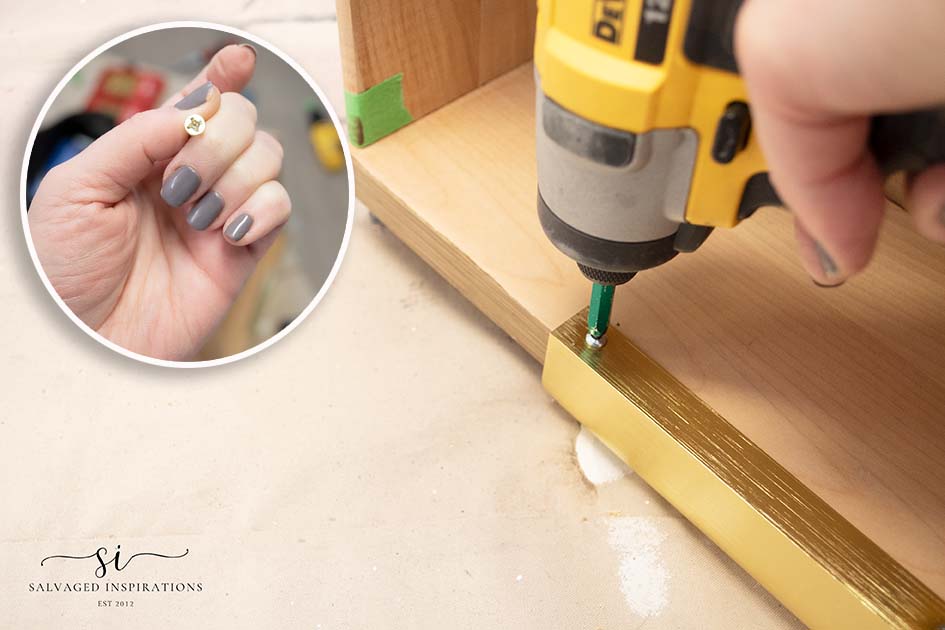
Pro Tip – If you have gold/brass screws included with your new hardware, don’t use them. Every time I’ve used the gold/brass hardware that I’ve purchased or that has come with hardware, the screw heads strip down because the metal is so soft. I like swapping them out with heavy-duty screws. Then if I want the screw to match the hardware, a little gold paint or gilding wax does the trick.
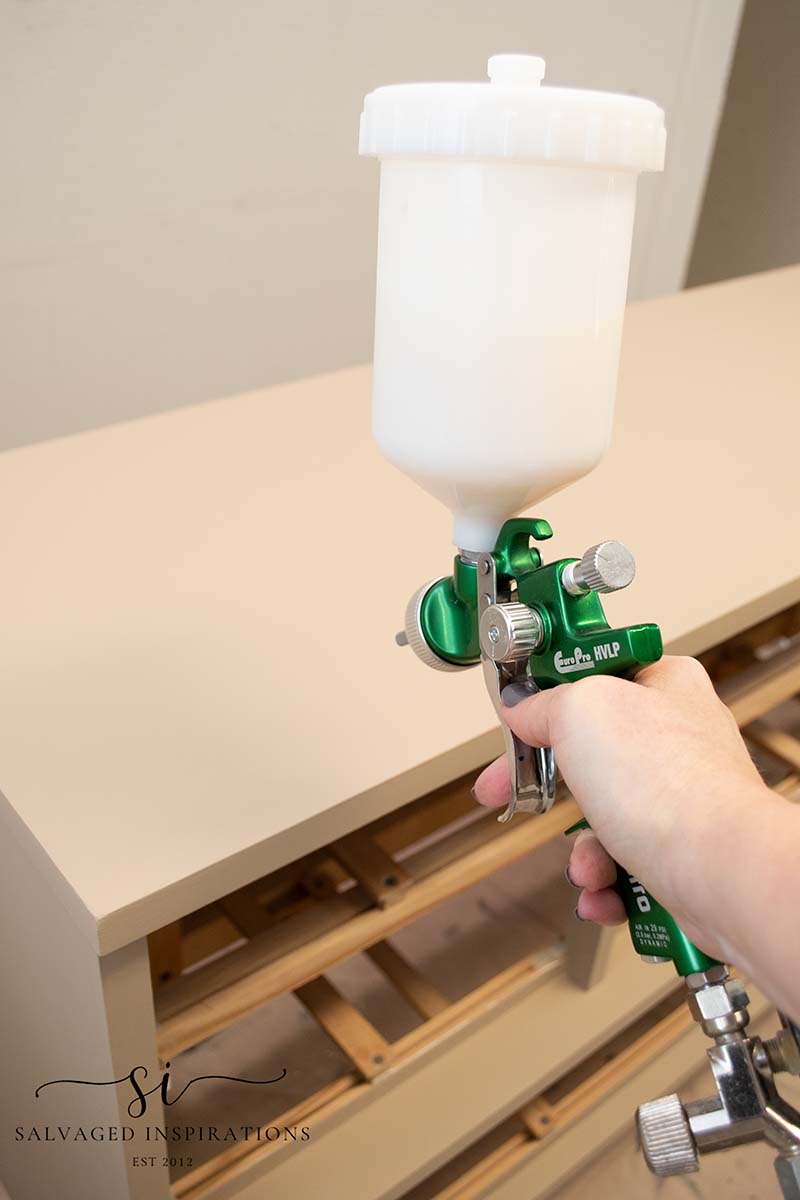
TOPCOAT | PROTECT
I used my favorite heavy-duty Gator Hide Topcoat. For the drawers, I used this blue sponge to apply 2 coats. For the body, I spray-coated two coats. Both look flawless and awesome so if you don’t have a spray gun, no problem.
FINISHED MCM DRESSER
Here’s the finished look. What do you think?!
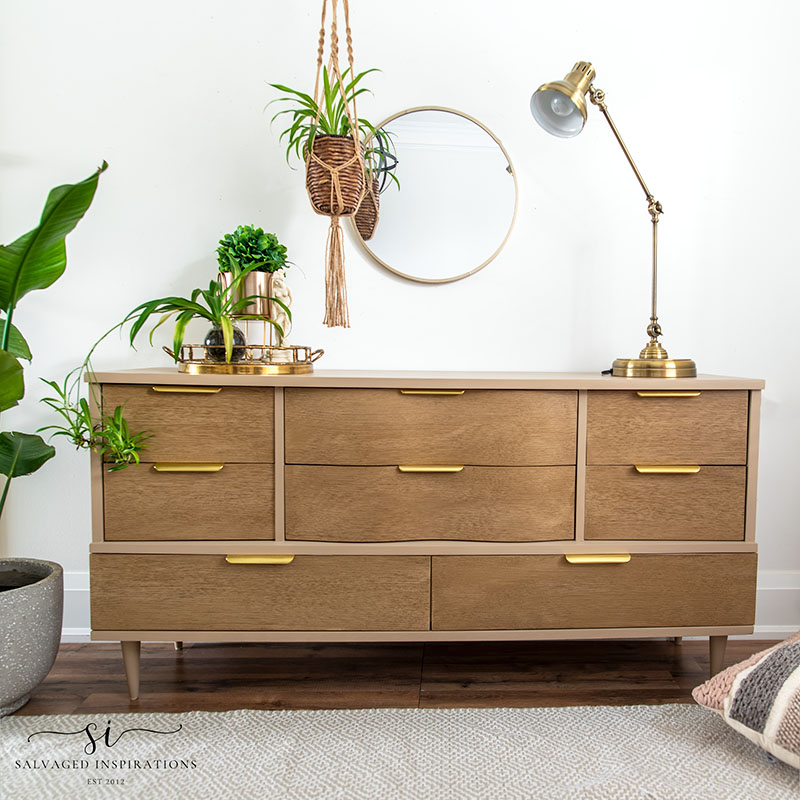
And here’s a few closeups of the smooth-painted top!

No more bubbles!
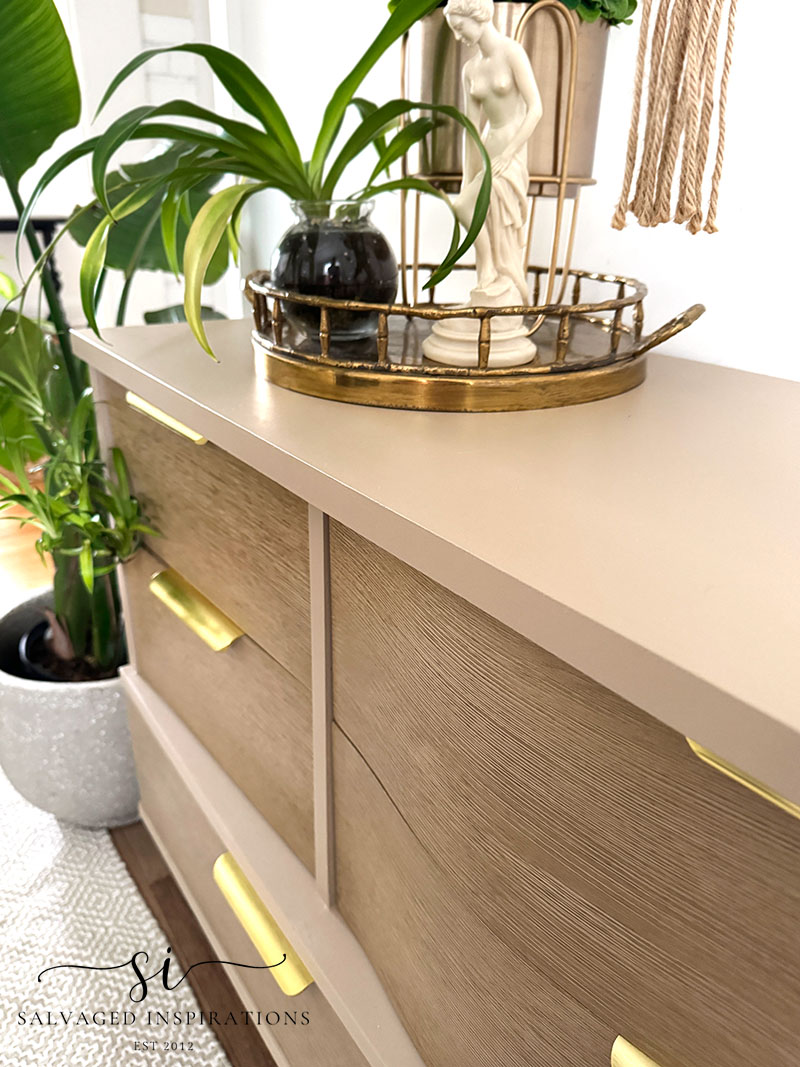
It’s a night and day difference. I don’t think anyone would know this dresser had such a damaged top.
I can’t wait to hear what you think of it’s NEW LOOK!

YOUTUBE TUTORIAL
Here’s the full step-by-step YouTube tutorial below. If you have any problems viewing it, you can watch it on YouTube here. Our #siyoutubefamily is already a community of 42.6K so don’t forget to subscribe if you haven’t done so already! So exciting, thank YOU! 🙂
Here’s another look at this salvaged MCM dresser before and after. I hope it’s inspired you and given you some ideas for your laminate furniture.

Thanks so much for being here and sharing this makeover with me today. Let me know what you think of this curb-shopped bubbled dresser before and after, or feel free to chime in with any questions you may have. I always love hearing from you. It makes my day! 🙂
And now I’m going to watch the last few episodes of Ted Lasso. Have any of you watched Ted Lasso on AppleTV? I started watching over my holidays and I’m addicted. I’m on the last few episodes of season 3 and can’t wait to see how it all ends.
See you next Tuesday and happy painting my friends!
Denise x
RELATED POSTS::
PAINTING OVER LAMINATE THE EASY WAY
2 BEST WAYS TO PAINT LAMINATE FURNITURE
HOW TO PAINT A FAUX WOOD FINISH
THE DIFFERENCE BETWEEN LAMINATE AND VENEER
HOW TO PAINT LAMINATE WITHOUT SANDING
PIN AND SHARE!

Hola me encanta el mueble me parece una preciosidad, pero tengo una duda para hacer la imitación en los cajones lo hiciste con barniz tintado normal o usaste algún tipo de glaze. es que quiero pintar unas mesitas de luz con ese acabado y no encuentro nada para hacer la imitación de madera. gracias.
Hola and thank you! I used this Vandyke Brown Glaze. However, if you don’t have access to a glaze in your area, you can always use a darker paint and mix with water until you get a ‘glaze’ consistency which I would describe like a syrup. Hope this helps.
Hi there and happy new year! Can you tell me what tool you used to mark the holes? If you mentioned it in the video I may have missed it.
This is exactly what I needed to know and all in one spot too!
Thank you!!
Kim
Hi Kim, happy new year! If you’re referring to the drawer hardware holes, I use this template here. Cheap and works great!
Denise’s guide on repairing bubbled laminate furniture is incredibly helpful and inspiring! Her detailed walkthrough, from sanding to painting, offers a practical solution for anyone facing similar issues with laminate furniture. The before and after photos showcase the dramatic transformation and the potential to save and restore even the most damaged pieces. This article is an excellent resource for DIY enthusiasts looking to give new life to their furniture. Thanks, Denise, for sharing your expertise and encouraging sustainable practices by salvaging and restoring furniture.
Stunning…just stunning! You did a great job with the drawer fronts. They look like real wood grain!
Fabulous job!
Thanks Sherry! I’m having so much fun with this faux wood finish!
What a transformation!! Absolutely Gorgeous!!! I so love the color and making the drawers look like wood sends the whole piece to top notch….not to mention the gold pulls, etc! I am so very impressed, but then again, you have NEVER not impressed or amazed me! Thank you for showing us the possibility of a not very pretty piece turning into a Queen piece!!
Aw, thanks so much Karolyn! I’m so glad you love it!🥰
Wow!! I really love this piece. It makes me want a dresser like that!!! I don’t usually comment but this piece took my breath away!!
Ohhh thank youuuuu Marcella! I’m so glad you love it and thanks for taking the time to drop by and comment. It means a lot!🤗 Enjoy your weekend. xo
Oh Denise, you’ve done it again! It’s just beautiful. You would never know it was the same piece. SCORE!!!
Yes SCORE! It was such a great find to start the new year off with. Thanks so much Caye! XOXO
Oh, WOW, TERRIFIC!!! Wuat a wonderful updated look!! Your vision is always extraordinary, and you nailed it, again!!! 🥰
YAY! Thanks Susan, it was a great find!😃
WOW this is gorgeous and what a spectacular find! Thanks for sharing your tip on the gold screw. I’ve stripped a few in my time and thought I was dping something wrong.
Thanks so much Nicki! And ya, its NOT you. They are made from some sort of soft metal. And it’s too bad because they look so pretty. 😉 lol
WOWZA! Exactly what I’m looking for! Too bad we live 2,000 miles apart! lol
I love most everything you paint, but this is one of my favorites. Looking forward to seeing how you fixed the rails. Sometimes that’s a show stopper for me
Happy New Year!
I love a good WOWZA…lol, thank you so much Cara! I’ll be posting the full video makeover this Saturday. Happy 2024! 🎉
Outstanding! Your vision shines once again. The contrasting drawer fronts & hardware are gorgeous. Thanks for posting, looking forward to video.
Thanks my friend! I’m loving this hardware as well! 🙂
Wowzer! What a beautiful piece. I LOVE the gold hardware too. ❤️
Thank you for always sharing your professional tips and tricks with us. Those laminate tops can be tricky.
Happy New Year! xo 😘
It would’t have been so tricky if I had picked it off the curb BEFORE the rain…lol. Thanks so much my friend and I hope your holidays were fabulous!!!
Great job, as usual! Awesome start to the new year Denise.
Happy New Year!
YAY, thanks Caye! It was a great find and a fun project to start the year off with for sure! Happy New Year!🤗
Amazing! Great finish and the new hardware really works! Wonderful
Thanks Mary! I’m loving this hardware as well! I’ll have to stock up on another pack! 🙂
Brilliant project. I love the faux wood idea and screw replacement suggestion. Could you share a link to the brass pulls? Those are just what I need for a project.
Thanks Andrea and for sure – it’s these brushed brass pulls here and they also come in black.:)
This is AWESOME!!!!!
YAY! Thanks Tiffany!!!🤗
that is one amazing road side find! Wow! You always have great fun makeovers. Well done.
This one was an amazing find… I just wish I had picked it up before it got rained on.😂 Thanks so much Kimberly!
🩷🩷🩷 this. This piece will remain a classic!
Thank you Doris!💕
Wow! You did a beautiful job. It’s gorgeous.
Thanks so much Lizzy! Happy New Year!🎉
Stunning!
Thank you Leslie! XOXO
Hi Denise. You definitely turned this ugly duckling into a swan. The dresser top looks flawless and your choice of color is beautiful.
That top was a little ugly…lol. Thanks so much Monique and a big Happy New Year to you. I hope your holidays were lovely!🤗
Fantastic job! Looks like it’s right off the furniture showroom floor!
Awwww, thanks Gayle!💜 You just put a huge smile on my face!😃
Gorgeous! The faux wood finish came out especially nice. Are those pet brushes you used?
Thanks Nette and yes that’s exactly what it is – a pet hair remover brush! It works awesome!