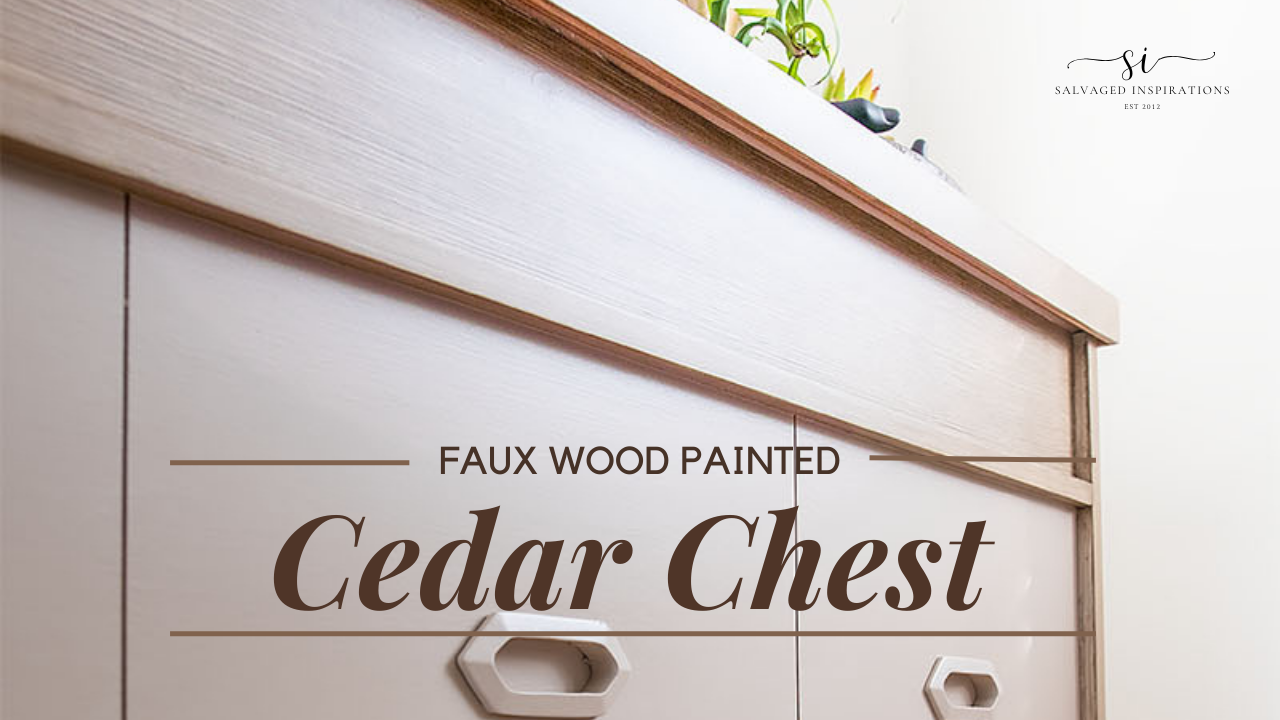
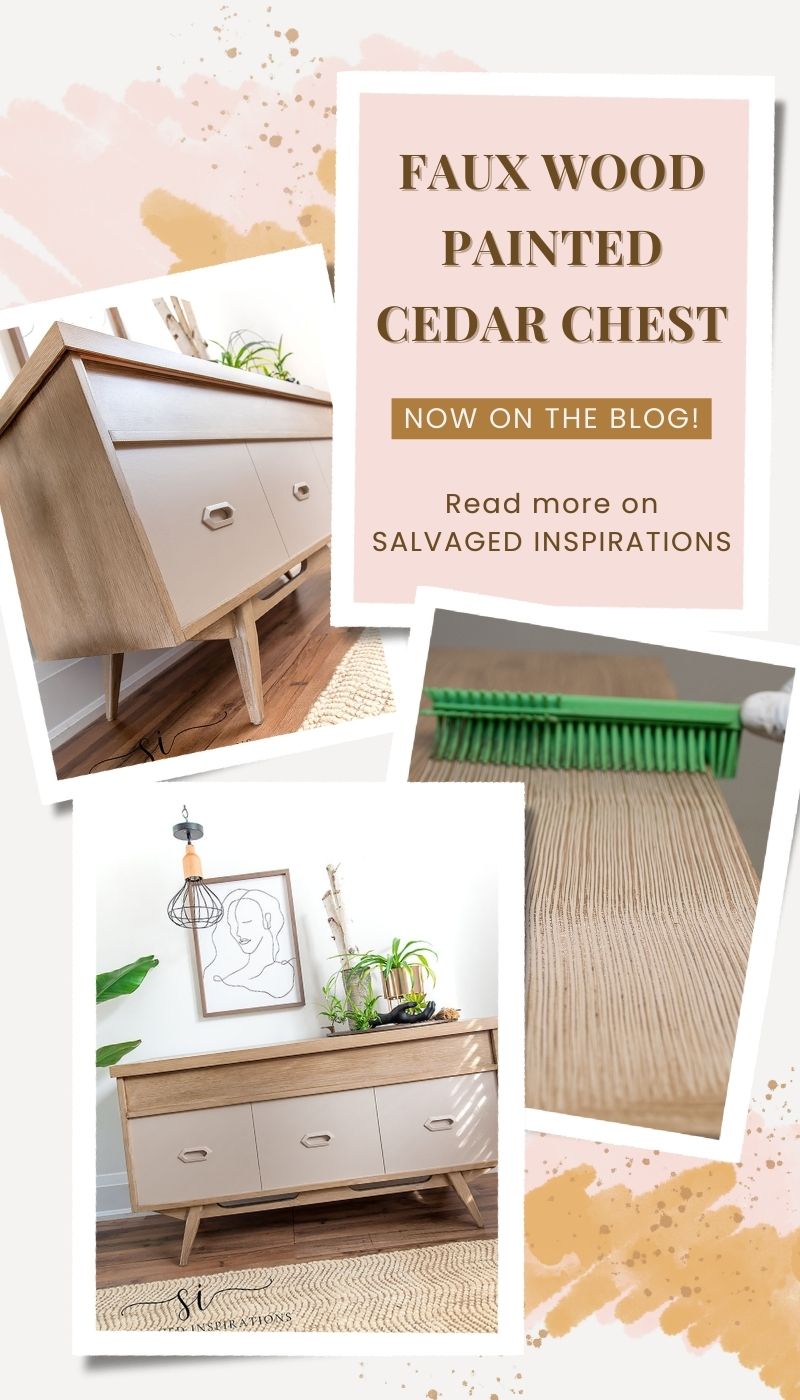
HERE’S HOW TO CREATE A MODERN FAUX WOOD FINISH USING PAINT AND GLAZE ON A CEDAR CHEST | YOUTUBE VIDEO
 Hi creative friends and welcome or welcome back! I think I’m addicted to this Rubber Pet Hair Remover and this awesome paint and glaze technique. No joke. Today I’m sharing how I updated this cedar chest with a modern faux wood finish. I can’t wait to hear what you think!
It’s also Furniture Fixer Uppers Day. We usually post on a Thursday but seeing as US Thanksgiving is on Thursday, we decided to share with a few days early! I’m joining my FFU crew and sharing links to their projects down below.
*As an Amazon Associate, I earn from qualifying purchases. There may also be affiliate links in this post to other companies/products I use and love as well. You will never be charged extra when you purchase through these affiliate links. To see my full disclaimer, click here!
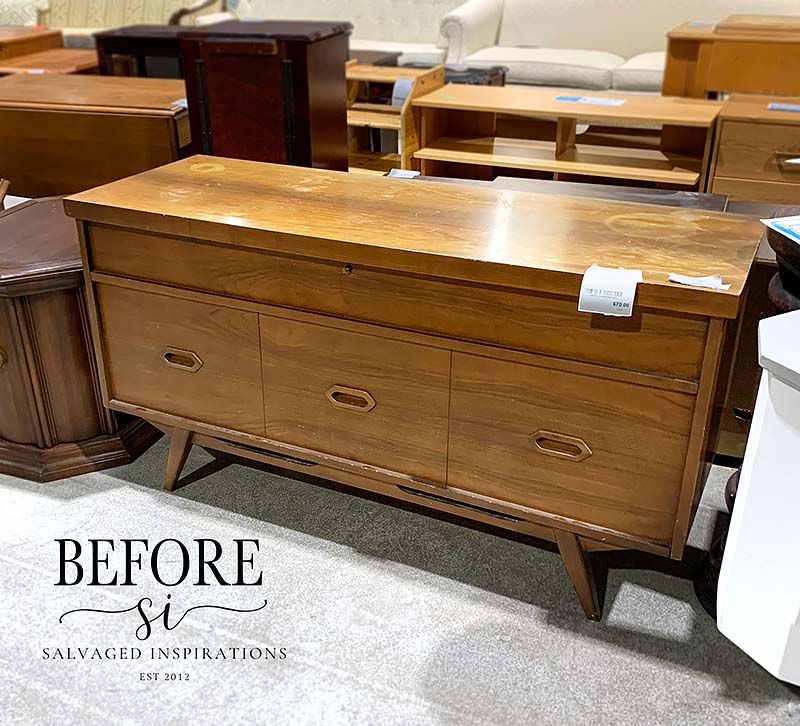
Here’s the salvaged cedar chest I started with. I found this selling at my local Restore for $70. Not the best price but I sure did love the quality and lines on this piece. The funny part was, that the volunteer who loaded it into my car was actually the original owner of this piece! He said he loved it but he recently moved and didn’t have room for it anymore. Lucky me!
Once I brought it into my studio I noticed a few areas with some missing veneer.
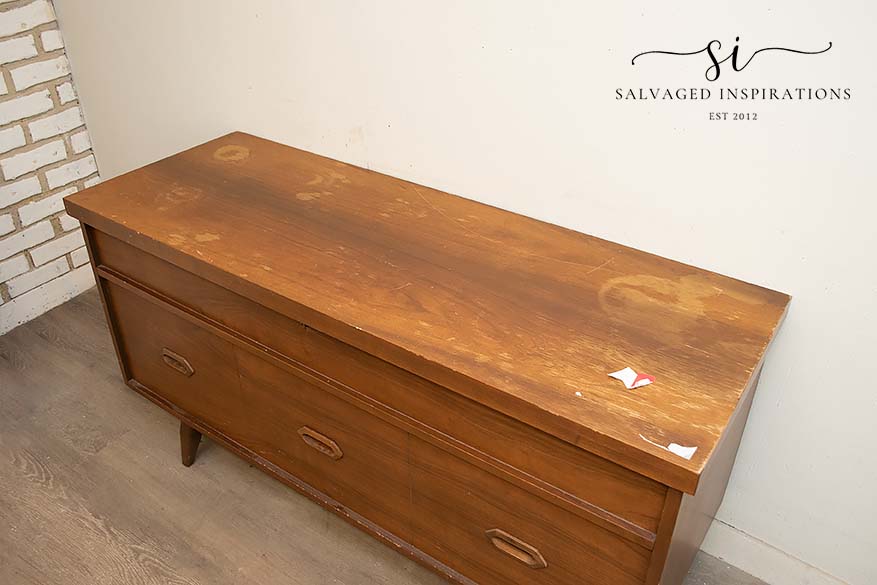
The top wasn’t in the best of shape but nothing that I couldn’t fix up. Challenge on!
THIS POST IS SPONSORED/CONTAINS AFFILIATE LINKS TO PRODUCTS I USE. YOU CAN SEE MY FULL DISCLOSURE HERE.
WHAT YOU’LL NEED
Cedar Chest – SALVAGED
White Lightning Cleaner
Wood Glue (similar)
Bosch Sander
BIN Shellac Based Primer
Big Daddy Brush
Cobblestone Chalk Mineral Paint
Endless Shore SILK Mineral Paint
Van Dyke Brown Glaze
2″ Round Paint Brush
Gator Hide Topcoat
PAINTED CEDAR CHEST MAKEOVER
Here’s how it all came together…
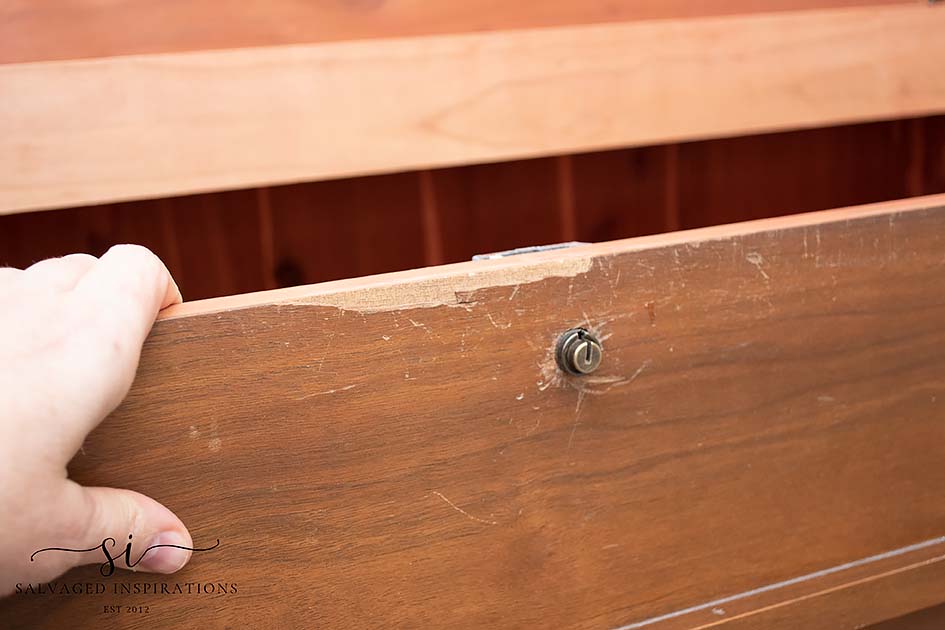
REMOVE LOCK
Since this piece will be listed for sale, the very first thing I did was remove the latch lock. I unscrewed the mechanism from the inside and it popped out really easy. But then I was left with a large hole. To fix this up, I used a dowel from a scrap piece of wood. I cut it down and glued it in place with some wood glue.
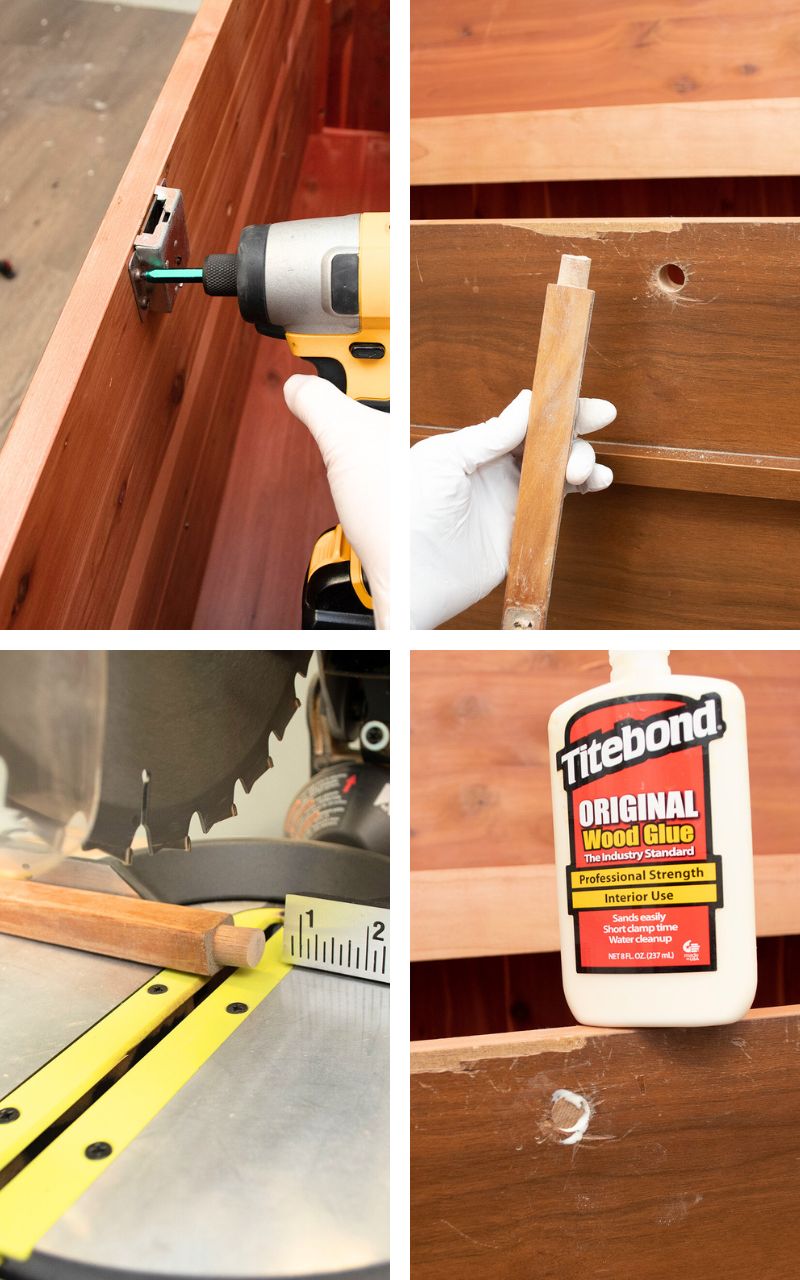
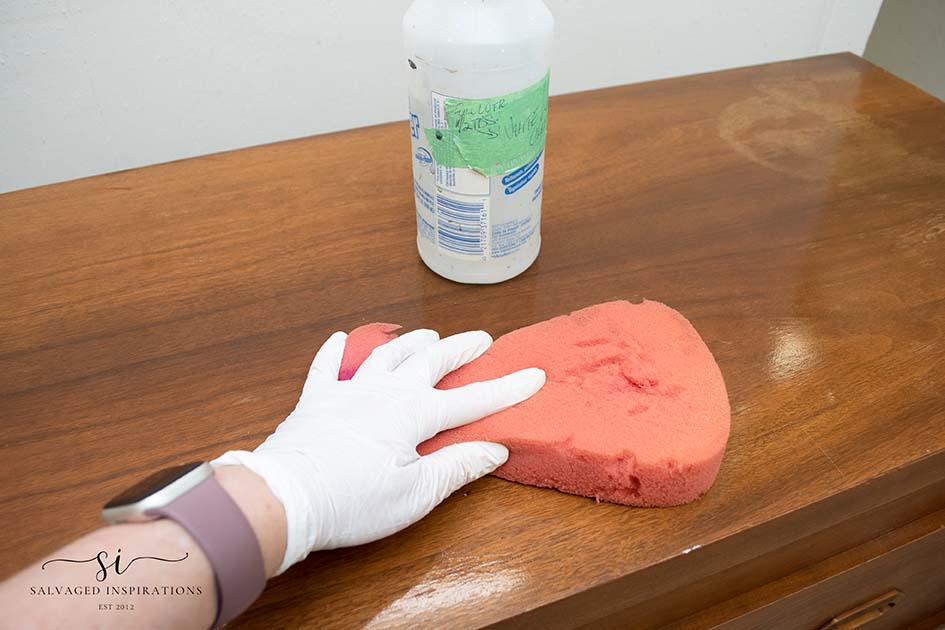
CLEAN & PREP
I gave this chest a good cleaning with White Lightning. making sure to rinse my sponge and wipe with clean water to remove any residue before sanding and priming.
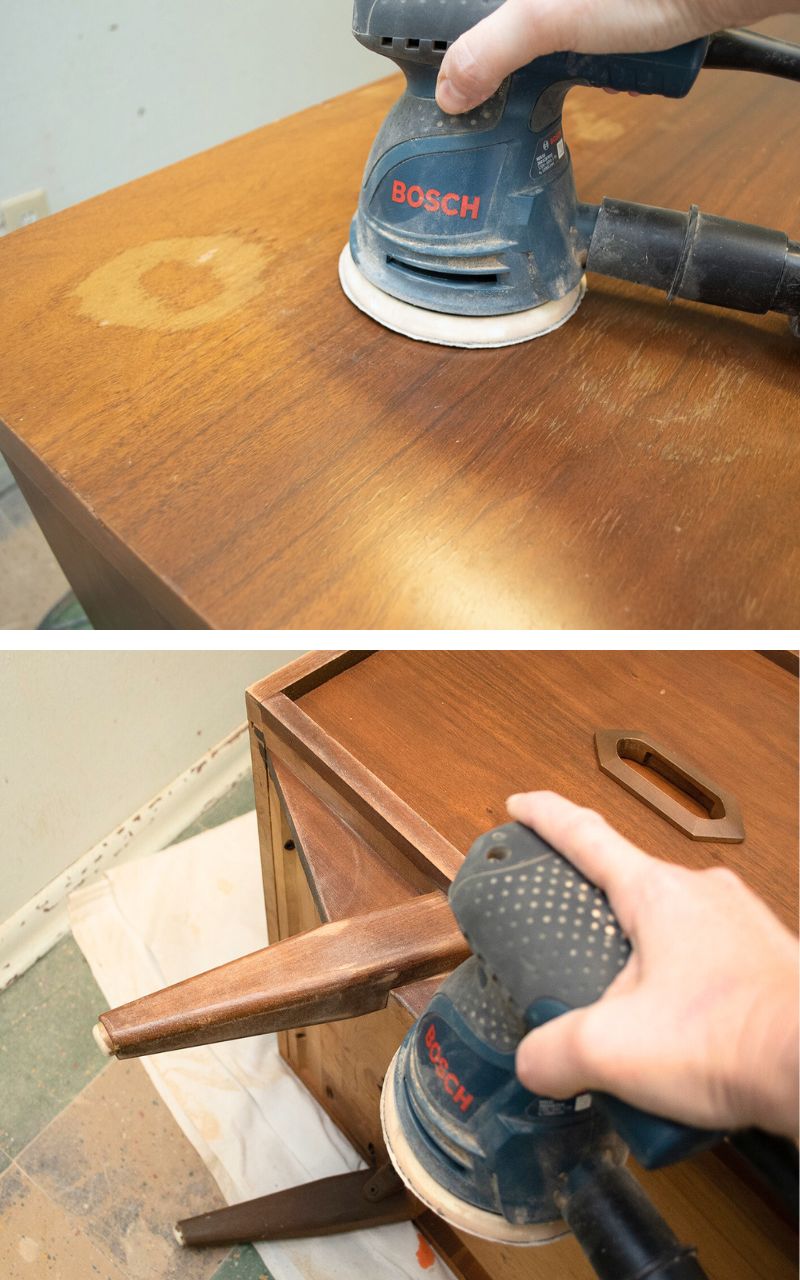
SAND
Once this chest was all cleaned and dry, I gave it a quick scuff sand with my Bosch Sander.
PRIME AND FILL
There were A LOT of scratches and dings on the top of this piece. And even though the chest is made of cedar, it’s covered in a walnut veneer so I couldn’t sand them out. Instead, I primed with BIN Shellac-Based Primer so I could see all the divots and scratches before patching. Once I started filling in all the imperfections, almost the entire top was covered…lol.
Here are the steps I took to get a smooth top and fill in all the missing veneer.
- Prime (so all the imperfections are easily visible)
- Fill with wood filler
- Let dry 100%
- Sand smooth
- Remove Dust with a Tack Cloth
- Prime again
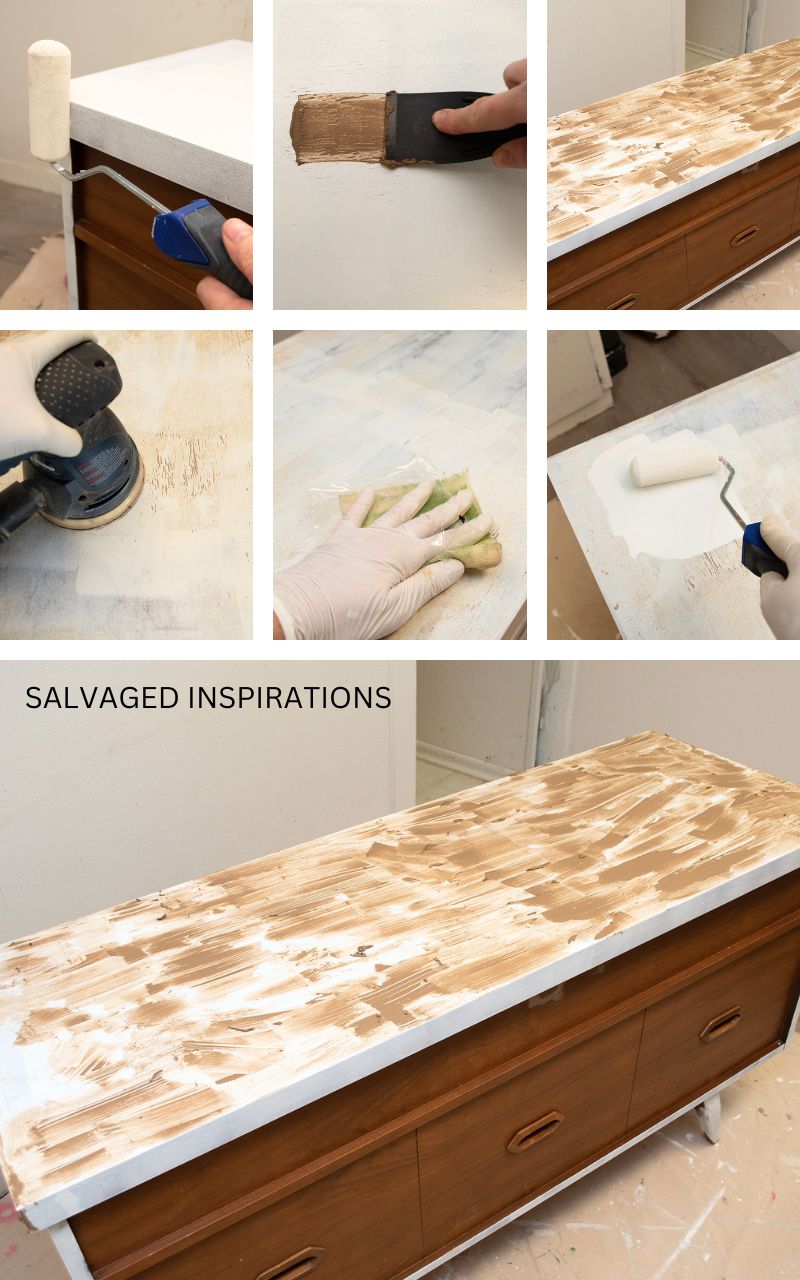
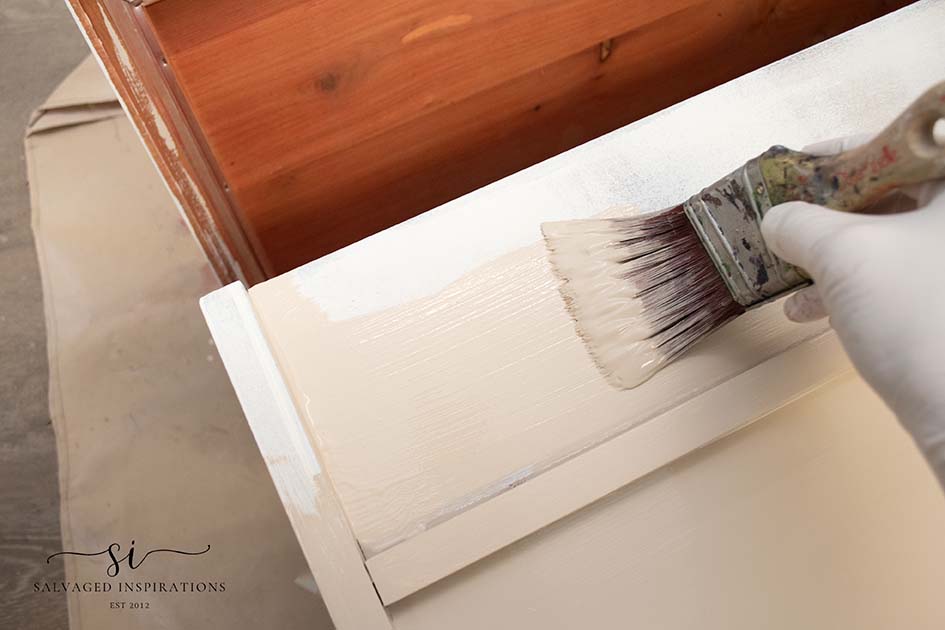
PAINT
For the base coat, I used a 50/50 mix of this Cobblestone Chalk Mineral Paint and this Endless Shore SILK Mineral Paint – by mistake! I thought they were the same line of paint. Once it was mixed, I didn’t want to waste it so I thought I would give it a try. It was a success! It adhered really nicely and passed the scratch test the next day. I don’t think the primer in the SILK All-In-One Silk paint would have worked but that wasn’t an issue because I had already primed. It’s good to know that these Dixie Belle paints and products all work together!
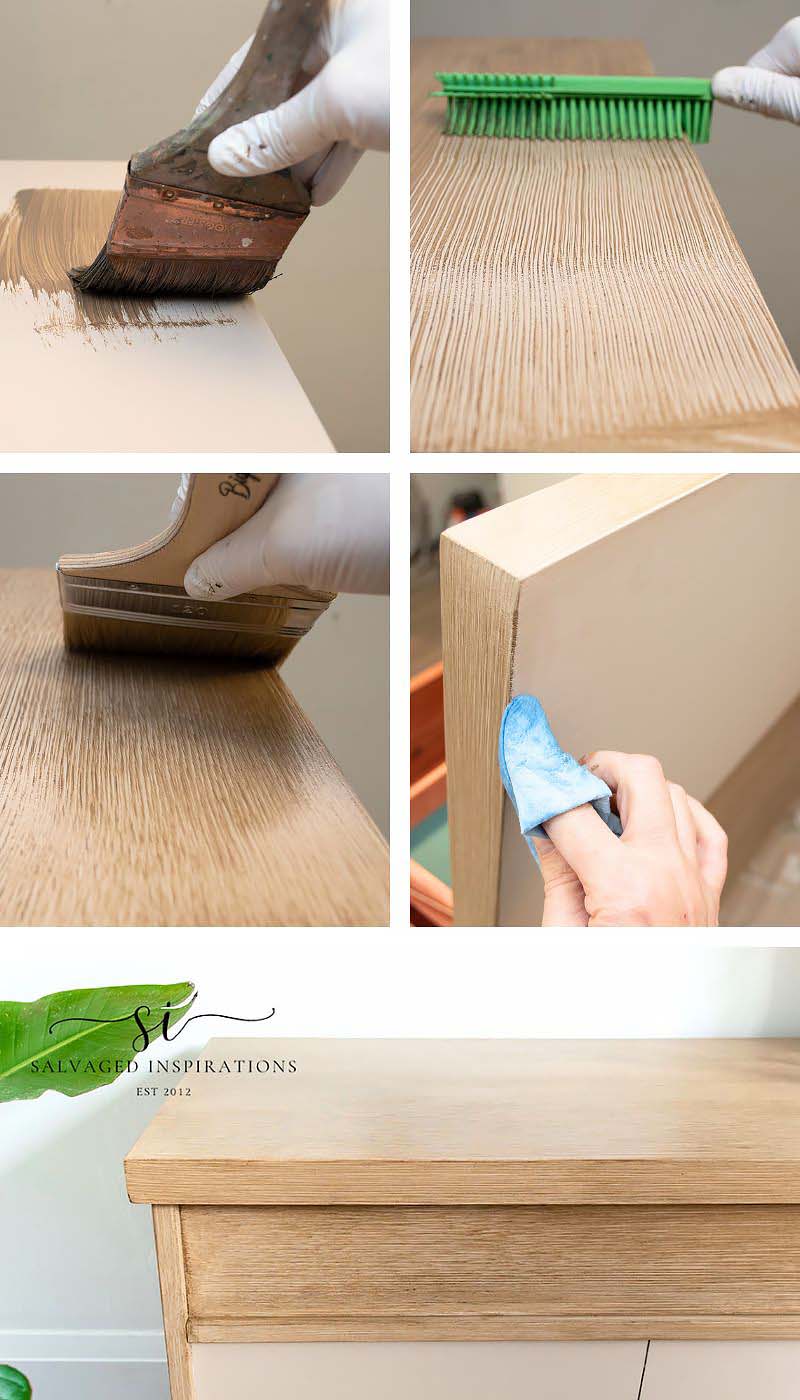
HOW TO – FAUX WOOD PAINT FINISH
To create my ‘modern’ faux paint finish, I brushed on a thin coat of this Vandyke Brown Glaze over my dried custom paint color. Then using this Rubber Pet Hair Remover (which works AWESOME as I’ll share on this Saturday’s Youtube video!!) I added lined wood grain into the glaze. To soften the grain effect, I used this large Big Daddy Brush. If I got a little messy with the glaze – no problem. A shop towel dampened with a little water will wipe the glaze right off.
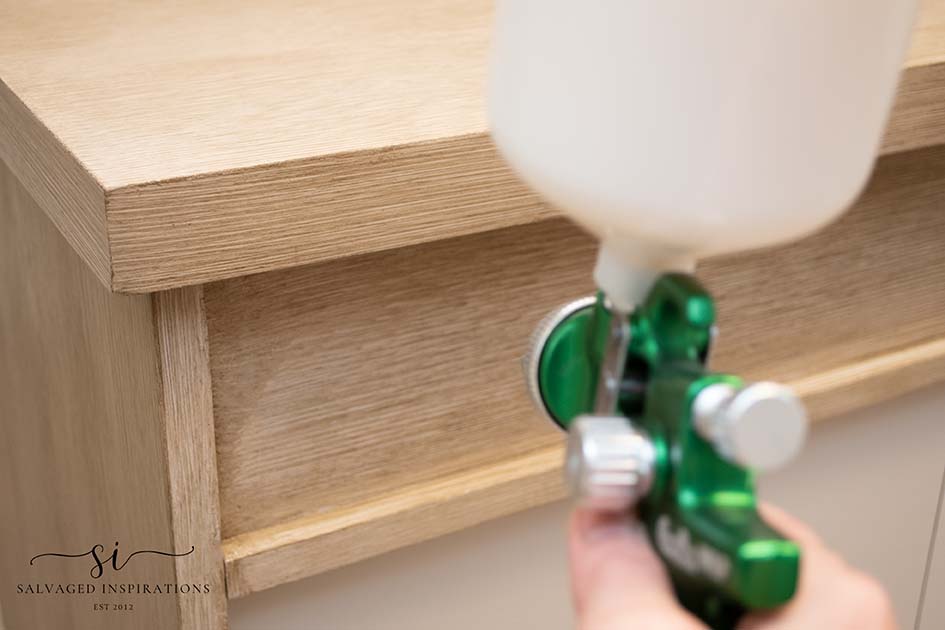
PROTECT
To protect this piece, I sprayed three coats of Gator Hide. Gator Hide does require a little water (10-15% dilute) to spray it through my gun properly. Once I thin it slightly, it sprays beautifully!
FINISHED CEDAR CHEST
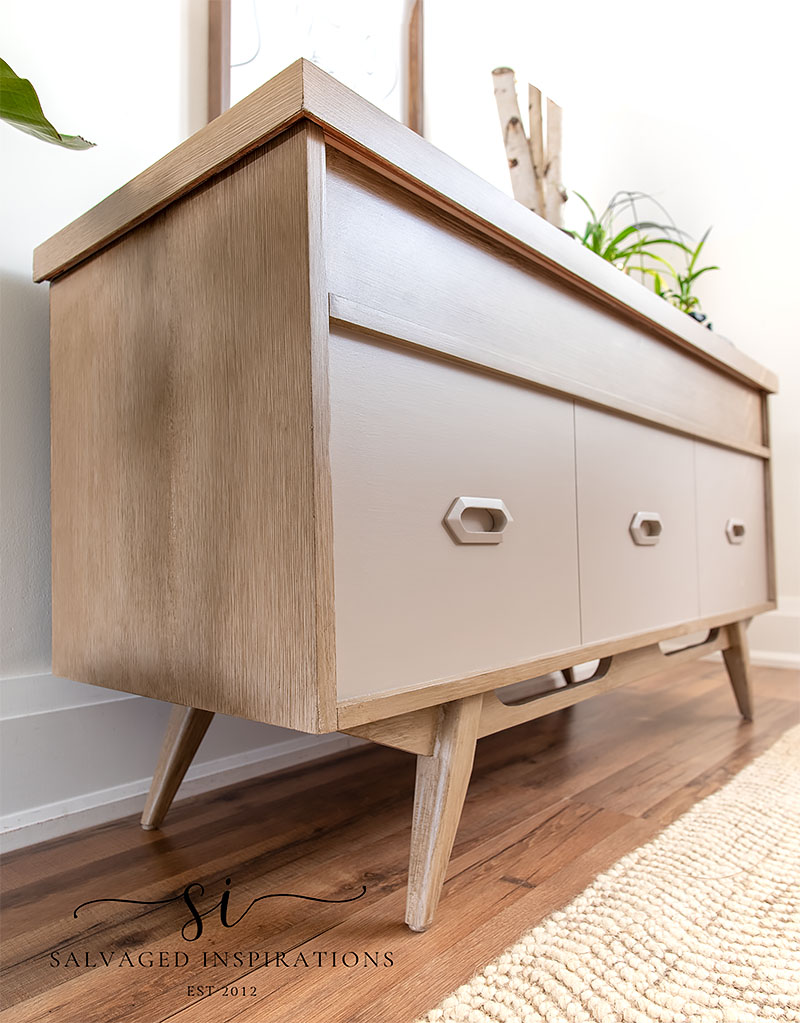
Here’s the finished look. Doesn’t it look way more modern?! It was a lovely piece to start but I have to admit I’m pretty smitten with it now.
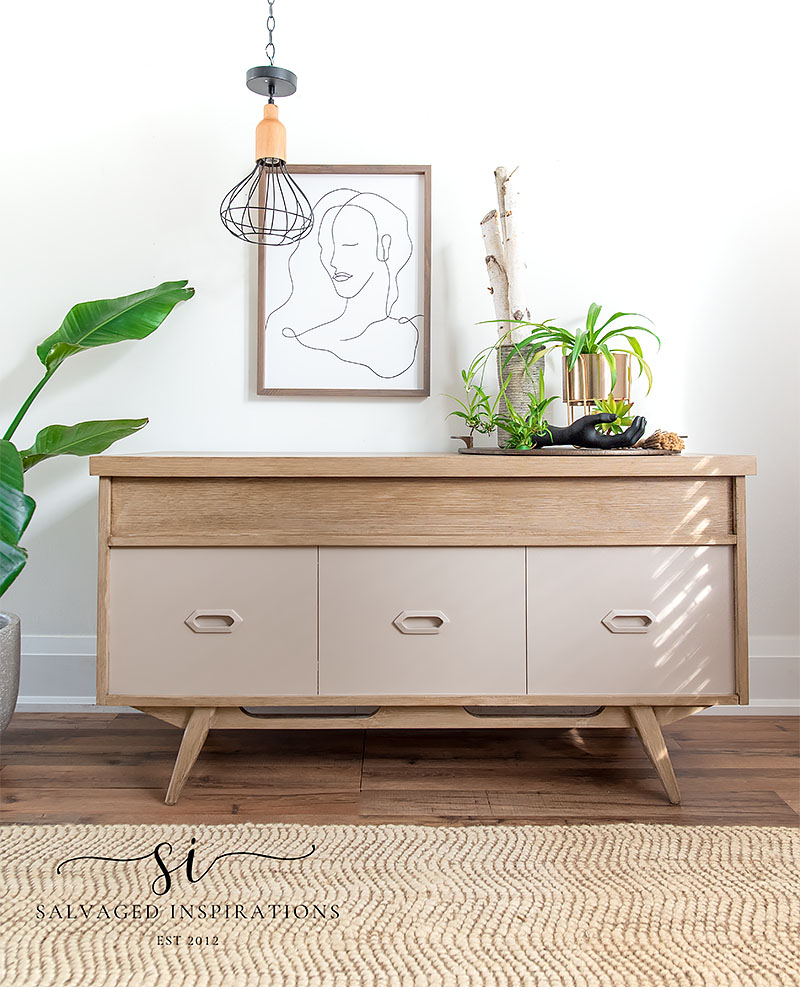
The two paint colors I mixed together created such a gorgeous neutral!
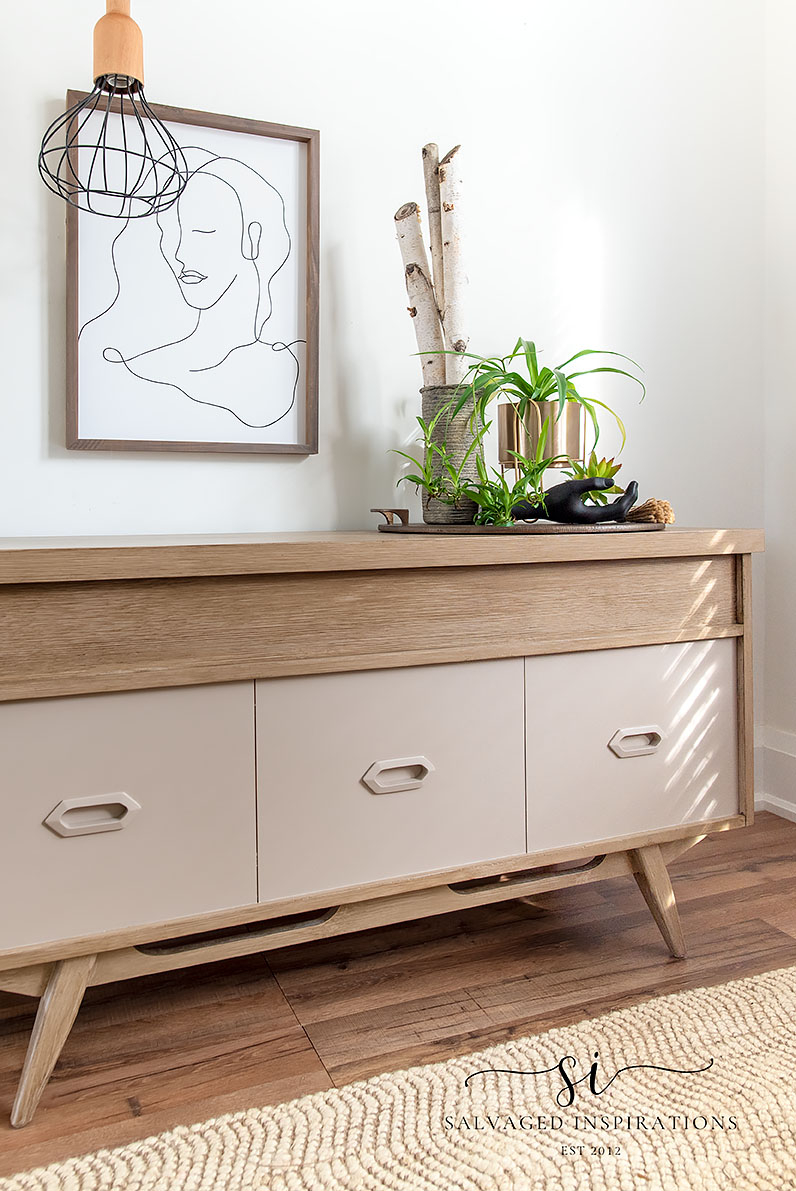
And this base and these legs. Such a great detail!
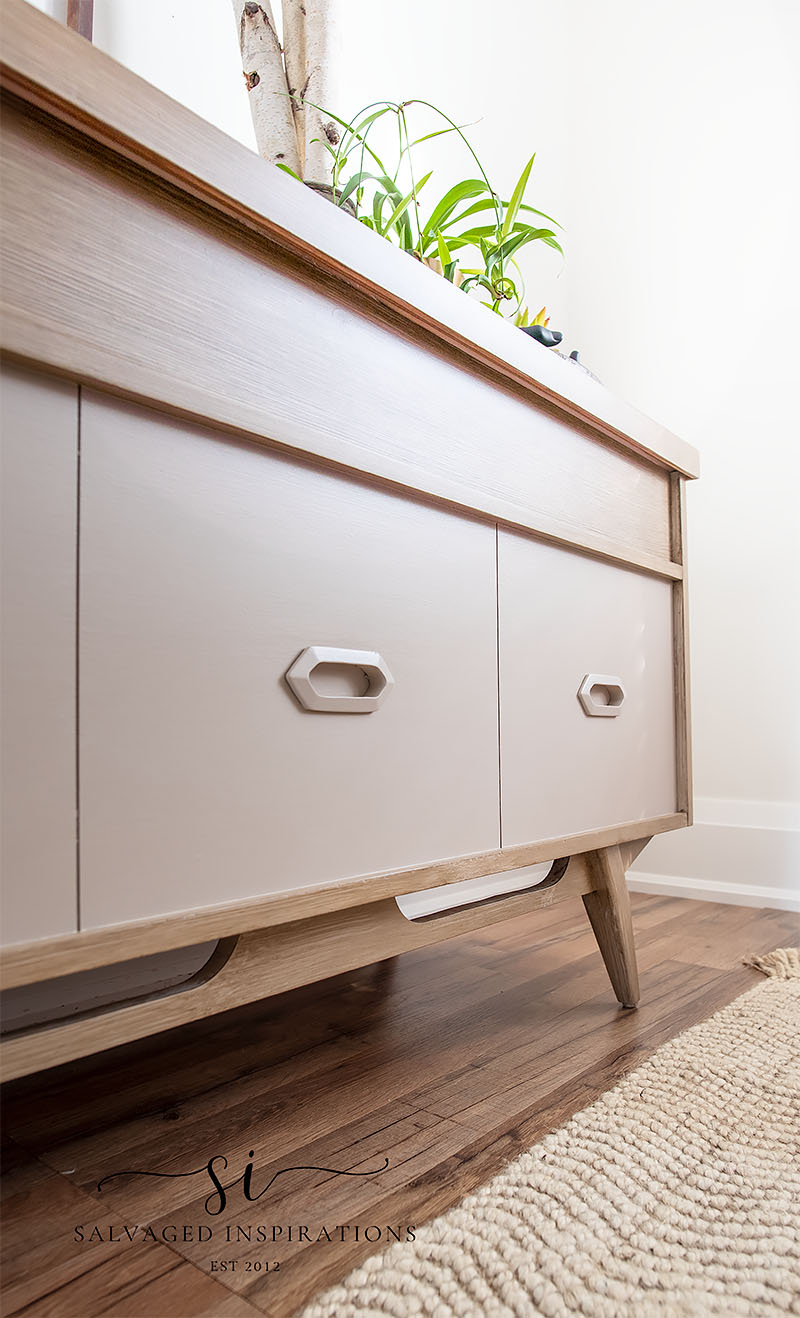
Here’s a closer look and the faux finish.

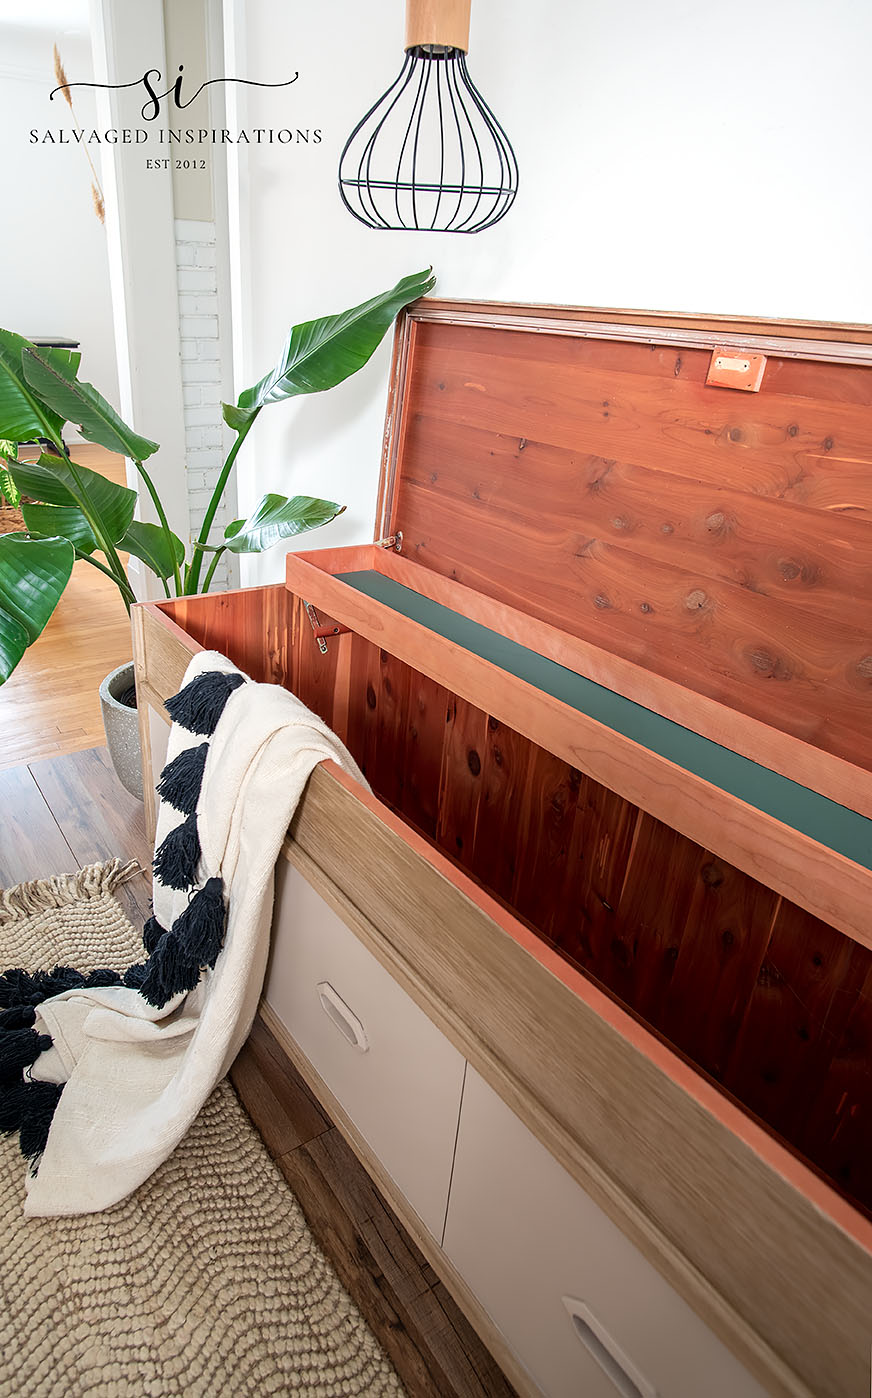
The inside of this red cedar chest is in pristine condition and has a ton of storage space. As an extra bonus, it also has a shelf for smaller items!
What a fun project!
YOUTUBE TUTORIAL
Here’s the full step-by-step YouTube tutorial! You can also watch it on Youtube HERE. Our #siyoutubefamily is already a community of 42.1K so don’t forget to subscribe if you haven’t done so already! So exciting, thank YOU!
And now for some FURNITURE FIXER UPPER FUN!
You’re going to LOVE what my creative FFU ladies do! Below are the BEFORE photos. Visit the links provided to see the amazing AFTERS and learn how they did it! I’m heading over to take a peek as well!
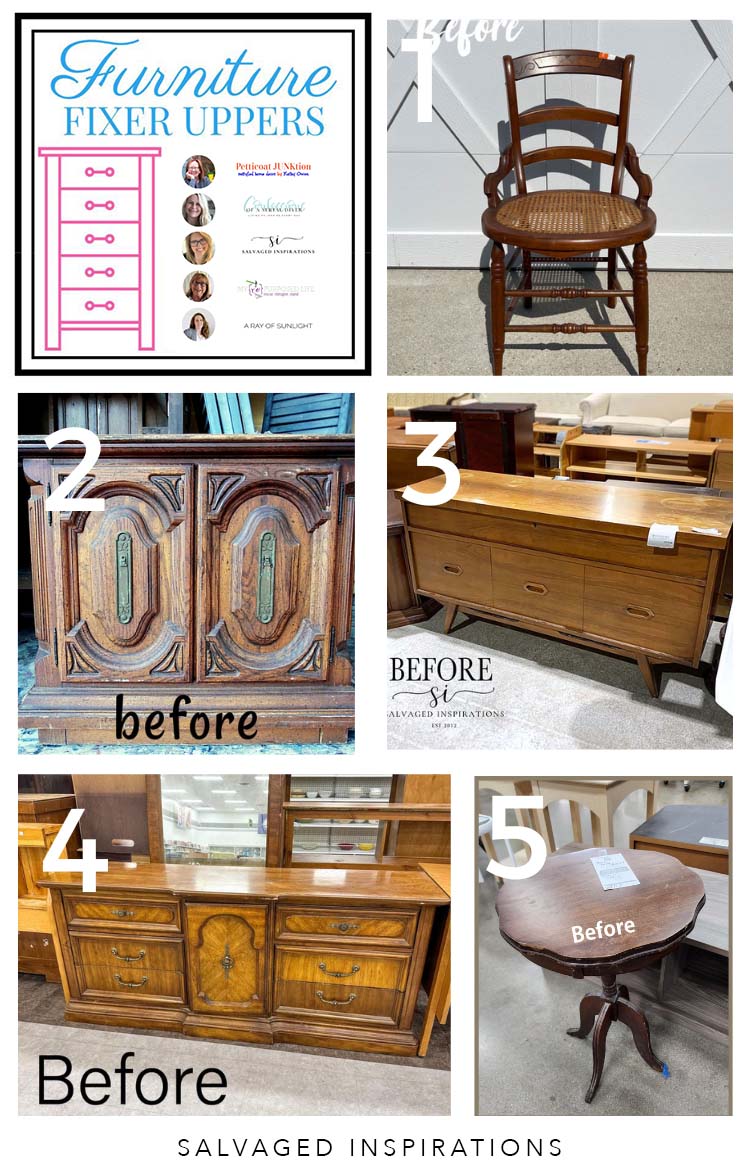
1. CONFESSIONS OF A SERIAL DIYER
2. PETTICOAT JUNKTION
3. SALVAGED INSPIRATIONS (HAPPY YOU’RE HERE!)
4. A RAY OF SUNLIGHT
5. MY REPURPOSED LIFE
Here’s another look at this painted cedar chest before and after. I hope it has inspired you and given you some ideas for your upcoming furniture painting projects.

LET ME KNOW WHAT YOU THINK OF THIS MAKEOVER FEEL FREE TO ASK ANY QUESTIONS YOU MAY HAVE… I ALWAYS LOVE HEARING FROM YOU. IT MAKES MY DAY! 🙂
Happy painting my friends!
Denise x
RELATED POSTS::
HOW TO MAKE PAINT LOOK LIKE WOOD
HOW TO: PAINTED FAUX LINEN DRESSER
22 SALVAGED FURNITURE FLIPPING IDEAS
HOW TO DECOUPAGE WITH NAPKINS
HOW TO REVAMP AN OLD DESK
CHALK PAINTED & DECOUPAGED DESK
PIN AND SHARE!

Loved watching your techniques. I’m trying this look on a 2-piece dresser set now. I’m loving it, just lots of work and dryin* time. I used a mini whisk broom first and then a wide chip brush to soften. My biggest obstacle is pet hair in the glaze…UGH, it’s awful. A tip I have is whatever I’m painting I start with my piece by laying it top down, makes things so much easier!
I love this tip Susan! Have fun with your 2-piece dresser set. I’ll bet its going to look FABULOUS!!
Nice job. Looks great
Thank you Wendy!
Absolutely gorgeous! I have a question on this technique. Do you think it’s possible to do this to exterior wood as a paint effect and how could it be sealed to protect it?
Hmmm, great question Cat. I believe it could but I’ve never tried. As for the sealing/protecting, an outdoor poly like this one to protect would be the best, especially if it’s in direct sun or the outdoor elements.
This may be my all-time favorite furniture makeover! 😍 Thank you for sharing your gift and your concise way of explaining how to achieve this look!
Awww, thanks so much Nicki! What a HUGE compliment and I’m so glad you love it! XOXO
This is so elegant and a fantastic makeover !!! Loved it
Thank you Harjith!🤗
Stunning!!!
thanks my friend! Happy Thanksgiving to you!
Hi Denise. You’ve got such a great eye! Originally, I thought the chest looked rather boring. Wow, you proved me wrong. I’m absolutely, totally in love with this trunk now. What an amazing piece. So beautifully brought back to life.
The custom color really made a big difference on the piece! I’m so glad you love it Monique and thanks so much! Happy Thanksgiving to you! XOXO
That’s such clean light look, perfect to fit into any style of decor. Love the faux wood look done with various brushes. I think, if I remember correctly, you used various broom sizes for faux linen technique.
I’m embarrassed to say, sometime I have to go back and read my own blog posts to refresh my memory on the technique I used.🤦♀️ But I believe you’re right Tracy! And I love this piece/look too. I just listed it on FB Marketplace and already have 4 inquiries so I think it will be a fast seller. If I had the room, I’d keep this one for myself tho..hehe. Have a super day my friend. XOXO
Denise,
You have such an eye for changing a piece of furniture. As has been said about old houses that need restoration, “Please make me pretty again.” Thank you for bringing back pretty.
Happy Thanksgiving
Awe, thank Babs and happy Thanksgiving to you and yours as well! XOXO
What a great re-do, Denise! You are amazingly creative and resourceful. Good job!
And from America to you, HAPPY THANKSGIVING! We sure are grateful for you and all you do.
Super sweet Caye!💕 Happy Thanksgiving to you and your family! Hugs
SCORE! This is beautiful, Denise! The light faux wood finish was a great option to keep that modern flare alive. Those legs. 😍 Very well done as always. 🙂 xo
Thanks so much Do! Wishing you a Happy Thanksgiving to you and your family. Luv and hugs my friend. XOXO
Hi Denise 😊 Your Faux Wood LOOKS GREAT 👏🏼👍🏼♥️Thanks FOR SHARING ❗️ G-d♥️Bless
aw, thank Cheri! And my pleasure!💕 Thanks for reading. XOXO
Looks amazing! What a great transformation!!
Heeeey, thanks for dropping by Marzenna!💕💕 Thanks so much! Hugs. XOXO
It’s really pretty. Great work!
Thanks Lizzy! I really love this finish and this pet hair remover is awesome..lol.
Hi Denise, that faux finish is terrific – love the lighter color. Hope to see you use it again.
Sheila
Thanks Sheila! I’m looking forward to trying it again as well! 🙂
Outstanding!!!
Thanks Cheryl!😘
I’ve never seen a MCM cedar chest. I love the lines. Your make over was great.
I love these lines as well! It was such a great find! Thanks Carla!
This chest looks incredible now, Denise! I really love the faux wood technique! XOXO
Thanks so much my friend! I really enjoyed this one! XOXO
Excellent! It reminds me of the finish on my parents wedding gift bedroom set from the ’50’s. I’ve never seen such a close match.
I love your posts, they’re always so full of practical and doable tips and ideas.
Thank you!
Terri
Milwaukee WI
Huge compliment Terri, thank you! I restyled a 50’s desk that had a similar finish as well. It was super beat up and I ended up darkening it up but I have to say furniture like this lasts for yeeearrrs!
Love love LOVE the new look of the cedar chest!! Pinned!
Awe, thank so much Natalie! And thank you for the PIN my friend. XOXO
I love your choice of color and faux finish, this is such an elegant piece! You have inspired me!
Yay! Music to my ears Sue, thanks so much! If you give it a try, I’d LOVE to hear how it turns out!