We had a gorgeous weekend here in the GTA! My daffodils are finally poking their heads up so I think spring is finally on her way!
This inspires me to start spring cleaning. I don’t know how long this inspiration will last. Anything remotely connected to cleaning usually lasts about a New York minute for me 😉 …but we’ll see.
Along with my cleaning, I’ve decided to focus on a few pieces of furniture that have been in my inventory for waaay too long. Last week I shared the Dijon DIY Chalk Painted Side Table that had been hanging around for years.
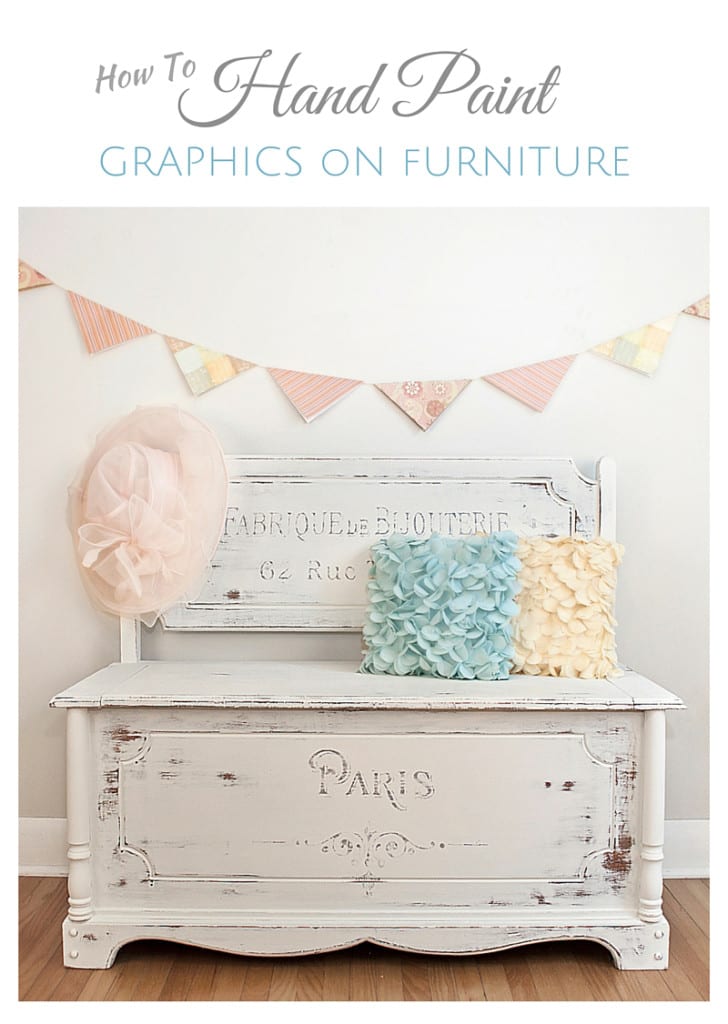
This week, it’s this salvaged storage bench.

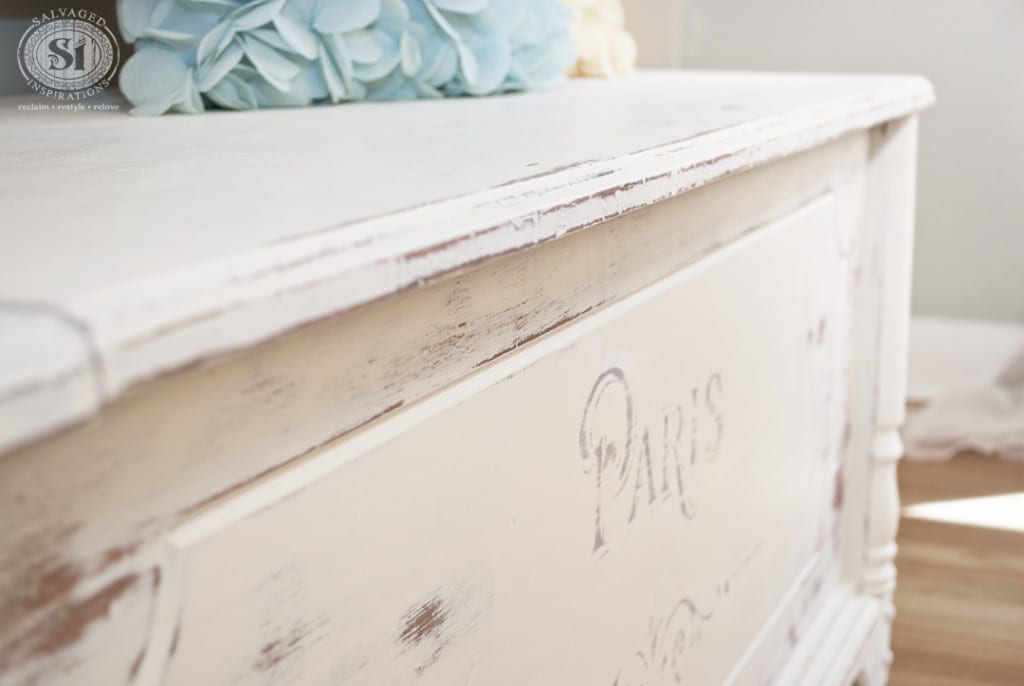
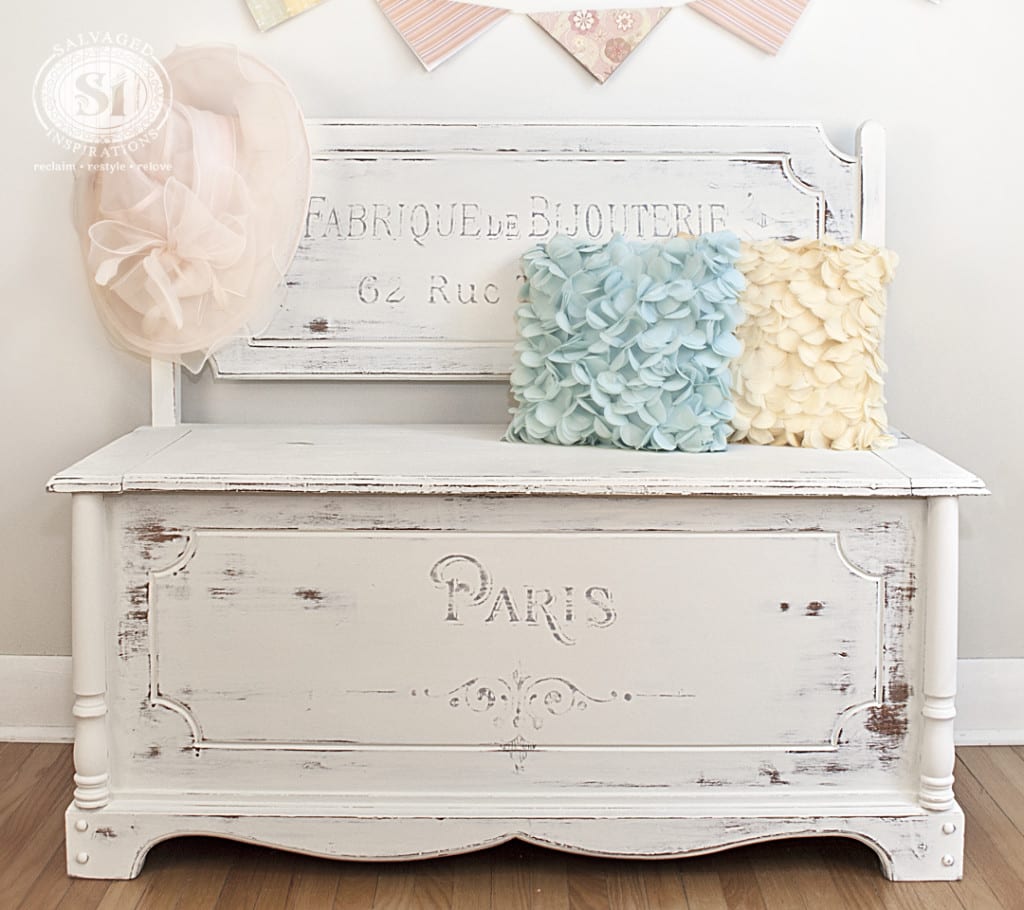
I’ve been ignoring it for months. It was plain-jane…but with a little paint, added wood spindles for detail, hand painted graphics and distressing, this bench looks amazing now!
The best way I know how to get a professional hand painted graphic is by using an overhead projector. I was lucky enough to find mine on Kijiji for $50. If you don’t have one, I found a great tutorial on how to make a DIY Overhead Projector from simple supplies like a box, a light, and a transparency sheet.
Finding A Graphic
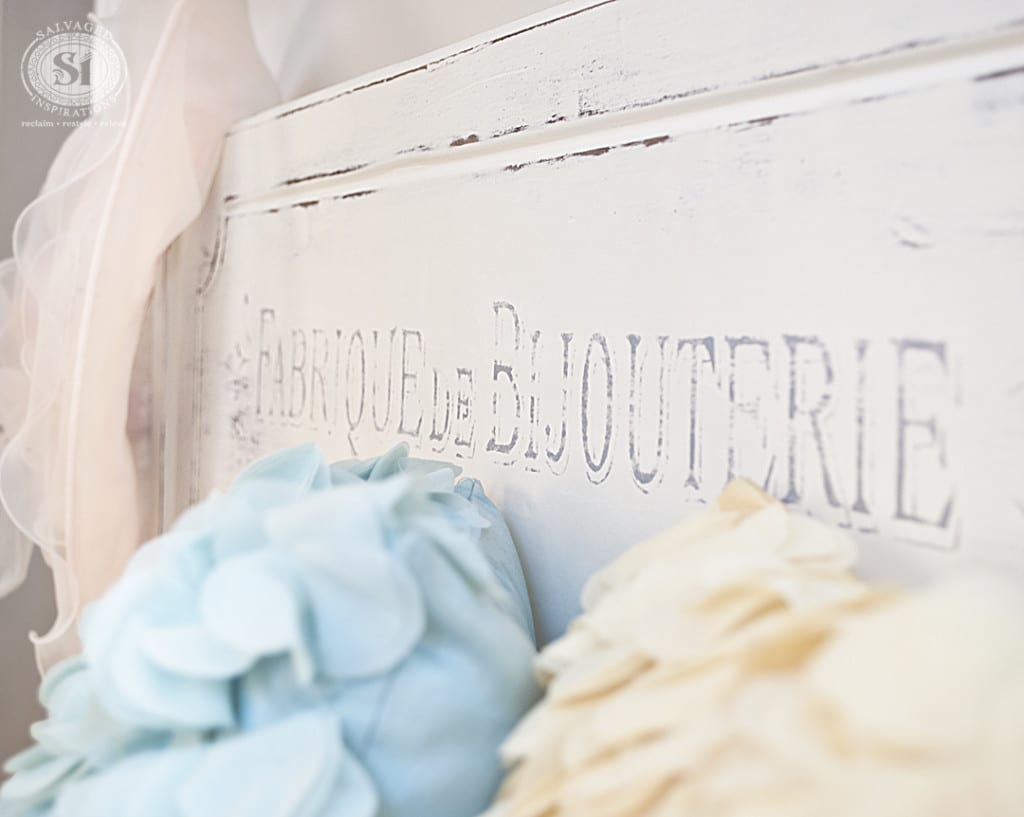
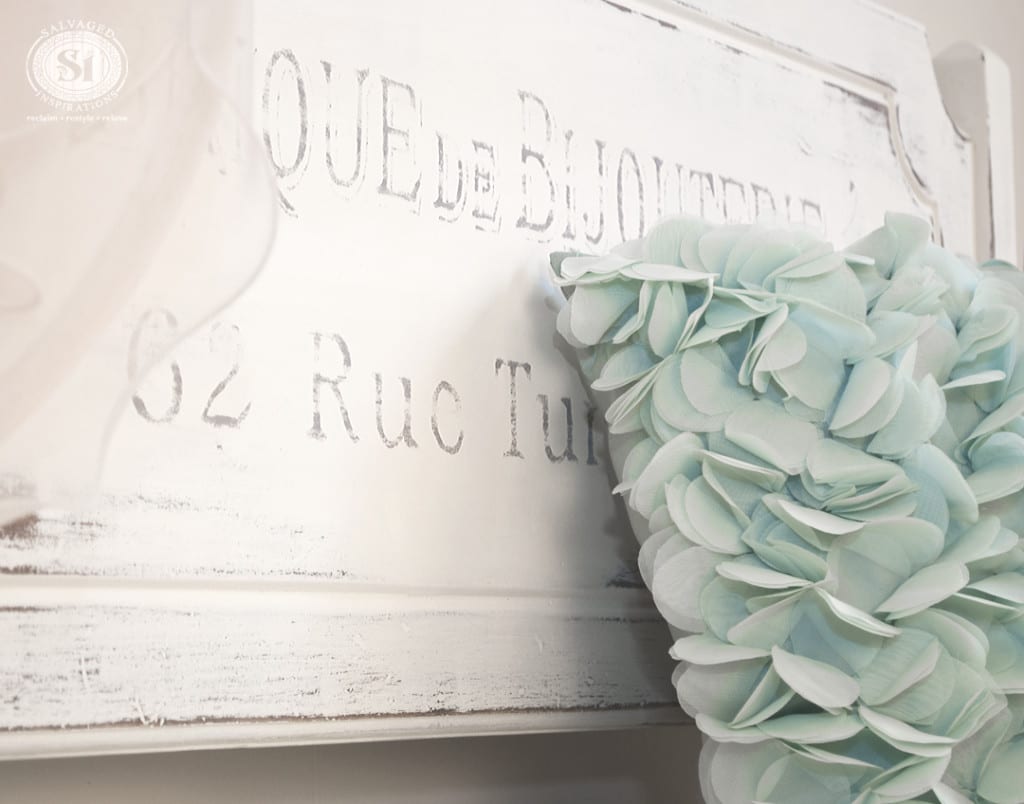
The French Graphic I used for this storage bench was found on The Graphics Fairy. It’s usually the first place I look because Karen has over 70 categories to choose from and there’s 1000’s of downloadable images for free. Thanks Karen!!!
Printing The Graphic
To print images for the overhead, I always use an everyday-run-of-the-mill ink jet printer and a multipurpose transparency sheet. You can even use self-adhesive laminating sheets which can often be found in dollar stores.
The ink stays wet on the transparency sheet for a good few minutes when first printed, so I have smudged my graphics a few times, but the great part about this is once dry, it’s easy to wipe off and reuse. Another bonus, when I project my image, it doesn’t need to be printed in reverse or even enlarged.
Projecting The Graphic
I position the projector so my image is the ideal size. To change the size of your image, manually move the projector closer or farther away from the piece of furniture.
Then I measure to make sure my graphics are aligned straight and centered. I tape the transparency sheet down to the top of the projector so it won’t slip or move. Finally, I use a piece of painters tape on the floor to mark the positioning of the overhead projector (just in case I accidentally bump into it).
Now I’m all ready to start painting.

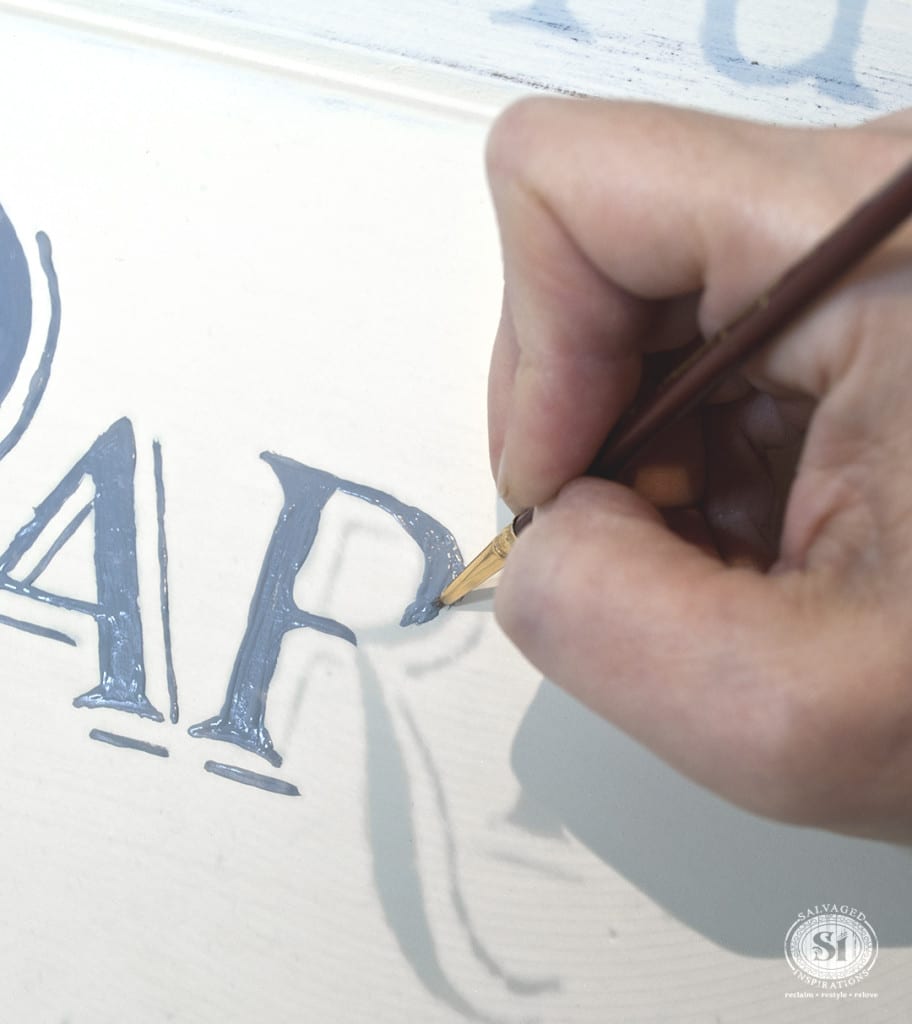
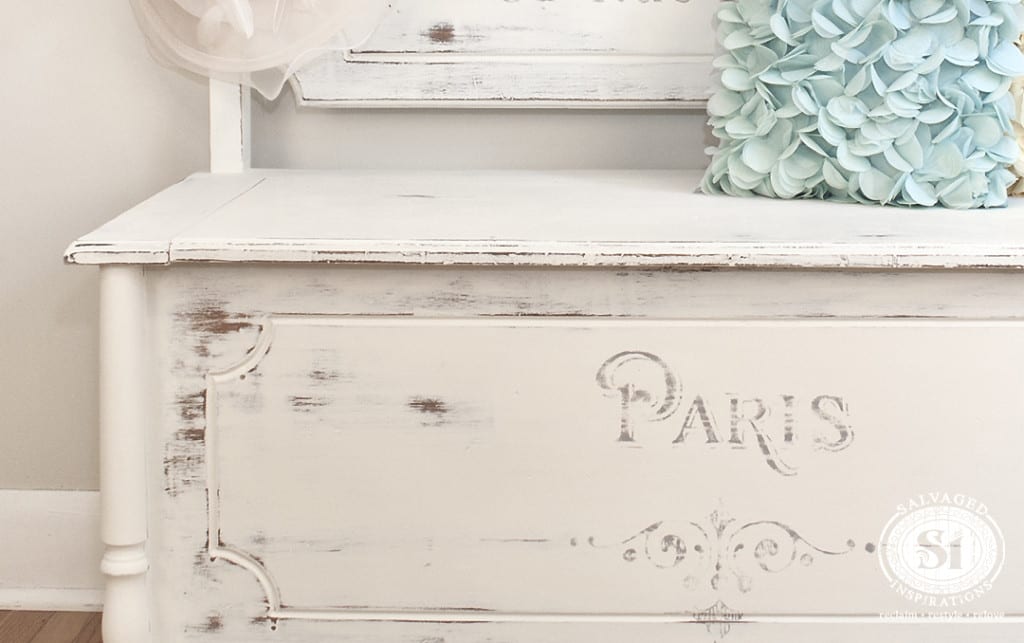
This entire graphic took me about 2 hours to complete. I love the look of a hand painted finish, although it can be time consuming. Well worth it, in my opinion.

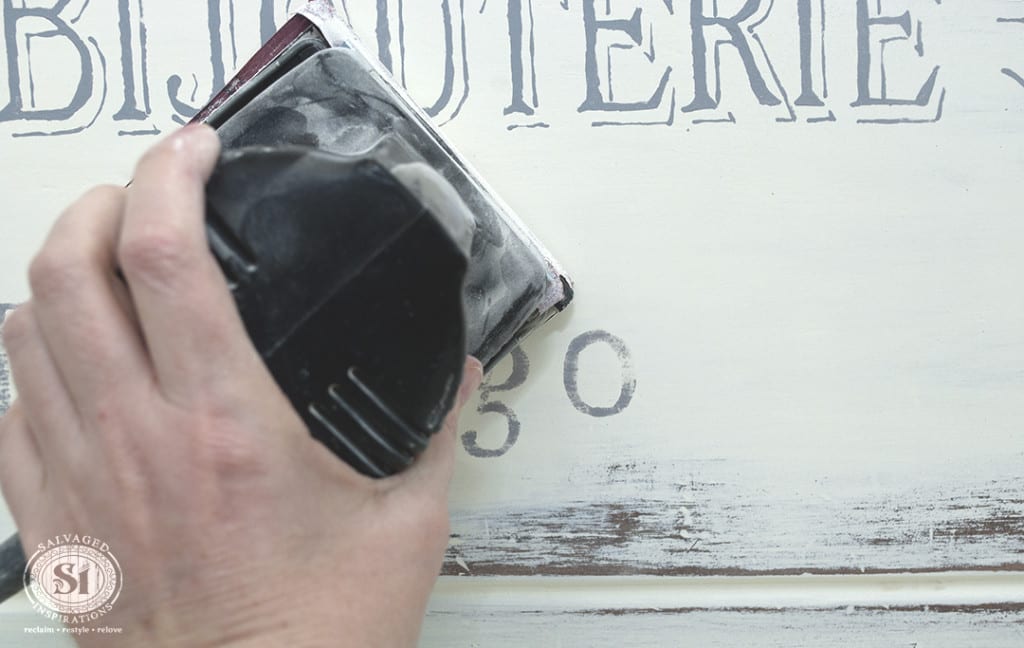
I don’t worry about applying the paint accurately. It usually looks thick and slightly messy…but no worries. Once the paint is sanded and distressed, the graphics will look perfectly imperfect!
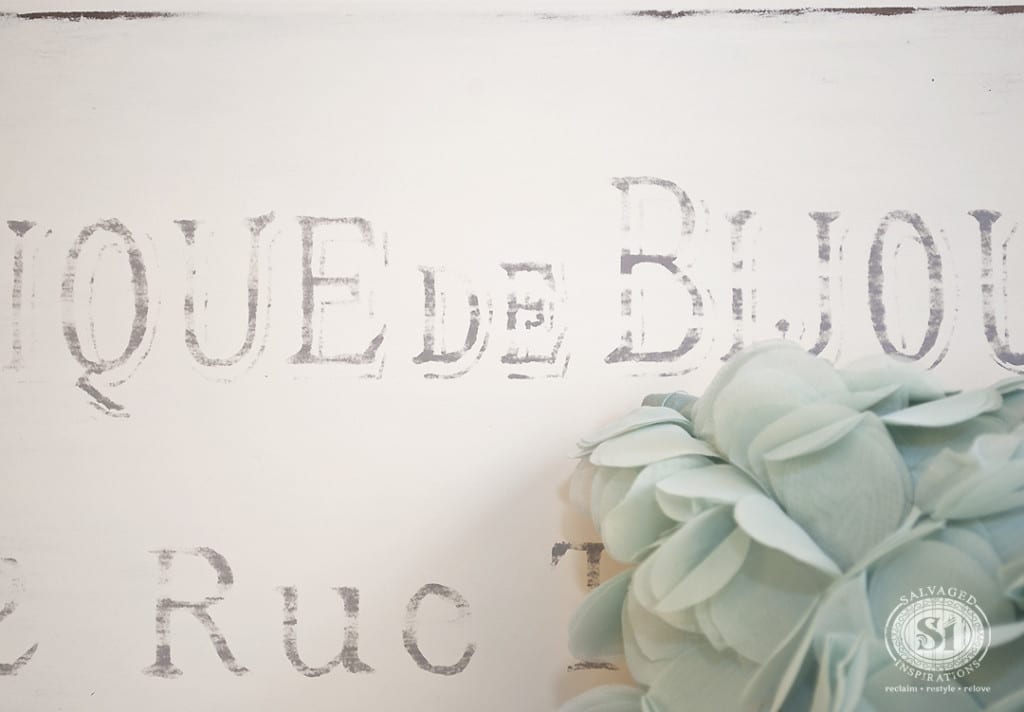

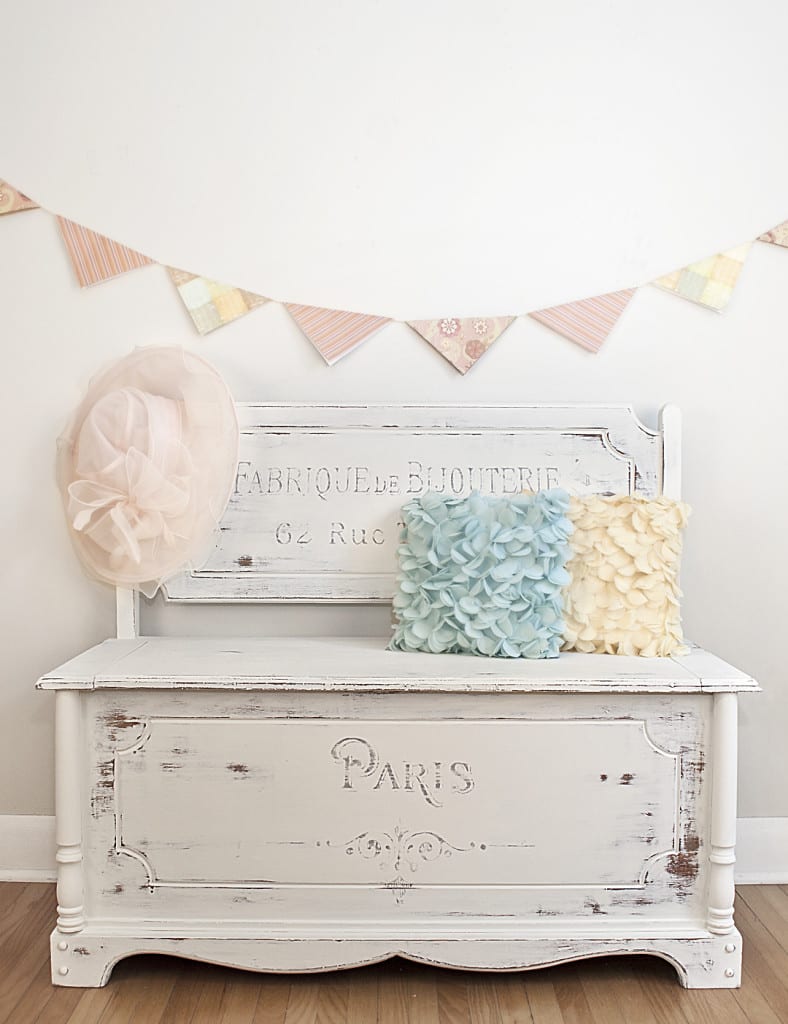
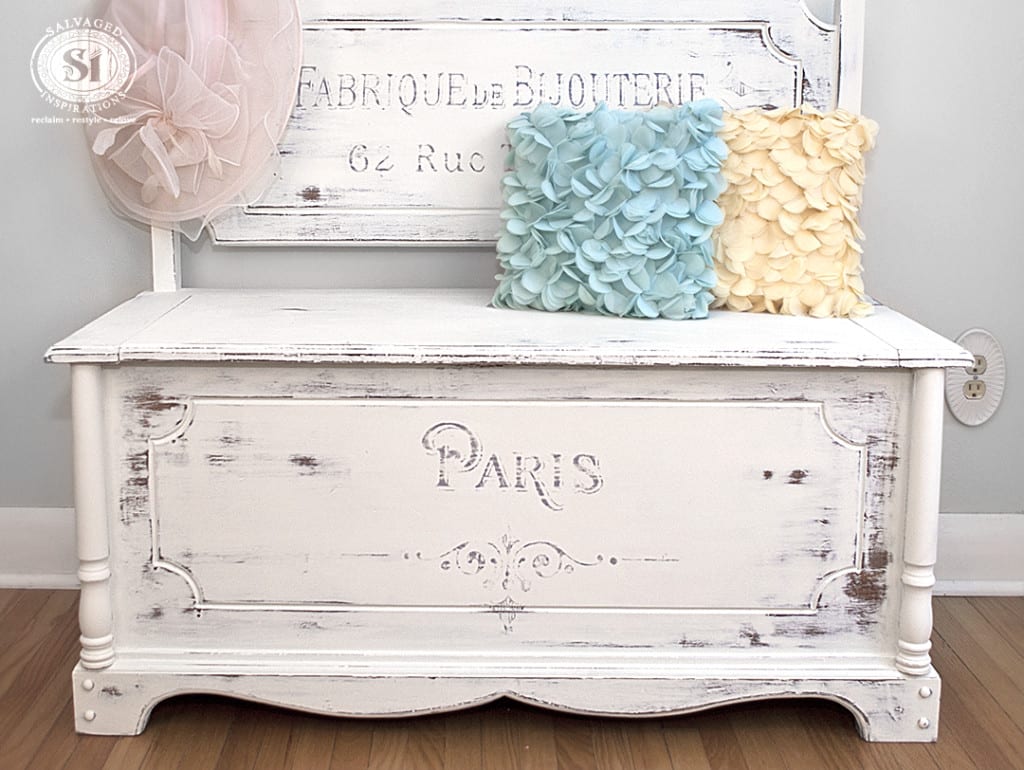
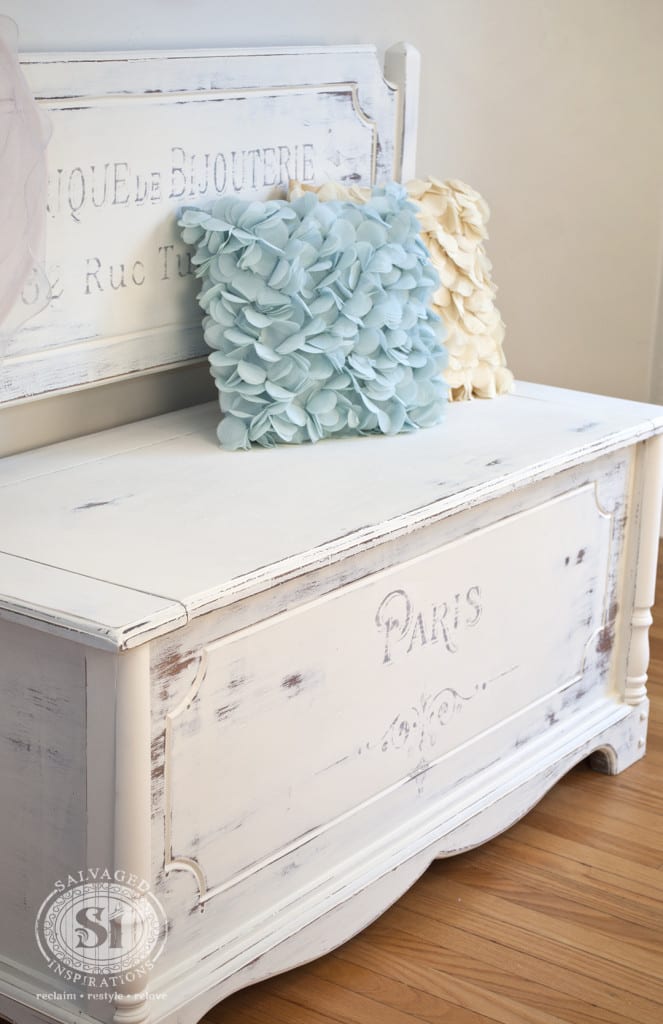
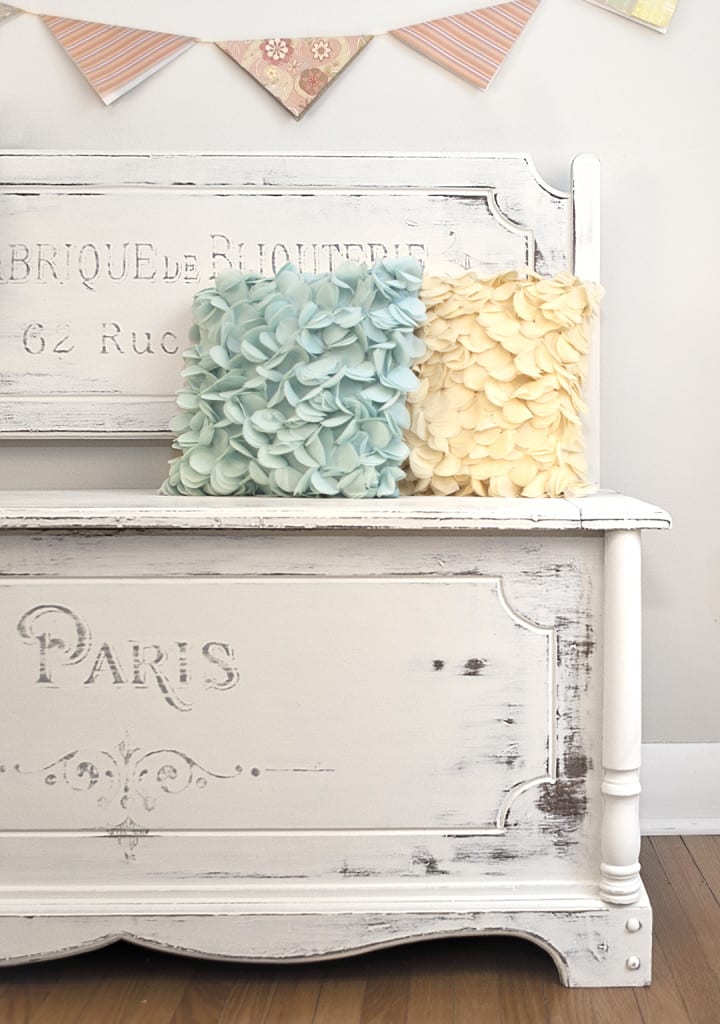
The pink hat and ruffled throw pillows remind me of springtime in Paris. They pair perfectly with my “Fabrique de Bijouterie” graphic. A fun addition to this newly painted storage bench!


Graphics are a wonderful and creative way to add interest when restyling a plain piece of furniture. With so many different styles to choose from, I know I’ll be using my old projector again soon! 🙂
What’s your favorite way to transfer graphics onto furniture? Chime in…I always love hearing from you.
Have an amazing day!
Denise
_____________________________

Can you tell me how to distress the graphics without color getting into the surrounding paint. It seems like no matter how long I let the paint dry this happens.
Hi there Trish! I’ve ran into bleeding with my painted graphics on a few occasions. What I did was topcoat with poly (or I’m sure a thin coat of wax would also work) and THEN sand the graphic area. I find this helps. 🙂
Thanks so much! I was getting a little discouraged but will definitely give that a try!
you do fantastic work…thank you for all the inspiration!
Thank you Connie… glad you stopped by! 🙂
Gosh, I love this finish!! So beautiful and elegant. I’ve been toying with the idea of adding quotes to my dresser once it’s painted, but it seemed to be a bit of a hassle. Will have to try out that DIY projector. For a perfectly smooth, yet matte, finish, what do you recommend? Does a light sanding distress it?
Hi Zovesta! I used an acrylic paint for the graphics and wanted quite a distressed look so I used my palm sander to smooth everything out. But a light hand sanding would work too. 🙂
Thanks for responding, Denise! =) I’ll have to try it.
Love what you did with the spindles!
Thanks Kathy! It was so plain I think it needed the extra little detail. 🙂
Stunningly beautiful!
Thanks so much Patricia 🙂
Hi Denise,
What kind of paint did you use to hand paint the image?
Hi Oxana! I used some left over Behr Exterior Flat Paint. The exact color is 760F-4 Down Pour.
So you can use any paint? doesn’t’ have to be a special paint for that type of thing?
Thanks
Any type of water based paint will work. 🙂 This storage bench was painted in Dixie Belle’s “Buttercream” Chalk/Mineral Paint and then the graphics in the flat Behr acrylic. For a cohesive look, it’s best when the sheen’s are kept the same though. Another words, I wouldn’t have used a matte chalk paint and then a high gloss for the graphics.
Beautiful job I would so love this n my room always look forward to the new posts
Thanks Ellen! It’s looking pretty cute in my room right now….LOL. 😉
Hi Denise, Beautiful! What a great way to ‘fancy’ it up 🙂 How did you get rid of that star shape on the front…wood filler?
Hi Annie! I used Bondo to fill in the dated star shape. Bondo is smelly, but there’s no shrinkage and I love that it dries so fast and then I can sand/paint with 15-20 minutes!
That bench looks beyootiful!! I think I need an overhead projector or the other thing you mentioned above. Nice job.
Thanks so much Sally! 🙂 If you keep an eye out on Craigslist, you can usually find these old school overhead projectors for between $30-50. Other than us creatives, I’m not sure people have much use for them anymore.
Hi Denise. This is fantastic great job! Thank you for sharing and inspiring us. Just been thinking about hand painting a project and this is a just want I need to try. Now I need a projector!
Thanks Cookie! Brand new projectors can be pricey so if you can’t find a reasonably priced used projector, they also sell these Artograph Tracers (affiliate link) that supposedly work really well. They have versions of the Artograph Tracers in Micheal’s, Hobby Lobby etc for anywhere from $29-$90.
Hi Denise. Love how you turned such a plain and outdated storage bench into a really beautiful piece of furniture! Gorgeous work. I’d love to do something like this for my front hallway. Thanks for the idea:)
Thanks Monique! A storage bench in an entry or hallway is handy. Perfect for seating while putting on shoes or boots and for tucking things away. 🙂