IF YOU DON’T LIKE THE COLOR OF YOUR VINYL FURNITURE… HERE’S HOW *EASY* IT IS TO CHANGE IT! | YOUTUBE VIDEO
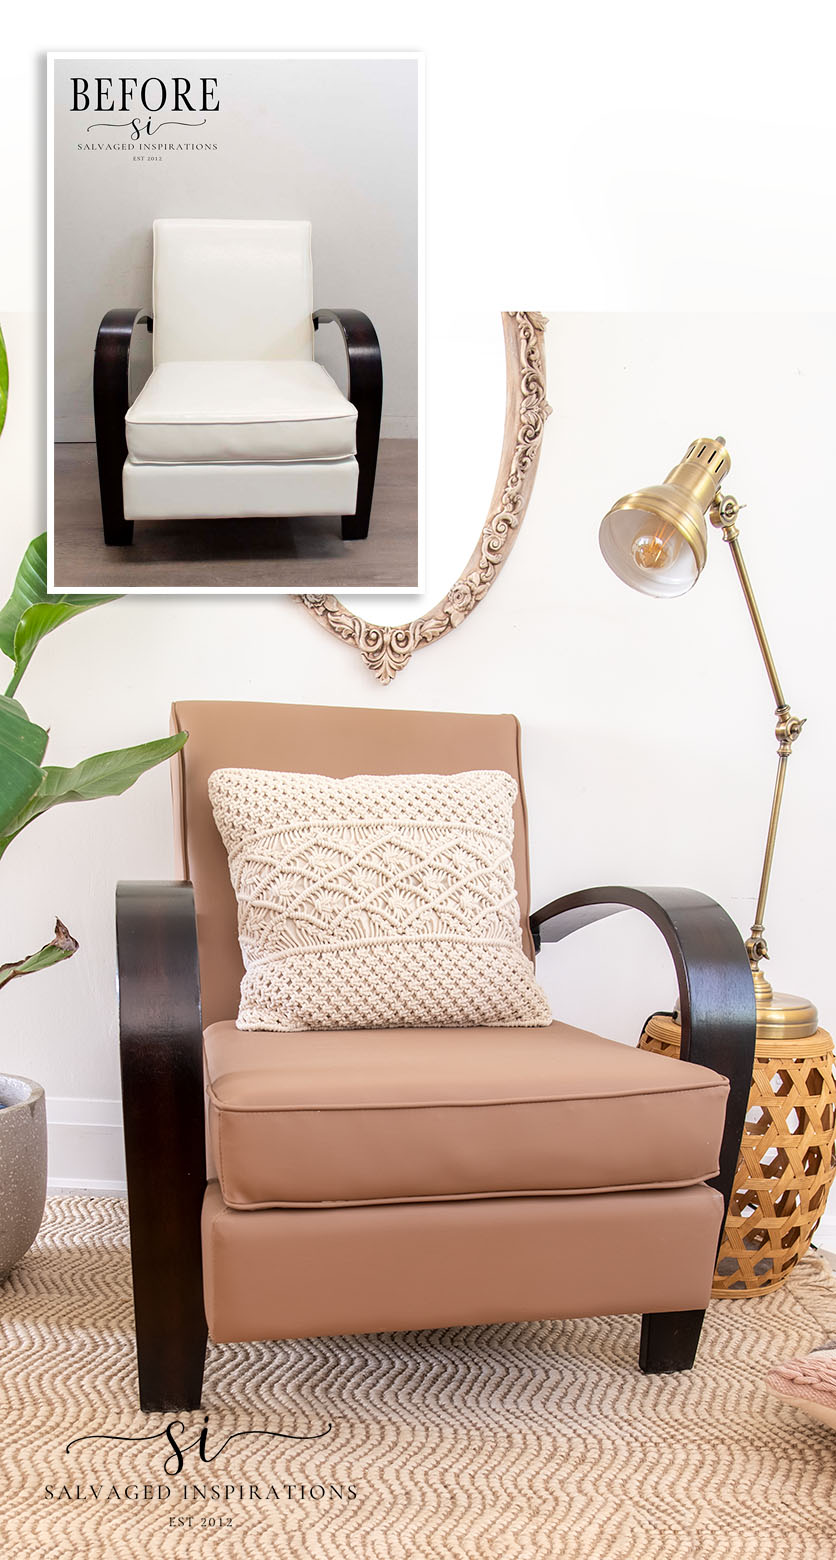
Hello creative SI family! If you ever come across a piece of vinyl furniture that you love — but hate the color, GRAB IT! I was out walking my Gidgy girl when my neighbor John asked me if I’d like a chair. He was putting it out on the curb for collection. He said it was barely used but it didn’t fit their decor. When I saw it, I liked the size and style — but didn’t like the color. Here’s how EASY it was to change the color to fit my home decor!
As a bonus, it’s also Furniture Fixer Upper Day! If you’re new to the #siblog, I join four of my furniture painting besties on the fourth Thursday of every month. We all restyle and fix up a piece of furniture and share how we did it. I’ll include a link to their before and afters below.
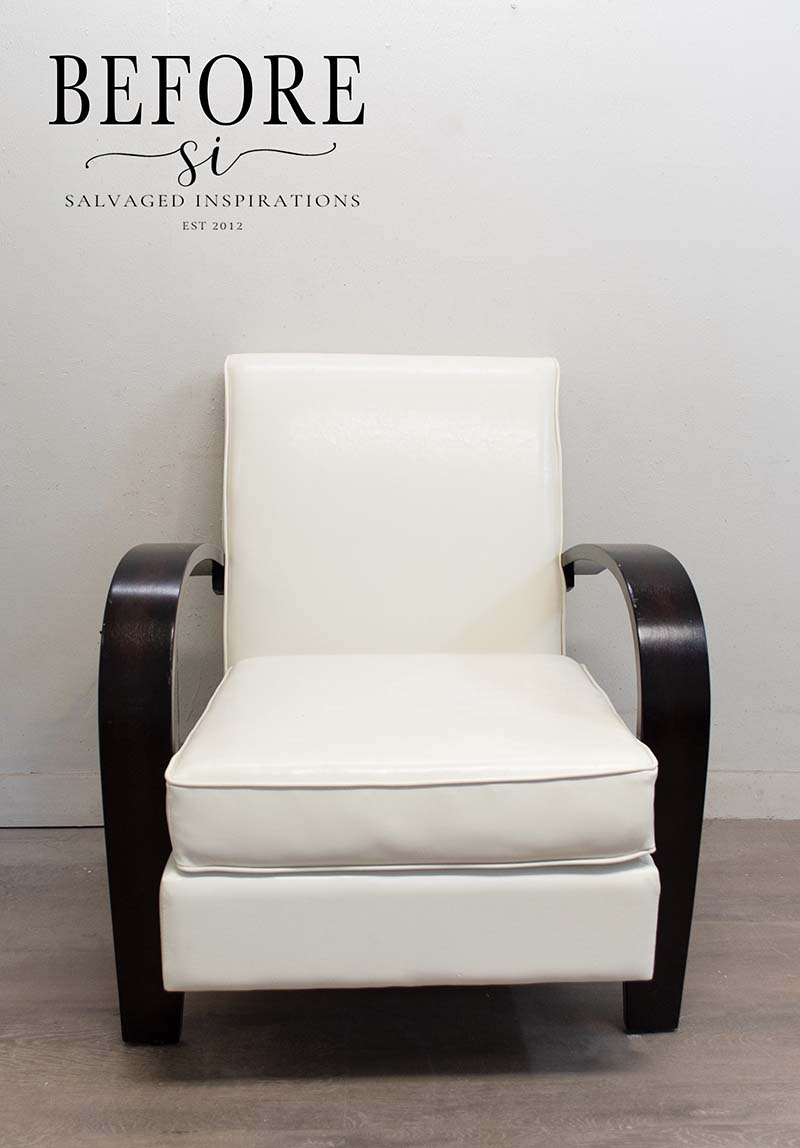
Here’s the vinyl chair my neighbor John gifted me. Good looking chair but I’m not woohoo about the color white in this style.
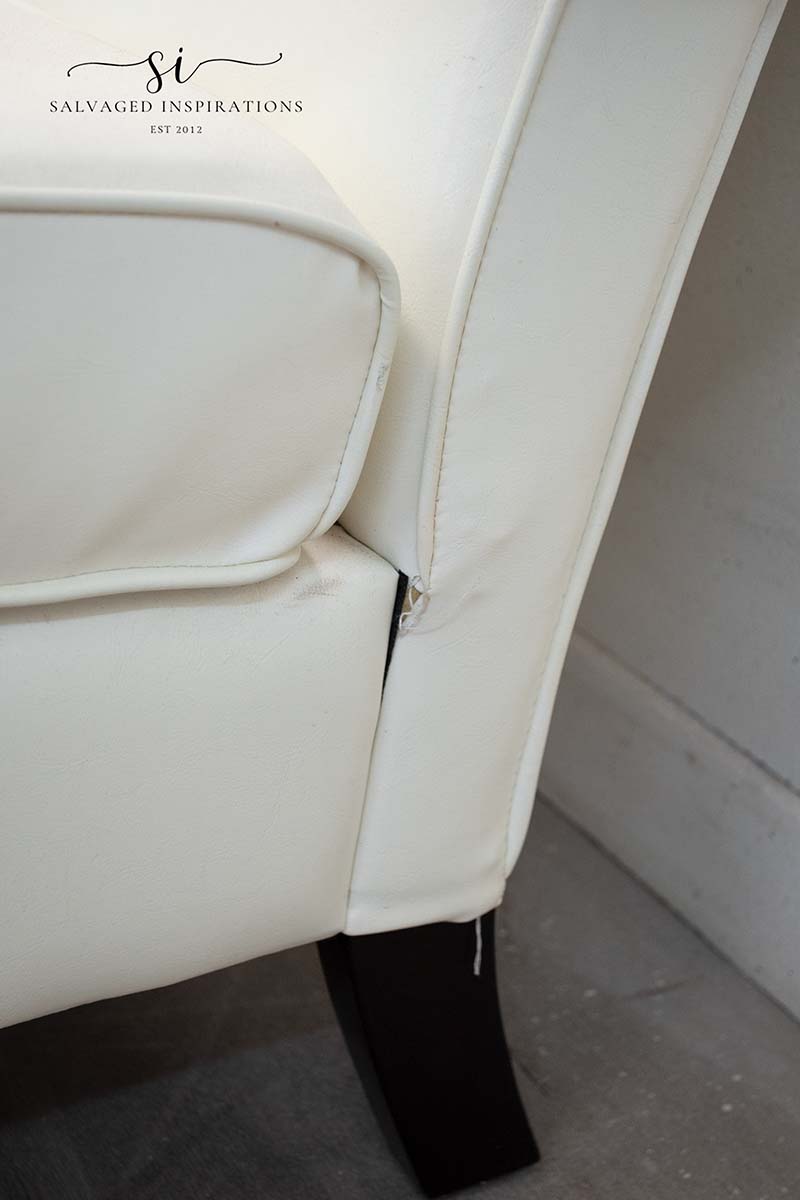
The vinyl was in really great shape except for this little area on the bottom.
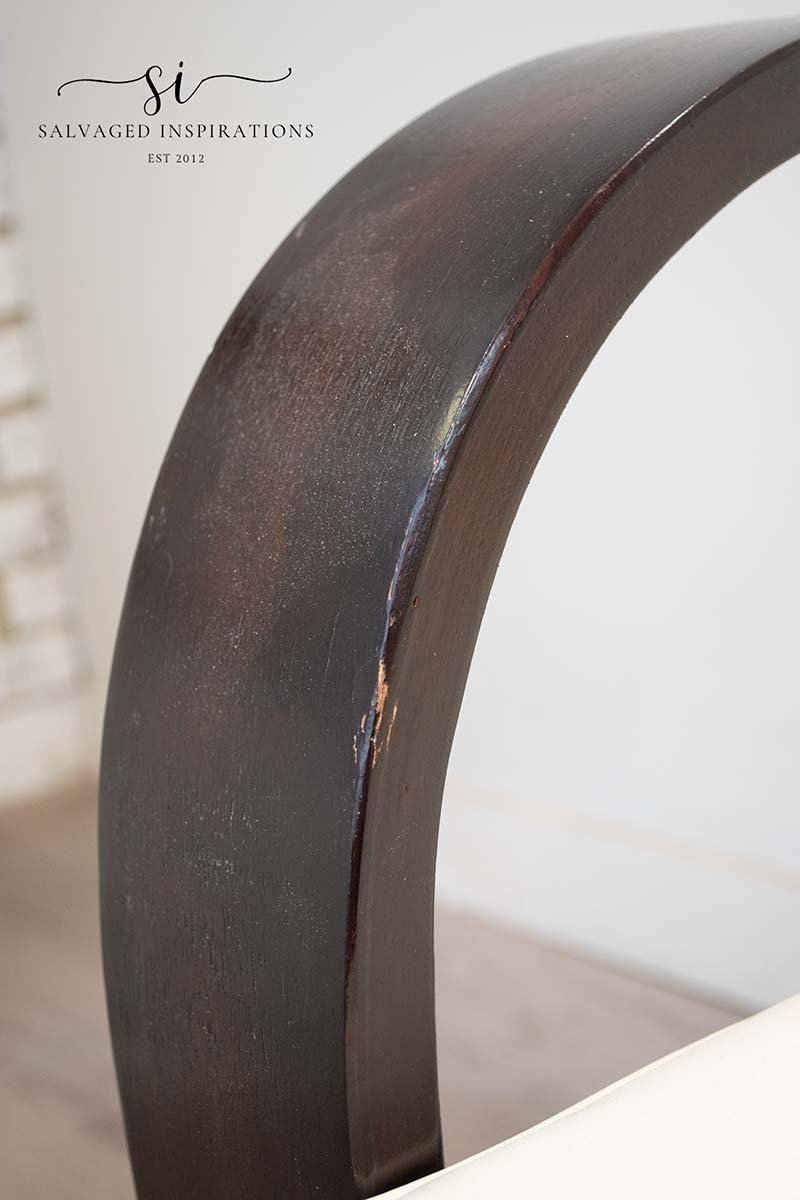
The arms and legs were also in great shape except for a few little scratches. There’s a SUPER EASY fix I’m sharing below!
THIS POST IS SPONSORED AND/OR CONTAINS AFFILIATE LINKS TO PRODUCTS I LOVE AND USE. YOU CAN SEE MY FULL DISCLOSURE HERE.
SOURCE LIST
Vinyl Chair– SALVAGED
White Lightning Cleaner
2″ FL Paint Brush
Painters Tape
Water Mister Bottle
Chocolate Chalk Mineral Paint
Terracotta Chalk Mineral Paint
Drop Cloth Chalk Mineral Paint
Trade Secrets Touch-Up Markers
Spray On Wax
HOW TO PAINT A VINYL CHAIR
Here’s how I salvaged this chair and turned it into something I’m going to keep for my own home!
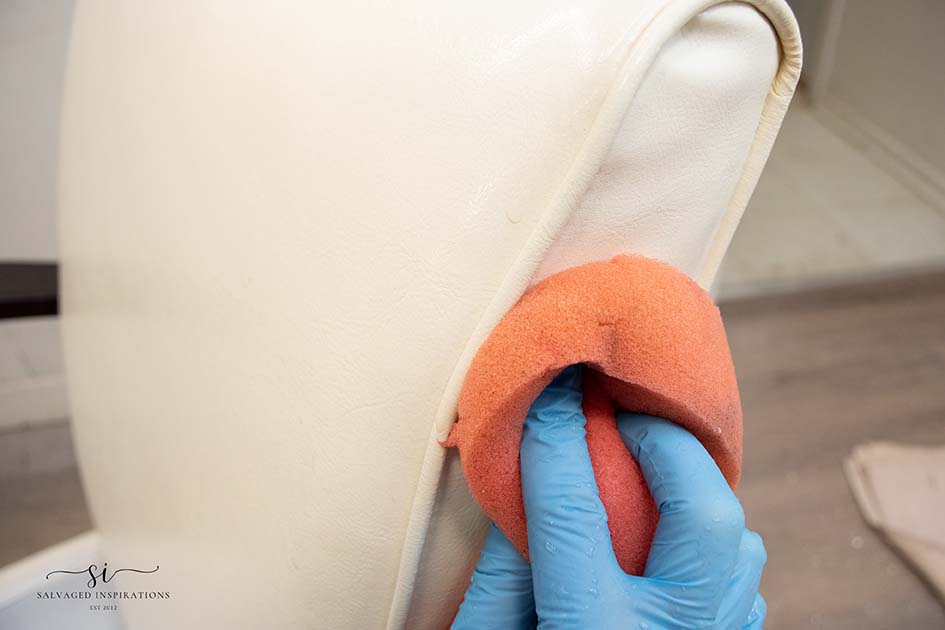
CLEAN
To clean this chair I used White Lightening Cleaner in a spray bottle and a regular old sponge. While cleaning, I made sure to spray and wipe in and around all the piping as this is where dirt and grime can hide.
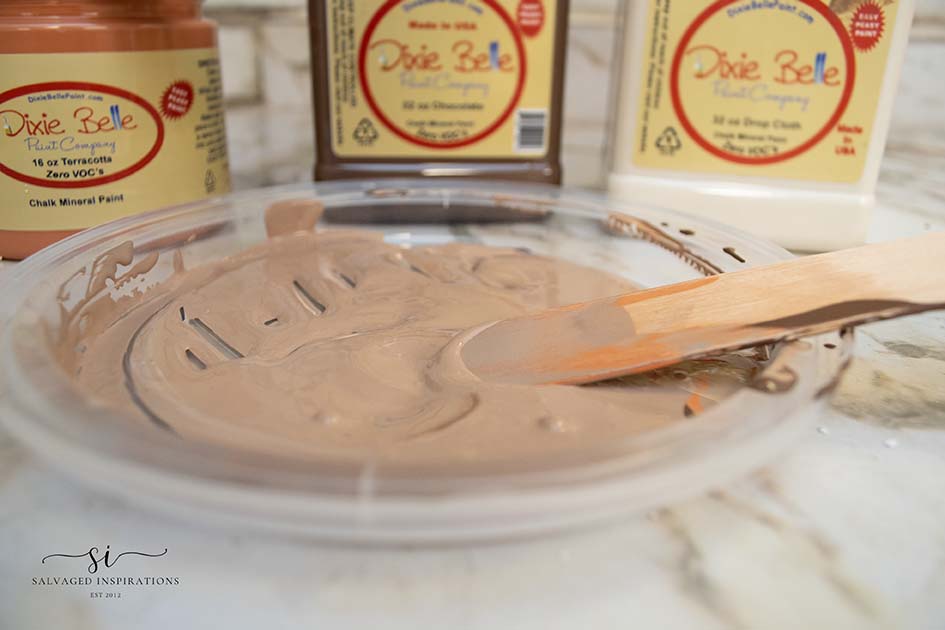
CUSTOM COLOR
I really wanted to warm this chair up and create a faux leather brown with orange undertones. To get this look I fooled around with a couple of colors and ended up mixing Terracotta with Chocolate and then added a little Drop Cloth to lighten it up. Creating custom colors is REALLY easy to do using this FREE online Dixie Belle Color Mixer as well.
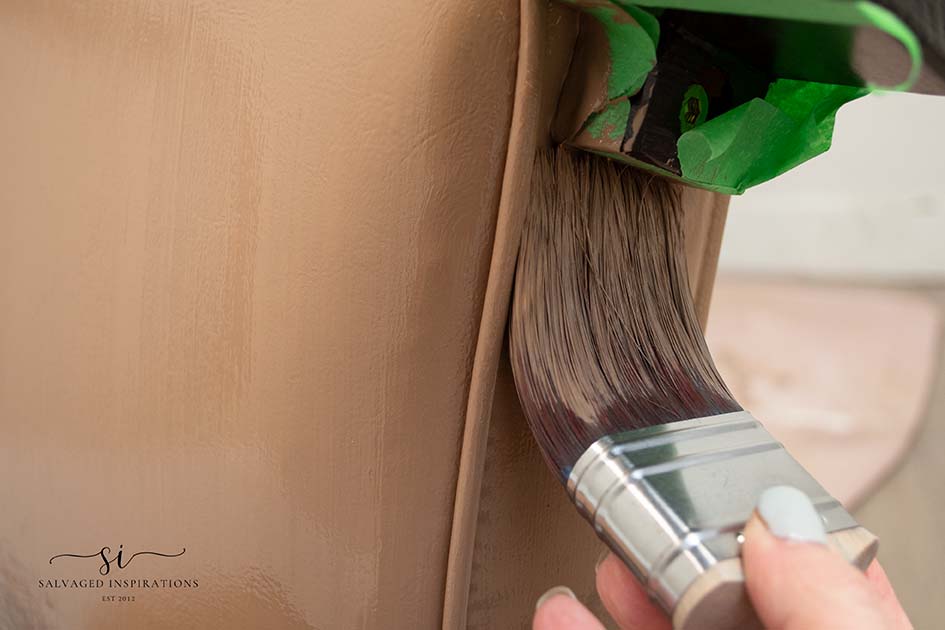
PAINT 1st COAT
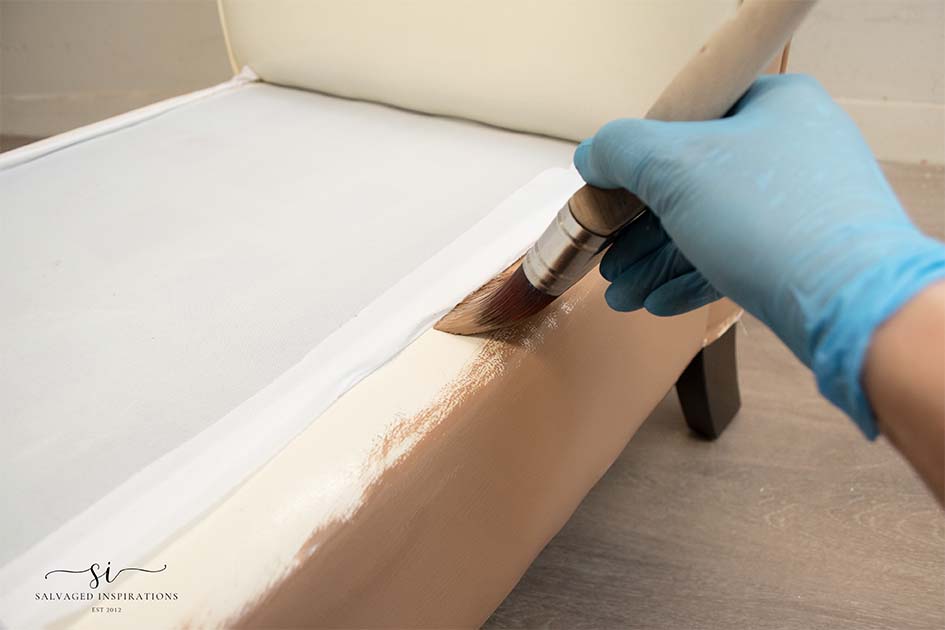
Once I was happy with my ‘leather’ custom paint color I used my 2″ flat brush to apply my first coat of paint onto the vinyl. I was so excited to see what this color looked like on the chair I forgot to tape the arms and legs off with painter’s tape. I ended up doing it for my second though.
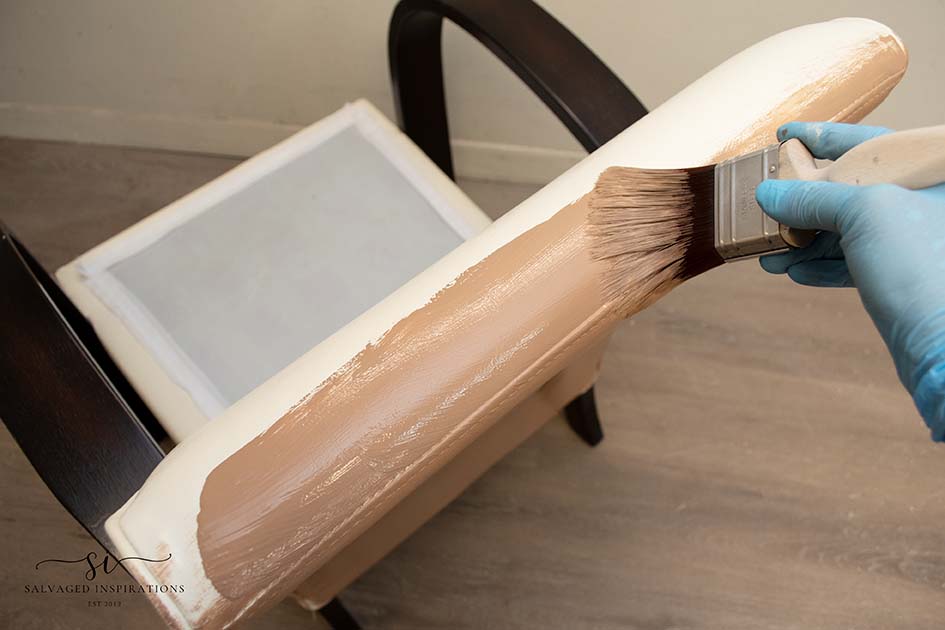
If you’re using chalk paint (any brand) no additive or prep other than cleaning is needed to paint vinyl furniture. On my first coat, I applied the paint as-is with no problems. The paint glides on beautifully without any issues and dries in a normal amount of time.

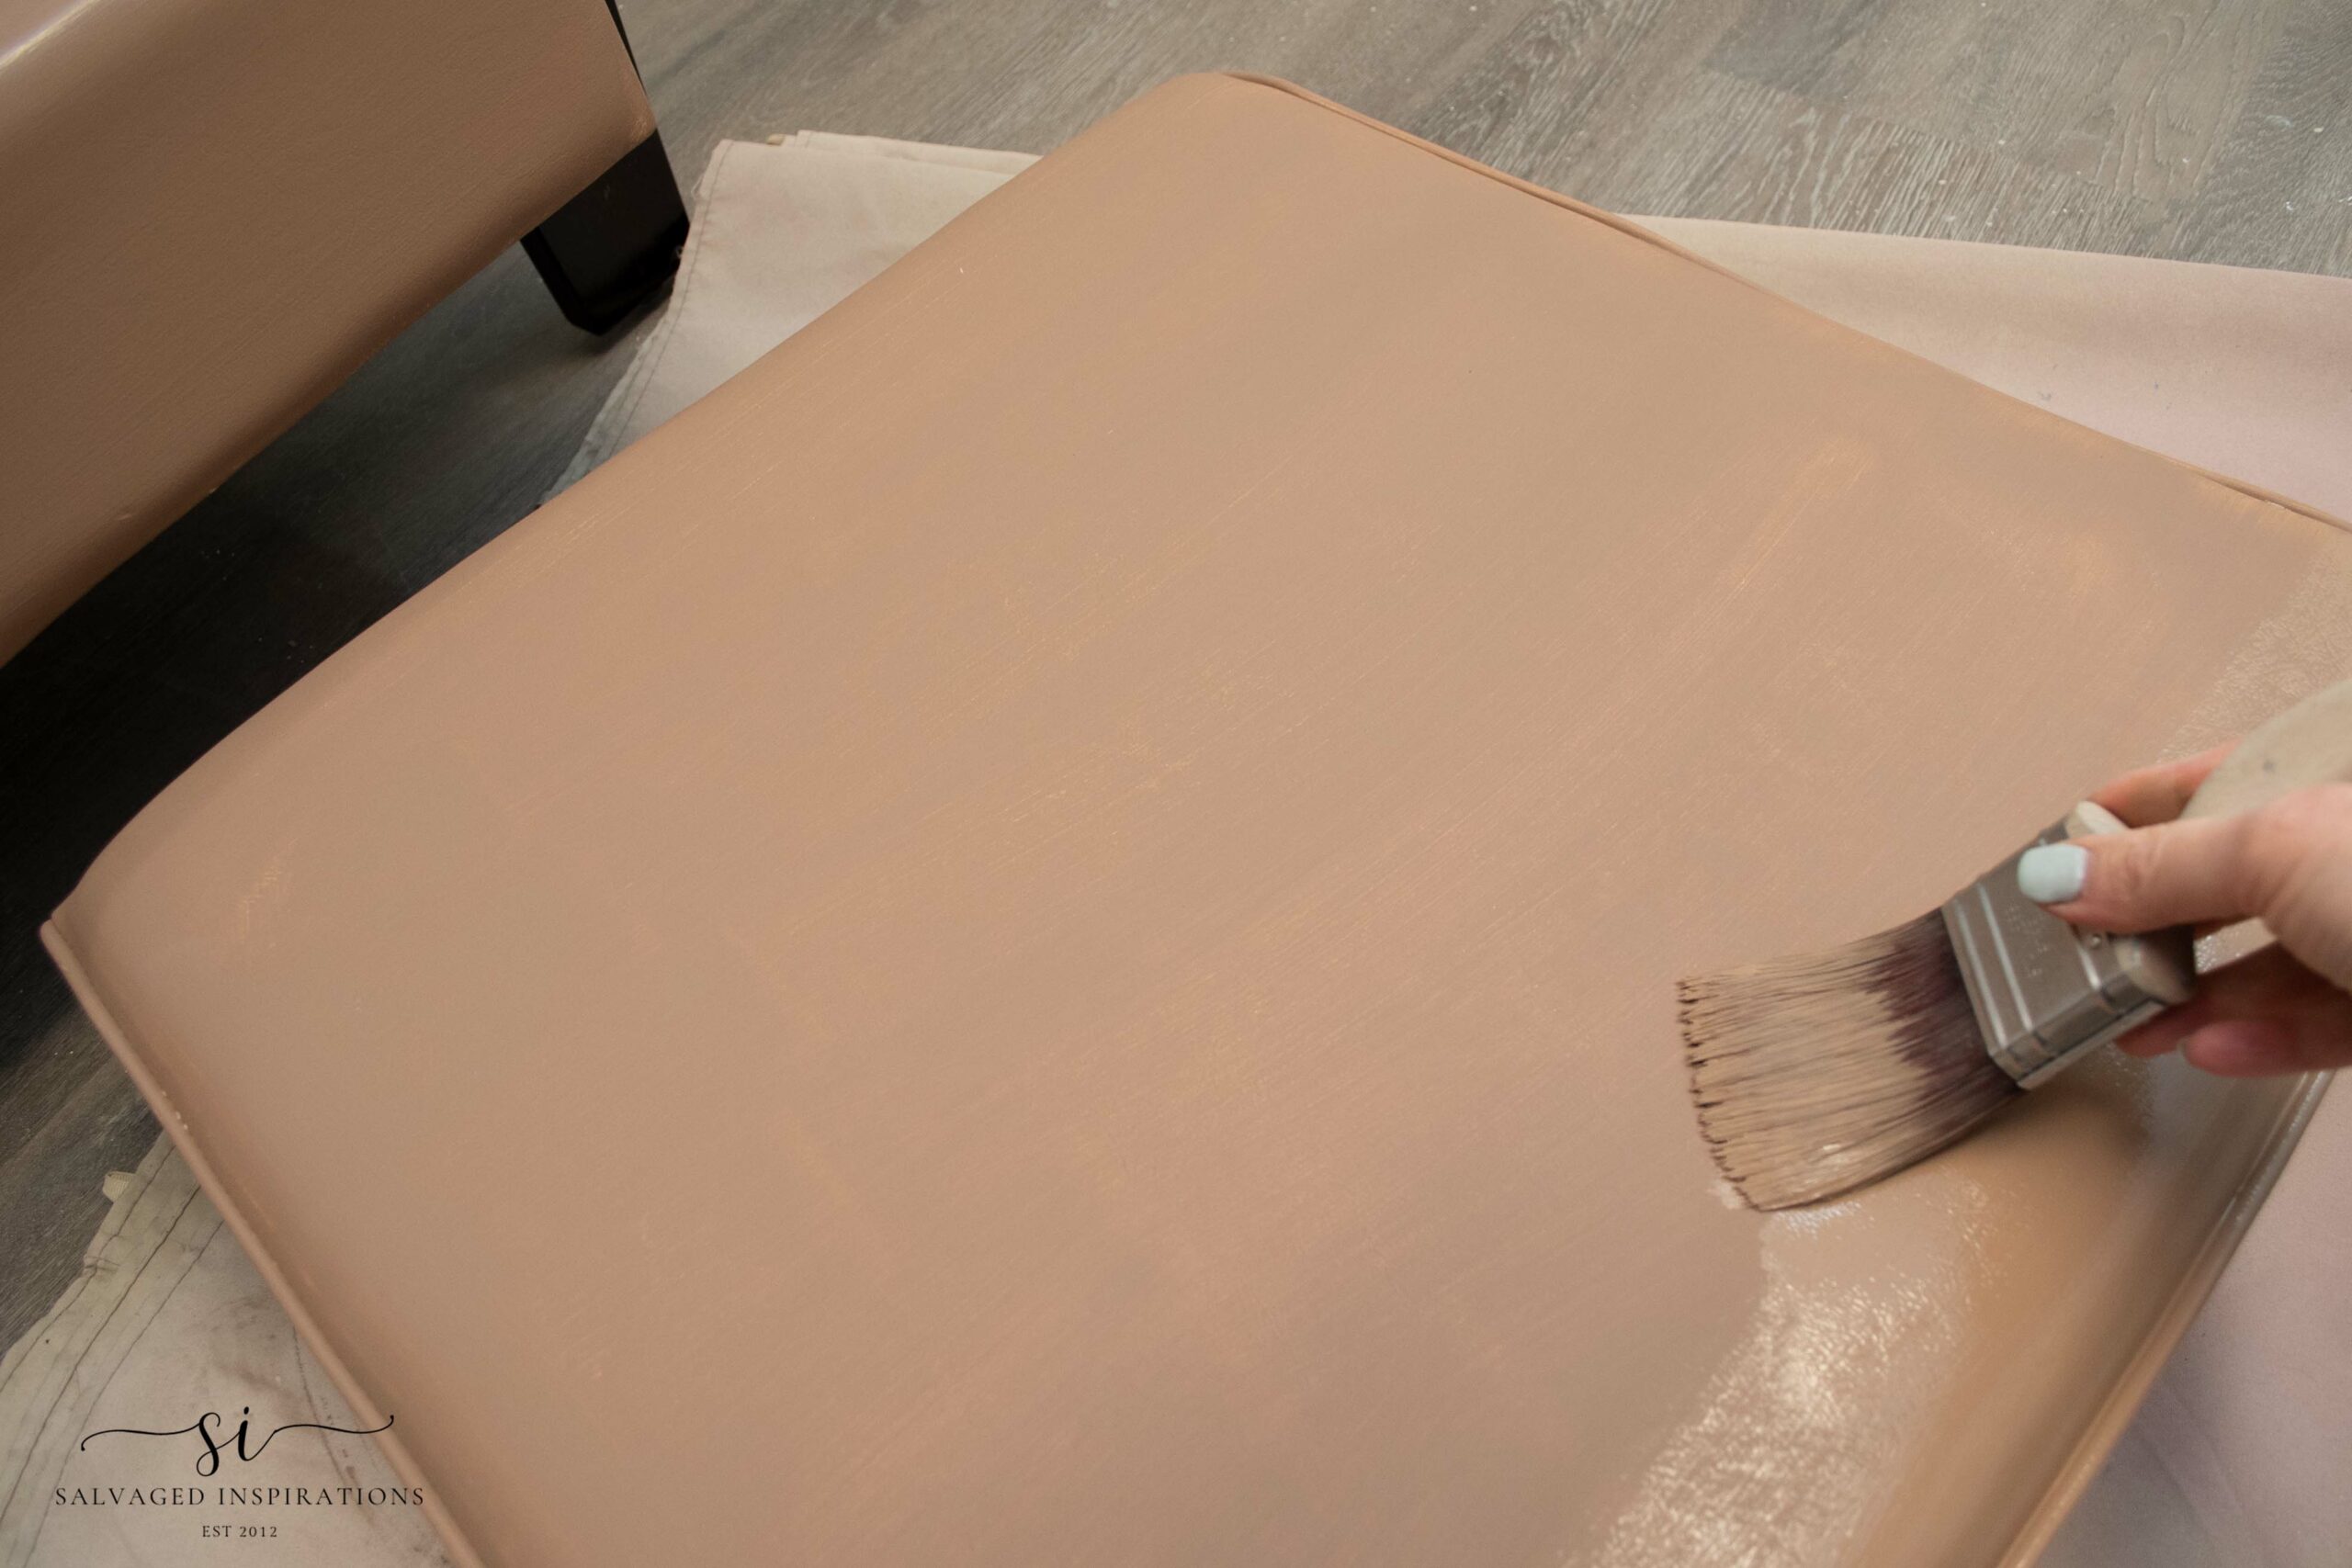
I made sure to take the cushion off for easy painting and get the paint under the seat and into all the piping and corners as well.
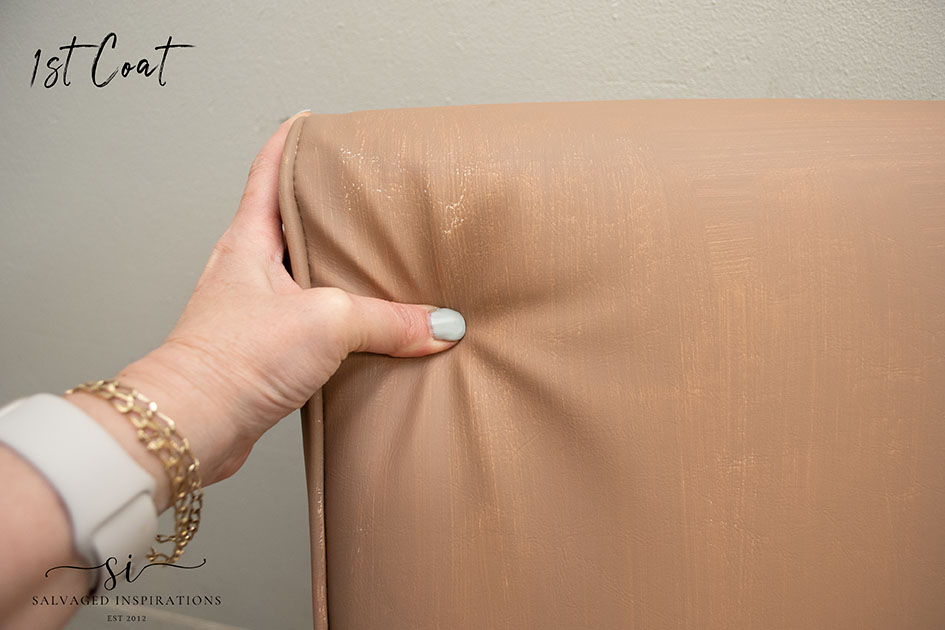
Here’s how it looked after the first coat. I didn’t get full coverage but it still felt really soft to the touch.
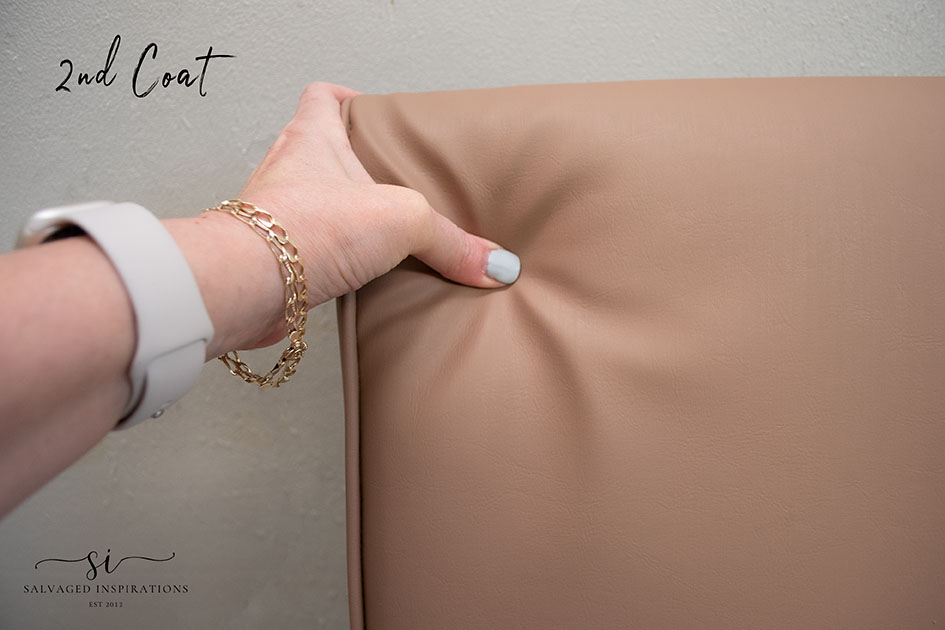
PAINT 2ND COAT
Once the first coat had dried I masked off the legs and arms and painted my second coat.
The second coat gave full coverage but I did use a water mister to spray water on my brush and add a little water when feathering out the paint. This may or may not be needed depending on the thickness of your paint.
Here’s how it looked once the second coat had dried. I had full coverage and it still feels soft to the touch.
TOUCH-UPS
To touch up the tiny scratches on the arms, I used this Trade Secret Touch Up Marker. They usually come in packs of three so you have different stain colors to choose from and they work exactly like a marker. You just draw on the scratches and they blend in nicely.
Pro Tip – If you’re working with a dark stain and you’re in a real pinch, try using a black Sharpie. Sharpies work just as well on tiny scratches as well.

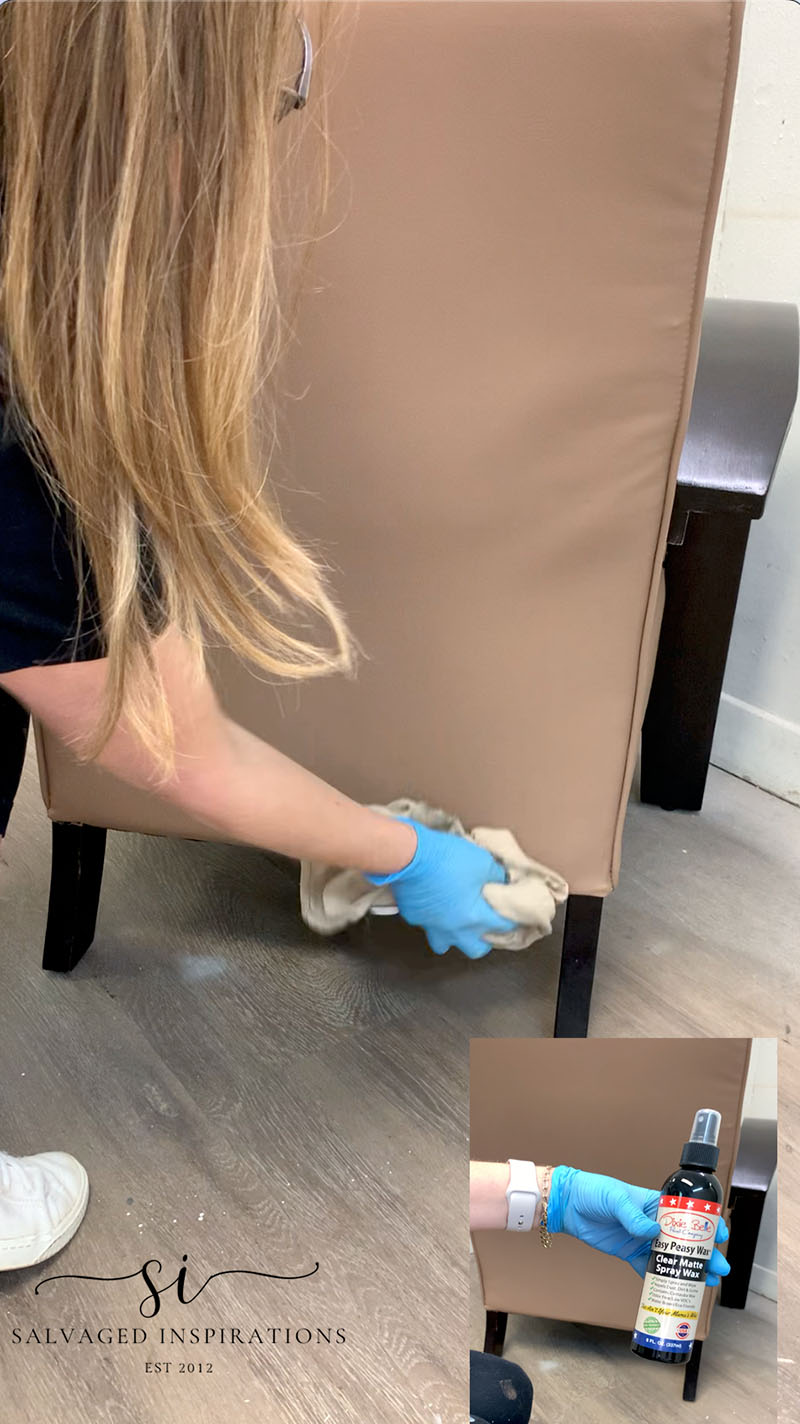
PROTECT
To protect and seal the paint onto this chair I went the lazy girls’ way and used this Spray-On Wax. This wax couldn’t be easier to use. You spray it on. Wipe it back with a soft cloth. It took me under 5 minutes to wax this entire chair as no buffing is required! It dries to a matt finish in 30 minutes and cures within six hours. It’s durable enough for outdoor furniture as well!
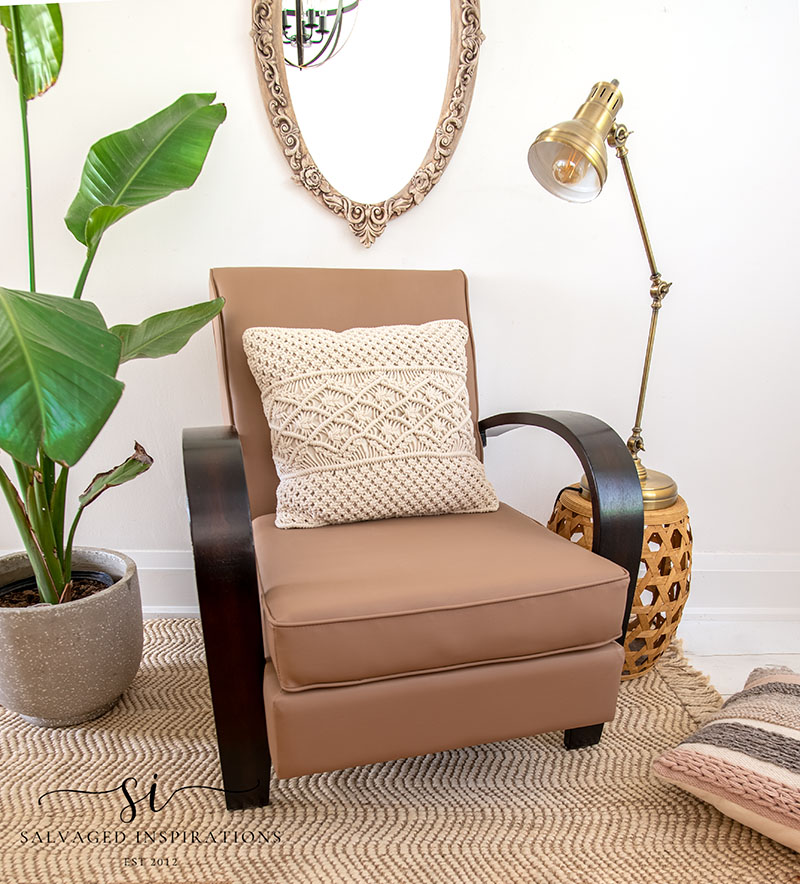
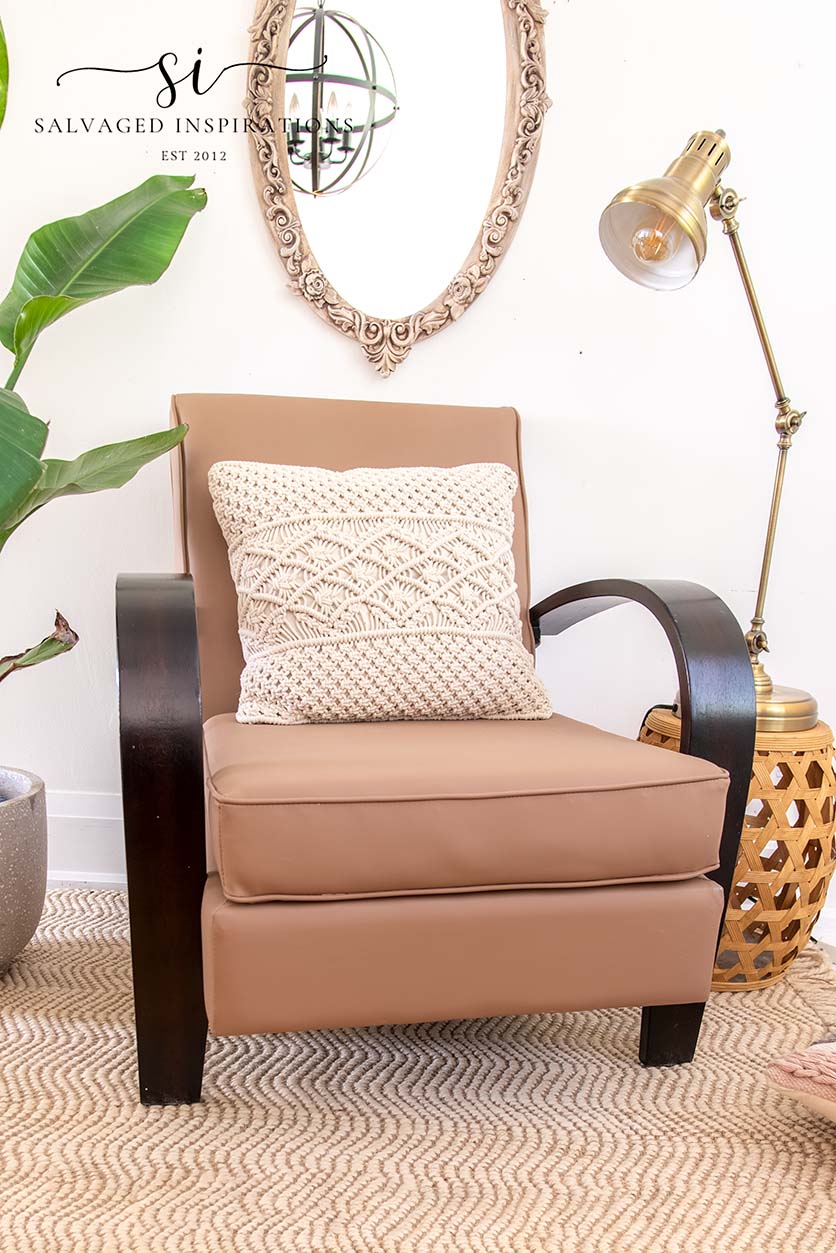
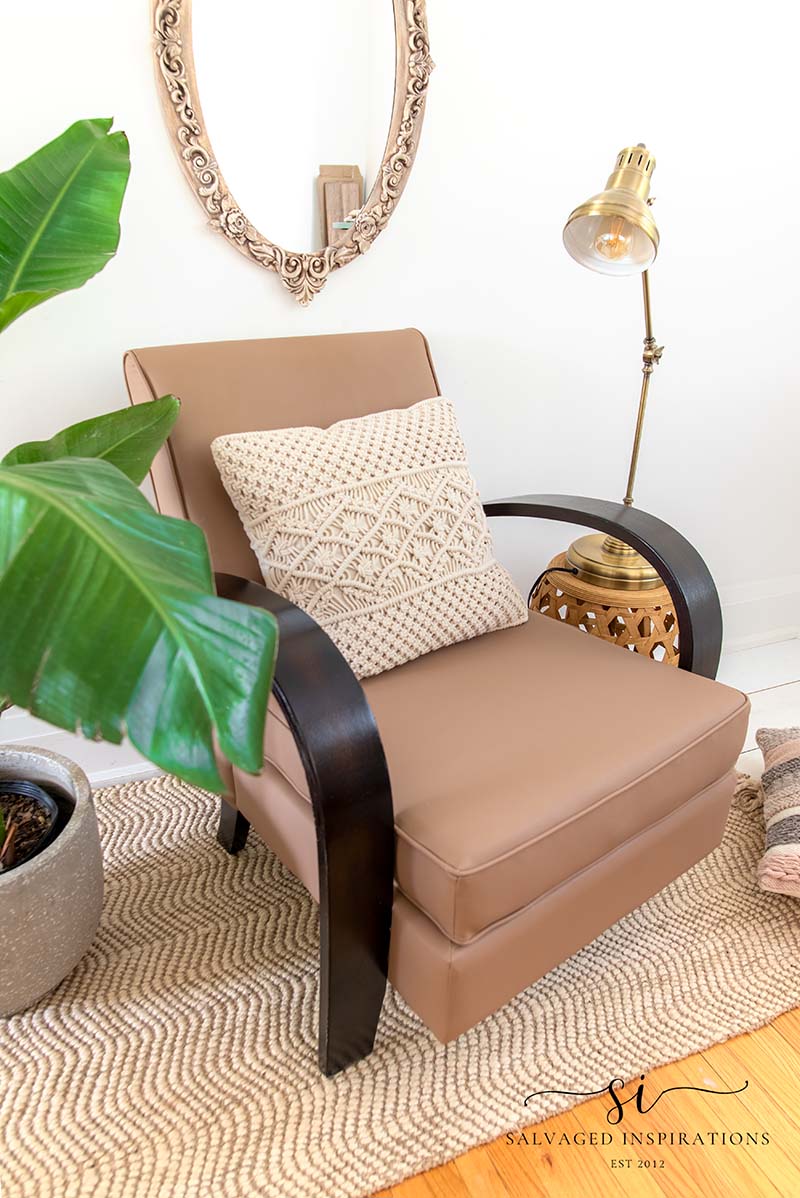
FINISHED LOOK
And here’s how this vinyl chair makeover all came together.
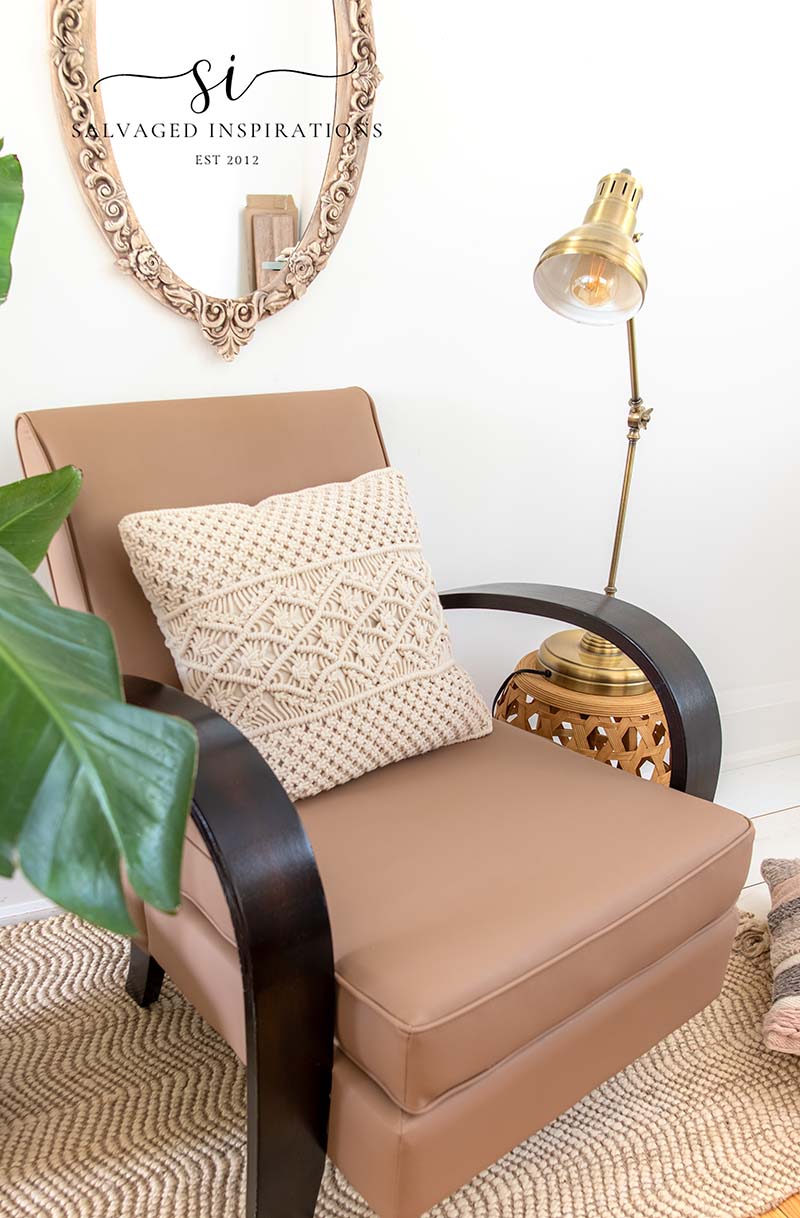
I love this warm leather look MUCH better than the white!
What do you think of the new color?
It’s still soft to the touch and I’d never know it was painted if it wasn’t me who painted it…lol.
YOUTUBE TUTORIAL
Here’s a step-by-step tutorial on Youtube. If you have any problems viewing it below, feel free to watch it on my Youtube Channel HERE. Our #siyoutubefamily is already a community of 38.6K so don’t forget to subscribe if you haven’t done so already! So exciting, thank YOU! 🙂
AND NOW FOR SOME FURNITURE FIXER-UPPER FUN!
You’re going to LOVE what my creative team of Furniture Fixer Upper ladies do. Below are the BEFORE photos. Visit the links underneath to see the amazing AFTERS and learn how they did it! I’m heading over to take a peek as well! x
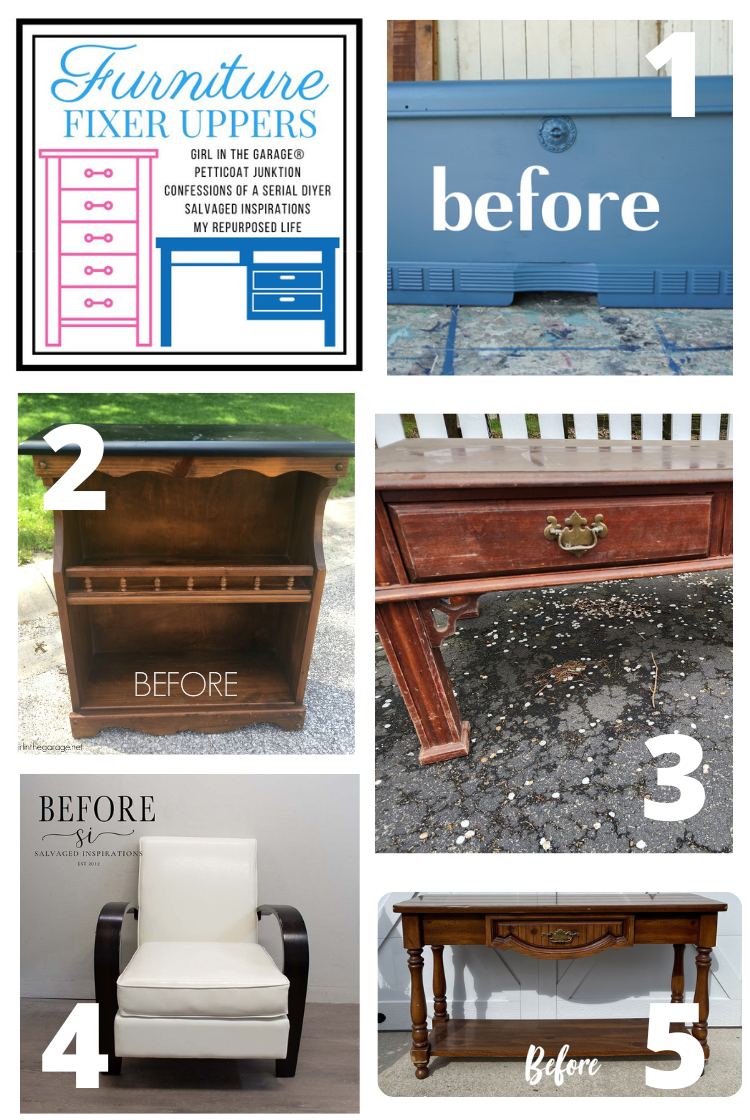
1. PETTICOAT JUNKTION
2. GIRL IN THE GARAGE
3. MY REPURPOSED LIFE
4. SALVAGED INSPIRATIONS (HAPPY YOU’RE HERE!)
5. CONFESSIONS OF A SERIAL DIYER
Here’s another look at this chairs’ before and after. I hope this easy makeover has inspired you and given you some new ideas on how to update your vinyl furniture.
LET ME KNOW WHICH COLOR VINYL YOU PREFER OR ASK ANY QUESTIONS YOU MAY HAVE… I ALWAYS LOVE HEARING FROM YOU. IT MAKES MY DAY! 🙂
Happy furniture painting my friends!
Denise x
RELATED POSTS::
GOLD AND VELVET CHAIR MAKEOVER
PAINTING A FABRIC CHAIR – HOW TO
PAINTING FRENCH DOORS IN BLACK
PAINTED LACE SECRETARY DESK
HOW TO REUPHOLSTER A CHAIR SEAT
PIN AND SHARE!


Would you recommend this on a white vinyl chair that has some blue ink spot stains? I can’t get them out and thought maybe I could repaint the chairs. They’re dining room chairs and will get a ton of wear and tear. I’m hoping that your great trick would hold up (?) Thanks very much!
Hi Julie! Hmmm, I’m not sure as I’ve never painted over ink spots on vinyl. I’m guessing the ink spots would need to be spot treated with a stain blocking primer before painting so they don’t bleed through the new paint. As for the painted vinyl holding up on dining room chairs, I’ve been using mine as a reading chair and it has held up great.
The custom faux-leather paint job looks beautiful! I wish I could do this you make it look so easy!
If I can do this YOU can do this Nicki!👍 Picking the color is the hardest part!😃
Great job! The white was nice but how you paired it with the other decor items , especially the mirror you enhanced :), makes it look outstandingly!
Thanks so much Susan! I really like this mirror paired with the chair as well.😊
You gave this chair a fresh faux-leather look! Great makeover, Denise! xo
Thanks so much Jen! XOXO
GREAT JOB, DENISE!!! LOOKS MUCH MORE INVITING!!! 🥰🥰🥰🥰
Thanks so much Susan!😘
Hi Denise. Your chair turned out beautifully. The custom color you mixed is so warm and cosy. Your tip on using a black Sharpie to fix scratches in dark wood made me chuckle because that’s EXACTLY what I do! Works like a charm. Thanks for sharing.
Sharpies work great, right!😆 Thanks Monique, so glad you like the chair. Have a super day! XOXO
Denise, this looks great! It looks like a brand new chair. The color is so pretty also.
Thanks Marian! I think it looks so much better for my decor as well! XOXO
Just beautiful! The Color is so warm and pleasant and I love the way you staged it. You said you used three different colors of paint. How do you know how much to mix so that you have enough of the color for two coats? Have you ever run out and then had difficulty mixing more to get the same color?
lol… yes I HAVE run out of a custom color before and it’s TOUGH trying to match it up perfectly. I learned my lesson and always mix more than I need. I eyeball it because I’ve been painting furniture for a long time but if you need a real measurement, you can use free online paint tools. For instance, DB has a mixing tool that calculates how much paint is required for the square footage of your piece. 🙂
The chair looks great! But if you sit on it, wont the paint start to crack?
Thanks Rosanne! And no. It doesn’t crack. It’s still really soft and pliable. I’ve painted a few chairs over the years and they’ve all held up really well! 🙂
Lovely upgrade! Somehow, the color change makes the chair look cozier. How did you fix the little torn place?
Thanks Gloria! It think the warm leather looks warmer and cozier too! And great question… i forgot to mention. I didn’t fix it. One it was painted over it was barely noticeable so I left it seeing as it’s for my own home.😊
Wow! I can’t believe someone threw that jewel away! Great job of reviving it.
Right?! Lucky me! Thanks Michael!😊
You did a beautiful job. Really transformed the look of the chair.
I couldn’t ’find in your process info on how you fixed the tear in the upholstery by seat and arm. I was really interest in knowing. Can you let me know. Great job. Love your work
I didn’t end up fixing it Bev. Once it was painted it was barely noticeable so I just left it as is.
Great tutorial. Thank you!
Thank you Lizzy! Enjoy your day. XOXO
Wow! The chair looks great! Beautiful. One question: I live in the desert (and keep my house fairly warm in summer), what happens when you are sweaty or wet? How does the paint hold up? I did touch up a black chair with tiny wear areas on the piping-with a small brush and craft paint, black. Thank you for your time, Elle. I live in Palm Springs and Midcentury Modern is very popular.
So long as you wait until the wax is 100% cured before you start sweating on it😂🥵 it will hold up perfectly fine. This was is used for outdoor furniture as well so it will hold up nicely. 🙂
It looks fantastic, Denise! It was very modern and a bit cold before, but now it is warm and inviting! Lucky freebie! XOXO
Super lucky freebie, right?! I’m a HUGE fan of white furniture but in this case, I prefer it warmer as well. Thanks my friend. XOXO
Super, super nice! Thanks for all the great product tips!
My pleasure and thanks so much Ruth! Have a super day! 🙂