We all know painting can be messy. Unless you have some sort of “magic pouring system” {and if you do…pleeeease share! 🙂 } the paint always seems to collect in the rim.
I can’t tell you how many times I’ve splashed myself with paint while sealing the lid back on. I’ve learned to place an old rag over the top while hammering. This way, the paint splash stays on the rag. However, this solution doesn’t help me when I open that same can, and there’s a ton of crusty dry paint stuck in the rim.
Paint build-up that dries hard and crusty in the rim can easily mess up a finish when it gets mixed into your fresh paint!
Jennifer from Trillium Park Designs has shared this wonderfully simple paint drip tip with us today!
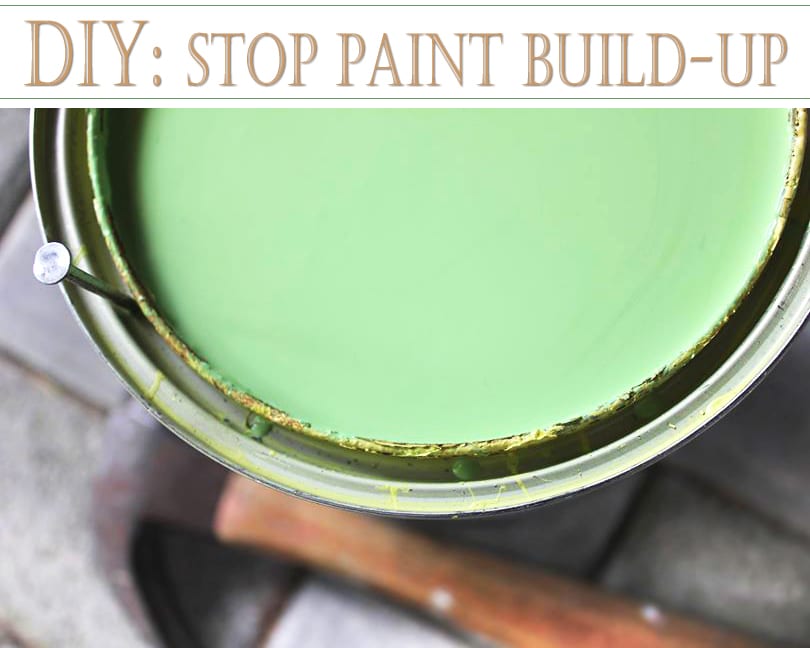
[box] Next time you open a new paint can, drive seven or eight nail holes into the recessed rim of your paint can.
The paint that accumulates in the rim will “drain” back into the can. This will reduce the chances of that nasty splatter when you go to hammer the lid back on and help reduce the chance of dealing with dried crusty paint for the next time![/box]
So smart and simple and I can’t believe I didn’t think of this. I’m all for any tip that helps keep my mess to a minimum! Thanks Jennifer!
Have any questions on reducing drips or storing paint? Or maybe you have your own tips on how to paint cleaner and smarter? Chime in because I always love hearing from you!
You can catch last weeks Q-T-T here and if YOU have any ideas or tips you would like to share on the SI Quick-Tip-Tuesday-Series, feel free to send me an email.
Now lets get painting!
Denise x
_____________________________
Like what you see? Subscribe to Salvaged Inspirations so you’ll never miss a post!
Follow along on Pinterest, Google+, and Facebook for more inspiration!

Take a small nail and punch 5 or 6 holes in the sealing ring. The paint will drain back into the can, no build up. Love the site
Thanks Dan 🙂
Great tip. I can just imagine, based on experience, the paint splashing out of the can with every smack of the hammer on that nail! So….I’ll put a piece of cardboard across the top of the can to take the splashing paint…..until i see it isn’t necessary.
Good-bye, rusty crusty rims……..
You and Jennifer, the paint angels……have won your wings with this one.
MJ
that’s cute…thanks MJ! 🙂
This is such a great idea!
I always try to do the last strokes or touch up small spots with the paint that collects in the top of the paint can… but I still get splashed. Ha!
I am DEFINITELY going to be doing this.
I want to change the back color of a bookcase that has been waxed. What steps do you use to repaint a different color? Thanks for the paint can tip!
Pleasure Charlotte! If you plan on using chalk paint, you can paint directly over the wax. For latex, cleaning with mineral spirits and then a light sanding will do the trick. 🙂