Happy Tuesday to you all!
Have you ever primed or painted a piece of furniture and then noticed scratches or dings you didn’t see prior to priming? Annoying right?
Large furniture flaws are easy to spot and fix. But sometimes smaller cracks, holes or blemishes are practically invisible until you apply that first coat of primer/paint on them.
When I first started painting furniture, I was under the impression that wood fill can ONLY be used directly ON wood. Under perfect conditions – this is ideal. But we all know I’m faaaar from perfect, so there have been a few times {ok…probably more than a few ;)} when I’ve missed filling in ALL the holes or scratches prior to priming my piece(s).
So here is today’s quick-tip:
[box] If you apply your first coat of paint/primer and then see additional scratch marks – no problem.
Re-apply your wood filler OVER the first coat of paint/primer. Wait for it to dry, and then sand as you normally do.
Then go ahead and add your second coat of primer (or just spot prime) and continue painting your project.[/box]
I’ve applied wood fill OVER primer a number of times and my finish has always turned out great!
Here’s a good example on this MCM piece I recently worked on. You can see the top has wood fill applied directly on top of the primer.
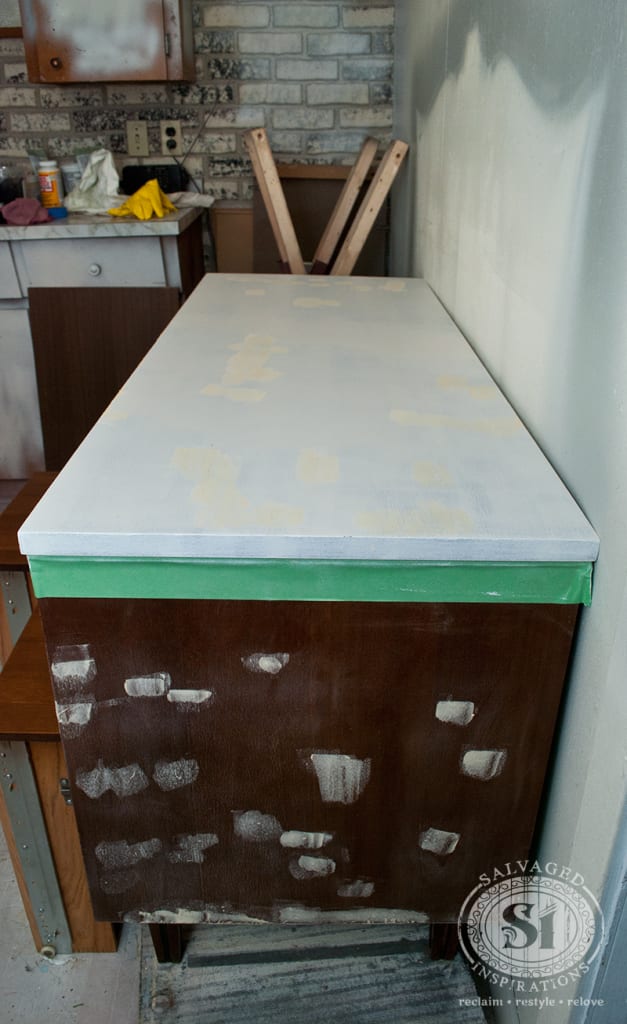
The finished Mid-Century-Modern Buffet is here.
And here’s another scratched dresser top where I used this same technique. This dresser had SO MANY scratches it’s no wonder I missed a few the first time around.
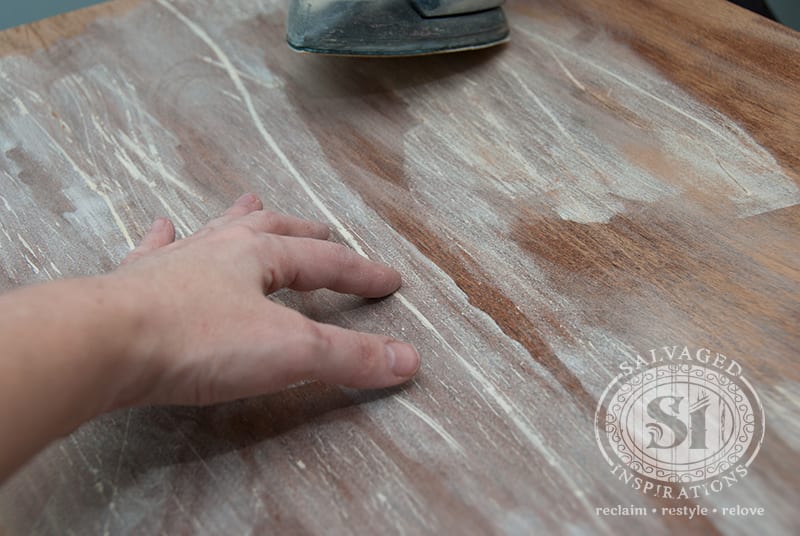
Here’s the same dresser top after it was painted.

Filling in unwanted scratches, cracks and other furniture flaws is a super important step in furniture painting and restyling. It can really make or break your finish so I hope you find this tip helpful.
Have you ever noticed scratches AFTER you’ve finished filling and priming/painting? What did you do? Chime in! As always, I love hearing from you all! x
Catch last week’s Q-T-T here – and if YOU have any ideas or tips you would like to share on the SI Quick-Tip-Tuesday-Series, send me an email!
Enjoy your day and have fun with your next project!
Denise
_____________________________
Like what you see? Subscribe to Salvaged Inspirations so you’ll never miss a post!
Follow along on Pinterest, Google+, and Facebook for more inspiration!

It seems to me that a thin coat of primer will soak into the wood and provide a more stable, dry surface for filler to bond to. I do not always do it, but this is my preferred way to fill splits and dents in old wood – prime first, fill, then prime again over the filled spots. I also find it easier to see the imperfections after a first coat of primer. I am sure it depends what type of filler you use too, I use the two part filler, as often used in car bodywork repairs, it sticks incredibly strongly, and sets fast.
I agree. And I like using Bondo as well. I use the All Purpose Bondo which works just as well as the Wood Bondo but costs less.
Hi im curious how long you let the wood filler dry before applying BIN Shellac. The elmers wood filler i have says sanding after 15, water based paint after 2 hours and all others should wait 24 hrs. Would the BIN be all others and i should wait? Or have you been able to prime before 24 hours?
Thanks!
Hi Laura! So long as the wood filler is 100% dry, it’s ready to prime, reprime or paint. 🙂
I painted a table with latex paint and should have filled areas where wood chipped and dented before painting. Will Elmers Carpenter wood filler work over latex paint?
Hi Theresa! Unfortunately, it’s not ideal. The reason being – if you apply the wood fill over paint, especially glossy paint, it will not stick as well. Also, it will require priming because if you just apply another coat of paint, you will most likely see where you did the patchwork.
Thank you!
I painted a frame; and, afterwards, I noticed some gaps.
I was wondering if i could add some wood filler and repaint.
Based upon your post, it appears that I can!
I have been involved in building a Les Paul Guitar Kit, and struggling with this whole grain filling process The back of the guitar body and neck are Mahogany. I have experimented with the grain filling process several times, and each time I’ve been very disappointed in the result., until finally grain filling between coats of paint. I probably should have grain filled and sanded several times before paint, but it appeared the surface was flat, so I sprayed the paint…but by then, you can only go back to the beginning of the process if you remove the paint. I think that no matter what kind of grain filler you use, water based or solvent based, when you apply the paint you’re goig to experience a sinking effect, which visually exposes the grain structure. Eventually, the only way I was able to arrive at a smooth surface, with no hint of grain structure,was to grain fill after painting, sand then recoat with paint, grain fill over that second layer if need be, and even a third layer if needed, unti eventually, usually after about three coats of grain filling and painting, I ended up with a flat surface with no hint of a grain structure. Initially, to grain fill, I used Timbermate. But, after much frustration, I went with drywall compound, which seems to work just as well, and it’s quite a bit cheaper. What I don’t know is whether the grain filling between painting sessions will hold up. I plan to spray some clear coat paint as a finish coat, probably three layers of clear coat, and I hope that the filled grain structure won’t come crumbling out over time. I would assume that if it’s all sealed up with the paint, and then the clear coat, it would be a relatively homogenous part of the guitar body. The right way to grain fill is probably with alternating coats of filler and sanding sealer, at least three coats based on my experience with Mahogany, maybe more with Oak. But, I didn’t realize at the time that the sanding sealer method might be the better process before I sprayed the project with paint because I thought the surface was filled and flat, when in reality it was not, at least not after the first coat of filler. Anybody know whether my method of grain filling between coats of enamel paint will work out well long term with respect to durability of finish?
I can’t speak for guitar use, but my furniture has held up perfectly. My guess is if you prep, paint and seal as you’ve described, it should be perfectly fine. If anyone else has experience and would like to chime in, feel free!
What wood filler do you use?
Hi Apryl… love the way you spell your name. 🙂 My basic go-to wood filler is this one here.
That is a wood filler for holes etc and a different product than a grain filler also called a pore filler. This is a product that is rubbed and “pushed into the grain of woods like ash, mahogany and oak to eliminate the grain from showing through and filling dips and dents and scratches.. it is applied to raw wood or primer by polishing it into the grain and following with a burlap rub to really get it into the pores. Some times it will need more coats especially on oak.
Love this tip, thanks Nancy!
Thanks! super helpful!
Thanks Denise for all your wonderful tips and expertise!
I love this buffet! Can you tell me what you used on the top?
Hi Jackie! The MCM Buffet was primed with Zinnser B-I-N Primer Sealer w shellac and painted w Sherwin Williams All Surface Enamel in “SW 7010 White Duck”. Both were applied with a high density foam roller. All the details here. 🙂 https://salvagedinspirations.com/mid-century-modern-buffet-restyling/
Thanks! Very helpful. I plan on painting over my fake wood cabinets with BIN, then using Timbermate, then another coat of BIN, then Cabinet Coat. Kept wondering if someone had done something similar. : )