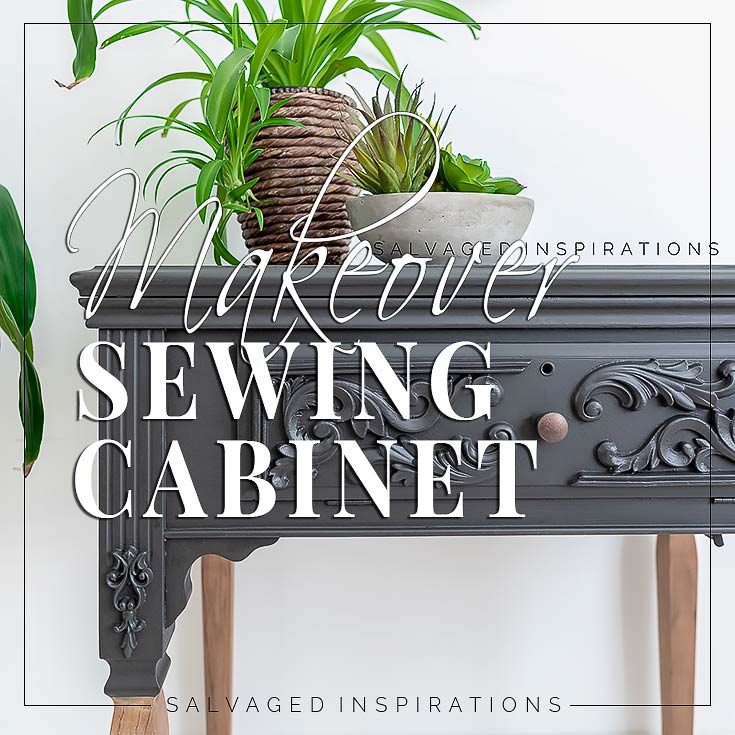
HOW TO UPDATE A SEWING TABLE | MY VINTAGE SINGER CABINET GETS A MAKEOVER!
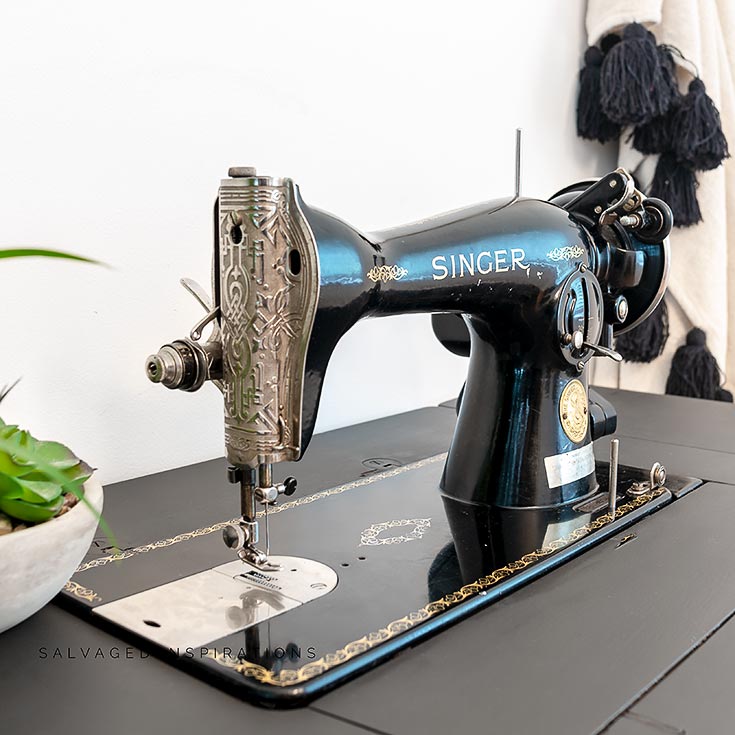
 Hi, sweet #sifamily! Today’s makeover has some history. I picked up this vintage Singer Sewing Machine from my local ReStore over 20 years ago. Because there was no power cable to this machine, my Dad rewired the old girl for me. It came with a matching bench. And as an added bonus it had the original owner’s name, manual, and date included. I’m sharing below but before you read on – can you guess how old this Singer is?
Over the years I’ve used my sister’s new Singer and I bought a brand new Brother machine, but I still prefer sewing on this vintage machine the very best! I wish I had more time because my sewing skills are mediocre at best but I’d love to learn!
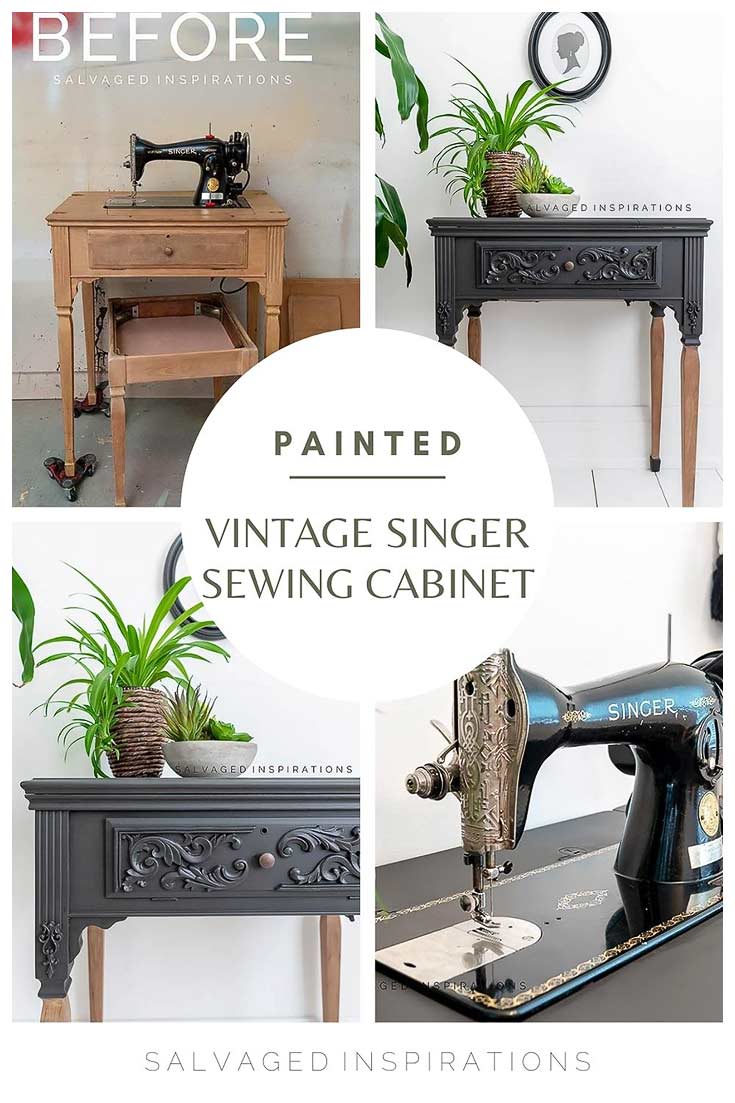
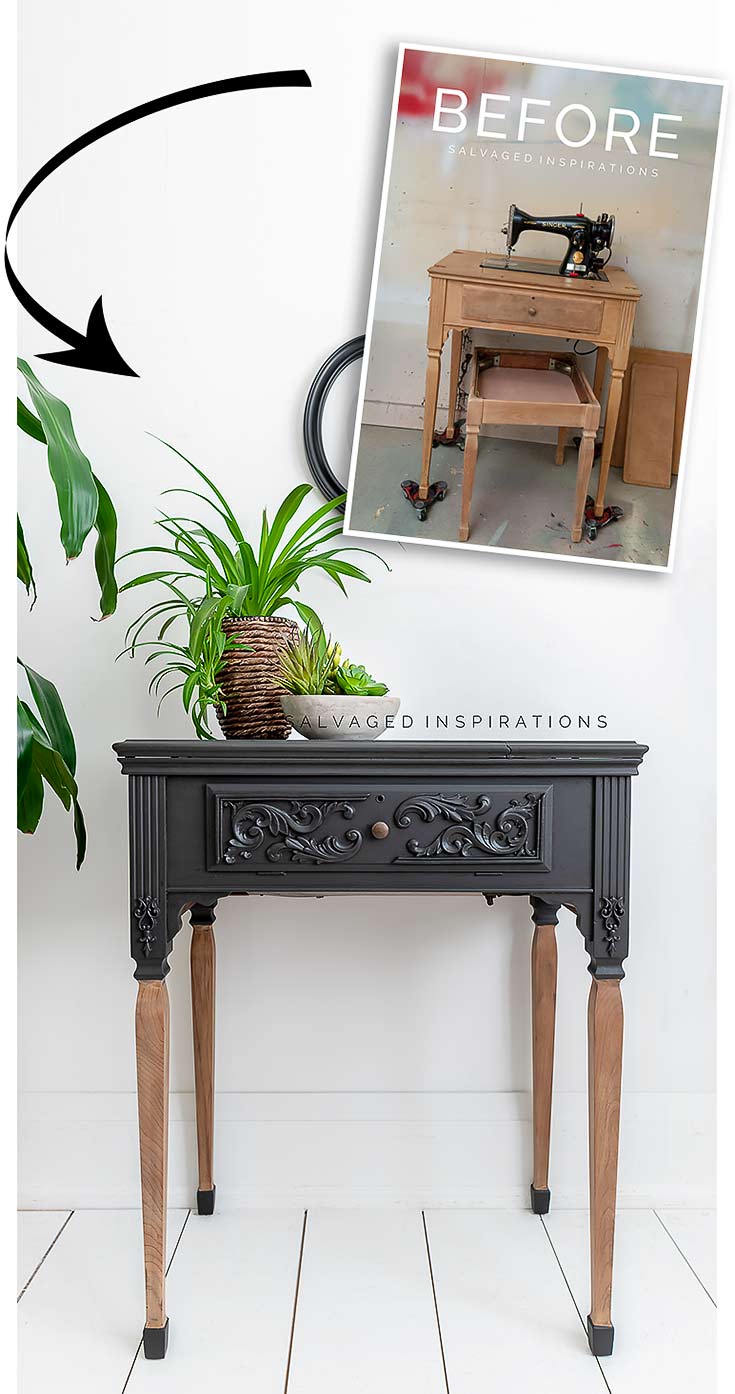
Here’s what I started with…

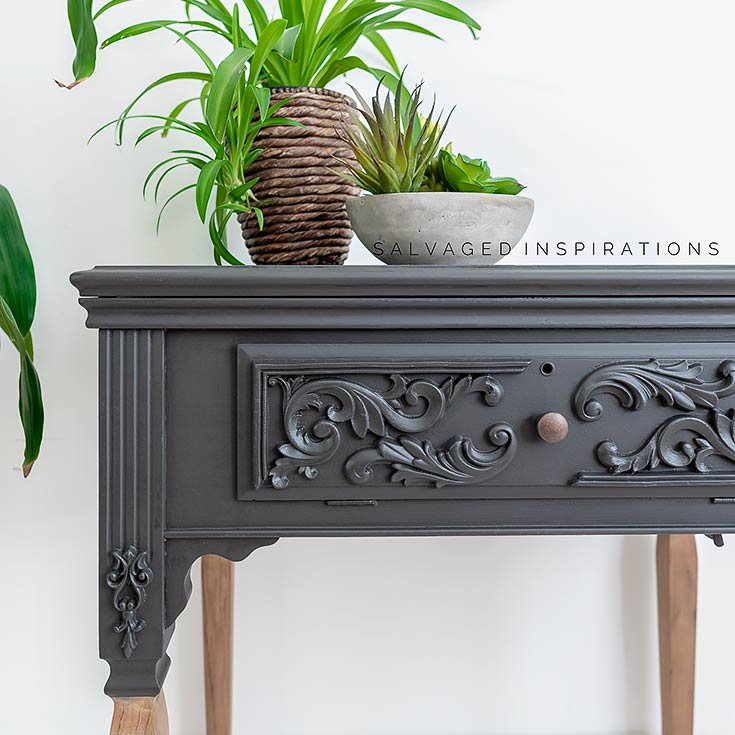
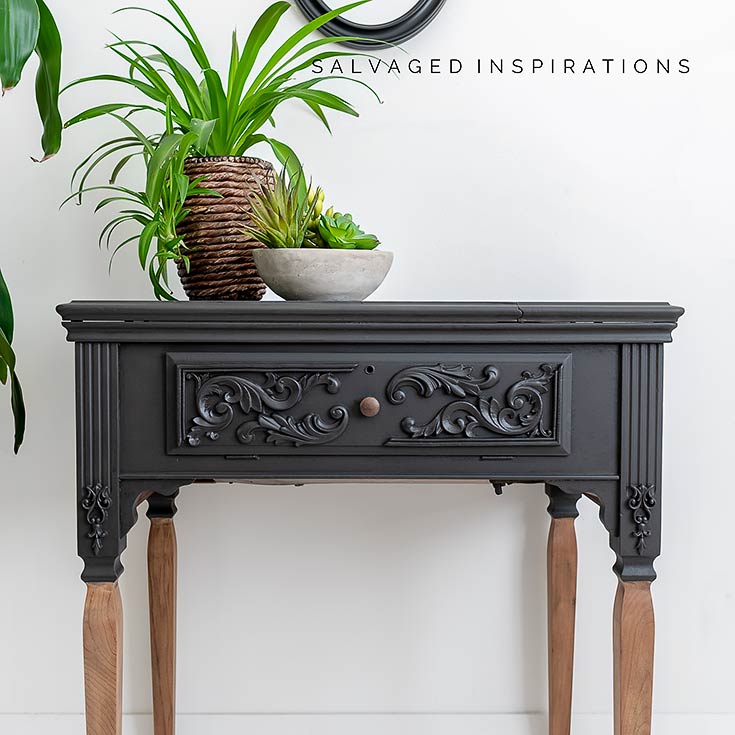
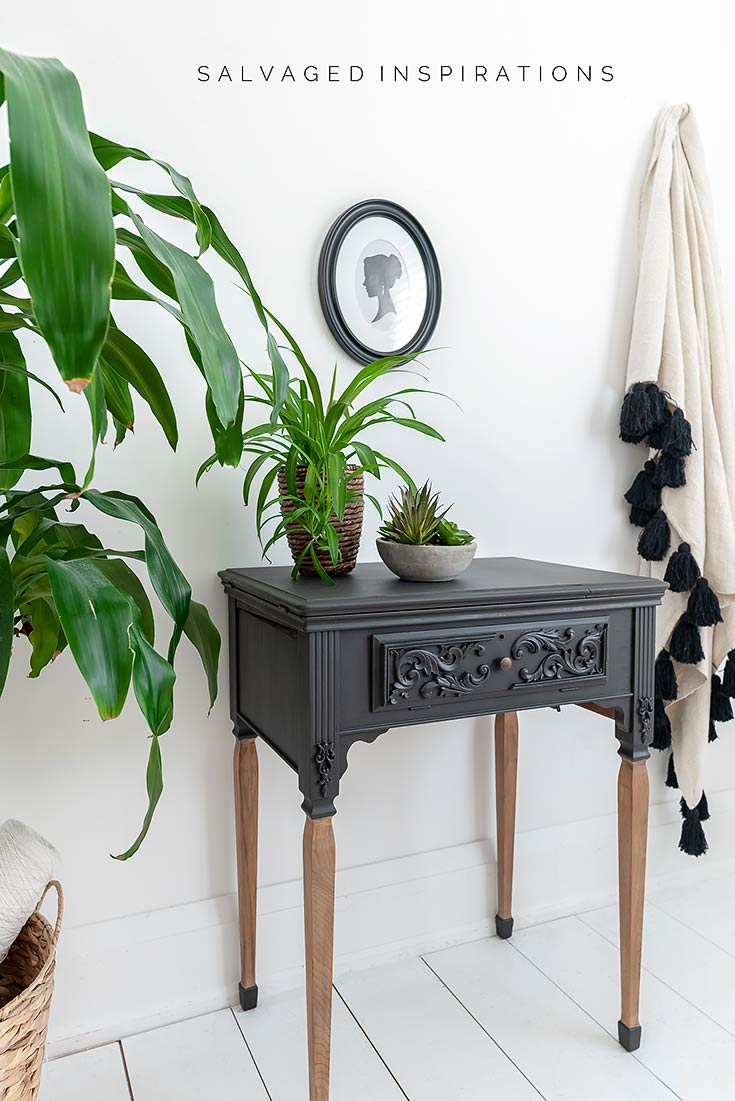
Here’s what my Singer Sewing Cabinet looks like now…
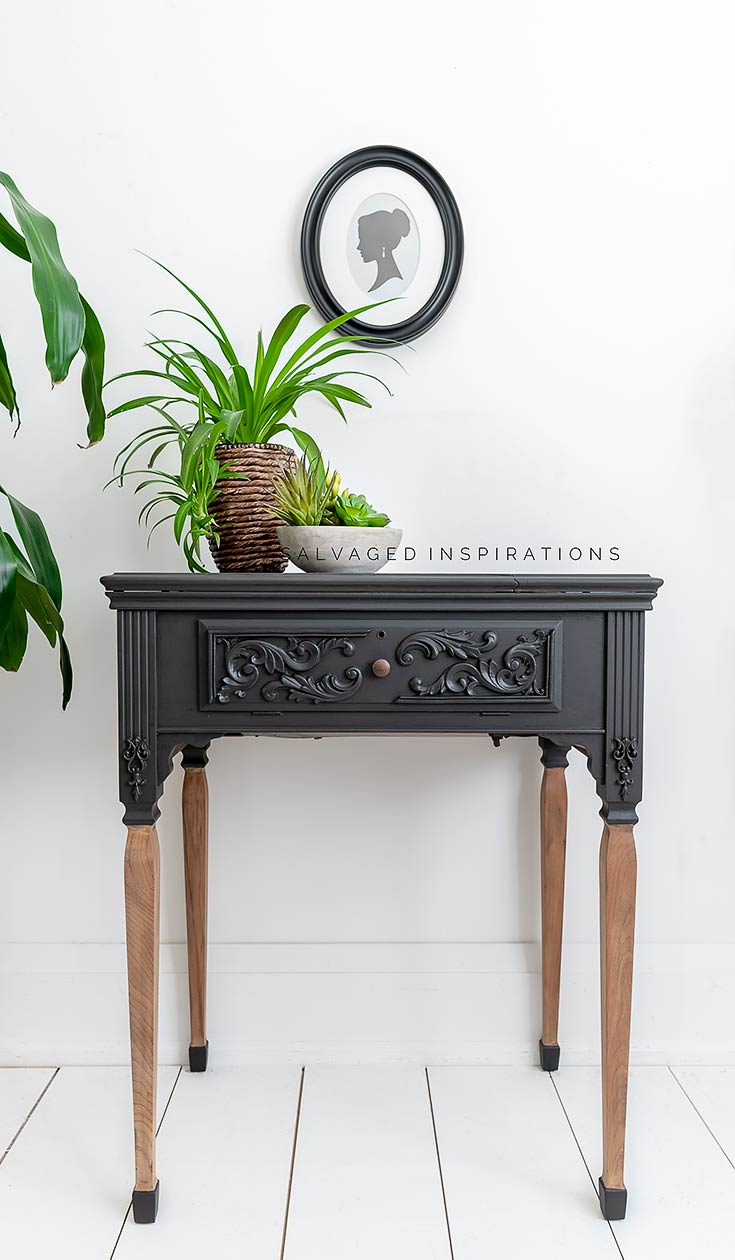
I dressed her up a bit! What do you think?

THIS POST IS SPONSORED/CONTAINS AFFILIATE LINKS TO PRODUCTS I USE. YOU CAN SEE MY FULL DISCLOSURE HERE.
SOURCE LIST::
-
- Singer Sewing Machine Table – SALVAGED
- Paint Brushes
- Coffee Bean Chalk Mineral Paint
- Tobacco Road Stain
- DeWalt Orbital Sander
- Heat Gun [similar]
- WoodUbend Corner & Pediment Scrolls
- Titebond Glue
- Satin Clear Coat
PAINTED AND STAINED SEWING TABLE
I recently brought this sewing machine for a tuneup. A BIG thank you to Charlie at Charlies Sewing Machines! He not only gave the machine a maintenance-once-over but also fixed the sticking drawer free of charge.
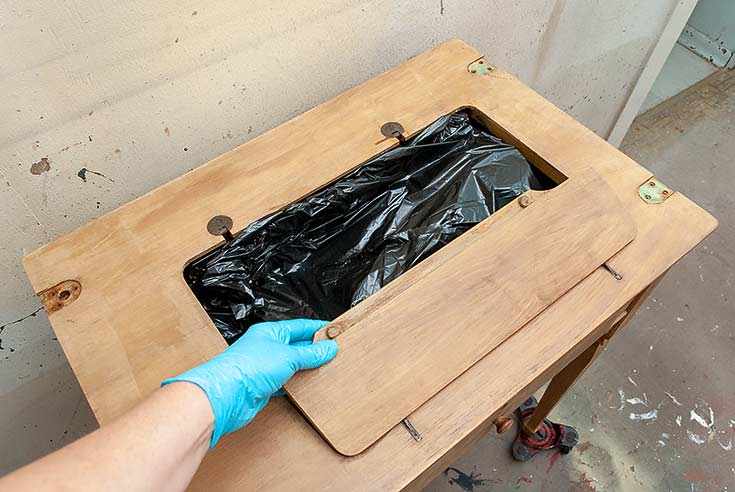
TIP ~ When you don’t want to remove your sewing machine and disconnect the wiring, an easy solution is to wrap the sewing machine in a garbage bag before you sand or paint.
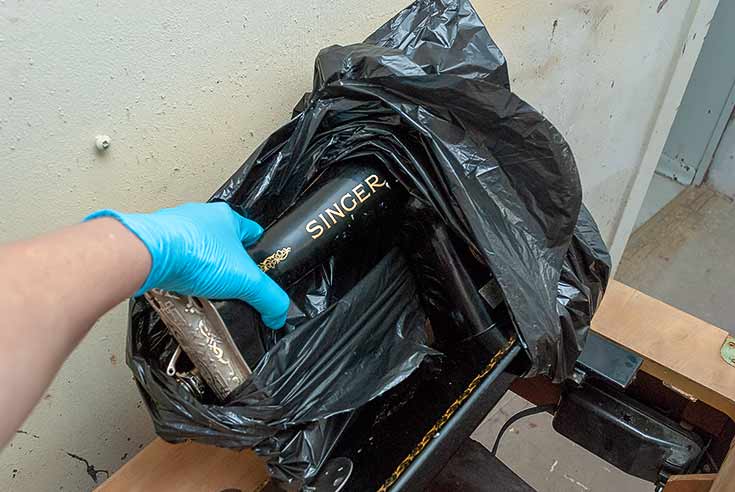
I wrapped mine securely and placed it back into the cabinet. This keeps it free of dust, paint, and topcoat.
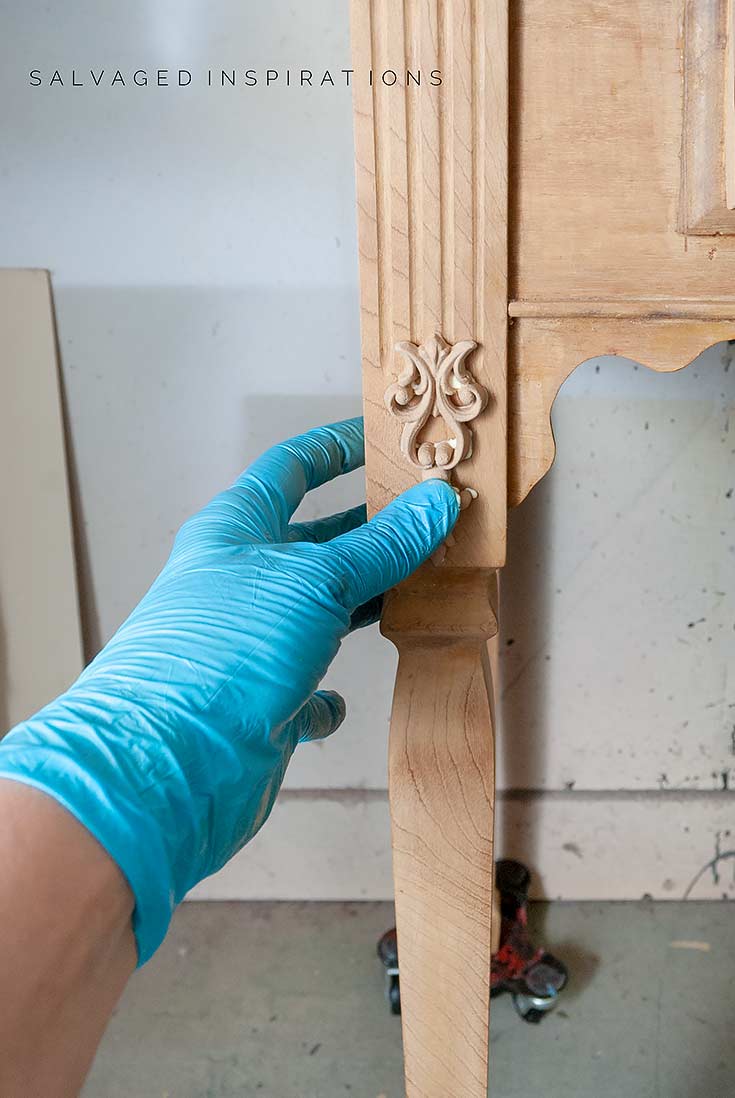
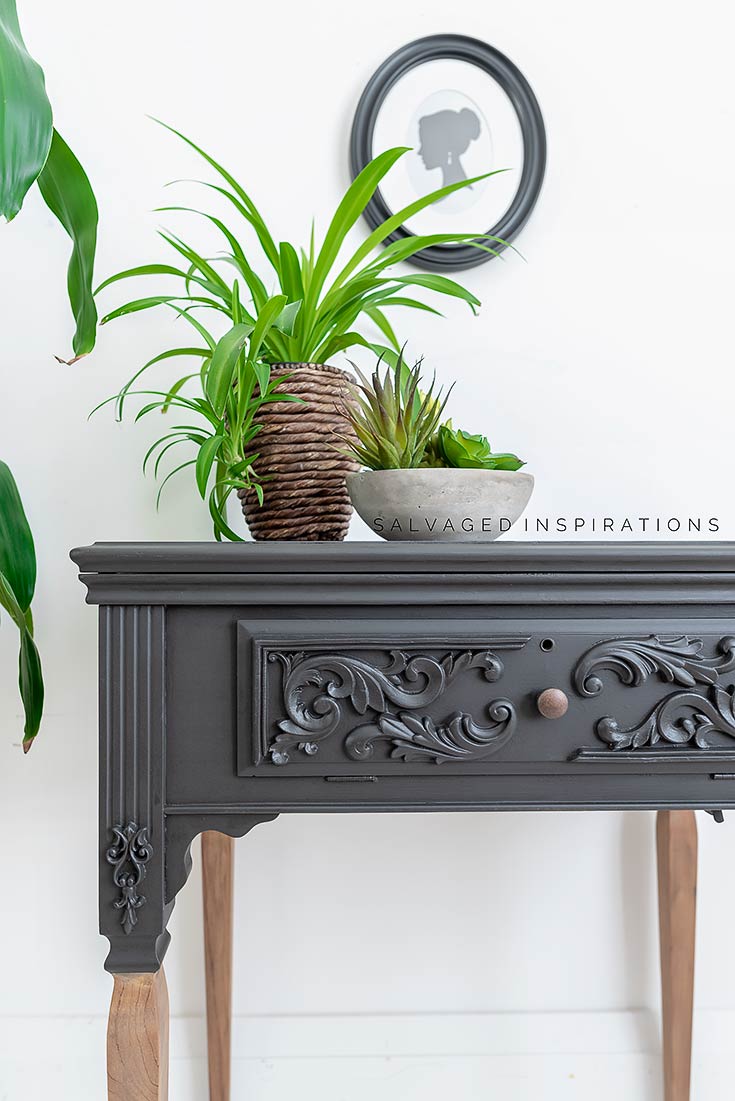
After giving the cabinet a sanding with a 120 using this orbital sander, I added some extra detail using WoodUbend moldings. I love the added dimension and detail. It really takes this plain cabinet up a notch.
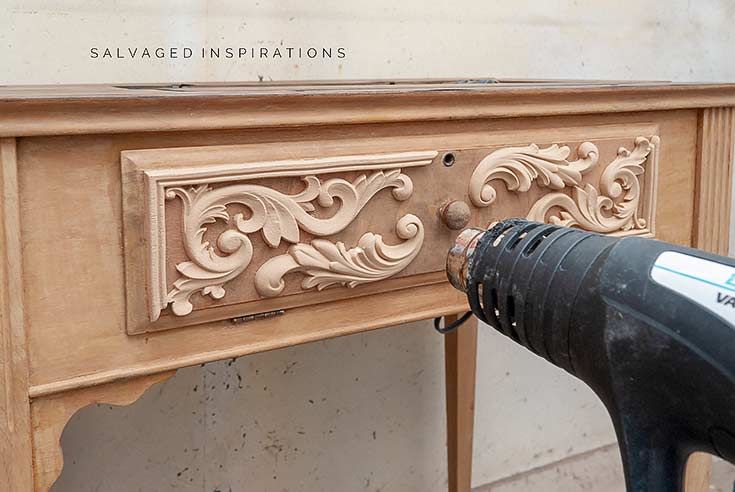
For extra detail on the legs, I cut the ends off this design. To cut these appliques, you warm them up with a hairdryer or heat gun and they cut easily with a sharp blade. If you’d like to see how to bend and apply them, I have a full video tutorial here.
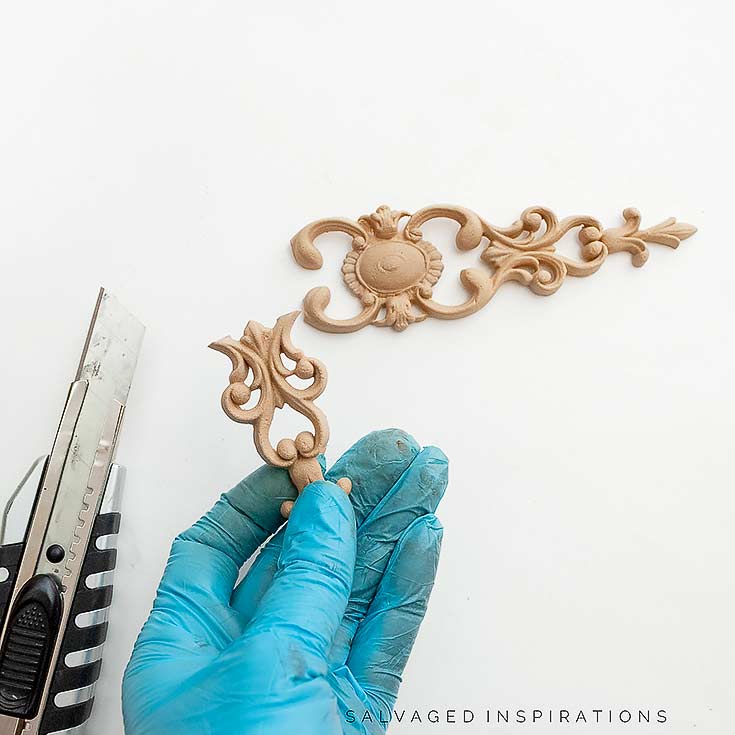
And using a heat gun and some wood glue, I used the two ends for each leg and still have the middle for another project.
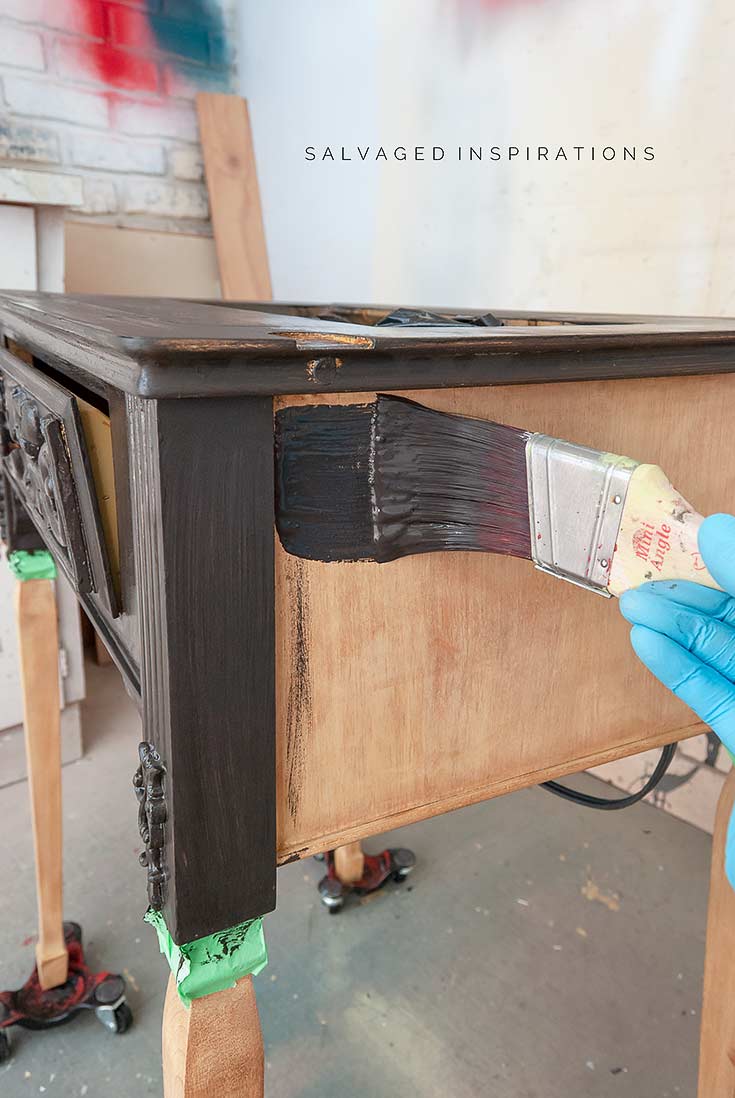
After the WoodUbend was dry, I masked off the legs with painters tape and gave this sewing table 2 coats of Coffee Bean. If you’re new here, Coffee Bean is one of my most FAVORITE blacks. It has brown undertones which gives it look much softer and warmer than other black paint.
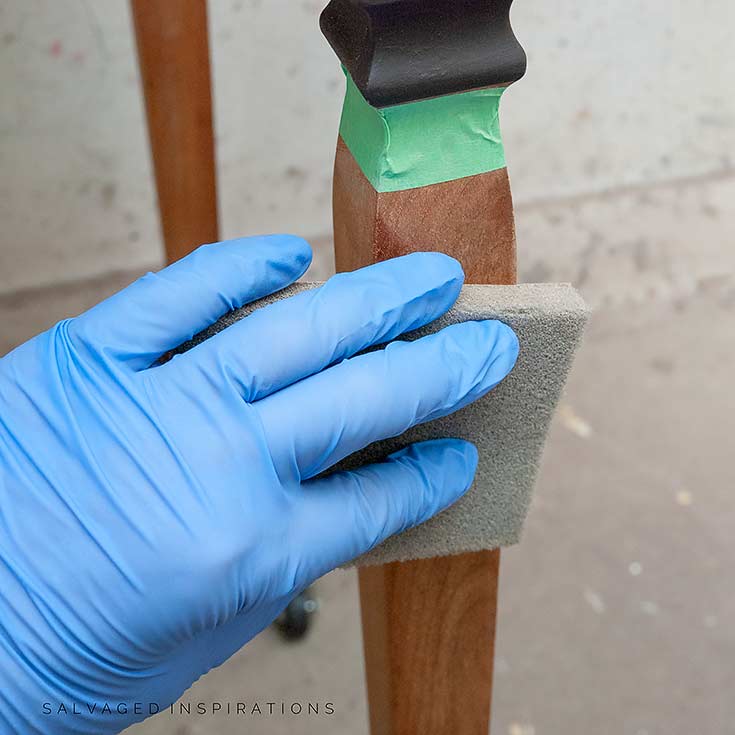
I really wasn’t sure what I wanted to do with the legs. Leave them bare? Stain them? Paint them? It turned out I stained them with Tobacco Road and sanded them back … WOW… the sanded stain looks AMAZING!
Also, my friend Janet on FB was asking where to get these furniture wheels for easy furniture moving and painting. You can get them here.
I love the new look and can’t wait to sew something!
Here’s the original manual and ower’s card from March 9, 1945!
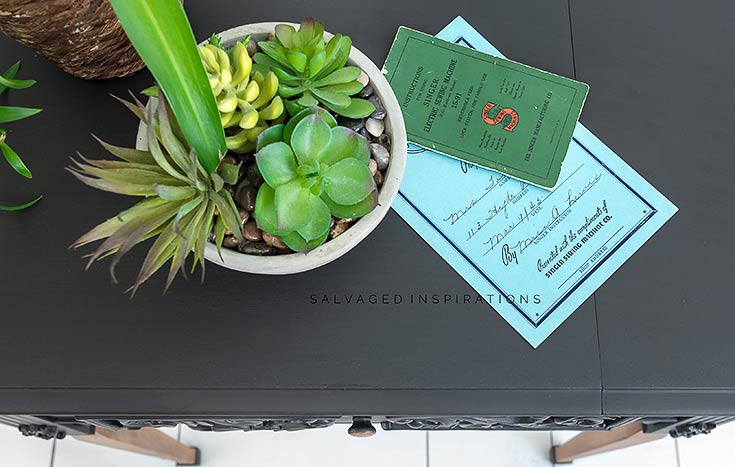
They don’t make things like they use to, do they?!
I see so many variations of old sewing tables and cabinets at yard sales and thrift shops. They make for amazing compact desks and side tables. And what a great piece of furniture to salvage and restyle!
I’m looking forward to sewing and I’m appreciating this new updated look… with her little black shoes and all! 😉
LET ME KNOW WHAT YOU THINK OF THIS SEWING CABINET MAKEOVER… OR FEEL FREE TO ASK ANY QUESTIONS YOU MAY HAVE… I ALWAYS LOVE HEARING FROM YOU.
ALSO IF YOU GET INSPIRED BY ANY OF MY MAKEOVERS AND GIVE THEM A TRY, BE SURE TO TAG ME ON IG OR FB WITH #SIBLOG — I’D LOVE TO SEE WHAT YOU’RE UP TO AND POSSIBLY FEATURE YOUR WORK!
Happy furniture painting my friends and stay inspired!
Denise x
RELATED POSTS::
Salvaged Sewing Desk Makeover
RH Greige Finish on Sewing Cabinet
Stop Bleed Through When Painting
How To Paint Furniture WITHOUT Brush Marks
PIN AND SHARE!


Would you mind sharing the item numbers for the WoodUBend pieces you used on your sewing cabinet? I’m not seeing them on their website when I click on your links. Your work is absolutely beautiful!!
Thank you Caren! The corner scrolls set is WUB2100 and the smaller ones are cut from Pediment WUB1249 I hope this helps and thanks for the heads up that the links weren’t direct. Appreciate it! 🙂
Loved this project, Thanks for inspiration.
Thanks Deborah!
Did you use the flat or the gloss clear coat on the sewing machine cabinet
Hi Pat! I used this clear coat in satin.
This transformation is incredible! I acquired a similar cabinet, though it’s in much worse shape. The veneer within the drawer is peeling. Did you do anything with this cabinet’s drawer? I’d be interested in seeing anything that might have been done to give me ideas on how to fix mine up.
Hi Marie, thank you! I didn’t do anything with the interior cabinet drawer because it was in decent shape. But if you didn’t want to fix the veneer, some ideas might be a furniture transfer, decoupage with gorgeous paper, or paint it with a pop of color ??
Denise:
How much would you estimate the supply cost for redoing your beautiful sewing cabinet?
Hi Nancy! I’d estimate around $50 total for the cost of supplies and the paint/stain I used.
Stunning transformation on your Singer sewing machine cabinet! I am curious, did you update the sewing stool also?
Would love to see those pictures, if so!
T. H.
This is a stunning piece!
Thanks Susan!
Oh Denise! This is GORGEOUS!! I absolutely love it, every detail of the fresh look, but especially the fact that your dad rewired it for you ♥️ What a beautiful memory with the physical reminder to always remember.
With love,
Amy
Hi Amy!!!!!!🤗💙 Thanks so much and it is a really beautiful memory. He knew how to fix anything and everything and was always there to help. I really miss him.💕
Wow! The sewing table turn out so amazing. I love the details you added as they coordinate with the scrolling design in the metal of the sewing machine. You mentioned the paint color coffee bean . Can you share the brand of paint that is? I would love to paint my front door that color.
Thanks and for sure. You can find Coffee Bean here… its a Dixie Belle Brand. It would be gorgeous on a front door!
Beautiful! I love this look you created. The WoodUbend pieces are perfect to enhance that piece. I am planning to do something similar with a jewelry cabinet. Did you apply a final coat such as a clear wax or anything? Thanks for sharing your talent!
Thanks and this will look beautiful on a jewelry cabinet! And yes. I sprayed a few coats of this Satin Clear Coat here but if you don’t have a sprayer, it applies just as nicely with a brush or sponge. 🙂