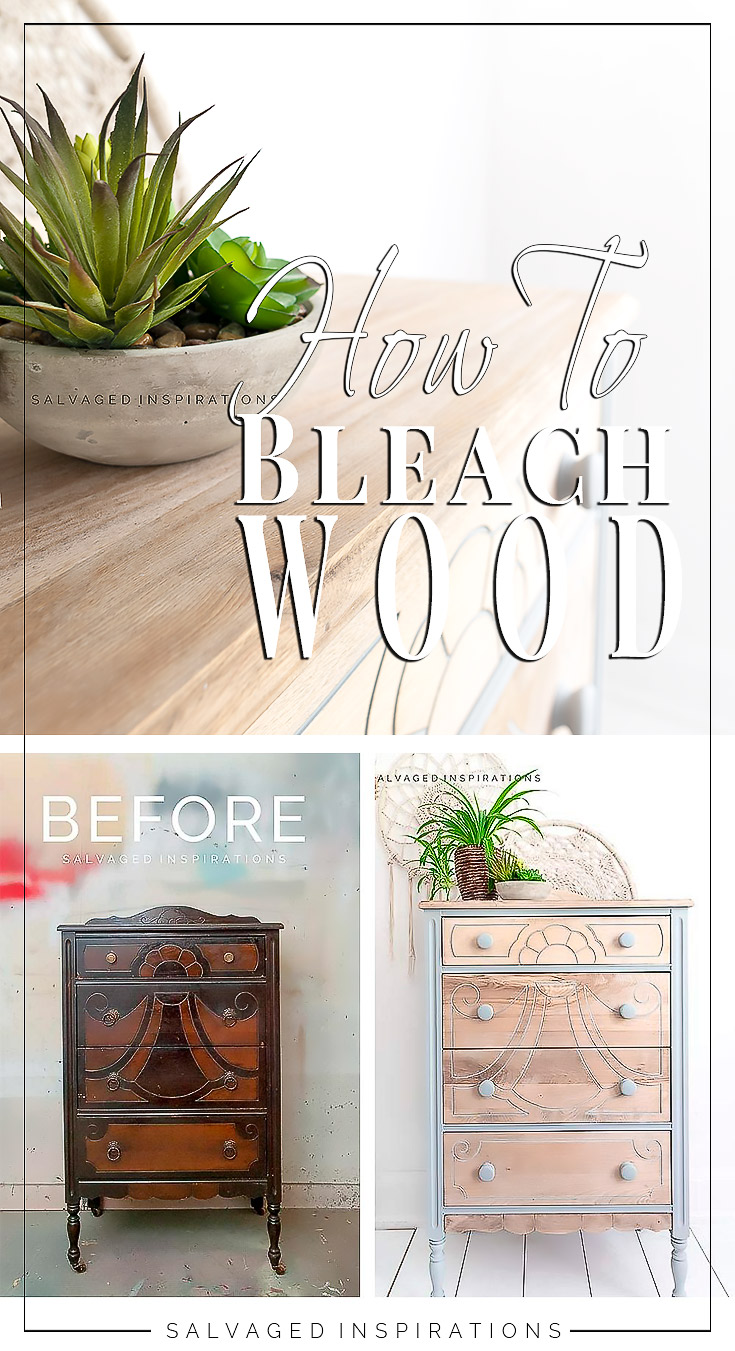
This week I tried a new-to-me furniture refinishing technique – Bleaching Wood! Here’s how it all turned out…

Hi sweet SI family! Thanks for joining me on one of my favorite days of the month – Trash To Treasure Tuesday! I’ll be sharing links to my talented T2T crews before and afters at the bottom of today’s post.
But first, this week I tried a brand new refinishing technique —– Bleaching Wood.
I’ve always wanted to try this and now that I have, I don’t think I’ll be doing it again. I’ll explain why down below.
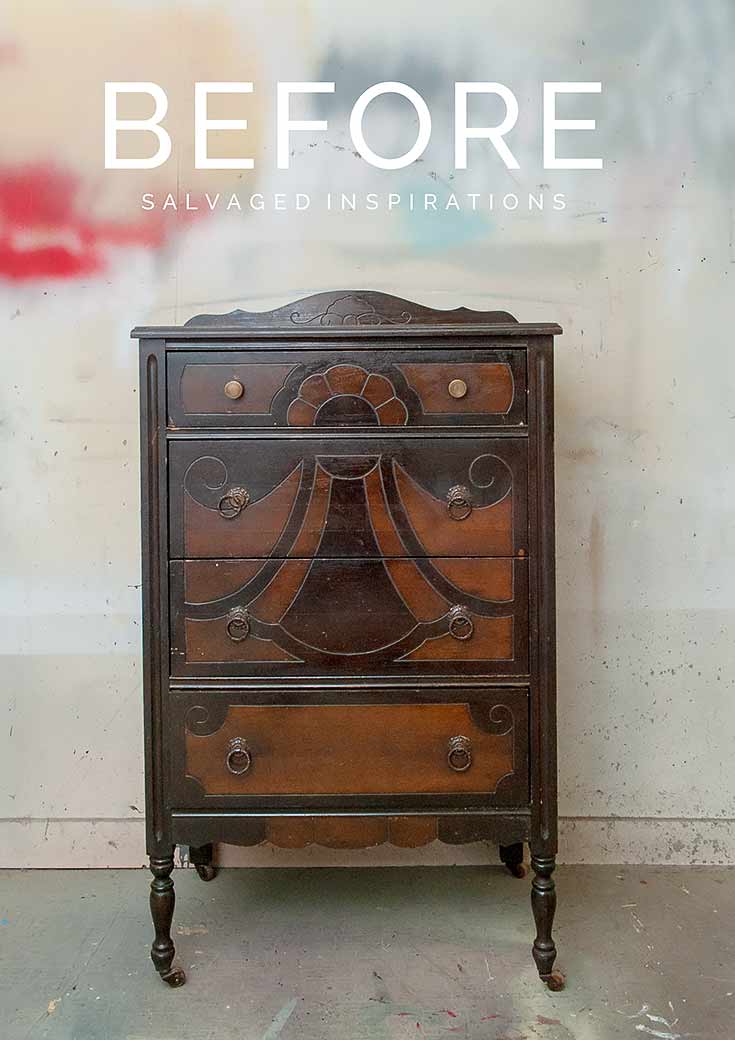
Here’s what I started with. It was the first time since March that I headed out for a furniture pick-up. I can’t tell you how good it felt to bring home some new inventory!
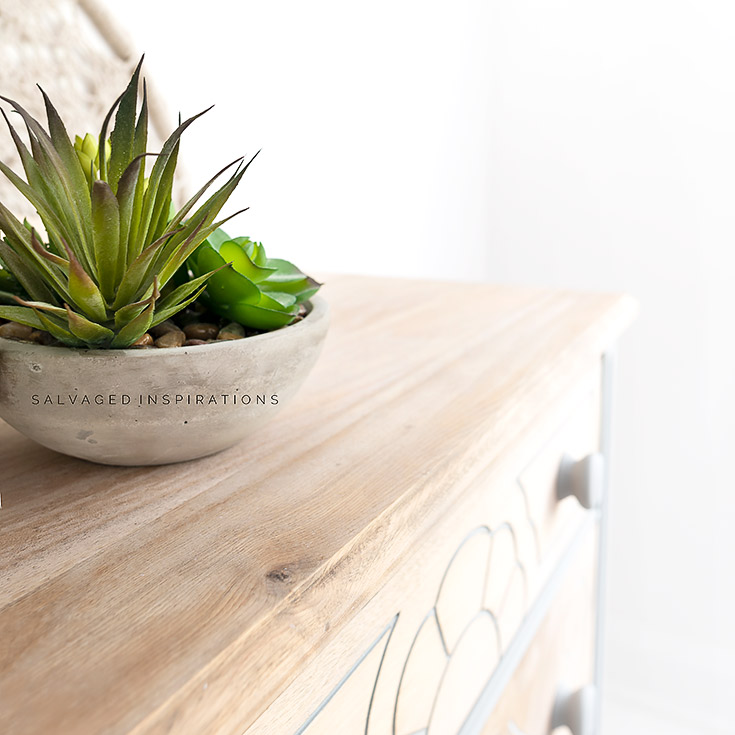
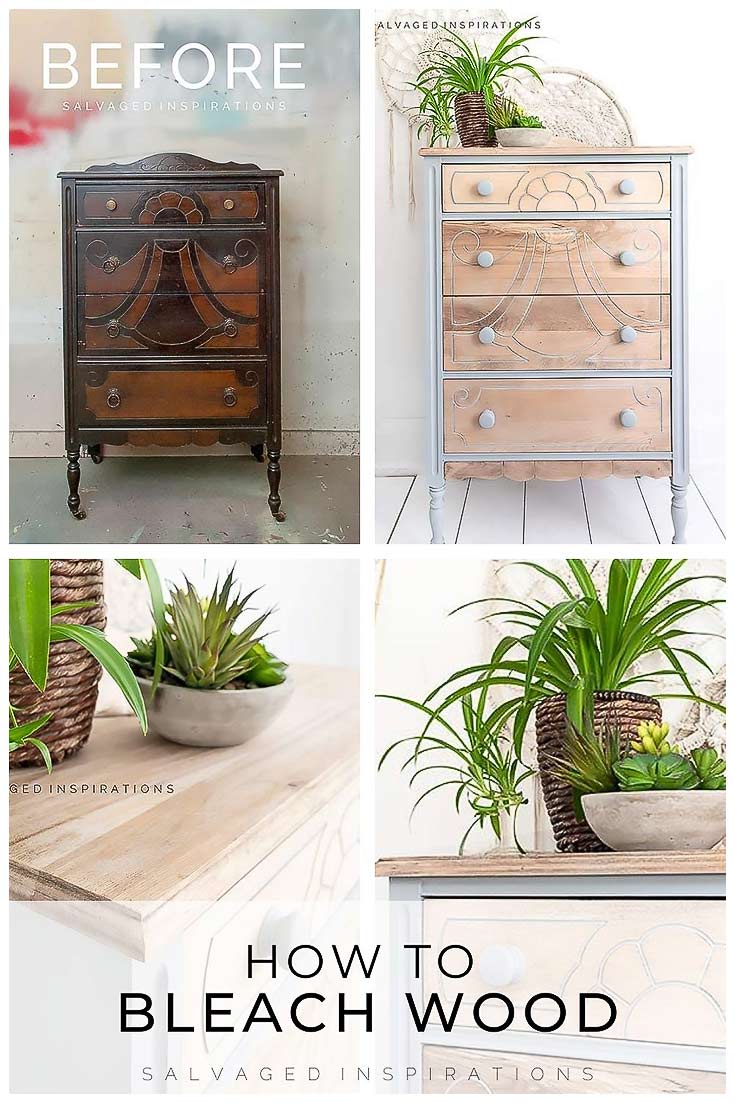
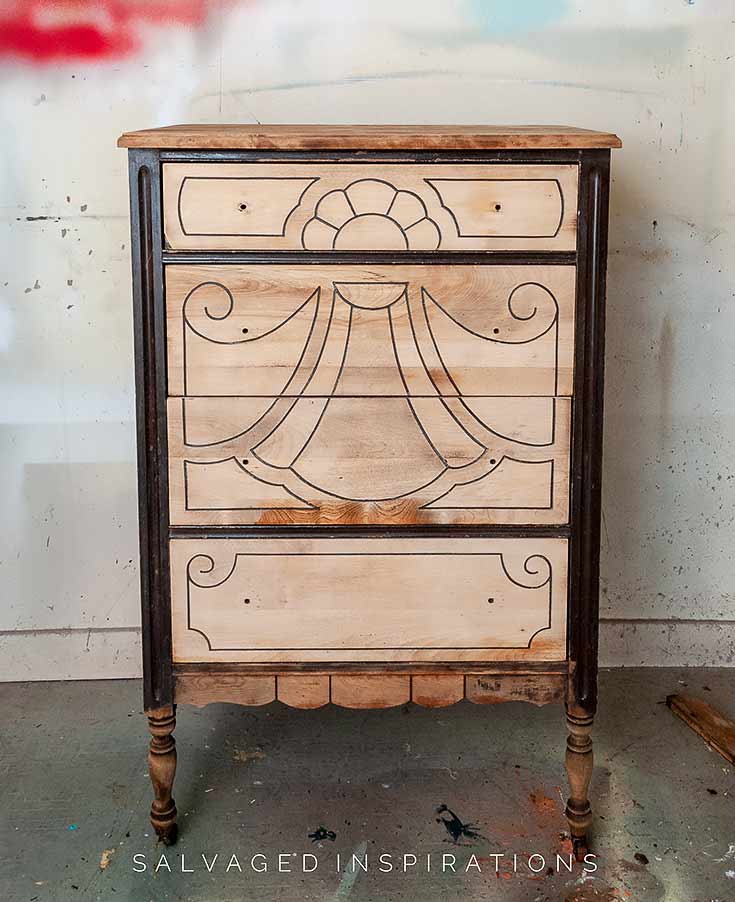
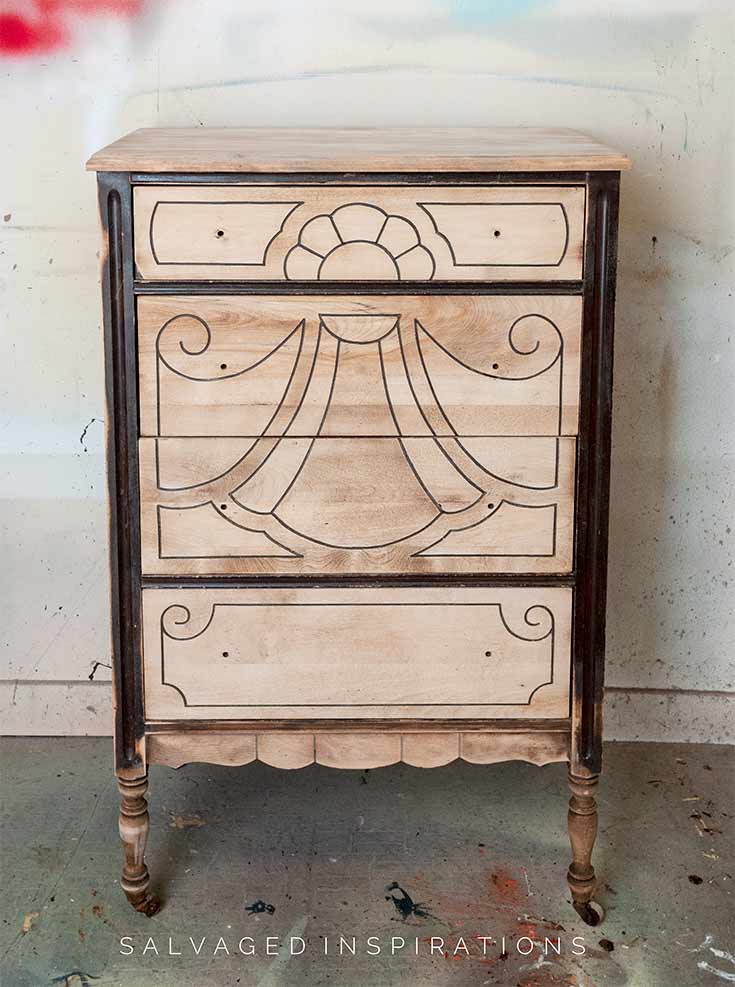
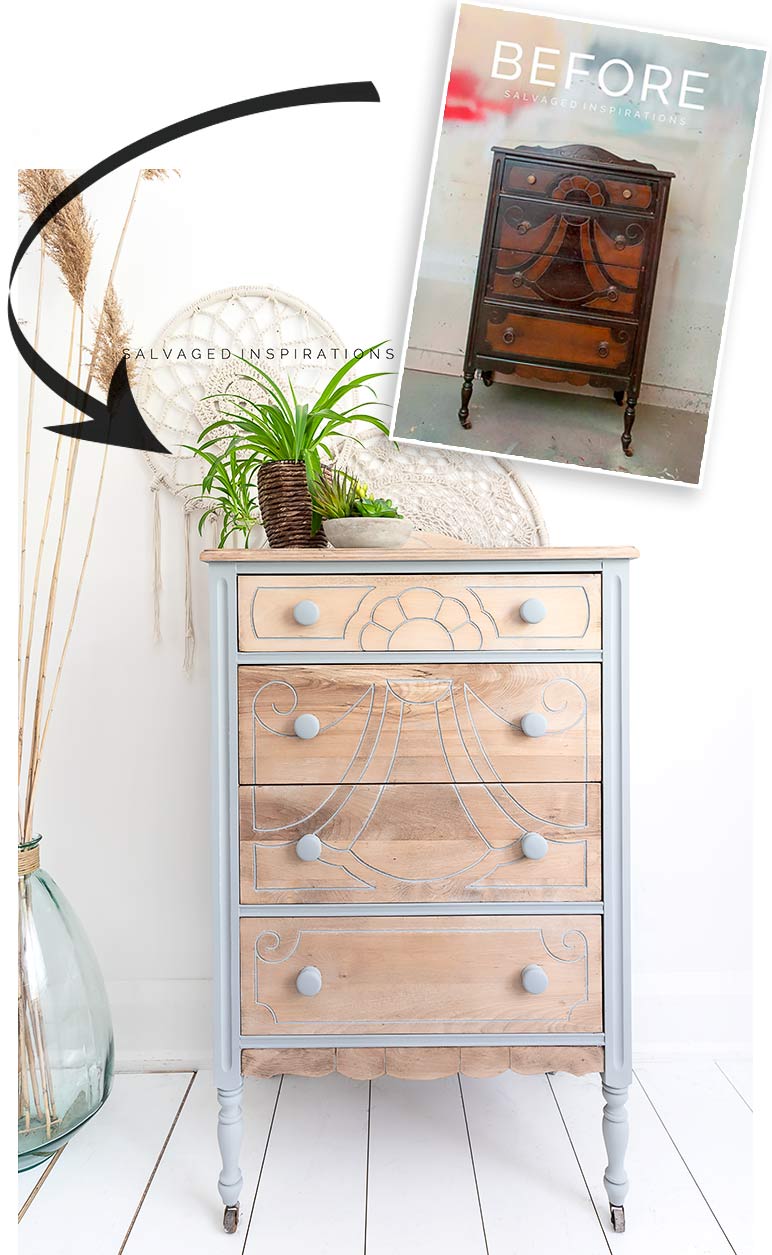
Here’s the bleached wood “after”. What do you think?

THIS POST IS SPONSORED/CONTAINS AFFILIATE LINKS TO PRODUCTS I USE. YOU CAN SEE MY FULL DISCLOSURE HERE.
SOURCE LIST
-
- Vintage Dresser – SALVAGED
- Bleach
- Spray Bottle and Sponge
- Gloves + Mask + Protective Eyewear
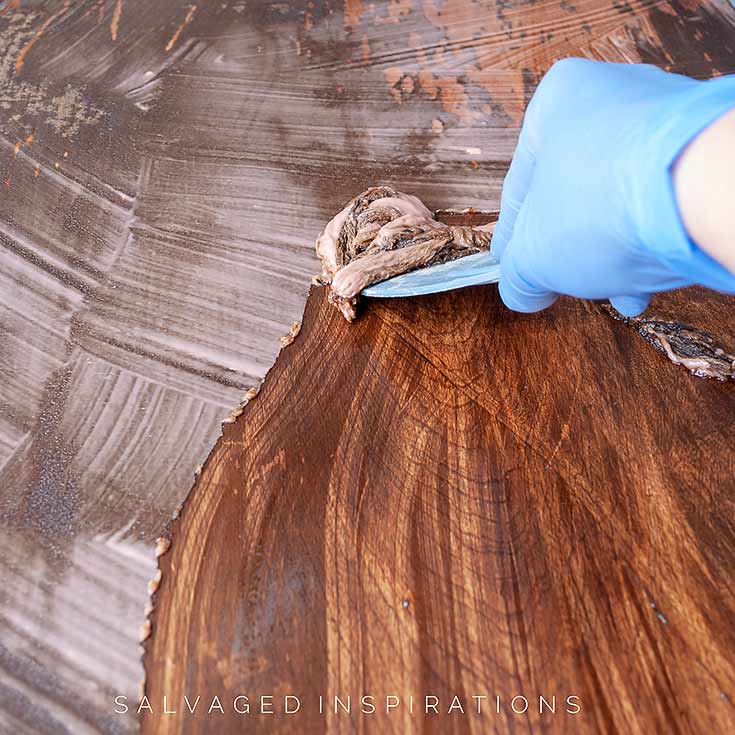
- CitriStrip | Putty Knife
- Sander and Sandpaper
- B-I-N Shellac Primer
- TSP or White Lightning Cleaner
- Manatee Gray
- Clear Coat Flat
How To Bleach Wood Furniture
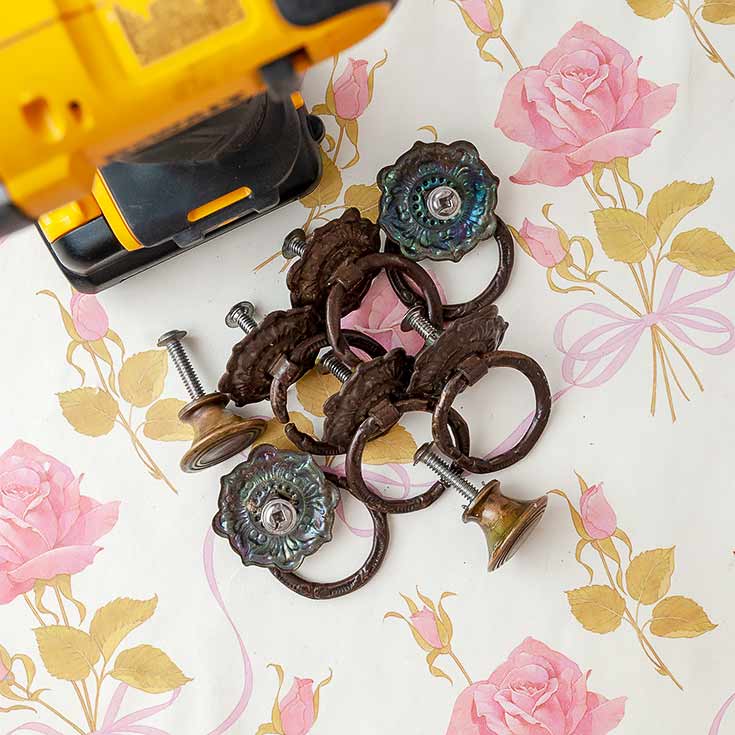
I started this makeover by removing the hardware and when I opened the drawers, found this rose paper. I just L•O•V•E surprise drawer liners! I have a collection of them but I don’t know what to use them for yet. If you have any suggestions, I’m all ears. 🙂
Because this was a FB Marketplace find, I gave this dresser a thorough cleaning with TSP. **TIP ~ The key to using any heavy-duty cleaner is to make sure ALL the residue is rinsed off otherwise, it can ruin your finish!
This vintage dresser was cute, but as you can see, some areas weren’t in the best of shape.
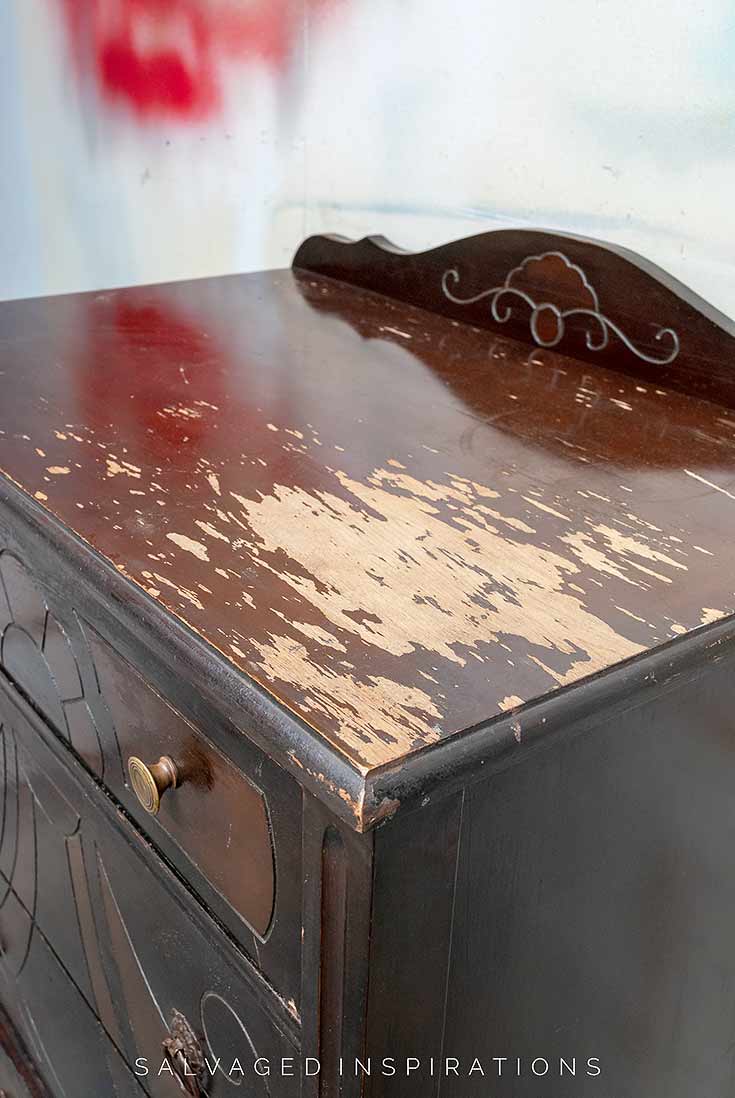
Using my favorite stain and paint remover, I stripped the top with Citristip and sanded down all four drawers.
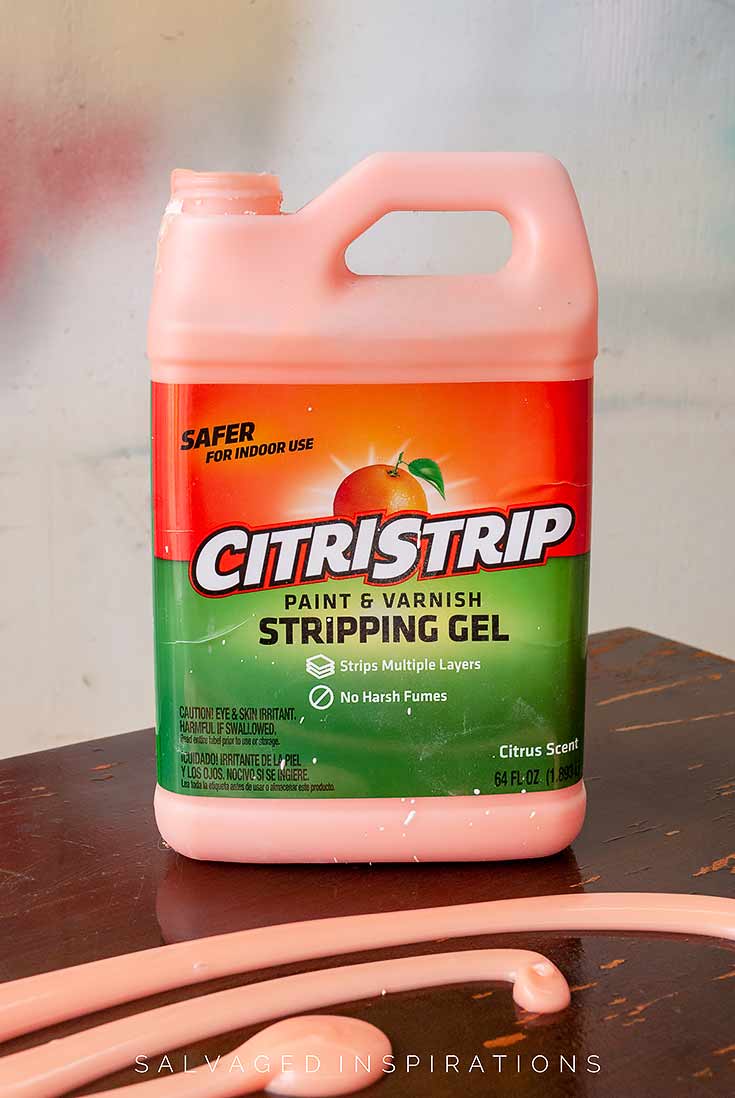
I have a full tutorial on how to strip furniture here.
The following day after the top was 100% stripped and dry, I filled a spray bottle with this household bleach.
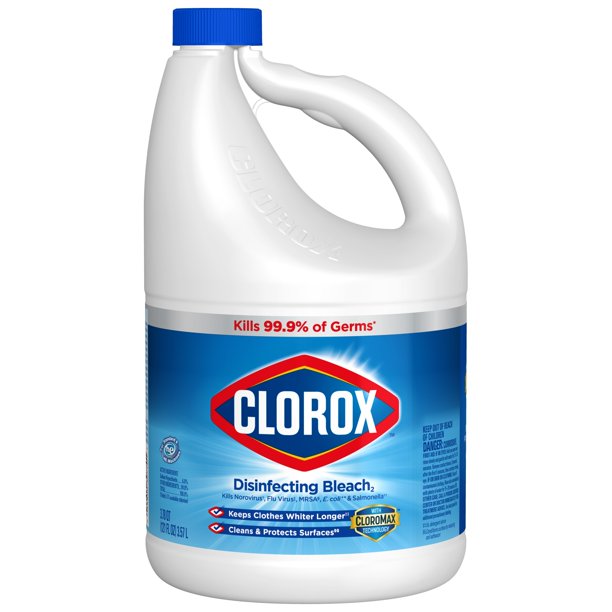
*** Please, if you try this wood bleaching technique BE SAFE and wear protective eyewear, mask, and gloves while working outdoors OR in a VERY well ventilated area!
These are my very favorite spray bottles for cleaning. I keep a good few of them on hand. One is filled with water and vinegar. Another with TSP or White Lightening. And one just with water for rinsing my furniture. They are heavy duty and work great. And not just for furniture makeovers. They are amazing for household cleaning as well.

I sprayed the dresser top and drawers with full-strength bleach. I read a few tutorials that mentioned if the bleach was pooled heavier in some areas, the wood may not lighten evenly. So after giving all the raw wood a really thorough spray, I used a slightly damp sponge to absorb the excess pools of bleach.

I waited until the wet Bleach was 100% dry – then repeated the above process four more times before I was [kind of] happy with the look.
I wish I had taken a pic all 4x but I was consumed with the process. Or maybe all the fumes killed a few brain cells. 😉 I remembered to document what I was doing on the 3rd and 4rth round. In the pics below you can see how the wood gets lighter.
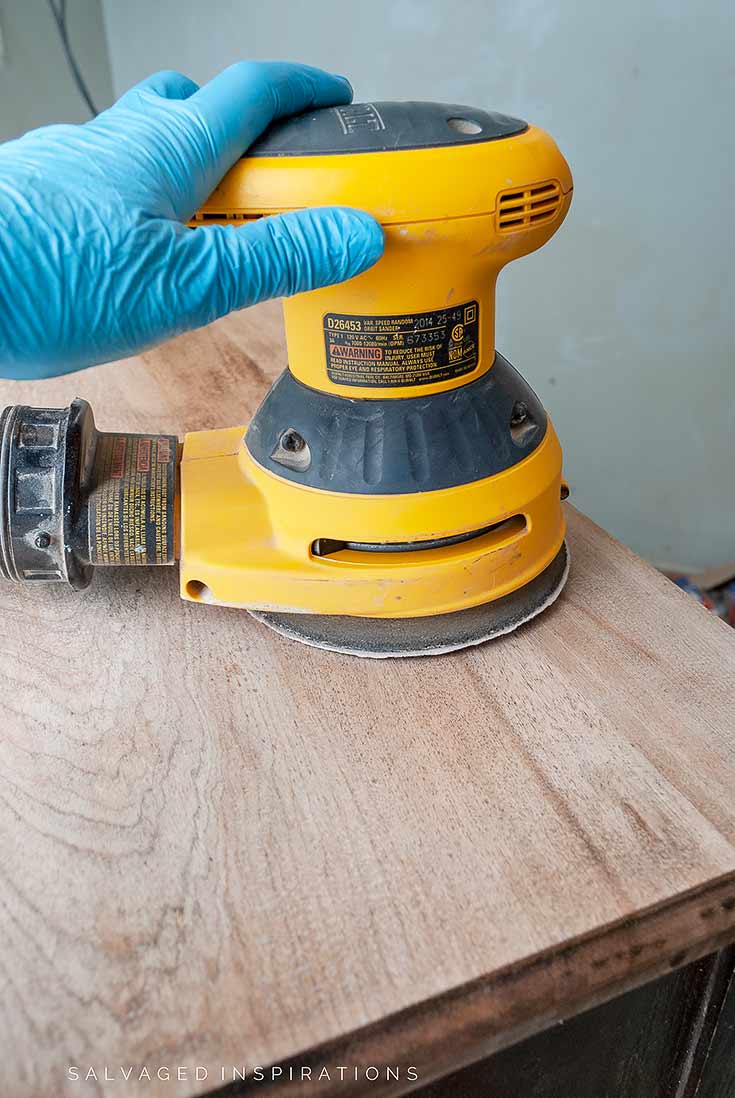
Once the fourth round was all dry, I neutralized the bleach by giving all the raw wood a wipe down with a wet sponge. Once it was dry, I sanded the top for a super smooth finish.
The body and inset designs were primed with BIN Shellac Primer. If you missed the post on how to stop bleedthrough using this primer, you can view the BIN Shellac Primer post and video here.
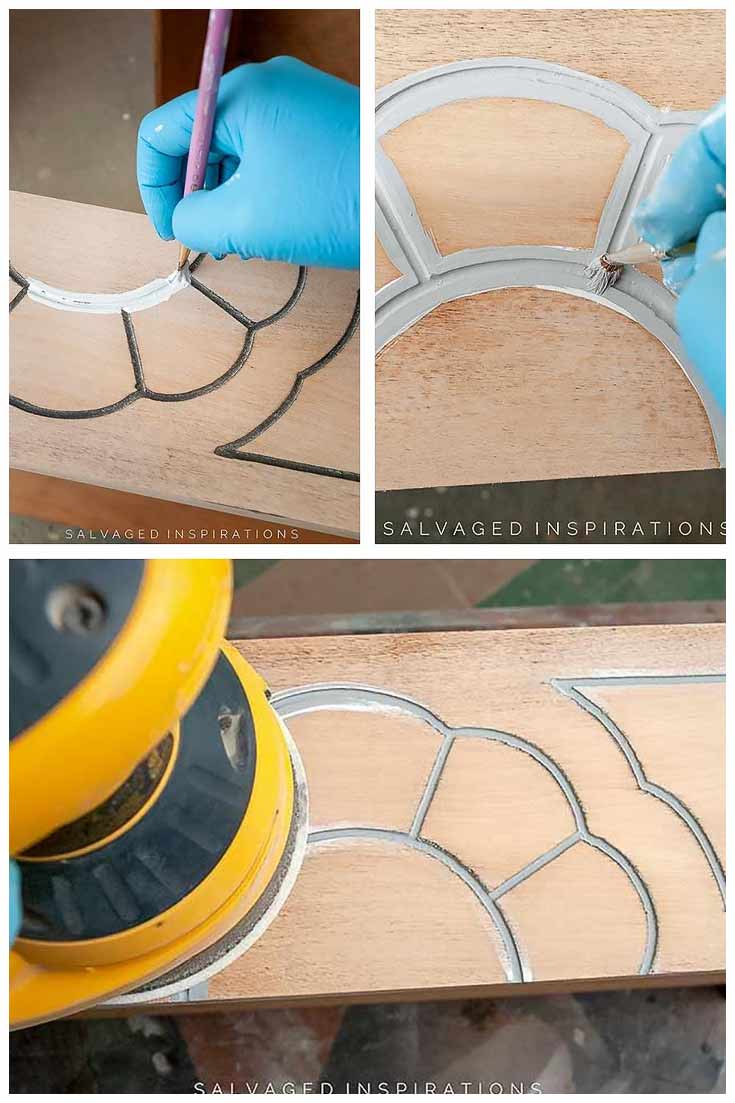
When I mentioned to my sister that I was planning on painting all the dark groove detail in gray she said that was brave because she’d never be able to do a nice clean job. Neither would I!
So here’s a little trick I use…
Taking an artist’s brush, I prime and paint in all the inset designs making sure to go outside the design. Once dry, I take my sander and sand the entire top taking off the overspill of paint and primer. This is the most precise and quickest way I know to get professional-looking clean detail work.
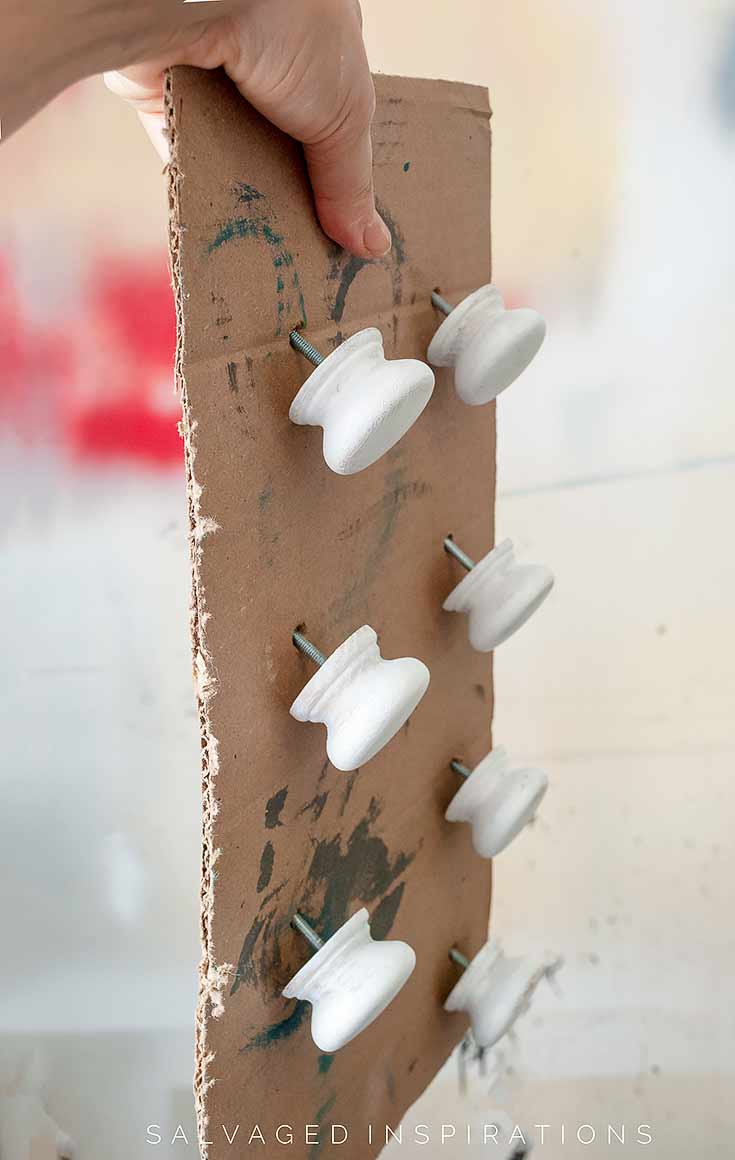
And here’s another tip when spraying knobs. I use a piece of cardboard to secure them for priming, painting and top coating.
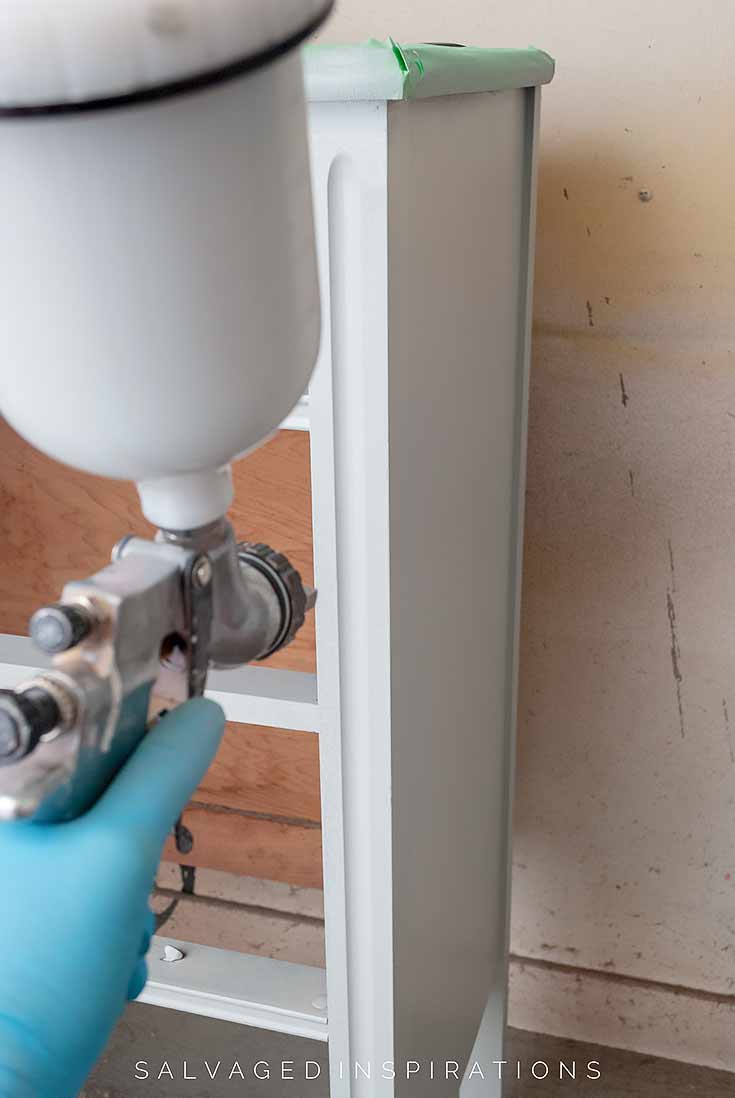
The body was sprayed in 2 coats of soft Manatee Gray and a Flat Clear Coat.
Here’s the finished look…

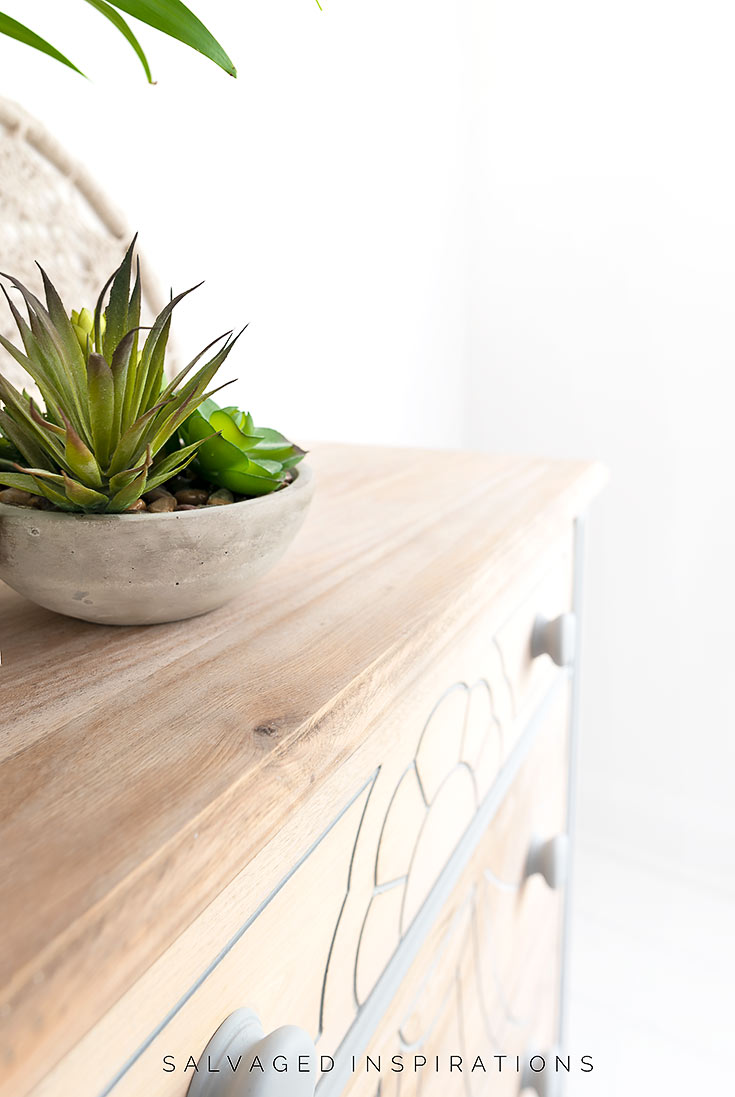

I think this dresser is adorable however I’m not as happy with the bleached wood as I thought I’d be and here’s why…
- The Bleach interacts with all wood differently so results are unpredictable
- If a piece has different types of wood or joined pieces of wood (which most furniture does!) they take to the bleach differently so it’s hard to get a uniform look
- It’s a smelly process and I much prefer working with environmentally safe products
- It was time-consuming waiting for each round to dry and then re-bleach
- Once a topcoat is applied it does slightly darken
I’m really happy I gave this a try. This vintage dresser turned out cute but I would have loved it even more if the bleached wood looked more consistent from top to bottom. Now that I’ve tried bleaching, I feel I have more control using a whitewash, white wax, or glaze technique to get a similar look.
I’d love to hear what you think of this makeover in the comments below!
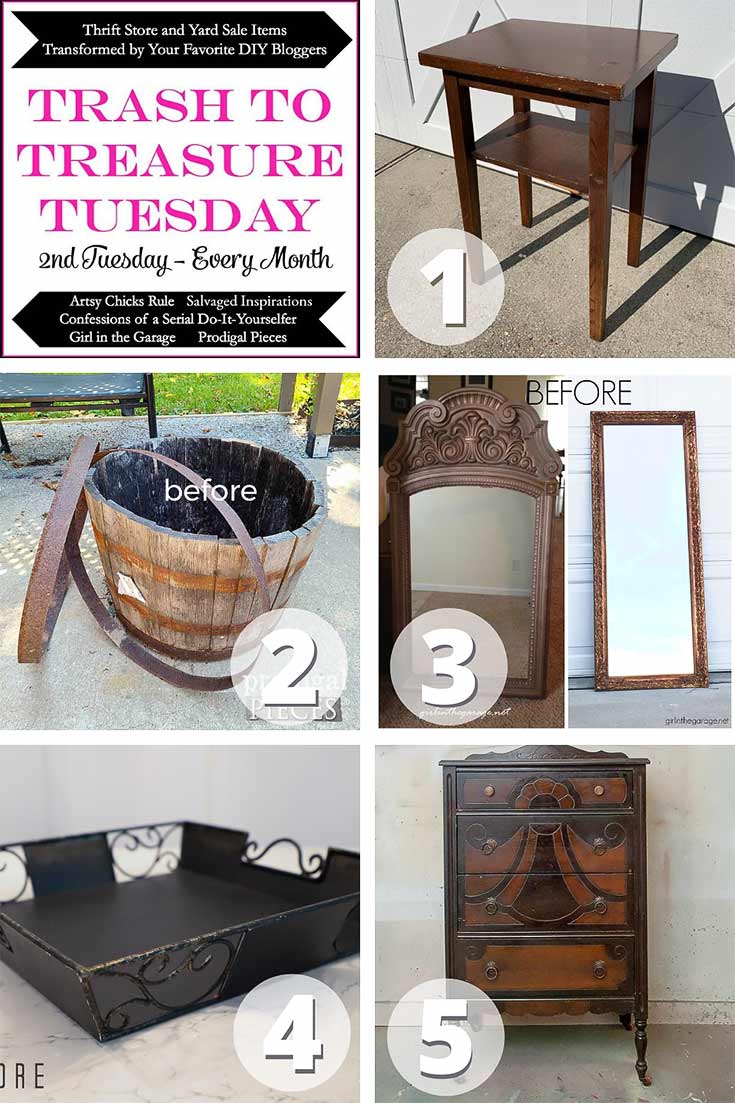
And now for some TRASH TO TREASURE FUN!
I know you’re going to LOVE what this talented team of ladies share. They never cease to surprise me with their creativity! Below are their BEFORE photos. Visit the links underneath to see the amazing AFTERS and to learn how they did it! I’m heading over to take a peek too!
1. Confessions Of A Serial DIYer
5. Salvaged Inspirations (I’m so happy you’re here!!)
Here’s one last look at the before and after…
I’d love to know if you’ve ever tried bleaching wood and if you have any tips for me? Feel free to let me know what you think of this dresser. I always LOVE hearing from you!
Also, if you get inspired by any of my makeovers and give them a try, be sure to tag me on Insta or FB with #siblog. I’d LOVE to see what you’re up to and possibly feature your work!
Thanks for reading. 🙂
Wishing you a beautiful day filled with inspiration and Happy Painting friends!
Denise XO
RELATED POSTS::
How to Whitewash Wood
White Washed Wood Plant Stand
Annie Sloan White Wax Desk Restyle
How To Seal & Protect RAW Wood
How To White Wash Wood – Video
PIN AND SHARE!

I really appreciated. it was very helpful.
I think this piece is beautifully done !! The varrying tones give it character.
I can understand tho how you like more even tones on some pieces.
You did a great job explaining the process. I would like to try it – prob wait till spring weather.
Your technique for painting the grooved details is a great one.
Thanks for sharing !!
I’m a newbie to furniture painting/flipping. What is the best way to sand down furniture with a design like this one without losing or ruining the design? I recently had this issue with an antique vanity and lost the decorative elements in attempts to smooth drawer faces enough to stain them. Thanks!!
Been there done that! Sanding can be tricky and there is a learned ‘art’ to it. I would suggest using a lower grit sandpaper and a lighter hand. It will take longer to sand but it may save your design. The alternative is to use a stripper, then give it a very light sanding before staining. Hope this helps. 🙂
I am in the middle of bleaching a dresser, really similar to yours, and loving how it looks! I love your idea of painting the sides and body and the scrolling. I am going to try my hand at it but I am using a taupe color. I hope mine looks half as beautiful as yours!!
I hope it turns out exactly as you’re envisioning as well! Have fun Melodee!
Thank you! So I ended up going with an olive green. The taupe ended up looking way to light, basically no depth at all. But I’m loving it!
Olive Green sounds amazing! So happy it all turned out for you Melodee!🤗
Hi! I am just looking into re-doing a dark coffee table and enjoyed this post!
As far as your comments on your dresser not having uniform wood “color”, I really like the character this gives the piece. I think it turned out beautifully!
So happy you enjoyed this post and thanks so much Cheryl!🤗
I love this. I am knew to re-finishing furniture and appreciate very much all your links etc. I have a similar dresser but I see your drawers line up perfectly and mine don’t. I hate to put time into something that doesn’t really work perfectly in the end.
Was the original cabinet solid wood or was there veneer on it. I am wondering if bleach works on veneer.
Hi Nancy! YES, you can bleach veneer wood, for sure!
I think the dresser looks great! I wonder if you might like working with oxalic acid or “two part” A/B peroxide-based bleach (sodium hydroxide and hydrogen peroxide). They both work faster and are easier to control than household bleach.
Just stumbled on this post on Pinterest.
It is absolutely stunning. I know you worked really hard on it and I believe it was worth it.
I would love to give it a try one day. I would like to know what kind of sprayer do you own? looking into getting one.
Thanks
Hi Keigi and thanks so much! I use this Husky Paint Gun that I’ve been using since 2013. Still works great.