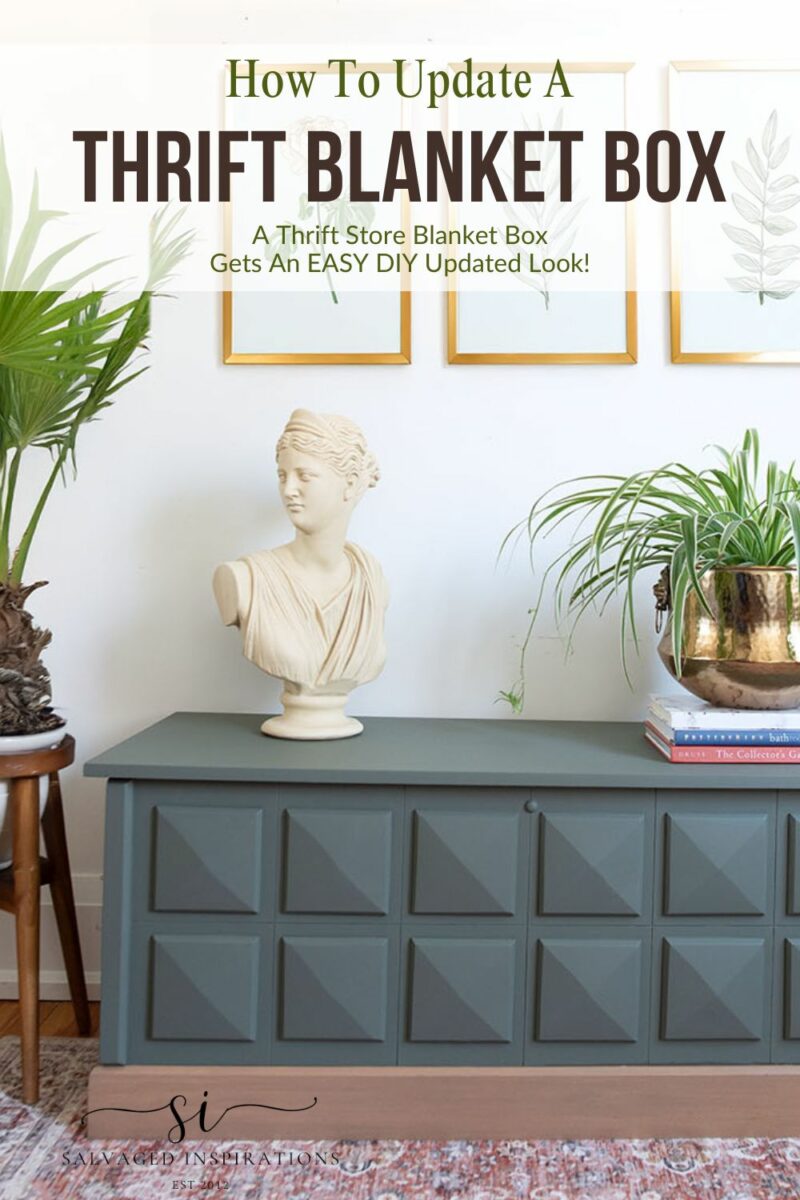
A THRIFT STORE BLANKET BOX GETS A DESIGNER LOOK | YOUTUBE VIDEO COMING THIS SATURDAY!
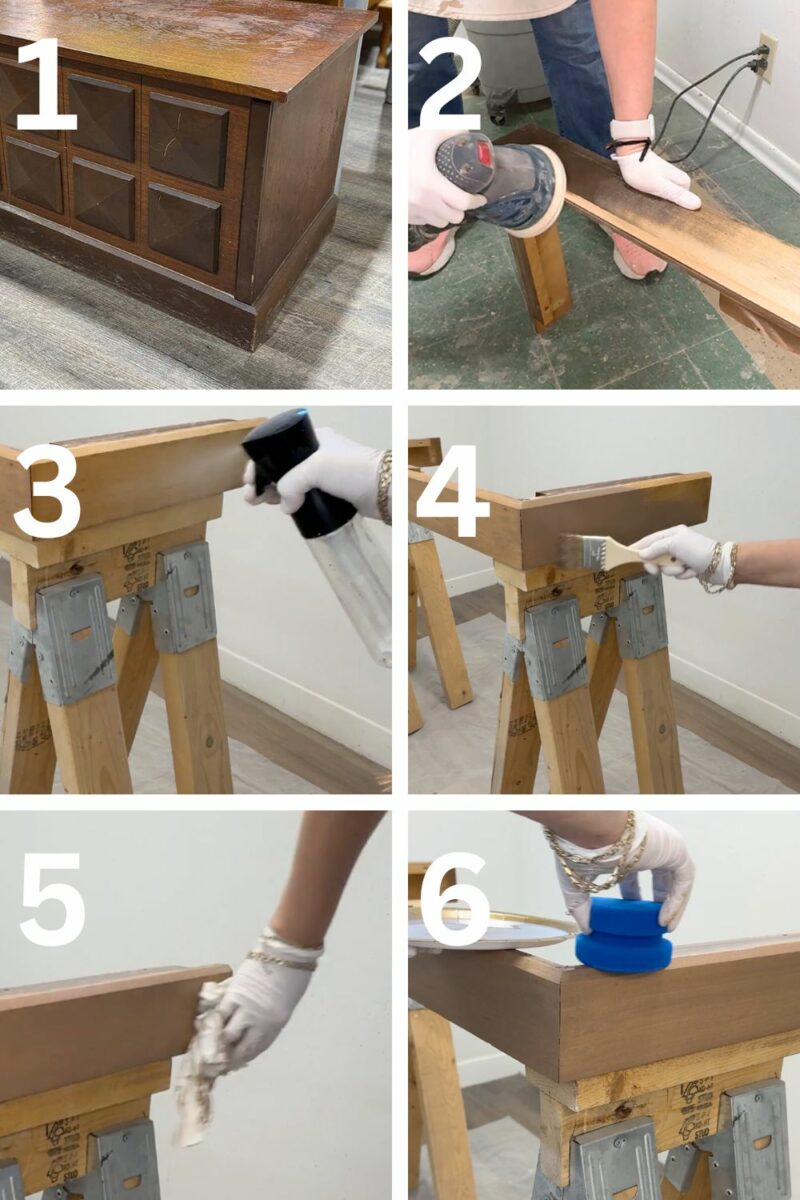
Hello, lovely friends, I’m so happy you’re visiting today! You know that moment in the thrift store when something catches your eye… but you’re not sure about buying it because of the price? This interesting-looking blanket box sat at the Mission Thrift store for weeks, listed at a $100 price point. But once they marked it down 50%, I scooped it up …and then gave it a totally updated look. I think it’s ready to tell a brand-new story in a new home, and I can’t wait to hear what you think!
I’m also sharing –
- How to remove a blanket box lock for safety
- The free wood conditioner I used before staining
- How to remove and update a wood base
- A simple FREE tip to reactivate the scent of an old cedar chest again
- … and more!
*As an Amazon Associate, I earn from qualifying purchases. There are affiliate links in this post to other companies/products I use and love as well. You will never be charged extra when you purchase through these affiliate links. If you purchase from my links – A BIG thank you for supporting me and the #siblog! To see my full disclaimer, click here.
It’s also the second Tuesday of the month, and this means it’s Trashy Treasures Tuesday! I’m looking forward to seeing what our TTT crew, Christy at Confessions Of A Serial DIY’er, Nancy at Artsy Chicks Rule, and Kathy at Petticoat Junktion, have created. I hope you join me on today’s tour as well! I’ve included their before-and-after links down below.

Here’s the blanket box I found selling at my local mission thrift store. I was eyeballing this piece for a few weeks.
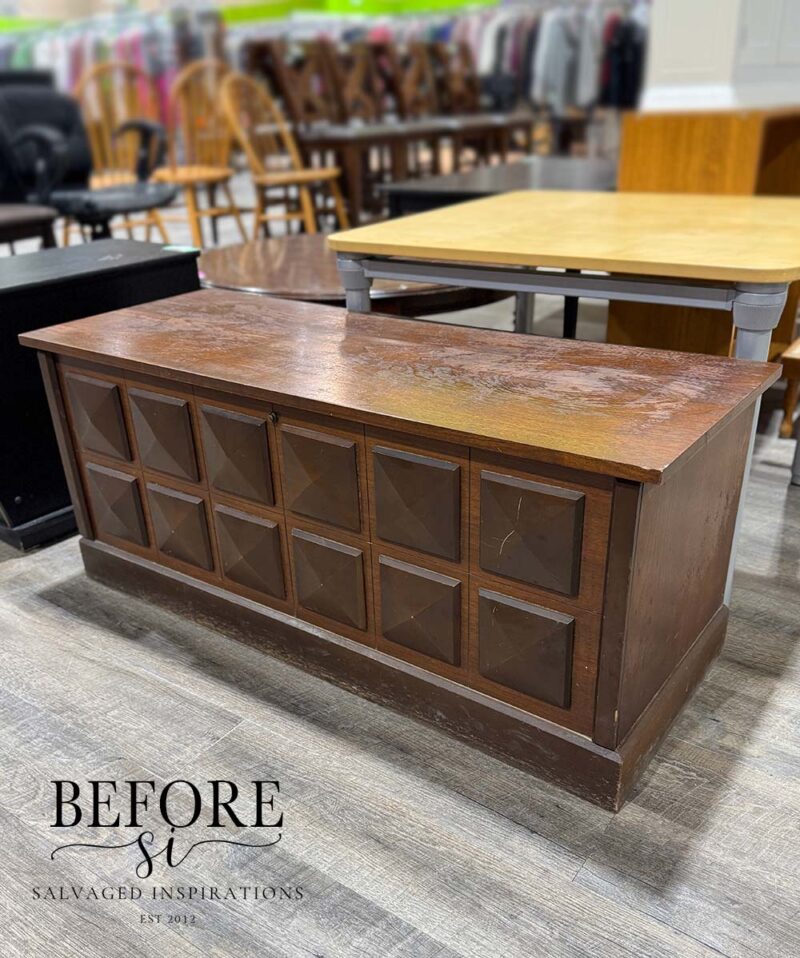
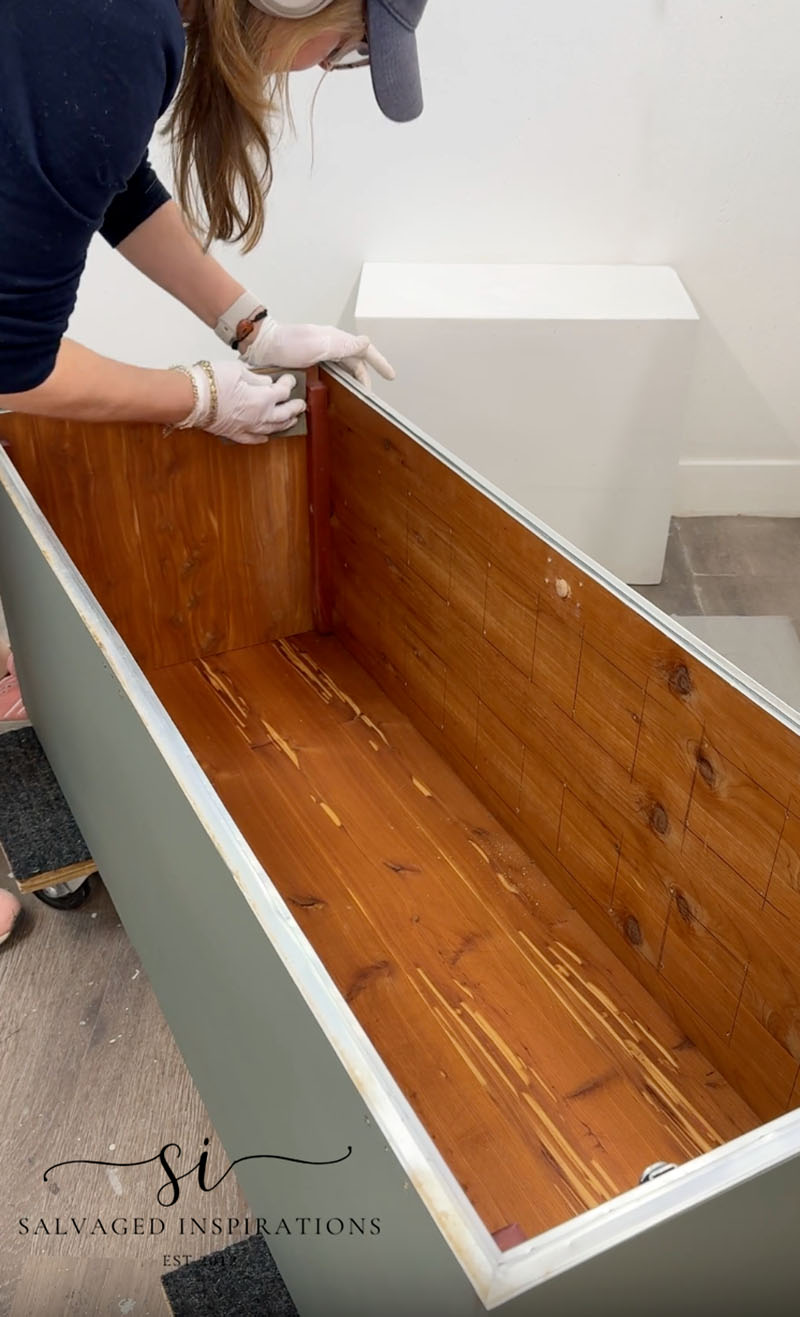
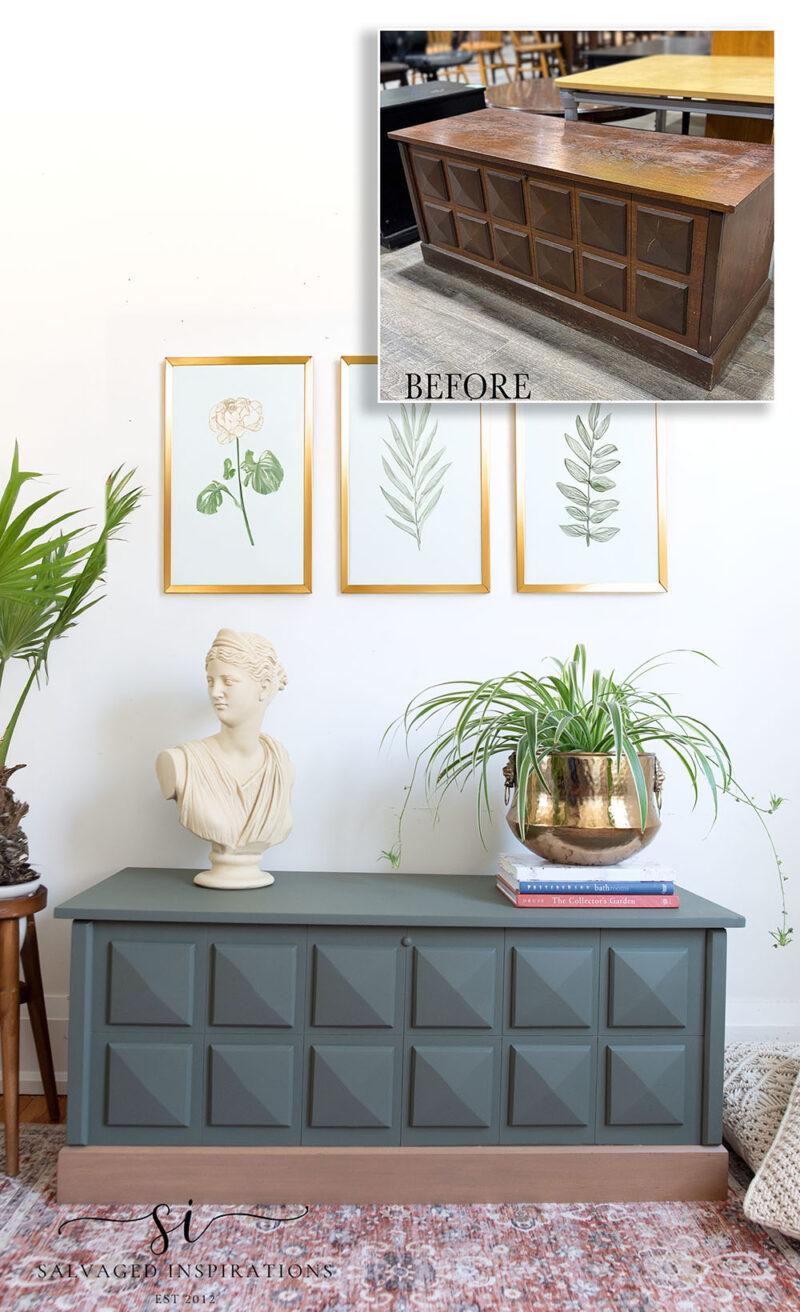
When I brought it home and gave it a once-over, I learned it’s more than just a place to tuck away wools and linens—it’s a little piece of Canadian history. Tucked inside was a perfectly preserved label from Huppé & Frères, a company founded in 1967 in the woodworking heart of Victoriaville, Quebec. They are still around today, selling high-end modern pieces.
The exterior finish had seen better days, but overall, this piece was in great shape.
THIS POST IS SPONSORED/CONTAINS AFFILIATE LINKS TO PRODUCTS I USE. YOU CAN SEE MY FULL DISCLOSURE HERE.
EVERYTHING YOU NEED FOR A DIY BLANKET BOX FLIP:
Thrift Blanket Box – SALVAGED
White Lightning Cleaner
Bosch Sander | Sanding Sponge
2″ Angled Paint Brush
Cactus SILK All-In-One Mineral Paint
Acadia SILK All-In-One Mineral Paint
Whiskey Barrel Water-based Stain
Mylar Plastic Sheet (for painting clean lines)
Lint-Free Cloths
Gator Hide Topcoat
TOOLS THAT MAKE THE JOB EASY
Shop Vac (40% OFF as of writing)
Bosch Orbital Sander
Dewalt Cordless Drill & Impact Driver
CLEANING & PREPPING
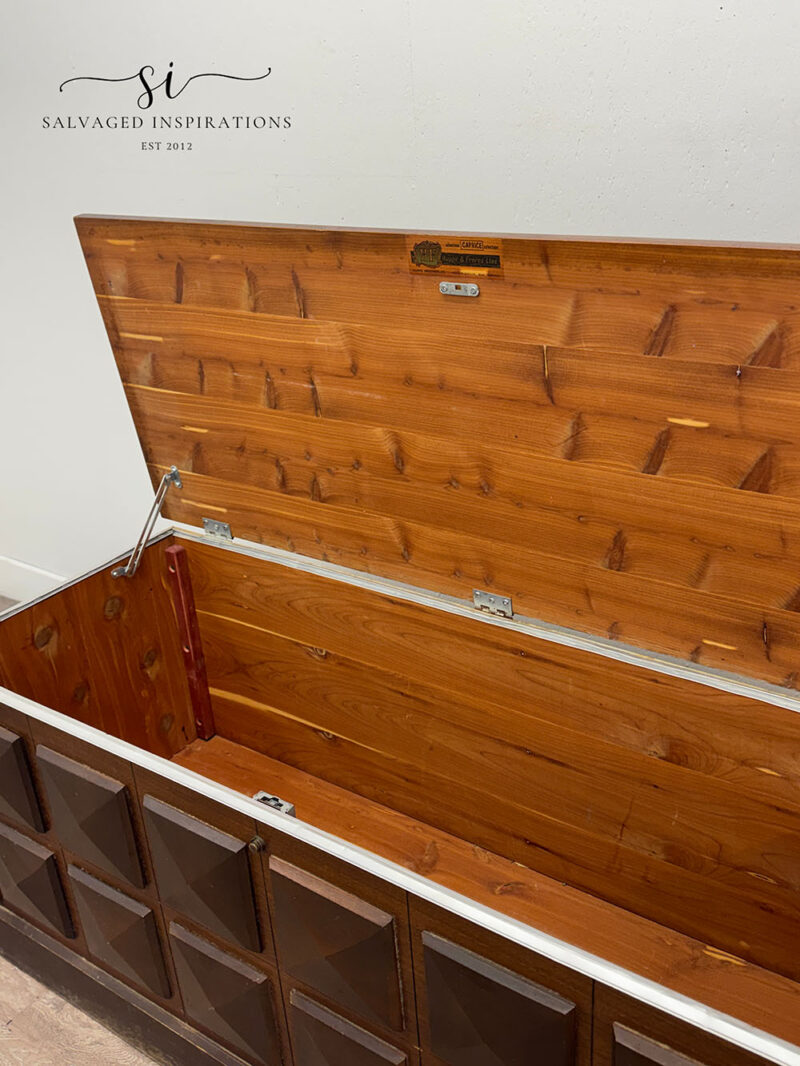
To give the inside, outside, and bottom of this box a good cleaning, I used a shop vac, a TSP substitute and large automotive sponge. I noticed that this cedar chest had lost all its cedar wood smell. Stay tuned till the end of this post when I share how to get that lovely cedar wood smell back!

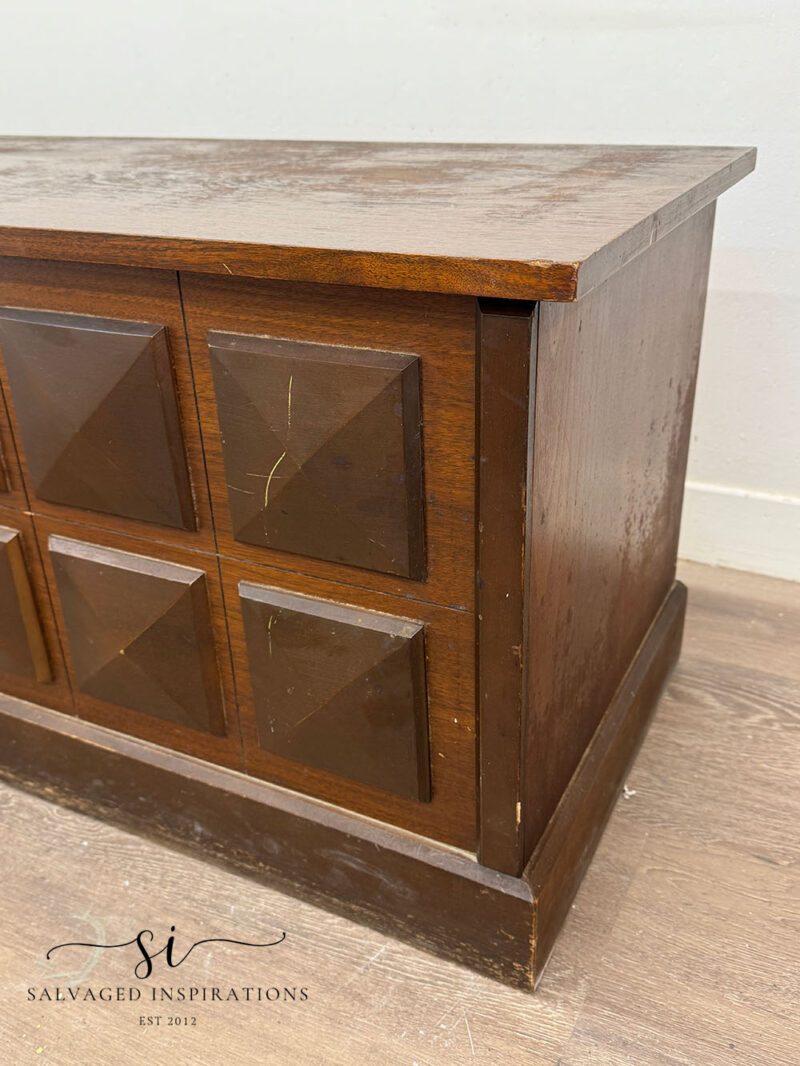
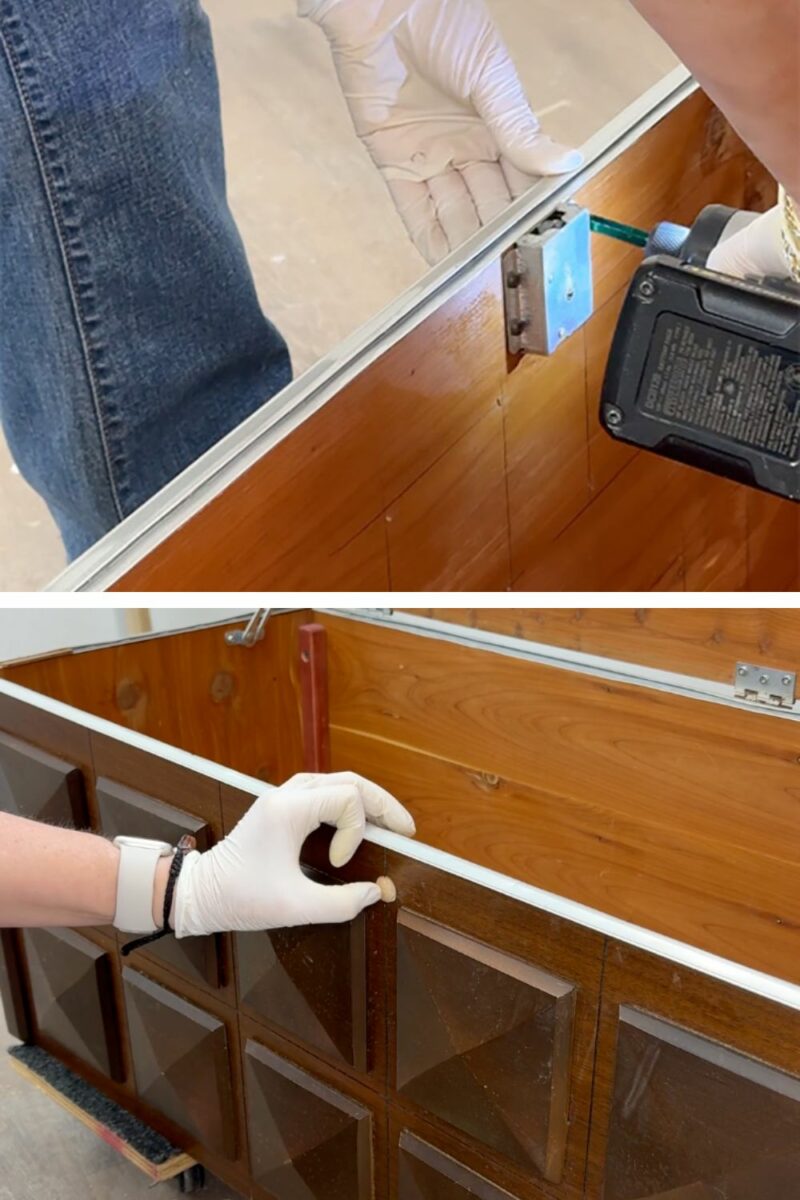
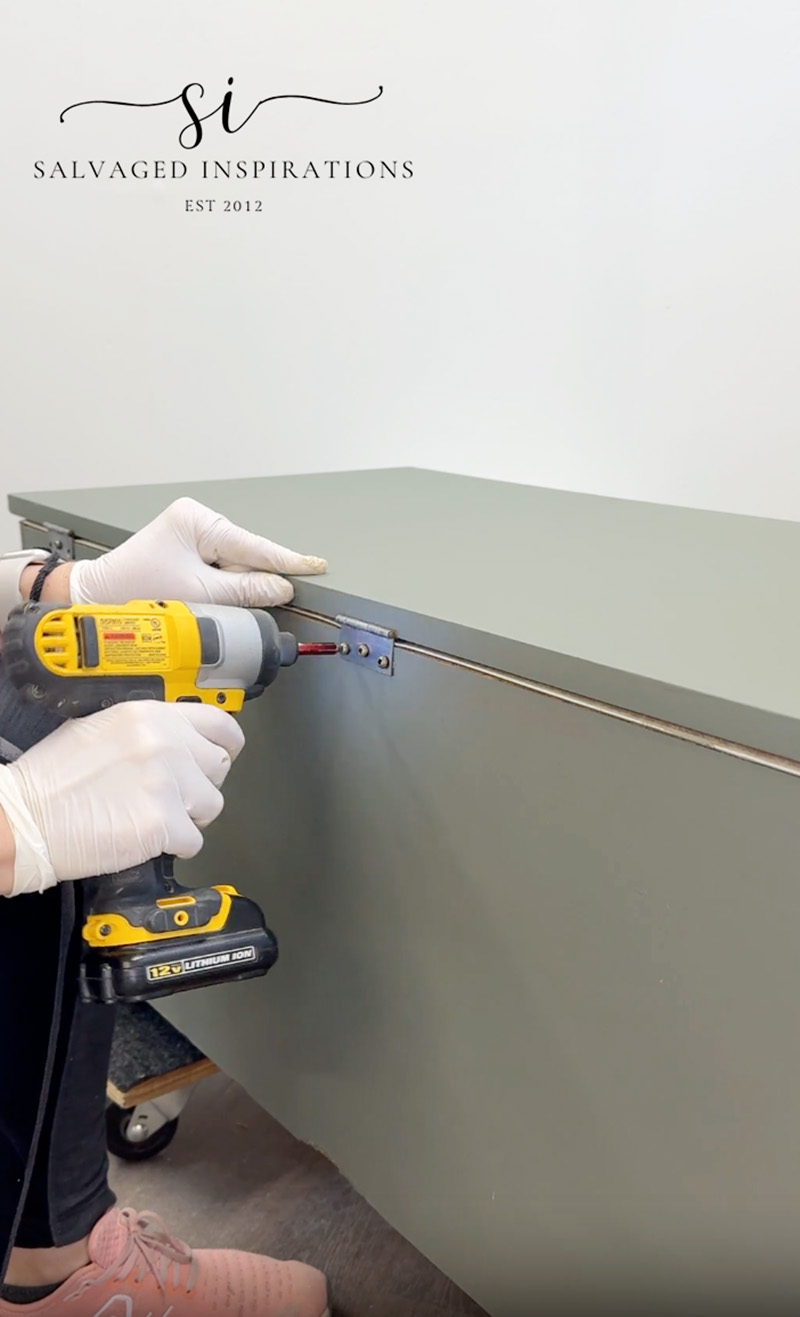
REMOVING THE LOCK
If you are selling furniture (with old locks), I recommend removing them for safety reasons. A few screws hold them in place so they are easy to unscrew and then knock out the lock mechanism. This will leave a hole but they are easy to fill with a dowel or wood screw cover as I did below.
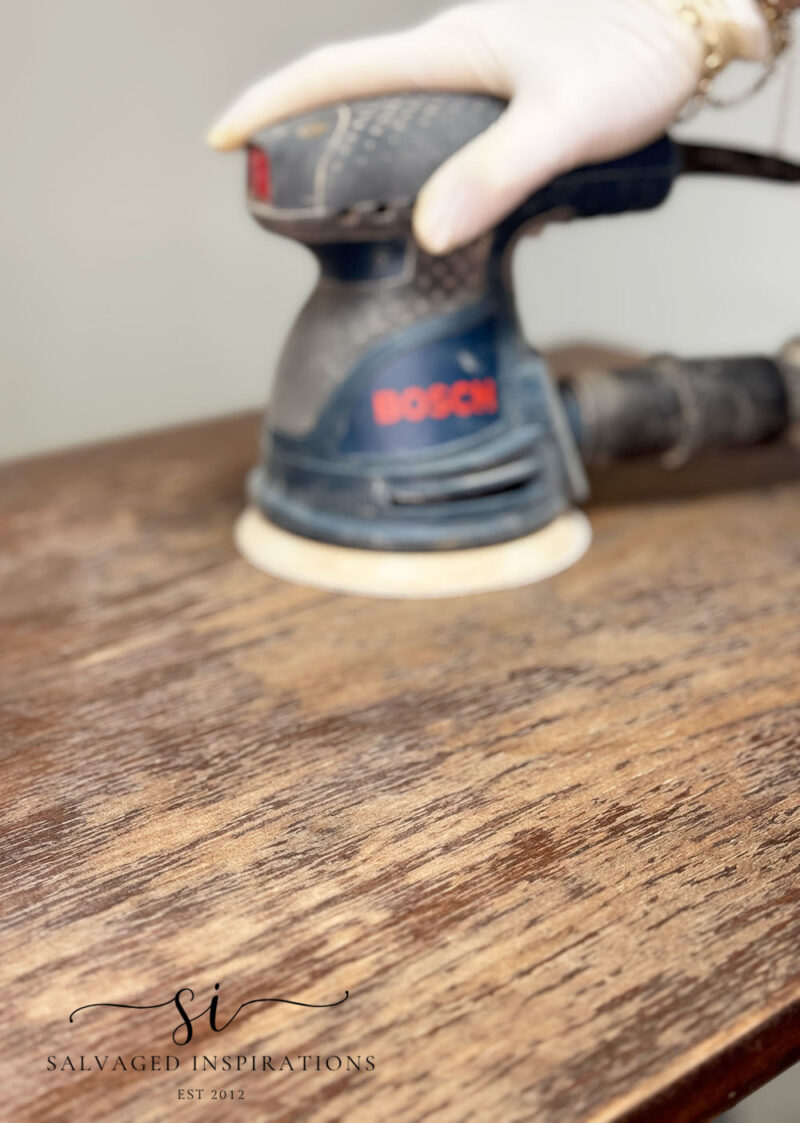
To scuff sand the finish on this box, I brought out my Bosch Orbital Sander with a 180 grit sandpaper. I also used my handy sanding sponges to get the square detailing all scuff-sanded on the front of this box.
CACTUS PAINT
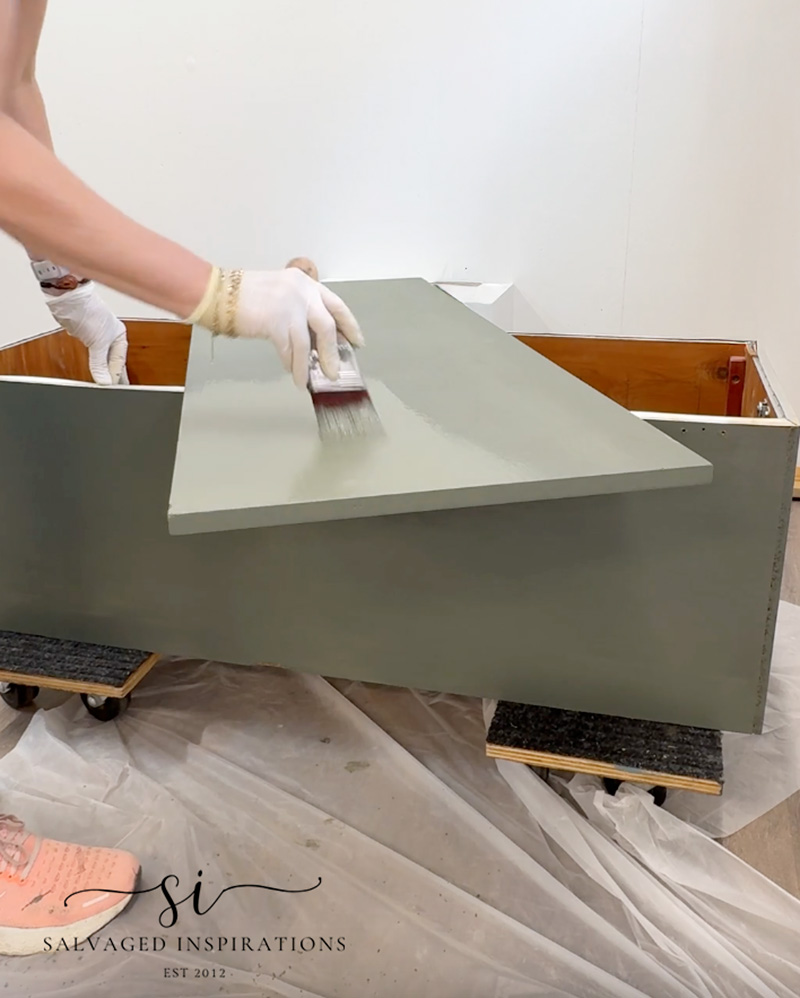
Once the entire piece was disassembled and scuff-sanded, it was time to pick a color. I chose a beautiful Cactus SILK All-In-One mineral paint. I also had a small amount of Acadia green left in a jar that I added to the mix. This is a great way to use up old paints and let nothing go to waste. It didn’t change the Cactus color much at all – maybe just a touch darker. I can’t give an exact measurement because again, it was just a little I had left over.
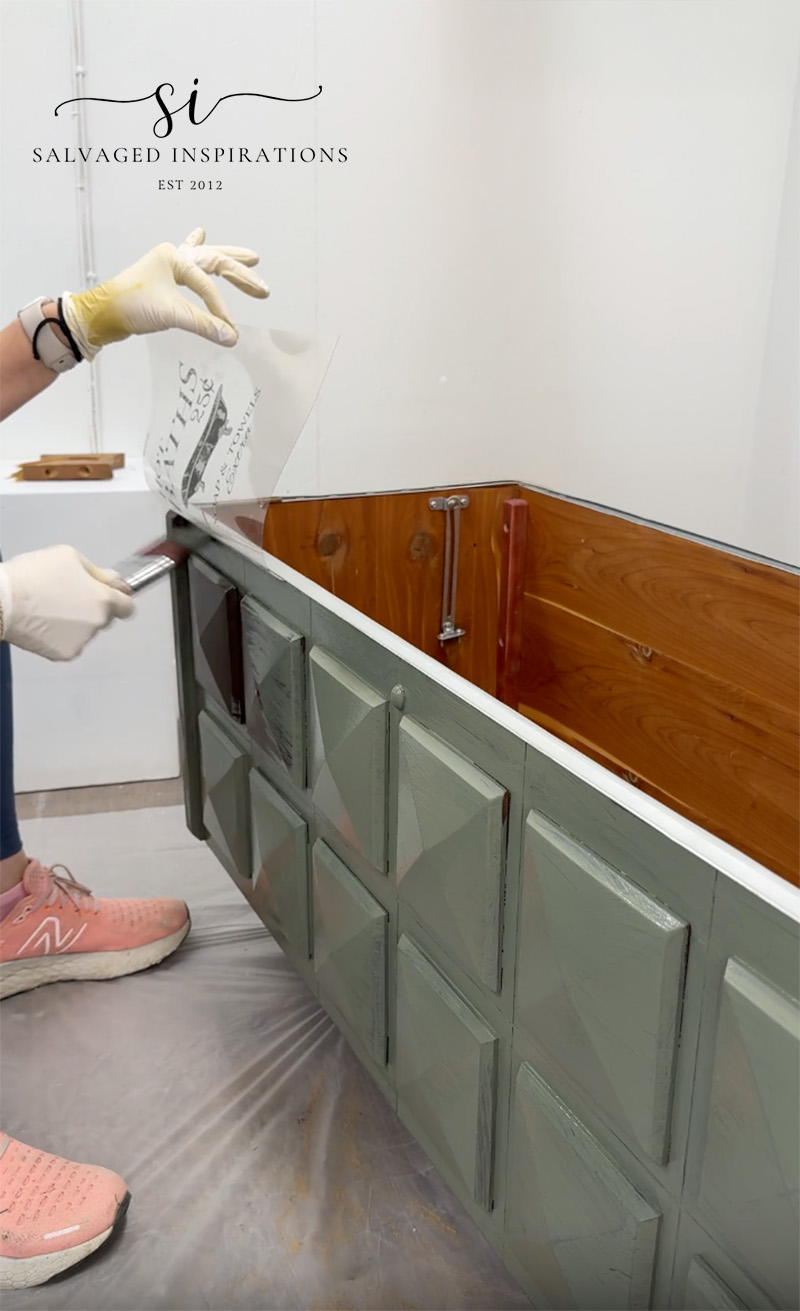
Also, rather than using painters tape to mask all the trim I wanted to keep original, I used this plastic mylar sheet. I tucked it under lip of the box and painted under it. These sheets have enough weight and stiffness to them to work really well on trim like this. I’ll share how easy and quickly this works in this Saturday’s Youtbe video. It works like a charm.
After I applied the first coat and let the paint dry overnight. The next morning, I came down and painted another coat. Two coats gave full coverage.
WHISKEY BARREL STAIN FOR BOTTOM
I used this Whiskey Barrel Water-based Stain on my last TTT project and LOVED IT so much, I went ahead and used it again for the base of this chest.
- I started by unscrewing the base from the blanket box.
- I sanded the old dark finish off the wood base using my orbital sander.
- Using my FREE wood conditioner – WATER, I misted the wood to prep for stain.
- Then, using an inexpensive chip brush, I painted the Whiskey Barrel onto the damp wood.
- Then wiped it back with a lint-free cloth.
- Once the two coats were dry, I sponged on 3 coats of Gator Hide Topcoat.
PIN AND SHARE 🤗
FINISHING TOUCHES
For the finishing touches, I cleaned up the rust off all of the hinges and reassembled the box. Because I used the all-in-one paint, no topcoat is required. The no priming and no topcoat are a huge time saver.
HOW TO GET A *NEW* CEDAR BOX SMELL
Quick Tip for Your Cedar Box: If the cedar scent inside has faded over the years, you can “reactivate” it by very lightly sanding the interior cedar wood with fine-grit sandpaper. This opens up the pores and brings back that fresh, protective aroma. This is very simple to do and costs pennies. Take a high-grit sandpaper or sanding sponge – I used a 220-grit sanding sponge and give the cedar wood a light sanding. Then using a damp paper towel or cloth, wipe the inner box down with a damp paper towel or old rag. You will smell the cedar wood scent right away. It works amazingly!
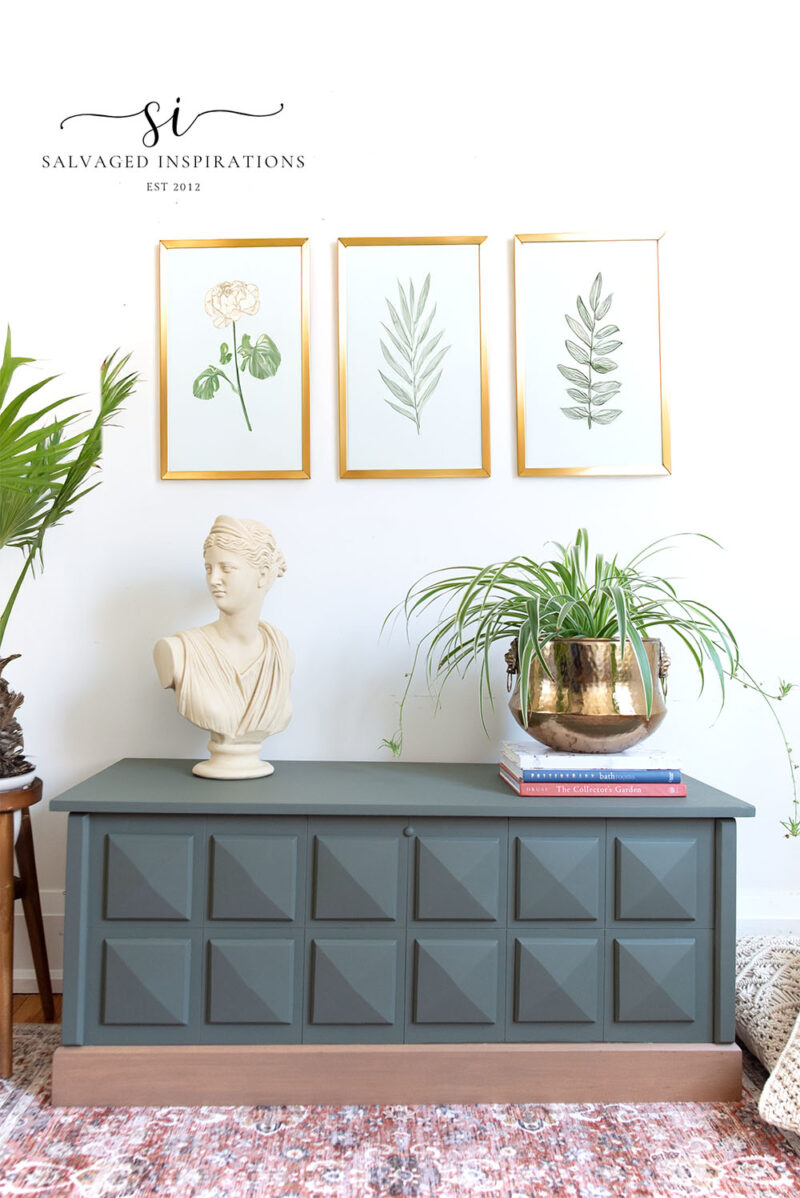
THE BIG REVEAL
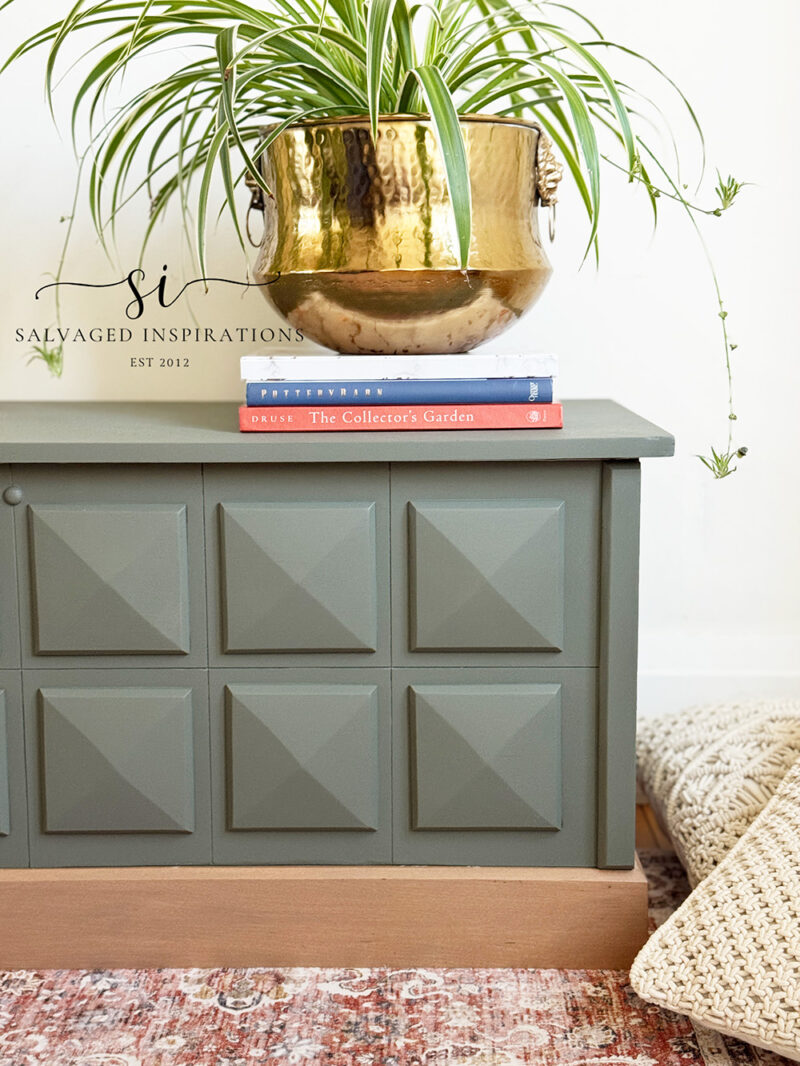
Here’s how this newly restyled and updated blanket box looks now…
And here’s a close-up of the smooth painted top!
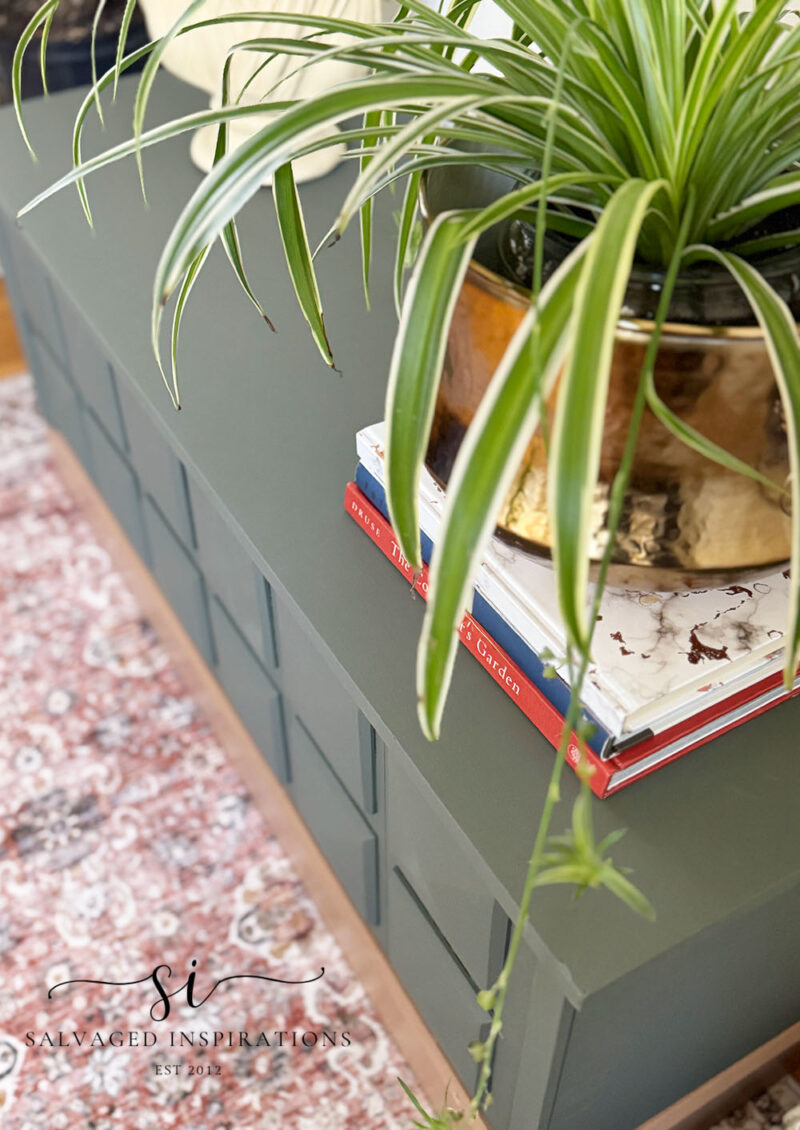
The square details on the front of this piece add a ton of dimension and interest. Now that the piece is all finished my creative wheels are still turning. I’m wondering what the squares would have looked like stained the same color as the base?… too much maybe??? or maybe fabulous!?? What do you think?
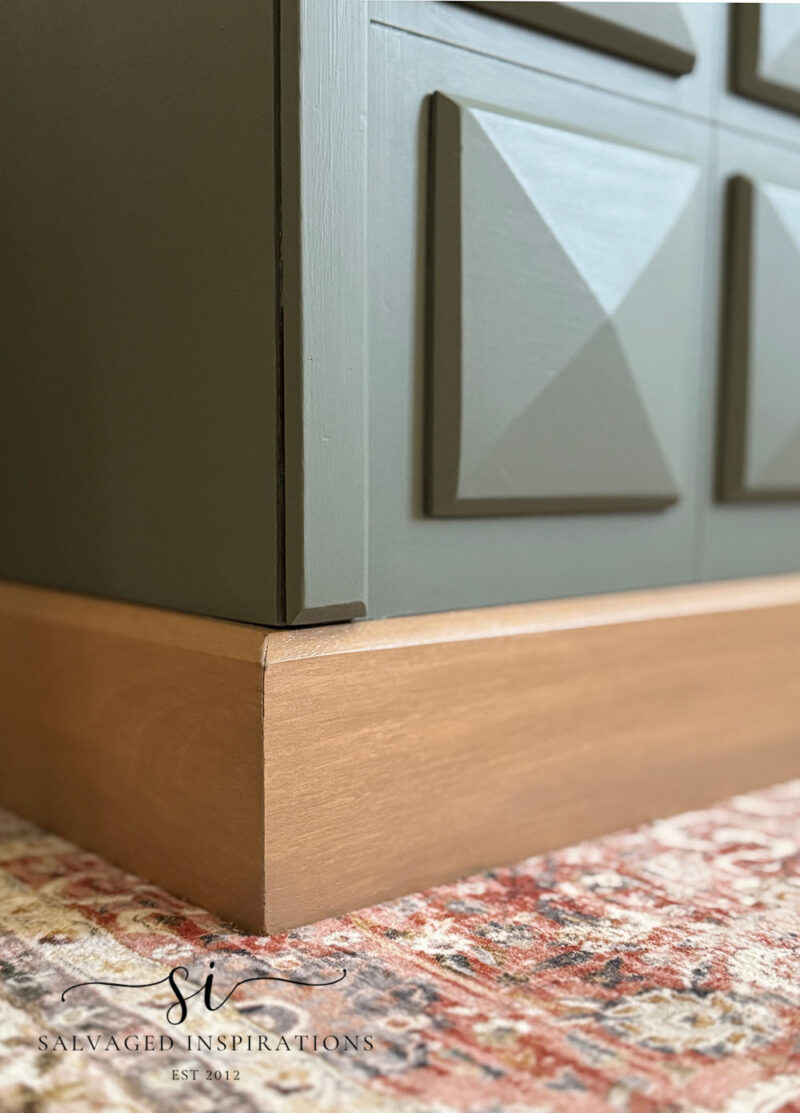
Remember what the skirt on this blanket box looked like? Here’s a look at the updated Whiskey Barrel stained bottom. Gorgeous, right?!
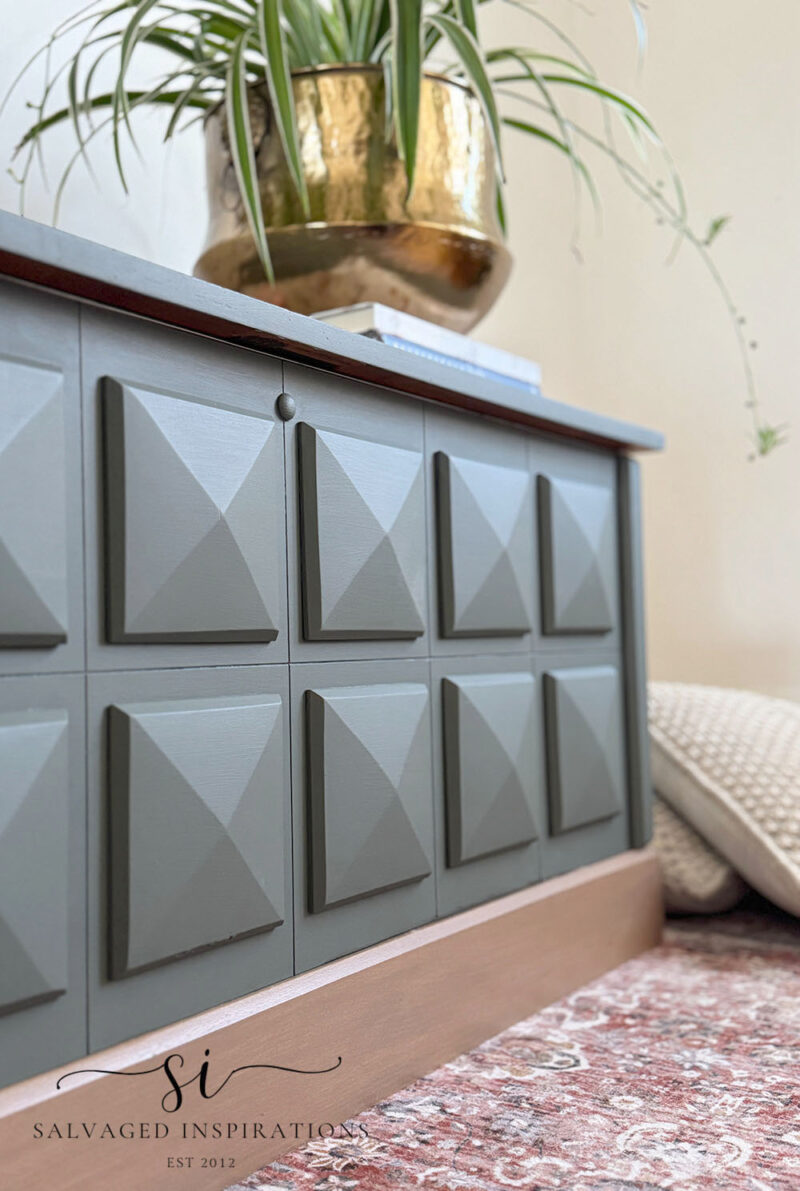
I love this stain color. Two coats with the Gator Hide topcoat, and it looks amazing!
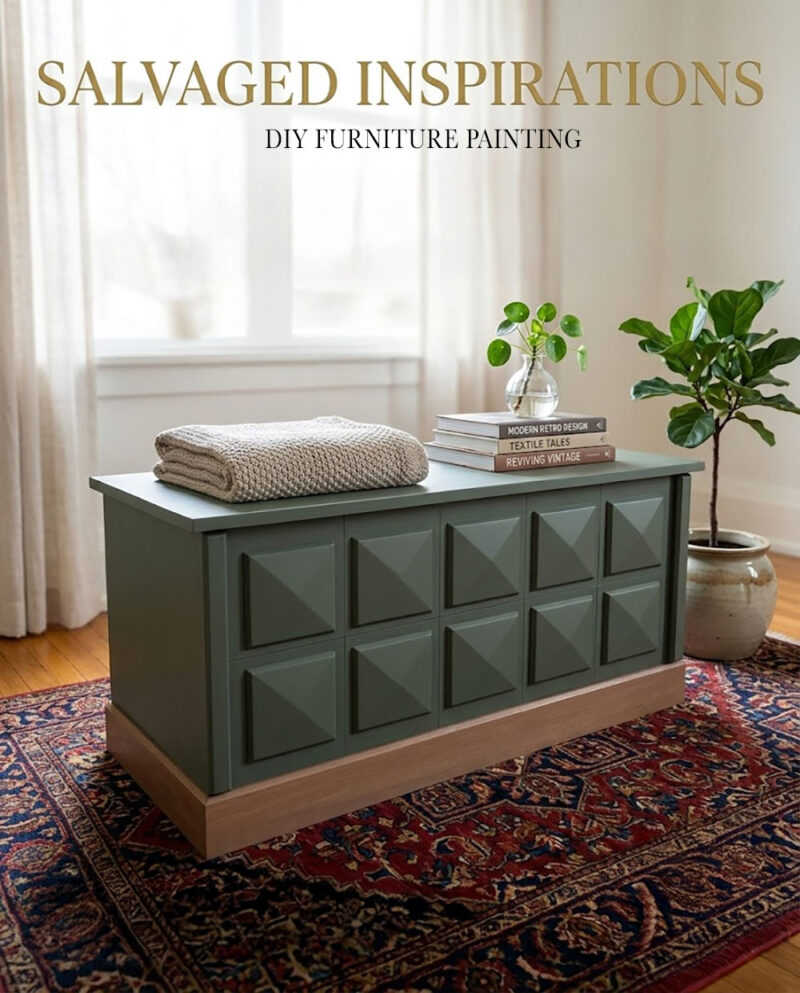
And just for fun, I prompted AI to generate a styling of this thrifted blanket box in a room setting. Here’s what it generated. I like the large window, potted plant, and cozy blanket styling! I’m always amused by what it comes up with…
YOUTUBE TUTORIAL
Here’s the full step-by-step YouTube tutorial for you. Our #siyoutubefamily has almost reached 57.2K, so don’t forget to subscribe if you haven’t already! So exciting, thank YOU!
And now for some Trashy Treasures FUN!
Below are the TTT ladies’ BEFORE photos. Visit the links below to see the amazing AFTERS and learn how they did it! I’m heading over to take a peek as well! x
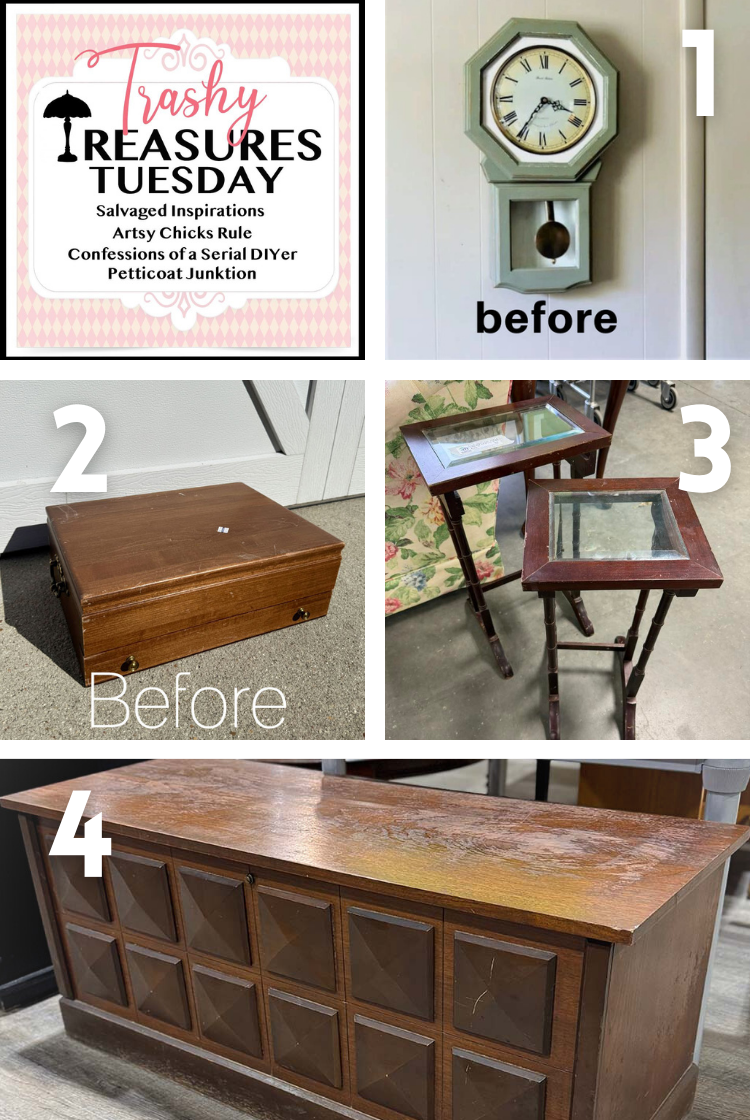
1. PETTICOAT JUNKTION
2. CONFESSIONS OF A SERIAL DIYER
3. ARTSY CHICKS RULE
4. SI (HAPPY YOU’RE HERE!)
Here’s another look at this before-and-after thrifted Blanket Box Makeover. I hope it inspires and gives you the confidence to update your old pieces of furniture.
Thanks for joining today’s Trashy Treasures Tuesday makeover. Feel free to drop me a hello and let me know what you think of this restyled storage box. I always love hearing from you — and just so you know, I’m always cheering you on from my end!
Happy painting, my friends!
Denise x
RELATED POSTS:
SMOKEY MOUNTAIN CEDAR CHEST
FAUX WOOD PAINTED CEDAR CHEST
THRIFT CHANTILLY BLANKET BOX
HOW TO APPLY GEL STAIN | STORAGE DIY
HOW TO ELEVATE FURNITURE BY ADDING TRIM
PIN AND SHARE! 🤗

LOVE the style of this chest! Cactus was a great choice for this piece and staining the wood skirt added a lovely modern touch. Another beautiful makeover. 💚Thanks for sharing. Pinned! 📌 Have a beautiful week, my friend. xo 😘
Thanks Do! I’m getting mixed reviews on the stained base (esp over on YT) but I love it too! Thanks for the PIN! Hugs
Beautiful job as always. I like the green as it looks fresh and comforting all at one time. Thank you again for sharing all the steps for recreating beautiful things. You inspire us!
Fresh and comforting… I LOVE that Jewels, thank you!
Hi Denise. The cactus green and stained wood skirt are perfection. In the before picture I thought the chest looked too heavy. By staining the bottom you created a base with interest and added a foundation. Looks awesome
Thanks so much Monique! Wishing you a fabulous week and always appreciate your kind words and support! Hugs XOXO
I wld love to see the squares stained the same color as the bottom. It wld truly give it a curated, unique look ❗️
It would be interesting for sure. I wonder if they would stain the same… if they are the same type of wood ?? Thanks for chiming in Gladys and enjoy the week!
Have you tried Retique It on any of your finds? It is a liquid wood paint. I would like to try it on a dark piece of pine but can’t only find a few videos on it.
I have not tried Retique – but now I’m SUPER curious! I’m going to google it and look this up, thank YOU!
Can’t wait to see what you do with it!
You updated and did this blanket box proud, Denise. I also love the stained skirt base with the updated green – it can live in any updated space now. Thanks for sharing! 👏
Thank you Nicki!🤗 I hope it finds a lovely new home.
p.s. 🙂
Nice to see the AI – but I like your staging better !
awwwwww, thannnnk youuuuu!🤗
So fresh now – and modern looking. I think I recall seeing those block patterns on furniture. 60’s maybe…?
Glad you were able to catch it at the marked down price. It looks very solid. I love the interior – and even has the hold open bracket hardware.
Color looks almost teal ish ? I love the Whisky barrel stained trim. Gives it that natural wood warmth.
If you decided to AI the blocks to match – it would be fun to see. I do like it how is is tho.
I inherited a rough sawn cedar box. It was my dad’s Navy foot locker. Crudely built – I’m thinking by boot camp soldiers? Mom kept it in the upstairs attic ish long closet – storing bags of flour and sugar for canning / baking.
I recently found a tarnished brass hasp for it.
Thanks for the tip to restore the cedar smell! I’d love to tan/taupe wash the exterior – but have not seen how to do that on cedar. 🙁 Taupe/tan would work much better with my darker bedroom furniture – so I could use it as a sweater chest. Any ideas on what product / color would cover that orange cedar ?
Thanks for sharing another sweet makeover.
I think you’re spot on with the 60s guess and soooo nice you have your dads navy foot locker – thats amazing! For a tan/taupe wash on the exterior I would pick one with some strong green undertones. I’ve tried it on a few pieces and it really helps tone down brassy, red and orange stained furniture. Have an amazing week my friend. 🤗
You know I’m a big fan of cedar chests! I love the skirt. What a great detail. Pinned, Kathy
Thanks my friend!🤗 And I know… I thought of you while working on this piece b/c you’ve done such GORGEOUS cedar chest makeovers!
Such a pretty new look, Denise!! And the Whisky stain on the bottom is perfect! xoxo
Thanks so much Nancy! I’m so happy they reduced it to 50% off otherwise it would probably still be sitting on the thrift store floor looking so sad.🙁😆 have a great week my friend. xoxo
What a difference paint made on this chest!! And I love that you stained the skirt…Whiskey Barrel is gorgeous withe the Cactus! XOXO
Thanks Christy! Whiskey Barrel is right up there with my favorite Charred Hickory… my two new FAVES! Enjoy your week my friend. XOXO
I think you should have painted the blocks the same as the base, or the base the same as the rest of the box. In my eye the base looks like an after thought or you ran out of paint.
Hi Irene! I think the stained base is a lovely look and I think adds a nice bit of contrast while still keeping some natural wood character. That said, staining the square detailing on the front to match the base would be a creative option too! I’m tempted to use AI to generate a visual on what that would look like! There are so many fun directions a piece like this can go—that’s part of the joy of furniture makeovers!😊 As for running out of paint… NEVER!😆