HERE’S HOW I CREATED A “REAL WOOD LOOK” USING PAINT TO UPDATE THIS THRIFTED TABLE | YOUTUBE VIDEO
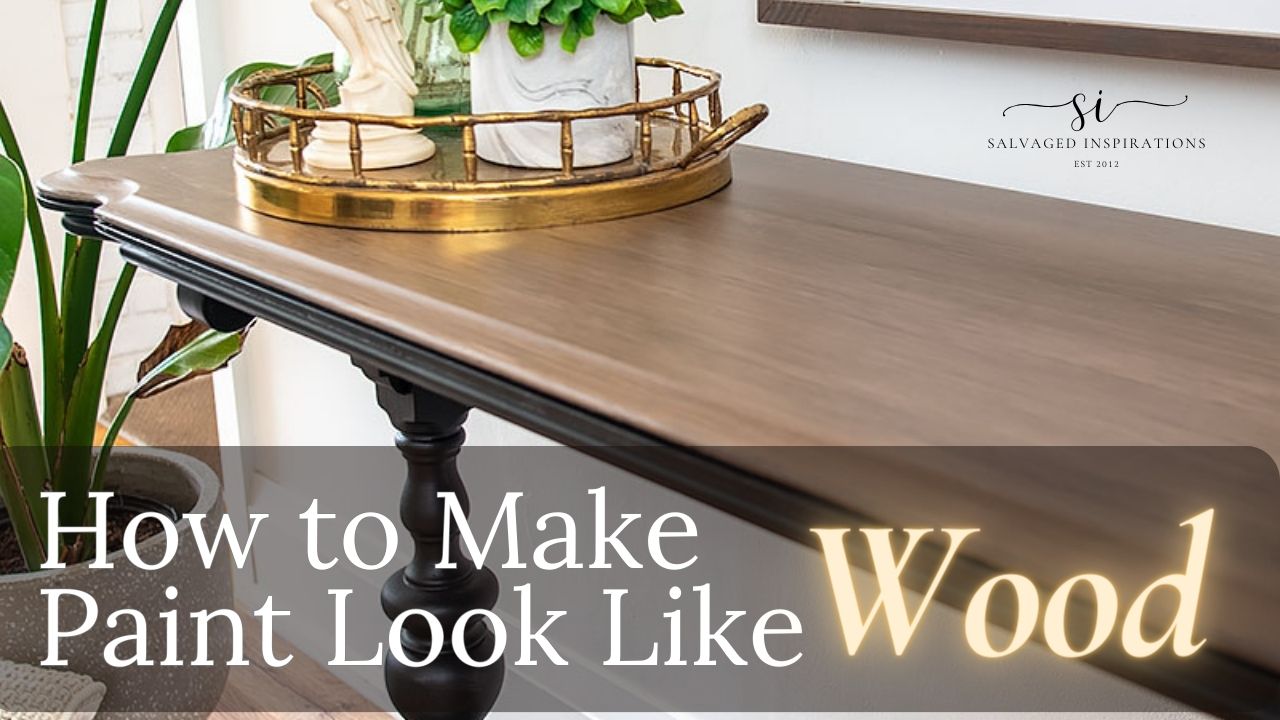
Hi sweet friends and thanks for joining me! Today I’m sharing how I updated this gorgeous table using paint to create a modern faux wood finish. This is a take two on this table (more on this below) and even though the first look was beautiful, I love this look is even better. It’s much more sleek and modern! I can’t wait to hear which makeover YOU prefer!
*As an Amazon Associate, I earn from qualifying purchases. There are affiliate links in this post to other companies/products I use and love as well. You will never be charged extra when you purchase through these affiliate links. If you purchase from my links – A BIG thank you for supporting me and the #siblog! To see my full disclaimer, click here.
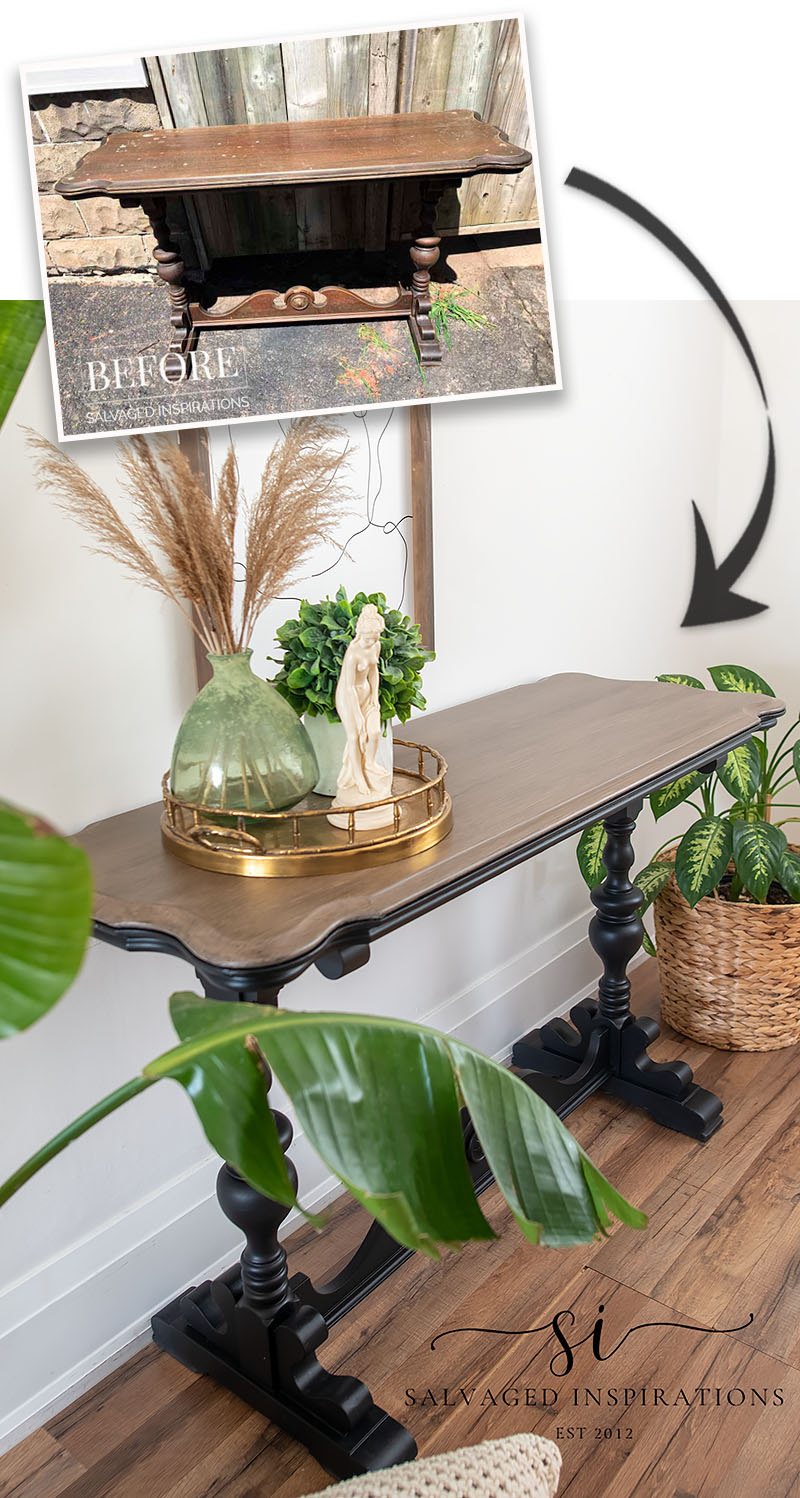
Here’s the console table I purchased off Facebook Marketplace back in 2019.

If you’ve been following along for a few years, you may remember this White Glaze Finish I gave it. It turned out lovely.
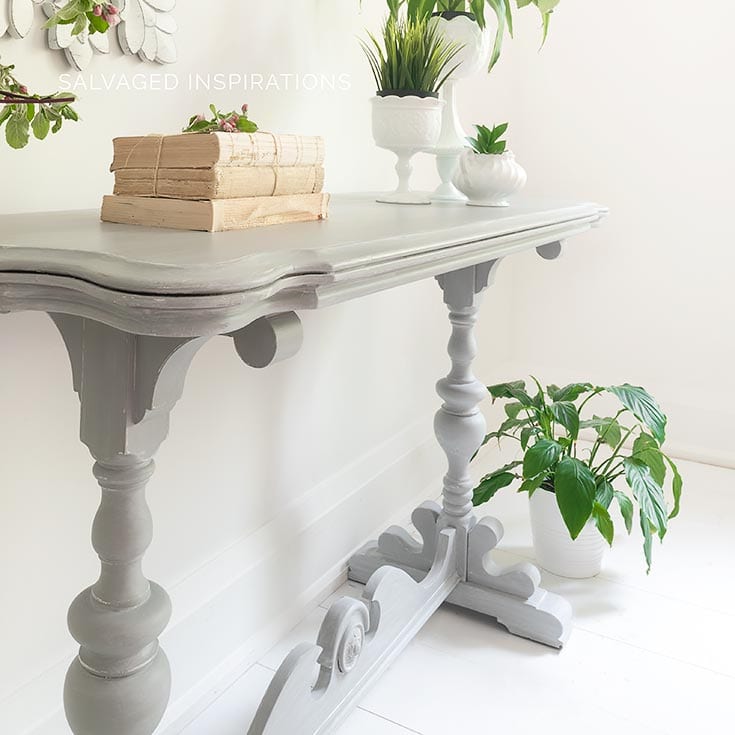
The only thing I wasn’t happy about was the gap between the top. Some of the glaze got into the grooves where I didn’t want it to go. Once I noticed it, I didn’t feel comfortable selling it this way. It did get a ton of use in MY home though. 🙂 Then it was stored in my inventory for another makeover.
THIS POST IS SPONSORED/CONTAINS AFFILIATE LINKS TO PRODUCTS I USE. YOU CAN SEE MY FULL DISCLOSURE HERE.
WHAT YOU’LL NEED
Sofa Table – SALVAGED
White Lightening Cleaner
Bosch Sander (25% off as of writing this post!)
Sanding Sponges
Caviar Chalk Mineral Paint
Mud Puddle Chalk Mineral Paint
Van Dyke Brown Glaze
Black Magic Voodoo Gel Stain
Rubber Pet Hair Remover (17% off as of writing this post!)
Large Fluffy Paint Brush
Oval Paint Brush
Shop Towels
Gator Hide Topcoat
DIY FAUX WOOD FINISH
Here’s how it all came together…
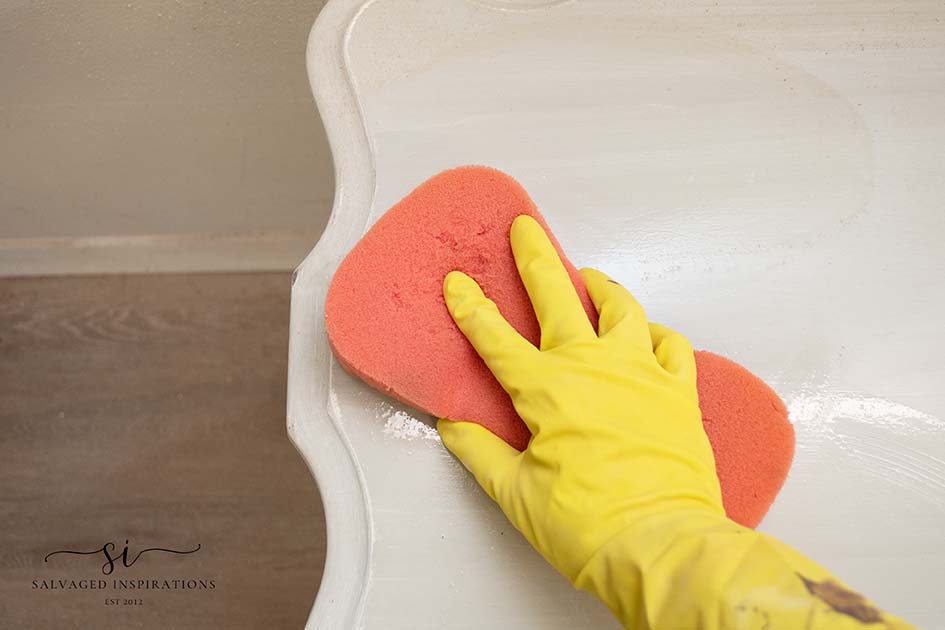
PREP CLEAN
I started by giving this table an overall cleaning with this White Lightning Cleaner. It was dirty as it’s been sitting in my inventory for the last 2 years. Once I had all the dirt and cobwebs off it, I rinsed my sponge with clean water and removed all the cleaning residue.
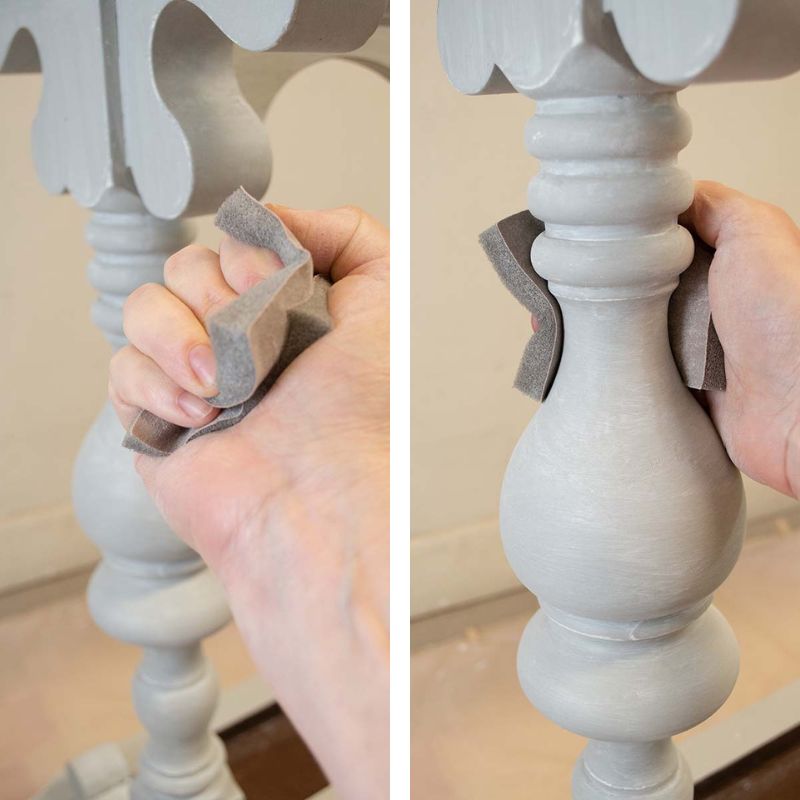
SANDING & PAINT
To prep the base for paint, I used a 220 sanding sponge to give the last finish a scuff sanding. The goal isn’t to remove the old paint finish but to add a little tooth/scuff up to enable the new paint to adhere to. These sanding sponges work really well when I’m sanding curvy legs because they contour and hug the curves really nicely.
Once the base was scuff sanded, I painted two coats of this Caviar Black Chalk Mineral Paint using an oval synthetic brush. These oval brushes fan out beautifully giving excellent coverage. If you’d like to see this brush in action, I have a super short YouTube quick tip on the Benefits of Using An Oval Brush here.
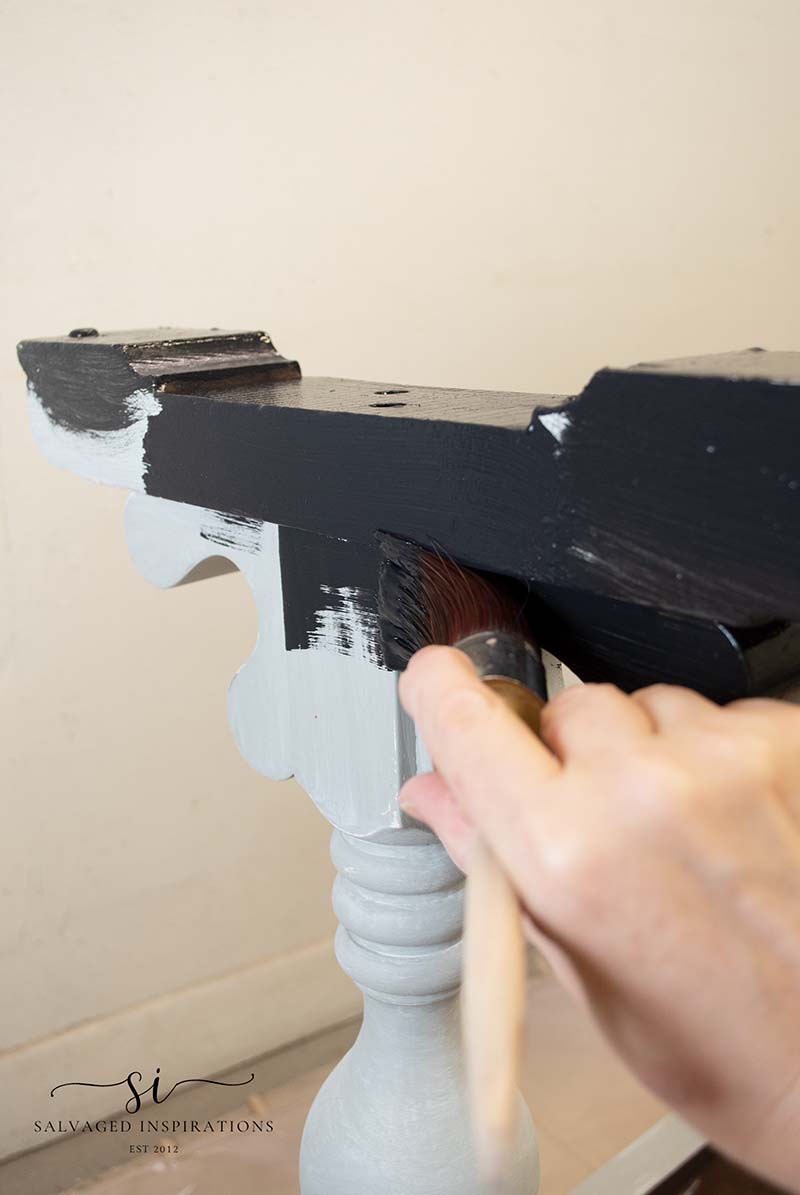
Pro Tip – I like to turn my furniture upside down to get into all the nooks and crannies I can’t see when it’s sitting upright.

TAPE OFF THE TOP
Taping off straight edges is easy. But when you have curved edges, the straight edges of the tape don’t do well. Here’s how I mask off curves.
- Lay a piece of painter’s tape on the curve and use a pencil to trace the shape of the curve.
- Cut along the pencil line you traced.
- Fit the curved edge onto the curved edge of your project.
- Paint away!
BONUS – If your furniture has symmetrical curves, the other half of the tape you cut will fit on the opposite curve! I’m demonstrating this in the YouTube video below!

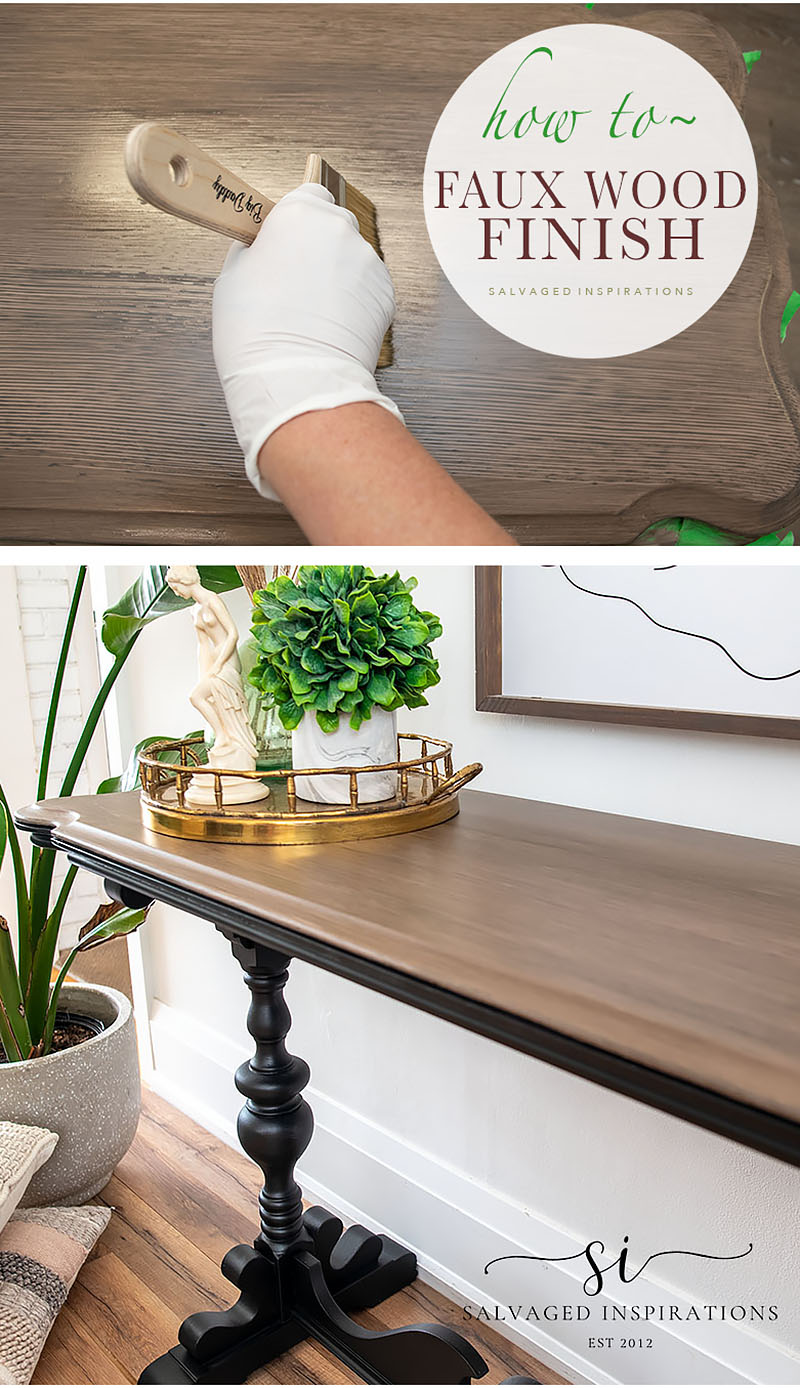
PAINTING A FAUX WOOD TOP
Once I had the table top perfectly taped off, I gave the top a scuff sanding with my orbital sander and then wiped off all the dust. I painted this table top in one coat of this Mud Puddle – the perfect paint color for a faux wood finish! I wasn’t overly particular when painting. A few brush marks or a variation of paint coverage just adds to the faux wood look so I just had fun with it.
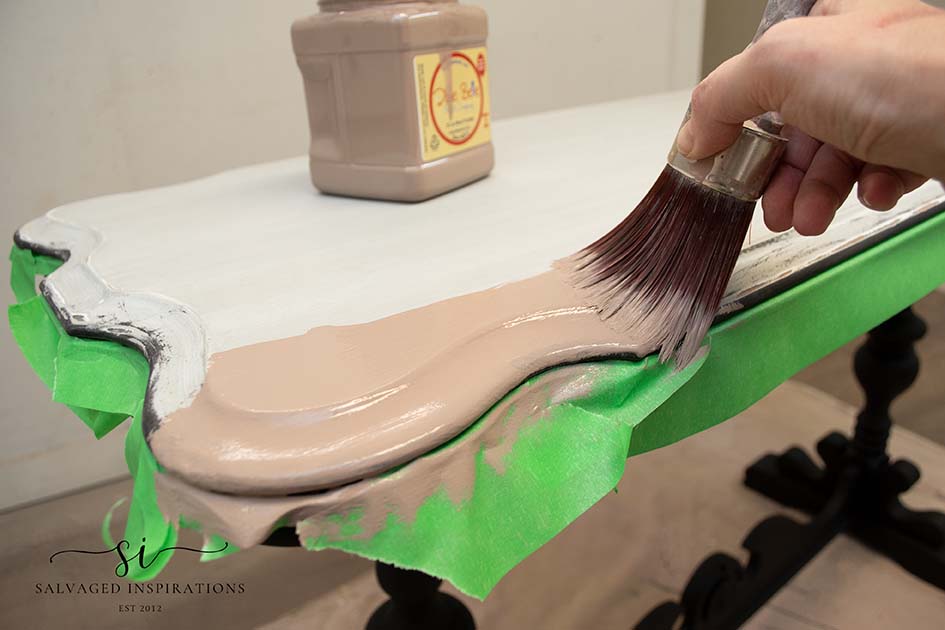
Here’s what the tabletop looked like with the wet Mud Puddle paint. As you can see, it’s not 100% coverage or perfect – but it’s perfect for this faux finish!

FAUX WOOD GLAZE
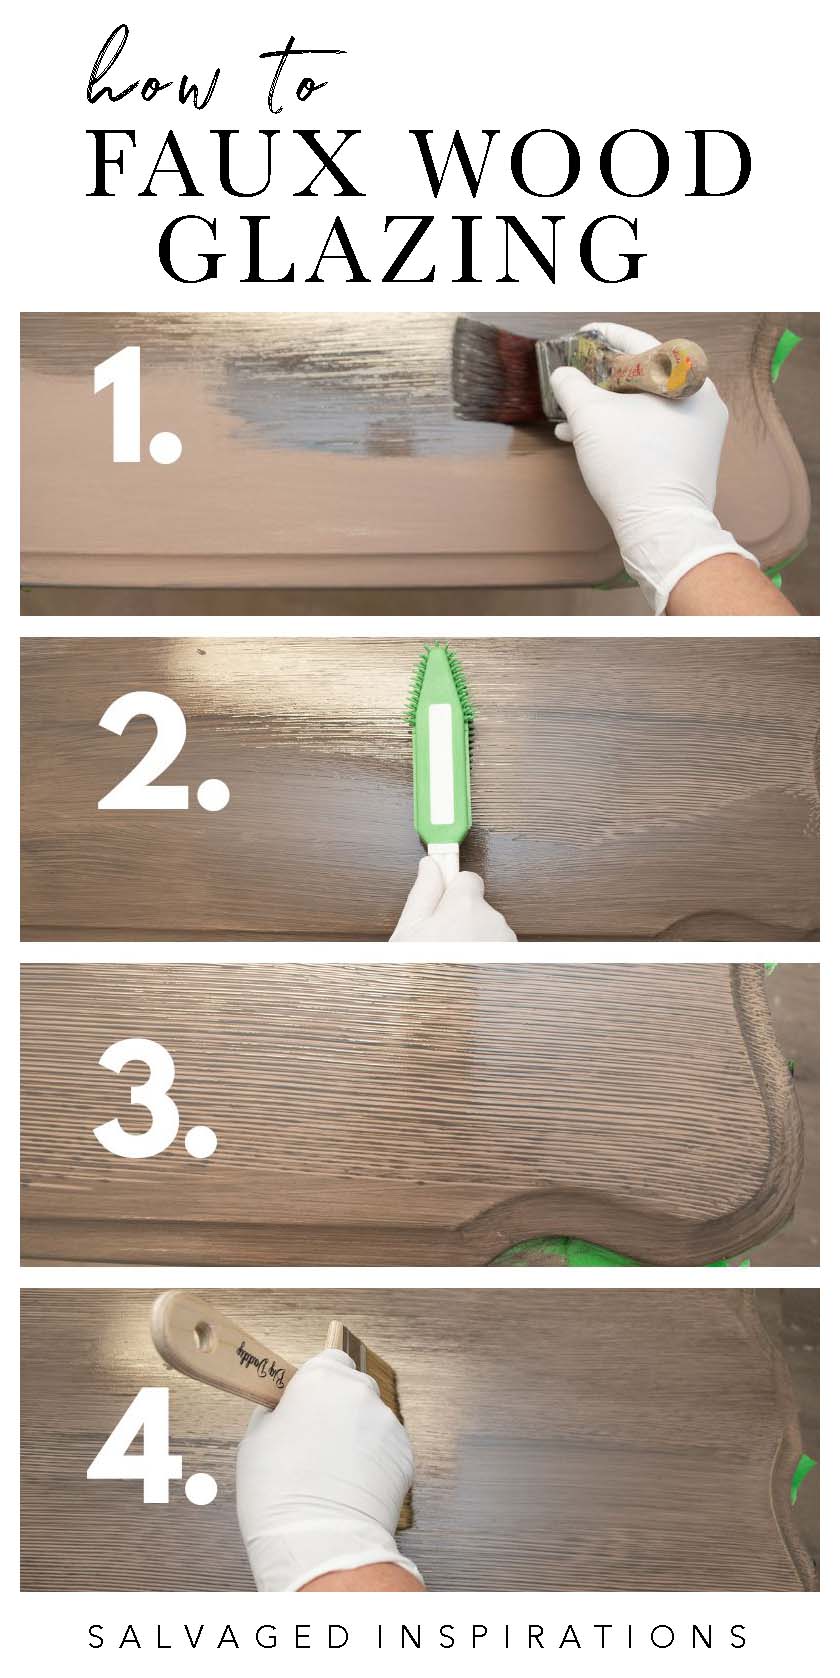
Now for the fun part! This glazing technique is fun and easy and just WAIT until you see the end result. I didn’t have a glaze that was quite dark enough so I improvised and made my own. I mixed this Van Dyke Brown Glaze with a little Black Magic Water Based Stain to darken it up. I didn’t realize I didn’t have any black glaze left in my stash so I’ll have to order more.
Here’s how I applied the glaze to get a ‘wood’ painted top.
- Apply a thin coat of glaze onto the dry base coat of ‘wood’ paint color.
- Using this Rubber Pet Hair Remover – create lines through the wet glaze. (a broom would also work!)
- The glaze has a long open time so if you’re not happy with the lines, play with it until you are.
- Using a large soft brush, soften the lines to your liking.
TOPCOAT
Once my faux finish was 100% dry, I removed the painter’s tape.

To protect my faux wood finish, I sprayed the table top and black base with three coats of Gator Hide.

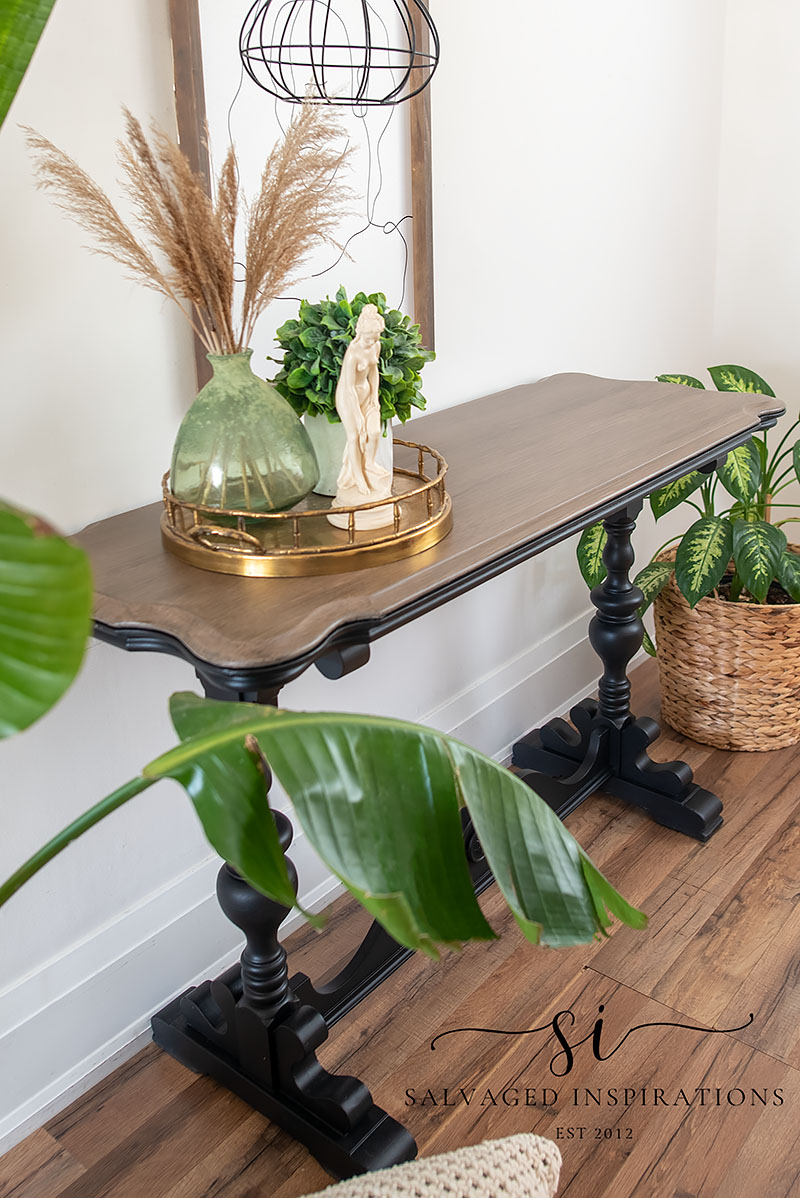
FINISHED DIY FAUX WOOD TABLE
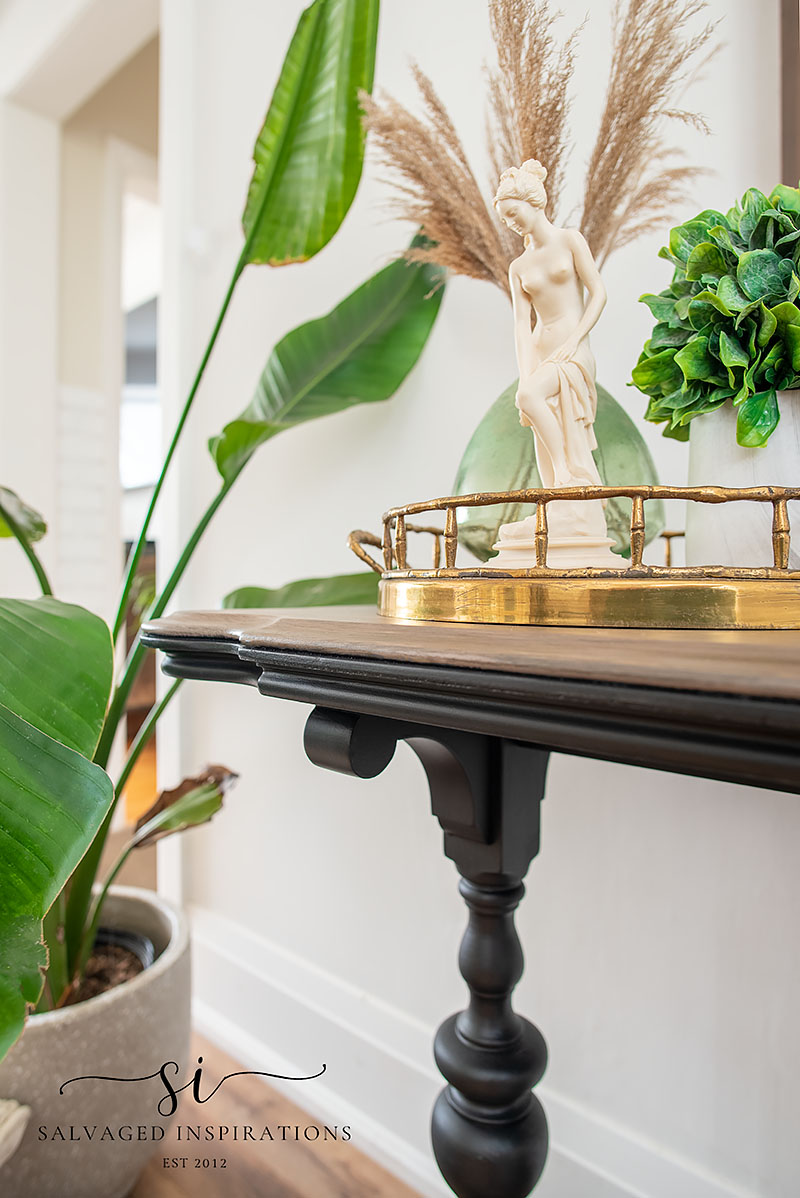
Here’s the finished look. It turned out even better than I imagined it would!
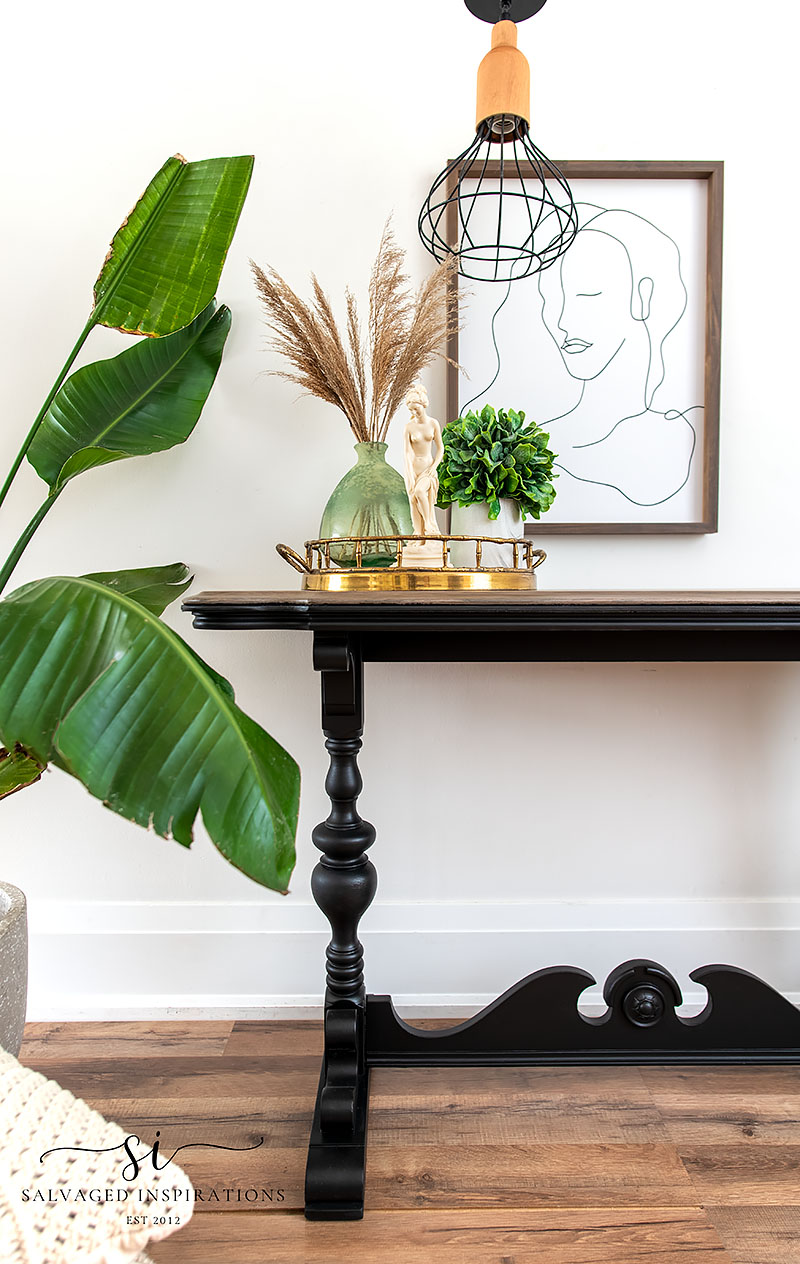
And here’s a look at how awesome the painted fake wood top turned out!

I love the contrast between the wood and the black base. It really updates this vintage table.
What do you think? Do you like this version or the gray whitewashed version better?
YOUTUBE TUTORIAL
Here’s the full step-by-step tutorial on YouTube. Our #siyoutubefamily is already a community of 41.9K so don’t forget to subscribe if you haven’t done so already! So exciting, thank YOU! 🙂
Here’s another look at this take-two table makeover. I hope it’s inspired you and given you some ideas for your projects!
LET ME KNOW WHAT YOU THINK OF THIS FAUX WOOD TABLE MAKEOVER. AND IF YOU LIKED THE FIRST WHITE GLAZED LOOK? – OR THIS GLAZED WOOD FINISH BETTER? FEEL FREE TO ASK ANY QUESTIONS YOU MAY HAVE… I ALWAYS LOVE HEARING FROM YOU. IT MAKES MY DAY! 🙂
Happy painting my friends!
Denise x
RELATED POSTS::
HOW TO PAINT A FAUX WOOD FINISH
HOW TO – DIY FAUX BARN WOOD
FAUX DRIFTWOOD NESTING TABLES
PAINTED FAUX LINEN DRESSER
PAINTED SECRETARY DESK
PIN AND SHARE!

Hi Denise,
I really appreciate your talent!!!!!! I liked the gray color, but I can picture the new version on the mezzanine of my stairs. You can do no wrong. Your vision always translates to the finished piece. Thank you for all of your hard work.
I appreciate YOU Marian! Thank you so much! Hugs XOXO
Love this! I think you just helped me decide how to redo my kitchen table. I want a combination of black and wood to go with the mismatched chairs I have (2 are black and I want to leave the other two wood). Would you consider gator hide the best topcoat for a high-use piece? I used general finishes water based topcoat the last time I did the table and want to use something different this time. Thanks for your advice and inspiration!
I would recommend Gator Hide hands down! I used Gator Hide on my kitchen table makeover which gets a ton of use everyday, and after almost 4 years, it holding up beautifully and still super easy to wipe clean.😃
I have an old table that is very similar to the one you have. I like what you did with the faux wood look. However, I really love the white washed grey that you had done before. I haven’t done anything to mine yet. I get nervous about messing up an old piece that belonged to my grandmother!
Hi Karla! It can be a little nerve wracking working on a piece that is sentimental for sure. I would suggest practicing on an old worthless piece or a small frame or something first. I’ve done this a ton of times and it takes the pressure off. 🙂
Super nice update, the black really shows off those beautiful legs and the faux wood top turned out lovely. Great way to avoid sanding.
Thanks so much Tracy!🤗
I can’t wait to see the video on this refinish, it turned out great but I have retention problems and I have looked at and read so many of your instructions over and over and I still can’t seem to duplicate your projects. No fault of yours, after all you are very experienced and talented and so good at sharing tips, I should be more patient I guess and practice more.! I really do love your posts and think this one could work great for a new project I have.
Oh I’m so happy this has inspired you to give it a try Celia! And yes, I’ll have the youtube tutorial published on Saturday. I hope between the written and video step-by-step, this will make it easier for you. If you have any questions, feel free to reach out anytime.🤗💜
Lovely piece. I like the curves of the table itself and the way you accentuated them with the black base and wood-grain top. I liked it white as well, but the new iteration is less feminine, which works really well when you have the bold black and brown paints contrasted with the curves of the table.
Yes! First makeover was definitely more feminine than this version. So glad you like it Cyndel and thank you!
The top of this table is beautiful and I never would have thought to use a PET lint brush! Thanks for sharing Denise!
My pleasure and thank you! I can’t take credit for the pet lint brush though. I actually watched a video from Black Sheep House where she used one… and I thought, hey I just bought that from Sobey’s a few months back…lol.
I Love it! What color base would you go with if you want it to look like more of a walnut stain?
Yay, thanks Julie! And for a faux walnut stain, I would use Chocolate (or a similar paint color) as the base and then add more black glaze. That would give it a really dark rich look!
Beautiful job, as usual! More of a contemporary look than paint alone.
I think so too! Thanks Ruth! xoxo
I really like this most recent transformation of your table. Your tips and paint colors will help me when I’m ready to so something similar! Thank you!
Thanks Denise, and me too!:) I’m so glad it’s inspired you to try something similar… it’s a super fun technique because you don’t have to be overly perfectionistic with it!🤗
You gave us a nearly impossible task! How to choose which one was more to our liking was more than I could manage because I really like them both. Maybe you could find another and do it the original way, and then we could have the best of both worlds! 🙂
Super cute Caye😁 thank you! You put a huge smile on my face! Enjoy your day my friend. XOXO
The black is my favorite! I love a two-tone finish and yours is beautiful! The black really shows off the gorgeous curves of the table against a lighter wall color. Love it!
I’m loving this black finish as well! I restyled it to sell it – but now I’m thinking I might use it again…lol.
It’s beautiful! I love the black.
Thanks Lizzy! I know a stark black isn’t for everyone but I’m with you… I love the black as well. 🙂
Hi Denise. Oh my goodness! I love the new look. I also loved your first take on this table. I honestly can’t decide which I like better. Amazing transformation. You really have a talent for making furniture look beautiful.
Ahh, thank you Monique! This was a really fun paint technique!
This looks great!!!
Thanks so much Tiffany! 🙂