HOW I TRANSFORMED A THIRTY-YEAR-OLD MIRROR FRAME WITH PAINT AND WAX | YOUTUBE VIDEO
Hi beautiful friends and thanks for joining me for Trash To Treasure Tuesday… the 1st one of the year! The mirror I’m working on today is 30+ years OLD. I had it hanging in my last home and then stored it when I moved into this house 20 years ago. It measures over four feet tall and thirty inches wide and weighs a TON. These old mirrors are built to last and can be totally transformed with a little paint and some imagination. I can’t wait to hear what you think of this old mirror’s brand-new look!
*As an Amazon Associate, I earn from qualifying purchases. There are affiliate links in this post to other companies/products I use and love as well. You will never be charged extra when you purchase through these affiliate links. If you purchase from my links – A BIG thank you for supporting me and the #siblog! To see my full disclaimer, click here.
I’m also joining my T2T crew and sharing links to their projects below. I’m looking forward to seeing what they’ve created and I hope you join me on today’s tour as well!
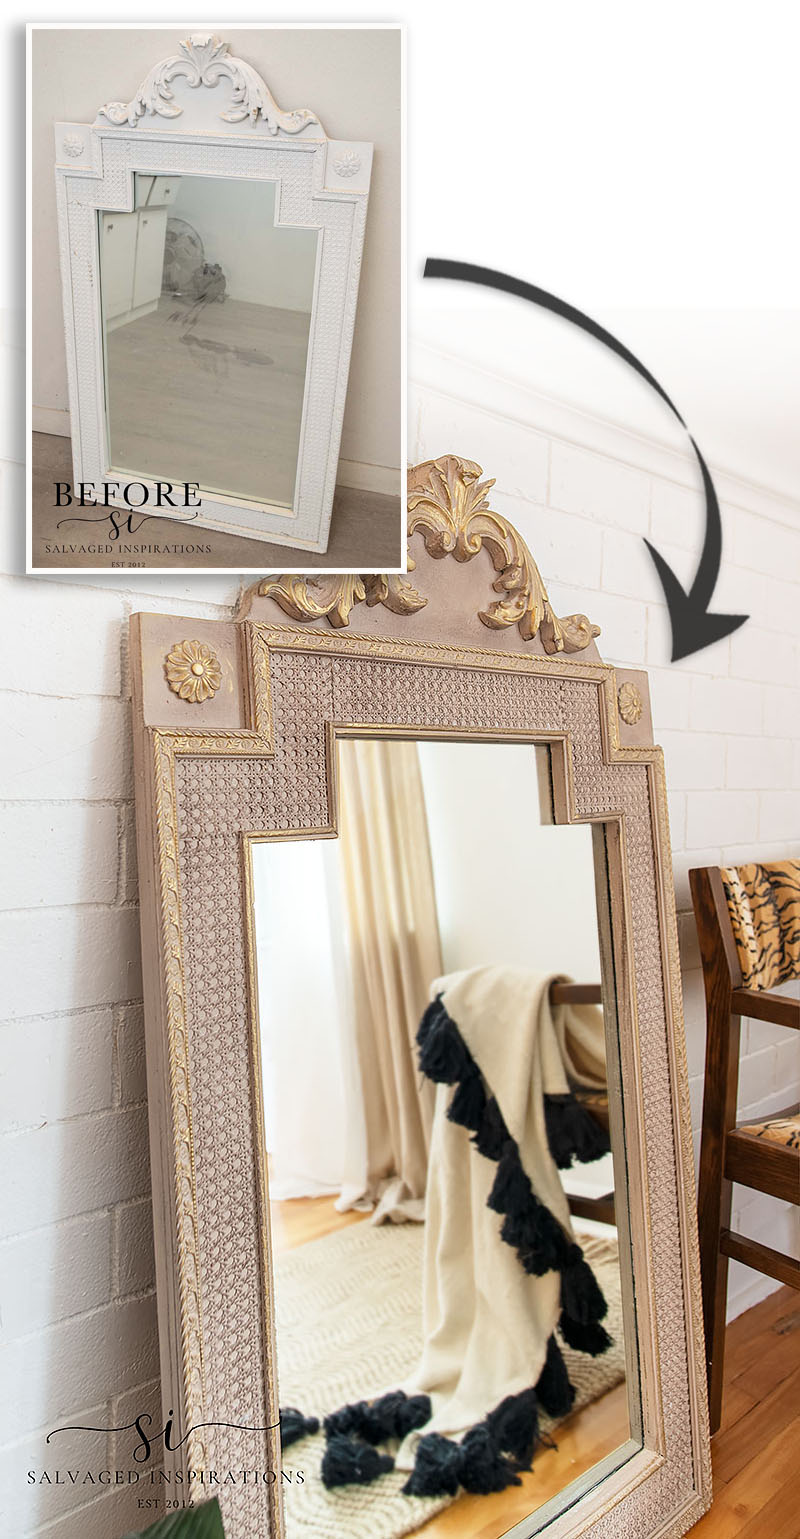
Here’s the 30-year-old mirror I started with. I believe its original finish was brown/gold. I must be getting old because I don’t remember…lol. But I do remember painting it white and not liking it so much. I took it down and put it in storage.
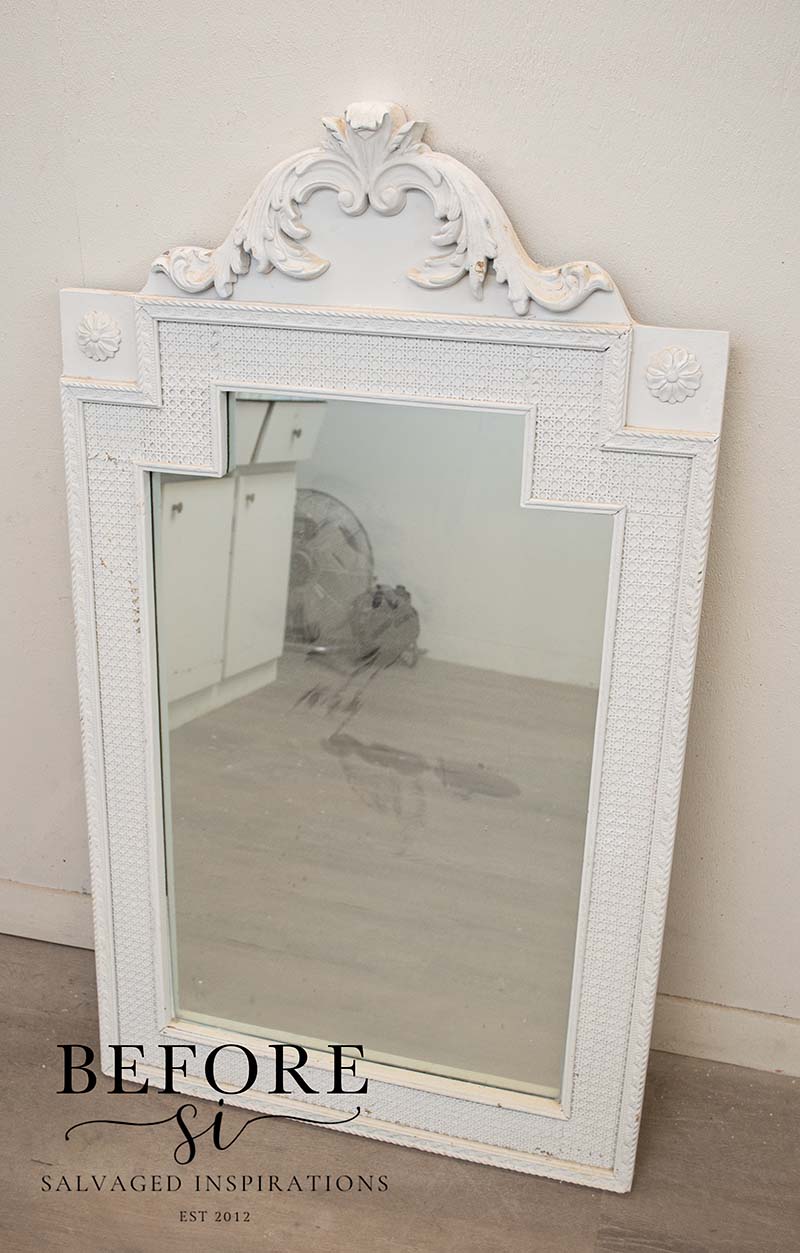
When I pulled it out of storage it was filthy and had a few chips, but check out all the gorgeous detail.
I love a classic piece that can stand the test of time. Over thirty years old and with an updated finish, I’ll be trying to make it look as amazing as the day I bought it. 😉
THIS POST IS SPONSORED/CONTAINS AFFILIATE LINKS TO PRODUCTS I USE. YOU CAN SEE MY FULL DISCLOSURE HERE.
WHAT YOU’LL NEED
Mirror – SALVAGED
Shop Towels | Windex
Razor Blade Mirror Scraper (40% OFF as of writing)
Oval Paint Brush
Cobblestone Chalk Mineral Paint
Brown Wax
Gold Gilding Wax
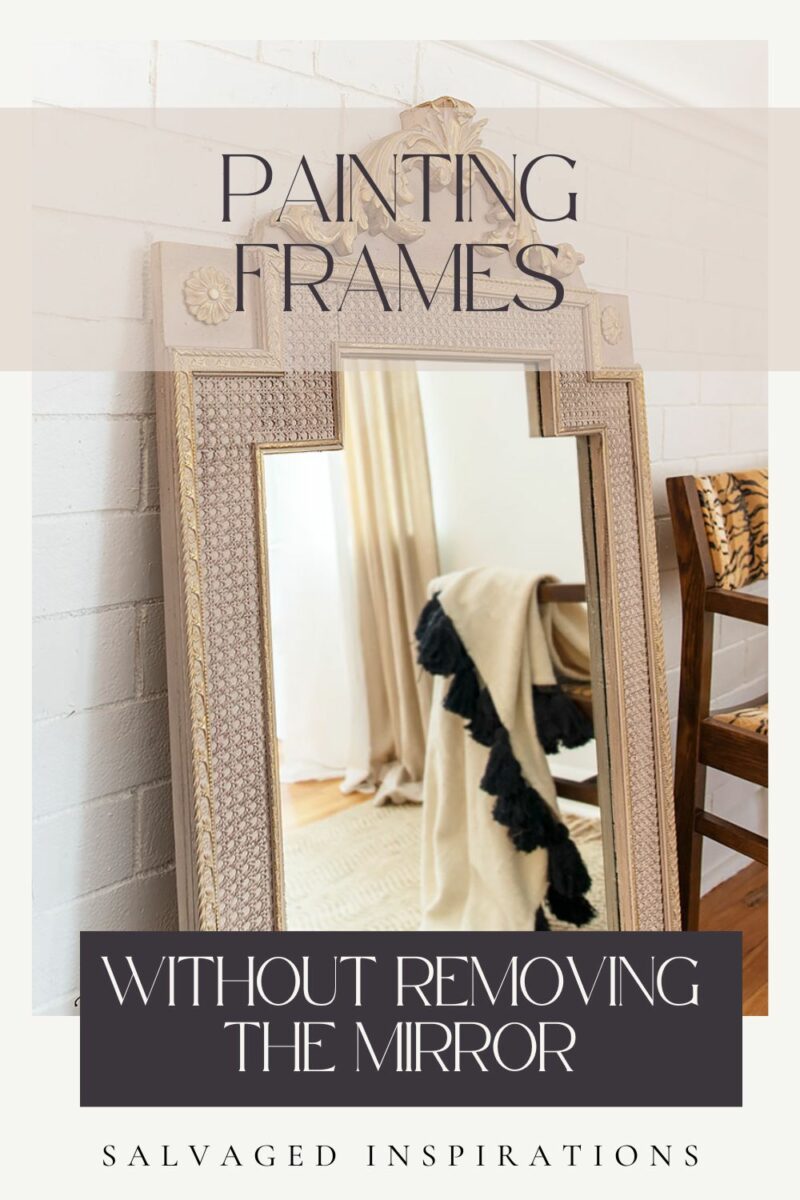
PAINTING FRAMES | MIRROR MAKEOVER
Here’s how this mirror frame all came together. I’m also sharing how to paint a non-removable mirror frame.
CLEANING
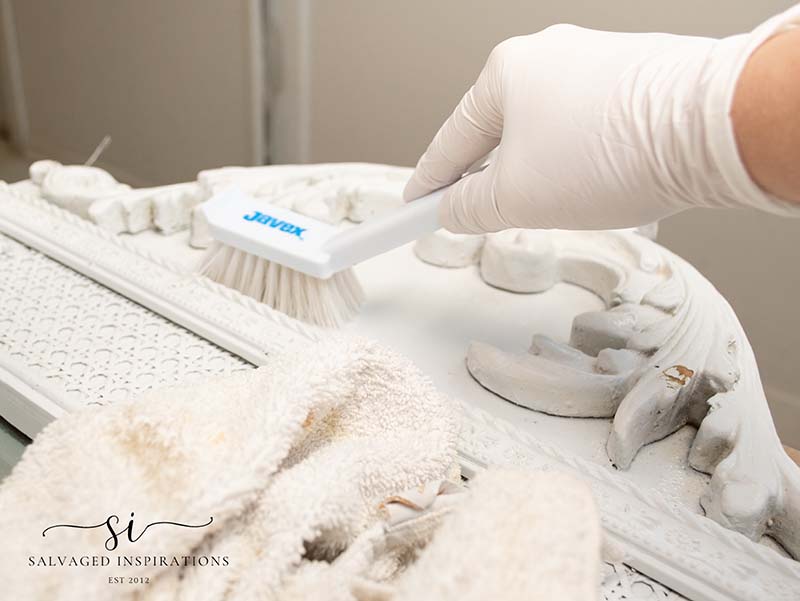
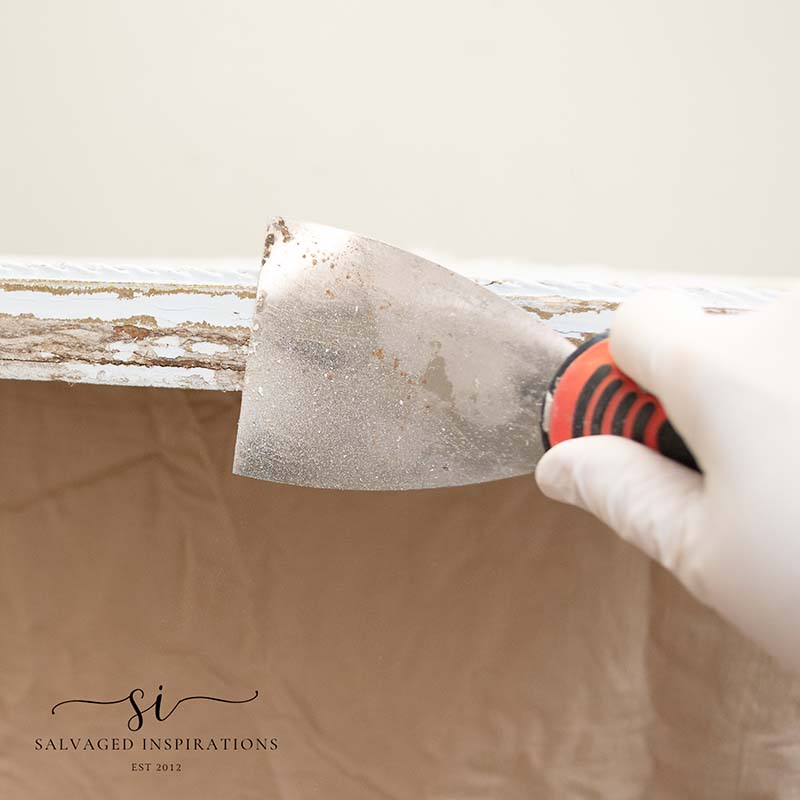
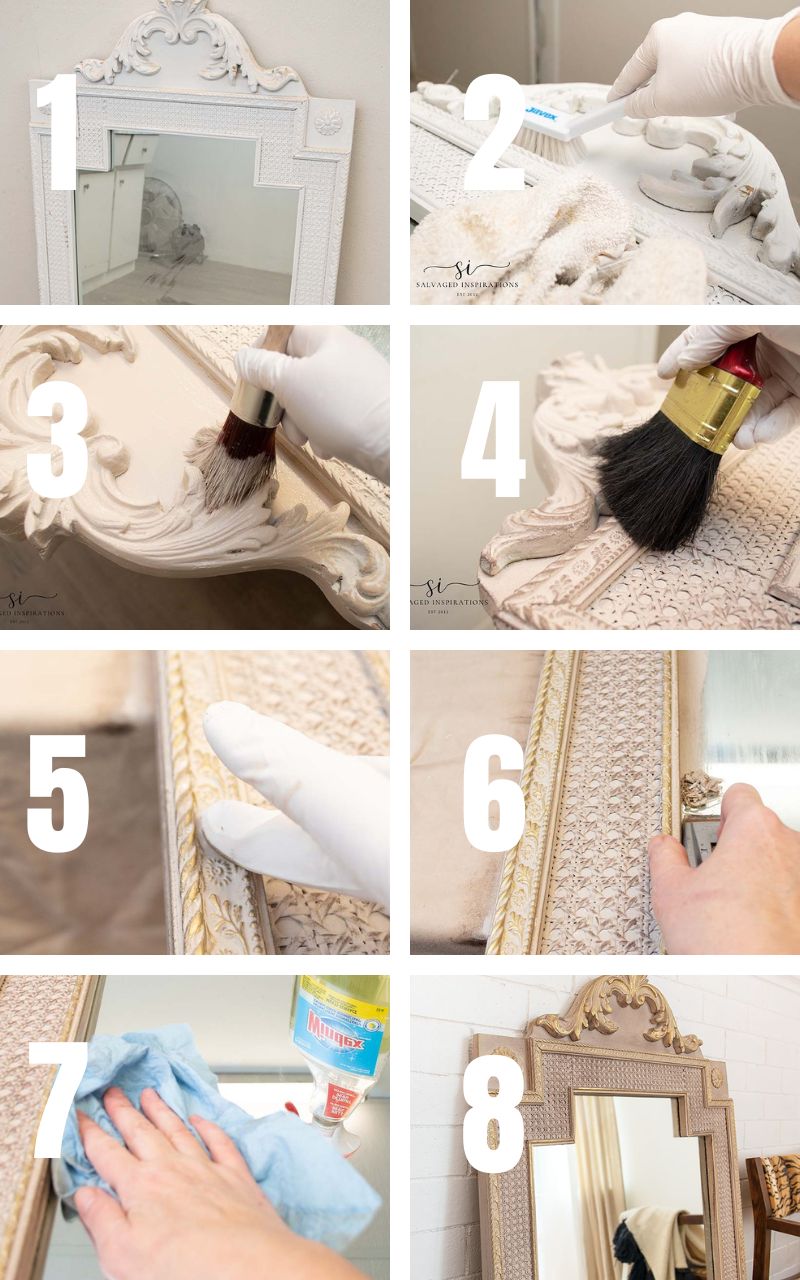
I started by giving this mirror frame a really good cleaning. I sprayed it with White Lightning Cleaner and used a Dollar Store brush to get into all the crevices. I made sure to have an old towel on hand to wipe and dry the scroll details and frame.
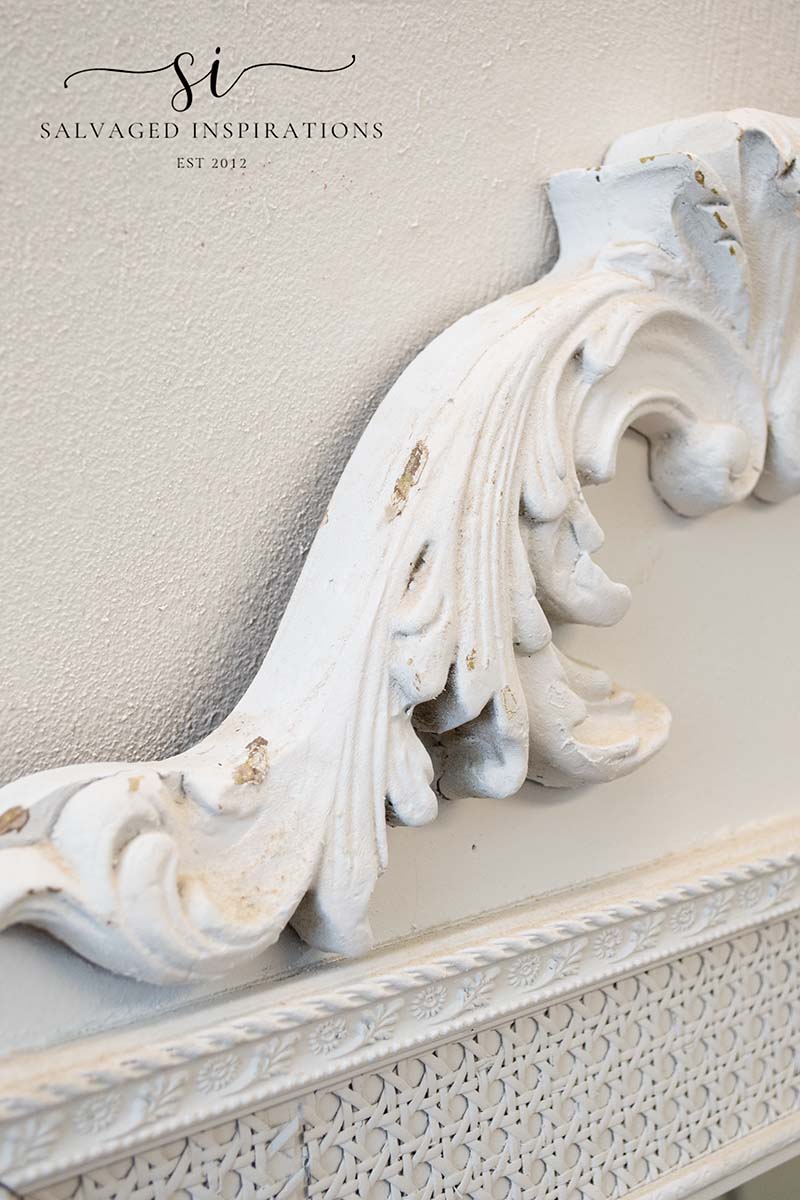
Once it was clean, I used a putty knife to scrape off any loose and chipping paint. Most of the chipping paint was on the bottom of the frame. I’m guessing from being on the floor in storage. And hey, lookie here. The original frame was brown and gold!
PAINTING THE FRAME
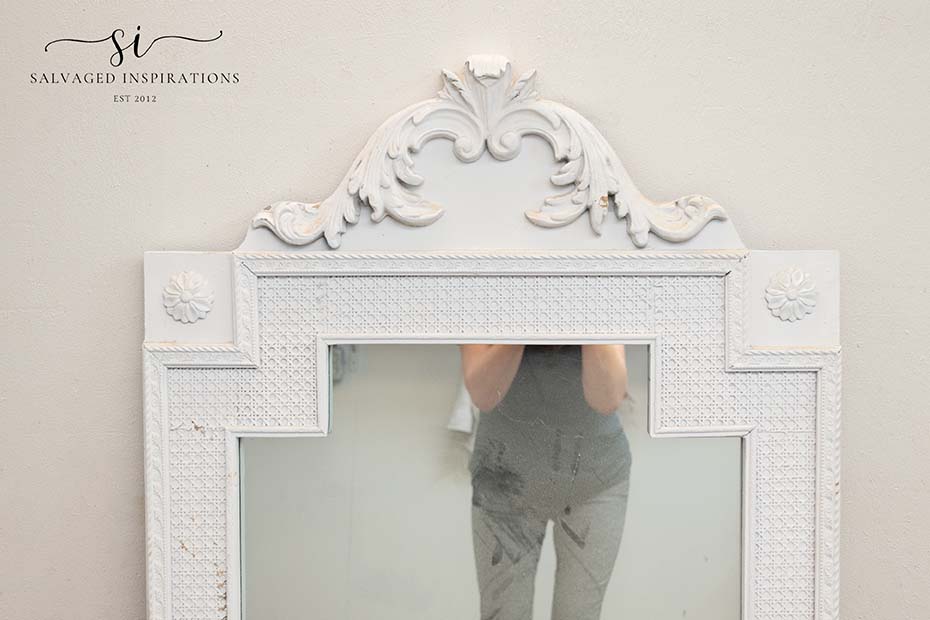
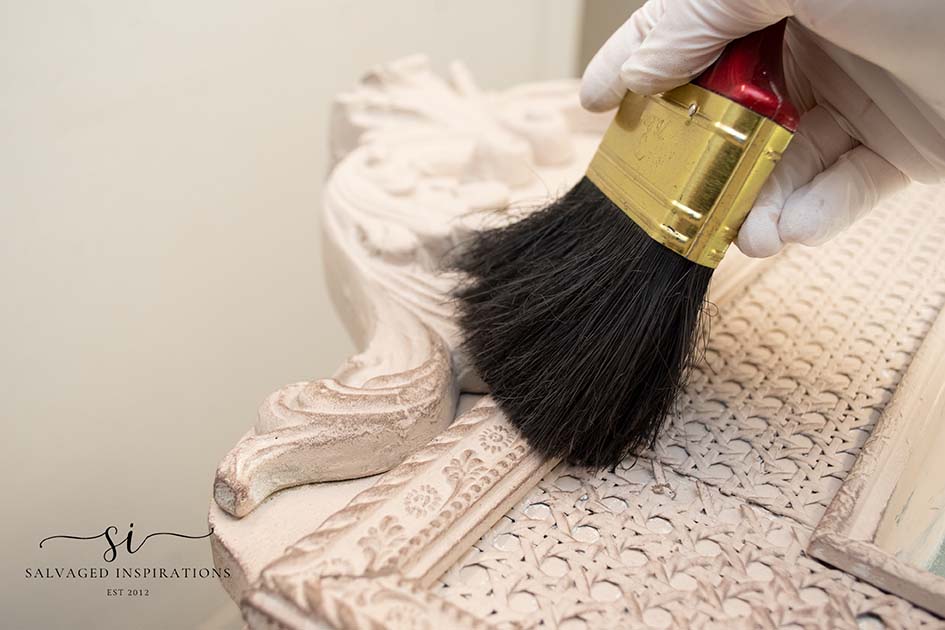
To get a neutral base I chose this Cobblestone Chalk Mineral Paint color. You may remember I used it on these Cobblestone Nightstands. I love this color. It was painted on super smooth using my medium oval brush.
Also, I didn’t worry about getting paint on the mirror. Rather than mask and cover the mirror up, I’ll share a quick way to remove the dry paint on a mirror below!
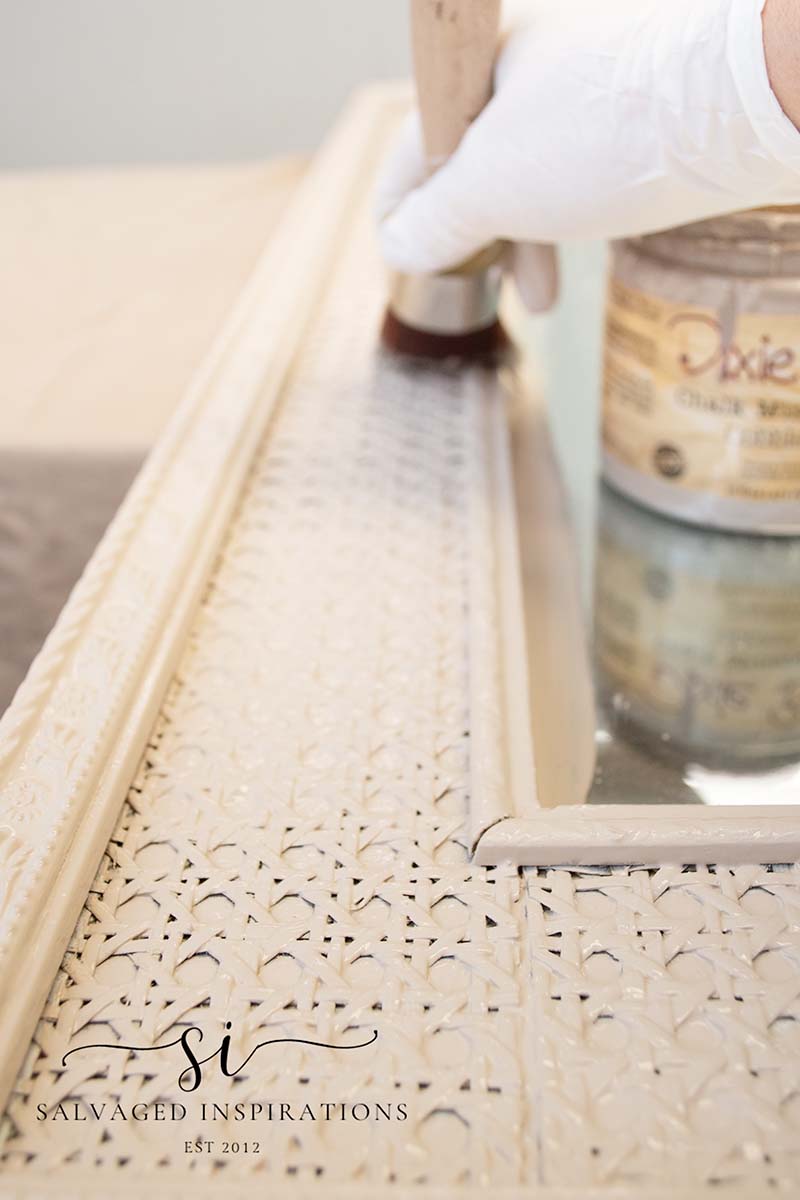
Pro Tip – To make sure the paint gets into all the crevices and rattan on this mirror frame, I pounced the brush up and down. A good quality brush is needed for this pouncing technique as a low-quality brush – the bristles will just break right off.
WAXING
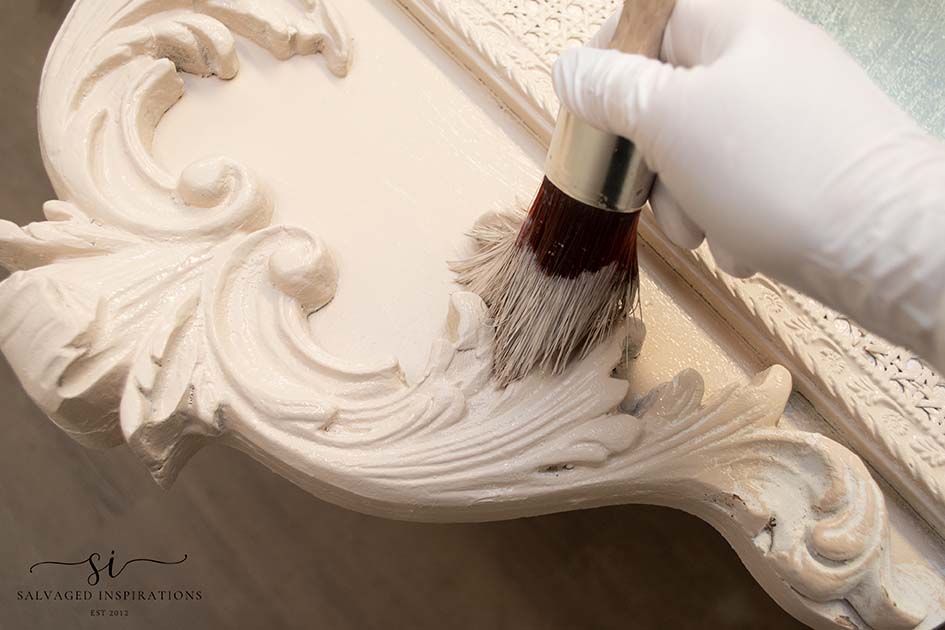
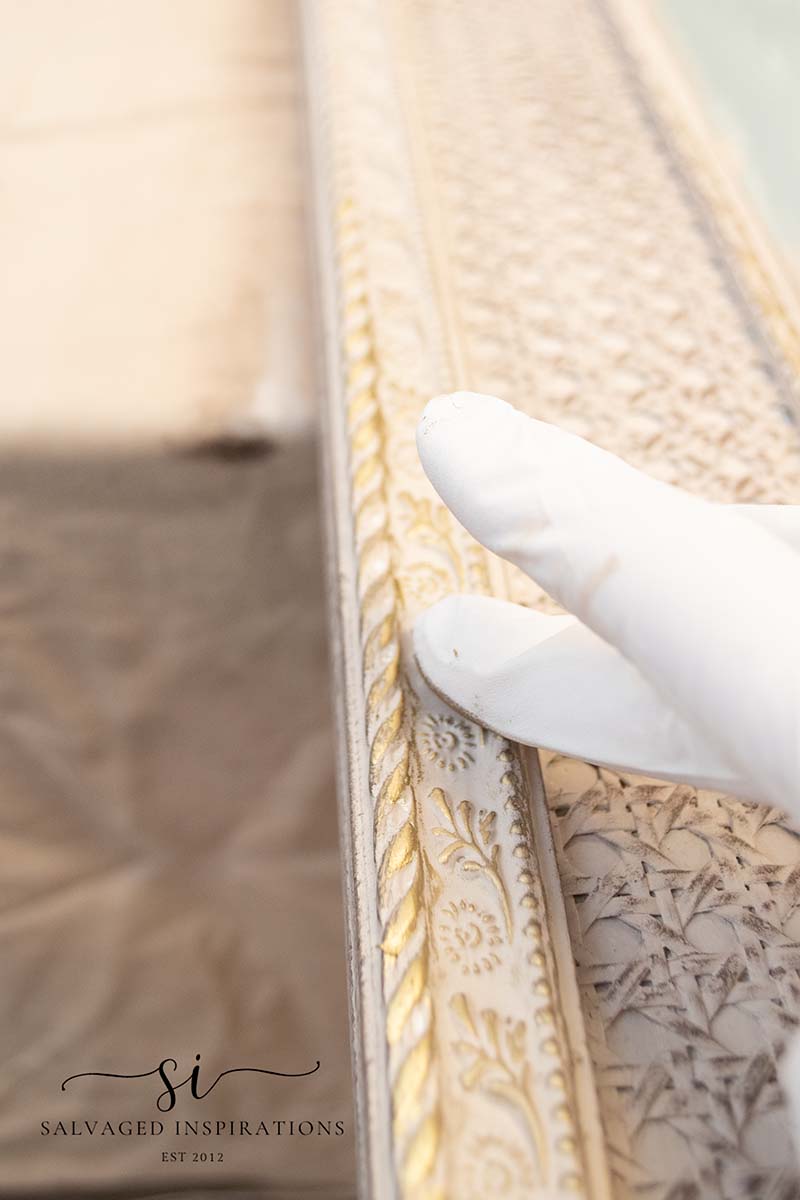
To give this mirror more dimension and age, I brushed on some brown wax. I have a designated old 3″ dollar store brush that I keep for waxing. I love it because I don’t have to worry about washing this brush out. It’s ready to go whenever I am!
I don’t use wax as much as I used to and I’m not sure why. It is an EASY way to create dimension and helps bring out the details with little to no effort.
GOLD HIGHLIGHT
To bring out some of the details, I rubbed on some gold gilding wax for the highlights. This is soooo fun. It seriously works like magic.
HOW TO REMOVE PAINT FROM A MIRROR
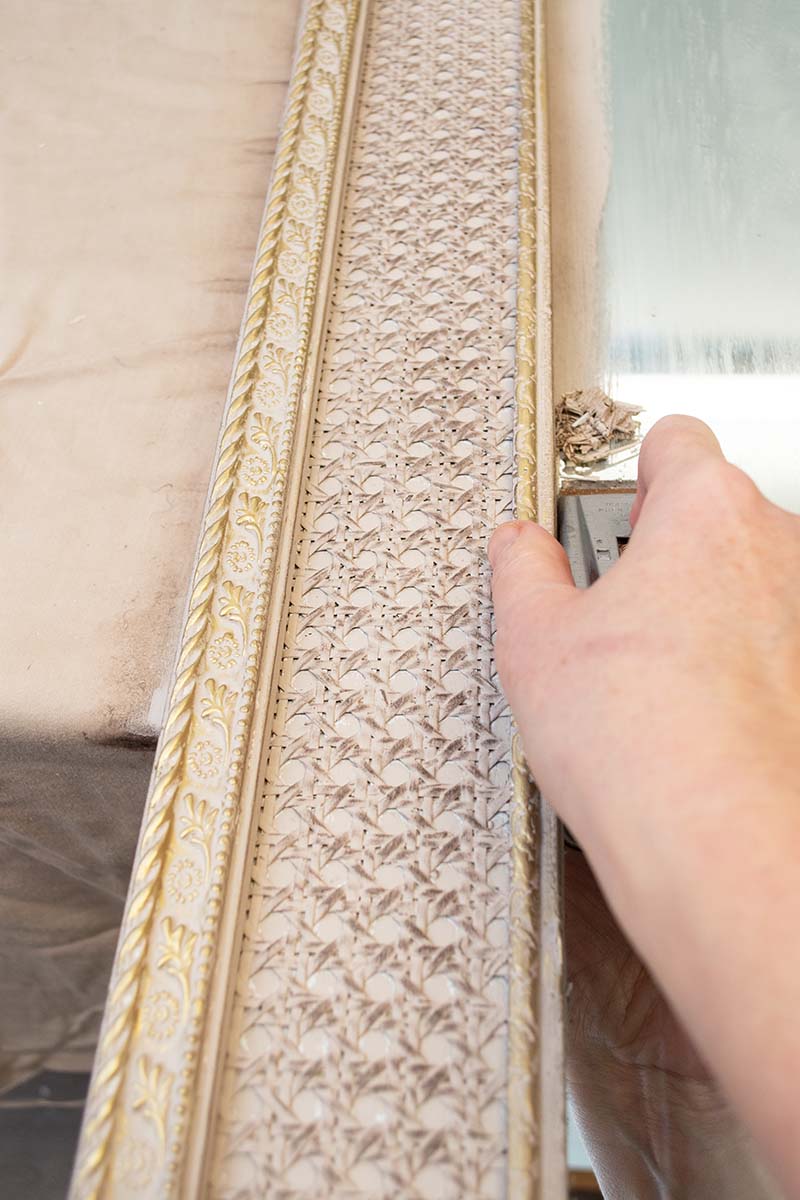
As I mentioned earlier, I didn’t worry about getting paint on the mirror. Instead, I prefer using my mirror scraper tool to remove the dry paint AFTER my mirror frame is all finished. This is a HUGE time saver! I picked up a razor blade mirror scraper online. As of writing this post, these Razor Blade Mirror Scrapers are 40% OFF! If you don’t shop online, they also sell at Home Depot and other hardware stores.
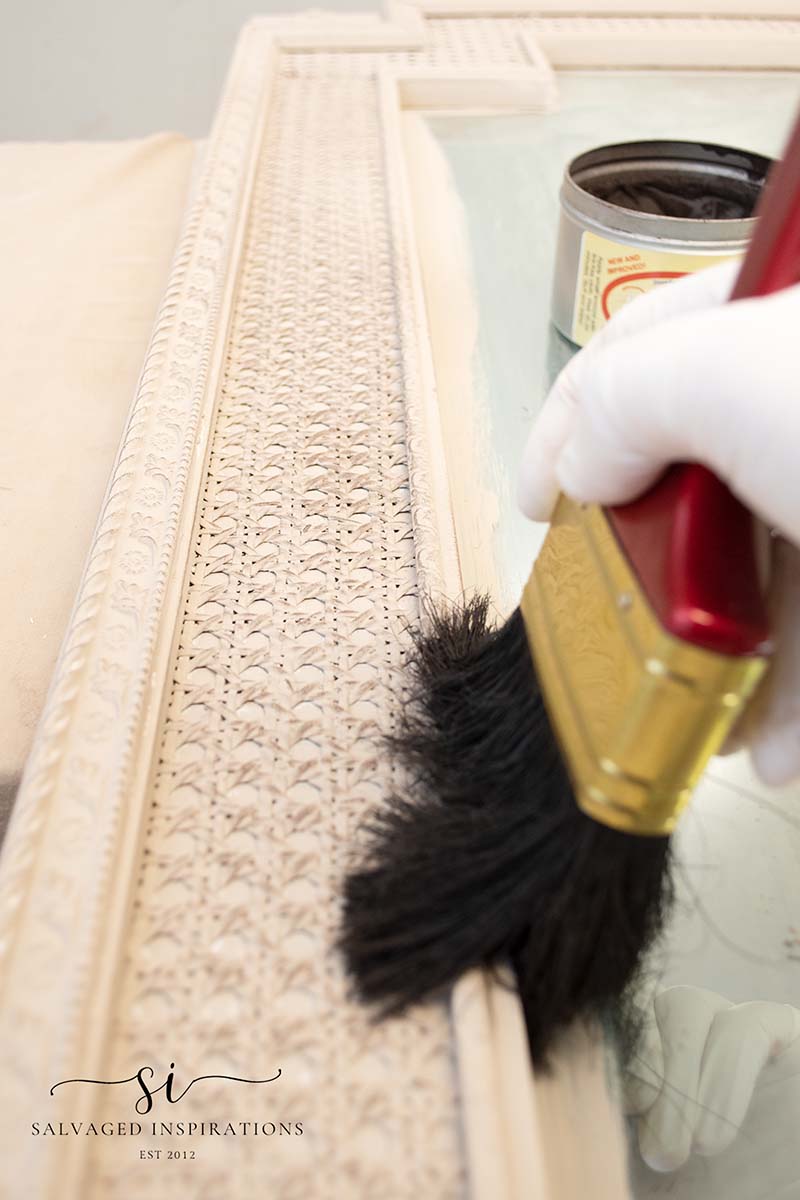
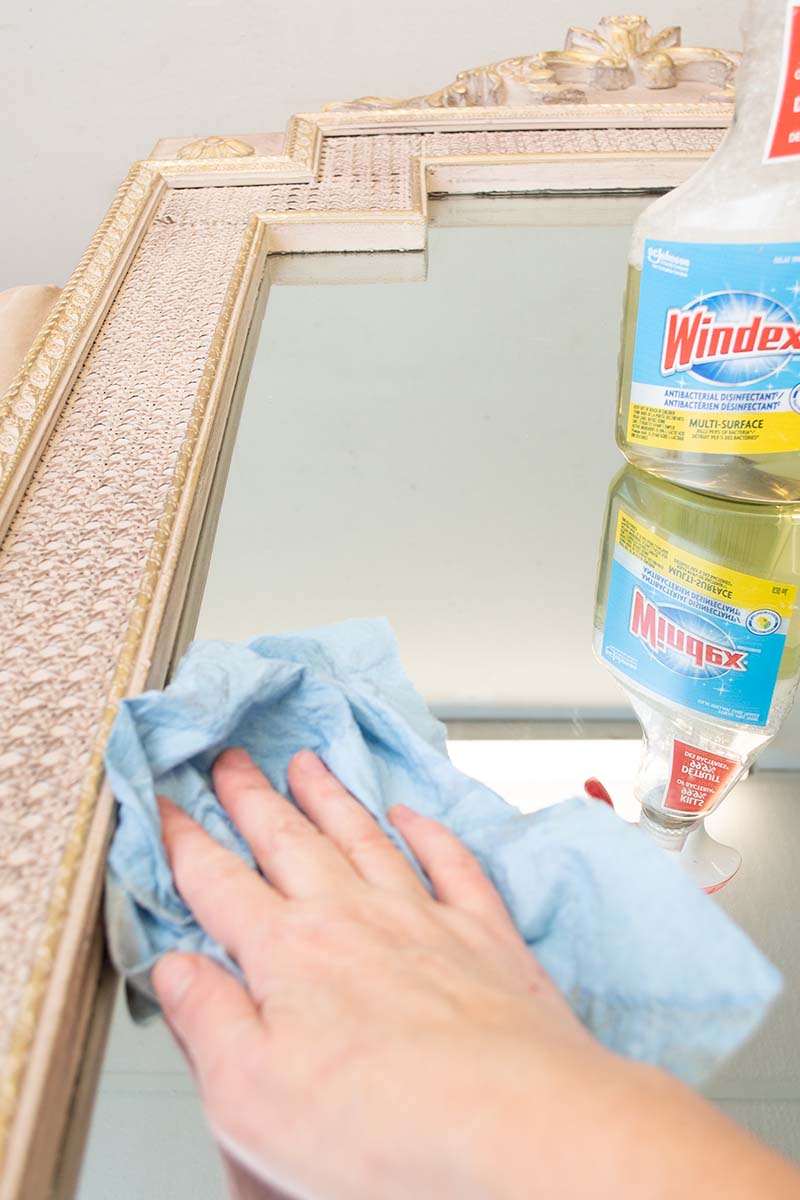
I cleaned all the shavings with my shop vacuum.
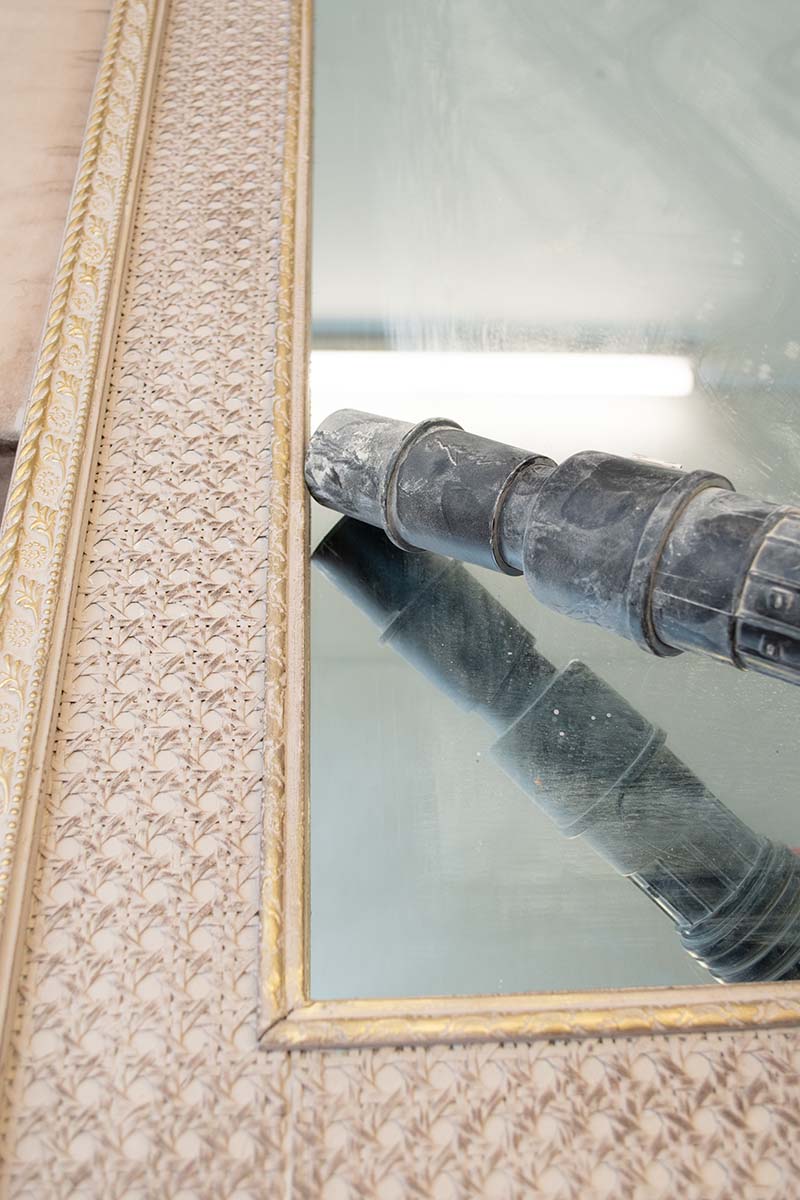
And then sparkled this glass mirror up with a soft shop towel and some Windex.
SHARE TO PINTEREST FOR LATER 🥰
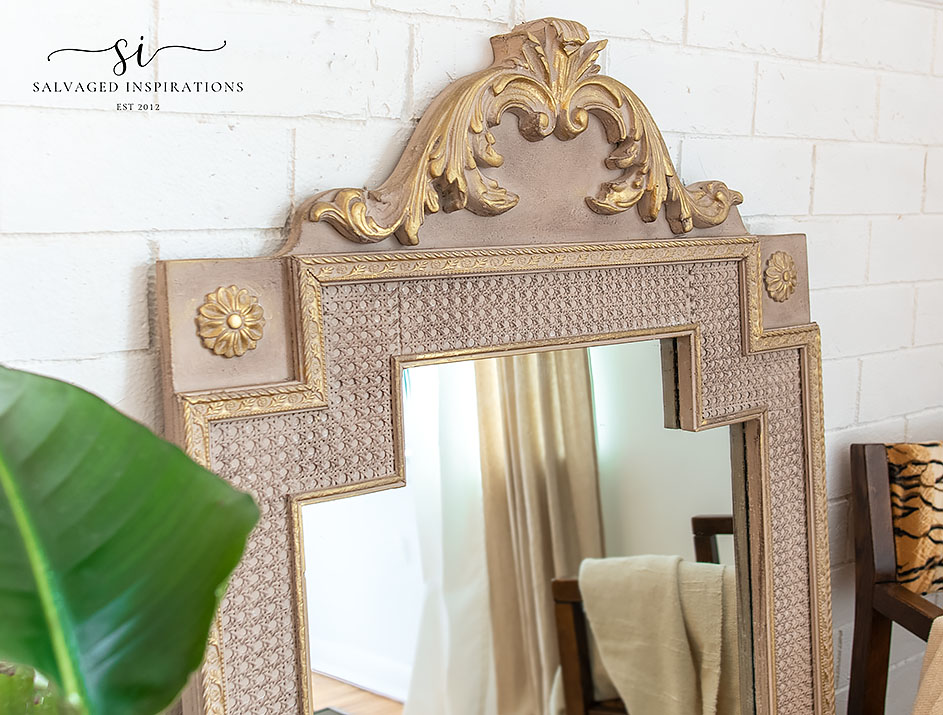
FINISHED MIRROR MAKEOVER
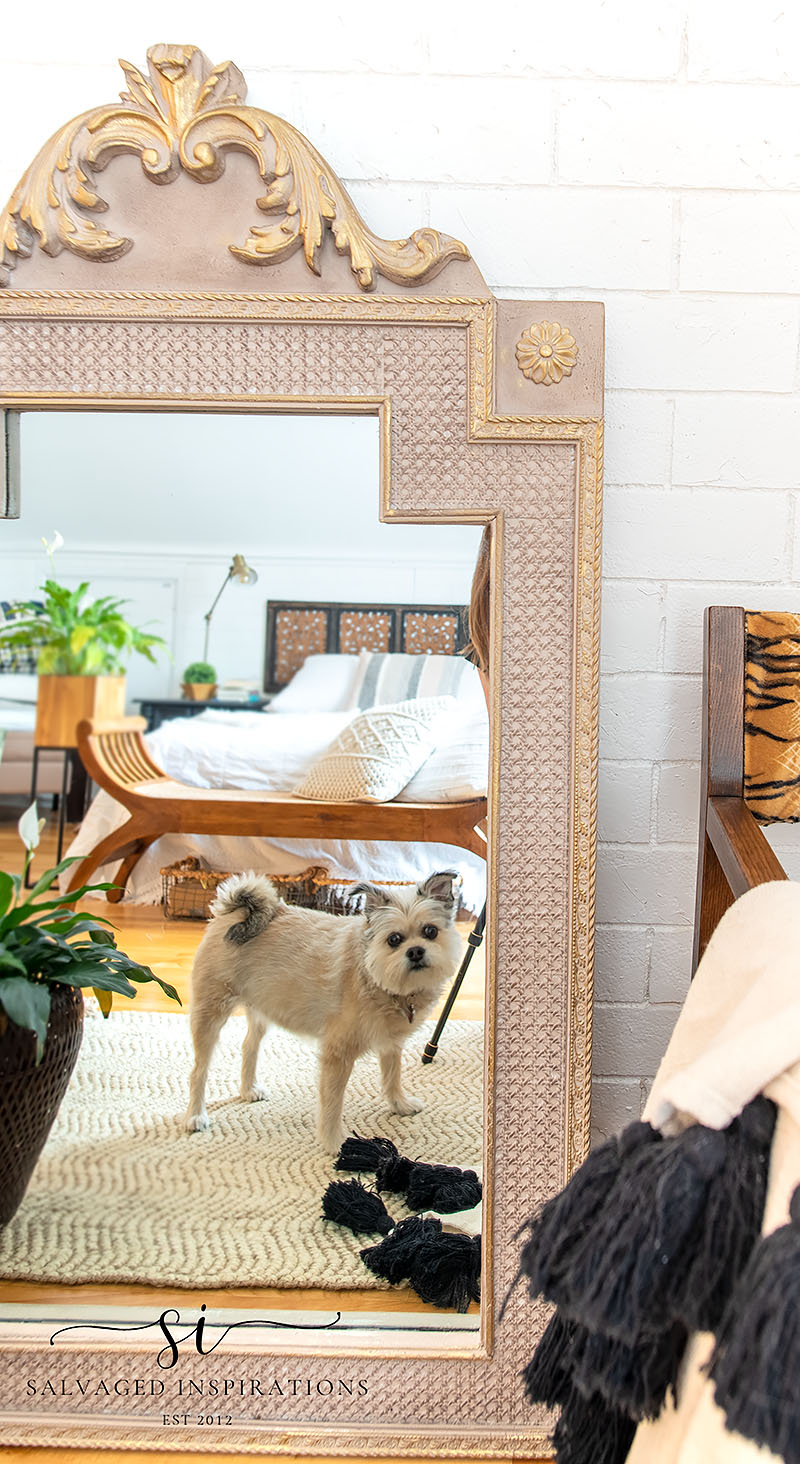
Here’s the finished look. What do you think?!

I love the Cobblestone with all the wax detailing.
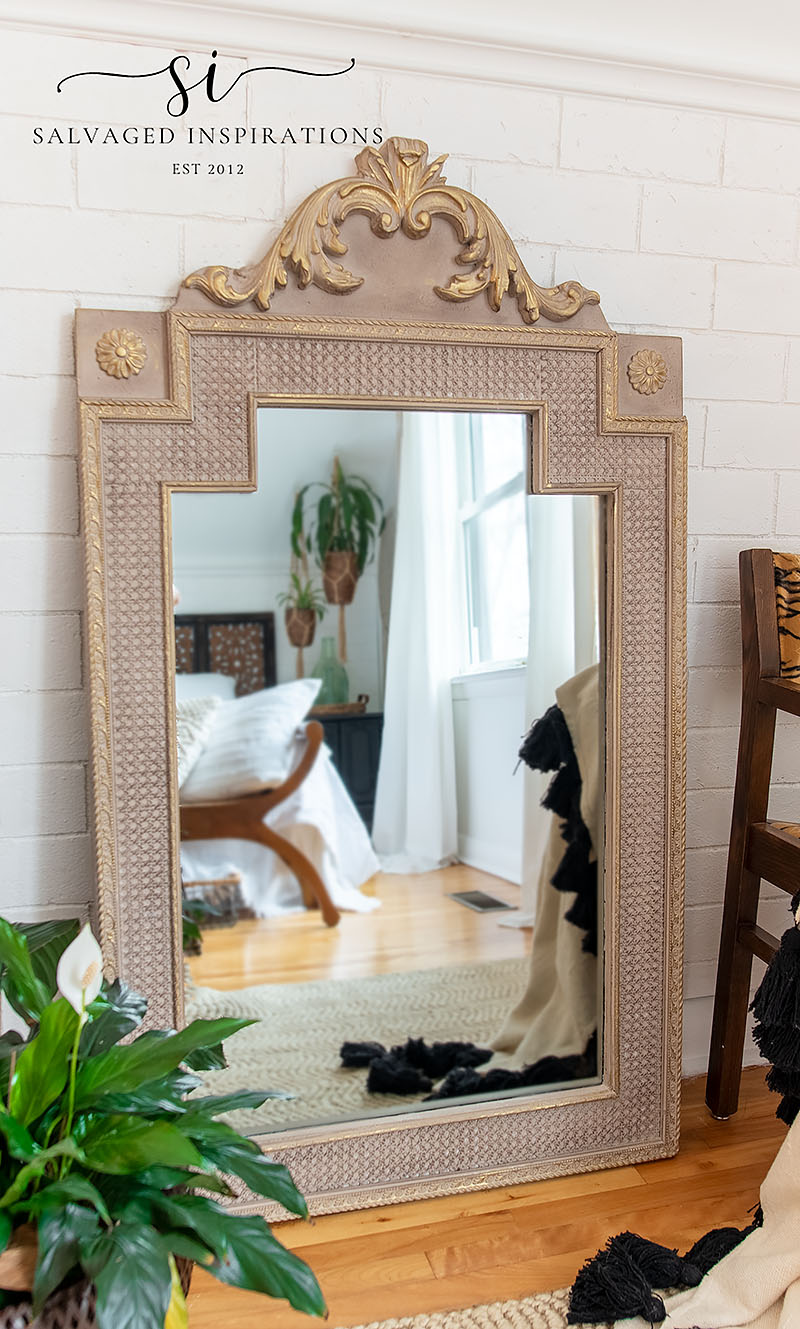
The gold gilding wax provides a beautiful contrast.
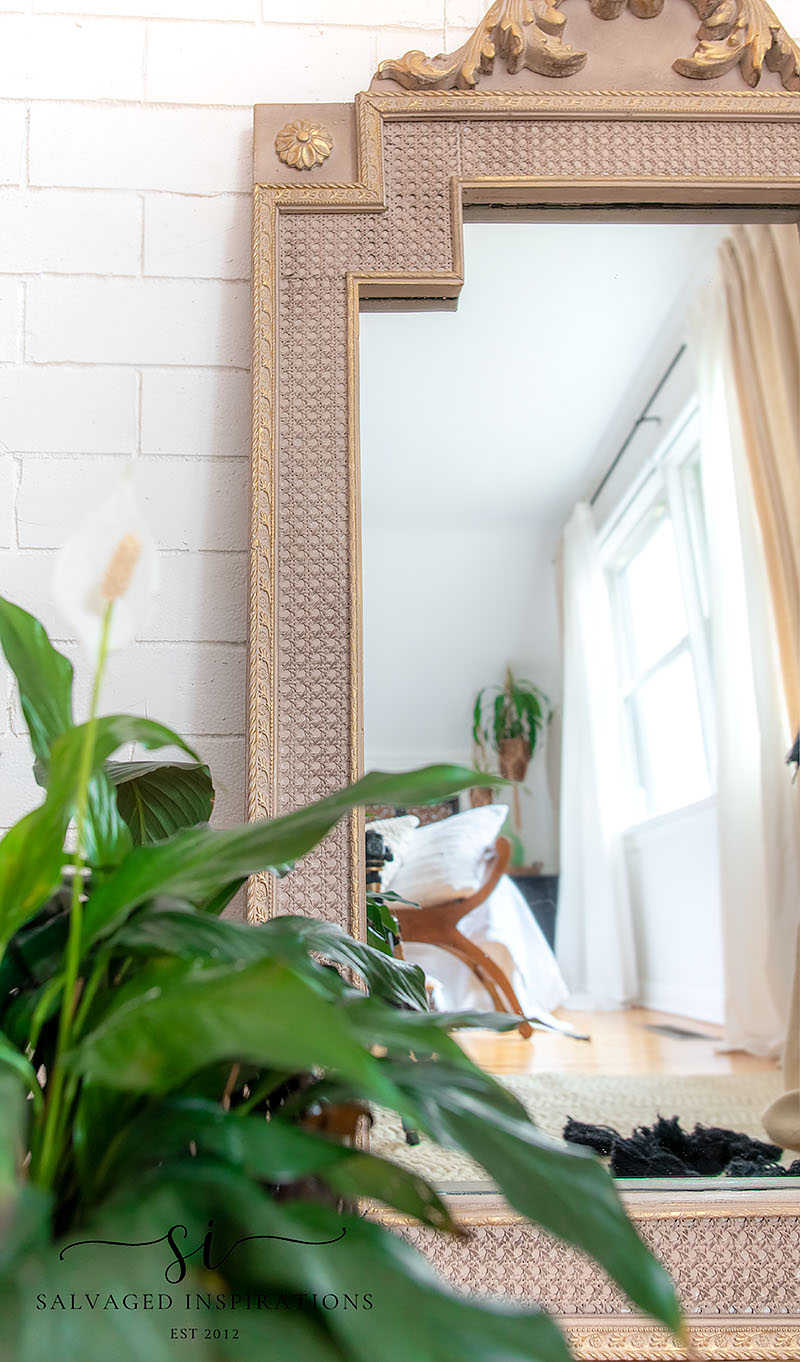
When photo shooting mirrors, the struggle is real. Does anyone else have this problem? You have to be SO AWARE of what’s in the reflection. And getting a straight-on shot without a tripod leg, me, or my Gidgy is near impossible. She’s lucky she’s so darn cute…lol.
I can’t wait to hear what you think of this NEW LOOK!
YOUTUBE TUTORIAL
Here’s the full step-by-step tutorial on YouTube. Our #siyoutubefamily is already a community of 42.7K so don’t forget to subscribe if you haven’t done so already! So exciting, thank YOU! 🙂
And now for some Trash To Treasure FUN!
You’re going to LOVE what my creative Trash To Treasure ladies do! 🙂 Below are the BEFORE photos. Visit the links underneath to see the amazing AFTERS and learn how they did it! I’m heading over to take a peek as well! x
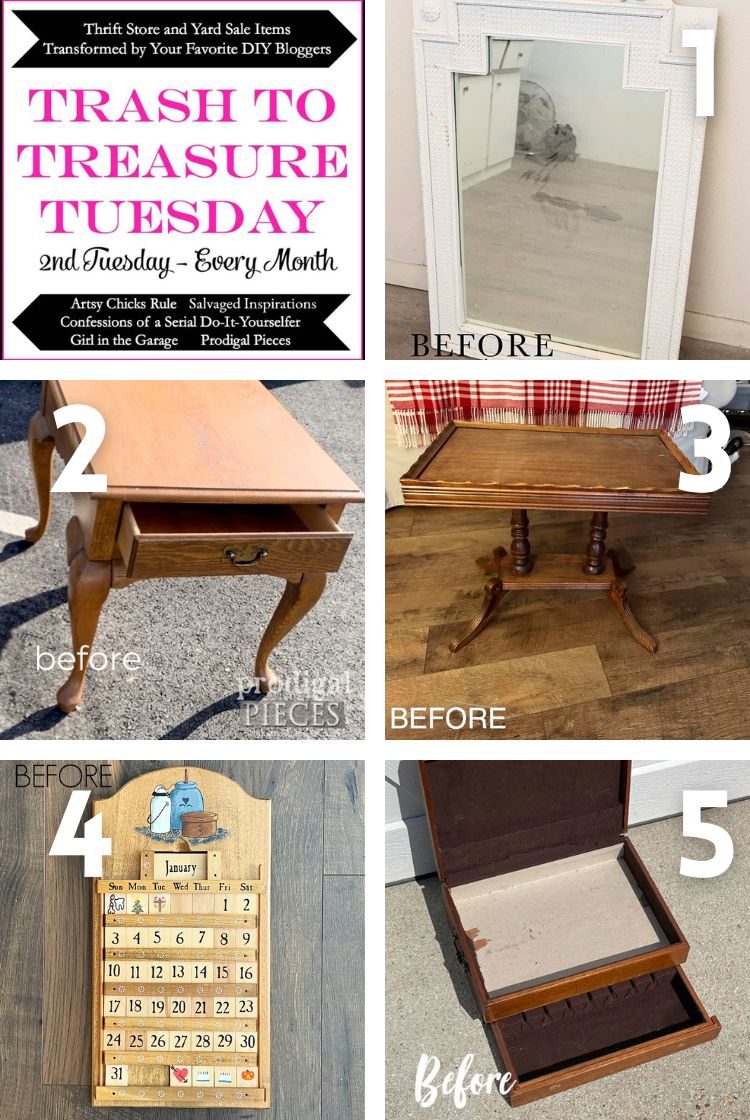
1. SALVAGED INSPIRATIONS (HAPPY YOU’RE HERE!)
2. PRODIGAL PIECES
3. ARTSY CHICKS RULE
4. GIRL IN THE GARAGE
5. CONFESSIONS OF A SERIAL DIYER
Here’s another look at this painted mirror frame before and after. I hope it’s inspired you and given you some ideas for your frame projects!
I’ll be back next Tuesday with another paint project. If you have any requests on what you’d like to see in upcoming posts, I’d love to hear your suggestions!
LET ME KNOW WHAT YOU THINK OF THIS FRAME AND MIRROR MAKEOVER OR FEEL FREE TO ASK ANY QUESTIONS YOU MAY HAVE… I ALWAYS LOVE HEARING FROM YOU. IT MAKES MY DAY! 🙂
Happy painting my friends!
Denise x
RELATED POSTS::
PAINTED GLASS & MIRROR | 12 MAKEOVERS
WOODUBEND MIRROR MAKEOVER
HOW TO UPDATE A MIRROR
DIY ANTIQUE GOLD MIRROR
HOW TO CREATE A ROPE MIRROR
PIN AND SHARE!

OMG! I love it! Amazing! It has a beautiful rose gold look to it, which I love. Fantastic!
I really love the gold wax as well! Thanks Anita!!🤗
I love the mirror! The gold really accentuates the details. And your dog is so cute 🙂 I have tried to get my dogs to look at themselves in a mirror, but they are not interested. I would like to try redoing a large mirror and you have inspired me!
Thanks Teresa! And have fun with your large mirror. That gold gilding wax work like magic, lol! And ya, Gidgy is such a cutie checking herself out.😂 I can’t believe it’s been 9 years since I got her. I look back 9 years ago when I first got her and she doesn’t even look like the same dog.
It looks like French Cottage style now – very pretty Denise! xo
Thank Jen! XOXO
I hate photographing mirrors! Ugh! But this one is just so gorgeous and elegant now! Great job! xo
Same…lol! Thanks so much Nancy! XOXO
Didn’t think I could like this piece because of the rattan, but your revamp made it GORGEOUS! You have a real talent for creating beauty.
Aw, very kind of you Cyndel, thank you!💜
You did it again, It’s beautiful!!!!
Thanks Carla!🤗
So beautiful ! Love the fur baby checking themself out!
Me toooo…lol. Thanks Deanna!
Hi D, I was just thinking how cleverly you had photographed the mirror! I wondered if you’d got some pro help because they are notoriously difficult to shoot. You don’t need to worry! Great photography!
Thanks John! and mirror ARE challenging to shoot! I know many photographers who take pics straight on and do not worrying about the reflection. Then they go ahead and photoshop an image/room scape in – which is one way to solve the problem. I prefer to take the shot on an angle to the right or left of the mirror and include a ‘natural’ reflection. I also fool around with the angle of the mirror. You may notice I didn’t put it flush against the wall but I have it leaning more back which helps as well. 🙂
I love the soft neutral color – and the brown wax added such warmth.
The gilding wax adds a touch of elegance.
Amazing how the entire ‘style’ of this piece has changed.
I have a white wood mirror I got a TJ Max 20+ yrs ago.
It has a random daisy pattern cut into it. I like it, but don’t want it to
look ‘cutsy” / childish. Your redo might help w that.
Thanks
Oh ya, these older mirrors are built to last and can be changed up numerous times. I’ll bet you can totally restyle that mirror!😃
Lovely update to a great mirror. Thank you for your technique.
Thanks so much Tracy! So happy I updated it. This mirror is a tank and weighs a ton…lol.
Simply W O W !
Aw, thanks so much Donna!🤗
What a difference! BTW, you mention your waxing brush is always ready. How do you store it? Thanks!
Great question! I have all my paint brushes stored in one of these 3 drawer plastic drawer/bins on wheels and I just throw it in there. I don’t wash it. I don’t cover it with plastic. I leave it au-natural and chuck it in the drawer. I’ve been using it for my dark waxing for at least a couple of years now and I’ve never had any problems. 🙂
Hi Denise! The mirror turned out so pretty. I love the gold on there. What a great mirror. Thank you for sharing
I love the gold highlights too. 🙂 Thanks so much Cheryl! XOXO
You took this mirror to a whole new level. Very Upscale! The cane just pops and gives it elegance.
Thanks Fran! I love the texture on this frame as well. Many times I debated whether or not to give it away to a thrift store (because it was just sitting in storage taking up space) but I’m really glad I didn’t.
The mirror is beautiful, Denise. I bought the razor scraper and I can’t wait to try it. Thanks for sharing!
Thanks Nicki and I’m so glad! Feel free to let me know how it works for you. I think you’re going to love it!
This is absolutely stunning now, Denise! It looks so high end/luxe and it works so well in your gorgeous bedroom! And yes…the struggle with photographing mirrors is real lol! XOXO
Thanks my friend! And ya, mirrors are my least fave thing to photograph.😂 My sweet little Gidgy girl is always crazy glued to me so getting a shot without her was a challenge.🤣🤣🤣
I know the struggle is real, but I love the Gidgy picture the best lol!
Meeeeee toooooo…lol.💕🐶
Such a beautiful transformation. Great job Denise! Love your posts!
Thanks Maryanne! XOXO
beautiful…great job and I love it
Thank you Cathy! XOXO
Hi Denise. This mirror turned out beautifully. From plain to a classic beauty. Well done. I also love seeing little peeks of your gorgeous home. Your puppy Gidget is adorable.
Thanks so much Monique…and yes Gidget is!!!🐶 She’s sweet and adorable on the inside and out… she’s like a littleDisney character, lol!💕
LOVE the dark wax and gilding, Denise. The base color is great, too. Good job as always! Now, will you use it or sell it?
thanks Caye!!! I’m going to keep it but I really don’t know where to put it yet.🤔 I have a taller mirror in that corner of the bedroom (about 5’tall full length) which is great for a dressing mirror. This one is too short for that corner. But I’m still hoping to find a great place for it. 🙂
Thanks Denise – truly an inspiration – always!
Thanks Gwen!🤗
I love the new look with the gilding. Beautiful job, Denise.
The gilding wax added a lot, didn’t it?! Thanks my friend. XOXO