HERE’S HOW TO FIX VENEER, PLUG HARDWARE HOLES, AND REPAIR SMALL AND LARGE WOOD IMPERFECTIONS WITH BONDO. [VIDEO]
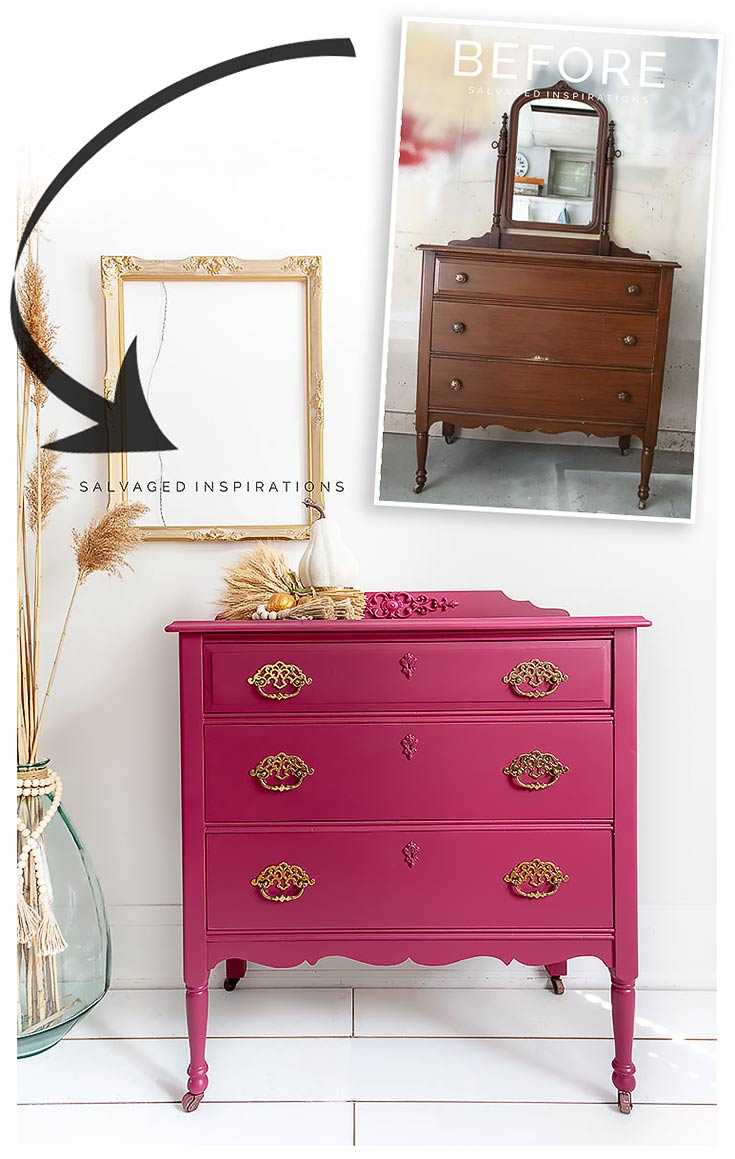
Hi sweet #sifamily and thanks for joining me! Today I’m sharing this gorgeous Plum Crazy Dresser before and after but it didn’t start that way. I used BONDO to repair the beat-up veneer, wood scratches, imperfections, and to fill in the old hardware holes. One product fixes all! This isn’t my first post on Bondo Repairs but it is my first video tutorial, so I hope you find it helpful.

If you’re working with damaged furniture—scratches, chipped veneer, or old hardware holes—learning how to use Bondo for furniture repair can completely transform your results. Bondo isn’t just for cars – which is exactly what I used to think! I remember my Dad using it for body work on our Ford LTD. It’s one of the fastest and most durable ways to repair wood furniture, fill deep imperfections, and prep a piece for paint in minutes.
Here are a few reasons why I love BONDO…
- It dries SUPER hard and is durable.
- Unlike wood fillers, you can drill through it, and it will hold a screw. {Perfect for new hardware!}
- It can be applied, sanded, and ready for paint or primer all within 15 minutes.
- It can be used for large or small wood imperfections.
Here’s the beat-up vintage dresser I started with…
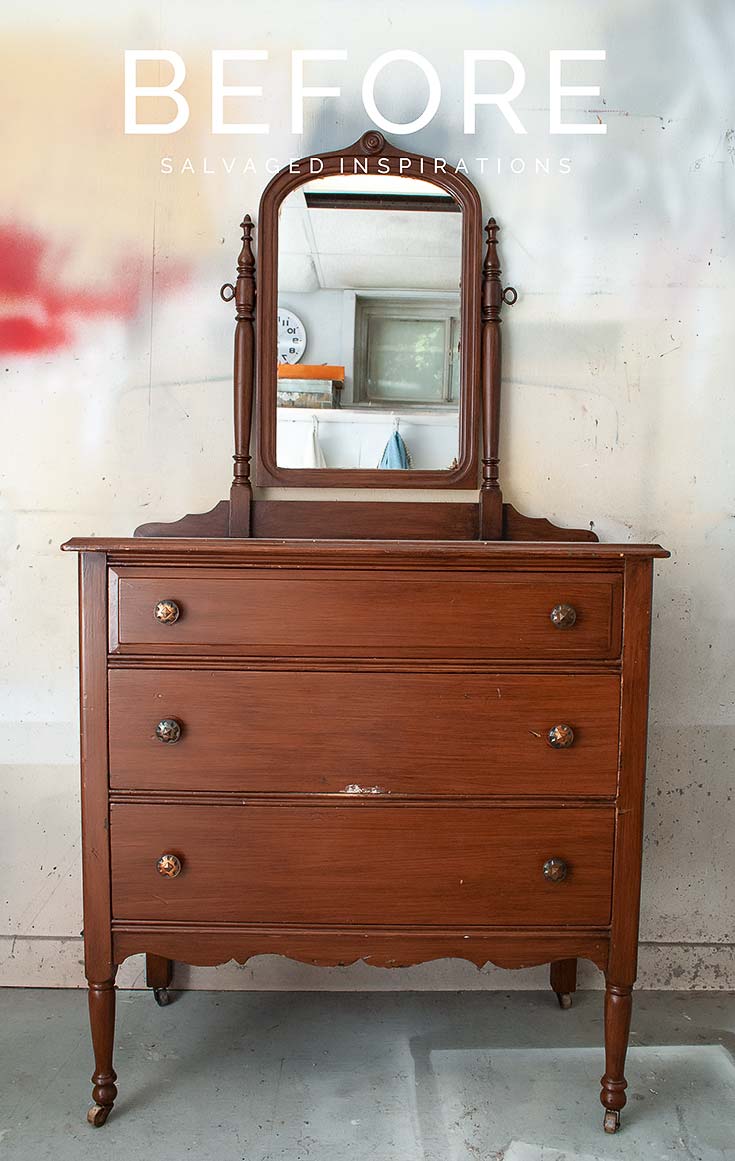
It doesn’t look bad, right? That’s what I thought too. But after driving 40 minutes to see it in person, it had its fair share of issues, as you’ll see later in the post.
THIS POST IS SPONSORED/CONTAINS AFFILIATE LINKS TO PRODUCTS I USE. YOU CAN SEE MY FULL DISCLOSURE HERE.
SOURCE LIST
Vintage Dresser – SALVAGED
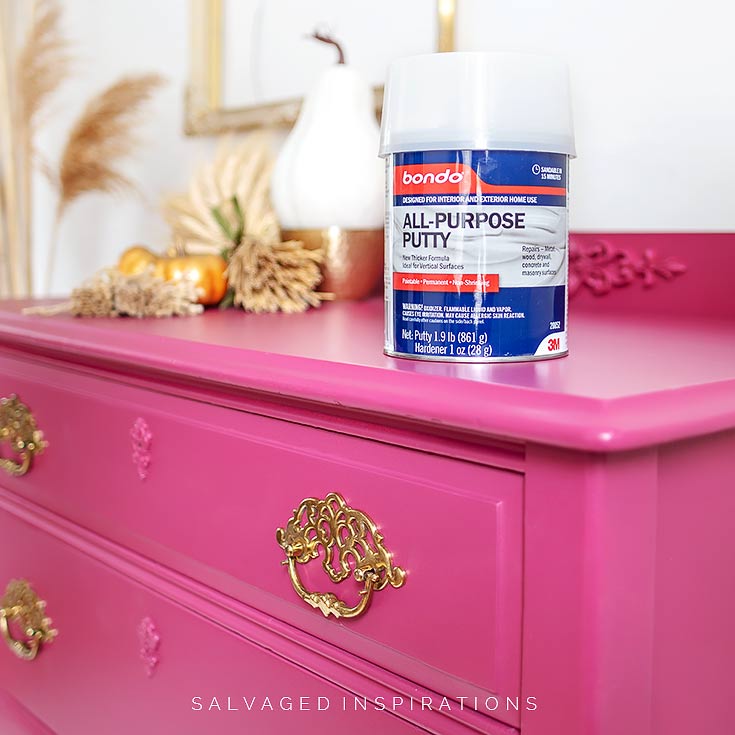
Bondo All-Purpose Putty
Putty Knife
Orbital Sander
BIN Shellac Primer
Spray Gun or Paint Brush
Plum Crazy Chalk Mineral Paint
WoodUbend Pendiment
Gloss Topcoat
How to Use Bondo for Furniture Repair (DIY Guide)
Here’s the full video tutorial on the repairs. If you have any trouble viewing it in your browser, feel free to click on my Youtube Channel here… and don’t forget to subscribe! 🙂
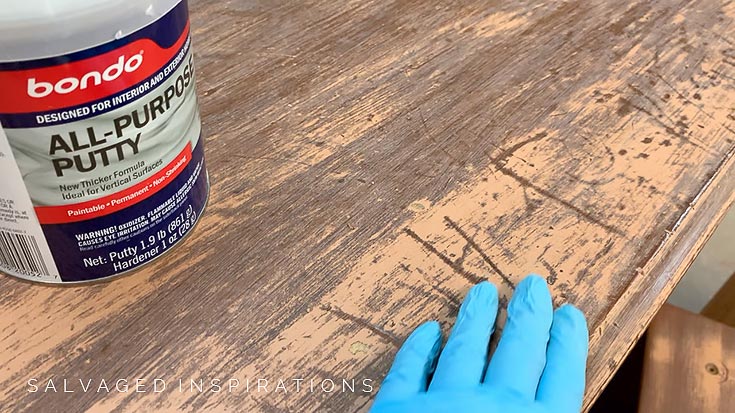
STEP 1 – CLEAN AND SAND
Before doing any repairs, I cleaned this piece and sanded down the finish to even out the scratches as best I could. Even after a good sanding with my favorite orbital sander, there were still deep scratches and gouges that needed repair.
STEP 2 – MIXING BONDO
Because Bondo dries in minutes, I work in small batches. I stir the product in the can with a putty knife. A plastic or metal one can be used because they both work well. Then I take out about a golfball-sized amount of putting and plop it on my mixing plate.
The instruction recommends Bondo be mixed on a non-porous surface like plastic or sheet metal or glass for example. I’ve used them all. I’ve also used paper plates and scraps of wood and cardboard and have never had any issues. In the pic below, I’m mixing it in my old Bondo lid.
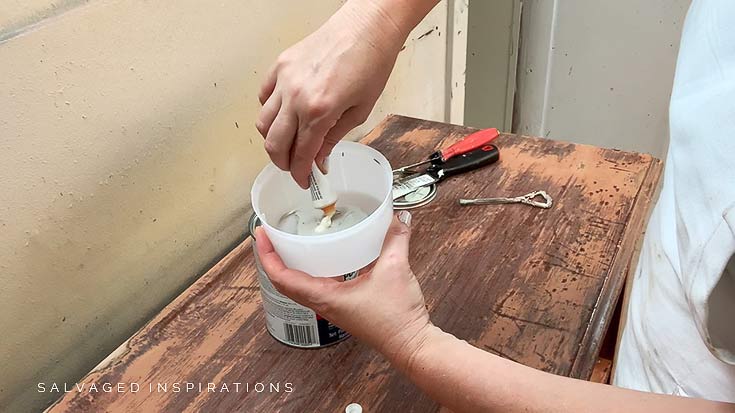
To activate Bondo, it is a two-step process. A tube of hardener is included in the lid of the Bondo can.
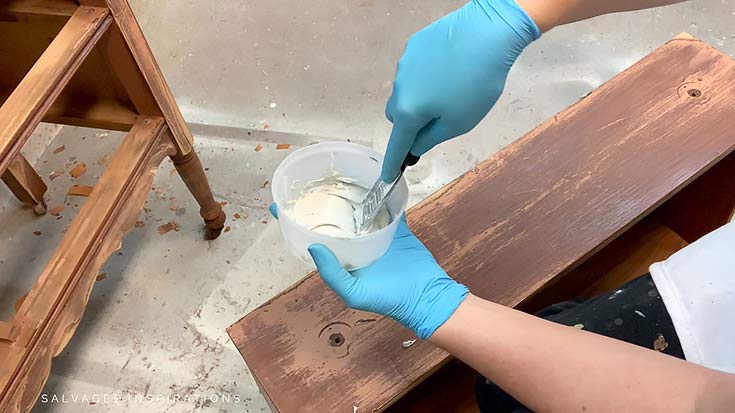
After placing my golfball-sized putty on my mixing plate, I add a pea-sized dab of the hardener and mix them together for about 30 seconds. Once mixed 100% – it’s ready to apply on the furniture.
STEP 3 – APPLYING BONDO
I’m not too particular about applying it. I make sure my hardware holes are completely covered and slightly overfilled for smooth flush sanding. If you end up underfilling, no problem. You can go back and apply a second coat to even everything out.
I demonstrate this with the veneer repair in the video so you can see how it’s done. I also share a super-easy way of removing any overfilled hardware holes on the back of your drawer!
The key is to work fast. Depending on how much hardener you add, there is usually between 3-5 minutes of workability with this product.
STEP 4 – SANDING THE BONDO
I find it’s best to use an orbital sander or palm sander to sand down Bondo because it is SO HARD, it takes forever to sand by hand. I place my furniture on a level surface and sand the Bondo flat with the original wood. For problem areas such as peeling veneer, more than one application might be required to get a super smooth finish.
STEP 5 – PRIME & PAINT
I applied two coats of BIN Shellac Primer to even out all the Bondo patches and sanded wood. Once the primer was dry, I used my Spray Paint Gun and sprayed 3 coats of this beautiful and vibrant Plum Crazy Chalk Mineral Paint. If you don’t have a spray gun, using a good paintbrush works just as well.
TOPCOAT TIPS
I used a gloss top coat to highlight the new smooth finish. When a finish is super smooth, a high gloss looks amazing. When a finish isn’t as smooth, a high gloss will reflect the light and SHOW all the imperfections. It’s something I keep in mind whenever I’m choosing a topcoat.
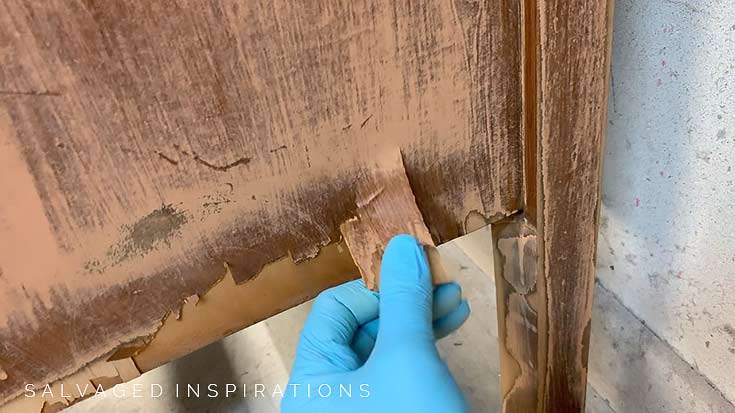
BONUS – TIPS FOR VENEER REPAIR
Depending on the size of the damaged veneer, instead of gluing it back down and fiddling with it, I sometimes find it easier to rip up the damaged veneer and fill in with Bondo All-Purpose Putty. It saves me time on the repair because ripping up veneer takes a few minutes in comparison to gluing it down and waiting for dry time.
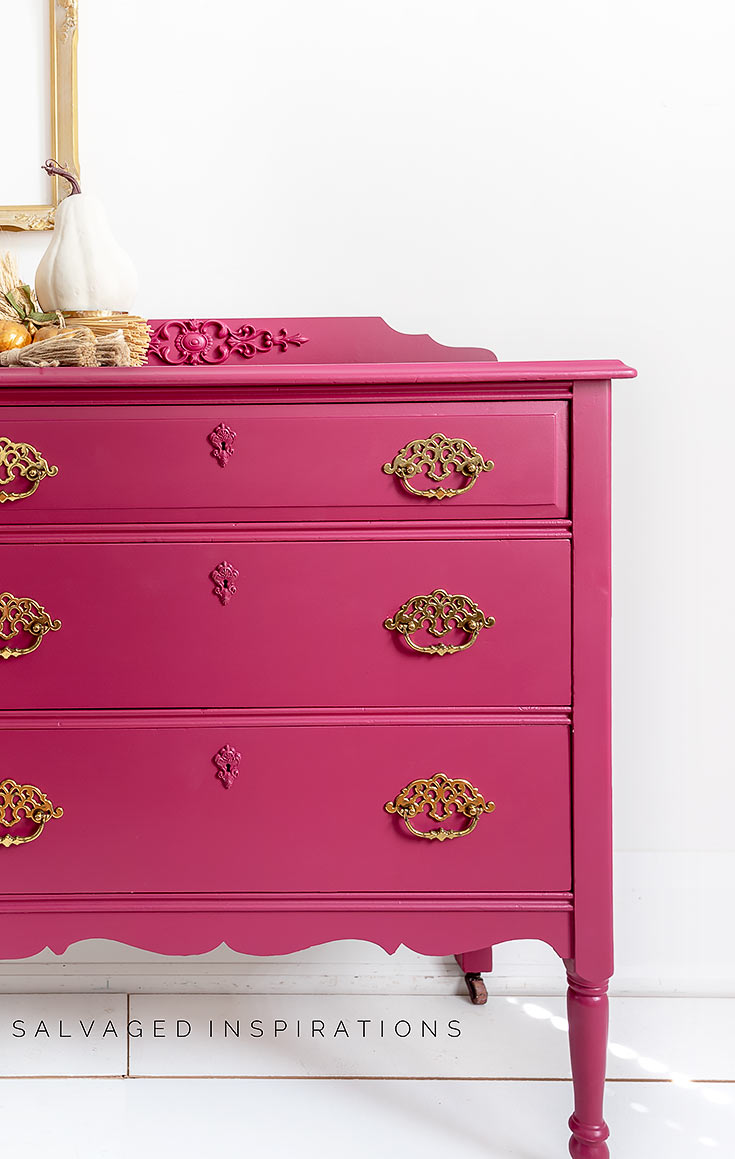
I used WoodUbend keyholes and this backboard applique. Even painted out in one color, they add so much character to the piece. To make the faux keyholes look more realistic, I create depth by painting the holes black.

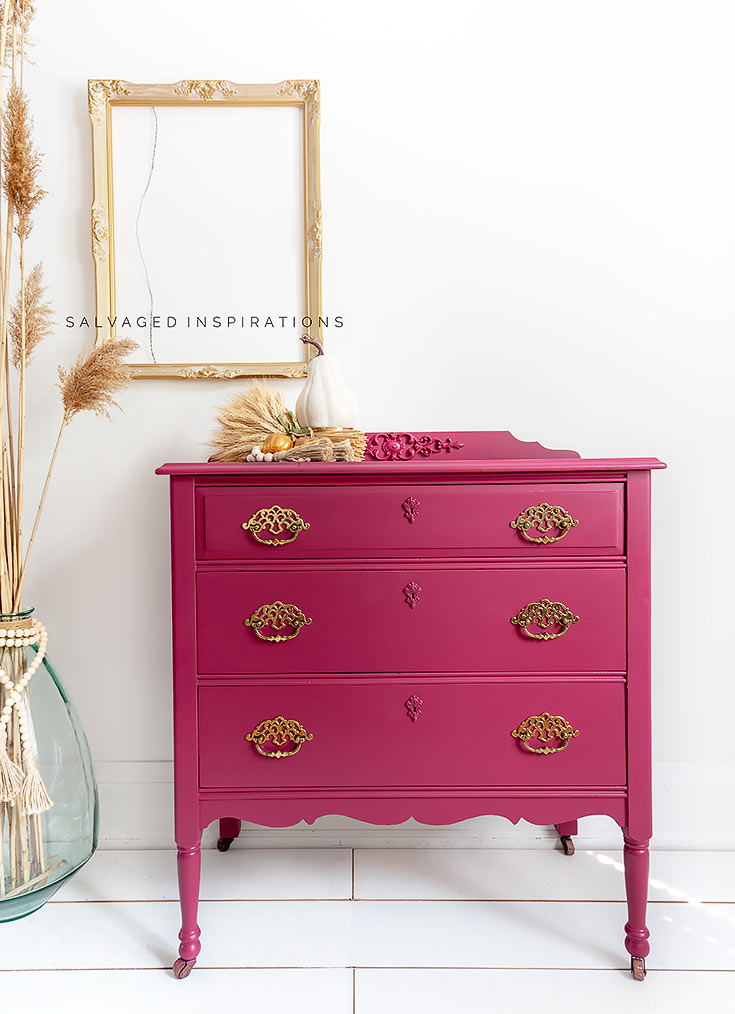
THE BIG REVEAL
Here’s the Plum Crazy after. This color makes me smile. What a beautiful jewel tone and great way to update a piece using one color! What do you think?
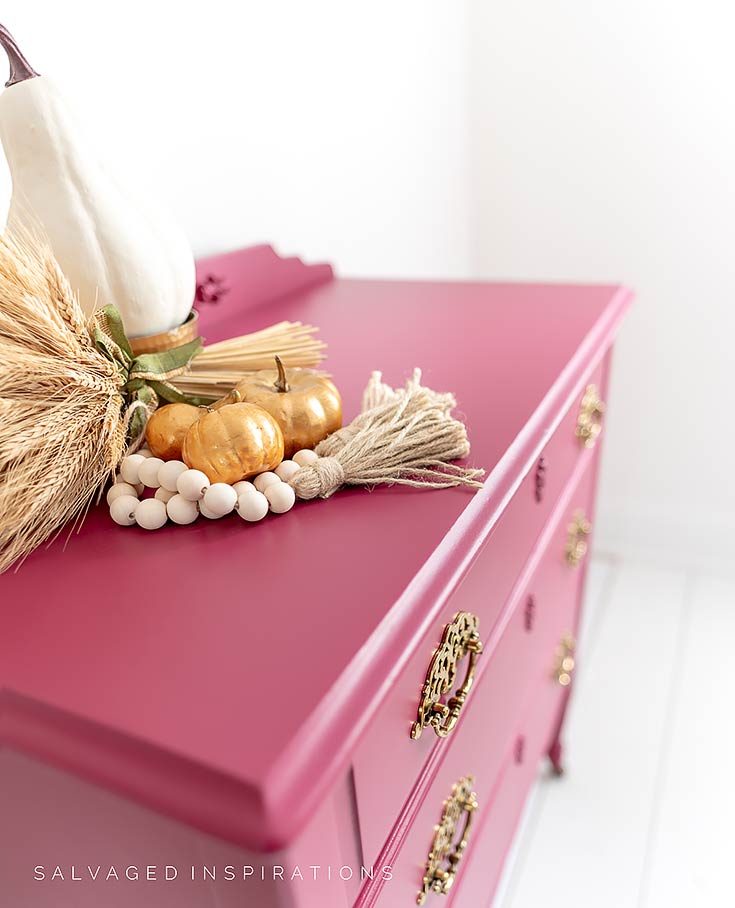
Super smooth with the Bondo repairs.
And I’m loving the Woodubend and ‘new’ salvaged hardware. It’s the small details that make a difference.
This was a fun makeover. I’d love to hear what you think about this Plum Crazy!

Here’s another look at the before-and-after of this repaired makeover. I hope it inspires and gives you the confidence to pick up a piece that may have some issues and may need a few repairs. I promise, these repairs are easier than you might think! 🙂
LET ME KNOW WHAT YOU THINK OF THIS PLUM CRAZY DRESSER MAKEOVER… OR FEEL FREE TO ASK ANY QUESTIONS YOU MAY HAVE. I ALWAYS LOVE HEARING FROM YOU!💕
ALSO IF YOU GET INSPIRED BY ANY OF MY MAKEOVERS AND GIVE THEM A TRY, BE SURE TO TAG ME ON IG OR FB WITH #SIBLOG — I’D LOVE TO SEE WHAT YOU’RE UP TO AND POSSIBLY FEATURE YOUR WORK!
Happy furniture painting my friends!
Denise x
RELATED POSTS
Bondo VS Wood Filler for Furniture Repair
Amazing NON-STICK Bondo Repairs
Furniture Repair – Filling Rounded Feet and Legs
Stop Bleed Through When Painting
Bondo For Furniture Repair VIDEO
PIN AND SHARE!


What would we do without good ole Bondo? Thanks for the revisit. Always good info. I a wood project sitting on the table this very moment that needs a lot of Bondo. 😩 Wish me luck. 🍀 Beautiful makeover! 🩷Have a great week my friend. xo 😚 Pinned 📌
I wish you luck but i KNOW you don’t need it. you’re a PRO at everything you do my friend! Hugs
I love the pink dresser and hope your client did too. My family room is kind of a mess. I love my gray walls. However, my brown furniture was purchased before I painted the walls. And now I want to do something with the end tables and don’t know what color to paint. I do have a beautiful white burst painting hanging over the loveseat, which has shades of light blues, almost like a robin’s blue and light sage. Also, because Birch are white with dark spots. Any suggestions for my end tables? Thanks a lot love your article articles.
Hi Anna! I’m always hesitant to give color advice because colors are so subjective and personal. But first I have to say that I LOVE that you’re thinking of restyling the end tables you already have. And the great thing about a furniture makeover is it can be restyled more than once like I just did with my recent vintage dresser. I would suggest a neautral (white, black, beige) if you want to play it safe. If you love blues, picking up on the robins egg blue sounds lovely as well. Pick what you love. And have fun with it!💙
What a beautiful color! I’ve already bought Plum Crazy to use on a client’s piece — we’re so excited! Can I ask…where did you get the hardware? Is it vintage or did you purchase it somewhere?
Your client is going to LOVE it, Lori! And the hardware came off an older piece of furniture.
The dresser turned out pretty and the bondo tutorial was great. What did you do with the dresser mirror?
Thanks, Lorrie and the dresser mirror is waiting in my inventory for another project. 🙂
I love your dresser in that color. My question to you is, do you really need to use a separate primer? Couldn’t you use hi gloss paint that comes with a primer to save some steps? You would also be able to skip the topcoat.
Absolutely gorgeous Denise! Thanks for all the Bondo tips and love the tip of painting the keyhole black. You’re right, it’s often in the little details.
Thanks Diane! XO
I have been following you for several weeks now and absolutely love your website. I’ve learned lots of great tips and will put them to use this fall/winter when I’m doing my indoor stuff vs. my outdoor gardening. The items that you have repurposed are fantastic. I’m so glad I found your website.! Thanks, Fran
I’m so happy you’ve found the #siblog too Fran… a BIG WARM WELCOME! Gardening season is winding down here as well 🙁 but it sounds like you have some fun fall/winter projects lined up! x
Hi Denise, I wonder which would win in a showdown, Plastic Wood or Bondo? I have always heard bondo has a super nasty smell, I don’t know about the plastic wood.. Really nice save with the bondo! I am going to assume that every person that left a comment and didn’t address the color of the bureau was a “negative”; that color upsets my stomach and makes my eyeballs hurt…..that being said it would probably look good in a Jelly Belly store which I totally love!
Hi Mary! Plastic Wood also has a smell. I have it in my inventory but don’t remember the last time I used it to be honest. I should give it a go again.
I love that you are so bold with your color choices! I love to flip furniture but am kind of stuck on gray, white and cream colors as my go to’s. You are an inspiration!
It’s taken me years to get comfortable with bold color. My home decor style and go-to colors are whites, creams, earth tones, and neutrals as well. This wouldn’t fit into my decor but maybe that’s why I have so much fun painting with color. It sure does liven things up. 😉
Love the plum color makeover probably would never try that color had I not seen it here. Love it. Also where did you get the drawer pulls.
Hi Bev! These drawer pulls are the common winged pulls that you see on old dated dressers from the 80’s similar to these. I installed them upside down because I much preferred the look. 🙂
Great tutorial Denise! The piece turned out beautifully.
Always enjoy your diy!!
Thanks, Rosie! Have a super day! 🙂
Hi Denise. I am “Plum Crazy” for this color! Wow! You totally updated this dresser and I can’t say enough about how much I love the gold handles. Beautiful touch with the appliqué accents as well. Thank you for your video on Bondo. My Father used to use Bondo to fix things and you’re not kidding, it dries as hard as a rock;)
Thanks Monique! I’m a little crazy for this color too. It makes a real statement, doesn’t it?! And yes, Bondo is super heavy duty! Enjoy your day my friend. XOXO
You did a fantastic job repairing the issues on this dresser. Does Bondo have a strong odor? I’ve never used it and want to try it on a damaged buffet. I love the keyholes ! I saw them on the WoodUBend website and wondered why they could be used for! You’re so clever!
I love those keyholes too! Even painted in the same color, they add SO MUCH character, don’t they?! As for the Bondo, YES, it smells. When I work with it I keep all my windows open in my studio and I have an industrial fan I sometimes place in front of the open window to suck out some of the fumes. For me, its well worth it tho. I can have everything patched and fixed and sanded within 15-20 minutes and it’s SUPER durable. A HUGE time saver if you do a lot of furniture. 🙂
Oh what a yummy colour!!! And stunning with the gold hardware. And fake keyholes! I love them!!! They really add so much depth and character. Who knew? You are so amazingly creative! And fun, to boot!❣❣❣
Thanks so much… and aren’t those keyholes cute?! 🙂
I wish I had known about this a few days ago before I started working on my latest project! I will definitely use it for the next one! Thanks for the information!
If you give it a try, I’d love to hear what you think Vivian! Have a super day. xo
Denise,
I really love everything about the new dresser. The color is deliciousL.. It would make me happy every time I looked at it.. Thank you for your video. I have never done a furniture makeover, but watching you, I think I could do it..
Thanks… and you could SO do it Marian! have a wonderful day. x
Beautiful Plum Crazy dresser! Thank you for the easy to follow bondo tutorial.
Question – I have a dresser that has a piece of the drawer”s top edge missing..When the drawer is vlosed its very noticeable. I.tried wood putty to build up the missing area. When I sanded it down the dried wood putty chipped off completely. Back to square one. Any tips or tutorials on how to repair a missing wood edge? Thank you!
Thanks, Deidra! 🙂 Your drawer is a bit of a challenge to comment on when I can’t see it. But I’m guessing if you screw in a few screws and leave the heads sticking out a little (making sure that they aren’t sticking up past the drawer height!) and THEN Bondo or fill around them, it will provide WAY more strength to the repair. I hope this makes sense.
I’ll try the screw idea to re-enforce the edge and give the bondo something to grip to. I did find your tutorial on repairing a dresser leg that had broken off. You clamped a wood strip, sprayed with W-D40, on the leg and built up the missing portion. Your finished result was flawless. Between the screws and wood strip I might pull off a perfect repair. Thank you so much!
My pleasure and good luck Deidra. I’d love to hear how it all turns out for you. 🙂
The dresser is lovely and highlights your many talents!
My off- the- subject question is : How do you decide what color or finish to use when you have a buffet, hutch, and table with chairs In a formal dining room all in 50’s mahogany? I have light gray wallls,, 2 windows, white trim and crown molding. I am so ready to get rid of the “dark” furniture, but how do I start? It all looks so matchy matchy. I just don’t know where to begin! Thank you for any suggestions you might have.
Hi Shirley! Color is such a personal choice, I’m always hesitant to put in my two cents. What I like, you may not. But I have a chock-full-of-inspiration Pinterest “Painted Dining Tables” Board that you might find helpful for ideas. Hope this helps. 🙂
Love the color and love the instructional tips. Thanks so much Denise. You are one of the few people I follow, because you do such beautiful work, and in your video tutorials, you make the work you are doing the “STAR of the show”. You don’t go on and on and on about anything except what you’re doing., and I appreciate that.
Thanks again and keep “up cycling”!
Bless you. Stay safe… Jo KERNERSVILLE, NC, USA
Thanks so much for this Jo! I always appreciate feedback on my videos because it still feels awkward for me. I try to keep it as short and to the point as possible. As much as I’d love to watch long videos, I just don’t have the time… so I figure I can’t be the only one out there that feels this way.
I could not agree more!
Thanks Jeannie! 🙂
Hi Denise,
This turned out gorgeous. I love the bold color and the keyhole details. What did you do with the mirror? Why didn’t you include it in the make over?
Thank you
Norma
Thanks Norma! I didn’t include the mirror because I really wanted to use some WoodUbend on this backboard and it would have taken extra time to sand it all. It doesn’t look like it, but this wood finish you see in the “Before” pic is actually painted and a glaze… they did a really good job!
I love the color! I agree, the details you added with woodUbend appliques really add that to the overall look. The drawer pulls really pop against the plum finish. Thanks, too, for the tips on Bondo. I have never used this before, but I am going to give it a try!.
Thanks, Sue! I’m loving this color too. Although my home is all whites and neutrals, when I see pieces that pop like this it makes me want to swap out my decor…lol. 😉
I love the color! I agree, the details you added with woodUbend keyholes and background appliques really adds that antique look. The drawer pulls really pops against the plum finish. Thanks, too, for the tips on Bondo. I have never used this before, but I am going to give it a try!.
Thanks so much, Sue and I’d love to hear your thoughts if you decide to give it a go. 🙂
You’re a Magician Denise dresser turned out so well.
Aw, thanks, Sher! Sometimes I wish I had a magic wand to do the work for me..hehe. 😉
Thank you so much for that tutorial!! Boy that dresser turned out beautiful!! Love that color and the hardware!! Love love it!!
Thanks Kristi!! XO
Beautiful work Denise. You are always so fun and informative. I always love to see what you are working on. I, too, love this color. To think it was just almost a year ago we were preparing to meet in Ontario for the Dixie Belle workshop. A lot sure has happened since then! We are good and have so much to be thankful for.
I know…I almost can’t believe it has been a year since we were at the workshop either! And I don’t think I ever thanked you for sharing Brandy’s tip about smacking the top of the DB container on the floor to get it opened. It’s helped on a few occasions…lol. 😉
Oh wow, great video & so timely as I am procrastinating on a rounded foot repair right now. Really appreciate all the links to your previous repairs for easy quick reference too, which I just reviewed. I have both Bondo & Plastic Wood & trying to decide which to use with their pros & cons. Think I’ll go with Bondo, work outside for fumes, cutting down the drying time. I’m super nervous as I have to recreate some detail to match. Thanks for your video & the bureau turned out so pretty
Aw thanks my friend! And good luck on your rounded foot repair and detail work. I get a little nervous when doing that for clients as well… but I KNOW you’re going to make it gorgeous Tracy! XOXO
Great tutorial! Bondo has has saved me many times. And that COLOR… Plum Crazy! Very nice makeover my friend. Thanks for sharing your expertise. xo 😘
It can be a lifesaver, right?! And ya, this Plum Crazy is crazy beautiful. It’s funny. My home and furniture are all whites and neutrals but I think that’s why I LOVE painting with bold color every now and then. It spices things up and makes me smile! Have a great day Do. XOXO
Hi. Why did you remove the mirror? Was it a detachable mirror or did you have to cut it off? What will you be doing with the mirror?
Hi Carole! I keep all my vintage mirrors. They get repurposed onto other pieces but I didn’t include the mirror because I really wasn’t into taking the extra time to sand it and then cover or remove the mirror while priming and painting. As I was saying to Norma, the wood finish you see in the “Before” pic is actually painted and a glaze.
Hello Denise, Thanks for this excellent tutorial video! QUESTION: Why did you use two different sanders (round and square head) when working this “plum crazy” bondo repair project?
Hi Carolyn! Great question! The second coat of BONDO requires less sanding because there’s not a lot of it and it’s typically a much thinner and ‘neater’ coat. I was lazy and rather than change out the 120 grit on my orbital, my palm sander already had a 220 grit so I went ahead and used that instead. 🙂